


hooter
-
Content Count
160 -
Joined
-
Last visited
Content Type
Profiles
Forums
Calendar
Posts posted by hooter
-
-
3 hours ago, skyhawk524 said:
I have also seen variations to the colors of the canopy, wingtips, tail tip, and horizontal tips. Some decals sheets call for all red, some say all blue, and some show a mixture of the two. I have yet to find more than one photo of the airplane to verify much at all.
I would like to do an Eduard in the markings since I built or started Monogram after Monogram as a kid, and never used the kit decals.
There does seem to be some variations on what the colour scheme was on this airplane. I have the Osprey publication " Mustang Aces Of the Eighth AF", which is supposed to be well researched and it mentions the red colours for the canopy and wing tips, (but there's no colour on the gun panel on the profile ) I guess it's up to the individual as to what colour they're meant to be.
-
Hi guys,
I'm building the Hasegawa 1/48 P-51D as the well known " Detroit Miss " flown by Lt. Urban Drew, and have a question regarding the colour of the wing leading edge gun access panels. I have the Aeromaster decal sheet and they advise that the panels should be red or black ?
Looking at photos of the actual airplane the panels are a dark colour, so they could be either. I've seen photos of completed models with red panels, along with the wingtips, but given the sort of wear they would have had it seems odd that the would be painted red ?
I would be most grateful for any info or thoughts regarding this query.
-
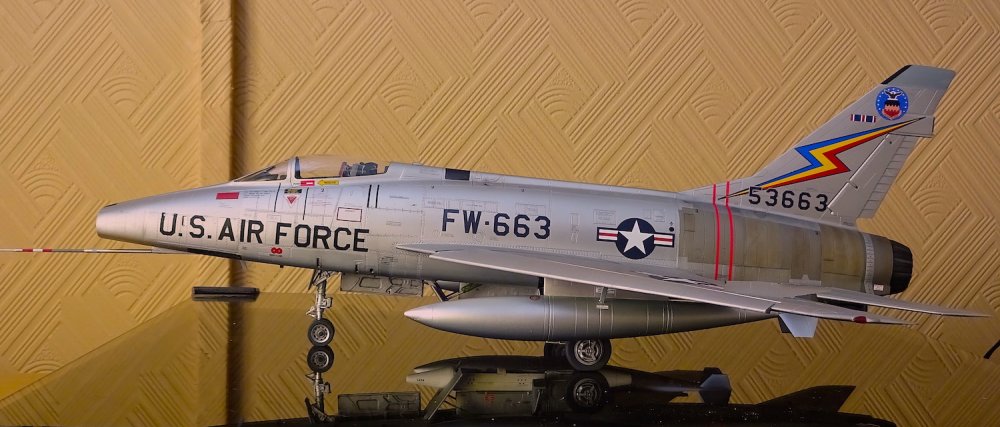
Many thanks for your kind comments . . . It's much appreciated. This is probably my favourite model, and one of my favourite airplanes, along with the F-104 Starfighter. I do have a soft spot for the F-100, as I live not far from the 20th. TFW's former home at Wethersfield. and spent many a day during the school holidays at the end of the runway watching their activities. They would stop about 200yards from us while doing their last minute checks before turning on to the runway ( After a wave from us ) and then blasting off down the runway . . . happy days. Sadly, that's all gone now, but this model brings back happy memories of younger days

-
Oops ! Here are the pics. Please excuse me, I'm new to this posting thingy ! 😂.


-
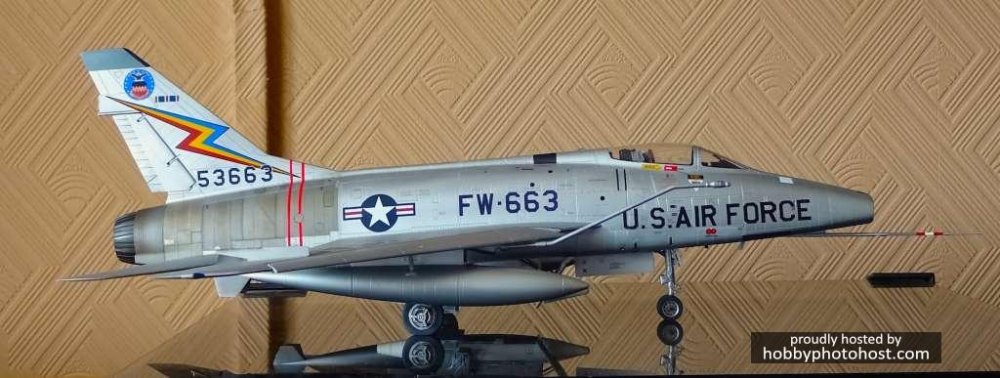
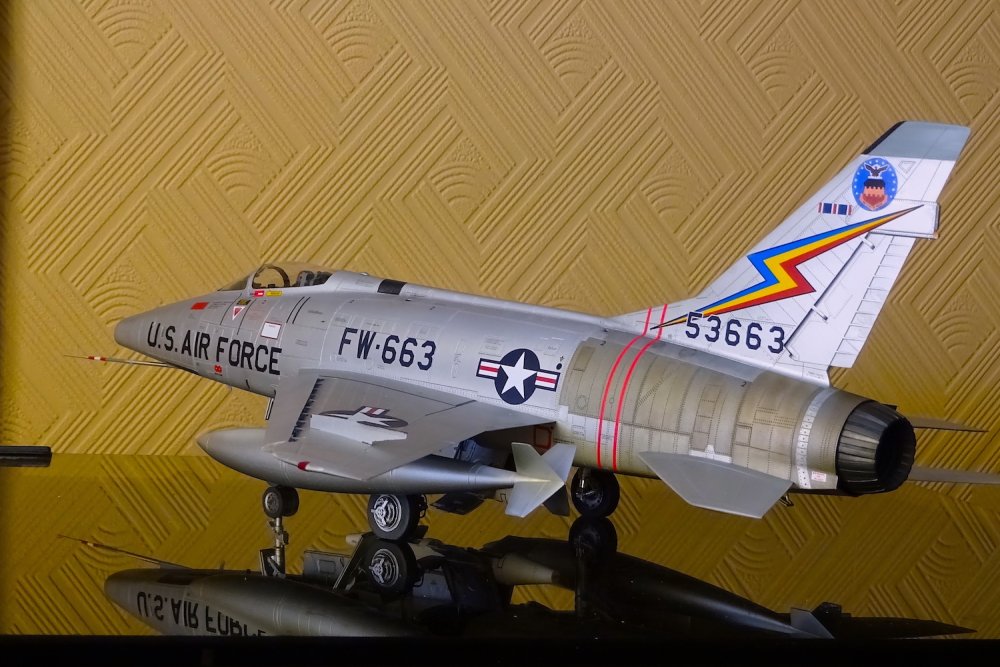
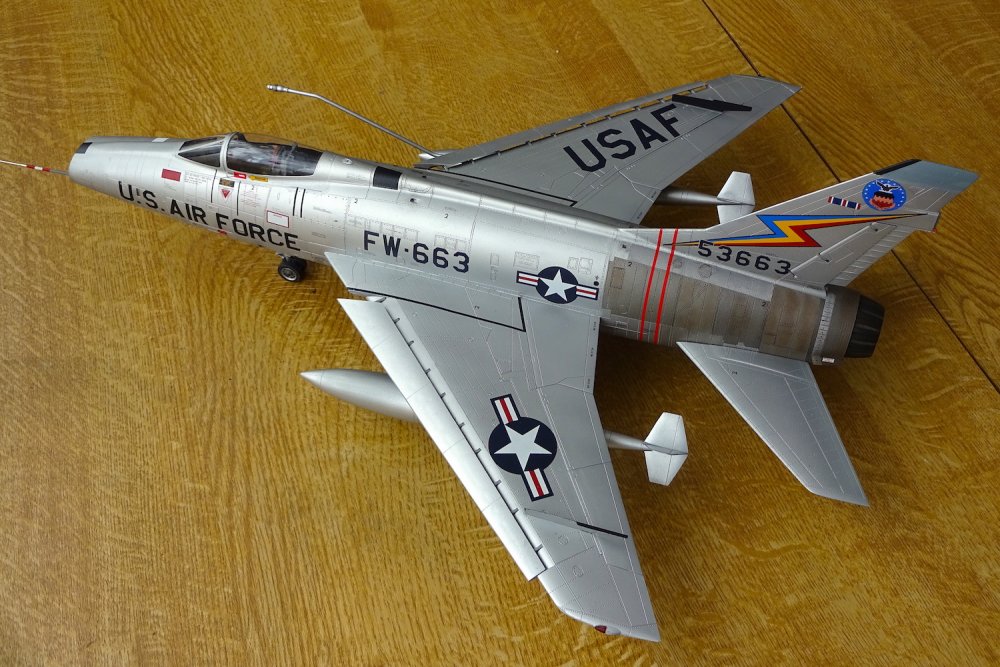
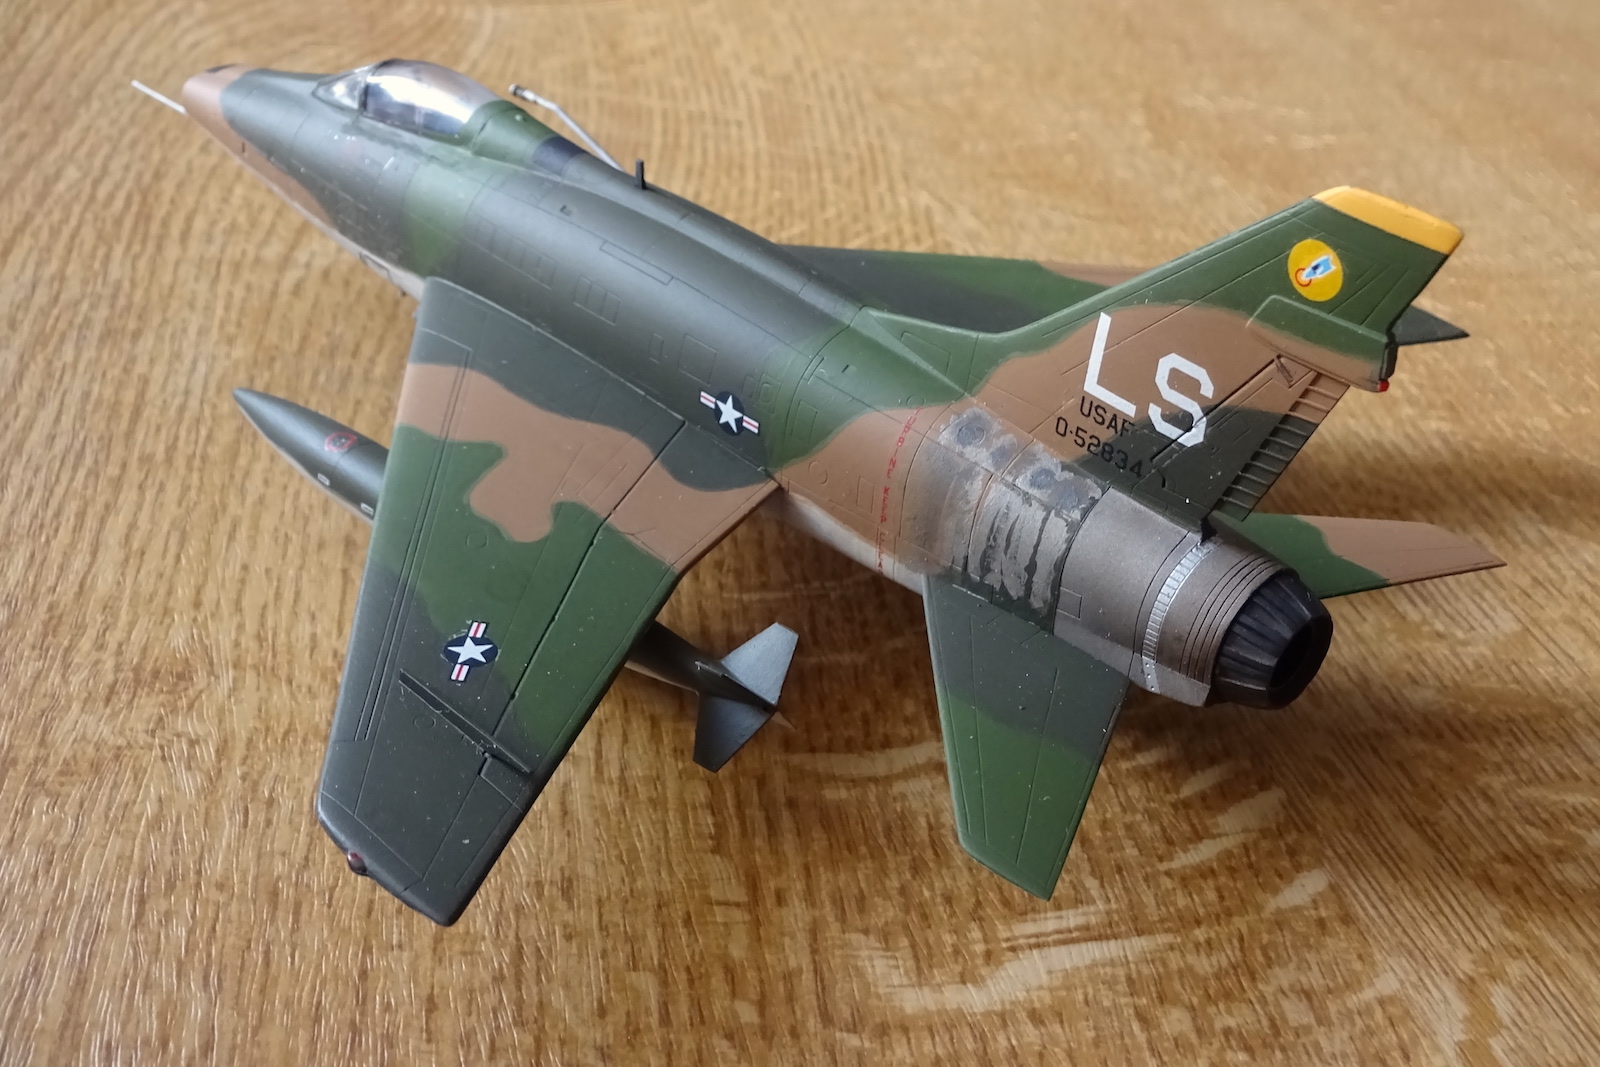
Hi guys, Here is my recently finished F-100D Super Sabre, which was assigned to the 20th. TFW in the 1960's.. here is a list of adds. and mods. I made to thr model :
New wheels of the correct diameter
Replacement pitot probe with scratch built mounting ( The kit one looked more like a drain pipe ! )
AMS resin ejection seat
Eduard instrument panels
Video Aviation MN 1 practice bomb carrier
Decals were a mix of Eagle Strike, Campro and kit decals ( The wing badge was home made, as the one on the sheet was not really correct )
All comments ( good or bad ) gratefully accepted 🙂
Hobby Photo Host- F-100D 20th. TFW, by Patemm.webloc Hobby Photo Host- F-100D 20th. TFW, by Patemm.webloc Hobby Photo Host- F-100D, 20th. TFW, by Patemm.webloc Hobby Photo Host- F-100D, 20th. TFW, by Patemm 2.webloc
-
Love the CF-104's. 👍

-
That's a superb pic, ovikingo . . . One of my favourite Century Series airplanes 🙂
-
I have the F 40 book on German F-104's of JG 71 & JG 74, and the pictures show the missiles as white with two bands behind the forward fins, although the photos are black & white, and don't say if they are live or practice rounds,
The best thing to do is go to the website "916 Starfighter " which has photos of almost every F/TF-104G that served in Germany. Even if you don't find the answer you can spend ages just enjoying photos of F-104's ! Hope this helps . 😀
-
On 3/9/2022 at 10:02 PM, Murph said:
In the pictures I've seen of F-100s carrying either "shapes" or live weapons only the pylons carrying the weapon or fuel were fitted. Since it was almost certainly a one-way mission they wouldn't want to lose the pylons that weren't going to be used.
Regards,
Murph
There are photos on the Wethersfield Museum facebook page of F-100's in the victor alert barns which show the weapon on the centreline pylon and 275gal. tanks under the wings. these tanks were later upgraded to 335 gal. tanks HTH
-
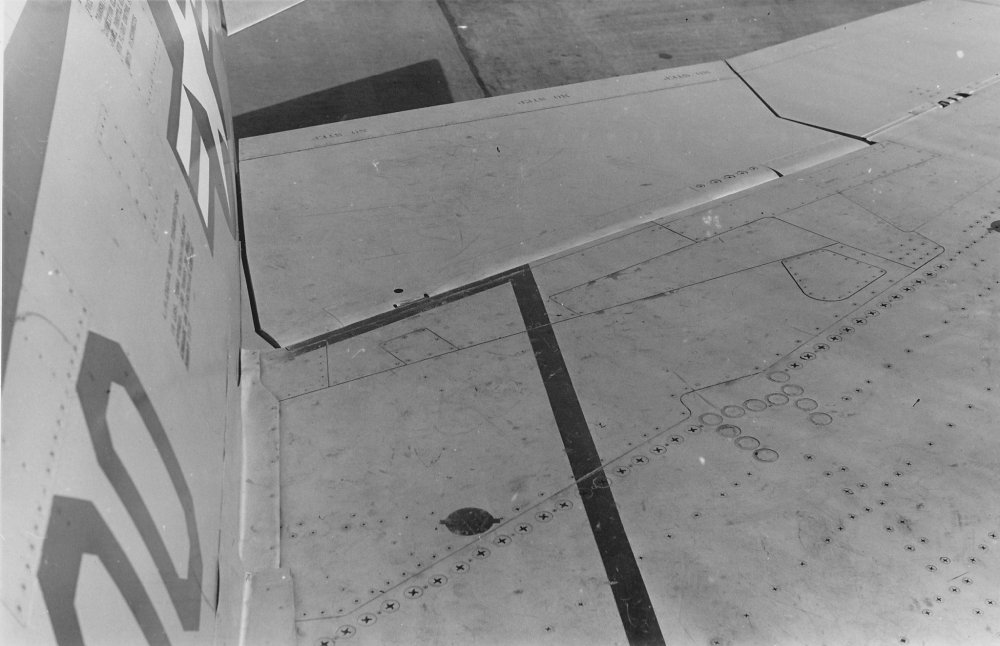
The wing walkway lines are correct, but all the photos I've seen of F-100's have no "Walkway " or "No Step " markings. Here's a pic of the upper wing of F-100D 56-3000, the famous "Triple Zilch " of the 20th. TFW to show you the walkway line. By the way, if you are doing a USAF airplane the silver aircraft were actually painted aluminium, and not natural metal, apart from the early versions HTH 🙂
-
On 1/13/2022 at 9:55 PM, Wolf_el_Real said:
Hi. I used Tamiya clear green.
Thank you
Thanks for that, Wolf . . . I'll have to get some of that
-
VERY nice indeed ! How did you do the tinted windshield ?
-
That light graey was Humbrol 28, and went on like a dream. It was just different enough from white , so that it covered nicely, as dud the other colours, so was a pleasure to paint.
-
Thanks for the kind words, guys . I usually mix my paints 50 / 50 with thinners, and give a slight rub down between coats, and this helps to remove any brush marks. The final matt, gloss or satin finish is sprayed on with my trusty Badger 200. I don't use acrylics ( I tried once and spent an hour cleaning out the gunge that had formed inside ! ) I do use a spray coat if it's one colour, or an aluminium finish required, and that system has worked well for me over the years. 🙂.
-
Hi Everyone,
Here is my latest effort for your inspection. It is a combination of an Esci kit with landing gear from the Revell version, as that had better details . The model depicts an F - 100D of the 493rd. TFS, 48th. TFW based at Lakenheath in the early 70 's. Brush painted with Humbrol paints, apart from the aluminium. which is Xtracolor. with a final spray with Matt Cote.
I used the technique of painting round the edge of each colour with a fine brush and a 50 / 50 mix of the adjacent colours to achieve the slightly feathered overspray of the real airplane, as my airbrush is only a basic one, but I think the effect works in that scale.
All comments ( good or bad ! ) welcome.


-
Thanks for the kind words, guys, it's much appreciated. I'm now building a 1/72 F - 100, so if all goes well I'll post a couple of pics when that's finished. 🙂.
-
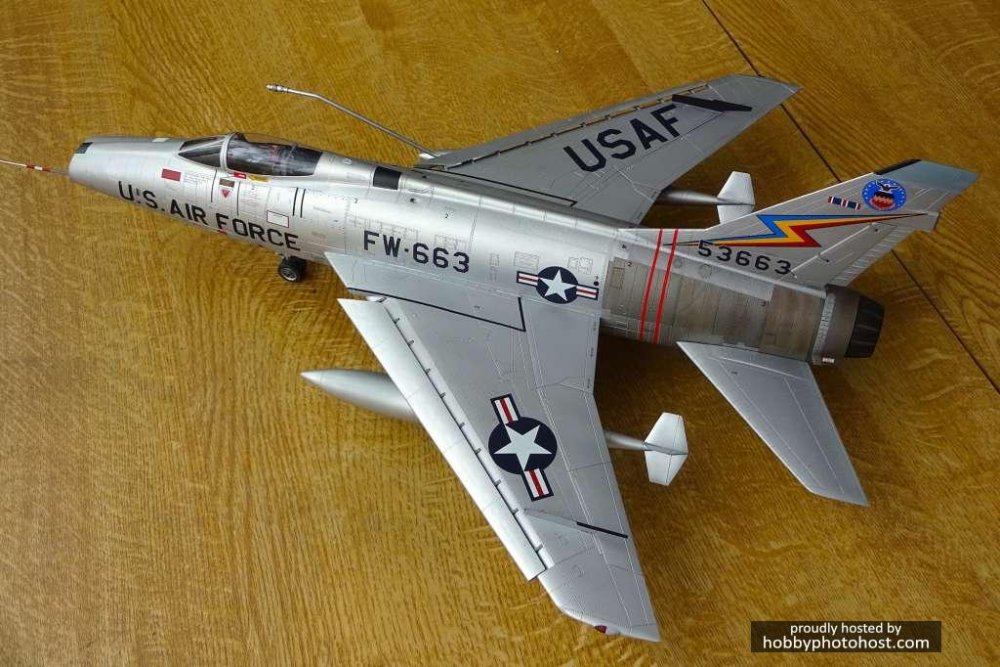
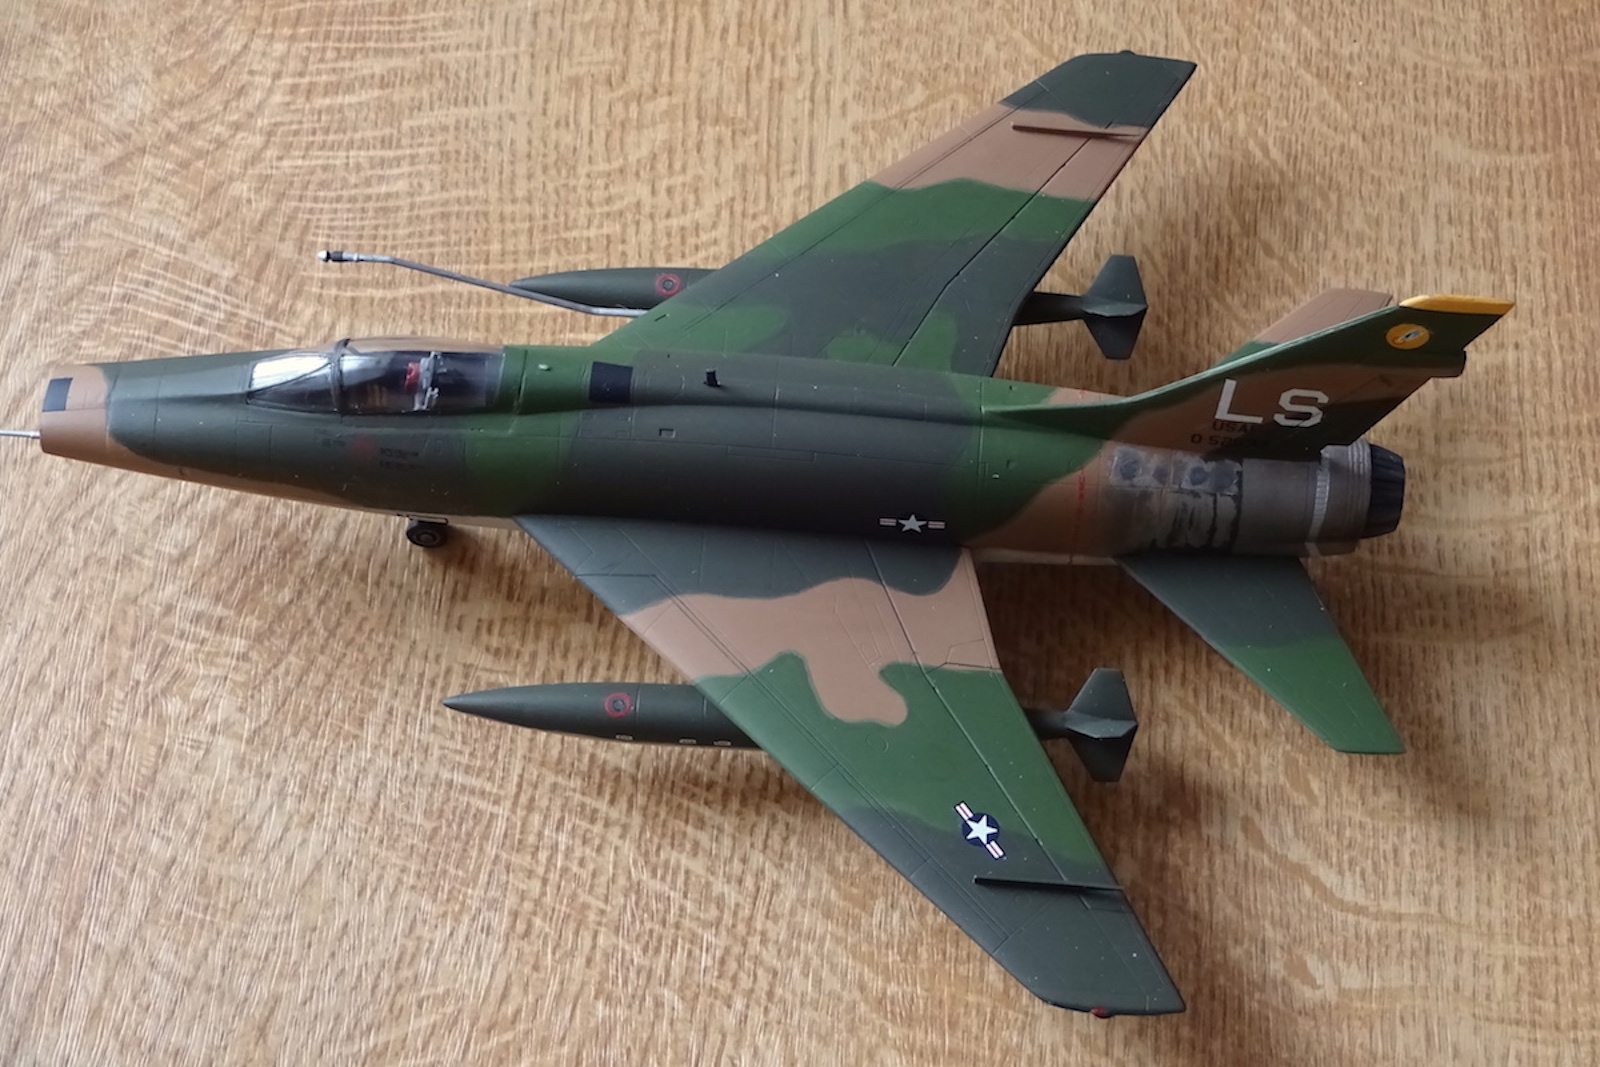
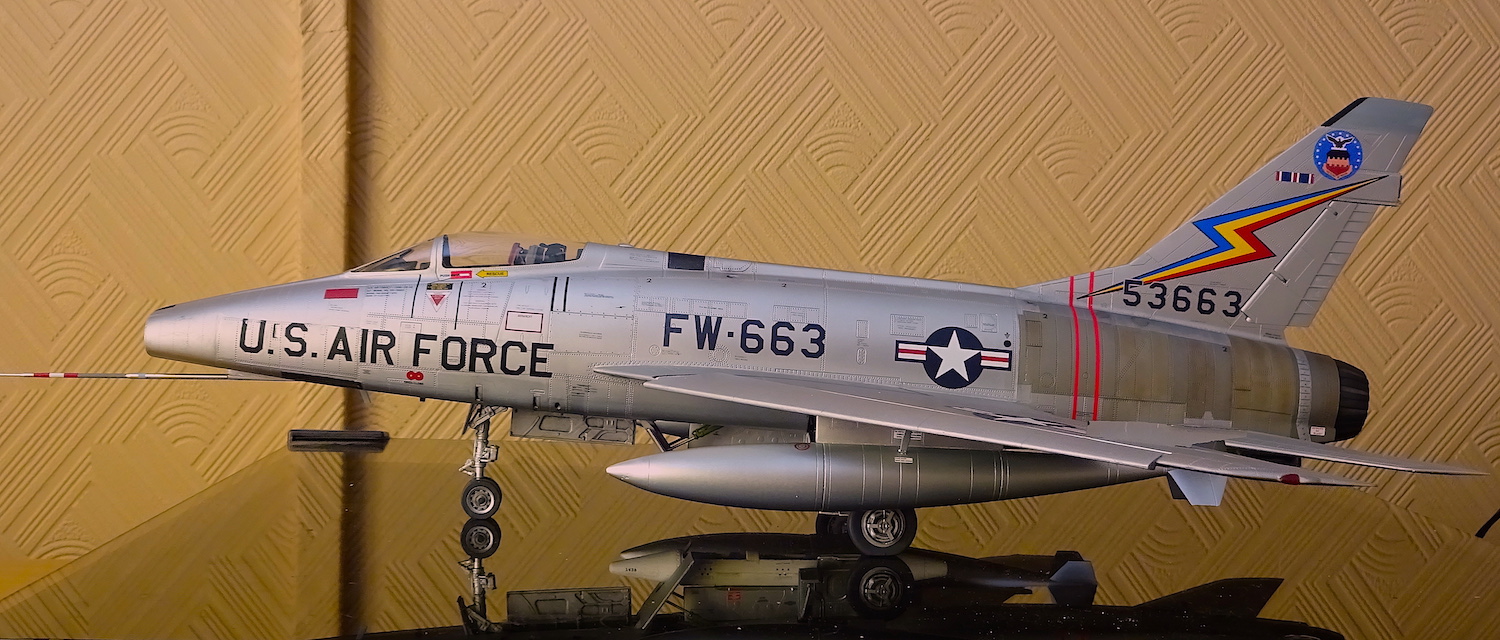
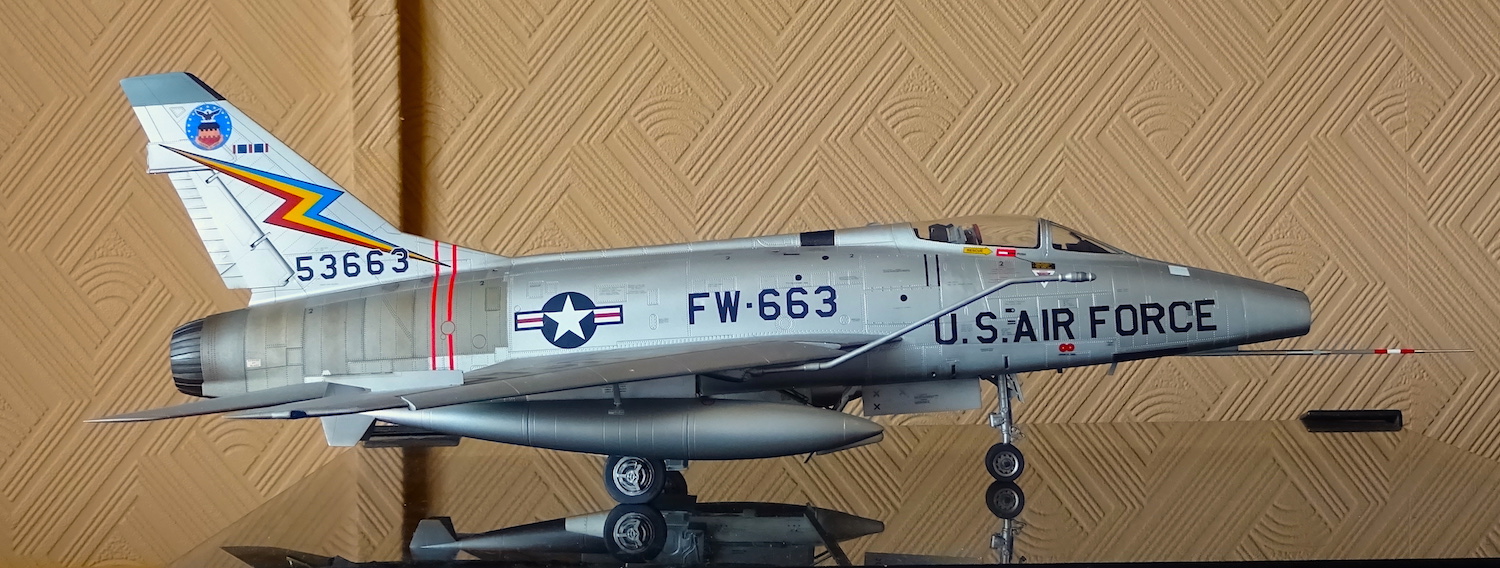
Hi guys,
Thought you might like to see my newly finished F - 100D in the markings of the 20th. TFW, based near me at Wethersfield in the 1960's. This brings back many happy memories of school holidays spent at the end of the runway watching the " huns " activities. There have been many comments regarding the accuracy of this model, so here's a list of mods / improvements I made:
New corrected resin nose from Zactoman
main gear legs shortened by 3 mm to get the correct nose up sit of the actual airplane.
replacement resin wheels of the correct diameter ( The kit ones were too long, and had awful " Rubber " tyres )
Replacement pitot tube from Master models with a scratch built mounting , as the kit one is wholly inaccurate.
MN 1 practice bomb carrier from Video nation models.
AMS resin ejection seat.
Decals were from Eagle Strike, but I had the wing badge downloaded and printed for me by my friend, as the one on the sheet had the wrong blue for the background, being too light, and the stencils were from Campro .
Please let me know all your comments ( good or bad ! )


-
8 hours ago, BillS said:
Just a wag on a possible Lakenheath configuration aside from practice munitions would be 2 tanks and a B -61 most
likely on station 3. Dollars to donuts they could haul nucs.
That's correct. There was / is a Victor Alert area at Wethersfield, where nuke armed F - 100's sat on alert, as did the 48th. TFW at Lakenheath. As you say, The nukes were carried on the centreline pylon.
-
The UK based F - 100's mostly carried the 335 gal. wing tanks after camouflage was introduced, although there were still some 450 gal. and 275 gal. tanks in use. They mostly had the centreline pylon fitted at all times with the MN 1 ( SUU 21 ) practice bomb carrier fitted from time to time. also, occasionally outer wing pylons were fitted.
At the moment I'm building the Trumpeter 1/32 F - 100D, although mine is in the earlier " Aluminium " finish of a 20th. TFW bird. Hopefully i can post some pics when finished. HTH 🙂
-
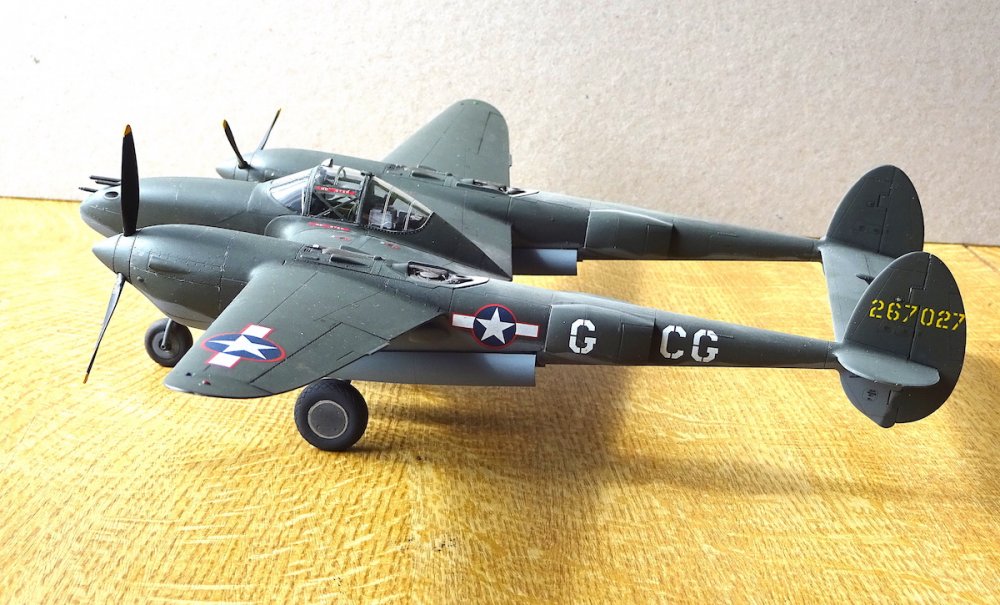
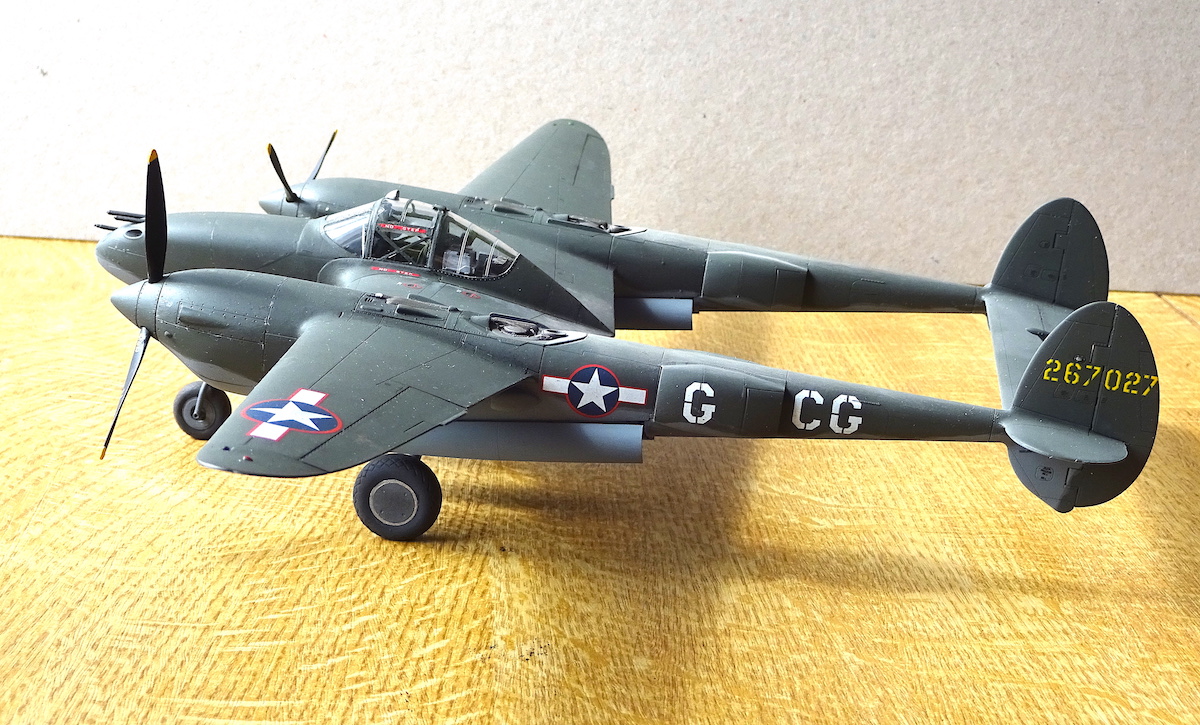
Looking good, dai phan. Those Fundekal sheets are superb, although I used Xtradecals for my P - 38., I did use Fundekals for my F -102A Delta Dagger, and they went on no problem at all. I think they must be one of the best researched sheets, and they're worth it just for the instruction sheets alone.😀
-
6 hours ago, dai phan said:
Love it ! I hope mine will turn out well like yours ! Dai
Well, your model is looking good so far, and I'm looking forward to seeing it when finished. I love Tamiya kits, as they are such a joy to build. 🙂.
-
You won't need any filler for this . . . I had this as a present last Christmas, and finished it in March, and have to say it's the best fitting kit I've ever built
, so enjoy !
-
2 hours ago, karl h said:
PM me your mailadress. i have a not complete F-100C in 32nd scale. there is a E21 part that is part of the maingear. i can send you a pic of the instructions and you tell me if its the part you need
Hi Karl,
My e mail address is : patemm17@gmail.com Part E 21 is the part I need, but you can send me a pic just to make sure if you want. 🙂
-
Thanks for that, Karl, but I think the F - 100C is a 1/48th. scale, and my model is 1/32 scale, but thanks for your offer, it's much appreciated. Of course, if you have the 1/32 kit as well that would be great.🙂


P-51D Detroit Miss gun panels.
in Props
Posted
Thanks for all your help, guys. Unless someone comes up with a period colour photo we're not really going to know for sure, but t did'nt know that they used patched over the gun ports. It does make sense , as the RAF used them on their Hurricanes and Spitfires. Once again, thanks for your help