


rav_pl
-
Content Count
221 -
Joined
-
Last visited
Content Type
Profiles
Forums
Calendar
Posts posted by rav_pl
-
-
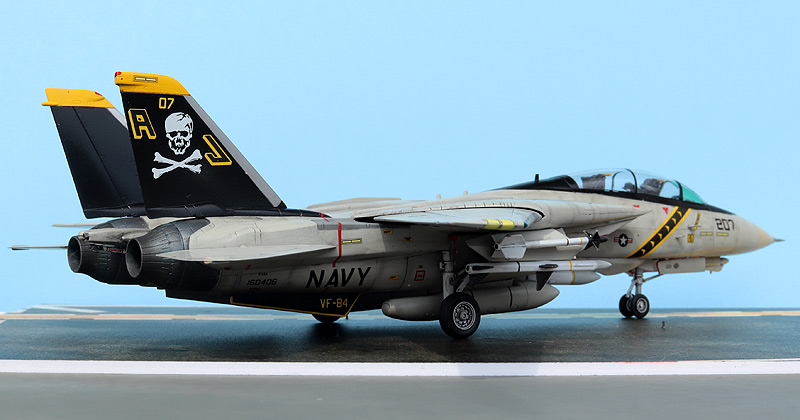
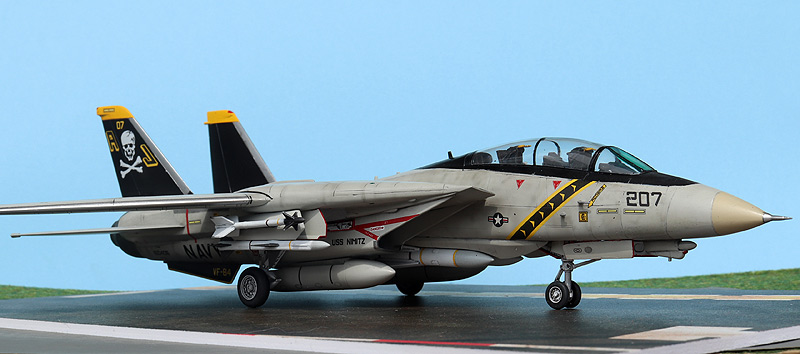
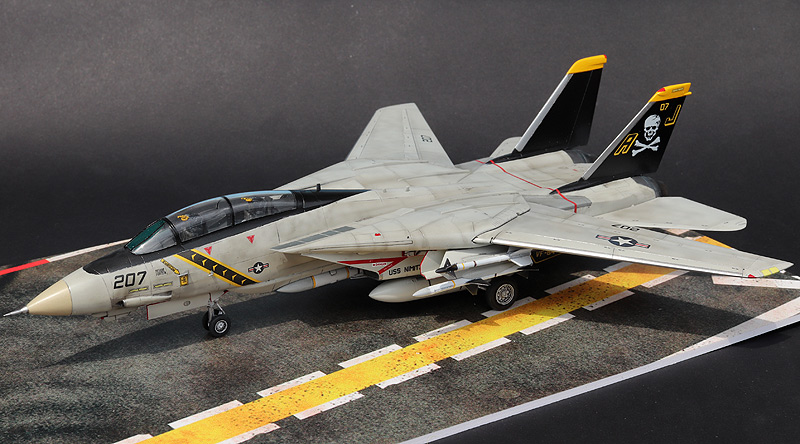
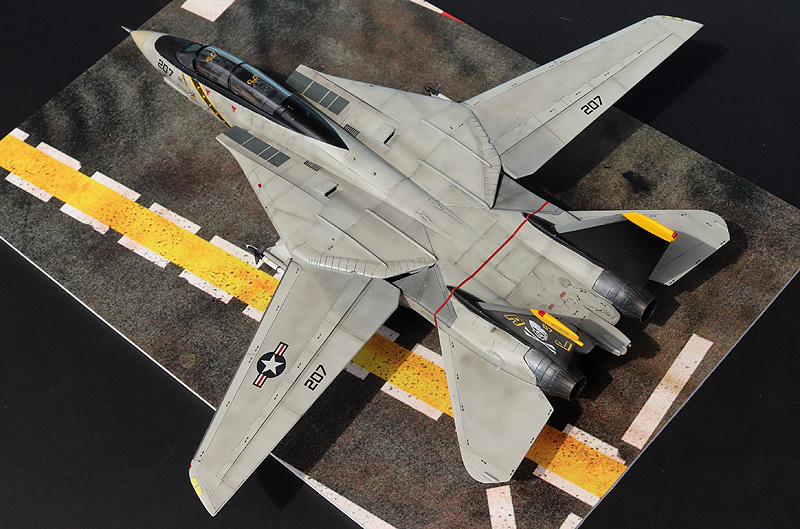
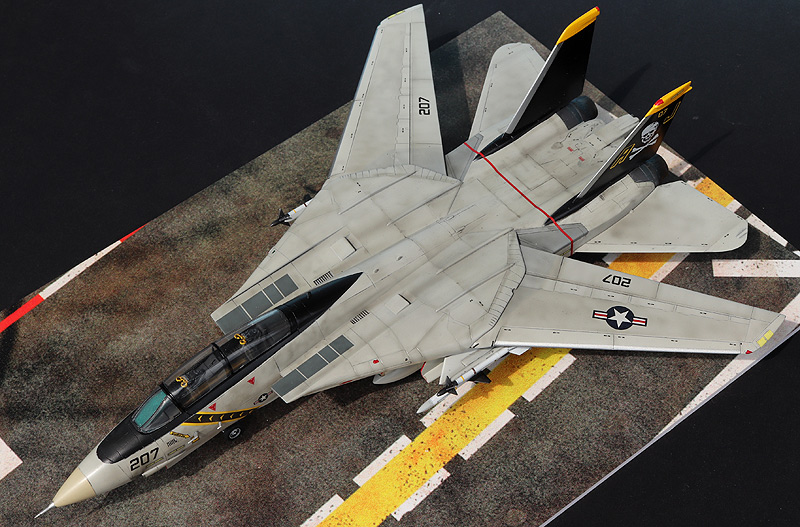
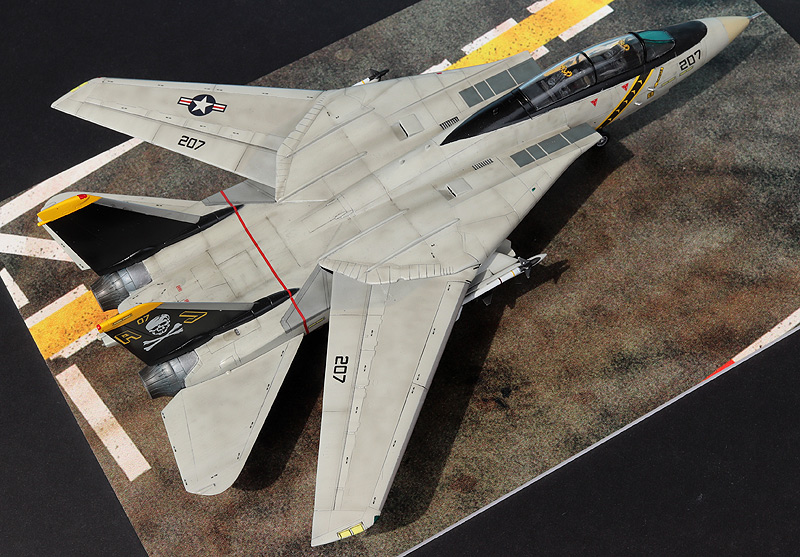
F-14A Tomcat from VF-84 Jolly Rogers, USS Nimitz, August 17th, 1982.
Kit: Design/Academy (1/72). Decals: Hasegawa.
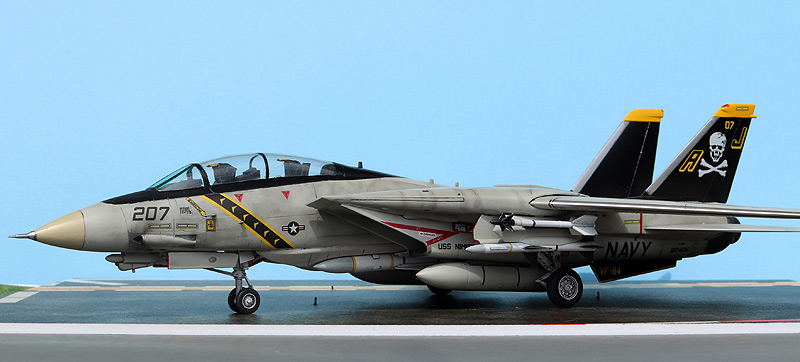

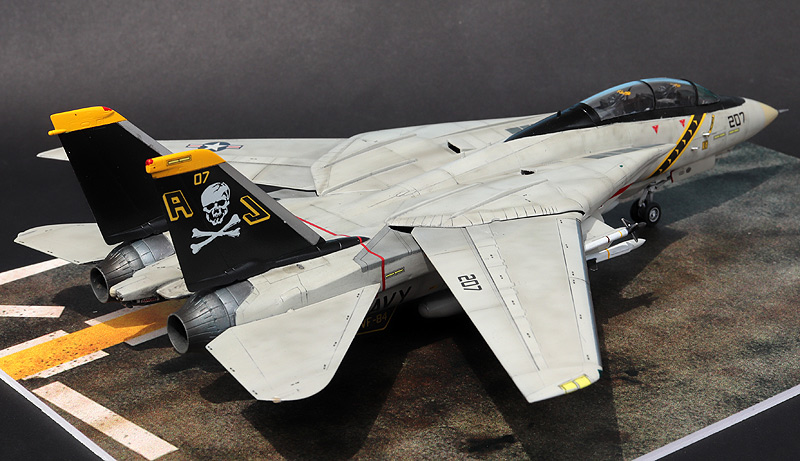

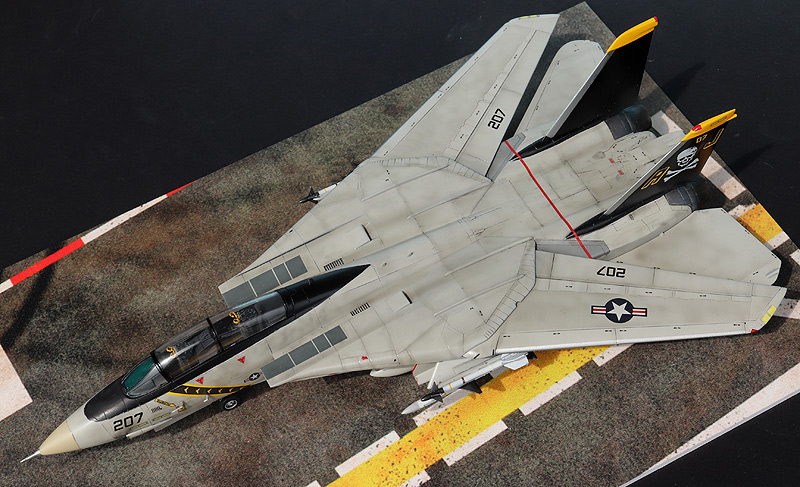
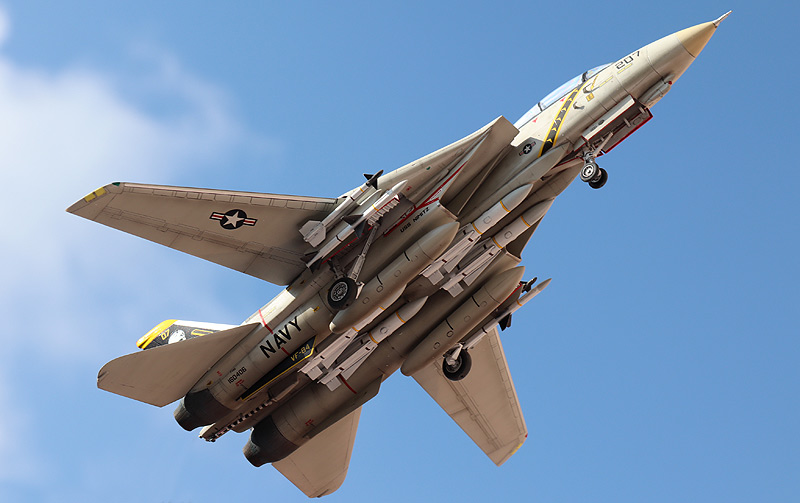
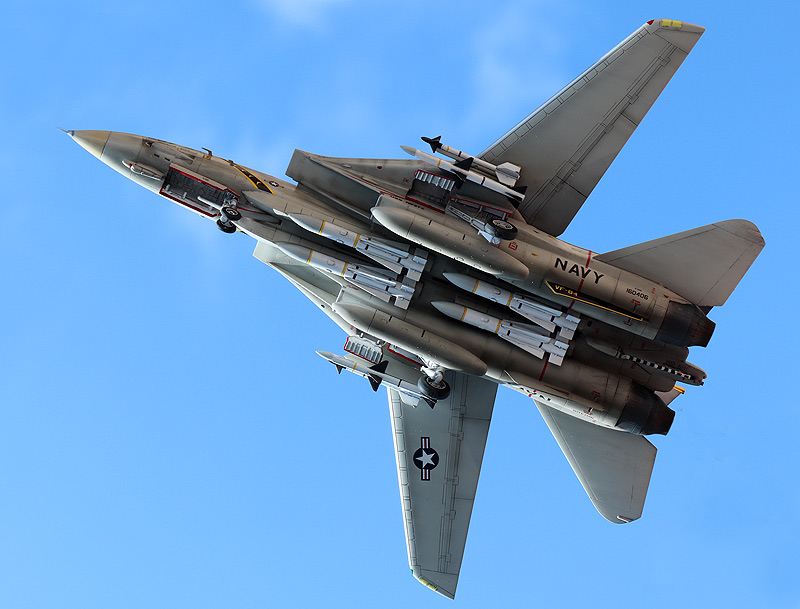
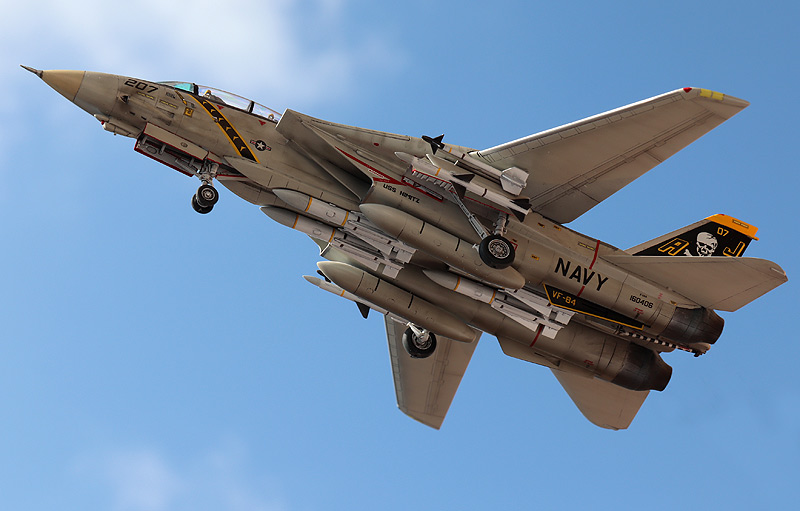
More photos on my website (click the photos above). -
13 hours ago, Steve N said:
how did you do the folded aft canopy sections?
I cut the last two sections. I replaced the overhead one with a piece of foil. I sanded and polished inside the front and rear part of the canopy to make them thin enough to fit one inside another. Frames are made of decal stripes.
-
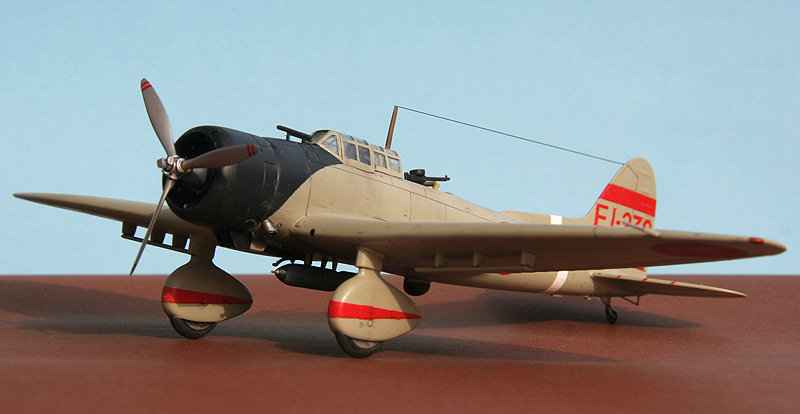
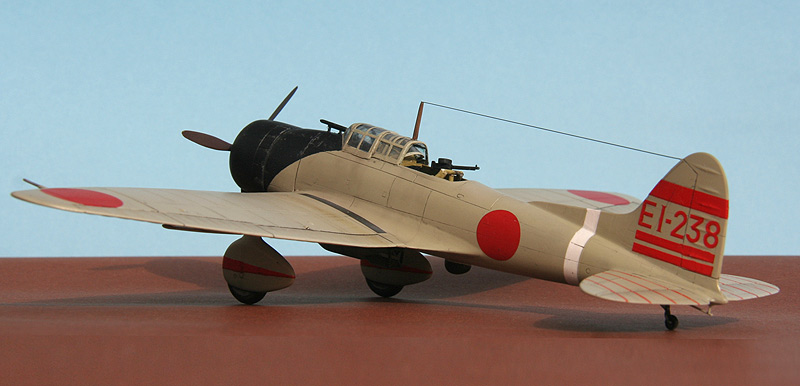
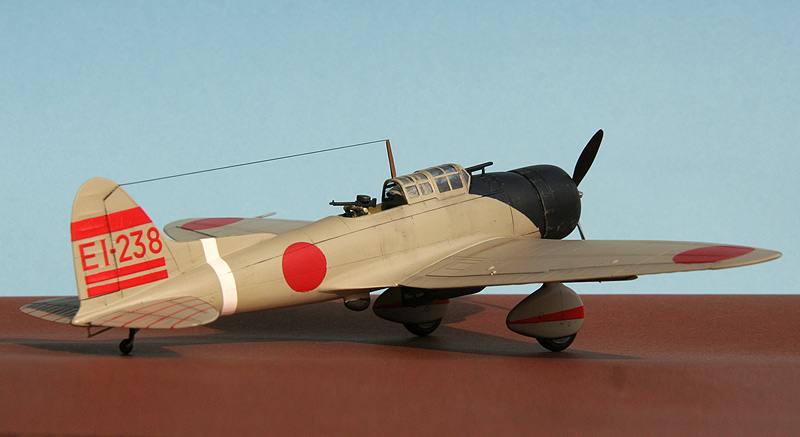
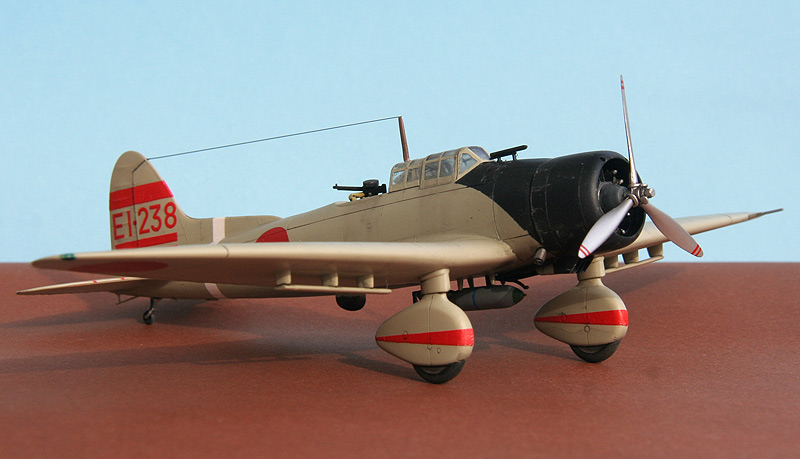
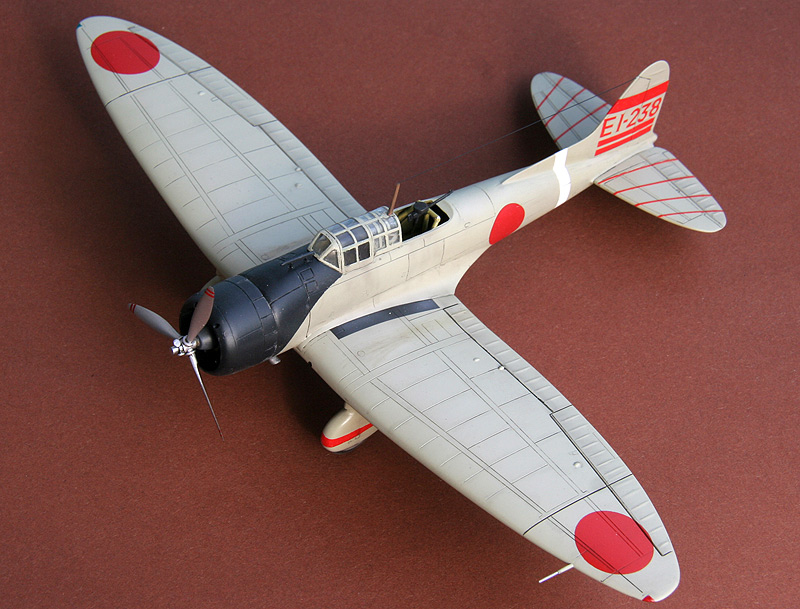
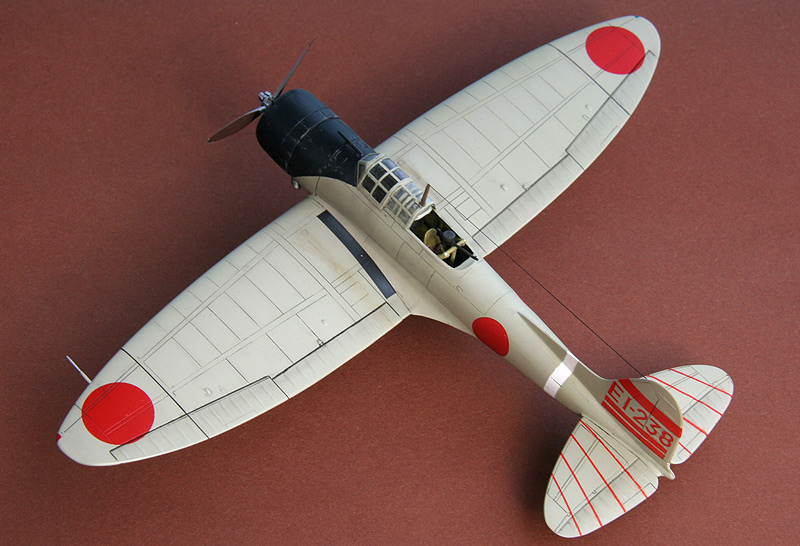
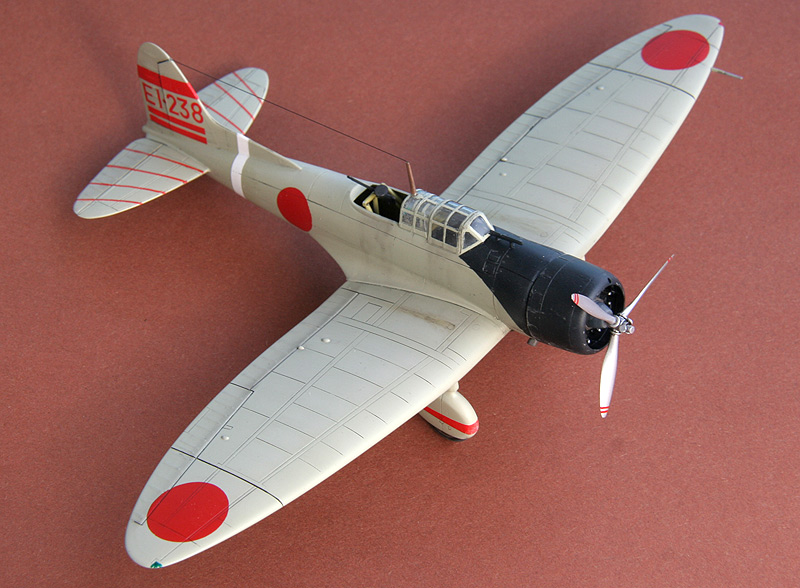
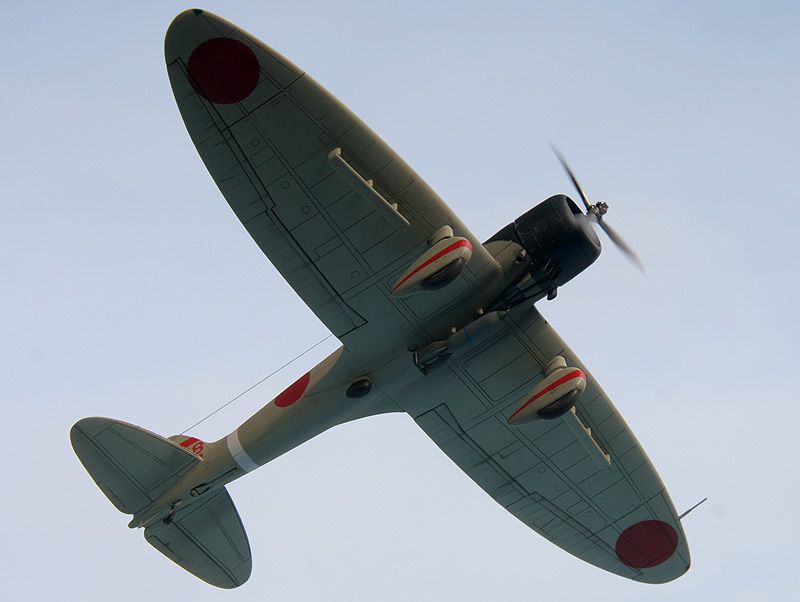
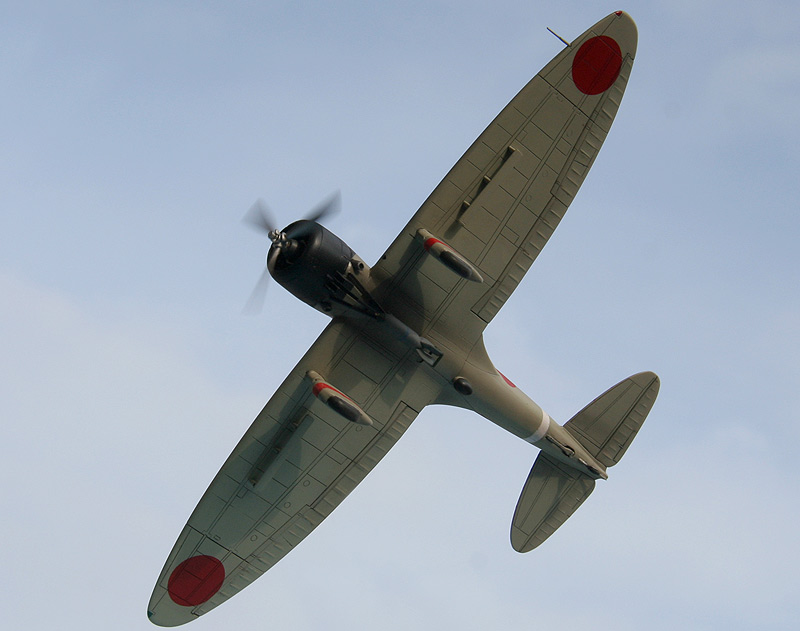
EI-238, pilot: Lt. Cdr. Kakuichi Takahashi, observer: Lt. Koizumi. Shokaku aircraft carrier, Pearl Harbor, December 7th, 1941. The leading aircraft of the first wave of dive bombers.
Kit: Fujimi (1/72). Decals: AeroMaster.

-
10 hours ago, Najk said:
I always cut them off and replace with stretched sprue.
Me too.
-
Thank you for your comments, Eric and RKic. I'm happy you like the model.
The canopy looks a little bit funny - its taller than the windscreen. This may be because SH made the windscreen too flat on top.
Yes, the canopy was the major problem in my build. The rear part could fit if the area under it was flat - but it is not. I has to cut the internal edge to make it sit lower. It was hard to get an acceptable result (and I did not get it in my opinion). I was close to abandon the model because of it.
Is it possible to pose it open, it wouldn't be as obvious then?
Yes, you can pose it open, but I never do it in my models.
-
-
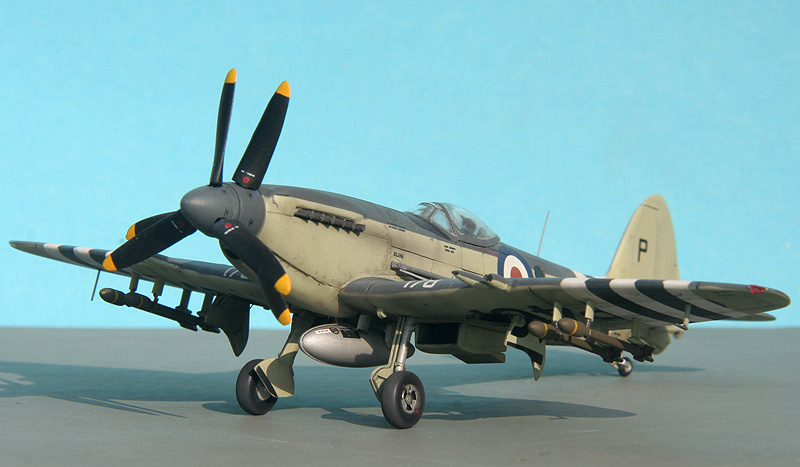
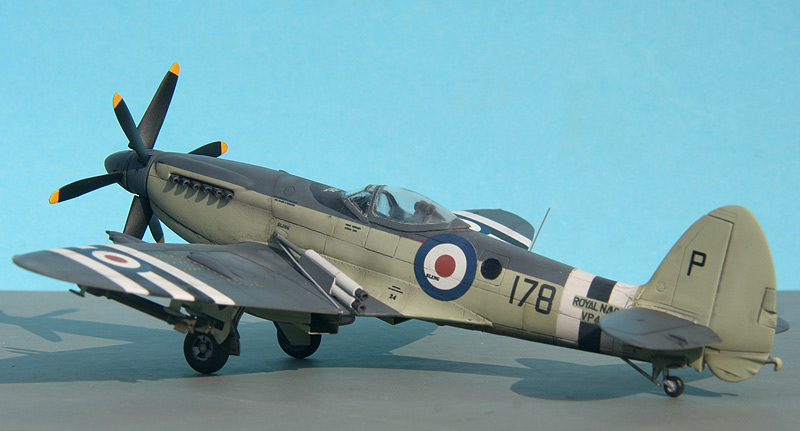
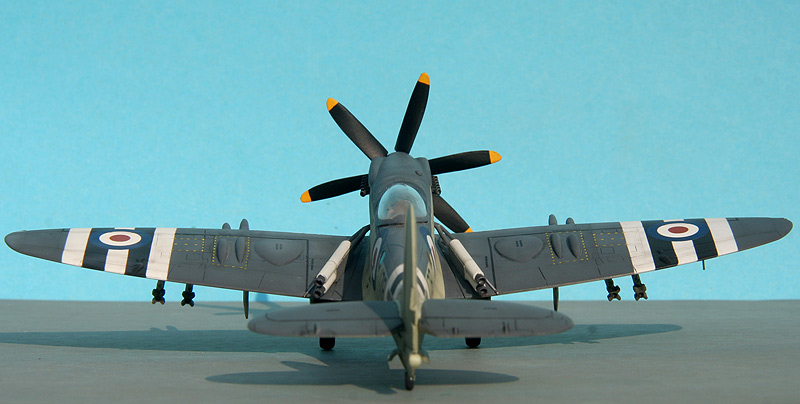
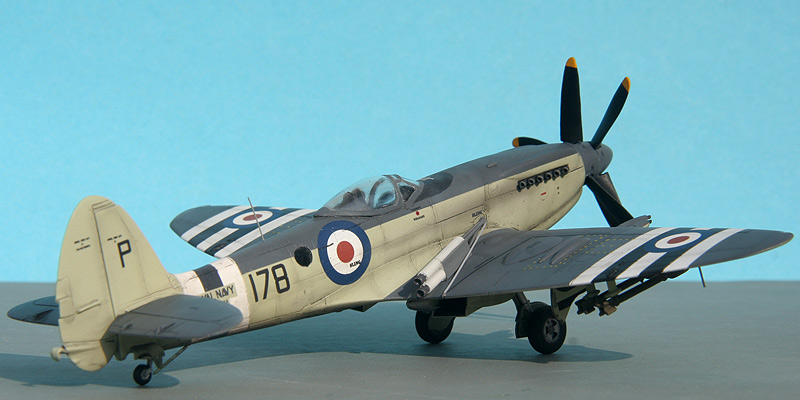
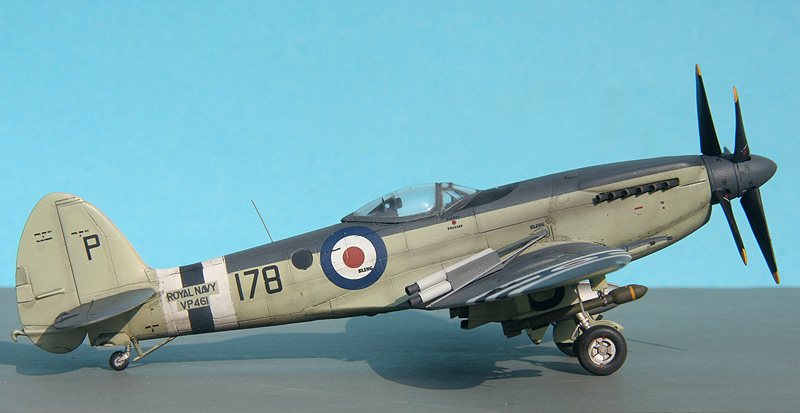
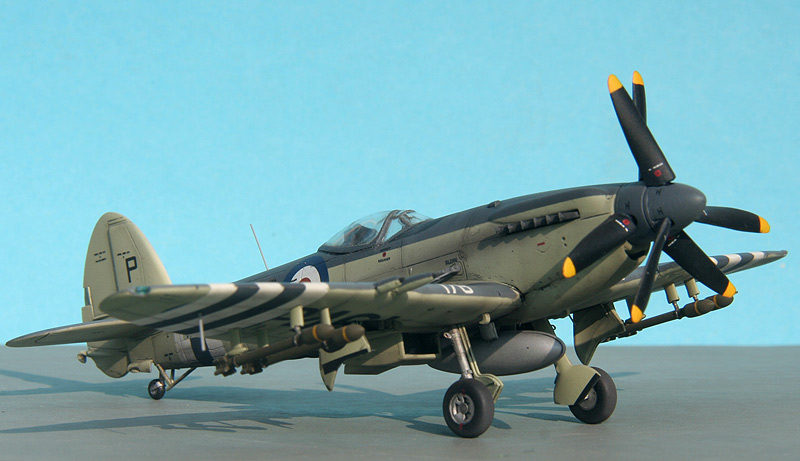
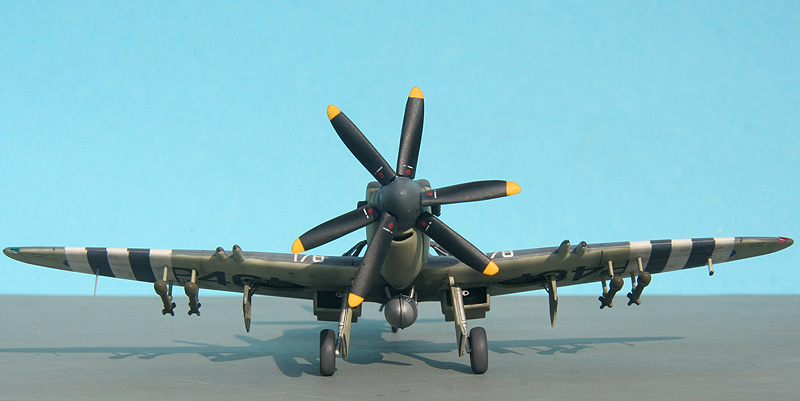
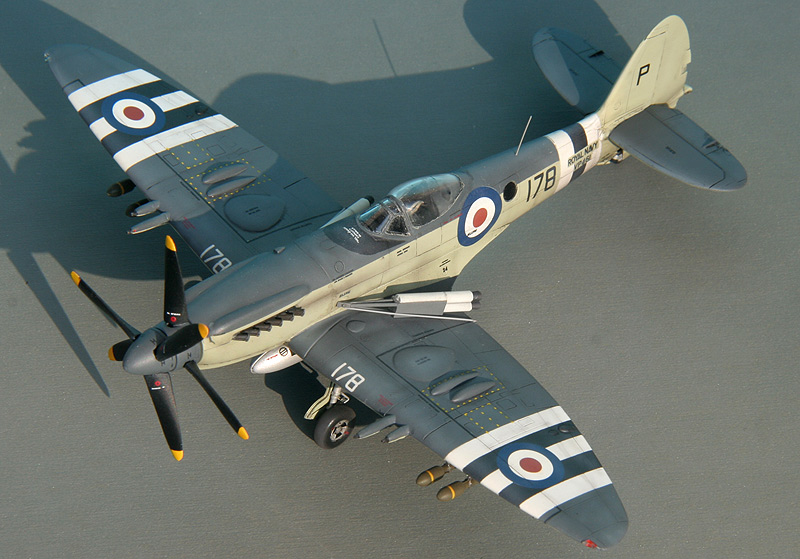
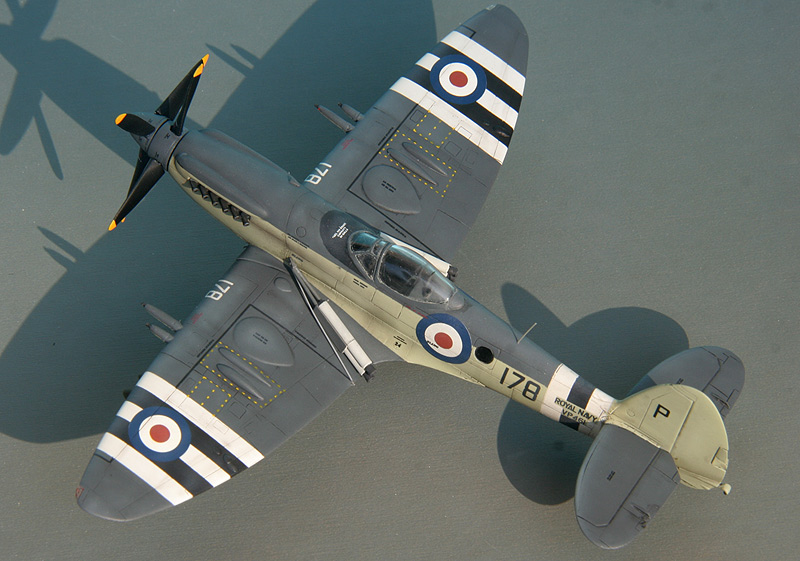
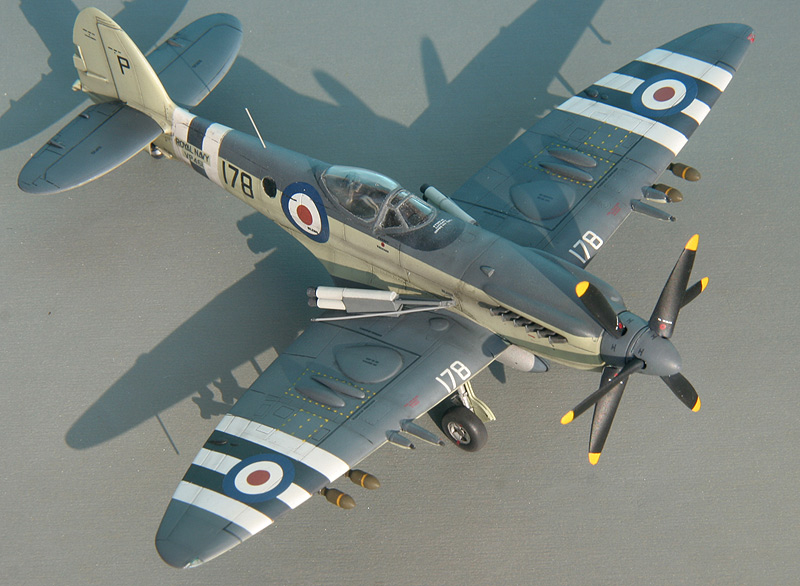
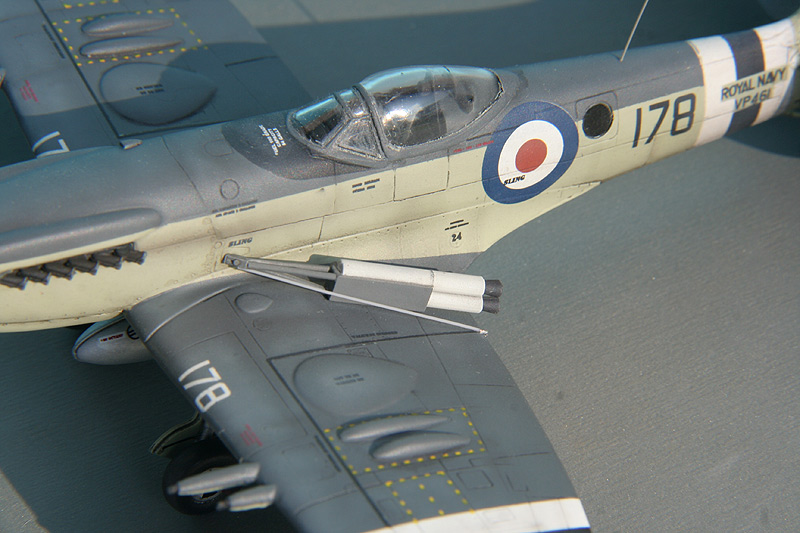
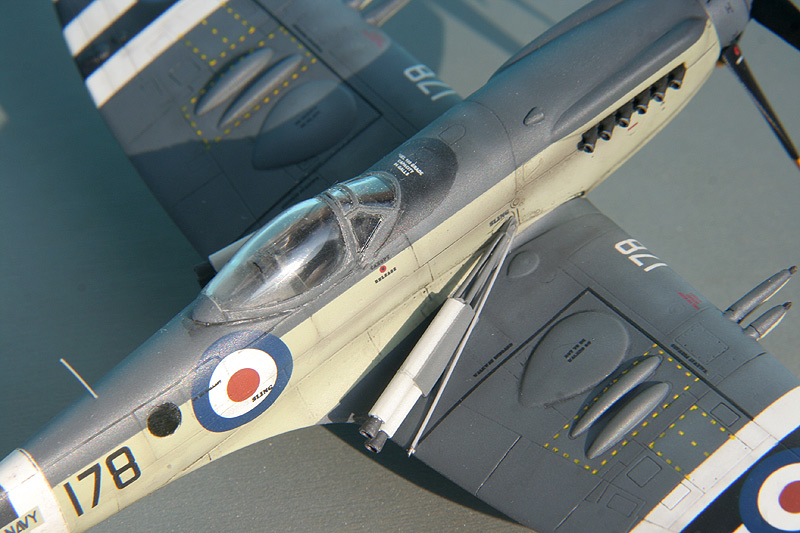
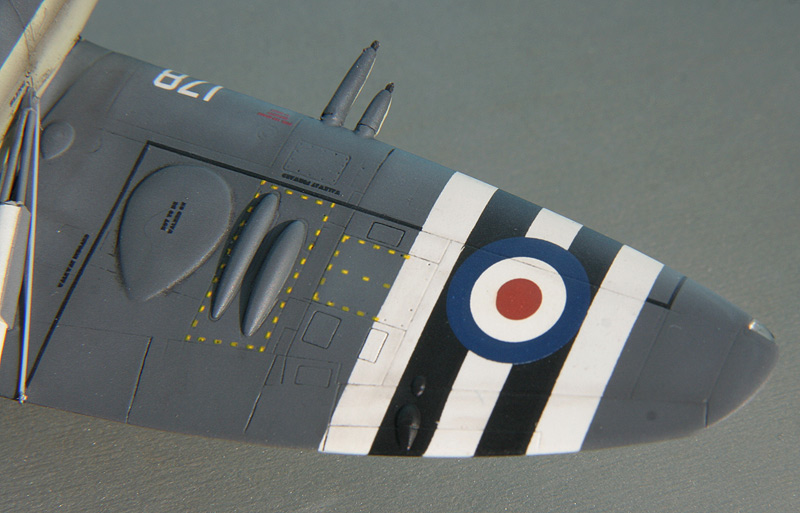
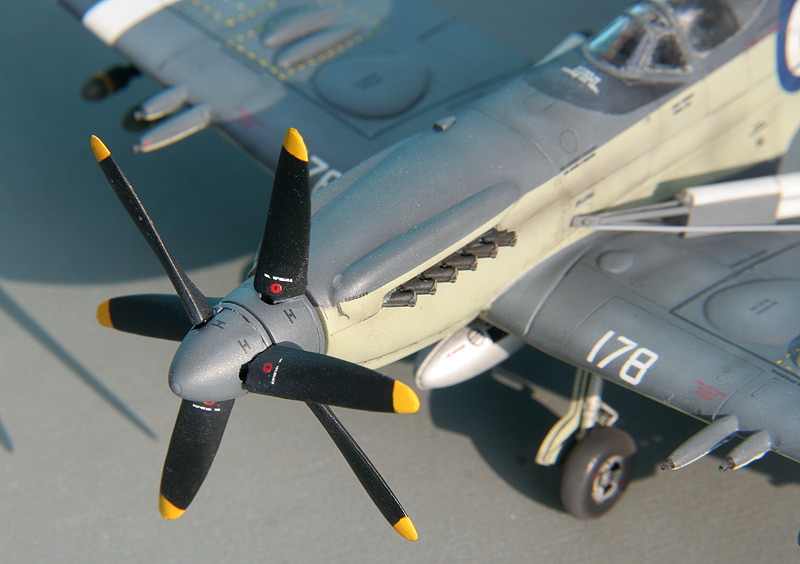
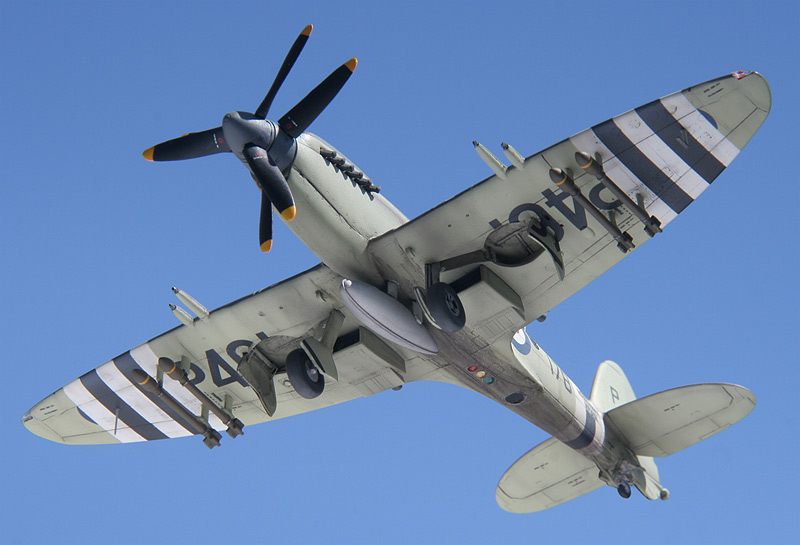
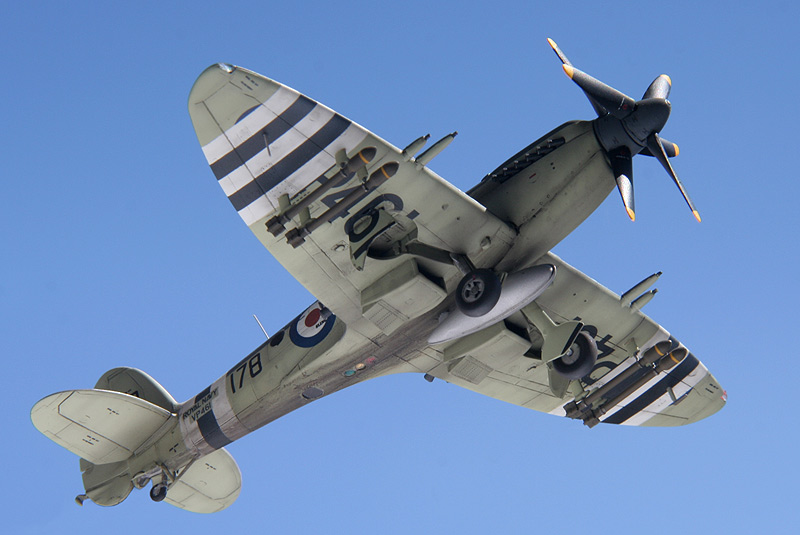
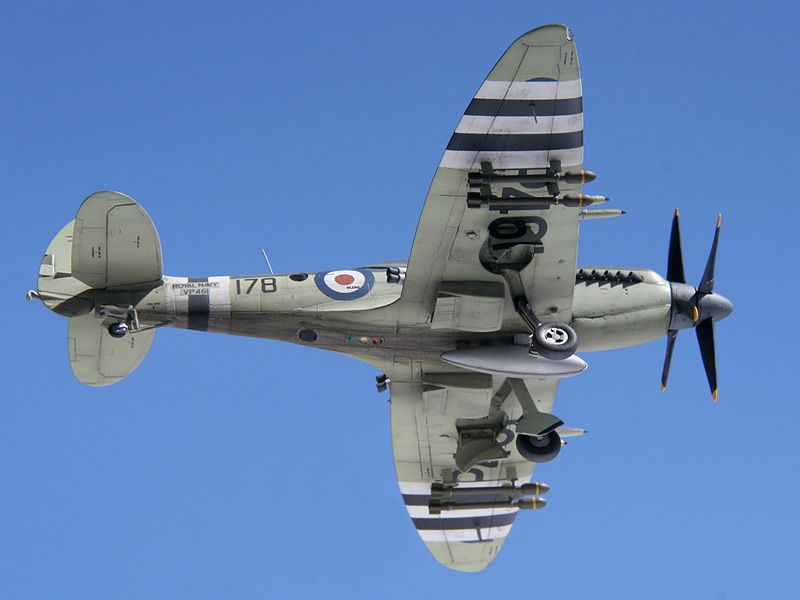
Supermarine Seafire FR.47 VP461 178/P, 800 Squadron FAA, HMS Triumph, Korea, August 1950. Pilot: Lt. Hanchard Goodwin.
Kit: Special Hobby (1/72).

-
What is the kit like?
Generally it is OK but has some issues in unexpected areas.
What can be easier than fit of upper and lower part of a wing? The parts here are done in a strange way (see the instructions) - some upper surfaces are molded with lower part and vice versa. This results with need of most of sanding in the build. But on the other hand, the completed wing with air intake and fillet fits perfectly to the fuselage along quite complicated join line - you even get correct dihedral.
Another issue is trapezoidal inset in the rear part of upper wing fillet. Apparently a louvers part should be fit there, but no such part is in the kit. You are left with the hole and enjoy it or help yourself. I tried to make such louvers but I'm not satisfied with them.
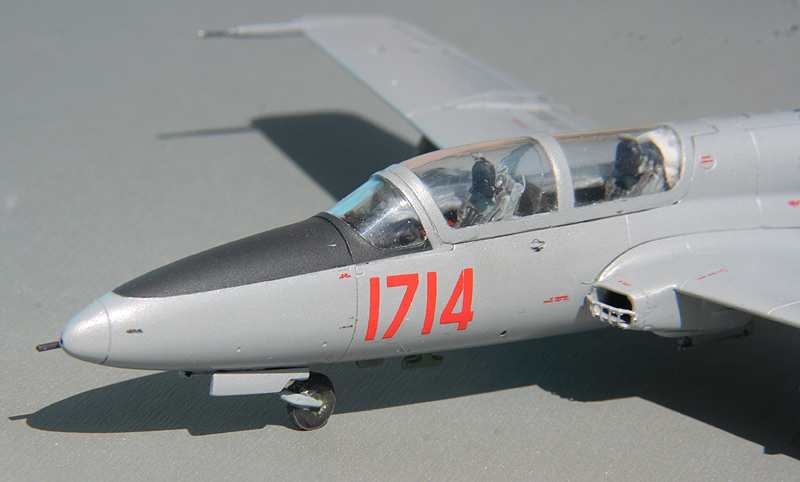
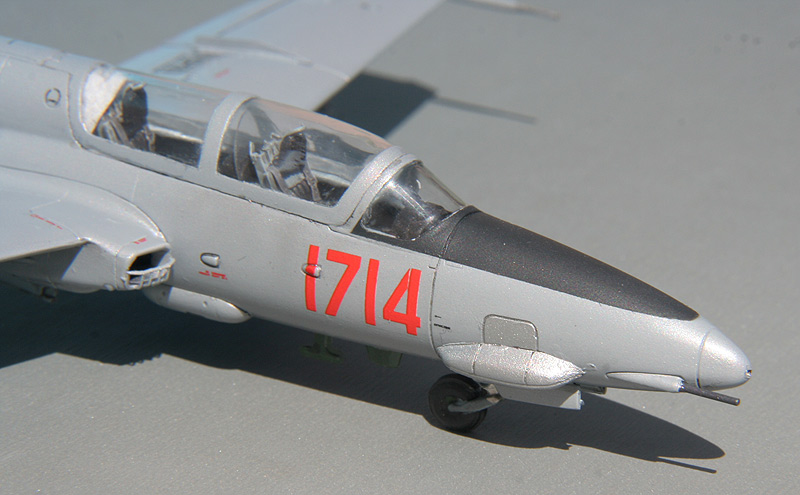
The canopy could be thinner (for better view to the well detailed cockpit) and shorter to fit in closed position. OK, I know it is a bit insane to put PE part to the cockpit and then close it, but that's the way I do. If you like you can open the cockpit and airbrakes plus lower the flaps which gives much more "living" model out of the box. You can even buy a engine set for the kit, however there is no open nose option yet.
The Iskra in 1/72 is the first injection molded kit from Arma Hobby, who is known and appreciated of resin kits. Therefore some issues can be forgiven. I'm looking forward for their upcoming kits.
-
-
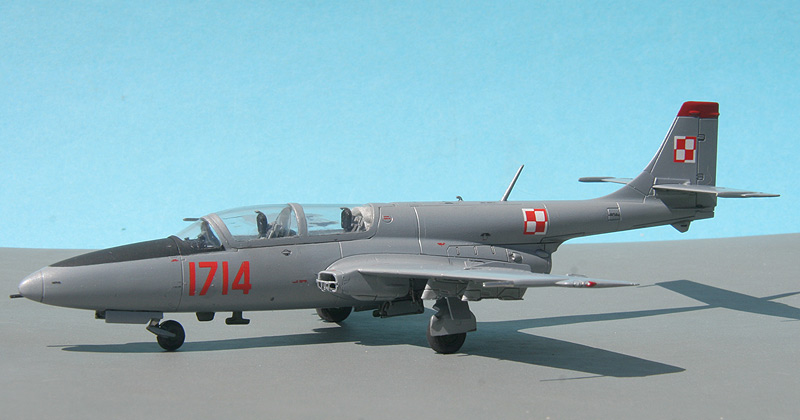
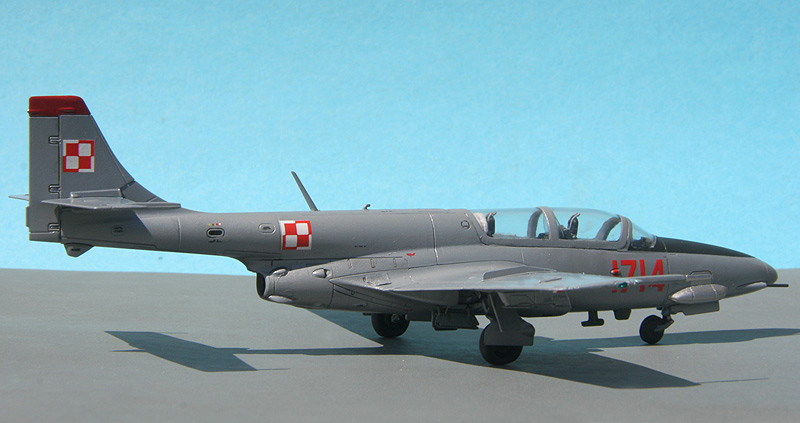
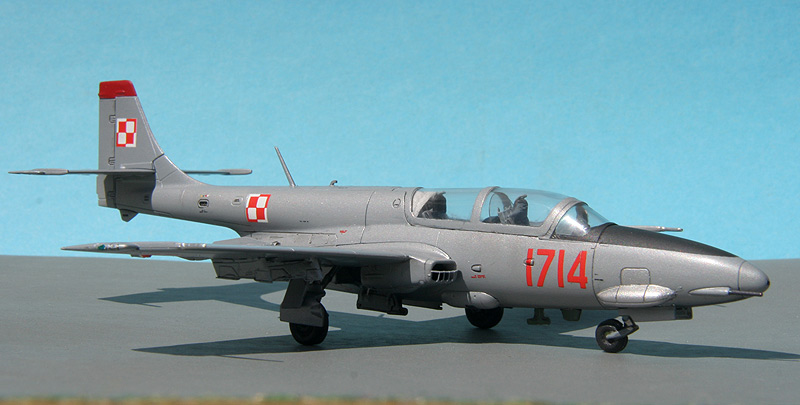
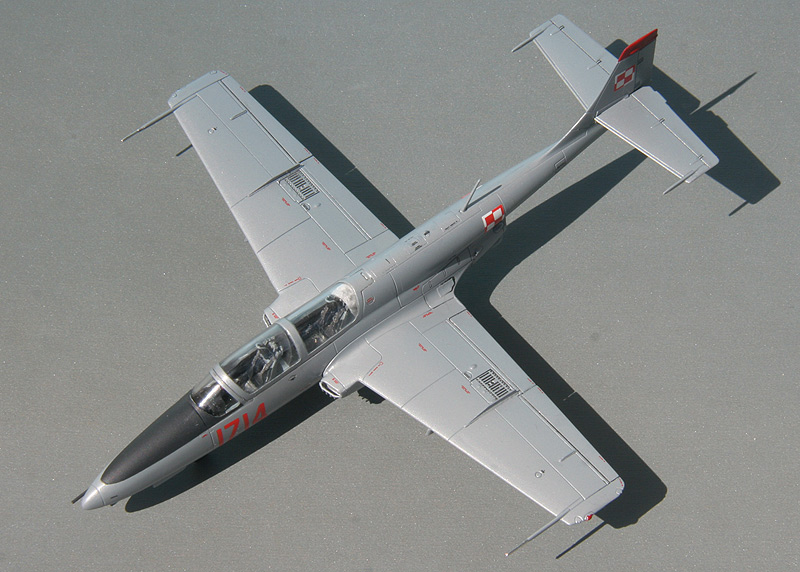
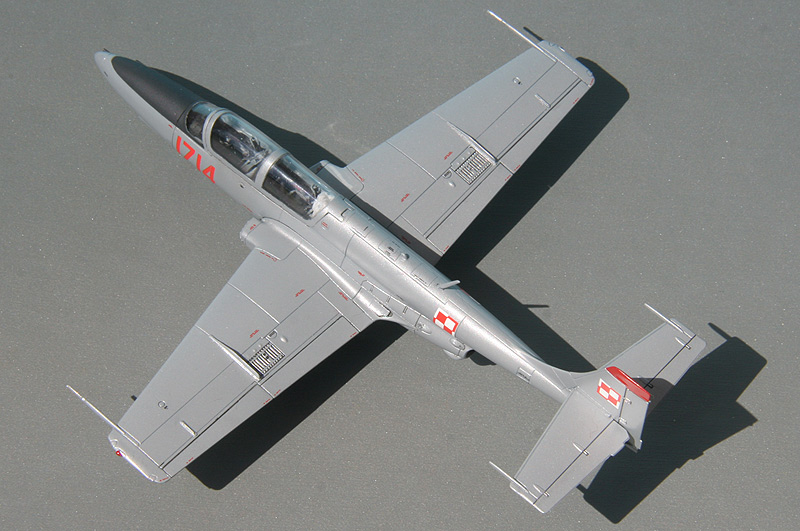
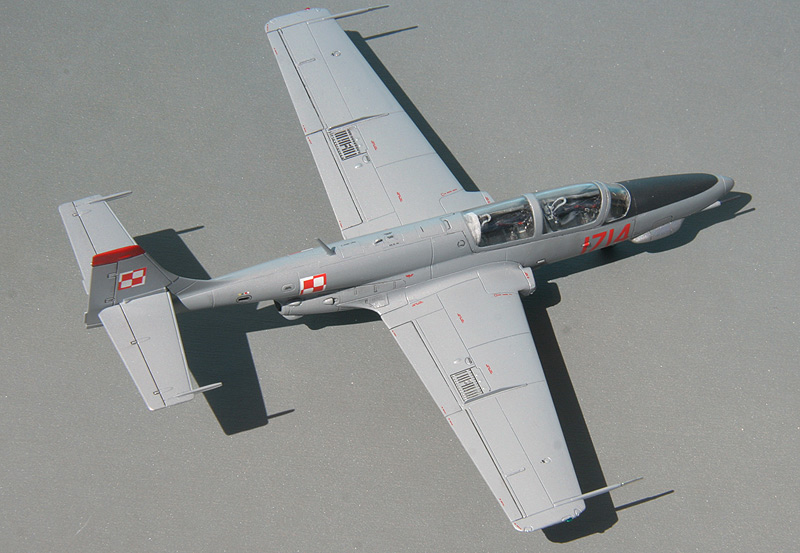
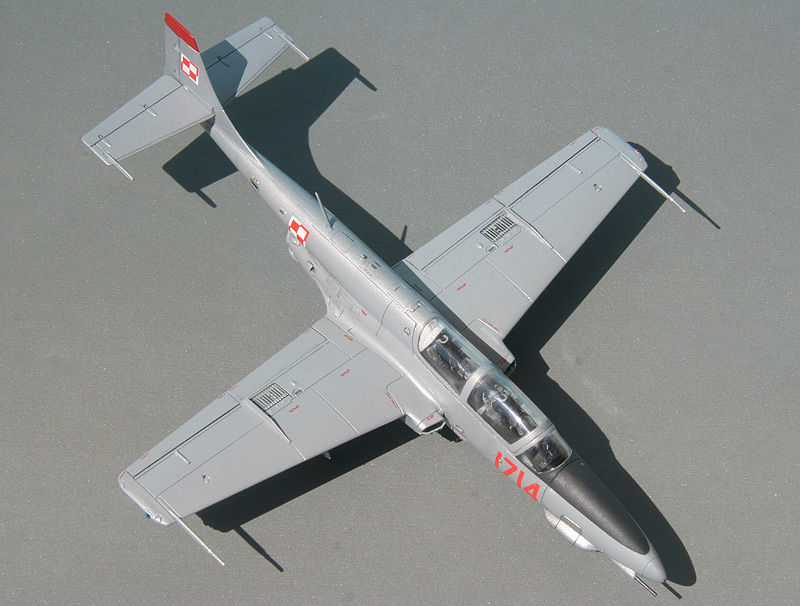
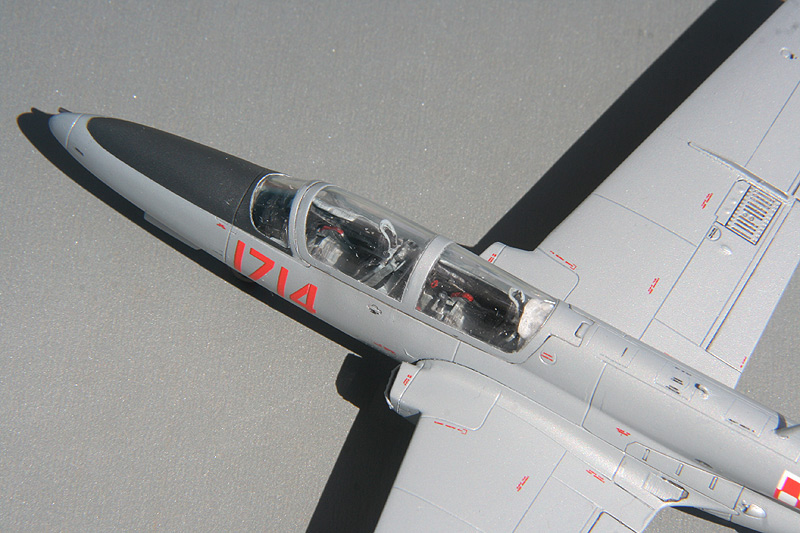
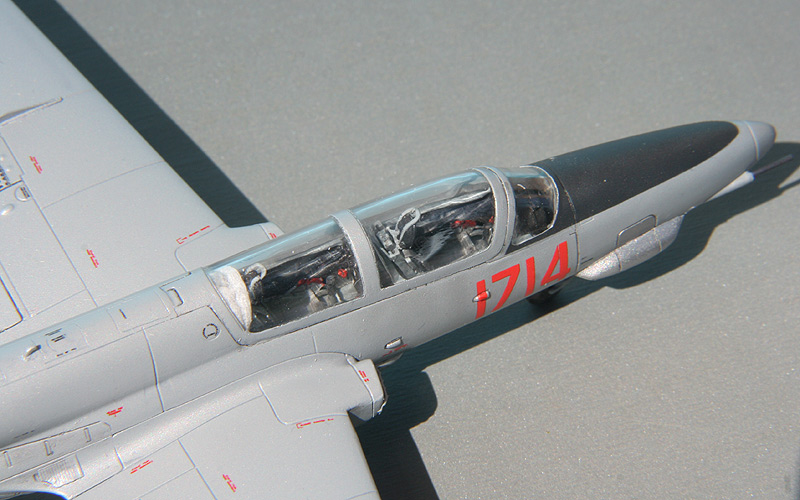
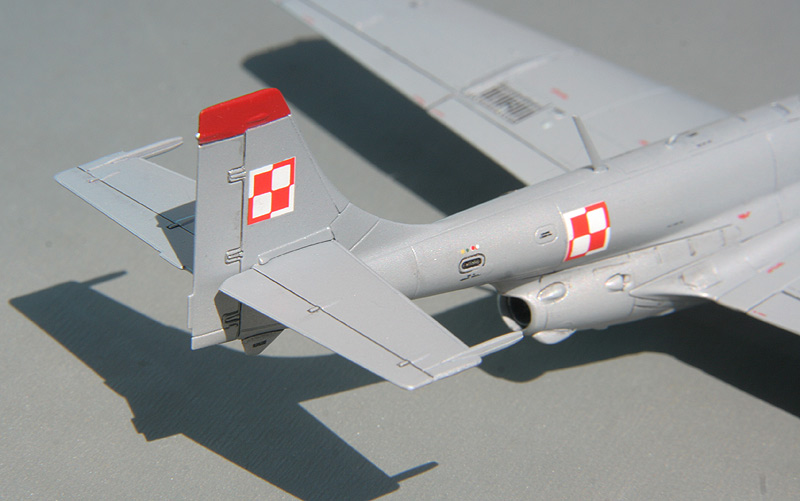
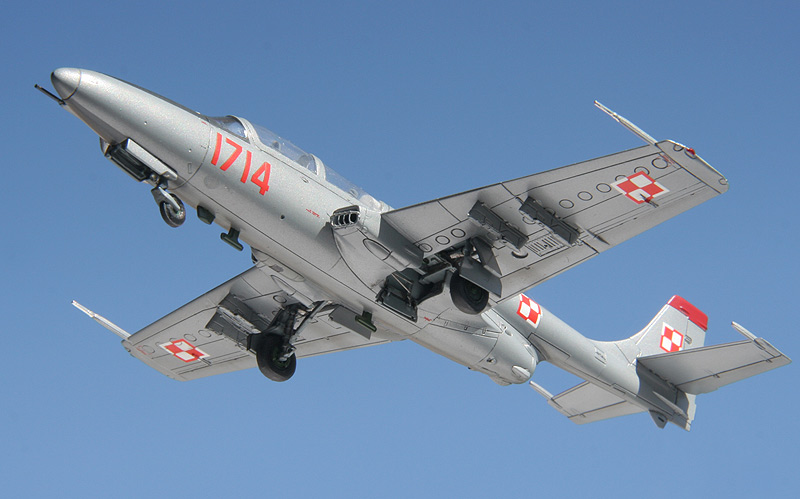
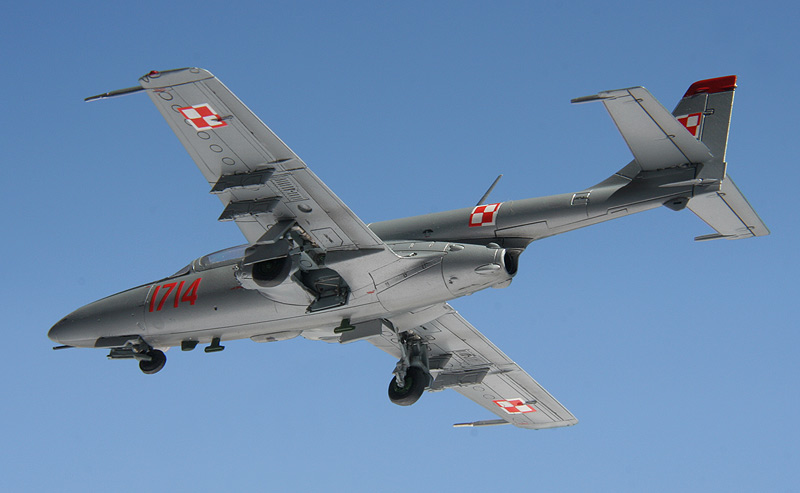
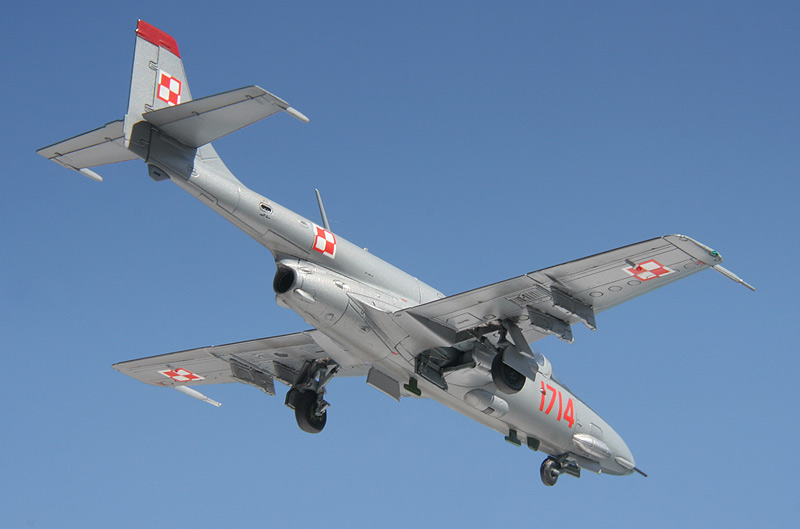
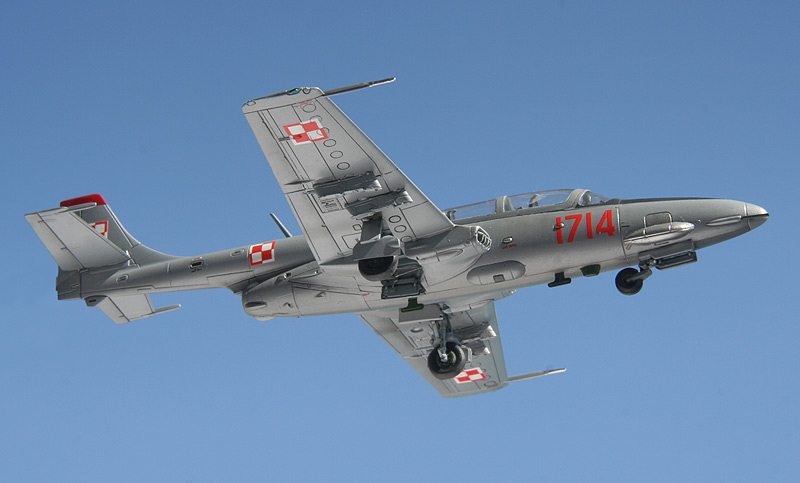
TS-11 Iskra bis DF nr 1714, 3 Lotniczy Pułk Szkolno-Bojowy (Aviation Battle Training Regiment), Bydgoszcz, October 17, 1990. On July 2, 1994 the aircraft crashed in Oleśnica. The pilot, mjr Piotr Siekański, was killed. I witnessed this tragic moment.
The kit: Arma Hobby Deluxe 1/72.

-
-
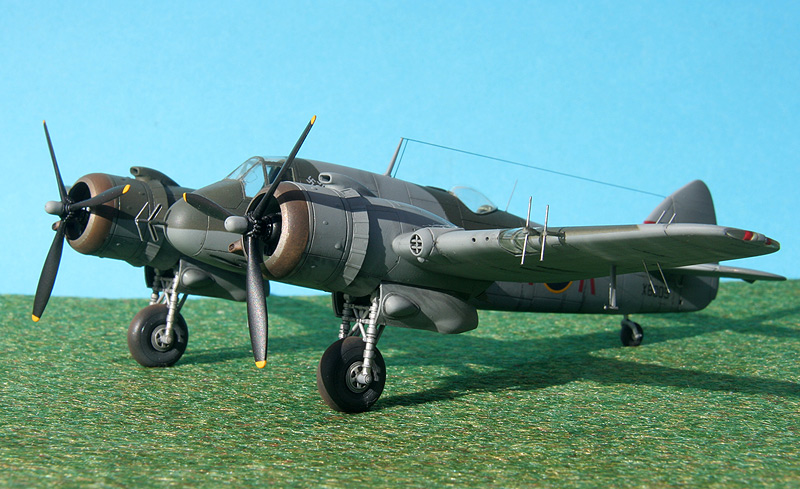
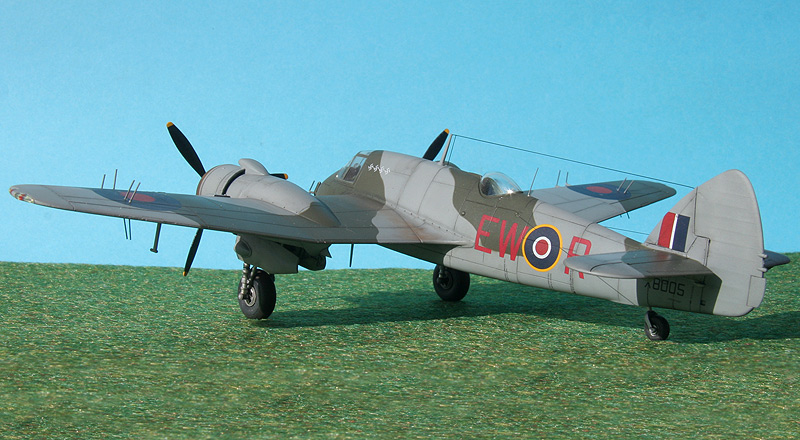
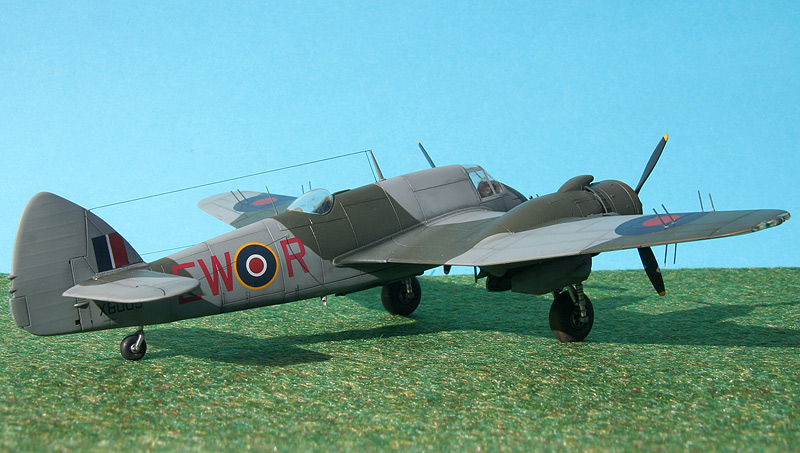
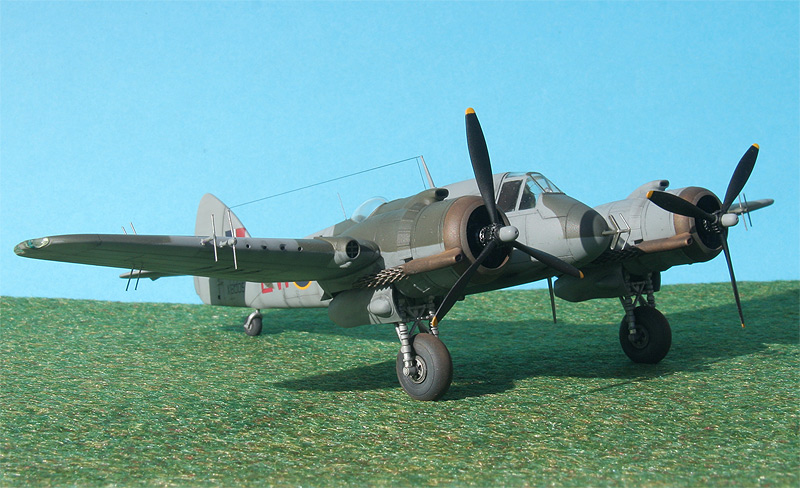
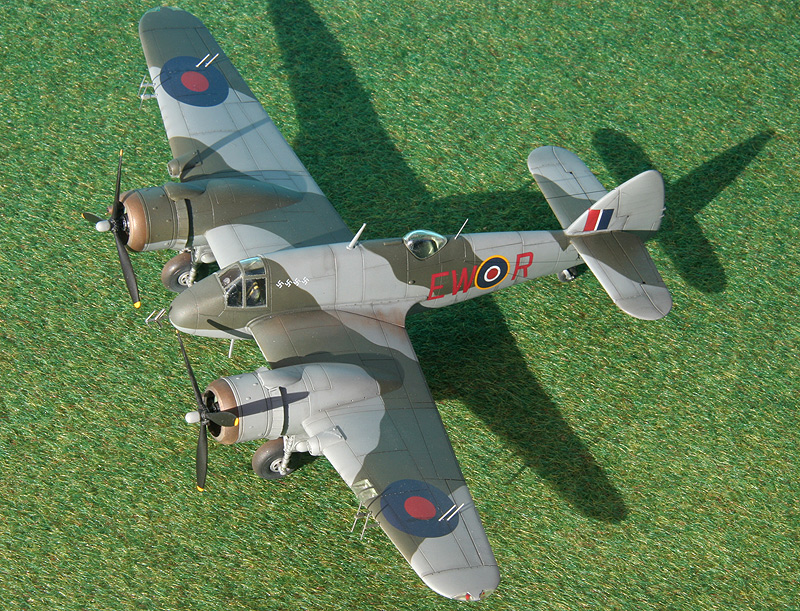
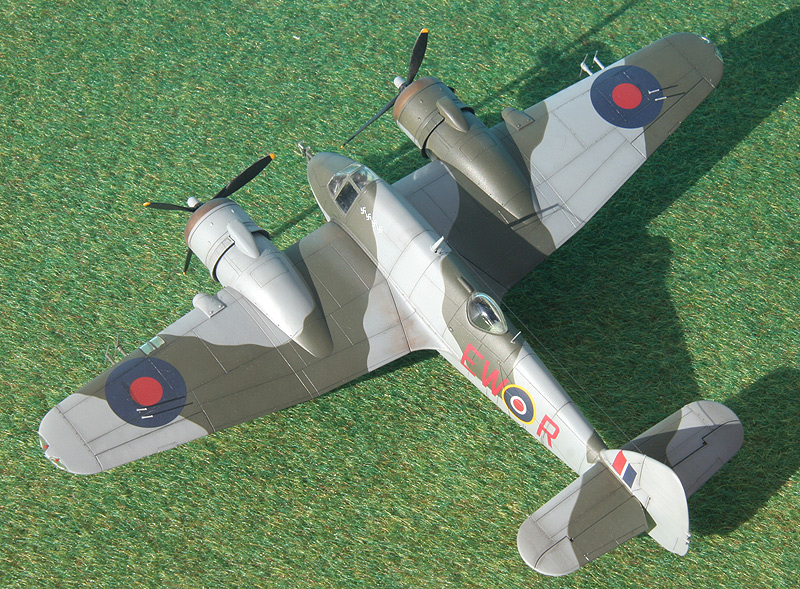
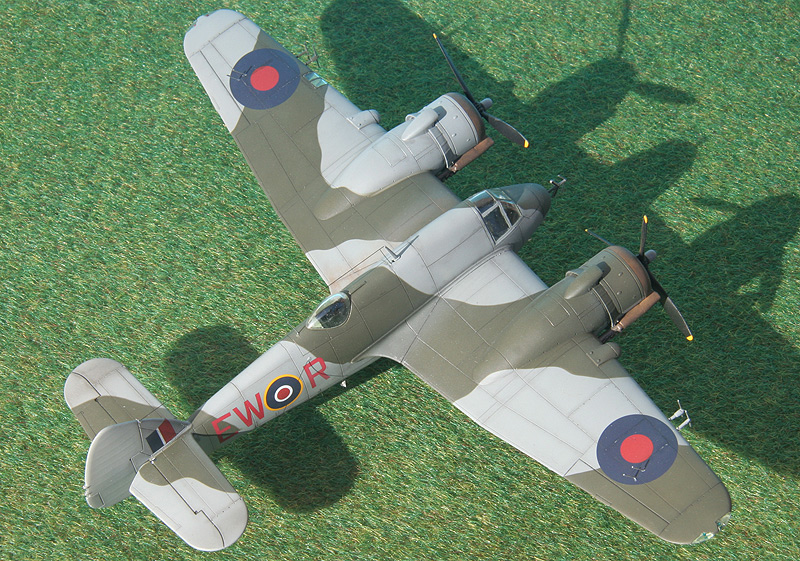
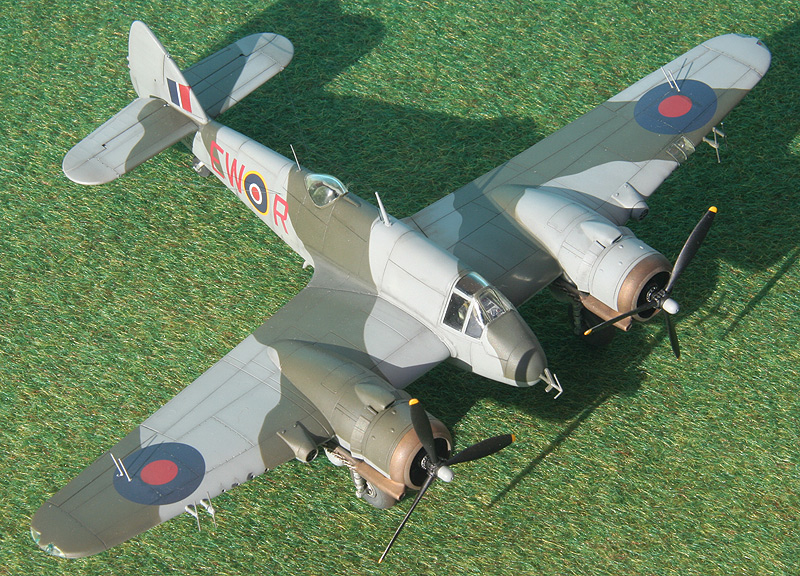
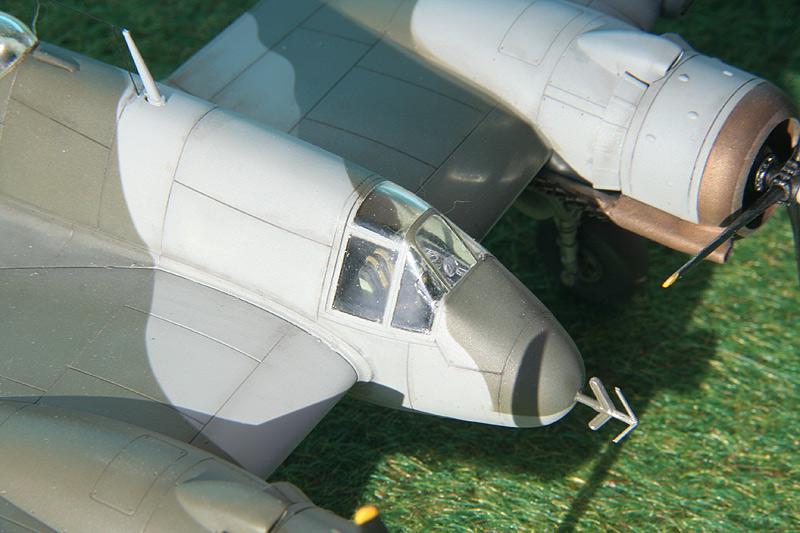
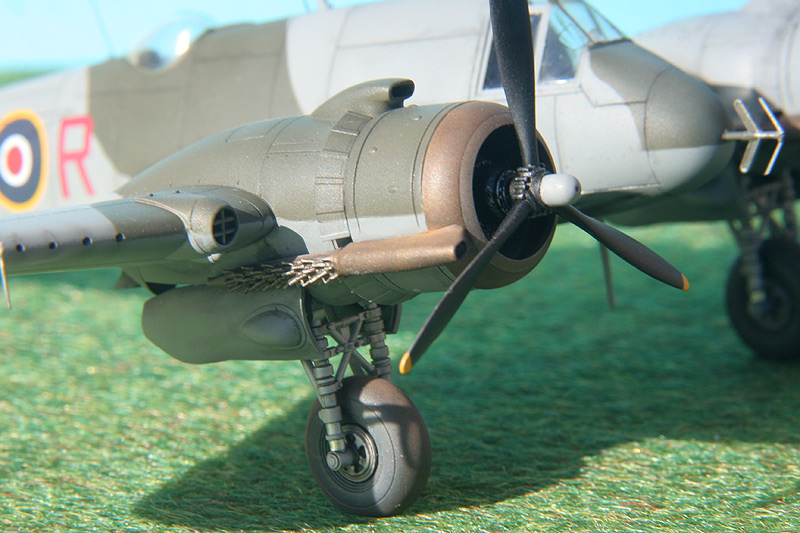
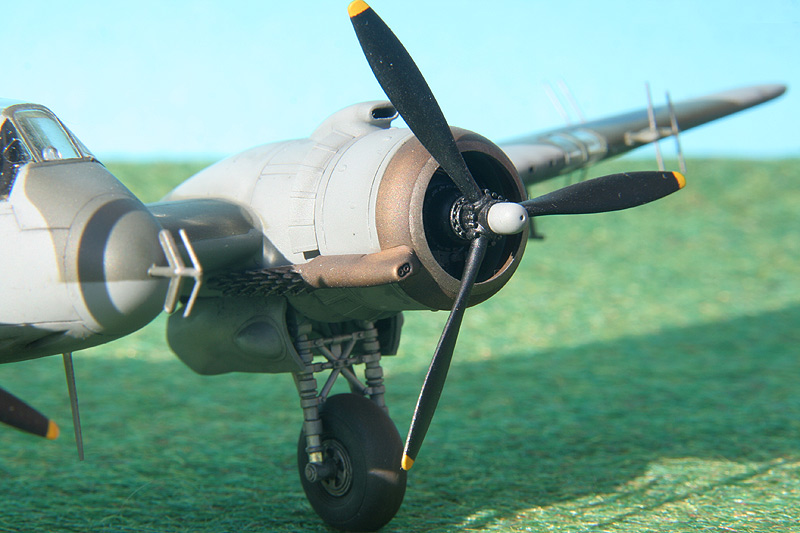
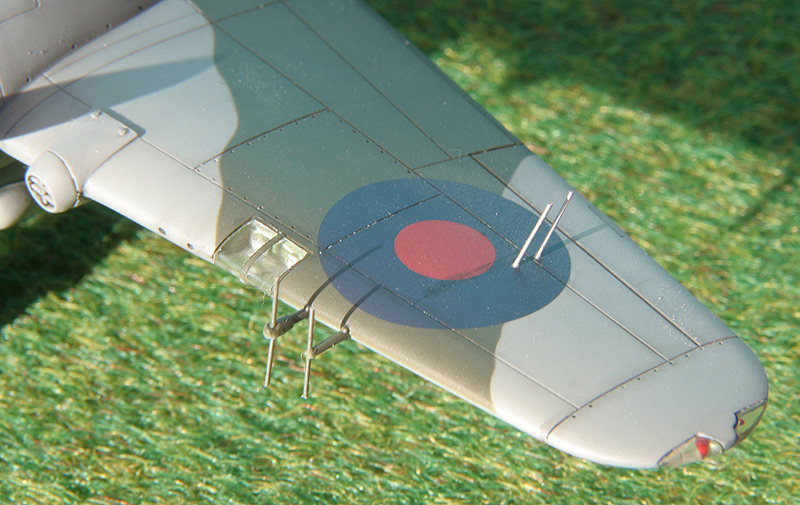
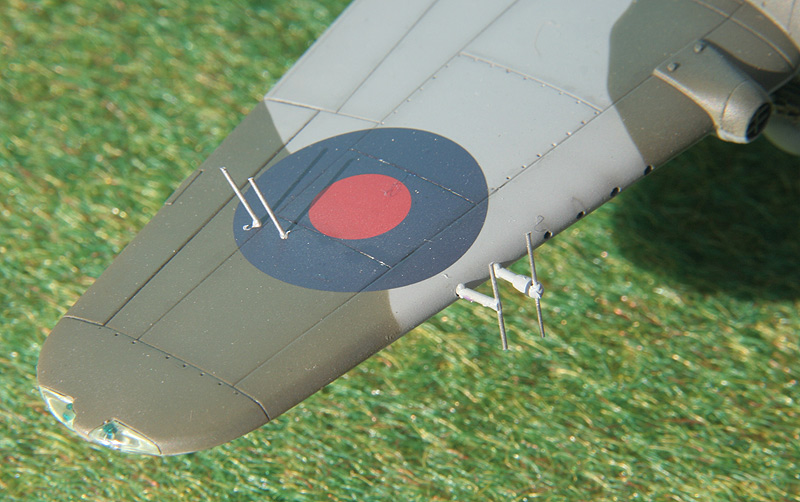
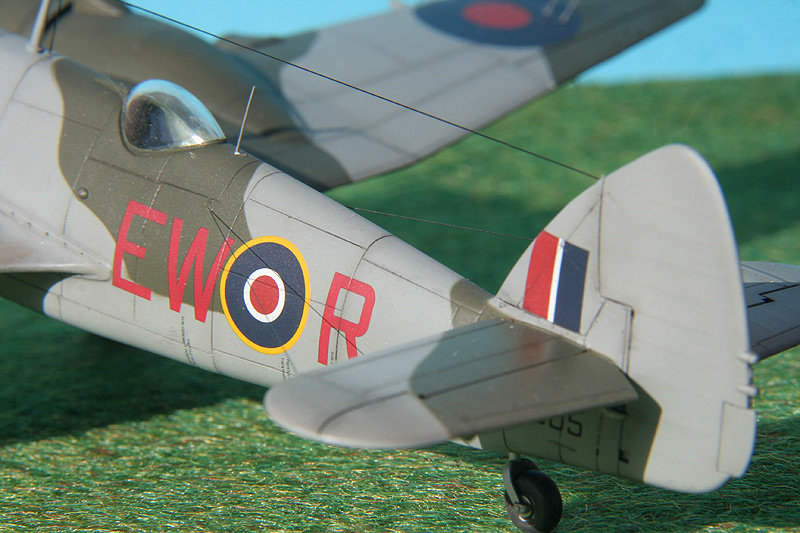
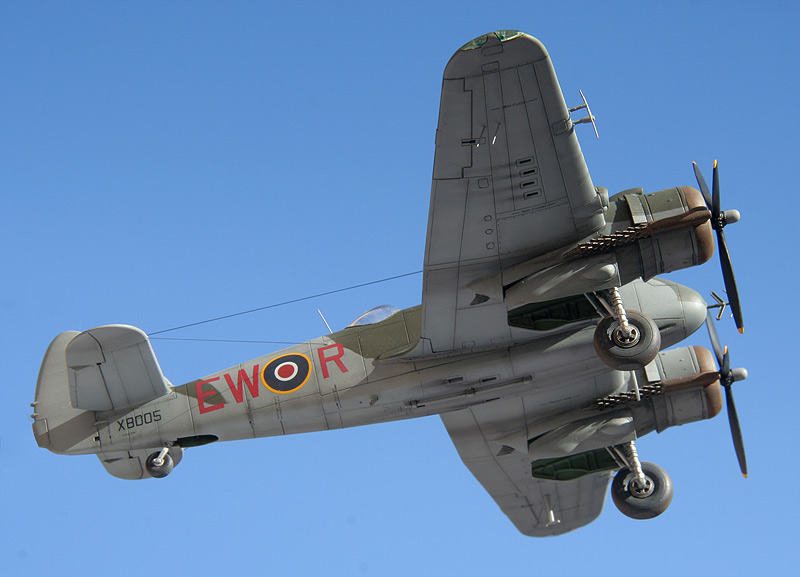
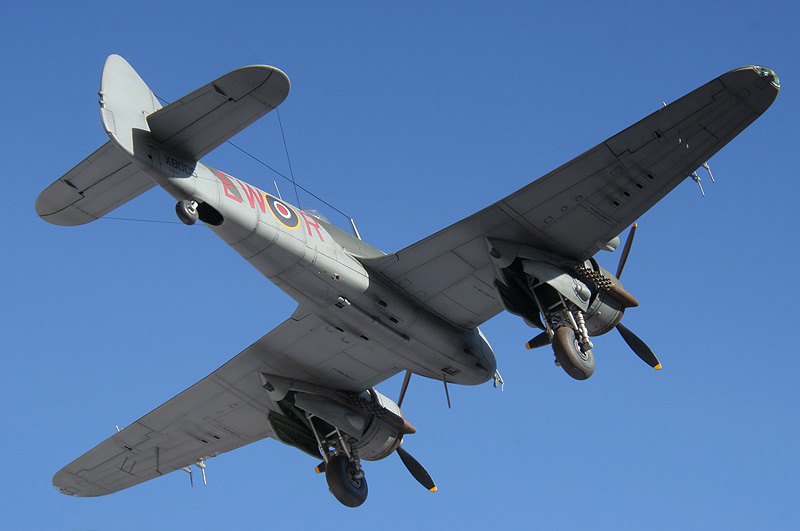
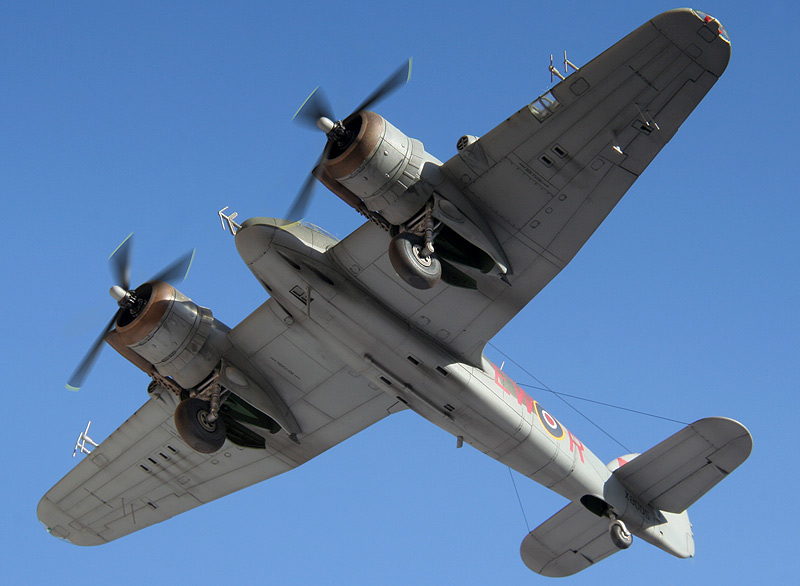
Bristol Beaufighter Mk.VI X8005 EW-R, Polish 307 Night Fighter Squadron, Exeter, January 1943. Crew: Capt. Gerard Ranoszek (3 victories, 2 damages) and Sgt Jerzy Trzaskowski or Capt. Stanisław Sawczyński.
Kit: Hasegawa 1/72. Decals: Techmod.

-
-
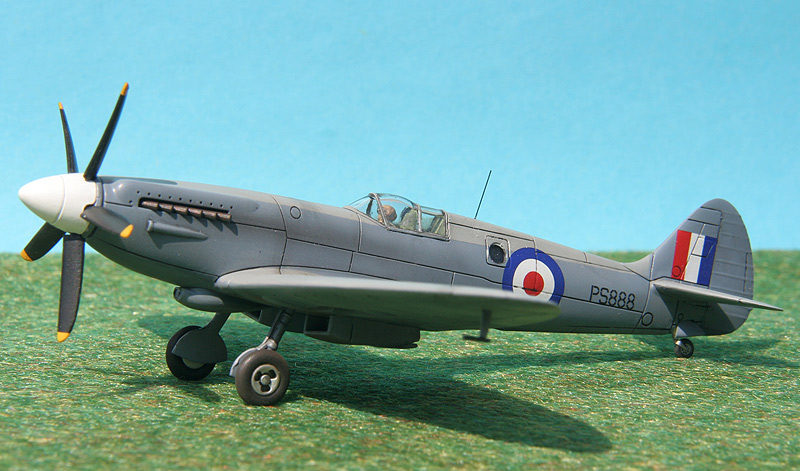
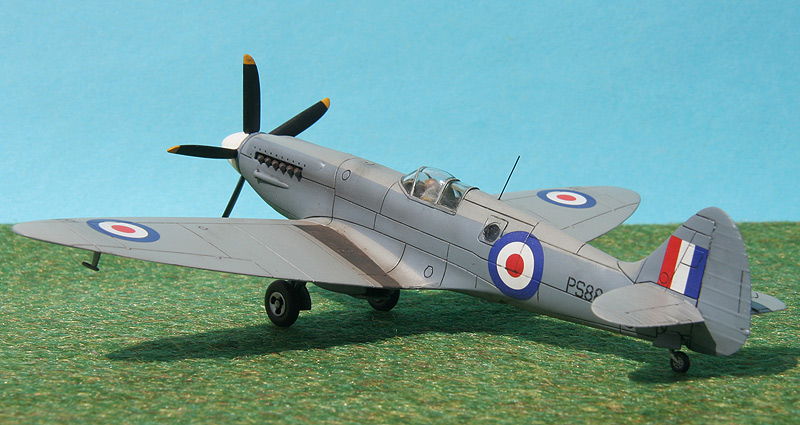
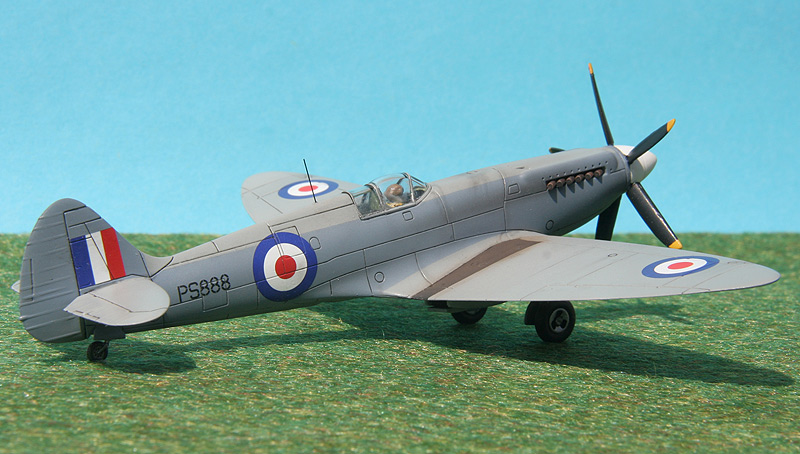
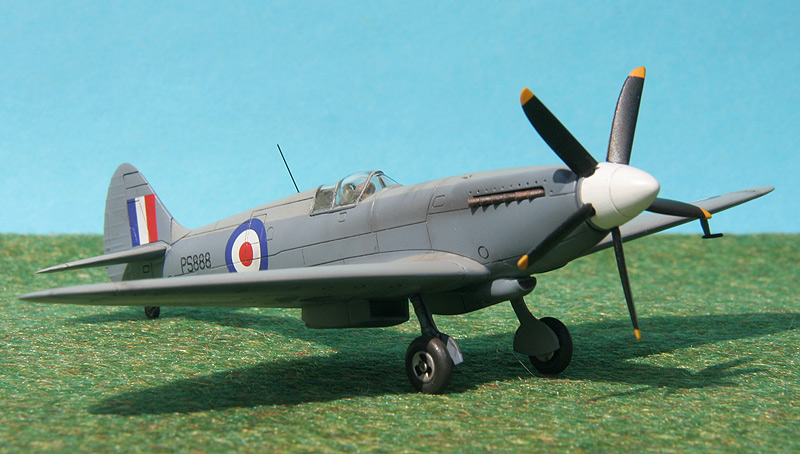
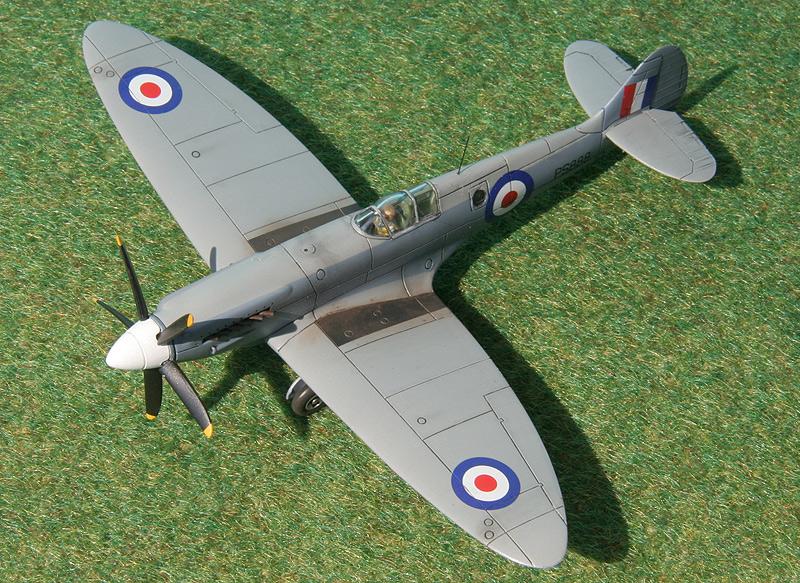
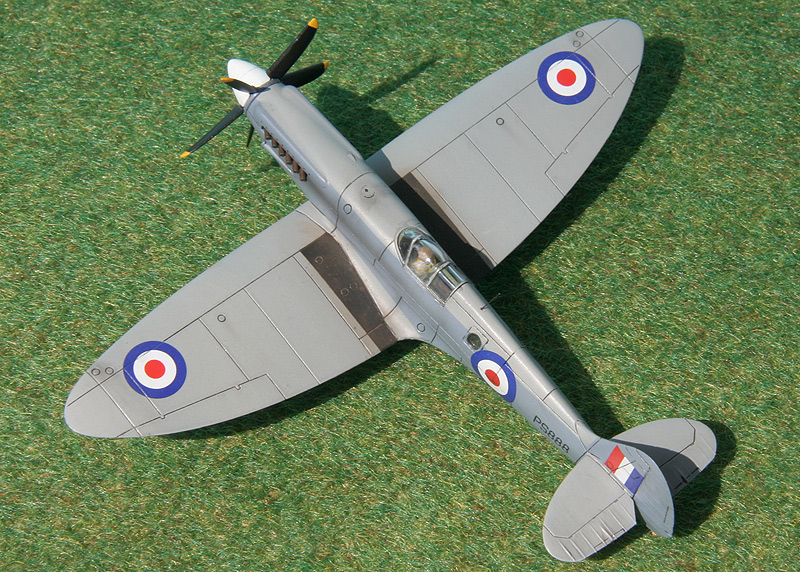
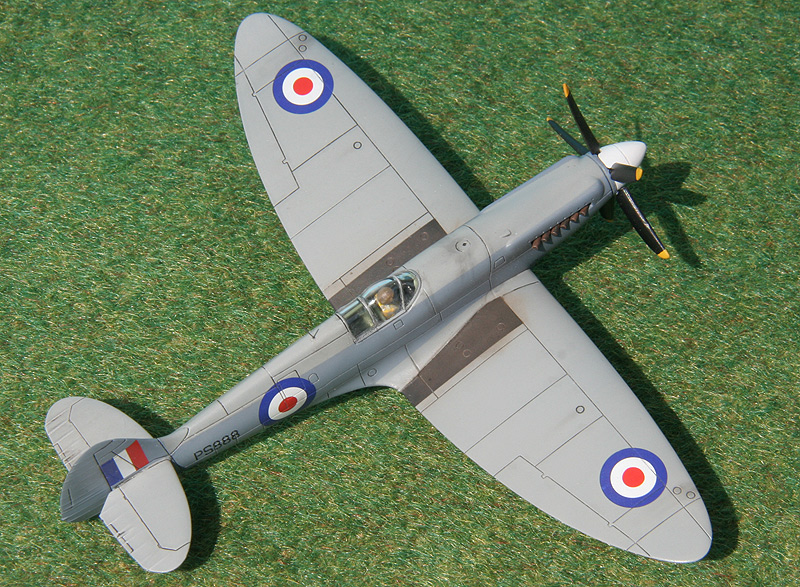
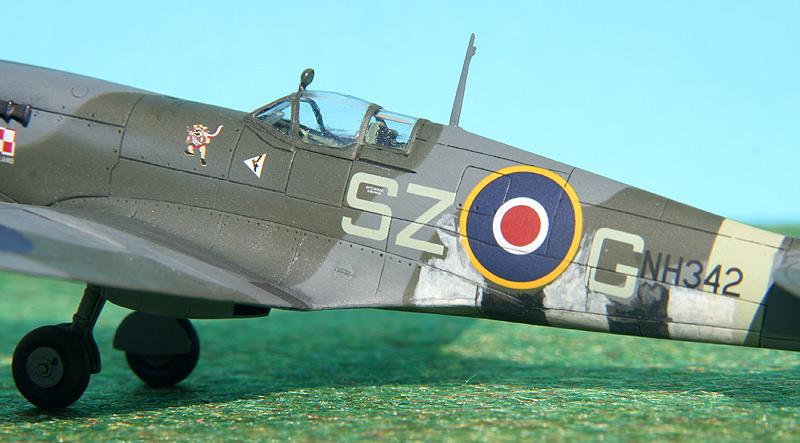
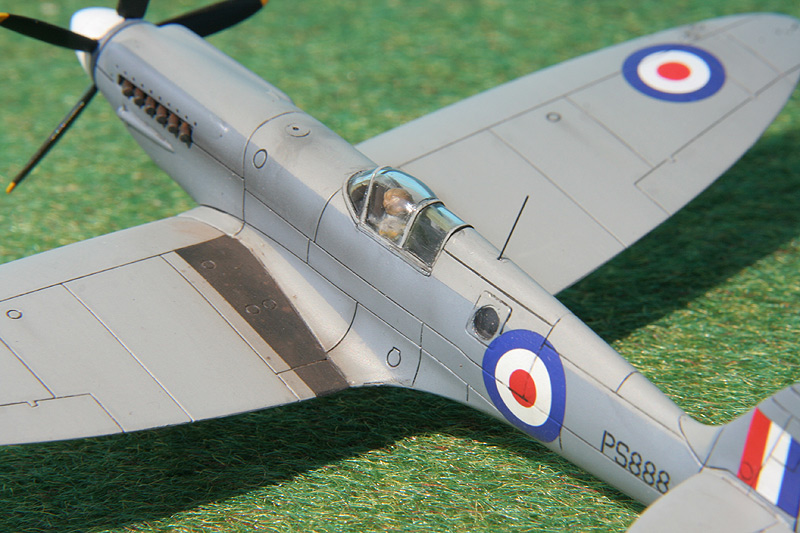
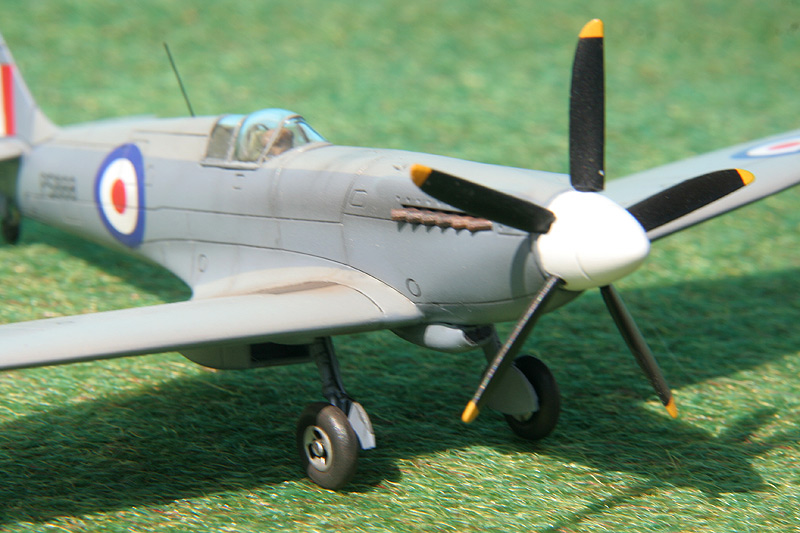
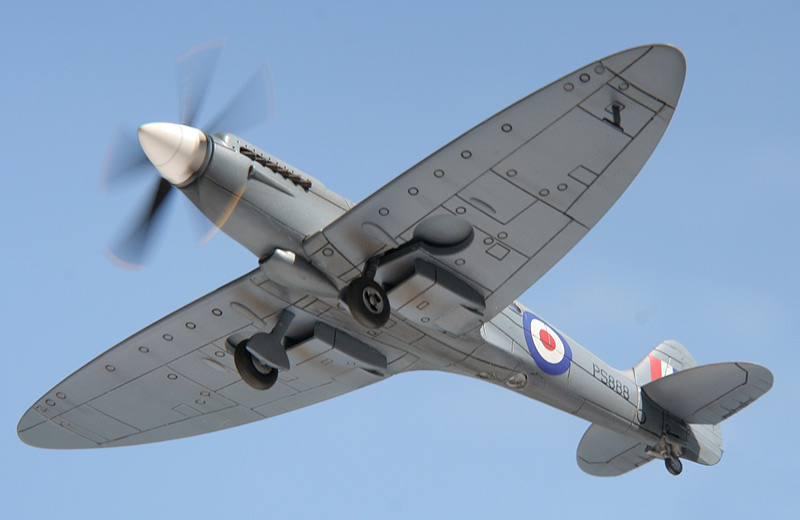
PS888 - the aircraft who had flown the last operational of a RAF Spitfire on April 1, 1954. 81 Sqn, RAF Seletar, Singapore. Pilot: S/Ldr W. P. Swaby. After the last flight the aircraft was decorated with famous "The Last!".
Later on the PS888 was transfered to Royal Thai Air Force. Nowadays PS915 can be seen flying with camouflage and markings (except for serial number) of "The Last!".
Kit: Airfix (1/72). Exhaust tubes and upper roundels from Spitfire F.22 (Airfix). The model is made by my 8-years old son Gustaw with my little assistance.

-
-
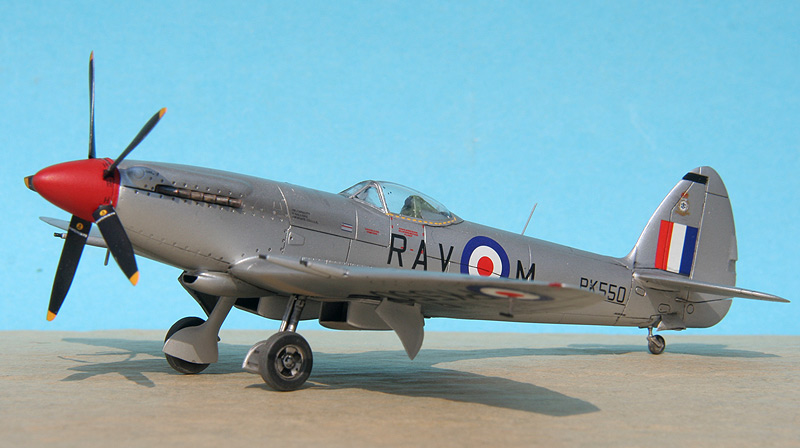
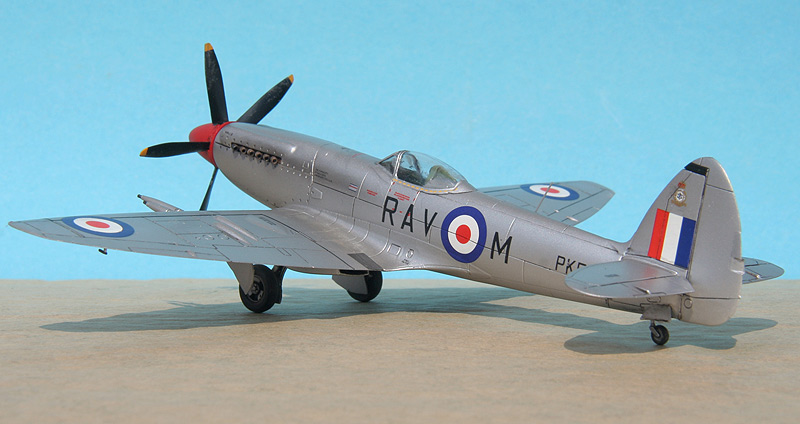
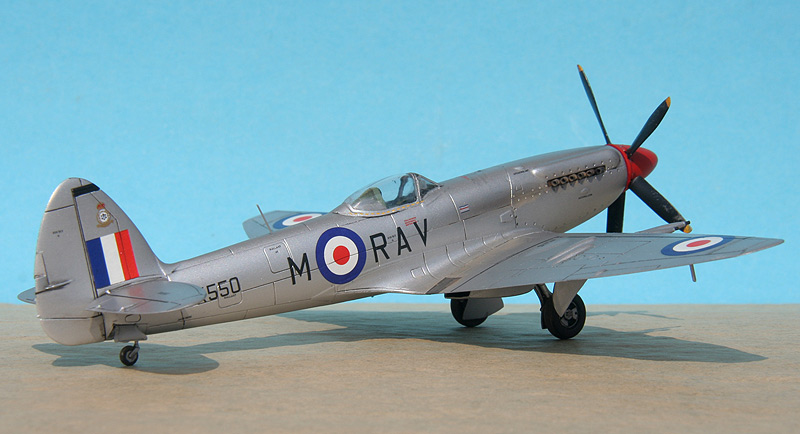
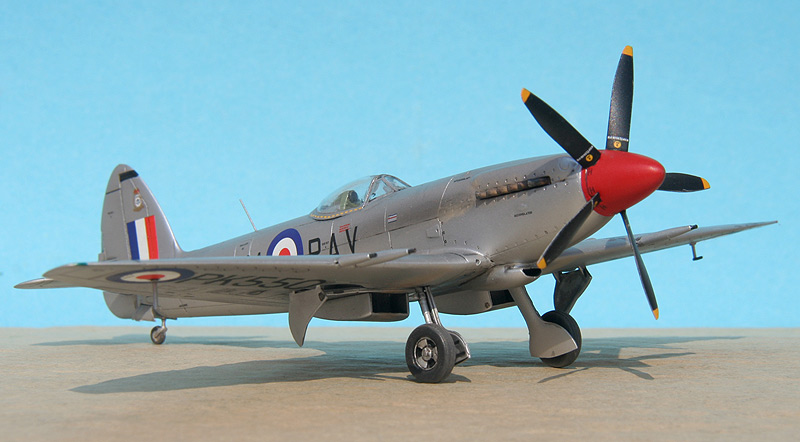
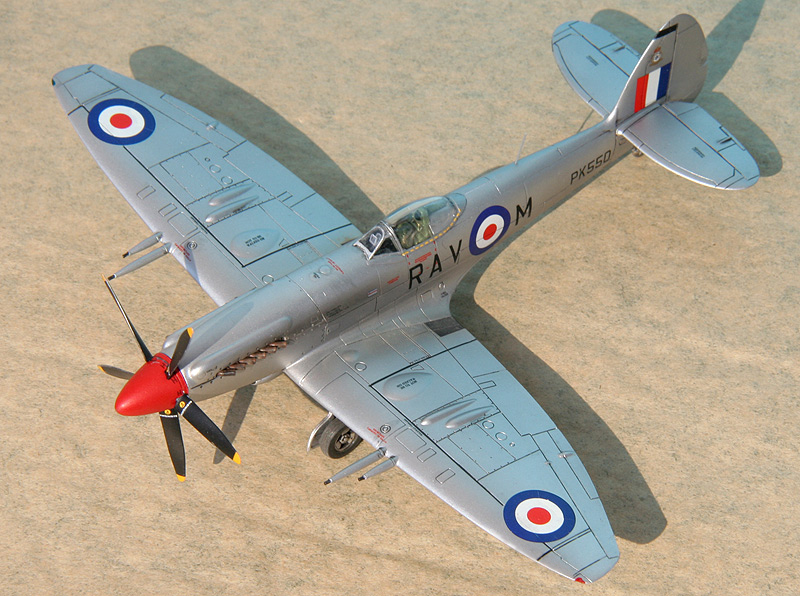
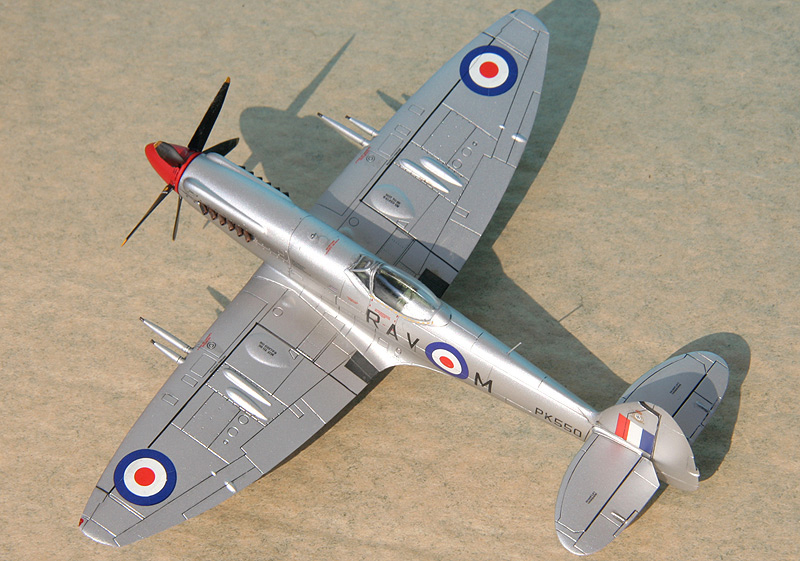
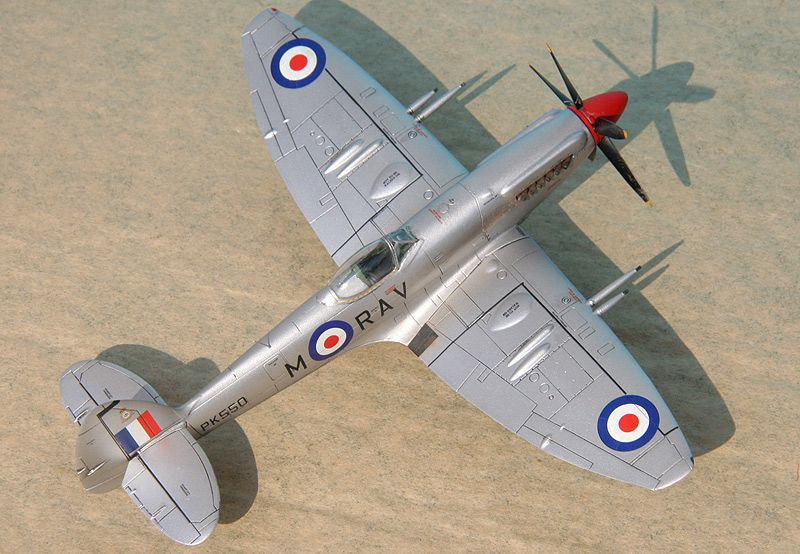
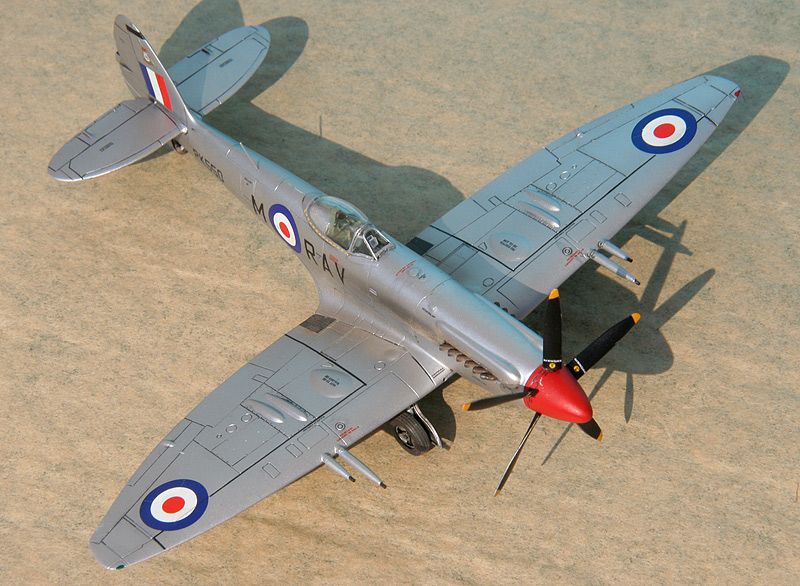
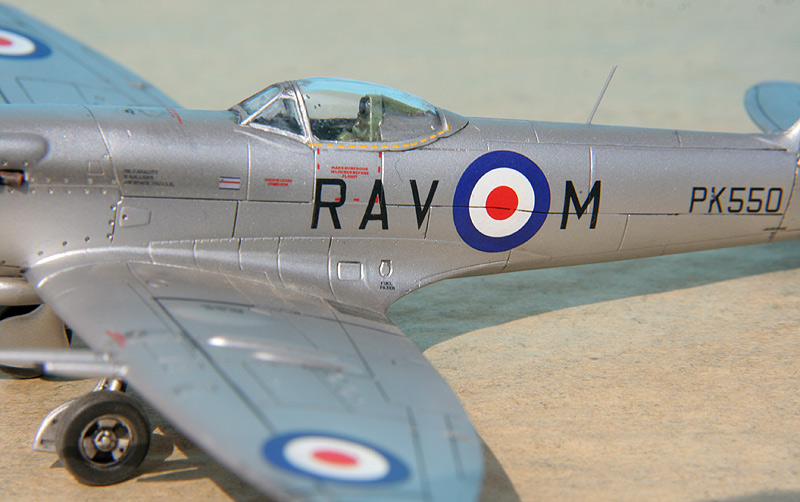
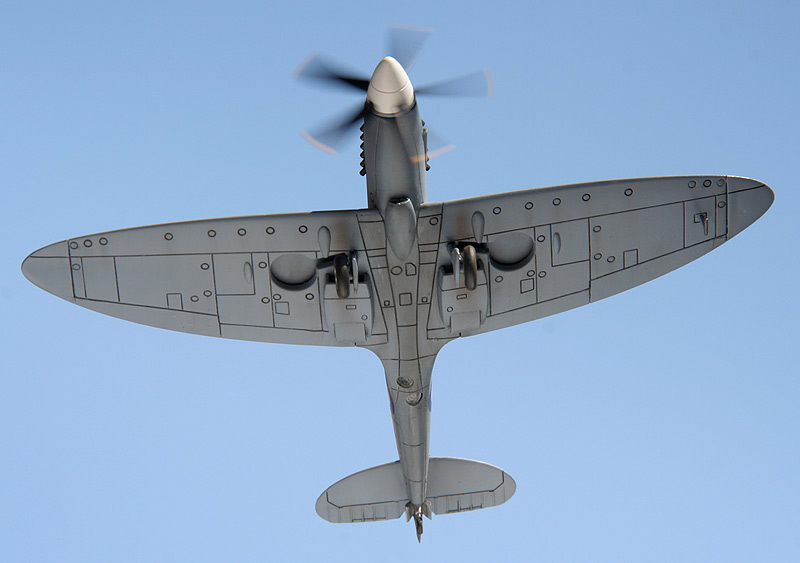
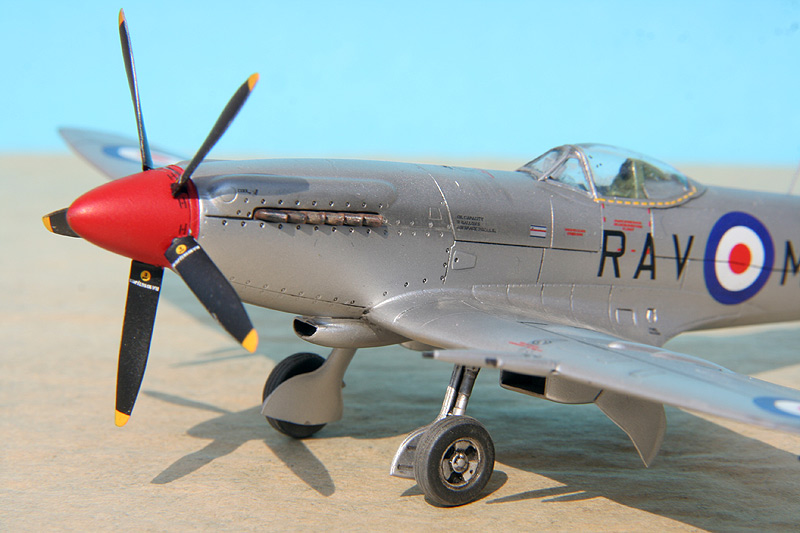
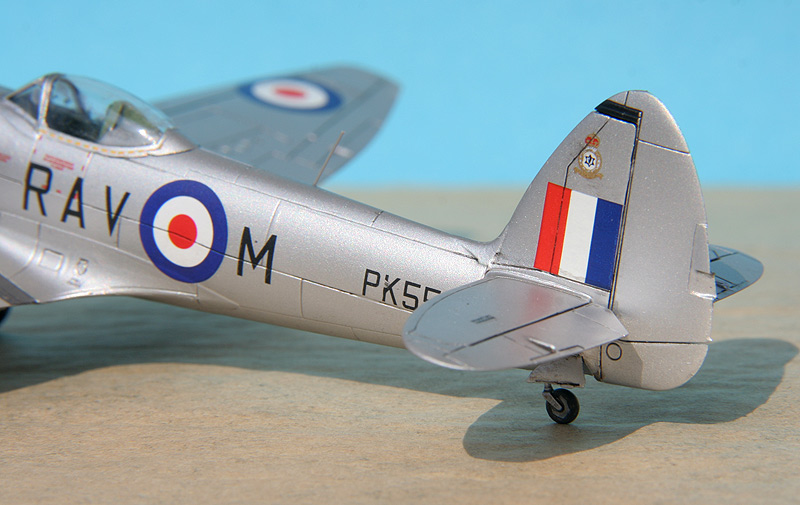
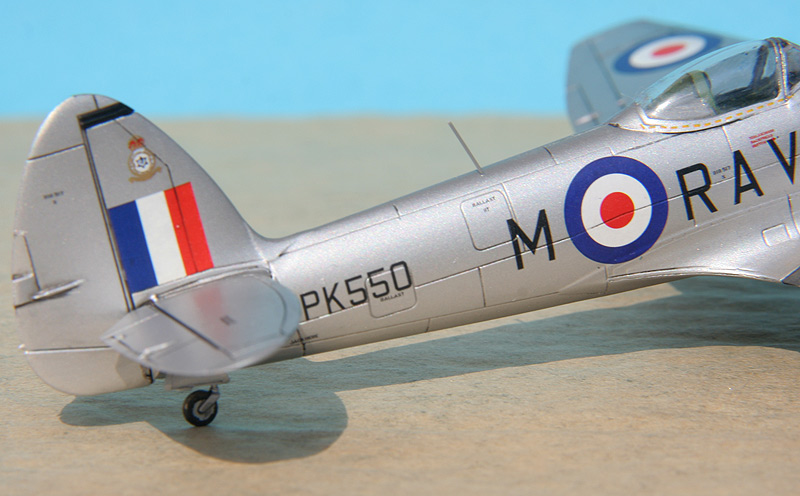
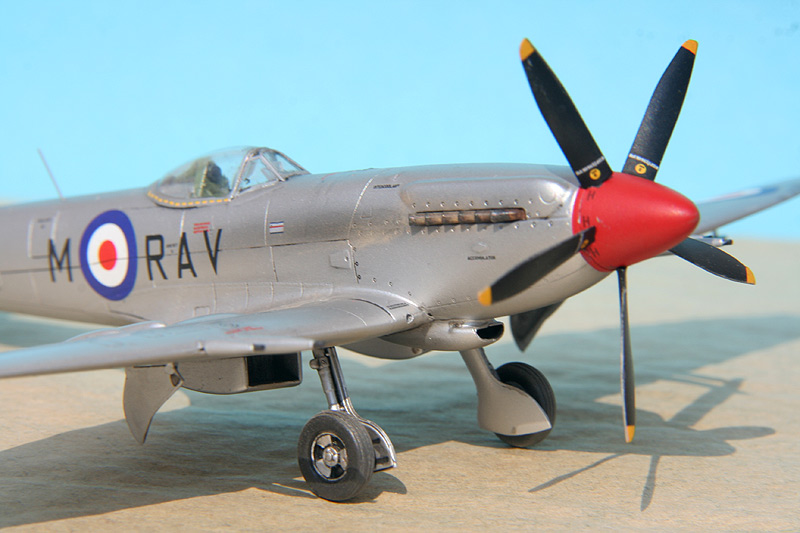
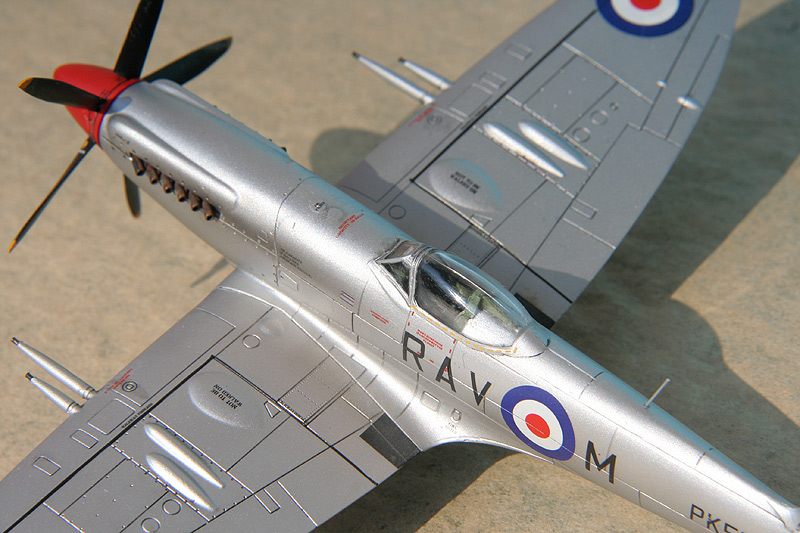
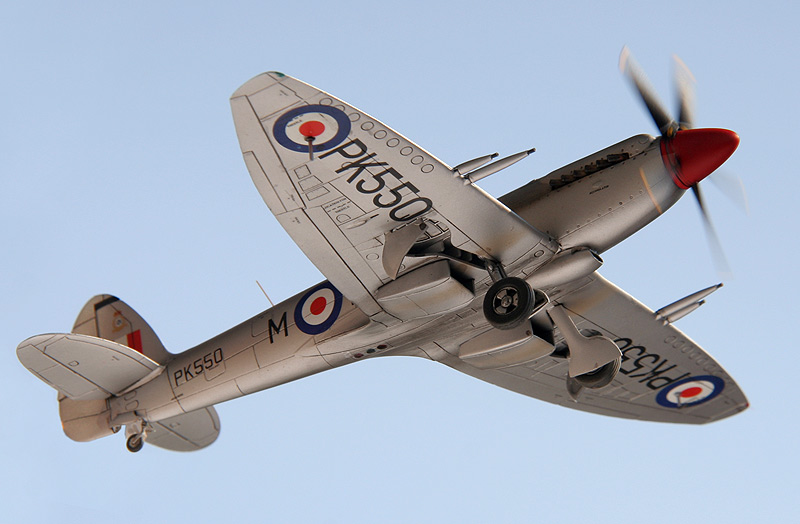
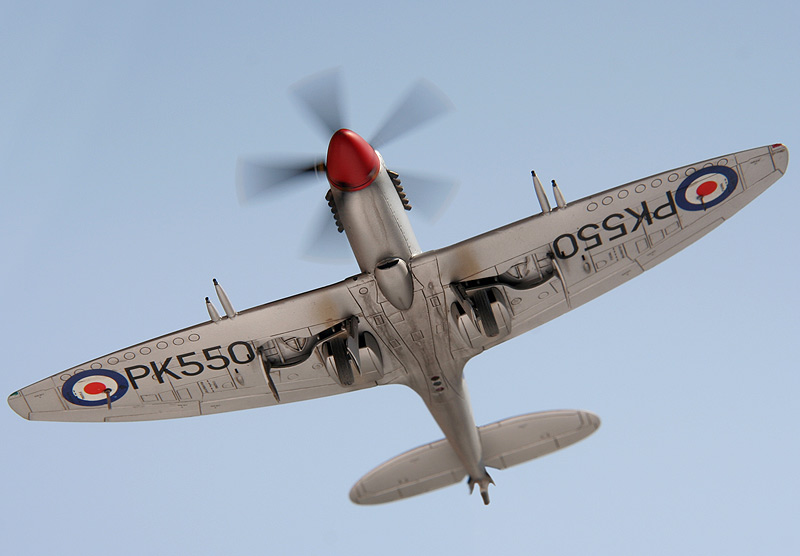
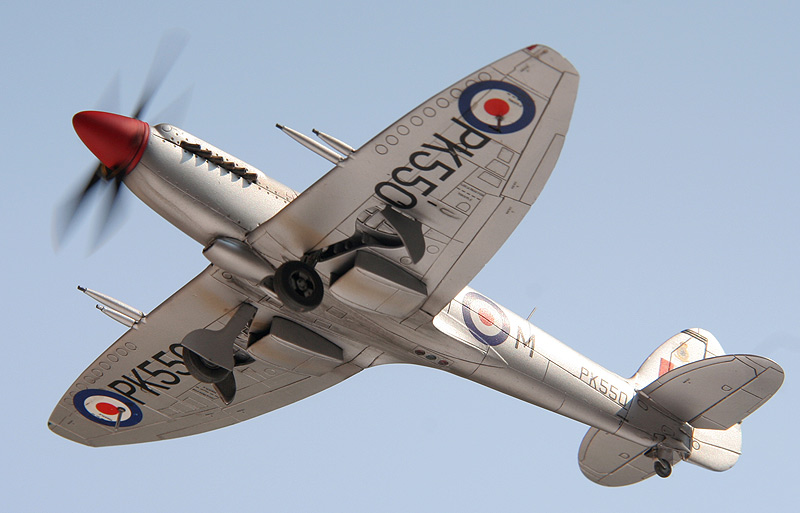
Supermarine Spitfire F.22 PK550 RAV-M, 615 Sqn RAuxAF (Royal Auxiliary Air Force), Biggin Hill, 1949. Pilot: S/Ldr. Ronald Gustave Kellett (5 victories) - the leader of 615 Sqn i and former first leader of the Polish 303 Sqn.
The kit: Airfix (1/72). Exhaust tubes: Quickboost. Decals and wheels: Freightdog Models.
-
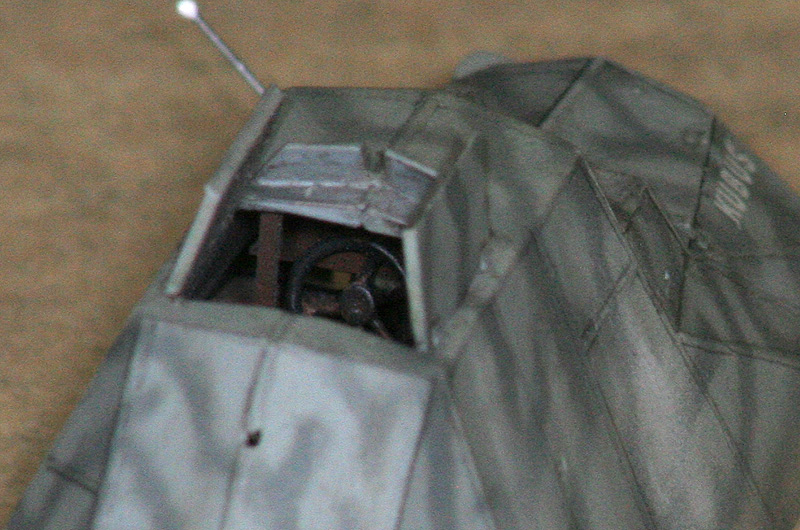
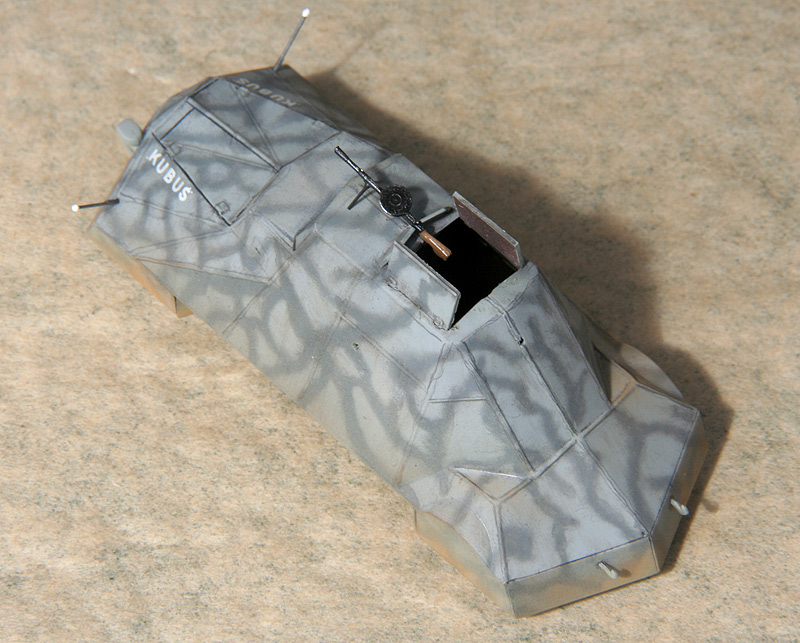
The interior of the model was scratchbuilt.
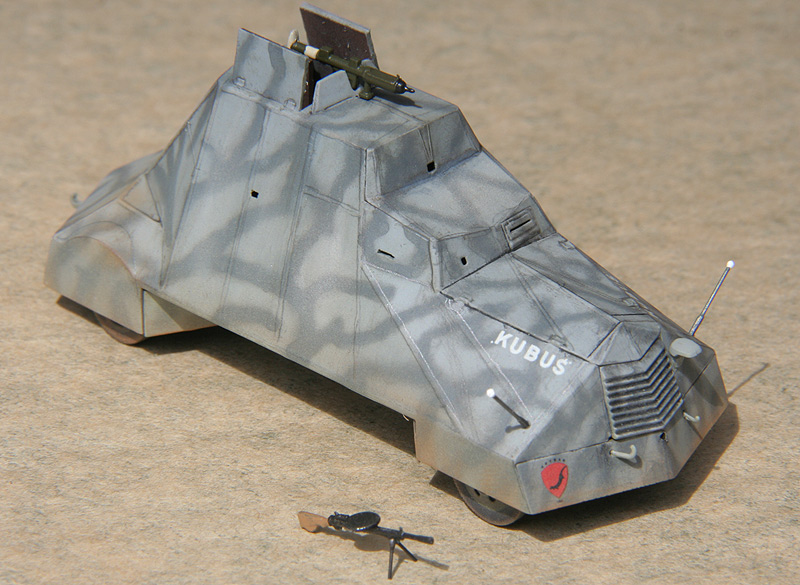
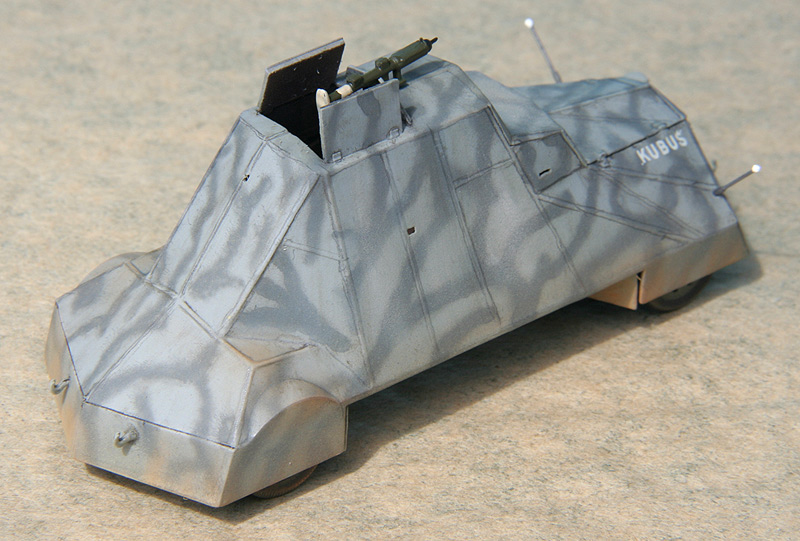
Kubuś with both weapon options.
More information about Kubuś:
-
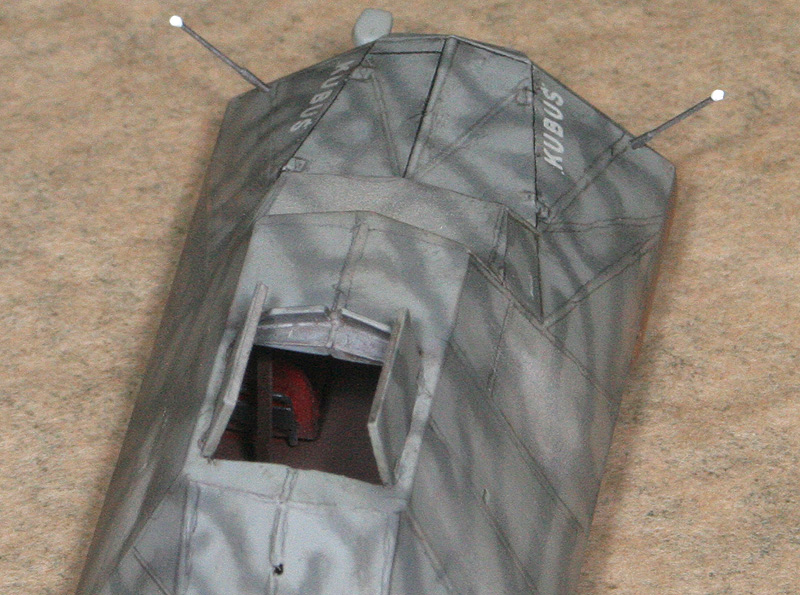
Kubuś (Polish for "Little Jacob") was a Polish armoured car made by the Home Army during the Warsaw Uprising (August 1 - October 2, 1944). A single copy was built on the chassis of a Chevrolet 155 truck and took part in the fights for Warsaw University on August 23 and September 2, 1944. Damaged and surrounded by Germans the car had to be abandoned in a workshop. It was discovered in the ruins after the war. Currently the "original" Kubuś is restored after the war and held in the Polish Army Museum. There is also a full-scale replica built for the Warsaw Uprising Museum.
The kit: Mirage (1/72). The interior, some welding lines, width indicators and machine gun's legs were scratchbuilt. The model was finished today - on the 71st anniversary of Warsaw Uprising.
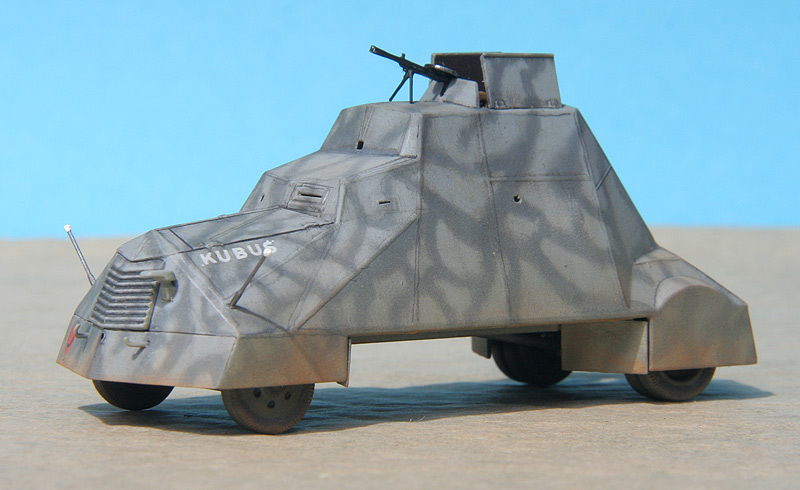
On the first attack Kubus was armed with Russian Diegtyarov DP machine gun.
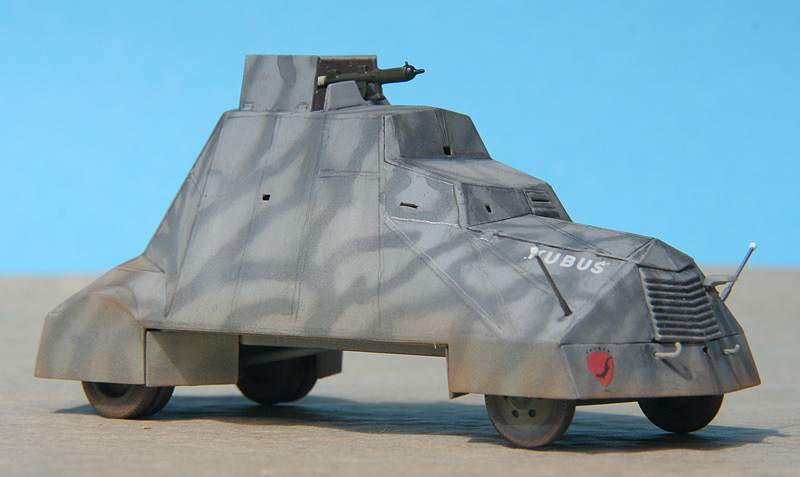
Later on it could also be armed with PIAT anti-tank weapon.
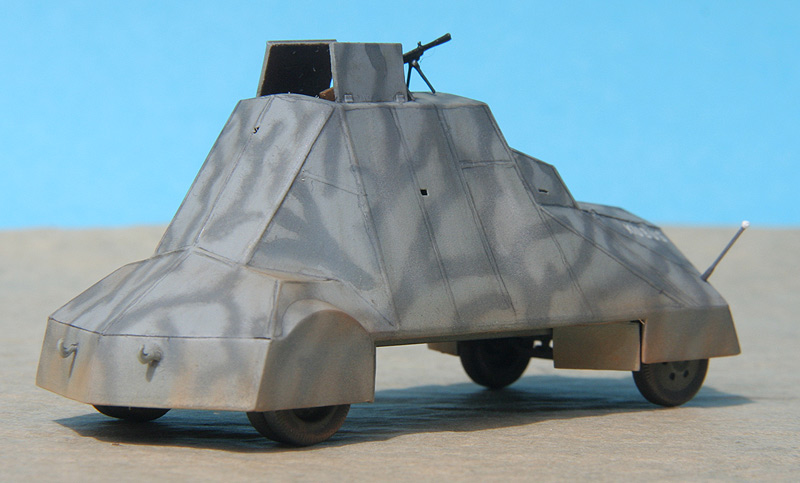
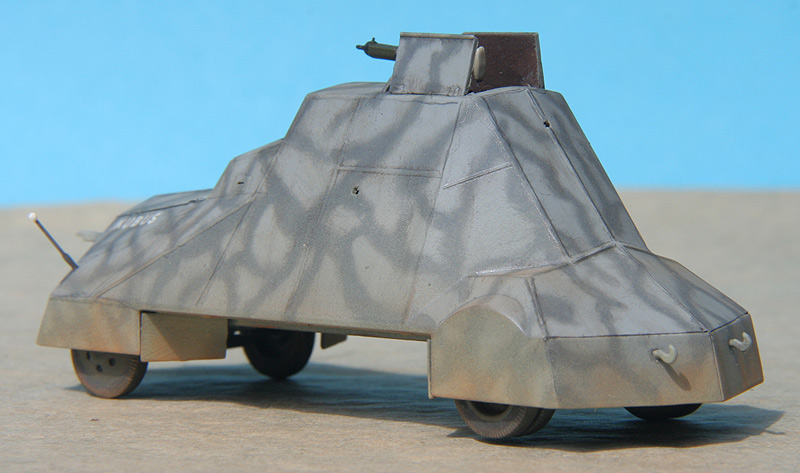
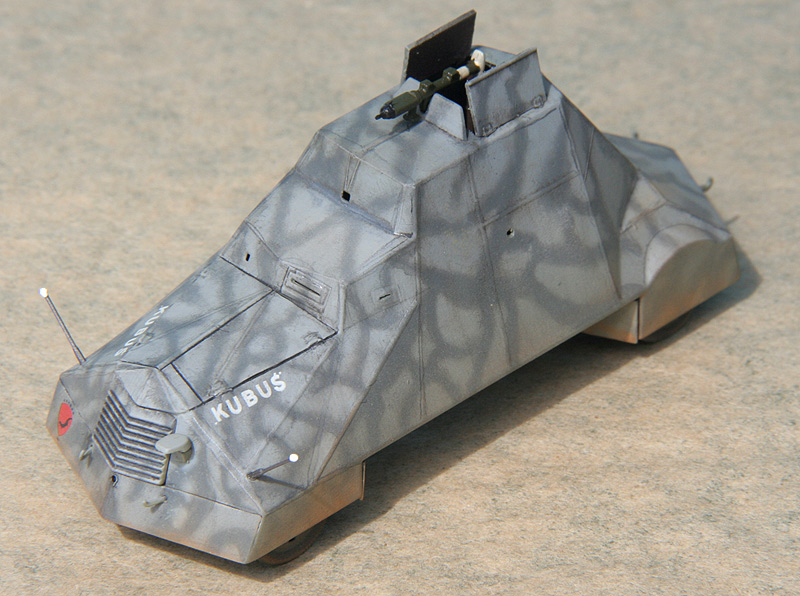
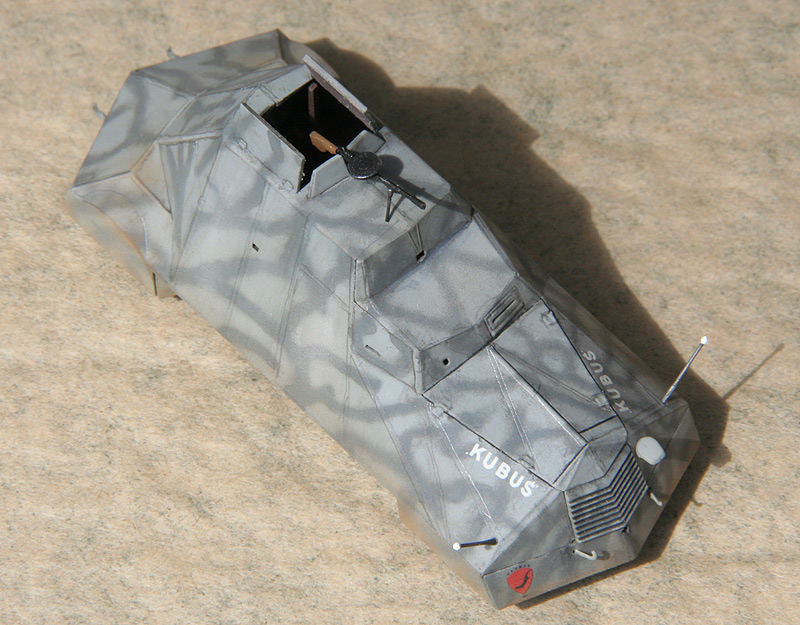
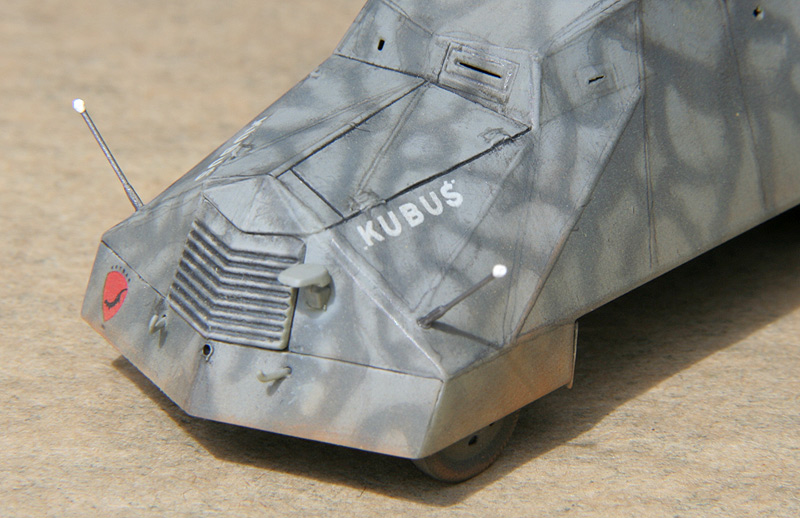
Kubuś originally was a nom de guerre of fallen wife of the vehicle's main constructor.
-
I often use the Techmod decals and I like them. You may click my banner below and enter "techmod" in the search field in my site to see my results. The Techmod decals are thin and their colors are accurate (the same in different sets) and the markings are sharp with correct shapes. I often replace RAF roundels of USAF insignia with Techmod if original decals have some issues. Most of swastikas on my models are also Techmods. Unfortunately some older sets were not soft enough but even they can set in panel lines if treated with patience (I use mostly Gunze decal liquids). I never have problems with silvering - the transparent foil is usually perfectly invisible.
-
Did You use kit decals?
Yes, but it needed a lot of corrections. The nose decals had to be cut to smaller parts and placed separately. Later I masked the nose along the decals and resprayed it. The lower fuselage decal is originally one big part from intake to rear fuselage and I cut it too. Under the decal we had the arrester hook and some other things that decals will never set to. I cut the decals there (decal solvents work really good) and painted the cracks dark blue. Maybe the kit was designed for beginners, but the decals are challenging even for an experienced modeler.
-
-
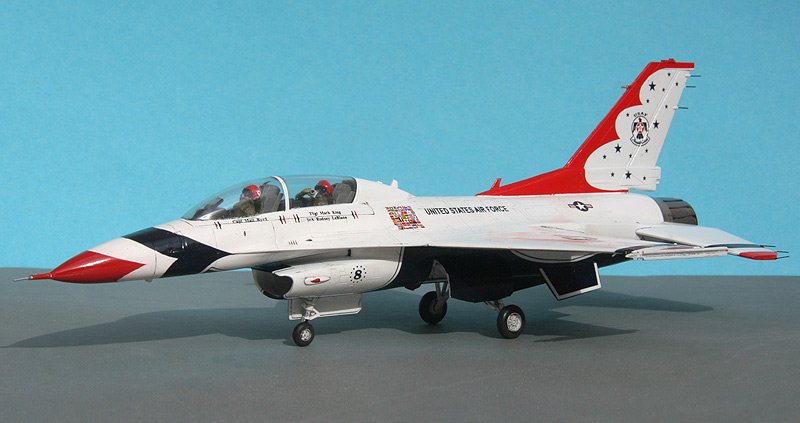
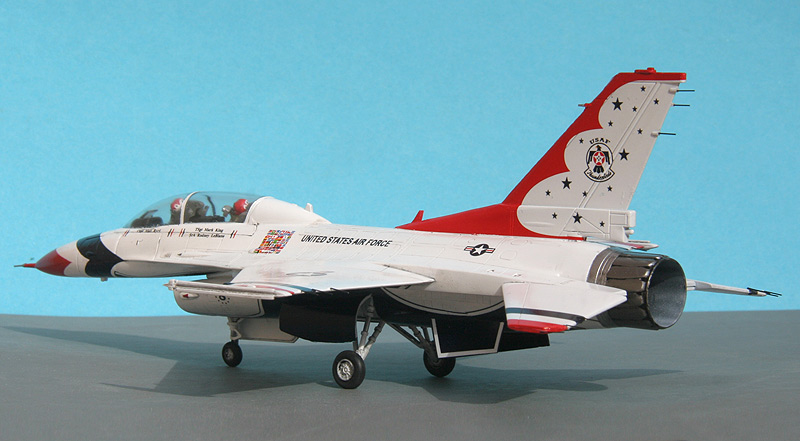
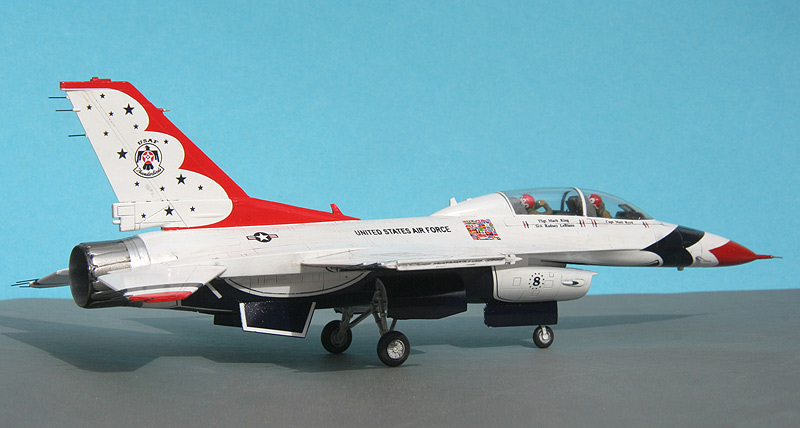
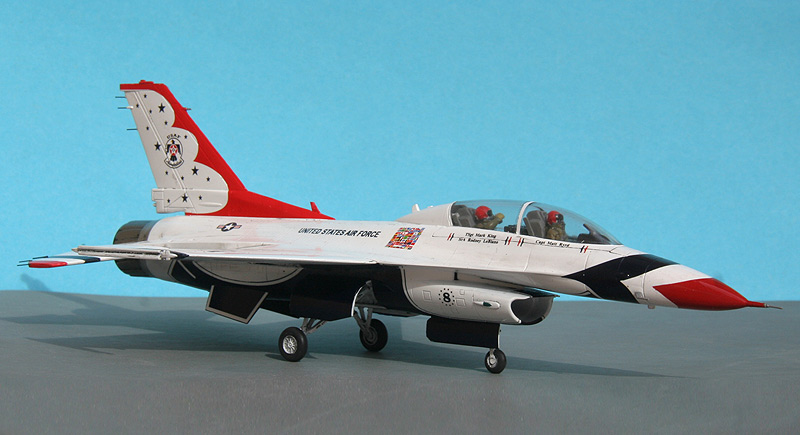
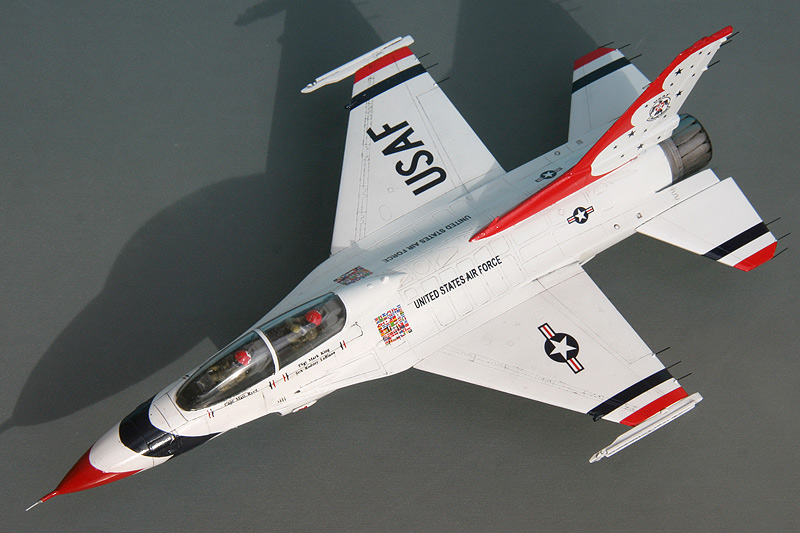
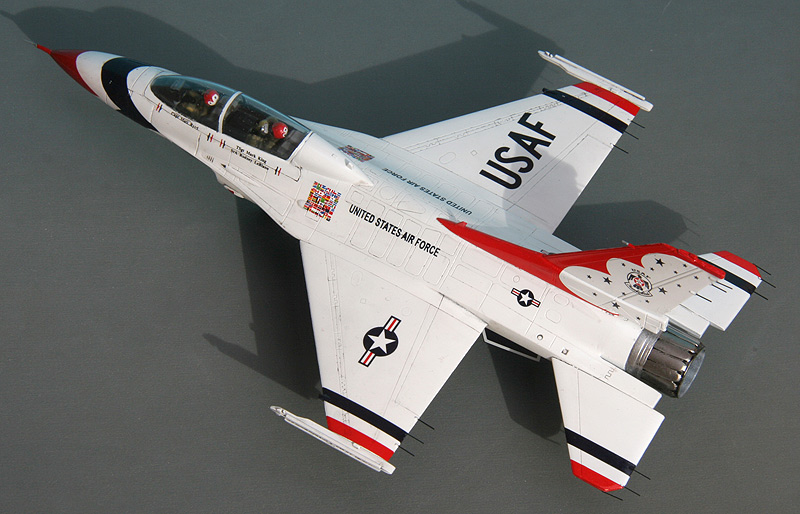
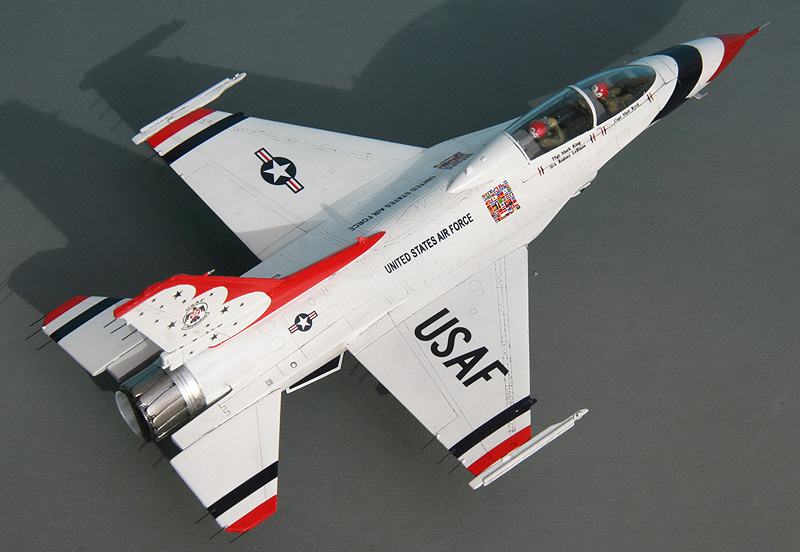
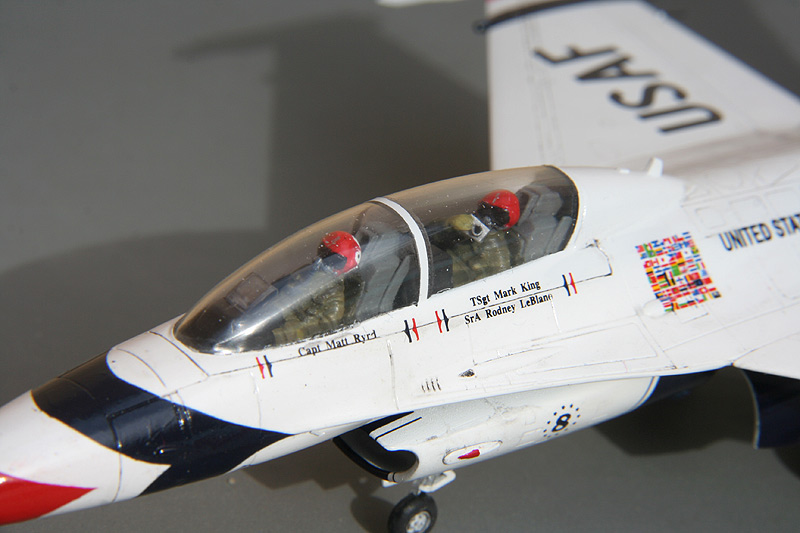
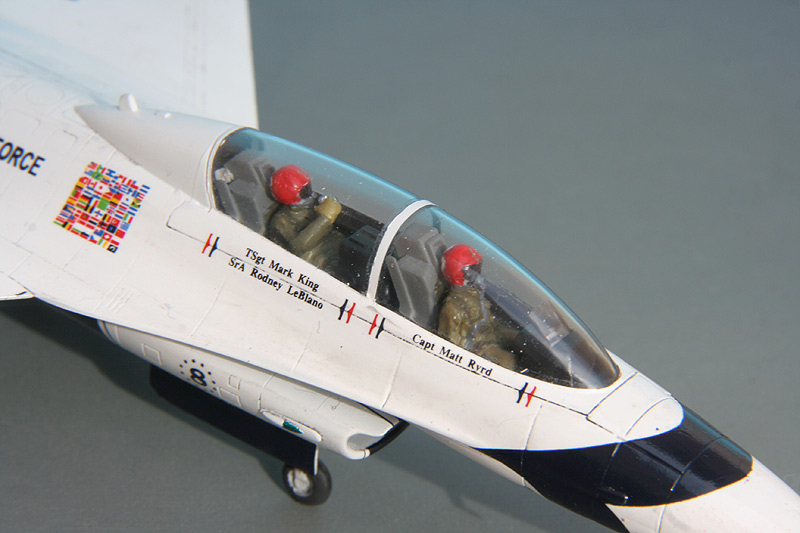
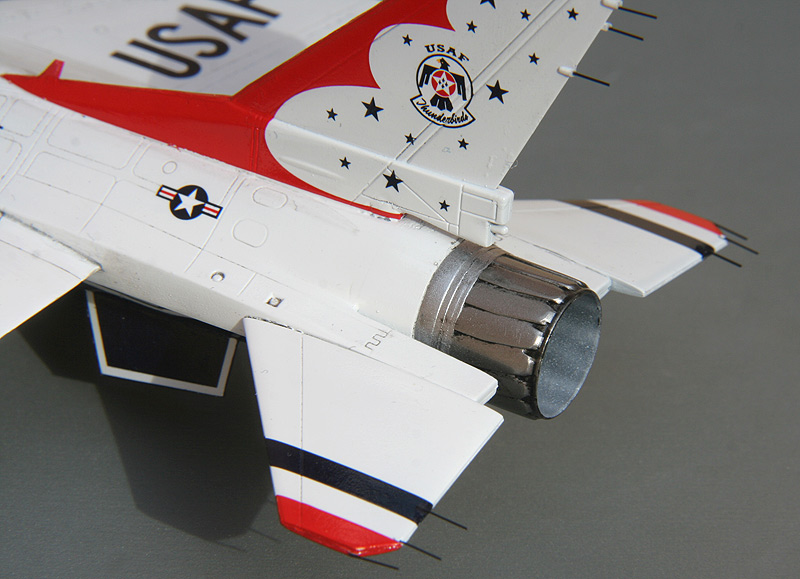
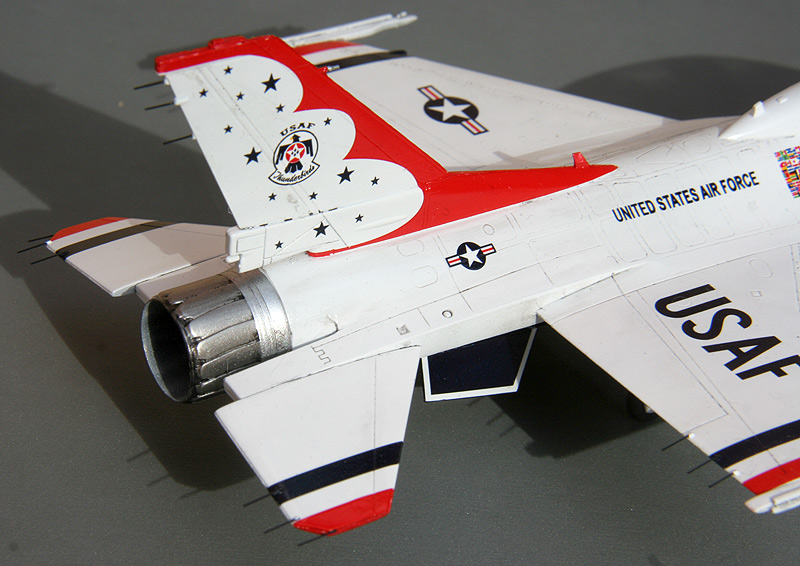
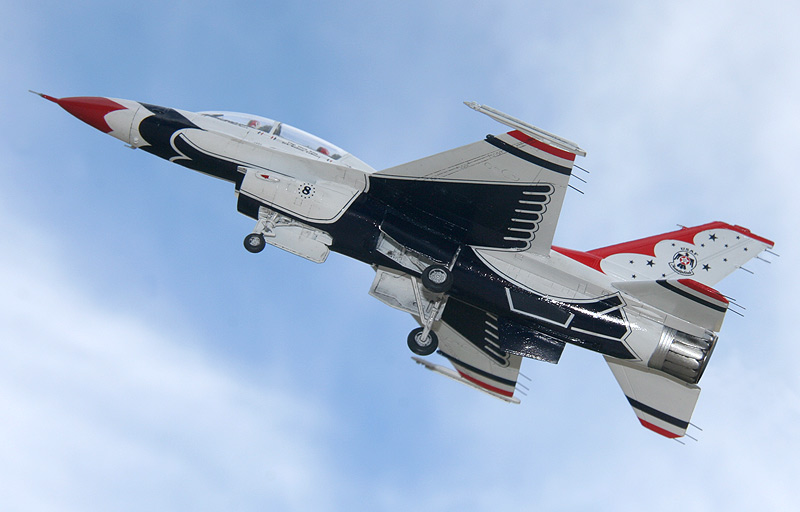
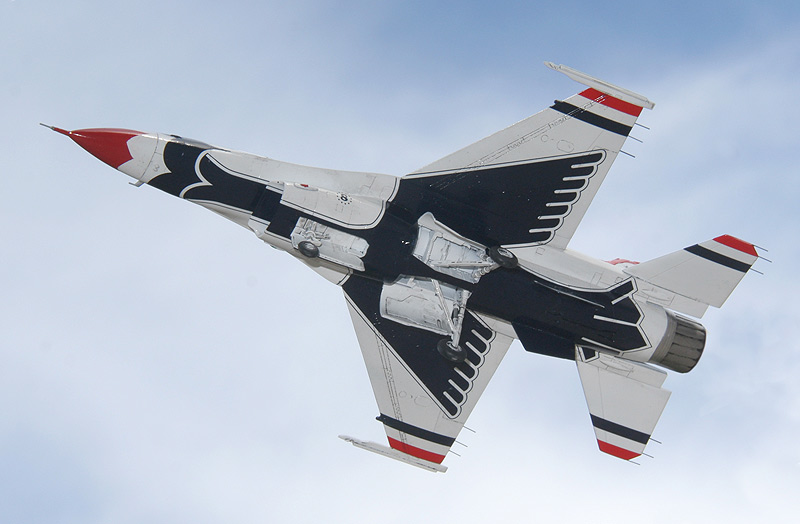
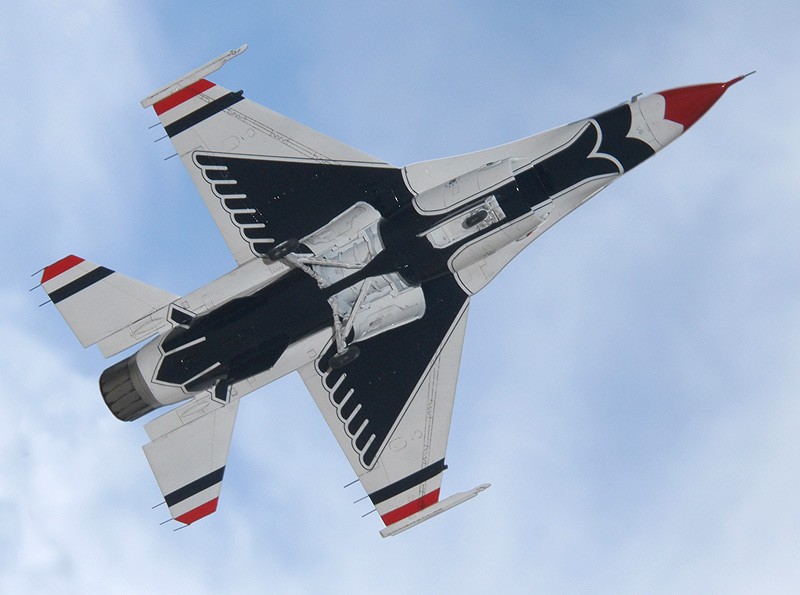
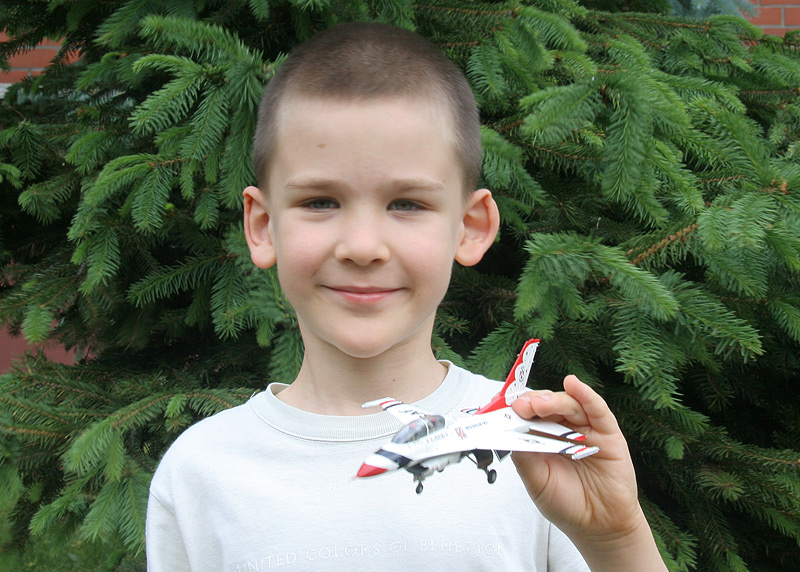
F-16D Block 32 86-0041 flying in USAF Thunderbirds in 1992-2008. Pilot: Capt. Matt "Byrdman" Byrd. Technicians: TSgt Mike King and SrA. Rodney "Frenchy" LeBlanc.
Kit: HobbyBoss 1/72. Pilots from Revell F-16. Model build by my son Gustaw and me.

-
-
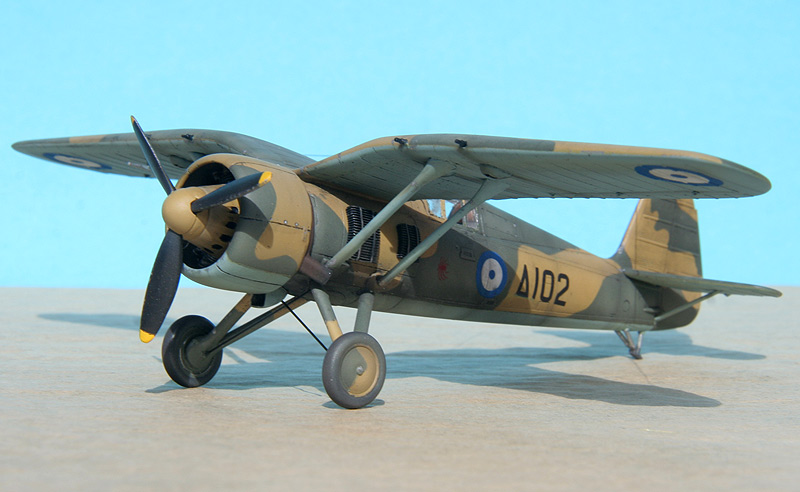
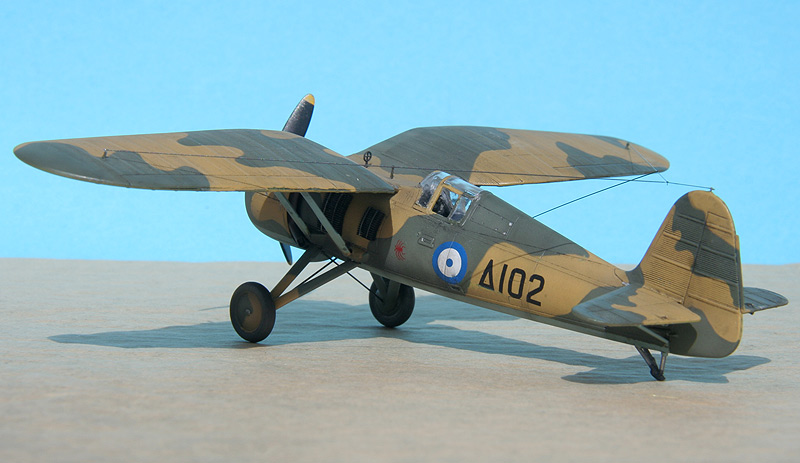
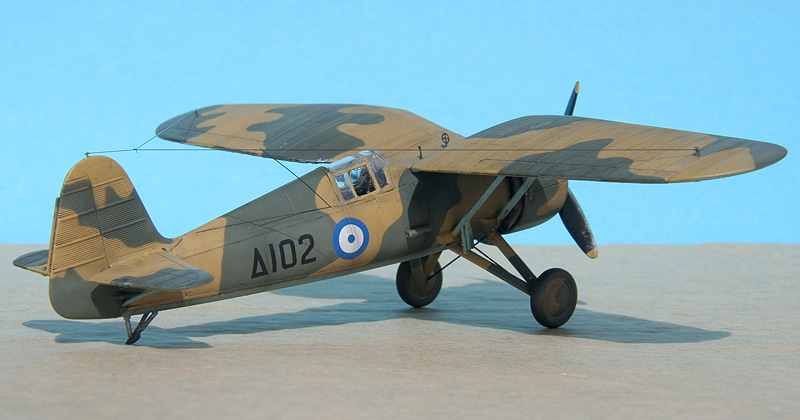
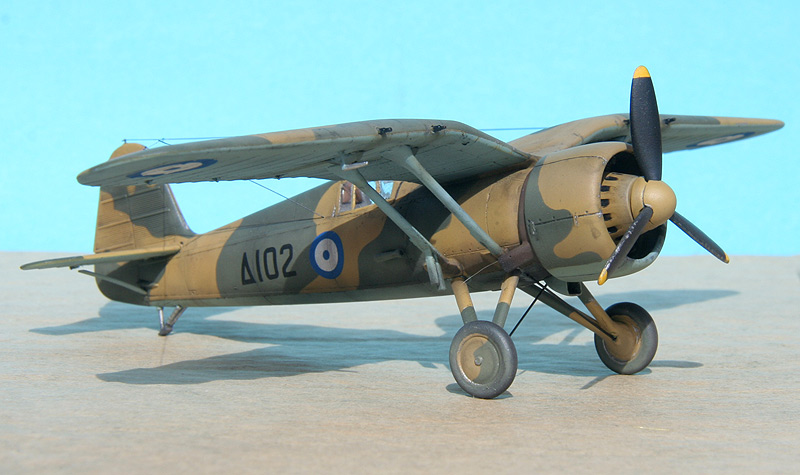
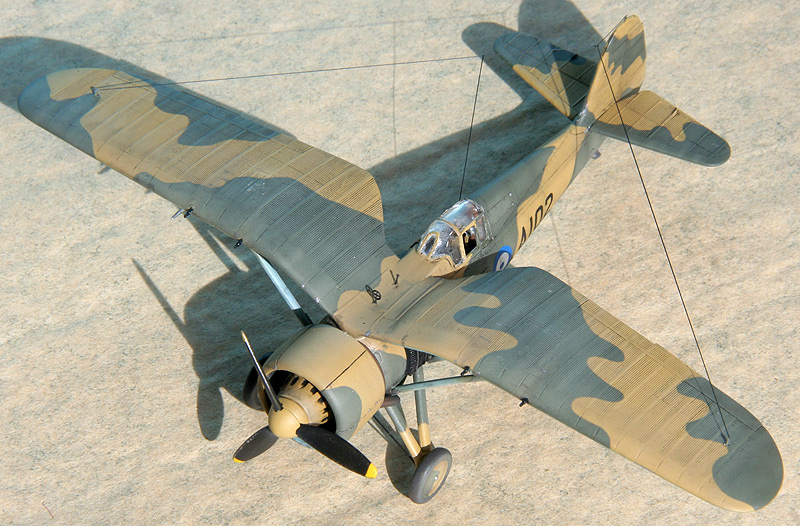
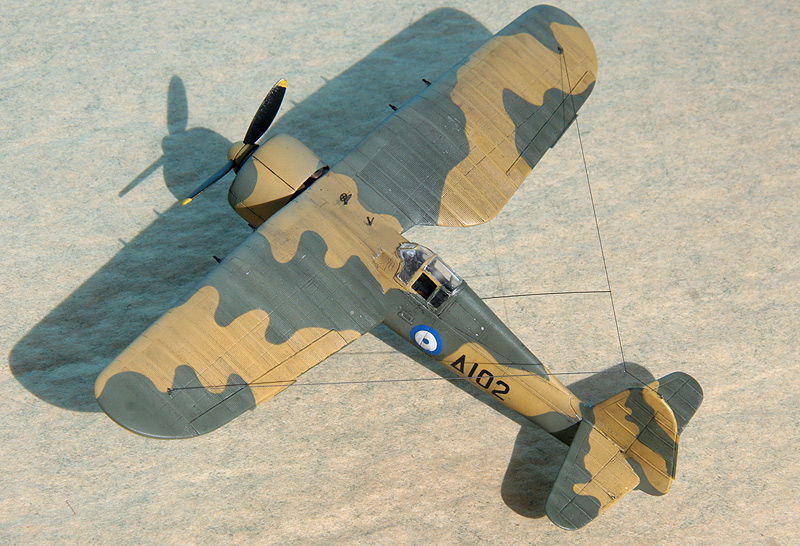
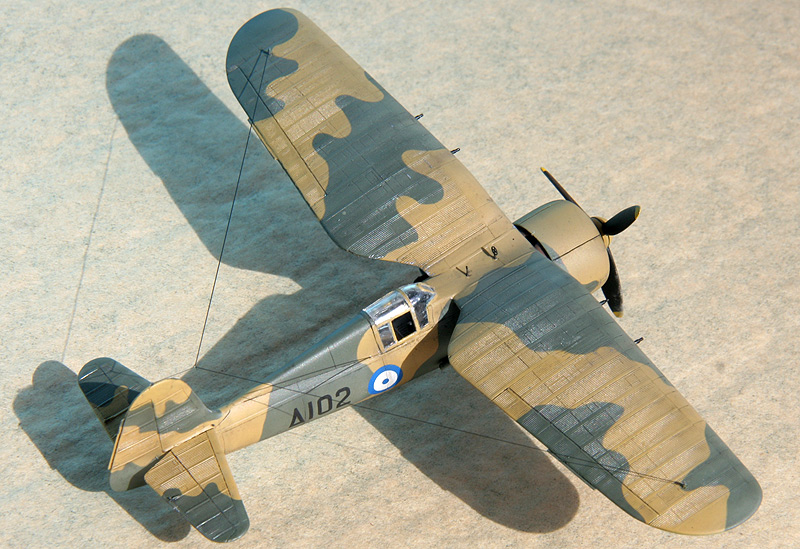
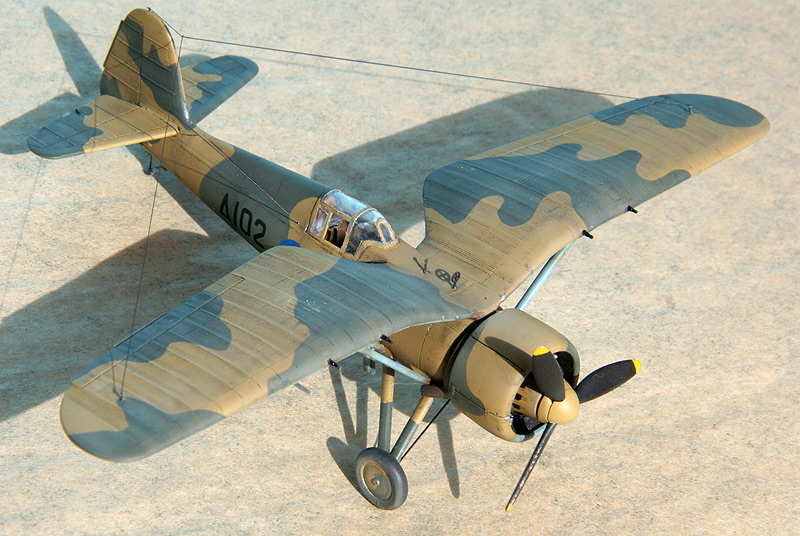
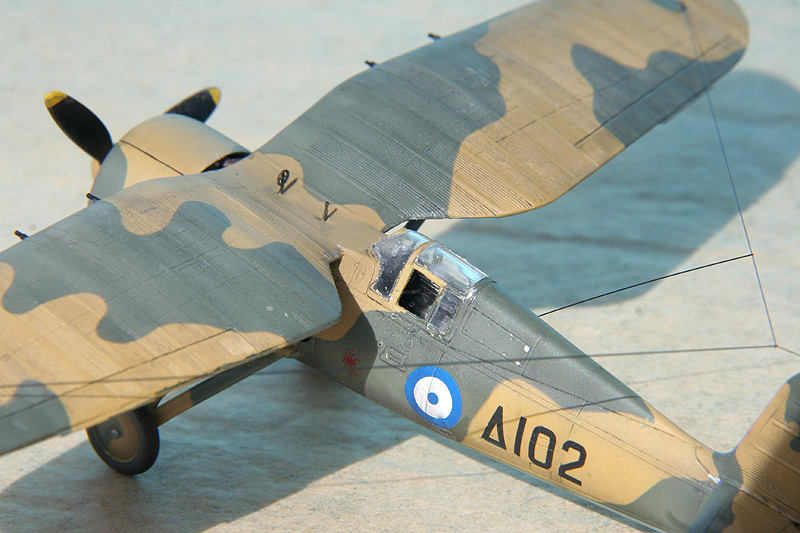
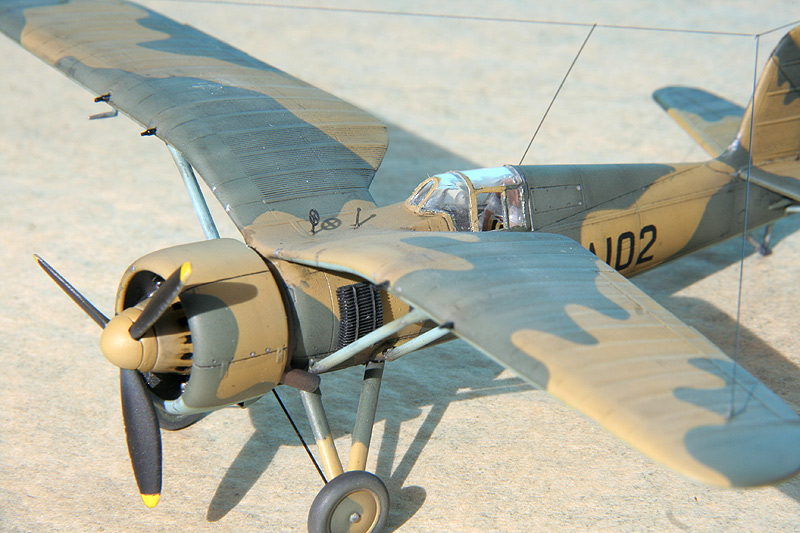
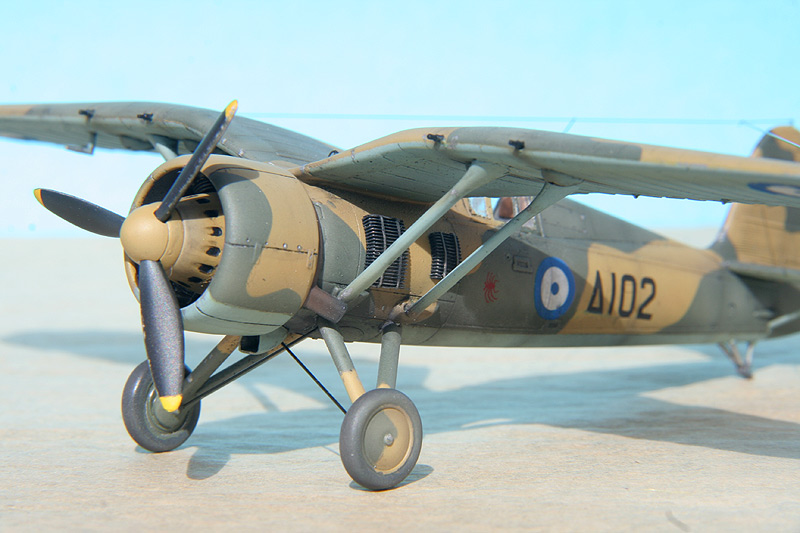
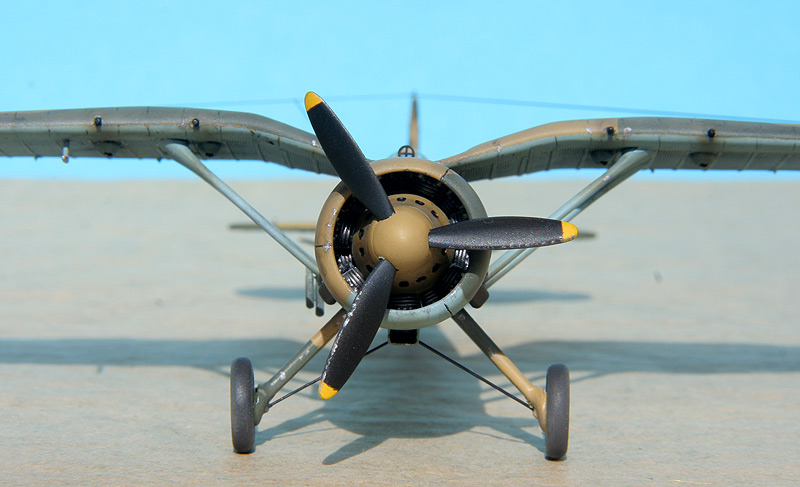
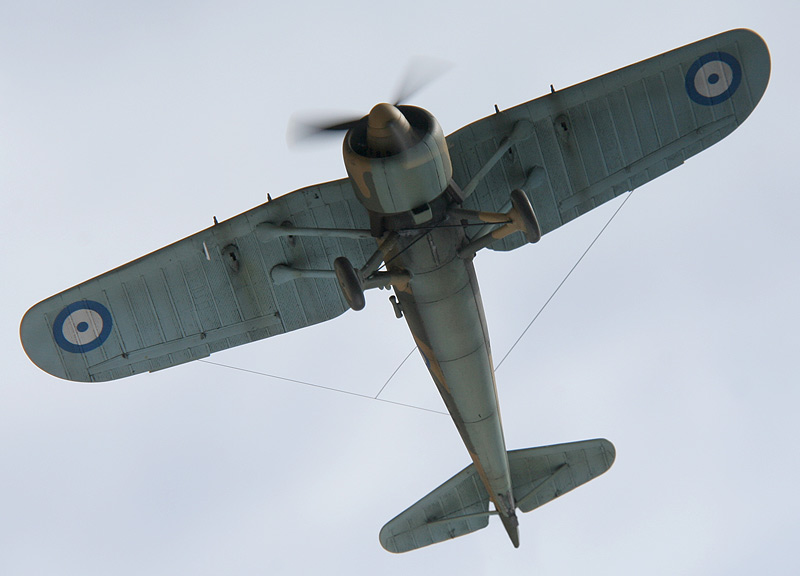
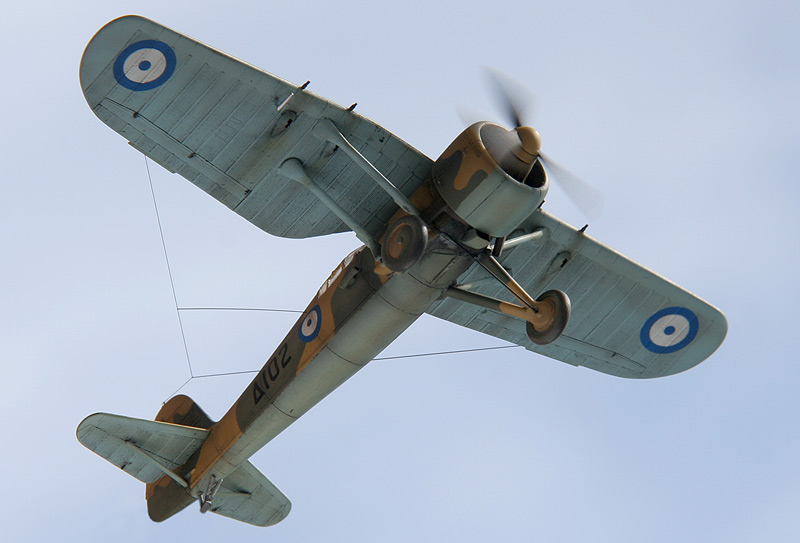
PZL P.24G D102, 23. Mira (squadron) of Elleniki Vassiliki Aeroporia, abandoned in Argos airbase (Peloponez, Greece), late April 1941. Pilot: Hiposminagos (Lieutenant) G. Laskaris (2 air vicories).
Kit: Azur 1/72.


PZL P.11a (IBG 1/72)
in Critique Corner
Posted
PZL P.11a of the 112 Eskadra Myśliwska (Fighter Squadron), Zaborów airfield near Warsaw, September 1939. The aircraft was damaged in air combat and then destroyed by Poles before being captured by Germans.
The kit: IBG 1/72.