


Face
-
Content Count
100 -
Joined
-
Last visited
Content Type
Profiles
Forums
Calendar
Posts posted by Face
-
-
I did a video review of the new Revell SD model on my YouTube channel, I really got a kick out of assembling it and it does build into a pretty nice representation, but it really is very simple. My girlfriend and I are learning to program with arduino microcontrollers, and I plan to use one to upgrade it with improved engine lights, fiber optic windows and possibly rig the main gun turrets with servo motors.
-
stupid video games, eating up all my free time... I shot this video a couple weeks ago, but never got around to editing it until tonight... sorry, gang, I'll try to do better
pics are coming soon
-
That was what's called a seagull post, fly in, crap on it, and leave.
I like that. I like that a lot. I'm gonna steal it!
There may well be a photo showing exactly what was modeled.
This image is basically what I was striving to emulate
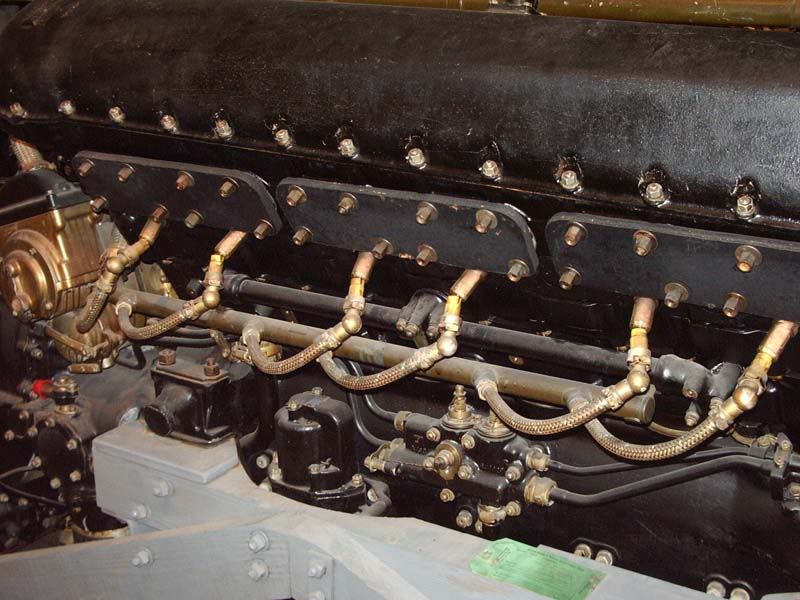
I'll be the first to admit, it's not totally accurate, but I'm an amateur scratchbuilder, I've gone to great lengths to avoid scratchbuilding in the past, so the very fact that I've decided to attempt it is rather a big leap for me!
Anyway, I've been pretty busy the past few days with work and other obligations(mass effect 3 is out on tuesday, I've gotta beat the other games before I get it!!!), so I haven't had a chance to get any more work done, but I'm gonna try to assemble the cockpit tonight. I did record a complete video of the engine build and put it up on youtube, so if you're interested in hearing me ramble for nearly 30 minutes about how much I love this model so far, check it out!
-
<br>well that was uncalled for!<br>thats not even close to accurate...<br> -
I've never been real big on superdetailing, but while studying the Packard Merlin engine in my reference photos, I discovered that Tamiya left off a few parts!
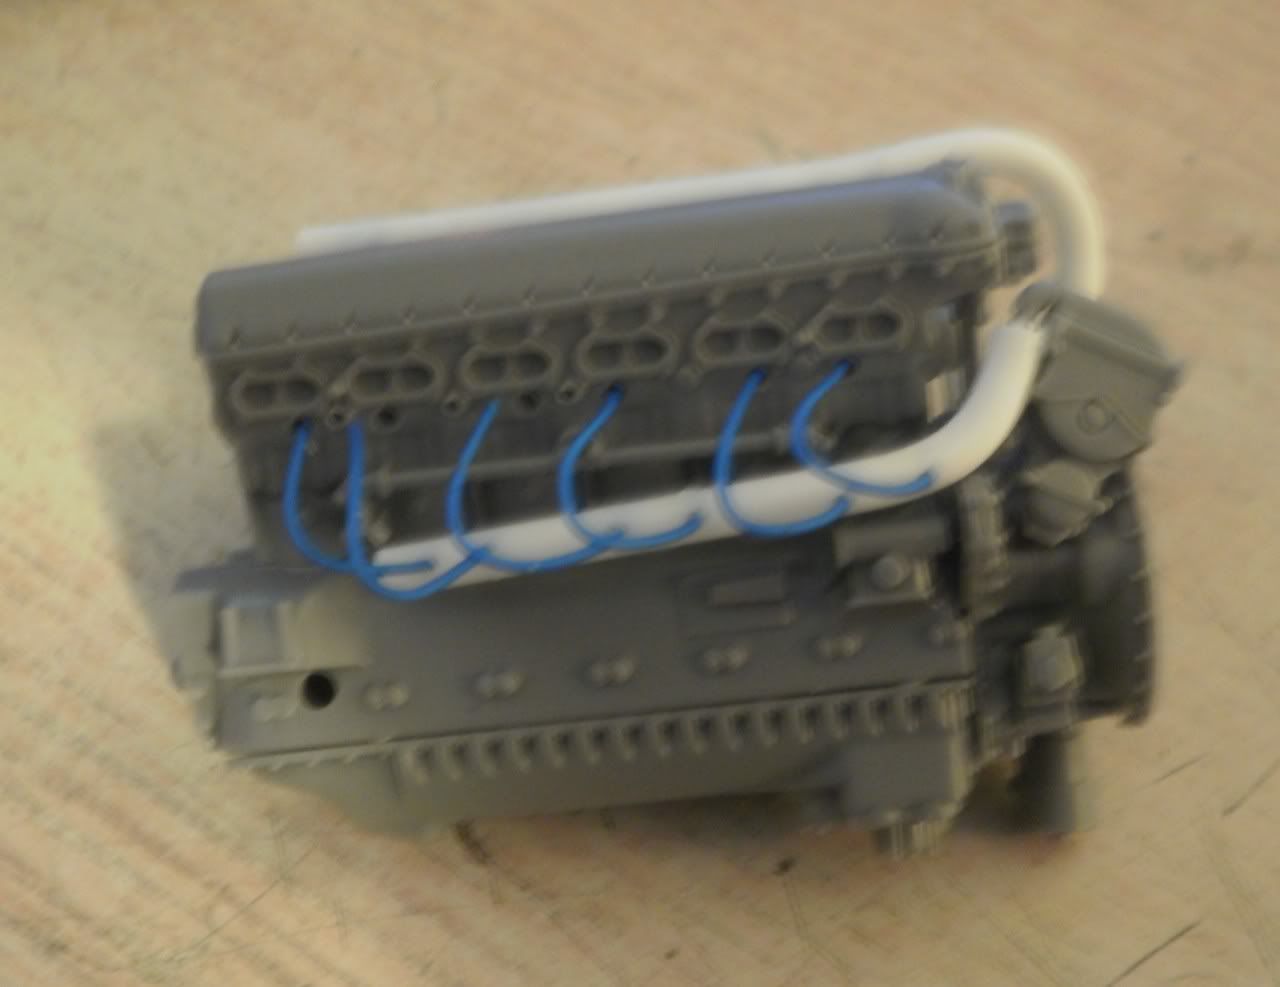
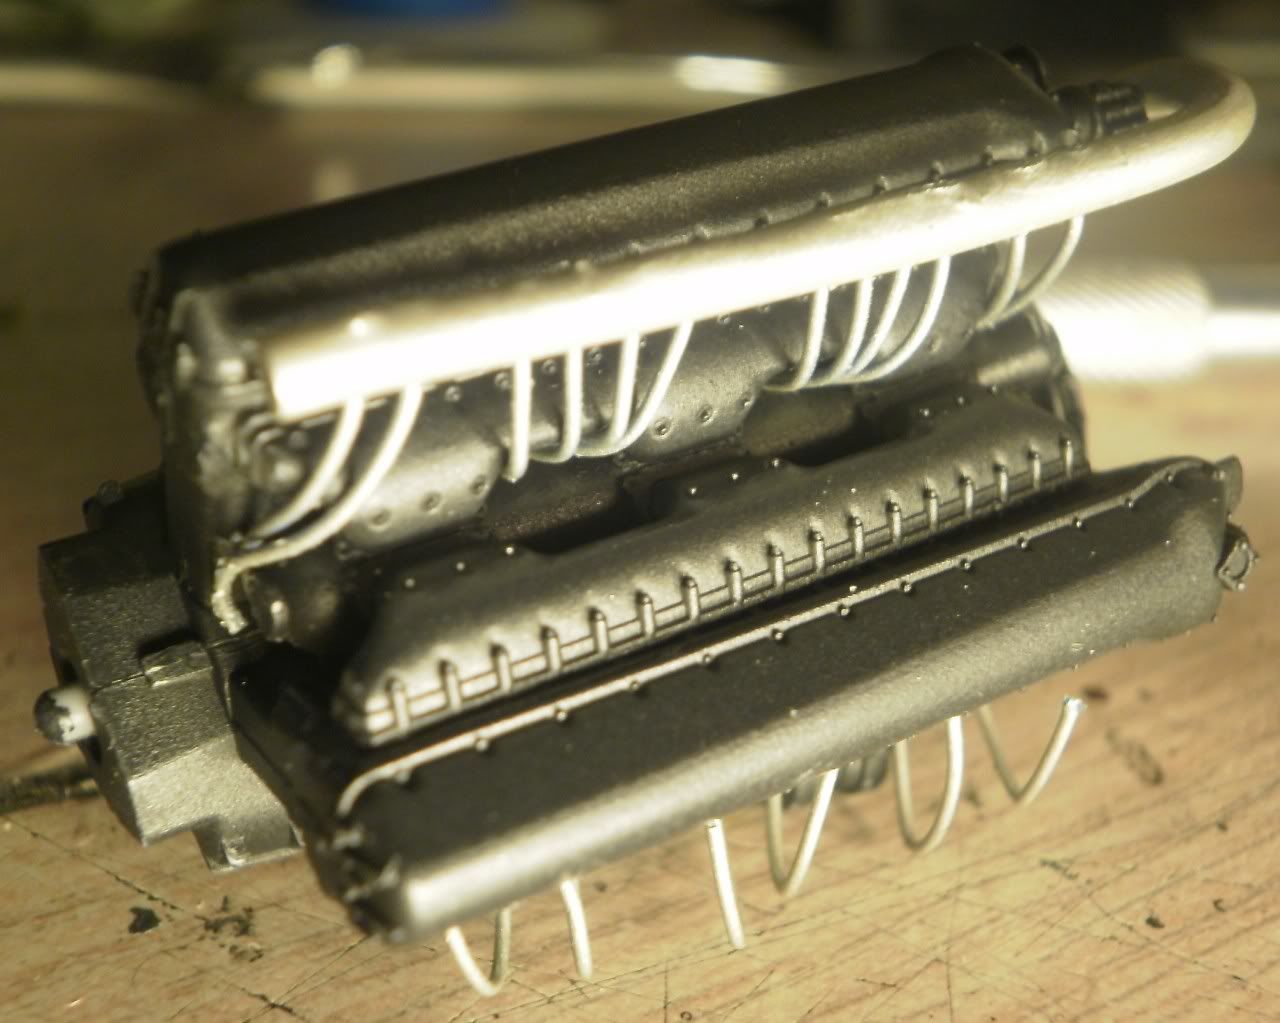
I started off thinking I might just add the ignition wires, but they actually attach to harnesses mounted to the sides of the engine, which were not included as part of the kit, so I had to build them. So, I went down to the hobby shop and picked up some 2mm plastic rod, though I wish I had gone with a smaller size, 1.5mm or so would have been a better fit. I drilled out the sparkplug sockets and the corresponding holes on the harnesses with my smallest drillbit, and threaded some fine wire through the holes, securing them with superglue.
There's another wiring harness that fits over the top of the engine, mounting against the right side cylinder head. I was careful when bending the plastic rod to ensure that it won't get in the way of any other engine parts. I don't have the intake manifolds attached in this picture, but I made sure that the wires I added would fit around them, and they do so quite nicely.
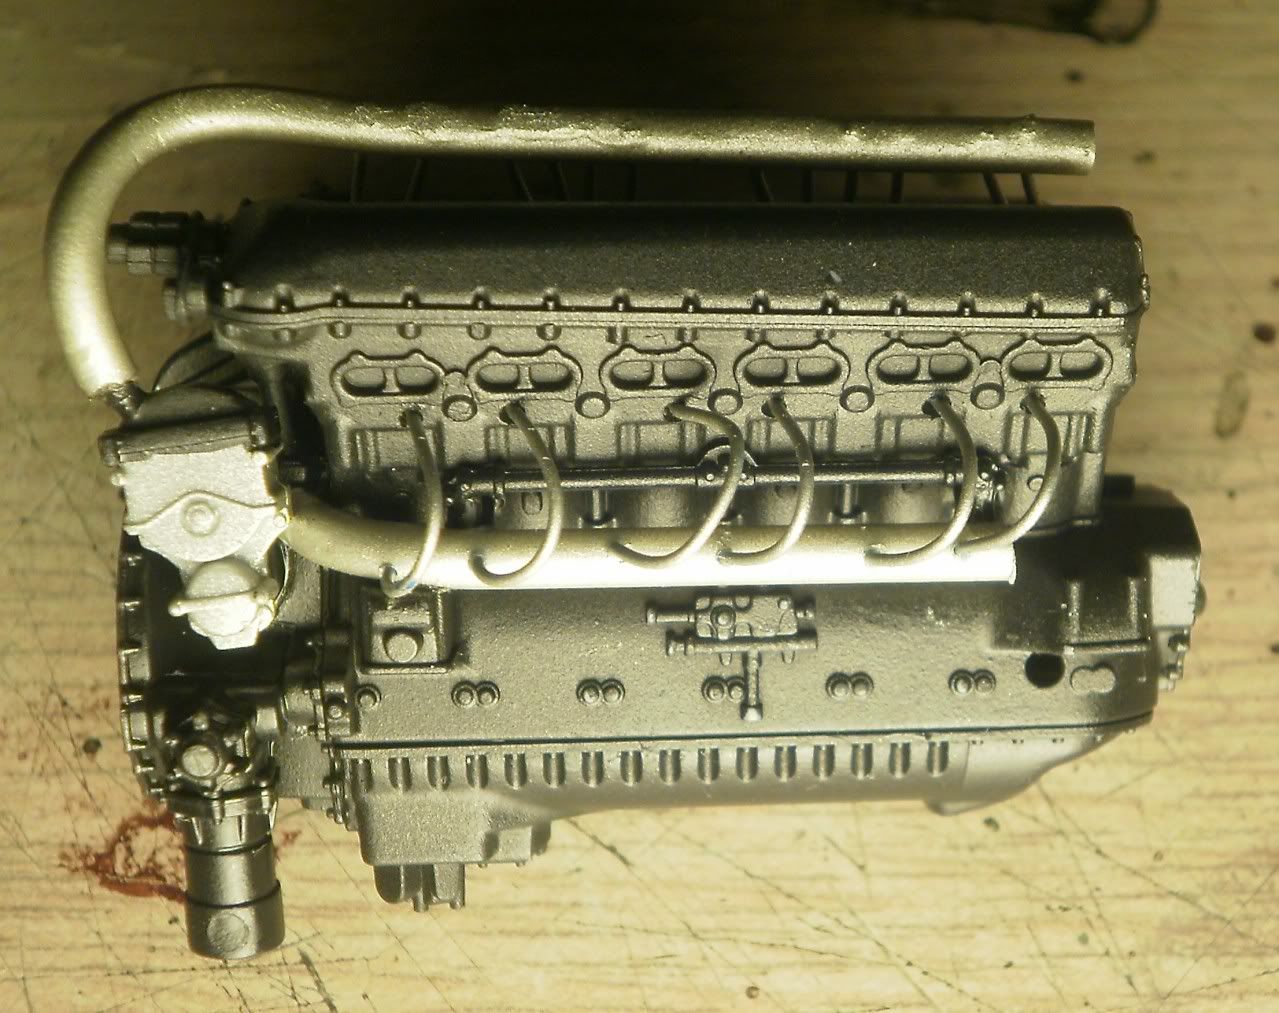
The instructions call for the bulk of the engine to be painted semi gloss black... I don't have any semi gloss black, and the hobby shop has been out for weeks, so I mixed equal parts flat and gloss, with about 15% XF80 royal light gray. I don't like painting straight black, it has no depth, no room for variation to the colour, so a slight lightening of it helps to add that depth. The starboard side harness here doesn't attach to anything behind the silver magneto, my references don't show what it connects to so I just had it fit somewhere that the end of it wouldn't be visible
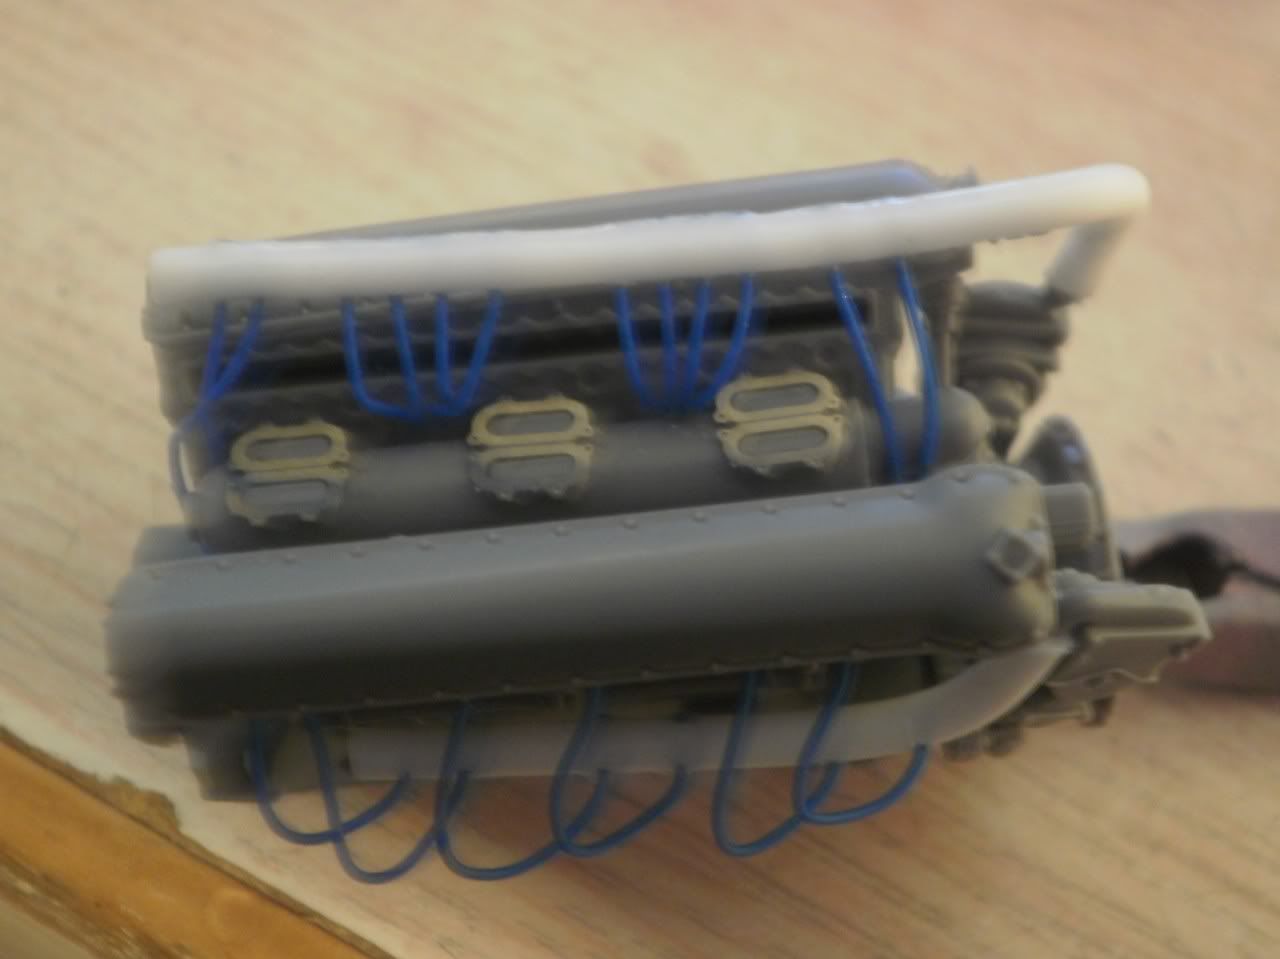
The top harness has cabling running down between the ducts of the intake manifold and behind where the propeller gearbox mounts to the front. They just end where you can't see them, I didn't drill out any sockets for them anywhere.
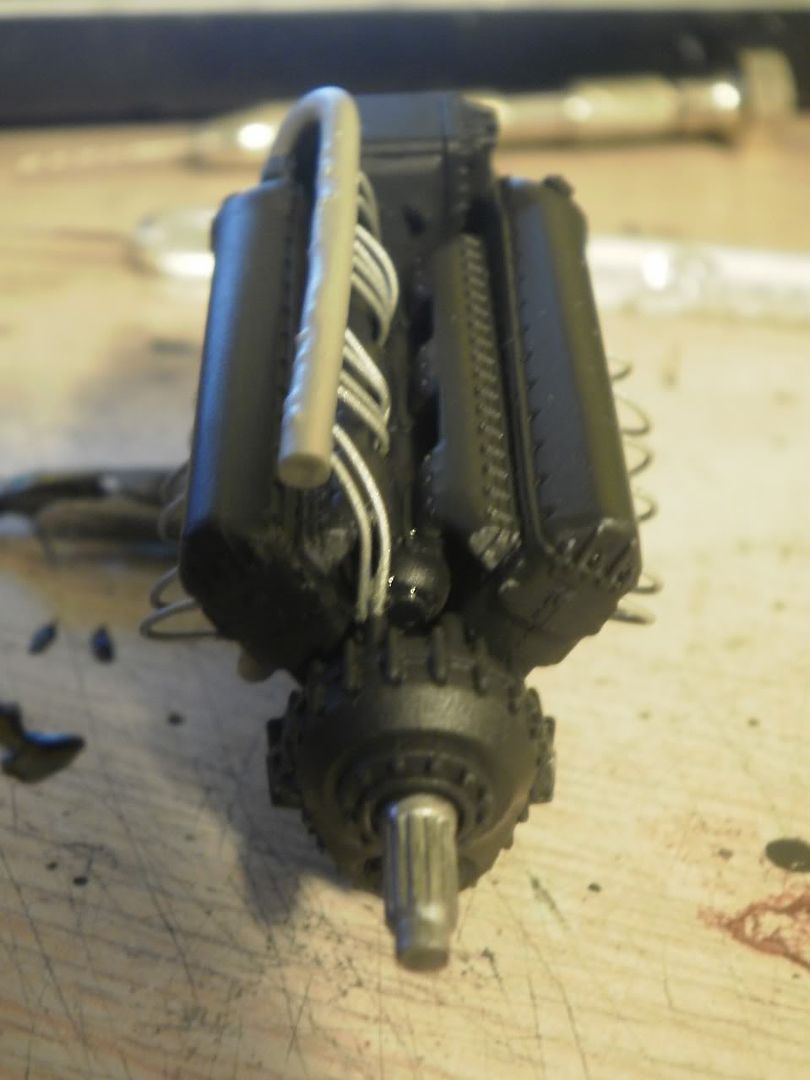
you can see here how the wires just fit behind the gearbox and disappear. I drilled out the plastic rod and inserted the wires through them, and secured them with superglue, applied with a toothpick. Once the glue was dry, I trimmed the ends of the wires off, and sanded them smooth
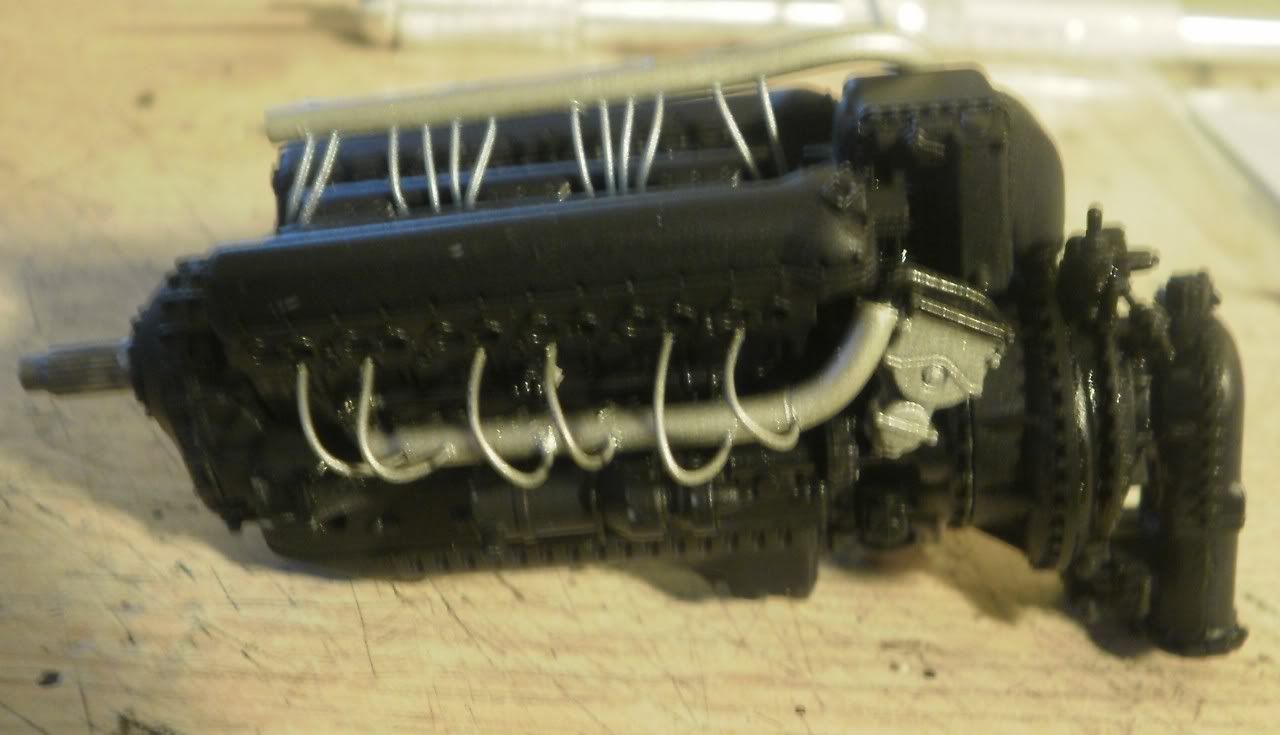
I drilled out the sockets for the sparkplugs with my finest drill bit, and reamed them out very slightly with a #11 hobby knife blade so the wires would fit better, and secured them with superglue. Since these pics were taken, I've done a wash of flat black, and did some drybrushing with XF-19 sky gray, to add some colour depth. I also painted part of the harnesses where they connect to the magnetos flat black to represent a flexible hose
It's coming along nicely! I'll admit to some trepidation in going forward, I have no idea how the engine is going to fit in the fuselage with my added parts, but I'm crossing my fingers that everything goes smoothly. I'm gonna get started working on the cockpit and other interior parts later today, from what I hear they should go together just as nicely! But first, I need to pick up some paint...
-
Ohhhhh boy, here we go! I've been reluctant to get started on this thing for a long time, it's really far more advanced than ANYTHING I've ever built before, and I was never really confident in my ability to do it justice... I'm still not sure I'm ready, but there's no time like the present to find out!
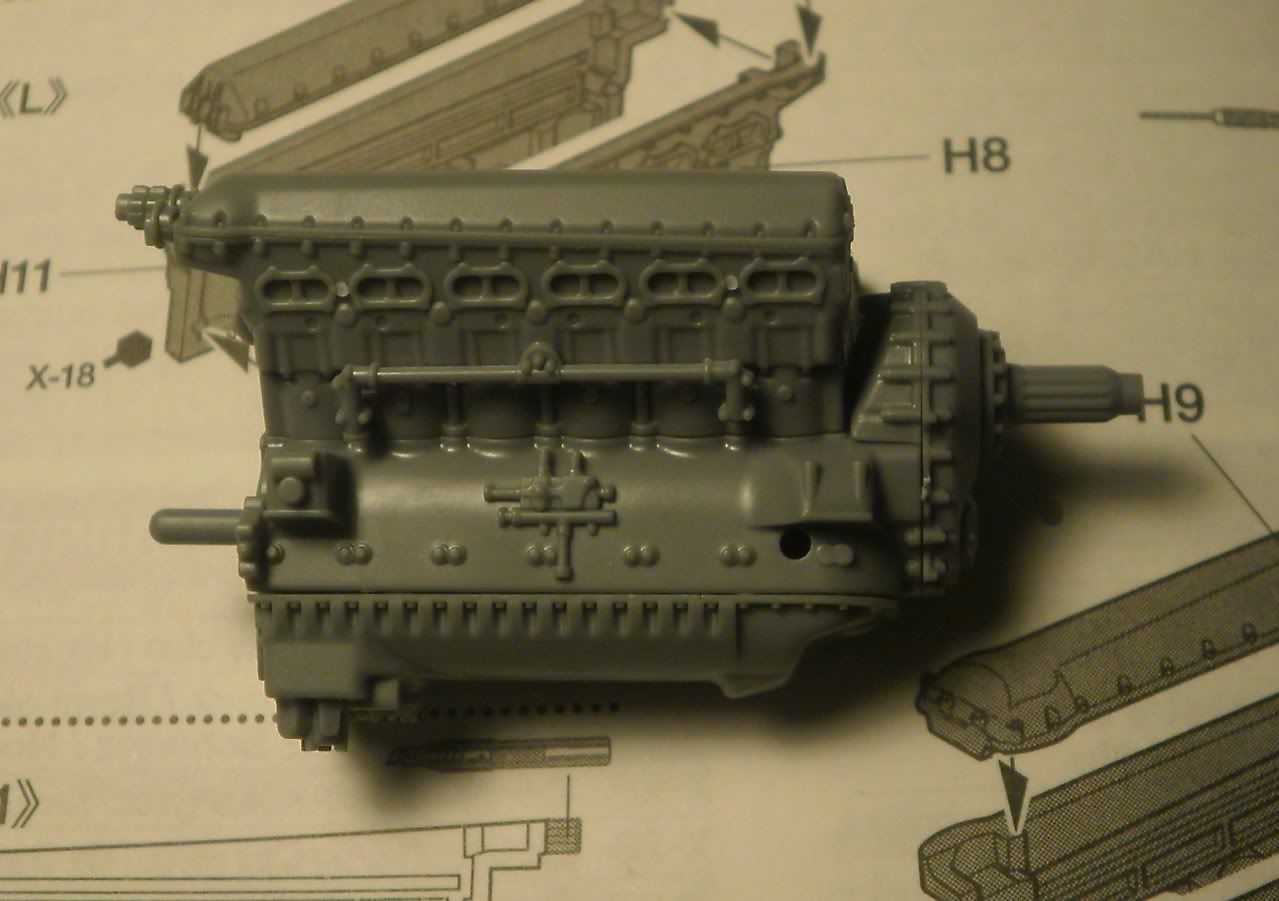
The kit starts with the Packard Merlin V-1650 engine, which really is a kit in and of itself... I build pretty fast, and this sucker still took me about an hour and a half, just to do basic assembly! The engine and cylinders aren't spectacularly complex, but are amazingly detailed and look incredible when put together
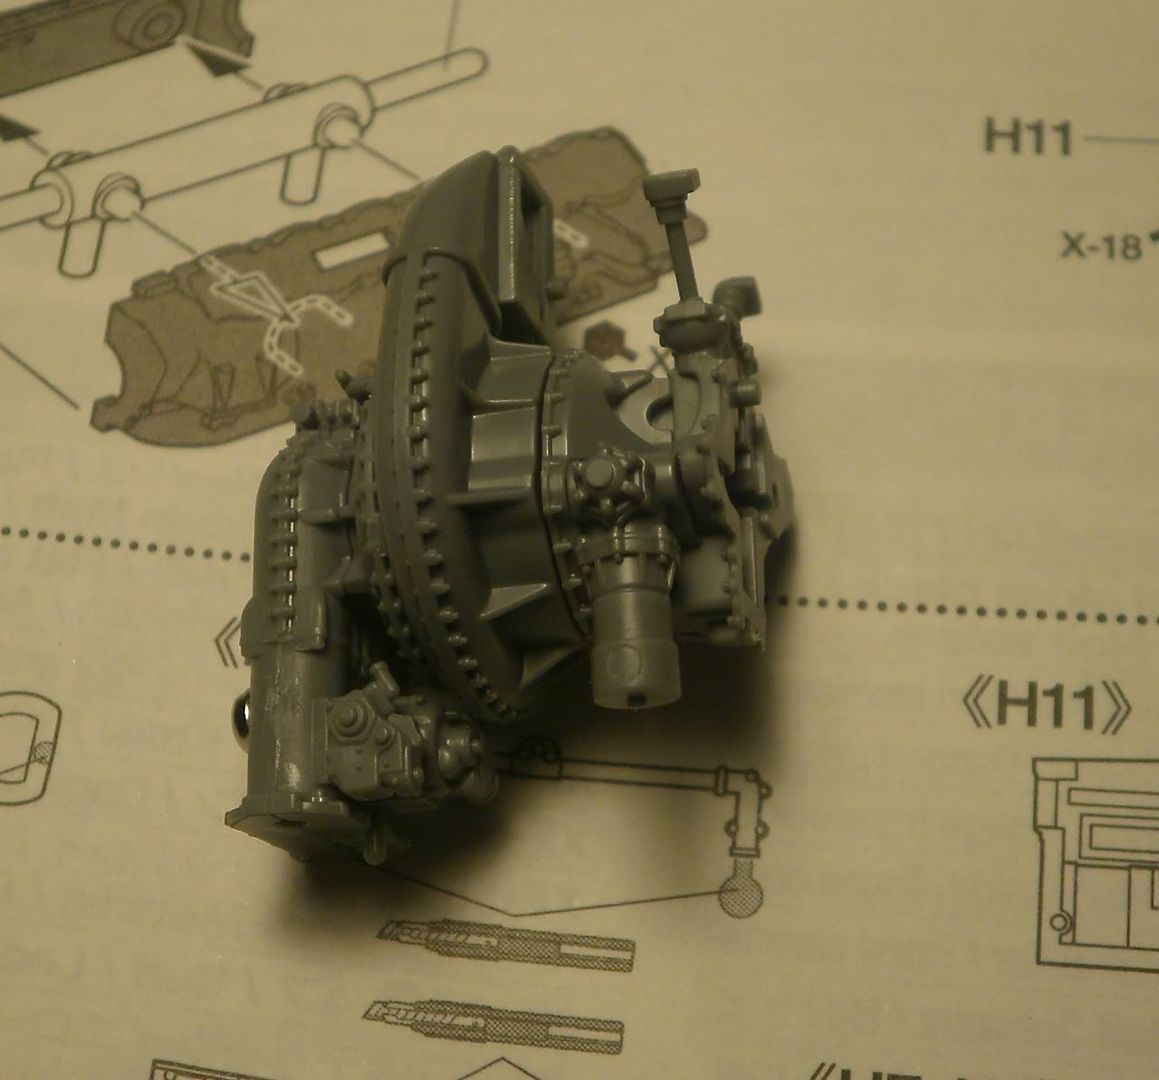
The rear section here isn't fully assembled, there's a few add on bits and pieces left to attach and none of the subassemblies are glued to each other, but here we have the carburator, supercharger and what I believe is referred to as the wheelcase, I'm sure if I'm wrong someone will correct me
The intake manifold has several photoetch parts, they sit quite nicely down on a raised locator peg
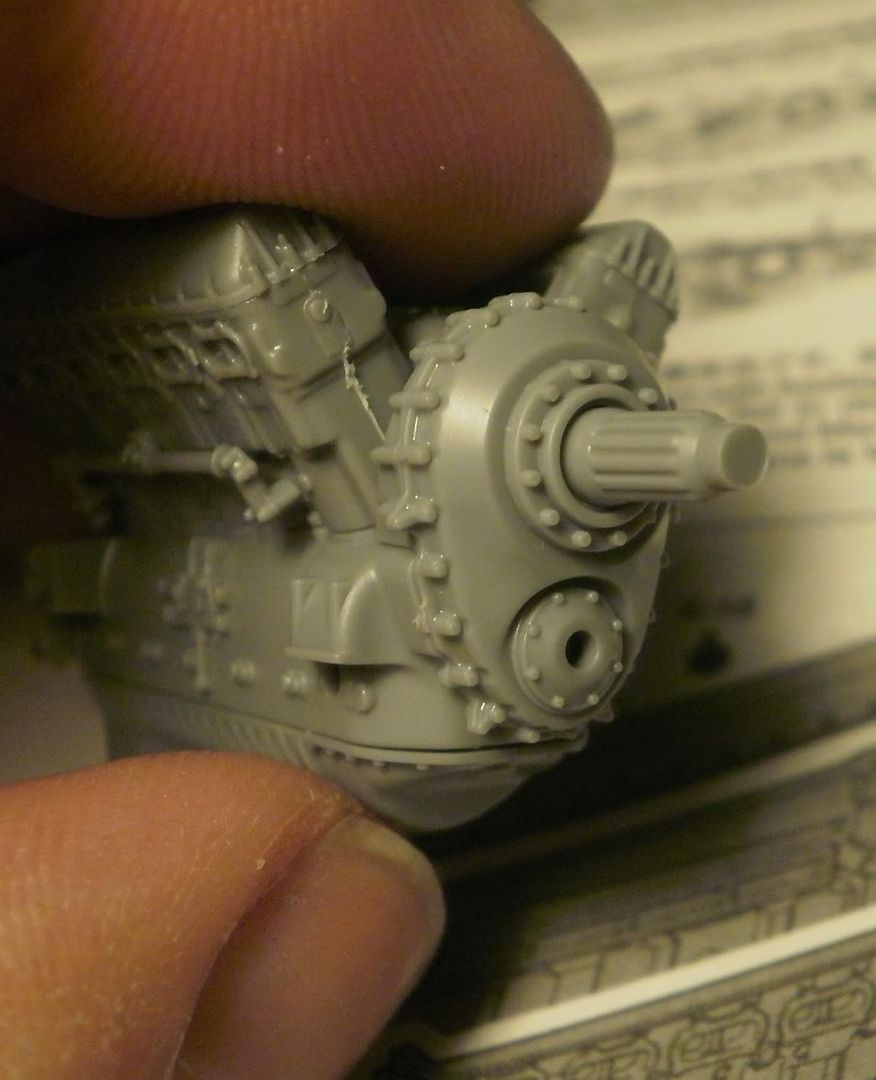
The driveshaft for the prop is nicely detailed, and spins freely. I just noticed I have a seam to clean up on one of the cylinders
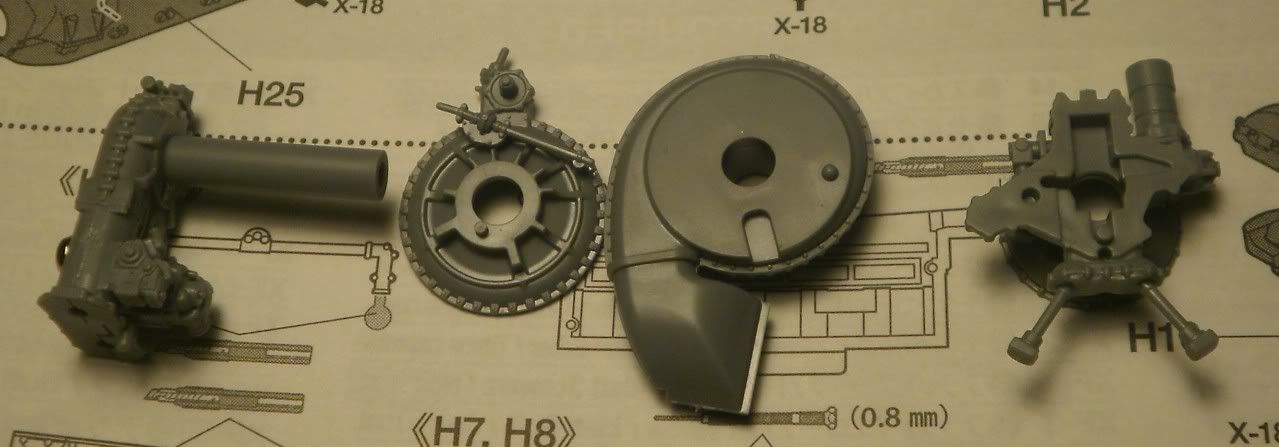
So from left to right, we have the carburator with the axle that links all these parts together, the supercharger housing, the supercharger itself, and again, what I THINK is the wheelcase

The oil tank mounts to the firewall, nicely detailed but only 2 halves. The firewall itself has some nice molded detail to it, but nothing overly fancy
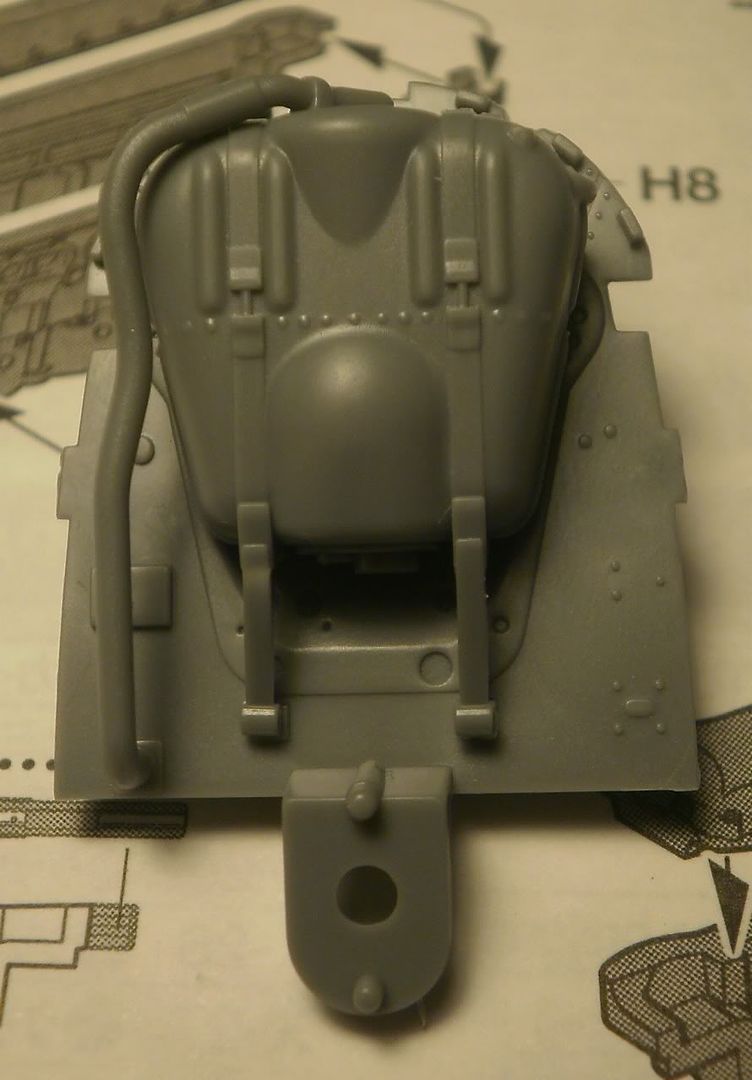
The tank mounts to the firewall, and has a separate cap and hose that would run down to the oil cooler under the fuselage.
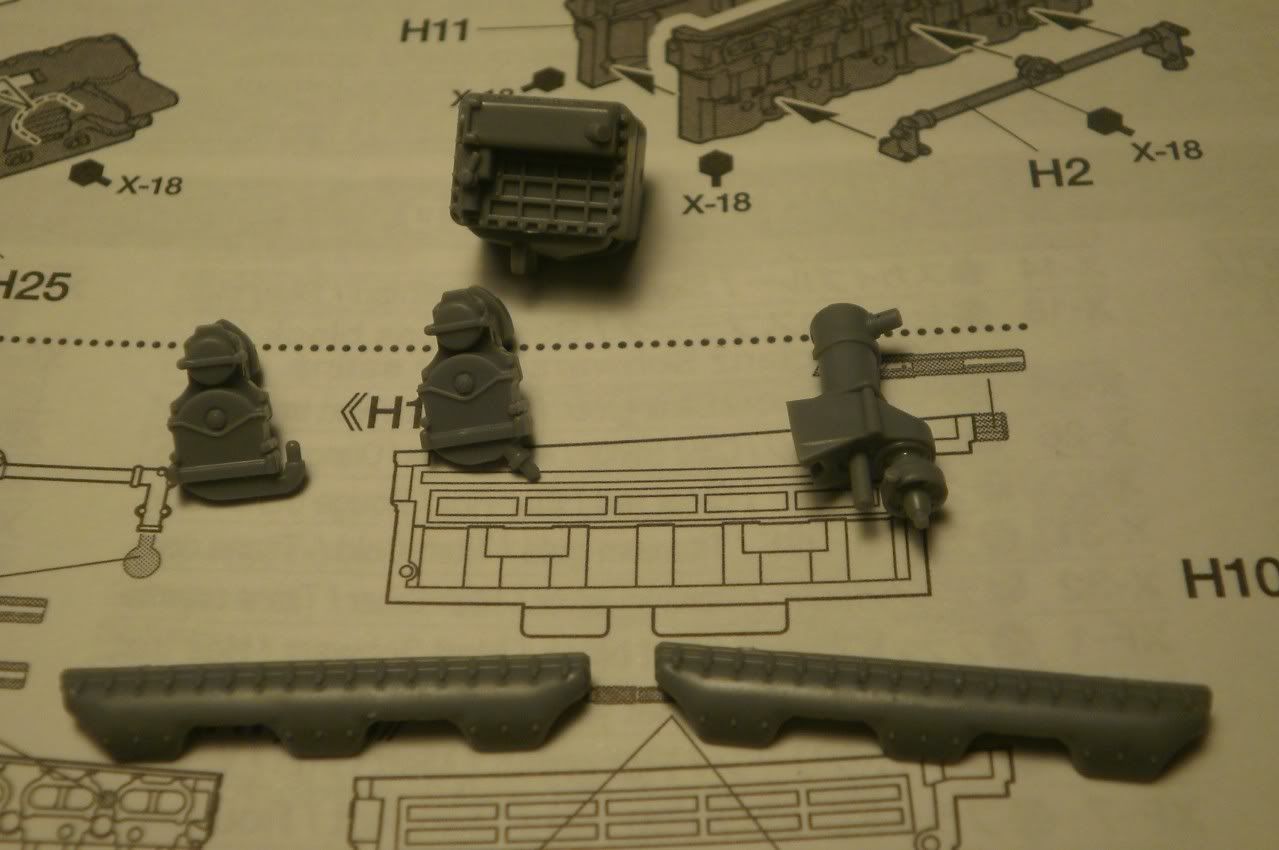
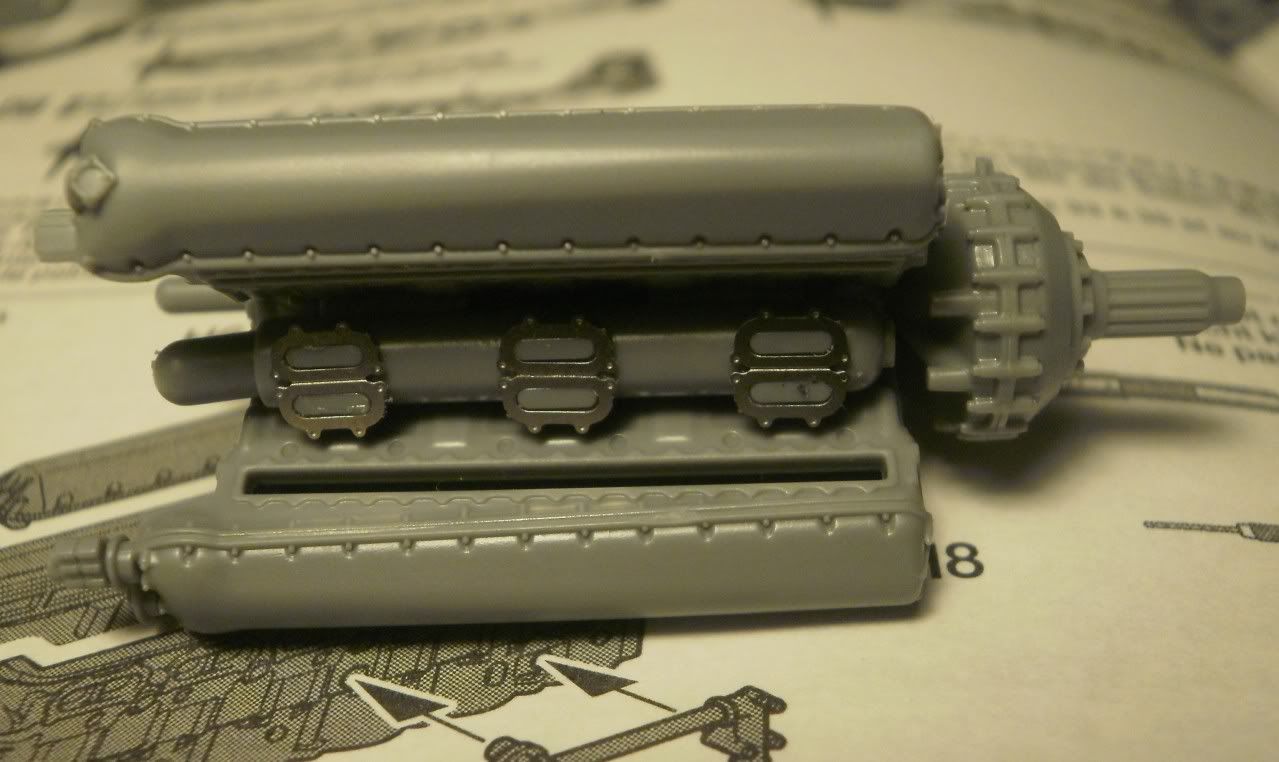
The last of the add on parts are seen here, the intercooler on the top, intercooler pump on the right in the middle, and intake manifolds on the bottom. The other 2 parts in the middle, I can't identify, but mount to the wheelcase, I believe they're the distributors
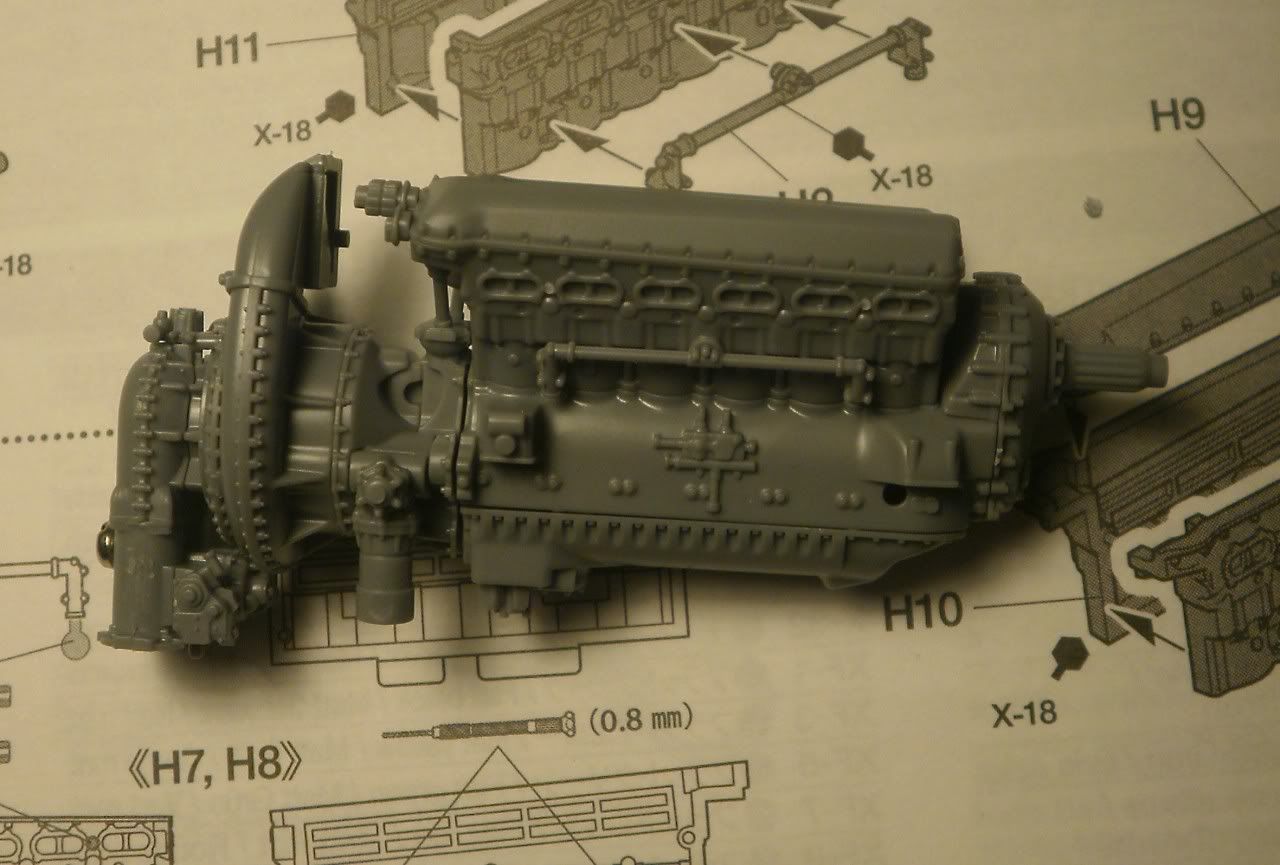
The entire assembled engine is about 4"/10cm long, and looks amazing out of the box. It could do with some additional plumbing, like ignition wires and hoses and what not, but despite that looks really good.
I'm collecting additional references for the engine, and have decided to add some wiring and plumbing to it. I also filmed the entire assembly, and will be adding it to my youtube channel(link in my sig) in a day or two. This is gonna be a mighty fun build!
-
I can only agree with you, this is a stunning kit. The parts fit is excellent, even better than the Spitfire kits.
Beware when assembling the carburettor/supercharger intake (no not turbocharger, not on this aircraft), the correct parts for the Mustang kit is on sprue V. I misstakenly built a Spitfire mk XVI engine, but i hadn't built my Spit XVI engine so i recovered that one. Use the wrong parts and you can't screw the engine in place.
dude, whoa, thanks for the tip!
-
Part 2!
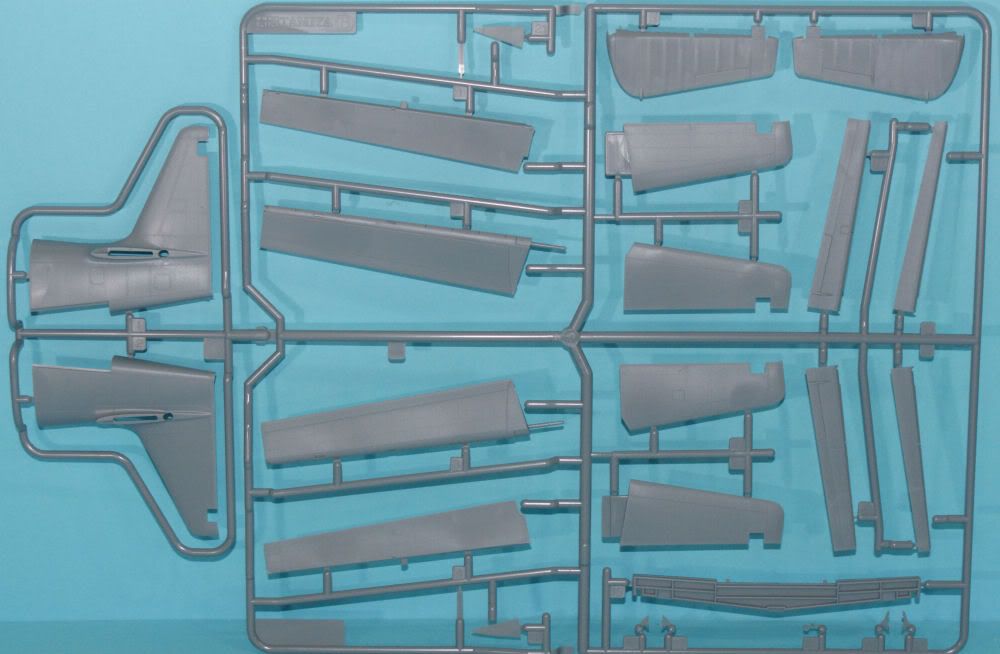
I was surprised when I took a closer look that this kit includes 2 different tail options, the first one has an extension on the leading edge while this version does not. Also shown here are the bulk of the plane's control surfaces
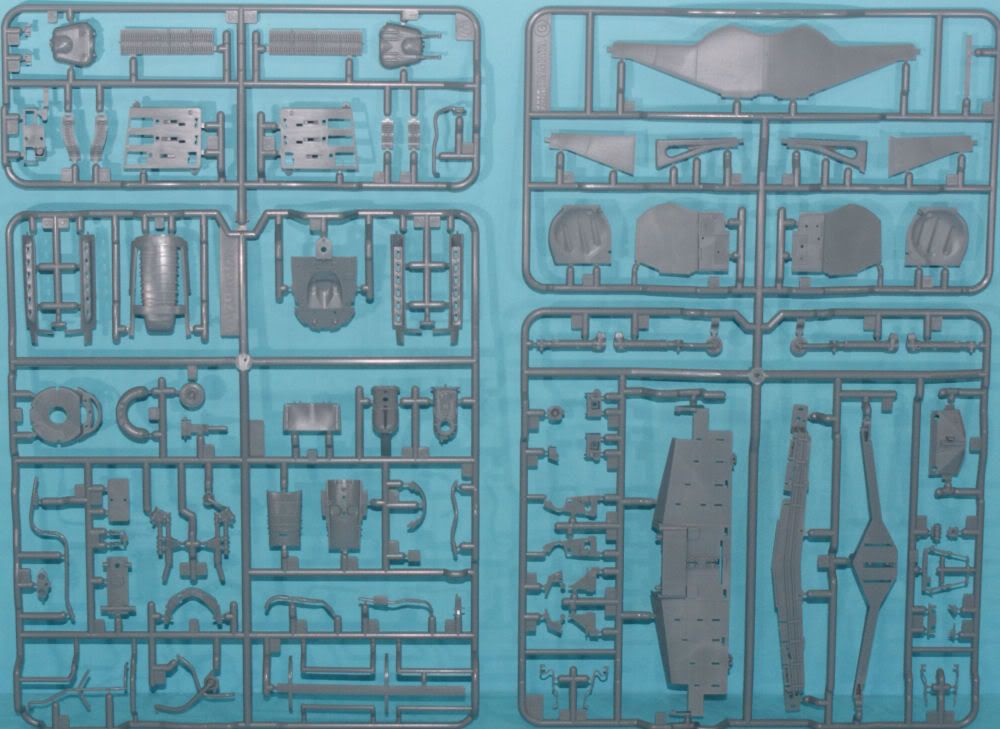
On the left, we've got much of the engine's plumbing and a few frame/bulkhead parts. The right side has the main landing gear bay, struts and doors which you can see have options for closed and raised display
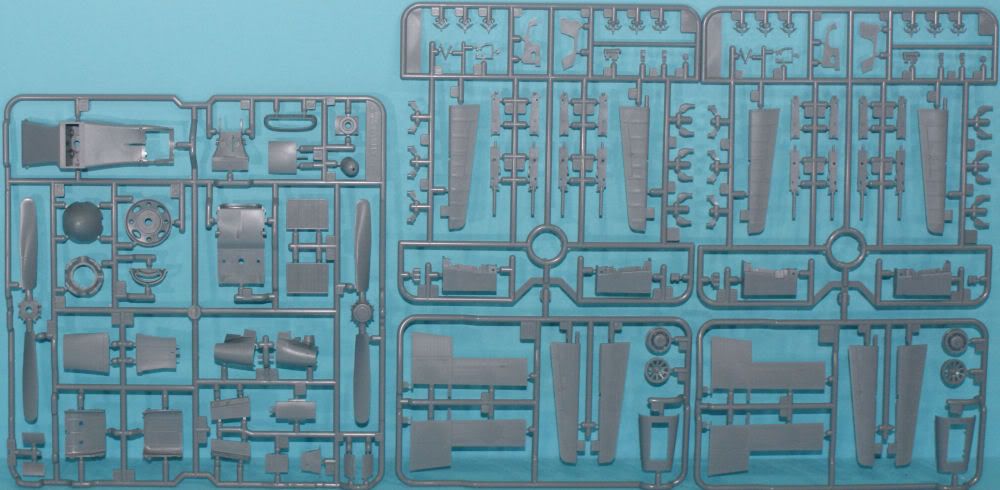
first up, we've got the prop parts, the oil cooler/radiator channel, as well as a few other parts I don't really recognize. Next, we've got the only doubled up runner in the kit, we've got the last of the control surfaces, which have options for fabric covered or all metal parts. Also included here are the exhausts, the guns and the doors for the gunbays
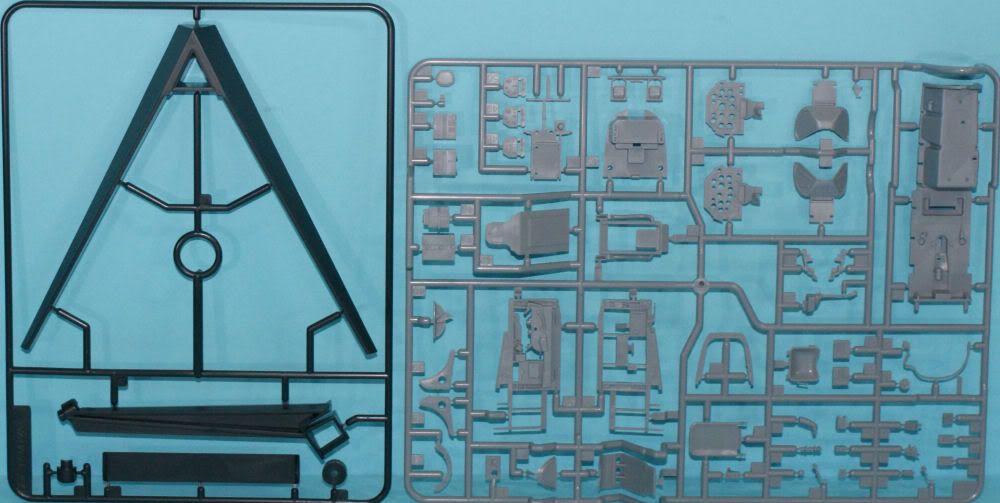
The stand is very simple, not much to say about it really. The cockpit has options for 2 different seats, and 2 instrument panels. The interior sidewalls are molded seperate from the cockpit floor, all of which are molded beautifully
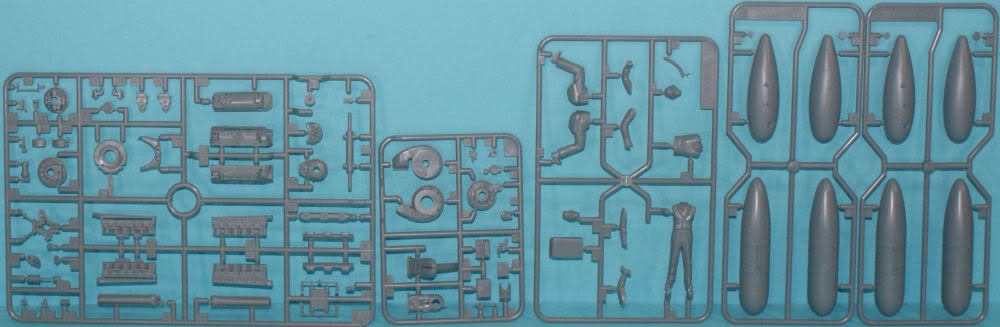
Engine parts! More engine parts! Even more engine parts! Seriously though, the first runner has the crankcase and cylinder parts, while the second appears to have the turbocharger and a few other odds and ends. The kit includes 2 pilot figures, one standing and one seated. Also includes 2 options for drop tanks, the 75 gallon and the 108 gallon

For clear parts, the kit has 3(yes, 3) different canopies! Clear faces for the instrument panels, armored glass and marker lights, etc
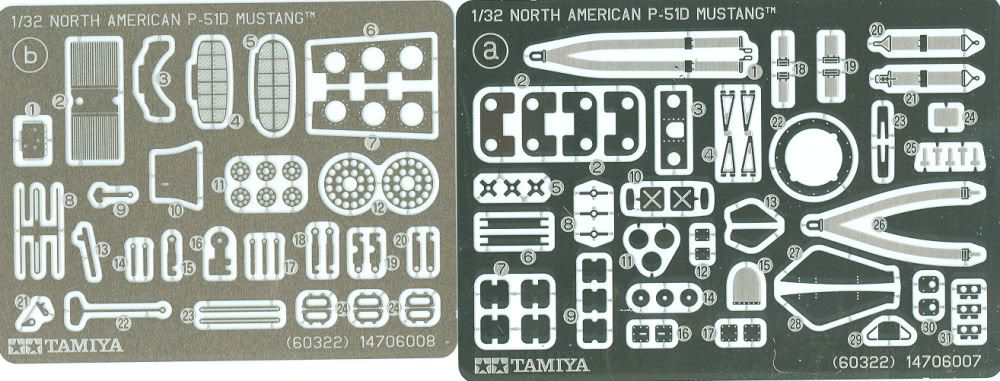
whoa, 2 photoetch sets? Yup! On the left we've got the intake screens, guide mounts for the guns, and hinges for the control surfaces. Second sheet has the multiple part seatbelts with detailed buckles, the contact points for the cowlings, and morestuff I don't recognize.
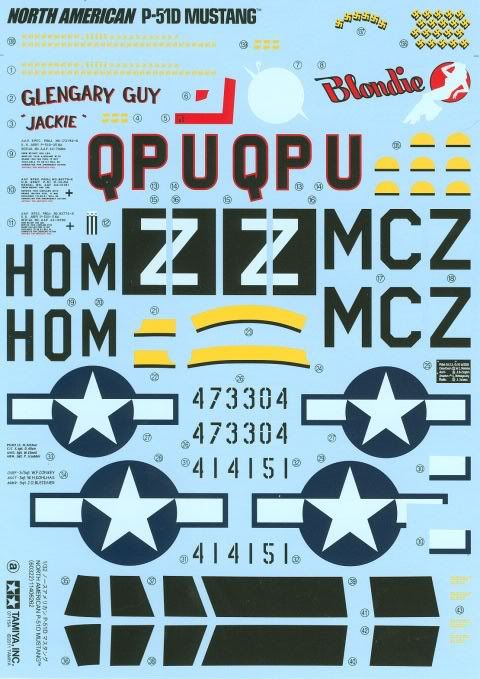
Also has 2 decal sheets, first one has the roundels, markings for two of the 3 marking schemes and other squadron markings
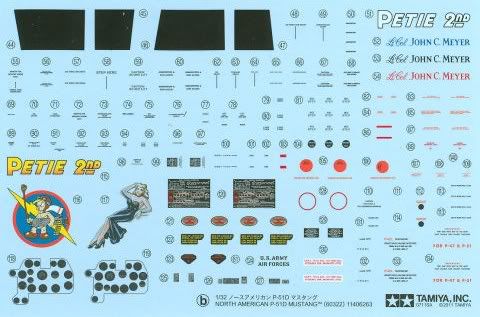
Second sheet has the instrument panels, markings for the 3rd scheme and all the stencils.
I took a couple videos of my initial unboxing as well, so enjoy!
Part one, documentation and decals
Part 2, parts, parts and more parts!
-
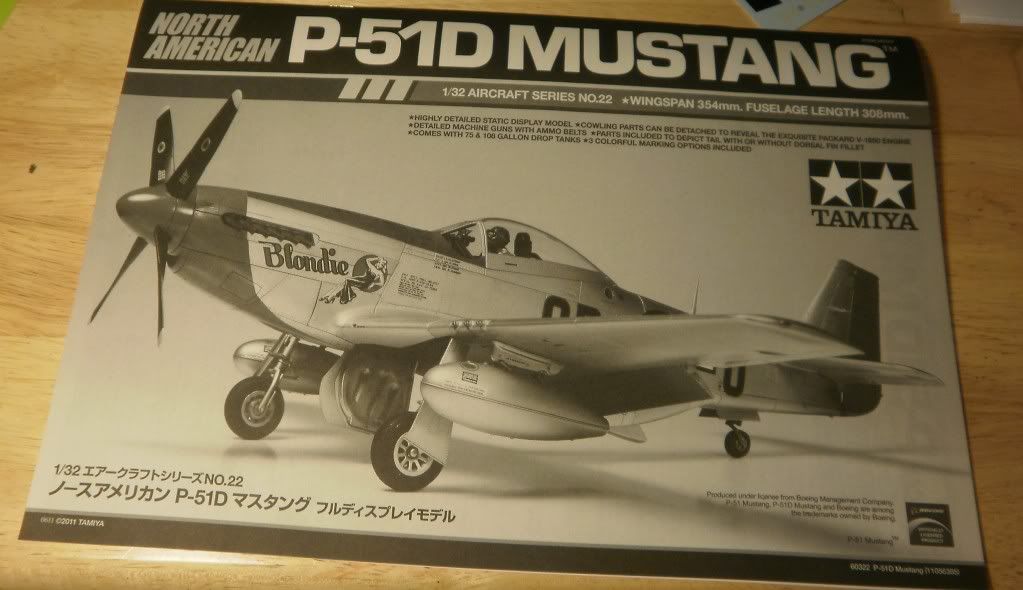
Picked this up a couple days ago, I don't know when I'll ever get around to it, but I wanted to show it off since it's a brand, spankin' new kit! I've never built one of Tamiya's 1/32 kits, but I've always heard amazing things about them, particularly their more recent releases such as the Zero and Spitfire, so when I found that the local hobby shop had a few of this sucker in stock for a really awesome retail price, I had to snag one up.
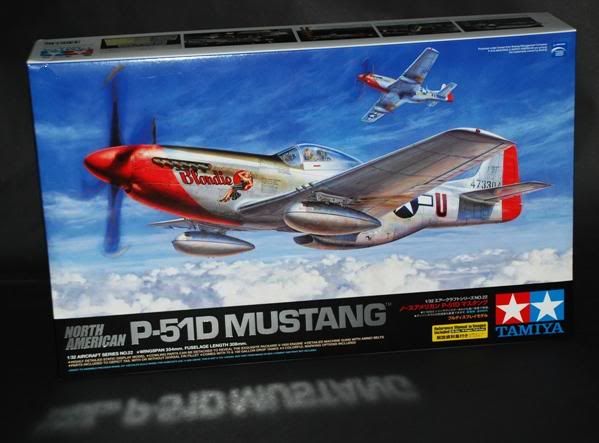
Box is about 19"/48cm wide, 12"/30cm tall and 4"/10cm thick and adorned with gorgeous painted boxart, the bottom and top sides have some specs and details about the kit and several photos.
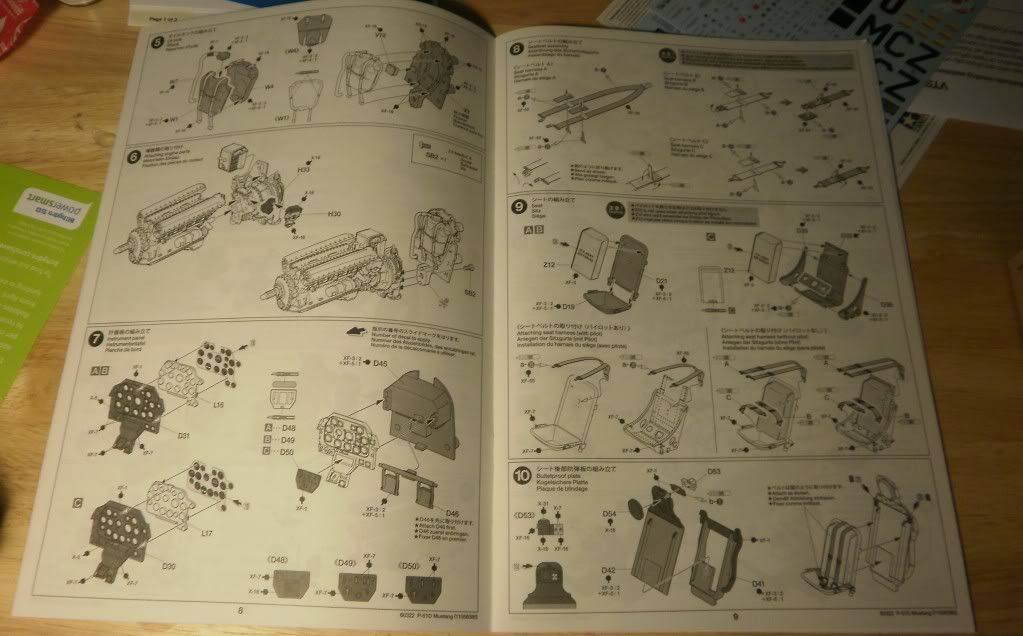
The manual is typical of Tamiya, printed in black and white and featuring a photo of the finished model on the cover.
The book is 36 pages long, and about 30 of those pages are the assembly! Assembly instructions are extremely dense, but look to be fairly simple to follow and clearly presented.
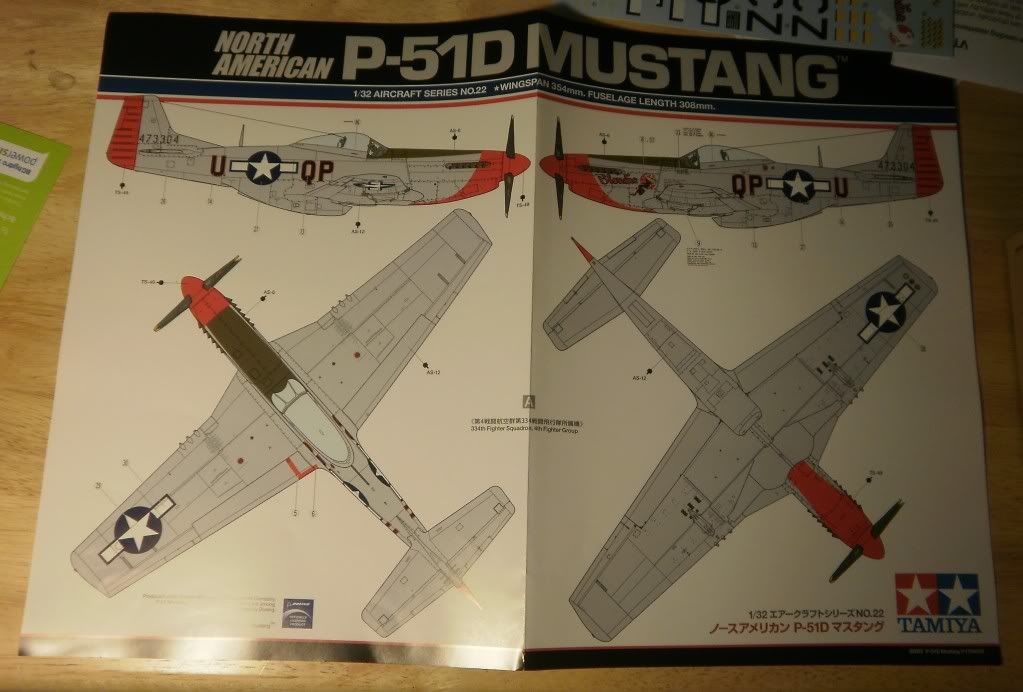
It comes with a 2 page foldout paint/marking guide for the scheme as shown on the boxart

I was excited when I came across this, it's a reference guide for the builder
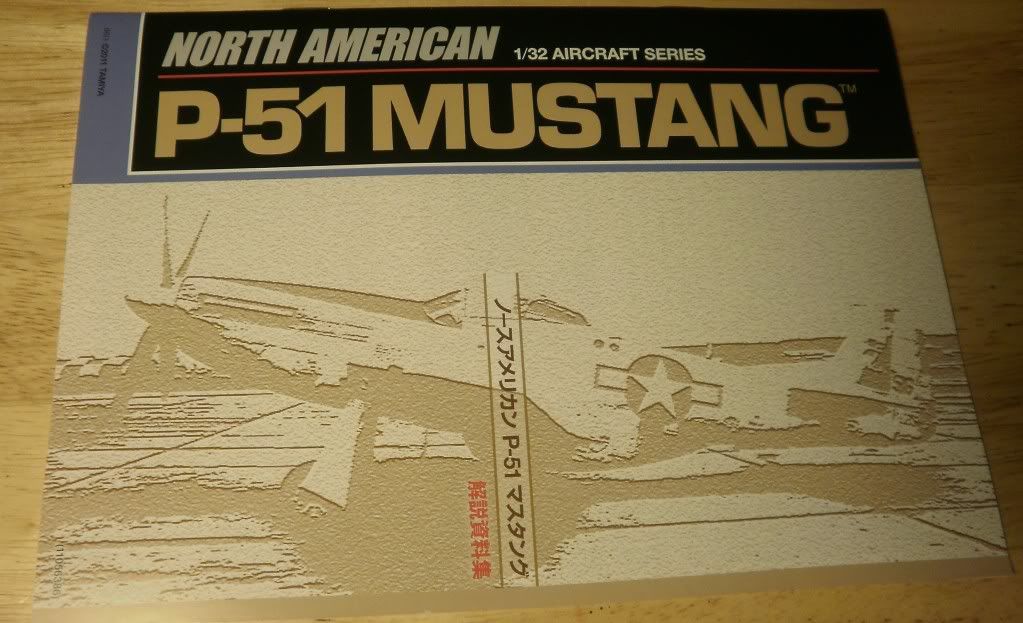
about a dozen pages of technical and historical info about the Mustang and its variants
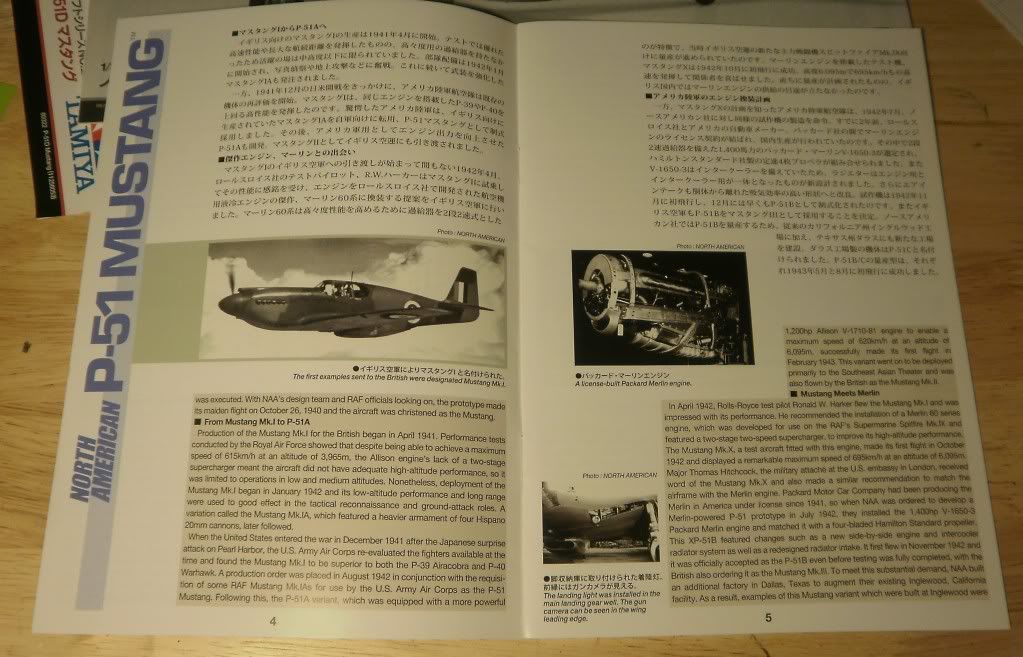
the last 2 pages are covered in colour reference photos, these'll be very helpful I should think and it was a nice touch to include them

The engine cowlings are advertised as being 'ultra-thin', and they live up to that boast, I wasn't aware styrene could be molded that thin and still hold its shape! The cowlings are removeable after assembly, using magnets embedded in the framework and photoetched parts glued to the cowlings.
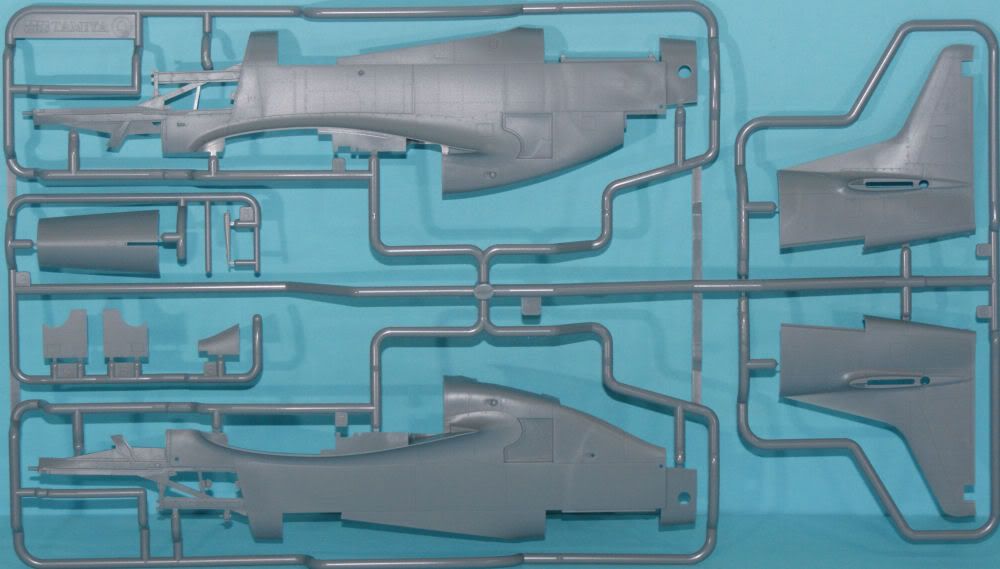
the fuselage is... rather odd, it doesn't really look like a fuselage! The nose is empty and skeletal because of the seperate engine, and the tail is detached to allow for easier tooling of variants. Note, most of these pics were borrowed from Cybermodeler, as my camera's battery died before I could get shots of them... not to mention, these were a lot better than I could have gotten
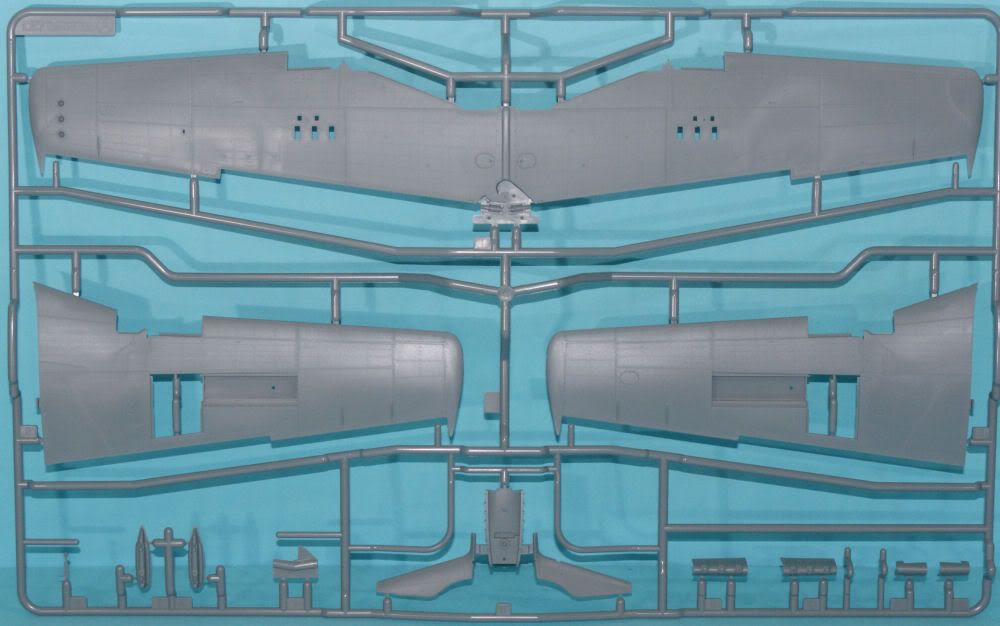
that's a big damned wingspan... box says it's 354mm wide, which if my math is correct is about 14". Molding is exceptional as is usual for Tamiya
More pics and my unboxing video in the next post
-
Where did the last 2 weeks go? Hopefully I'll be able to pick up the pace on the rest of the series
-
Couple days late getting this posted here, been really busy...
-
-
-
Next episode is up!
-
I've been posting videos on youtube about the models I build for a couple years now, and I figured I'd post some of 'em here to see if I can't drum up some new viewers. Not sure if I'll keep posting these here long term, depends on how much interest comes from it.
I guess the best place to start would be with my latest series: Modelling 101, a beginner's guide to model building.
Episode 4 will be up in a few days.
-
from the pictures I've seen, the proportions look really odd, the nose and cockpit being really large and bulbous, while the rear portion is really small... just my opinion but it looks kinda doofy
-
a year or so ago, I did a series of lighting tutorial videos on my youtube channel, starting with the very basics of setting up simple circuits, to slightly more complex circuits right up to installing a system in a model. I have it all set up as a playlist, which you can watch here
-
oh by golly, I'm speechless... been watching this thing since the beginning and every new update has left me stunned
-
mother of god...
WANT!!!
-
and would cost about $400
-
The ned to make 350 scale bird of pray
technically the scale of the Klingon Bird of Prey is up for some debate, and depending on who you ask, the AMT kit can be pretty close to 1/350
-
in particular, refer to the episode 'Hand of God', Apollo drops a couple missiles mounted to under the wing, I think you get a fairly decent look at the fighter moments before he launches them
-
Starship Modeller's store says they're getting their shipment on March 26th
http://www.starshipmodeler.biz/shop/index....mp;ParentCat=56
-
if I had to guess, I'd say the builder probably used either 2 strands side by side, or made new windows with micro krystal klear or something similar and backlit them. I'm planning to use that technique on a build I'm just getting started on, so drop by my youtube channel, the first vid for that build should be up in a day or two
Star Destroyer Kits
in Sci-Fi Modeling
Posted
My Star Destroyer build is progressing, I've been drilling holes for windows for the past week or so, and my fiber optic cable has arrived! So, here's another video!