


Marcel111
-
Content Count
1,936 -
Joined
-
Last visited
Content Type
Profiles
Forums
Calendar
Posts posted by Marcel111
-
-
Remarkable save, Chuck... sometimes you just gotta go back to the basic techniques, in this case filling with CA. Must say you did an exceptionally smooth job with that, very very hard to get such a flawless result over a curved surface, esp. without introducing a flat section.

Marcel
-
More extensive work travel for me, including six days in Las Vegas (yes, that was for work), so progress is slow. I did receive some additional decals from Keith, which I have now applied.
Here are some close-ups, as requested:
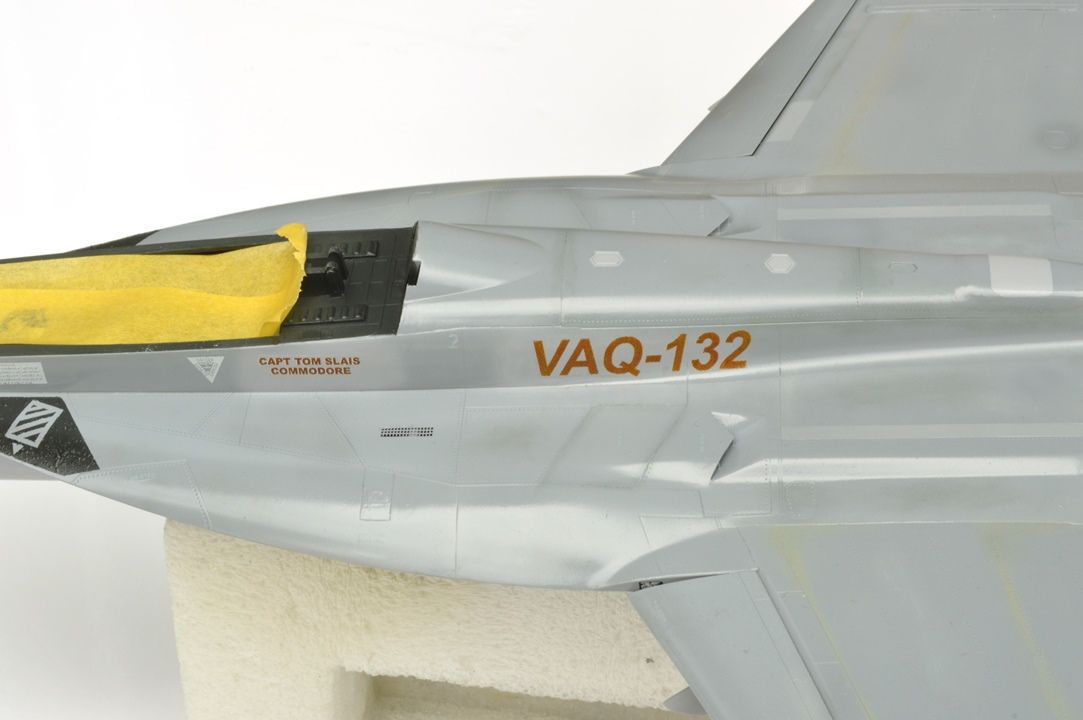
In the above pic, the ejection seat warning and rectangular warning marking are too light--these were also custom made since the kit decals are too dark. I asked Keith to err on the light side with these (better too much contrast than too little), I have since oversprayed these with Dark Ghost Gray to make them blend in a little more.
Again, the light gray triangles and rectangular warning markings have since been toned down.
All in all I am really please with the results. Sure, the color decals have some "digital print" effects if viewed under the microscope (black and white always come out perfect), but the overall look is really cool imo.
Off on vacation for a week and then two weeks of Asia travel, who know when I will be able to update again.

Marcel
-
Chuck, I admire your resilience! Really hope you manage to fix things and move to completion of the model, as I am sure you will.
Marcel
-
Wow, this is just awesome... and you are making some very quick progress considering the work involved.
Cheers,
Marcel
-
Steve, it's all just looking so impressive, cannot wait to see more.
Marcel
-
Top notch work as usual Marcel. That scorpion scheme is killer! It will be great to see the finished product now that you're so close to the finish line.
Thx Chuck! Yes, getting pretty close to the finish line but all those things under wings will keep me busy for a while yet.
This is looking awesome! It's made me google "EA-18G profiles" and "1/48 EA-18G decals" for inspiration for a future project. More closeups of your work would be great to see!Thx... and yes, I should snap some more close-up, will try to remember that the next time I take pics.
Sah-weet!Great contrast between the tan cammo and black scorpion. I agree with the other guys, killa work Marcel.
I hope you're able to get a snap of your two Hornets together eventually. It will be a cool comparison.
Cheers.
Thx Guy. Yes, I will have to take some group pics, seems like forever since I did the D.
Very nice. I like the camo!Hope to see the Plane once in real :-)
Regards from Basel
Marcel
Thx Marcel... must admit I am a bit lame on the in-person modeling club scene, I really need to get into that again. Are there any military jet, large scale guys at the Basel club? I will unfortunately be missing the Basel model days event.
Awesome work Marcel, it's really looking great. Attention to detail is very important and yours is right on.Steve
Thx Steve... takes on to know one ;)
Marcel
-
Chuck, big thanks for taking the time to create this very thorough tutorial.
Marcel
-
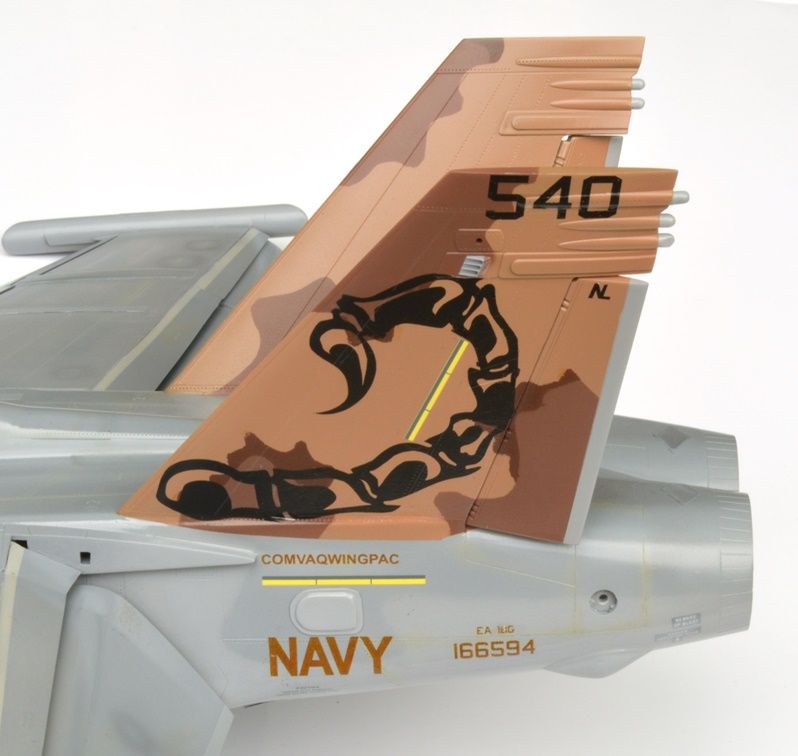
The custom-made decals are mostly on. I'm really pleased with how Keith from Red Pegasus did these
 and really love the overall look of this jet.
 Getting the scorpion sting on the tail to fit was a major challenge and I ultimately had to make a few concessions... for those very familiar with this particular aircraft, you may notice that the sting doesn't extend slightly over the rudder as it should... this is the best I could do to make things fit. Since taking the picture I have also done a bunch of touching up with black paint.
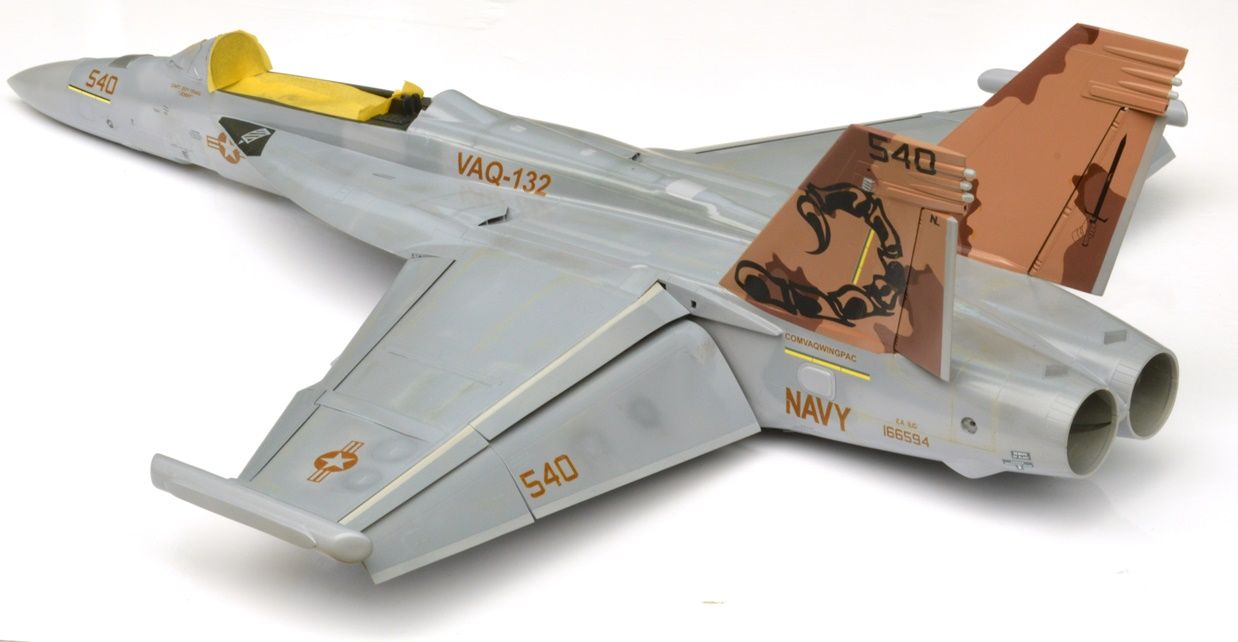
Unfortunately I noticed that we missed two crew names in producing the custom decals so hopefully I will get those sorted out asap.
I have generally been pretty impressed with this Trumpeter kit, Trumpeter have come a very long way since producing the Flanker in 1/32. I think shape accuracy is very good and the panel lines are nice and fine. That said, I was really cursing Trumpeter when applying the kit data decals: The slime lights by the nose are incorrectly sized (I ended up scavenging slime lights from a Fightertown F/A-18E sheet which I hate doing), the decals that go on the topside are too dark (so they are almost invisible), the decals that go on the underside are also too dark (so the contrast is too strong) and the instructions only cover about half of the data decals supplied.
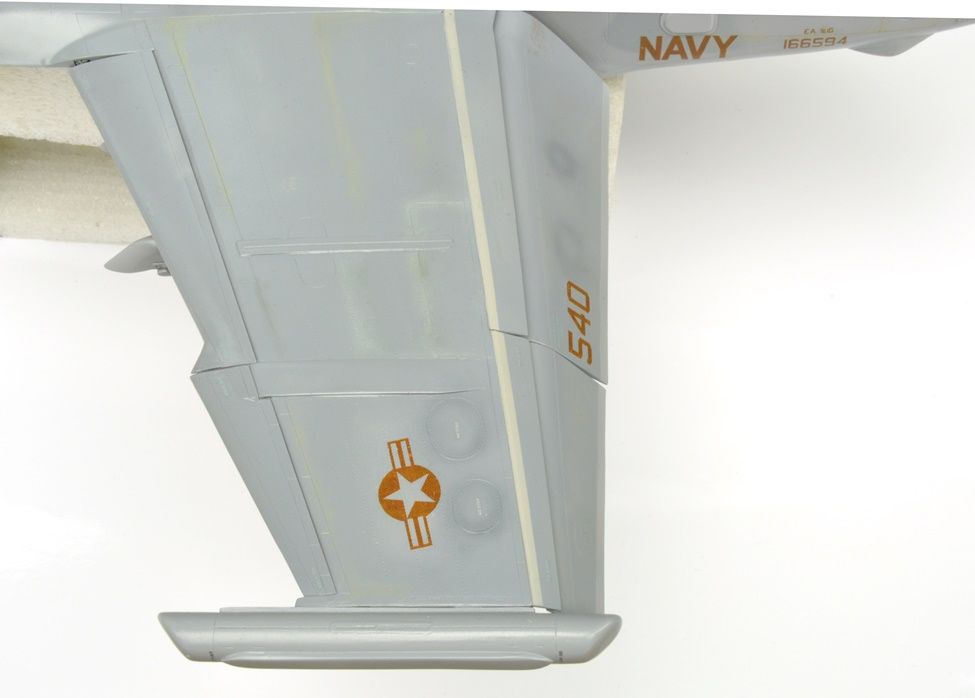
Here is where I am now:
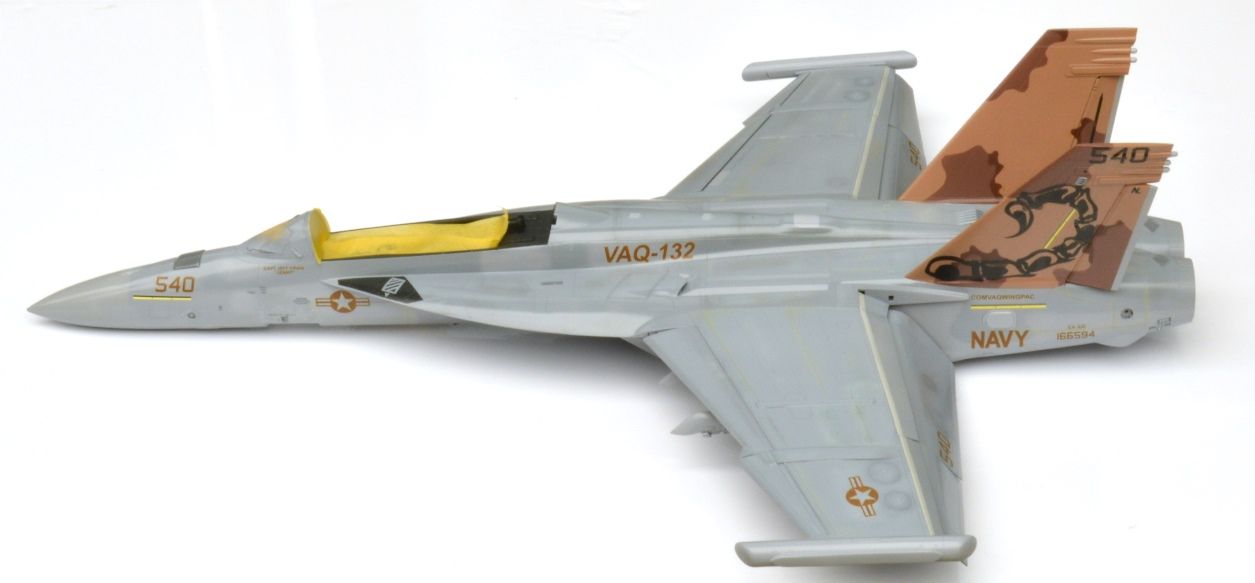
I will be overspraying some of the underside decals to make them more subdued.
Also note that the areas behind some of the brown decals are a lighter shade of gray, this effect is apparent on the real thing.
Marcel
-
Interesting fact: friends of mine who actually put the paint on those aircraft did so using the standard navy swabs (mops) to throw the paint on!
Neeko, any chance your friends have any records of the camo patterns? I'm pretty sure the decal guys would jump at the opportunity to make decals for these special schemes... as Brian said, there just isn't complete info out there.
Since I do 1/32 jets and not every subject is covered, I end up doing custom decals now and again... although this is definitely not the preferred path for quality and cost reasons.
Brian, great to read that you're working on more Tomcat releases!
Marcel
-
This is a truly beautiful build, the weathering is one of the most realistic efforts I have ever seen.
Since this is critique corner... my only critique would be the loadout, seems a little bit of a stretch to have a dummy Aim-9 with live A/G loads. On the rudders, seems to me that on Supers you can do whatever you want with them, they seem to point in all kinds of random directionsnwhen parked. :thumbsup:/>
Marcel
-
Wow, that is a spectacular Growler, I just hope my 1/32 version of the same subject turns out as nice.
Your attention to detail is inspiring, right down to the lighter gray behind the brown CAG markings.
:thumbsup:/>
Marcel
-
Don't forget one of the early schemes on the Tomcat:
http://www.masm.fr/Navycag/vf/VF1/158979.jpg
note the spoilers are up even with the a/c just sitting there.
Jari
Yeah that looks pretty wild... although if I was building an A, it would probably be building this one.
Marcel
-
Thx guys. Bummer nobody documented those schemes.
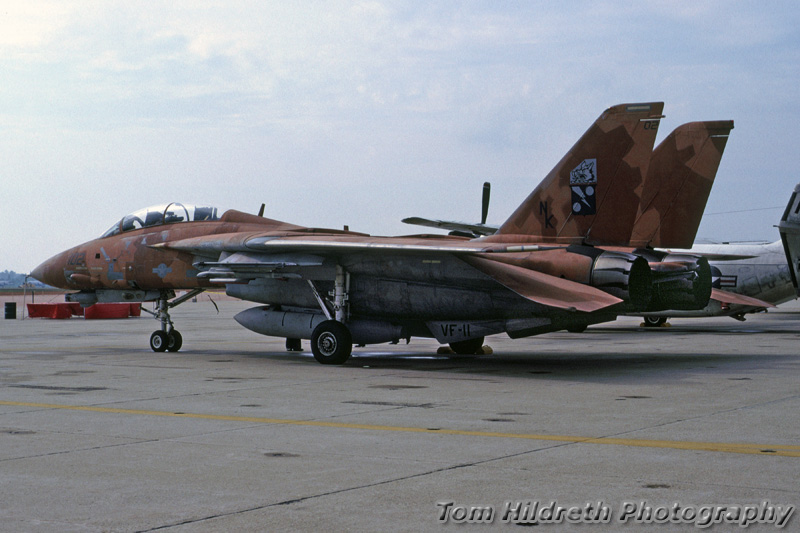
Yeah, remember seeing the blue splinter and BROWN desert jets at Miramar.Brian, would that be this one?
Marcel
-
Brian, great to see you cover these!
Marcel
-
I am wondering if anyone has any additional info/pics on this F-14D? I am referring to the Tomcat in the 5th pic from the top (not the one in the F-15-type pattern).
I have a thing for blue camo'd jets.
Marcel
-
Hello Guy,
Really truly great modeling news to see you back at this build! And straight away, your meticulous detail work impresses!
Marcel
-
I've been lurking on this thread from the beginning. Just wanted to finally say what a fantastic job you have done. Grey jets tend to get a bit monotonous but this was is a cut above the rest.
Keep up the good work.
John
Thx John! Rest assured, the next few projects I have lines up should not be gray...
Marcel
-
Thx Marco, thx Joel, much appreciated!
-
Thx guys!
I have a couple of questions for you - do you have any photos of the radome repair? or a photo of the real thing for comparison?I'm curious how you did the camouflage work - do you have masks?
-Anthony
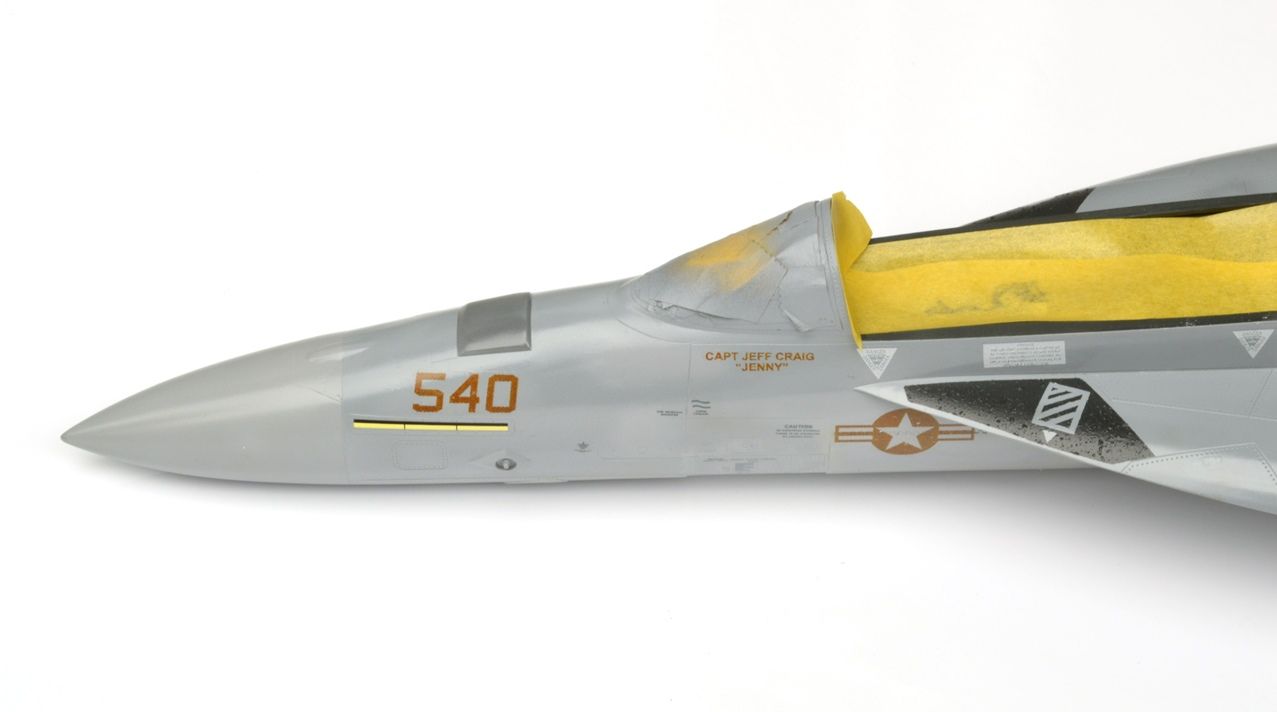
Hello Anthony, the radome on the kit presents the same way as it does on all legacy Hornets, which is with a recessed "panel" line denoting the boot tip of the nose. Later Super Hornets and all Growlers no longer have the boot end on the tip of the nose, so all that needs to be done is that the nose needs to be sanded clean of that recessed line.
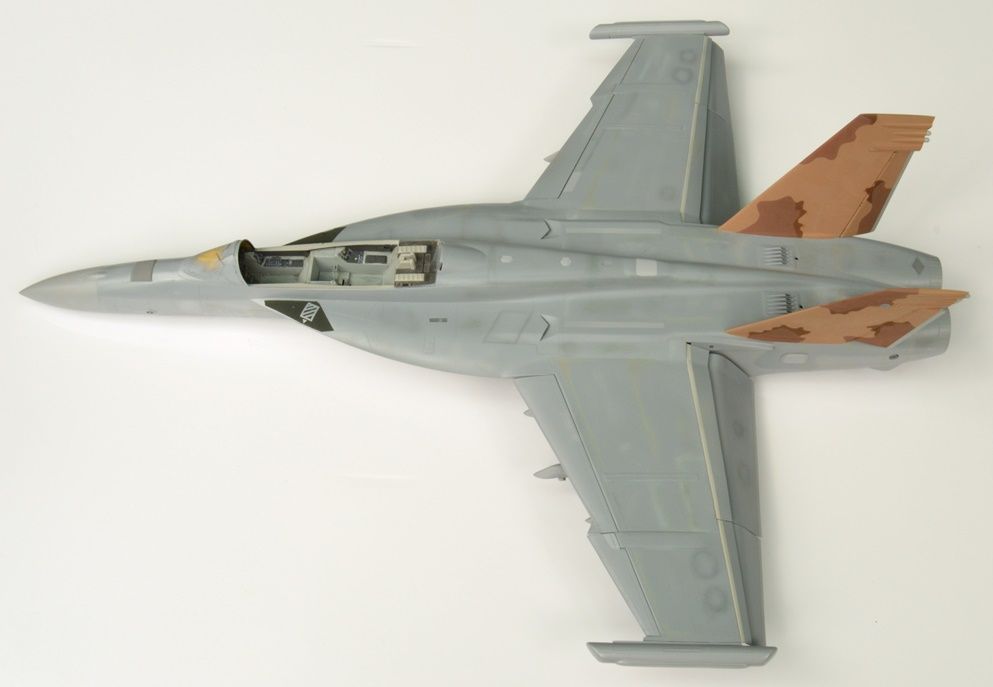
It looks like this in the end, i.e. a simple, smooth nose:
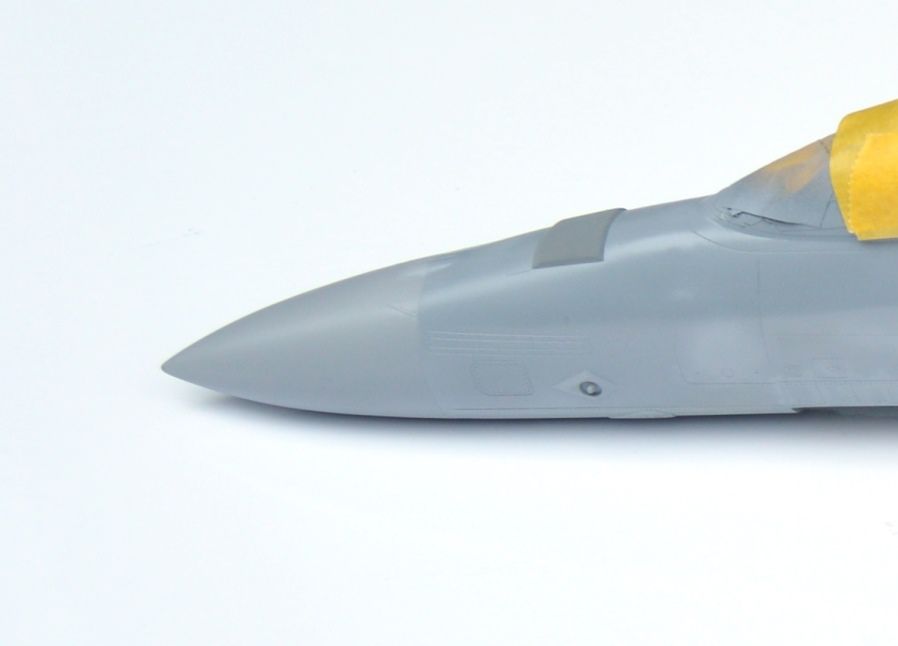
As far as the camo on the tail is concerned, that's just a bunch of tedious masking.
Could this F-18 Trump ( pun intended) your Academy F-18D? Hard to do, but time will tell.:) The Chuck... I think I have learnt a lot since my F/A-18D build but as you know it's hard to beat the surface detail on that Academy kit.
Something else that I just noticed is that the ejection seat warning triangles and the canopy warning "rectangle" are a lighter shade of gray than the surrounds, on Super Hornets it is the other way around. The kit supplies there decals as they would be on Super Hornets and not as they are on Growlers.
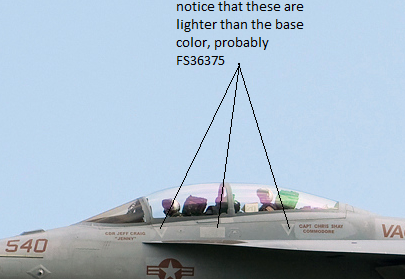
So I am getting more custom decals done :o
Marcel
-
John, very nicely done!
Marcel
-
Joel, that's a beautiful Skyhawk build... and I must say I domhave a softbspotbfor Lady Jesse.
Marcel
-
Thx Igor, thx Dieter.
Just got word that the build will be published in the October edition of Sacle Aircraft Modelling, the pics in the article are a big improvement on these.
-
Chuck, nice save on those legs! And big thanks for the photography tip, will need to try that.
I often photograph a build step and when I see the pic on my computer, I notice flaws and errors that I eventually fix, which I think makes the model better. Other times, like with the landing light on this build, I see some tiny flaws in the pics above I just can't see with the naked eye, so I let them slide. If I can't see them without magnification, they don't exist!Yep, that's pretty much how I roll
Marcel
-
Thx Rom!
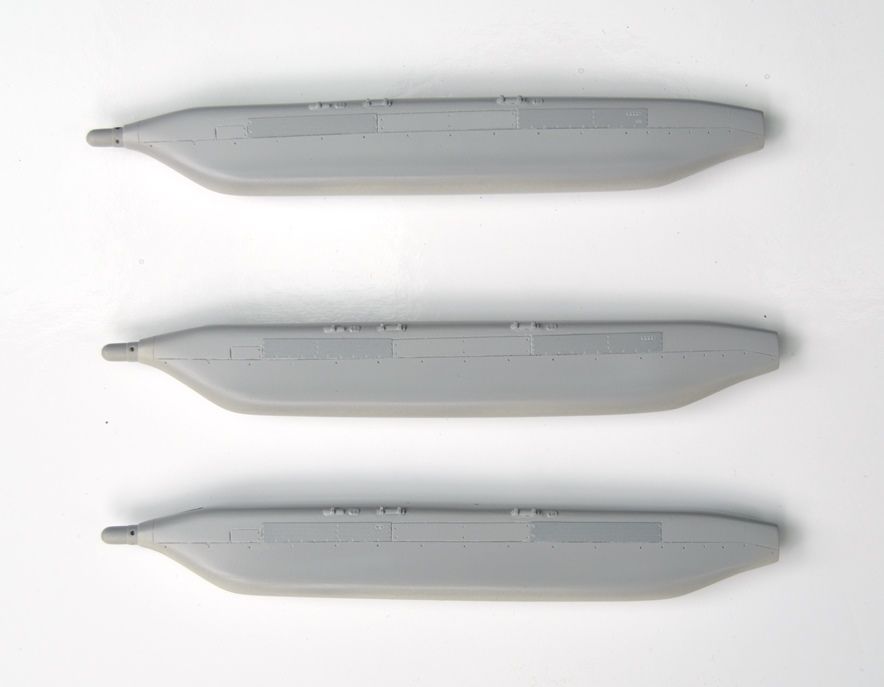
Here is how the ALQ-99's look after a first coat of paint.
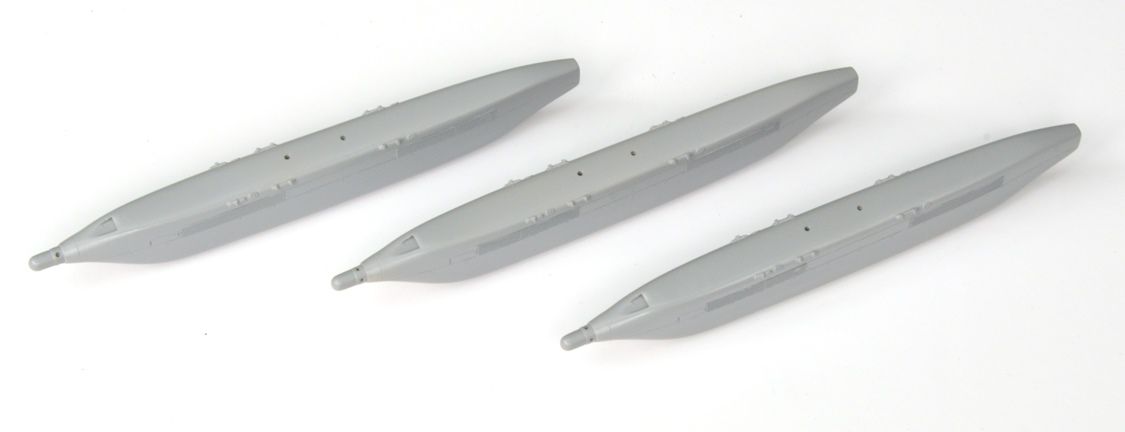
The Eduard photoetch "ribbed" panels are a big help, these come in several varieties, all of which are covered by the Eduard Growler armament set. I chose panel configurations as seen on the real deal.
And here is a pic of the overall model. I have put in many hours since the last update but it's not all that visible, most of the recent effort has been about spraying ECM panels a lighter shade of gray and that sort of thing. Notice that I have done the walkways using the textured paint process--unfortunately, I didn't find my favorite textured paint over here so I had to make do with what I could find the in the local hardware store, not keen on packing aerosol paint cans in my suitcase to bring it over.
Marcel


Official! HK 1/32 British Phantoms!!
in Jet Modeling
Posted · Edited by Marcel111
Wow, that is really great news, love the Spey Phantoms!
Marcel