


Marcel111
-
Content Count
1,936 -
Joined
-
Last visited
Content Type
Profiles
Forums
Calendar
Posts posted by Marcel111
-
-
Rom, very nicely done, looks really impressive!
Marcel
-
Really lookinqg forward to this and the Kinetic E.
Thx for sharing,
Marcel
-
Very cool to se you start this kit. The cockpit looks really convincing.
:thumbsup:/>
Marcel
-
Beautiful job taking care of all of the rough little odds and ends that make Trumpeter kits take so long to put together. The light looks really nice, and that in spite of the magnification under which you show the pics here.

Marcel
-
Thx guys! The drybrushing weathering is one of my favorite parts of the process now, best thing about it is it's almost impossible to screw things up.
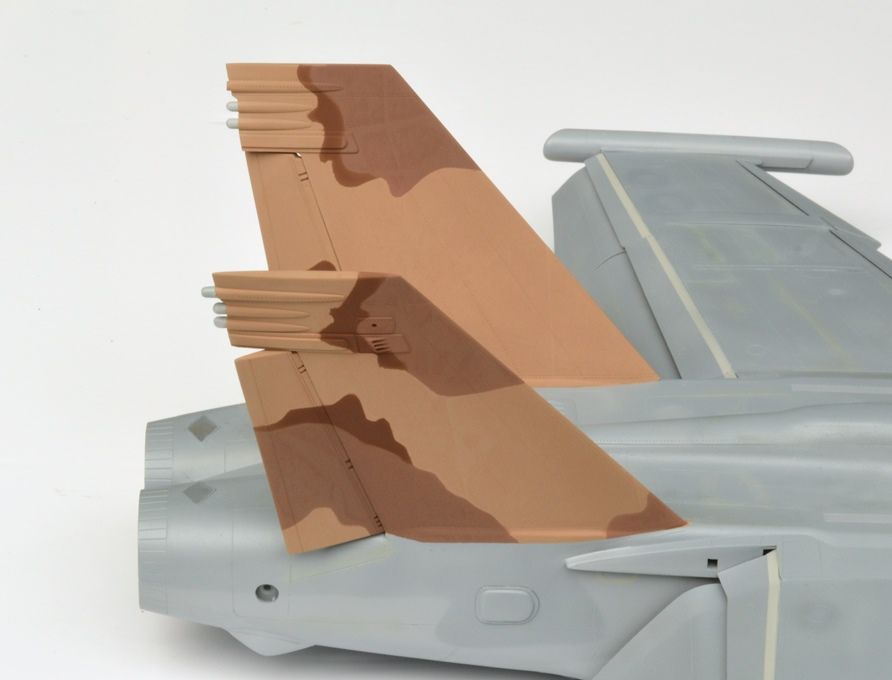
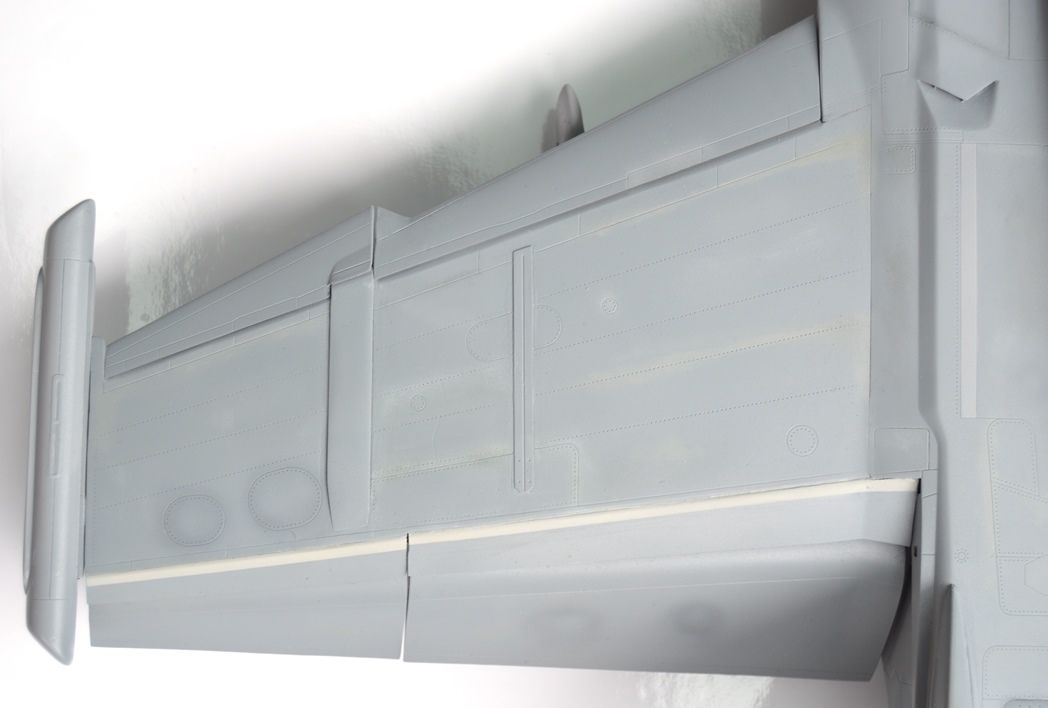
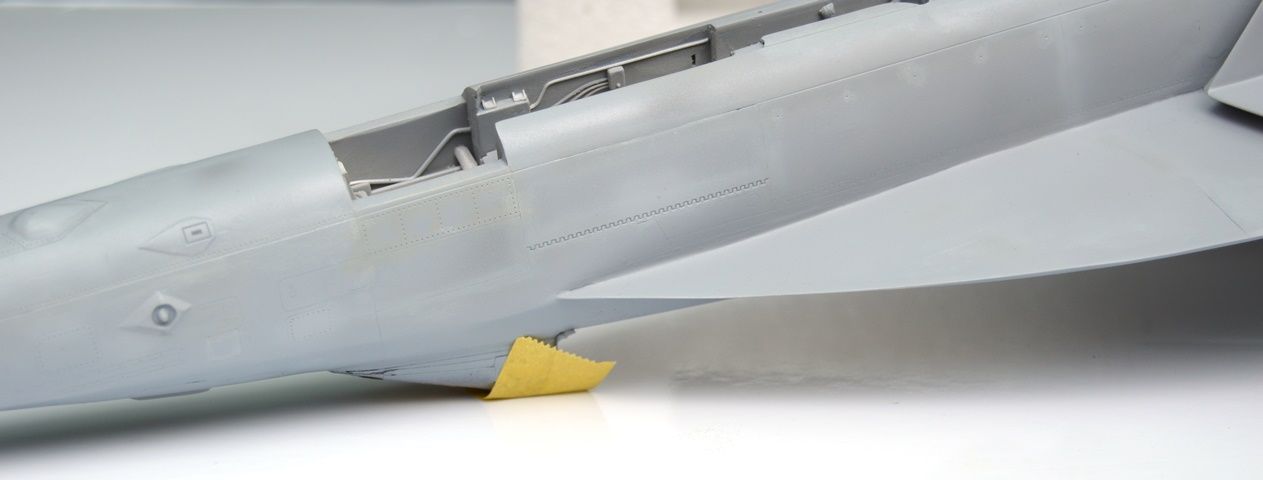
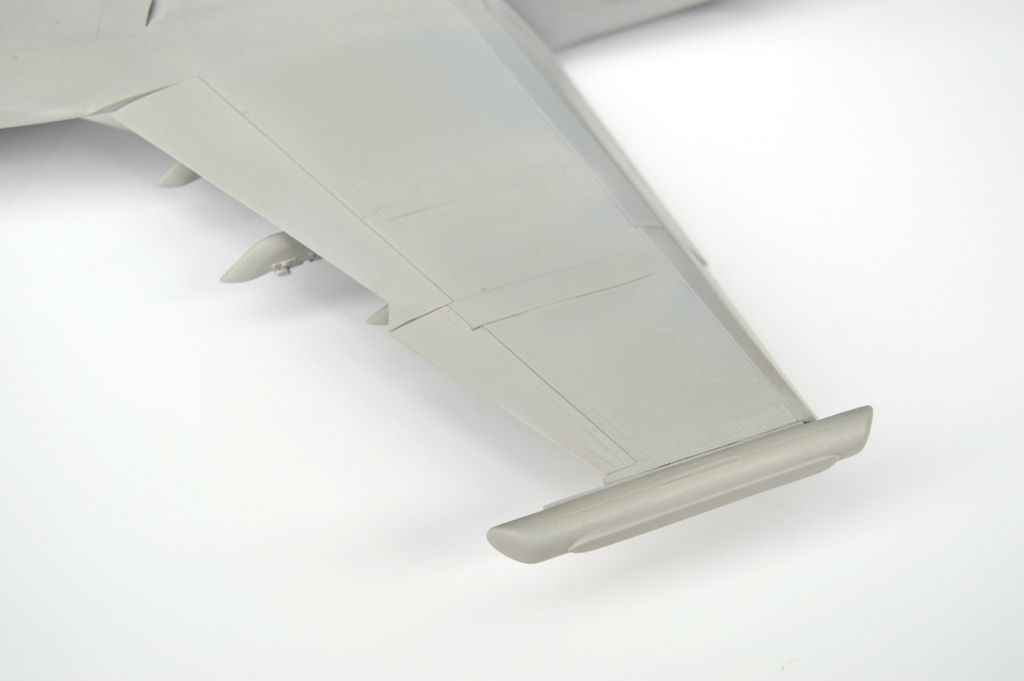
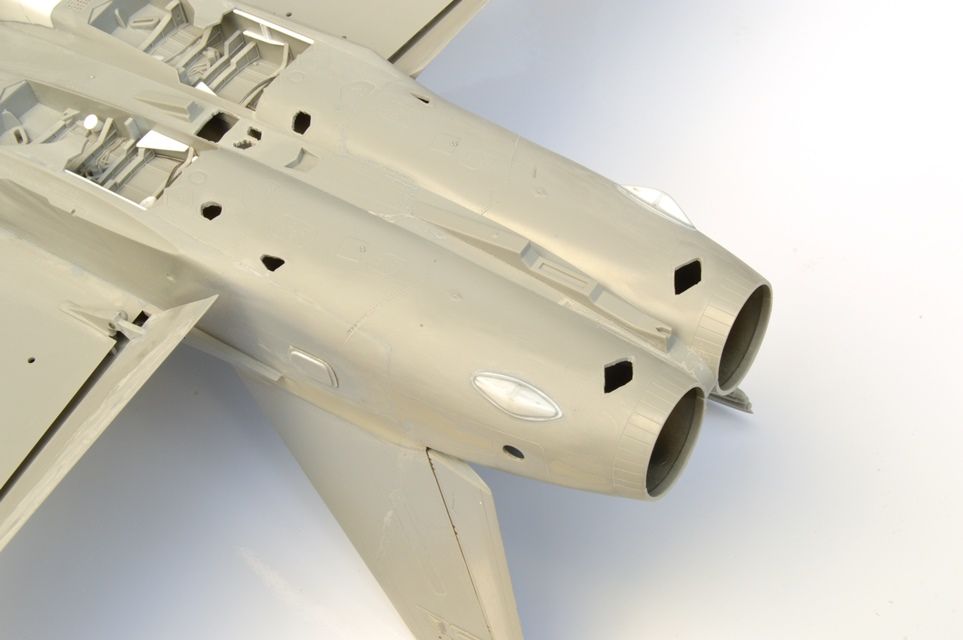
Here is where I am with the "camo" tail--all in all I love the look, even though I got some paint creep here and there that I will need to somehow address. Something I forgot to mention earlier is that I filled and sanded out the "boot" on the radome--later model Superhornets and all Growlers feature the APG-79 AESA radar, the radome of which no longer has the urethane boot at the tip.
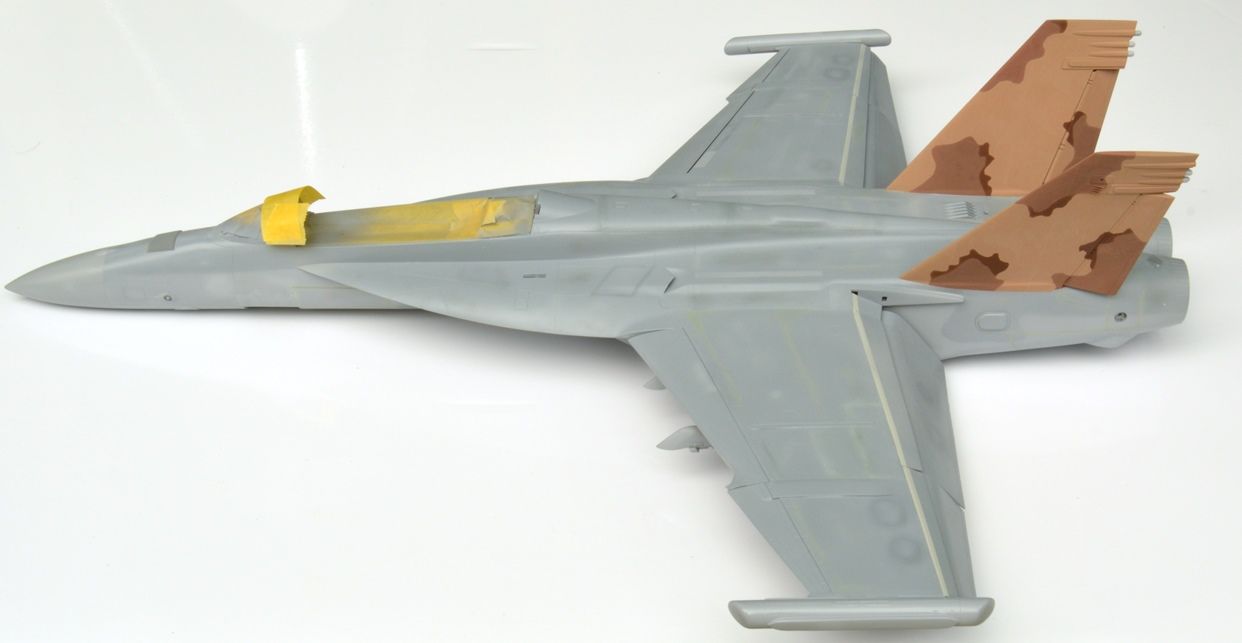
I mixed the tail colors using a color palette I created by sampling photographs of the real thing. The browns are actually very reddish. Many models I see of this bird use browns that are too yellow.
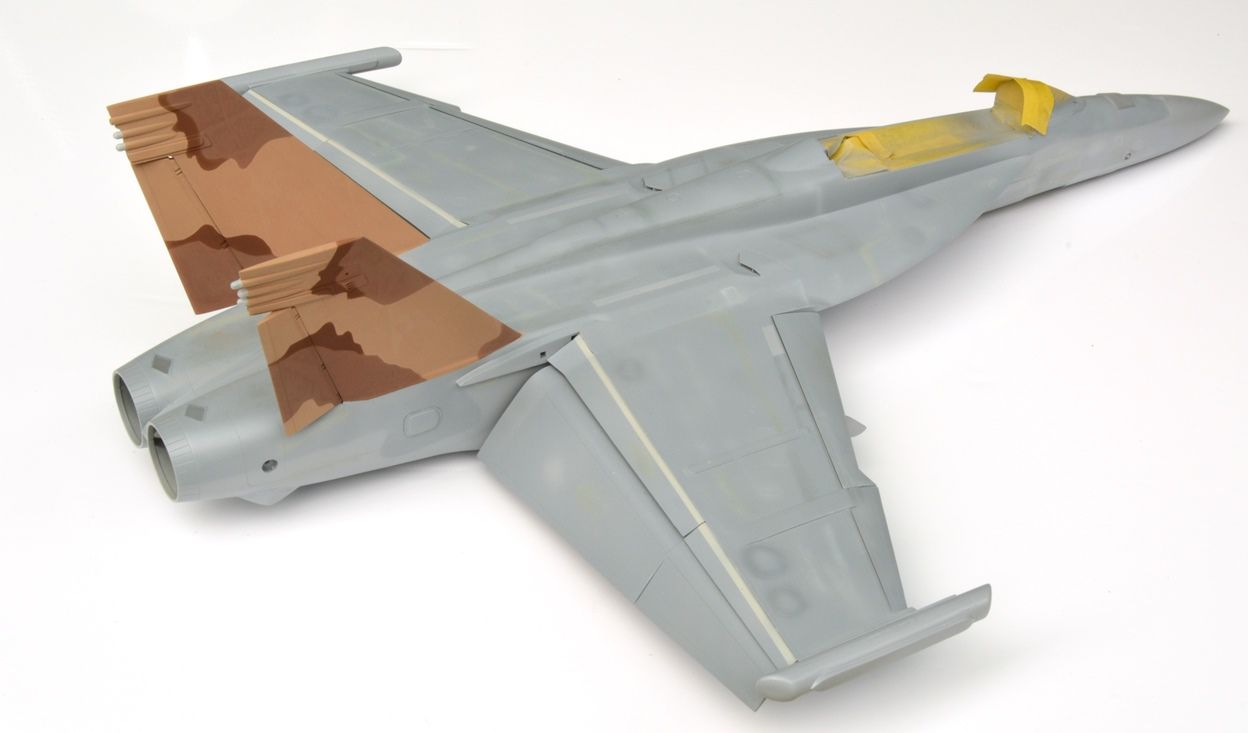
Trumpeter has both vertical tails feature navigation lights, while in reality the left tail has three ECM antennas. I distinctly remember having quite a few beers when I did this fix on the model, which would explain why I got this the wrong way around. Rest assured I have remedied this by now so that the left tail features the additional ECM antenna.

Marcel
-
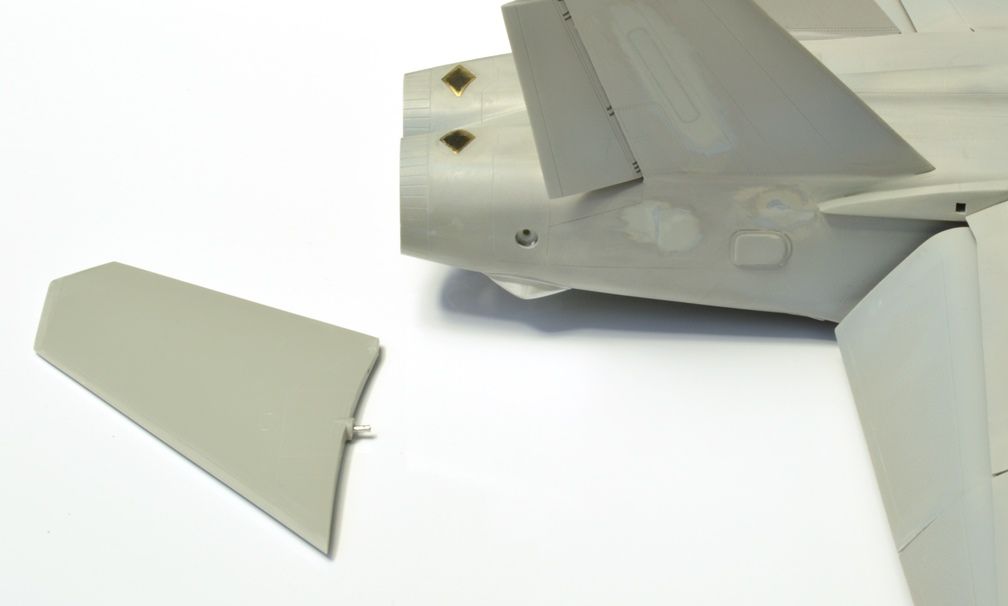
Paint job is coming along, including some weathering. I do much of the weathering effect by dry-brushing different shades of gray over the base coat. Although I use acrylics for airbrushing (Gunze and Tamiya), the drybrushing only works with enamels, I usually use Humbrol.
Here is a look at the actual aircraft, I tried to represent some of the patches on the real deal, such as those dark touch-up on the outer wing sections.

Left wing close-up:
It will all start flowing together nicely once the wash is on.
Marcel
-
As for bribery U.S. vs Europe, depends what parts of Europe you're talking, it's not one country (newsflash). Germany and Netherlands both score better than the U.S. on the corporate bribary as well as the corruption perception indexes (Transparency.org), the nordic countries are generally way less corrupt than the U.S., while the Mediteranian country with beautiful beaches and great food that I am vacationing in right now is unfortunately way down the list.
:cheers:/>/>
Marcel
-
There seems to be a lot of color variation, even for what is the same Heater-Ferris pattern. I am not sure if that is due to fading, bad color film photographic representation from the 80's or just variation in the actual paint used. Especially the darkest shade can sometimes seem pretty vividly blue, sometimes dark gray and sometime lighter blue/gray.
While on the subject, does anyone have any pics of the Marine Phantoms in Heater-Ferris (as seen on the Afterburner sheet)? I can only ever find pics of the VF-301 and VF-302 F-4's in Heater-Ferris.
:cheers:/>/>
Marcel
-
I modified the horizontal stabilizer to ensure a better fit later on in the build:
Some more progress on the arresting gear... just dry fitted at this point:
Marcel
-
I'm not sure what my next model will be, but I have all the parts and decals for an Israeli F-15E "Ra'am". That might be a fun project.
Doing the I would be awesome... you have my full support
Beautiful work on the P-38, the riveting is amazing.
Marcel
-
Thx guys!
You've raised the bar high enough to not be dethroned for a long while....Congrats!E.
Ha, it's not really such a big deal, I just spend a lot of time on long flights, which is often times dead time, esp at take-off and landing. On the other hand, there are about 5 or 6 projects I just can't wait to see completed in my display cabinet, so may as well...
Marcel
-
Thx for the encouragement and advice. Just ordered some of that Great Planes debonder, hope it get here fast.
I wonder how the TSA would handle it if you tried doing this with 1/32 scale JDAMs or HARMs.Can't be worse than the weird looks I was getting on the plane

Cheers,
Marcel
-
So how did the A-10 do at the contest? Pretty darn good if I do say so myself. Gold in the above category and a few extra special awards. The GOMBS award has a great pic of the late Rick Chin next to a real A-10. How neat is that!
Chuck, congratulations... but was there ever any doubt ;)
Welcome back, now finish this build off so you can get stuck into a jet again!
Marcel
-
David, fantastic progress on the Brit Phantom, really special to see this in 1/32.
Marcel
-
I have had a bunch of family visits, so not too much time for modelling. But here goes:
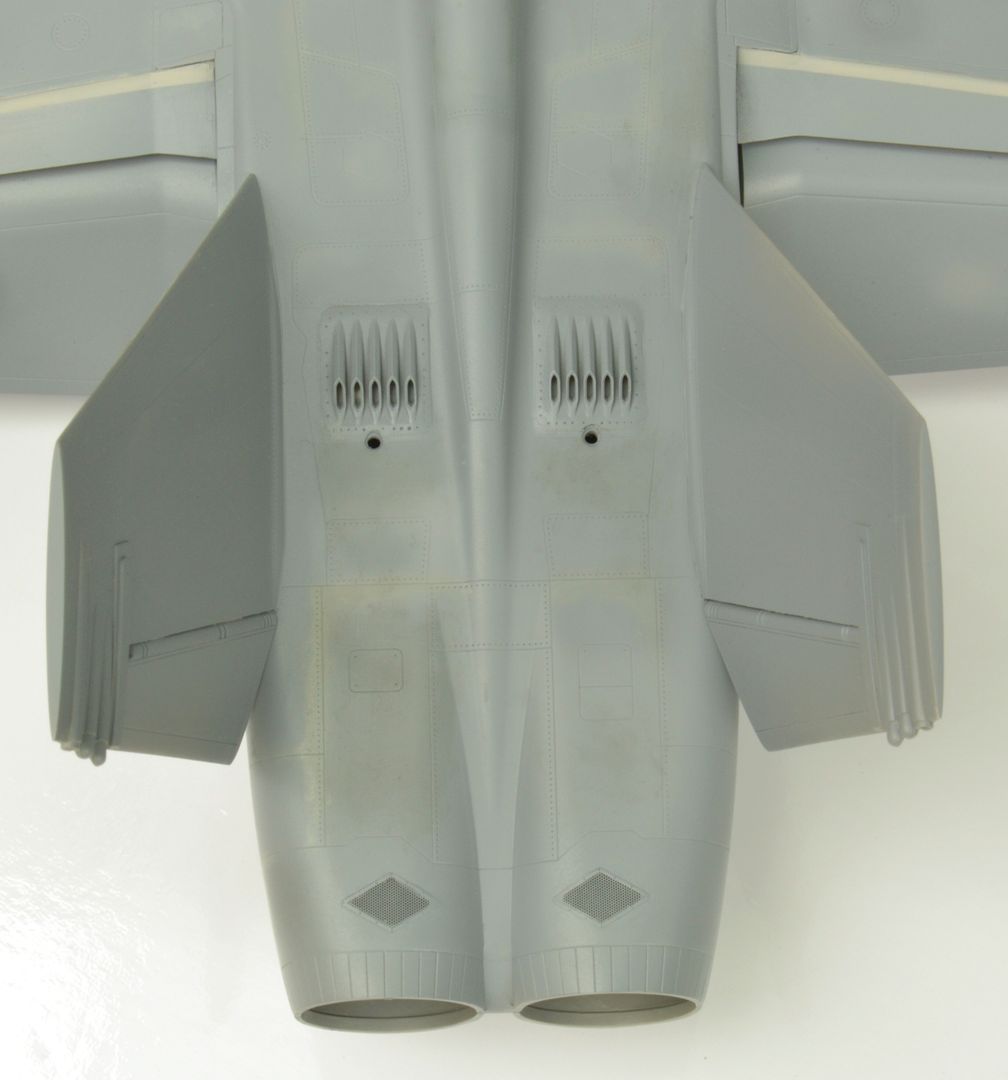
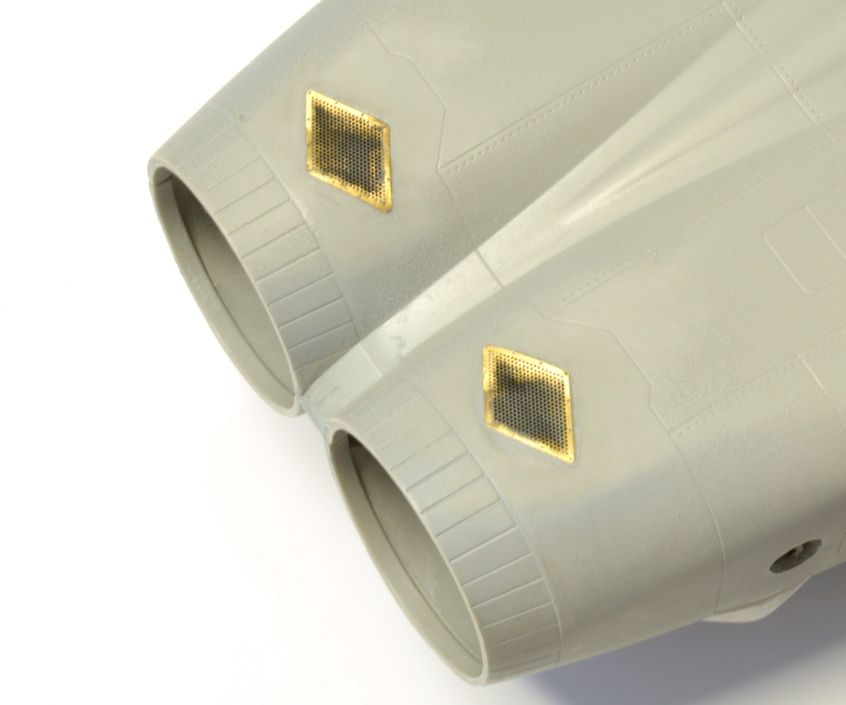
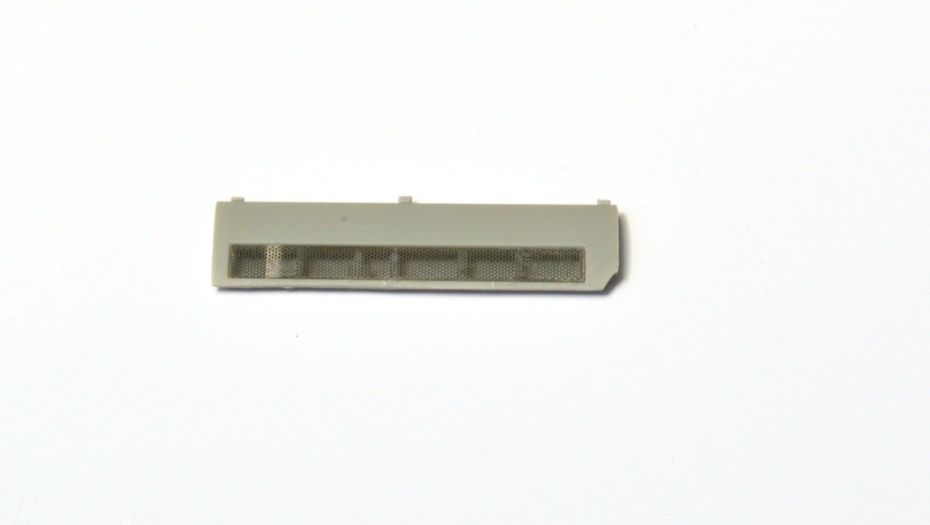
I have started to add the Eduard mesh over the previously cut holes in the fuselarge. For the most part, things went well and the mesh will add sigbnificant realism.
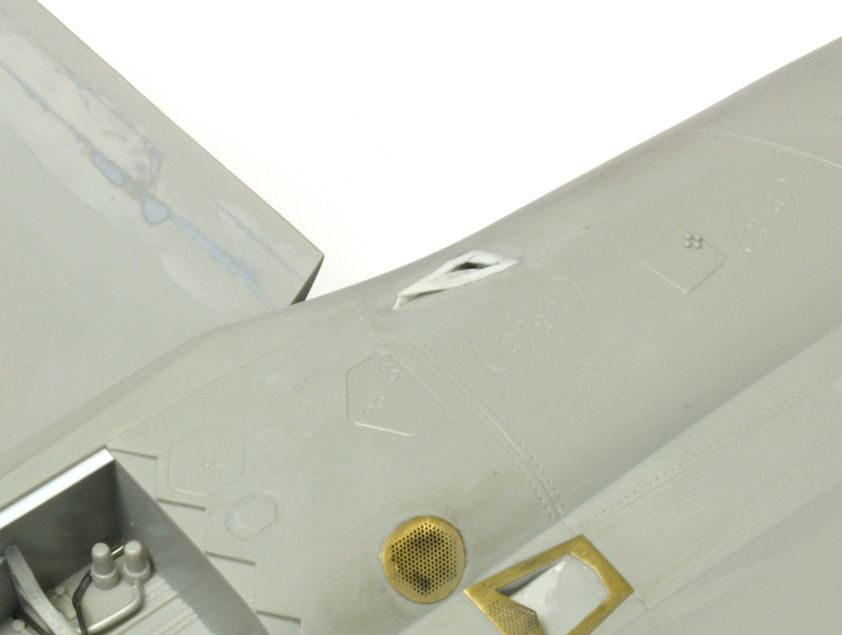
Probably the most important mesh use is here at the back of the fuselarge, since it will be very visible once the model is complete. It's important to sand the mesh relatively smooth with the fuselarge once glued on, ideally without getting the mesh clogged up with sanding debris i.e. best done dry. Incidentally and fortunately, most of the these mesh panels seem to be applied ONTO the fuselarge on the real deal.
Various underside mesh panels... unfortunately, one of them got clogged up with CA and there is nothing I can do about it. Also note that the Trumpeter kit has some odd protrusion between the wheel wells--that was cut off and filled with plastic scrap and superglue.
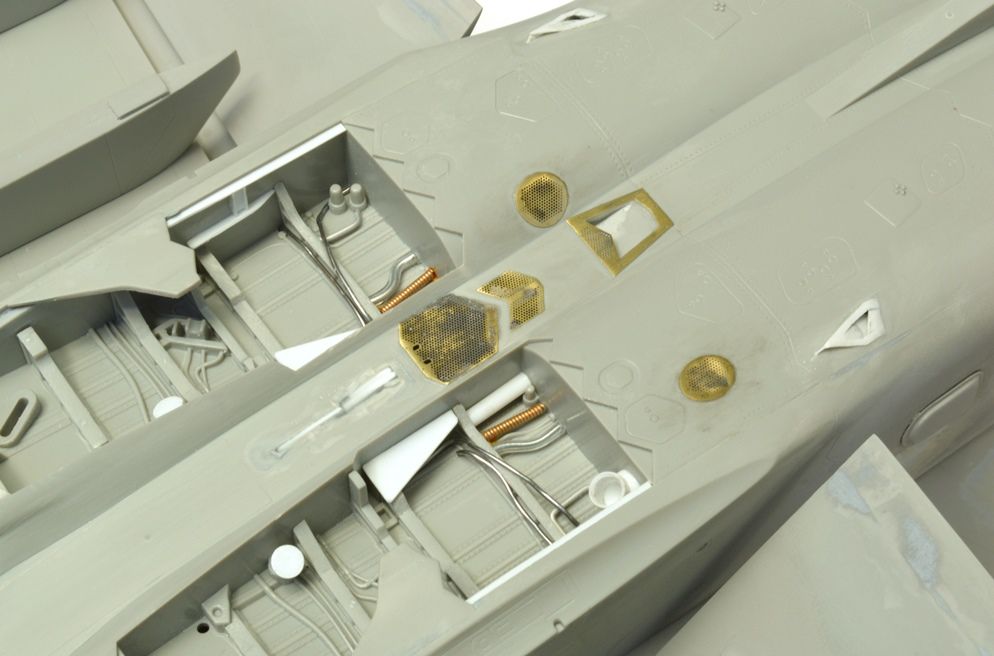
I scratch-built those little intakes on the fuselarge bottoms:
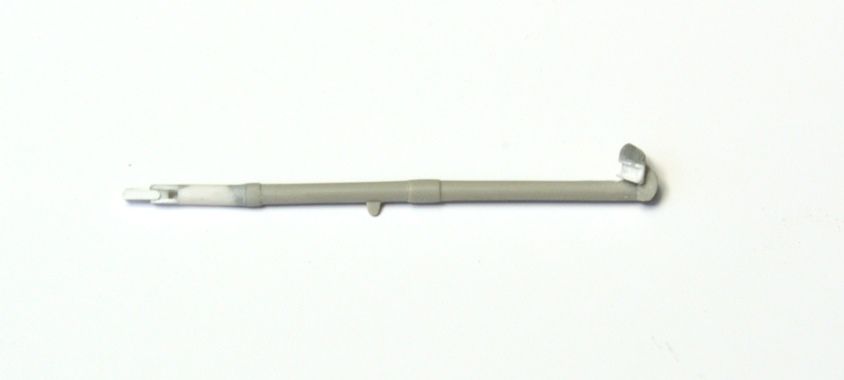
The Trumpeter arresting hook is complete garbage, to the point where it looks unfeasable to anyone with a mild technical inclination. Trumpeter introduced a fairly abrupt bend in the bar towards the front. So I have started rebuilding the hook, including the actual hook itself.
Now with linkages instead of bend:
:cheers:/>/>/>
Marcel
-
Haha...one other modeler just received a set. He saw your build and NEEDED a set for his.
Harold, glad you could come to the rescue.
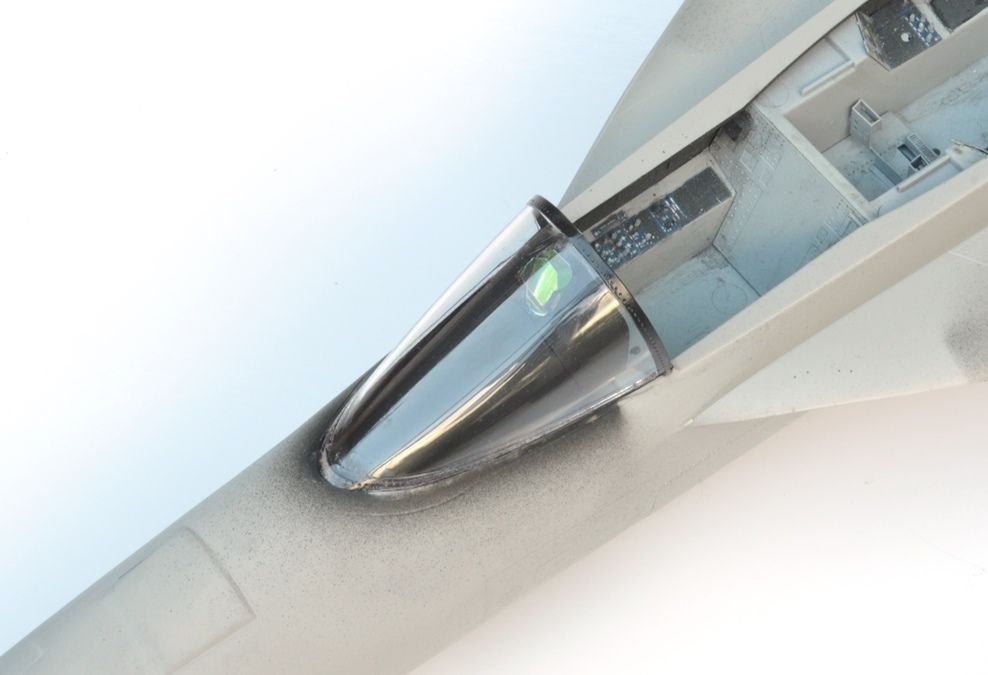
Thought I'd show this: The windscreen is slightly too narrow in order to sit correctly, a problem easily solved with a correctly cut match:
And here is how it looks now:
Marcel
-
Thx for all the encouragement, guys!
So when do these pods and such become available?-Anthony
Anthony, that is really up to Harold, I think he is pretty busy but I am sure he'll get around to it at some stage... I am fine with him taking some time, else somebody might beat me to the finish line wiht a 1/32 Growler using These parts <_<
Marcel
-
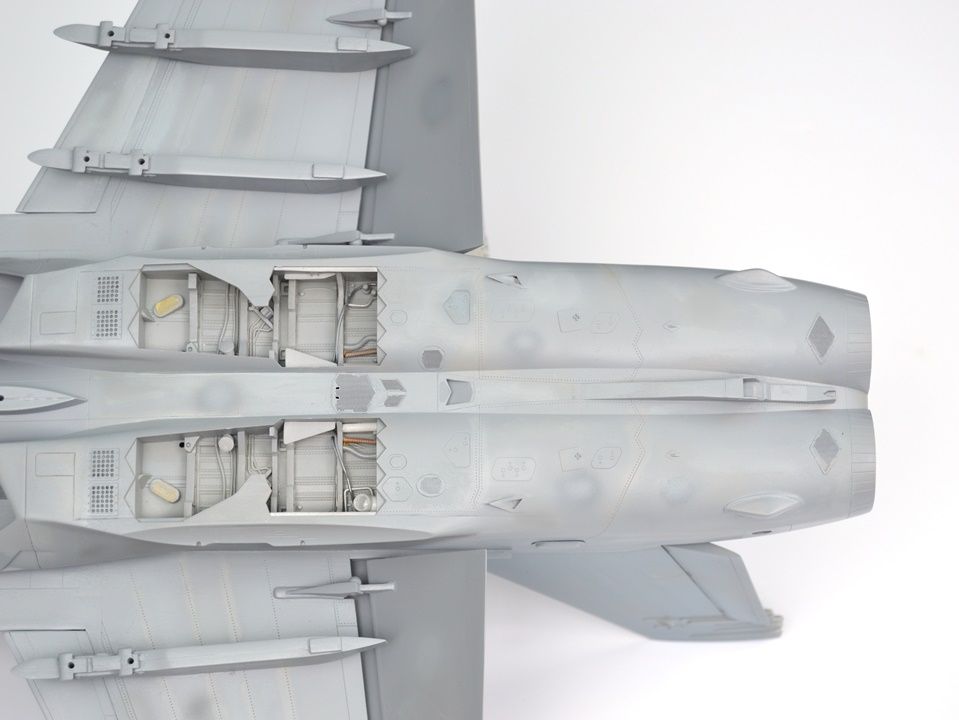
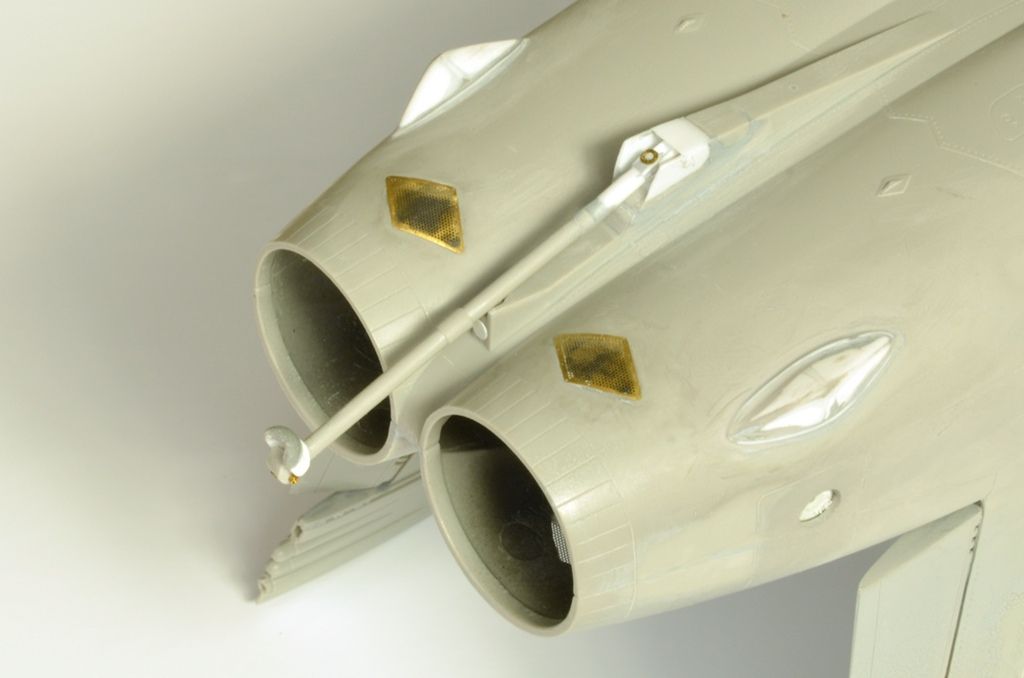
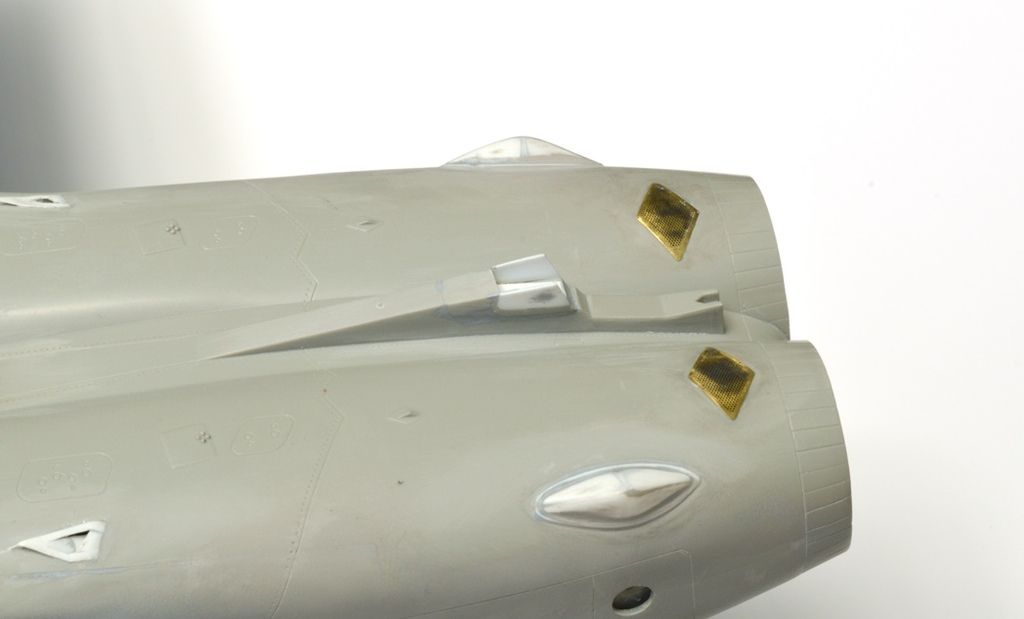
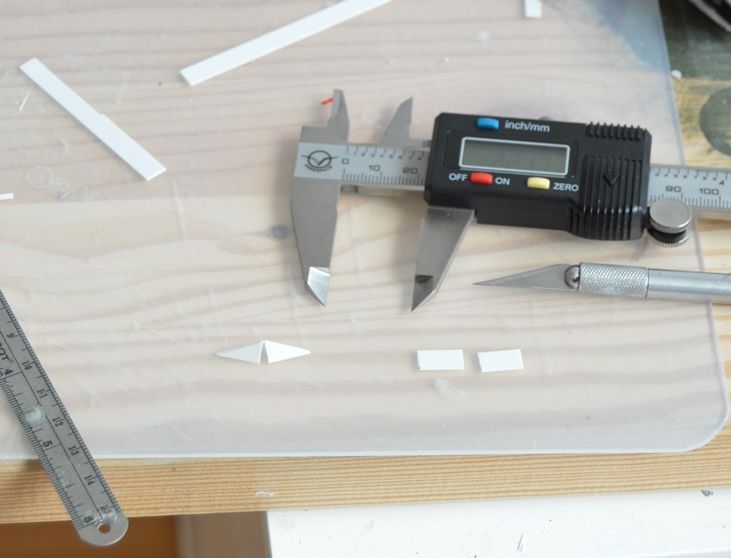
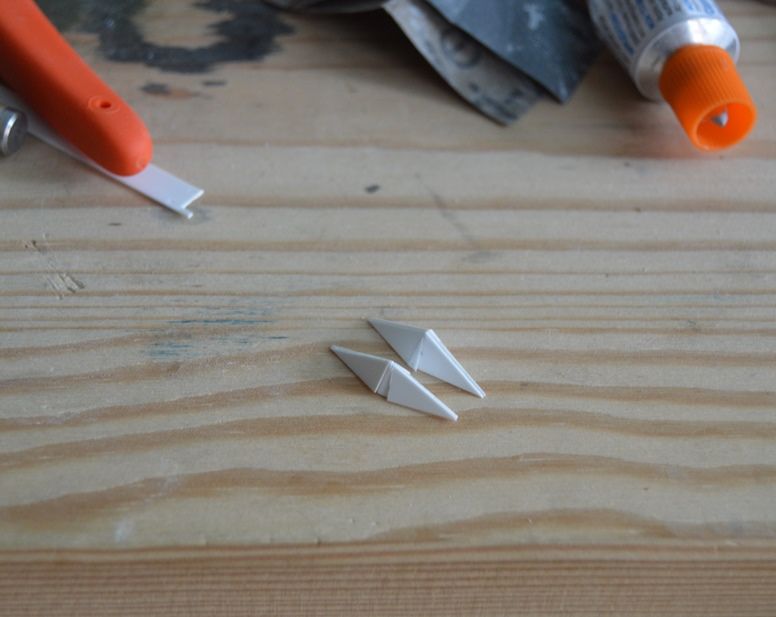
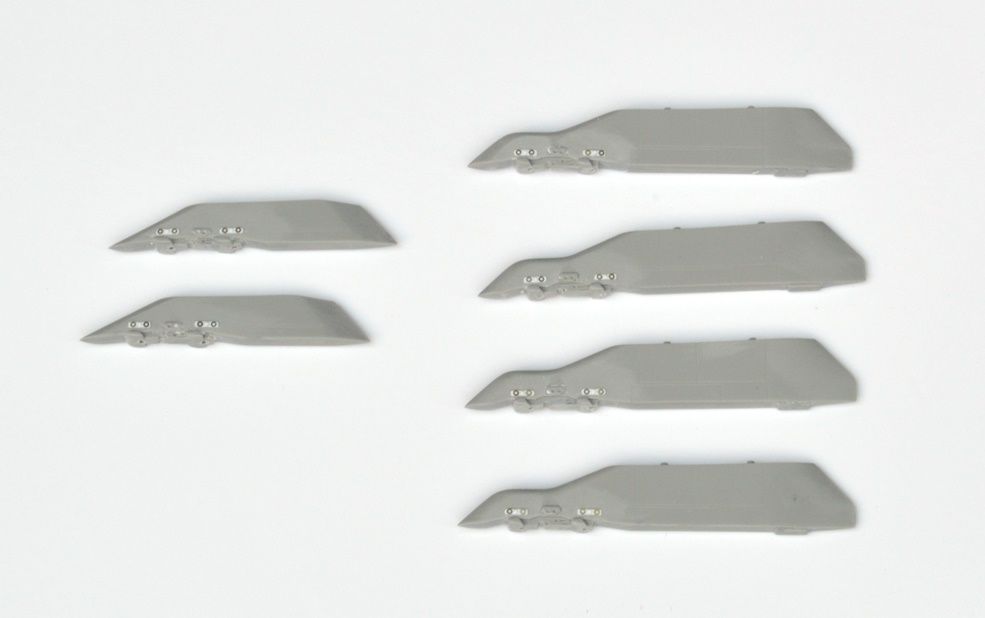
The reshaped wingtip pods are on:

Also note the "dogtooth" leading edge on this pic:
HUD lens is in:
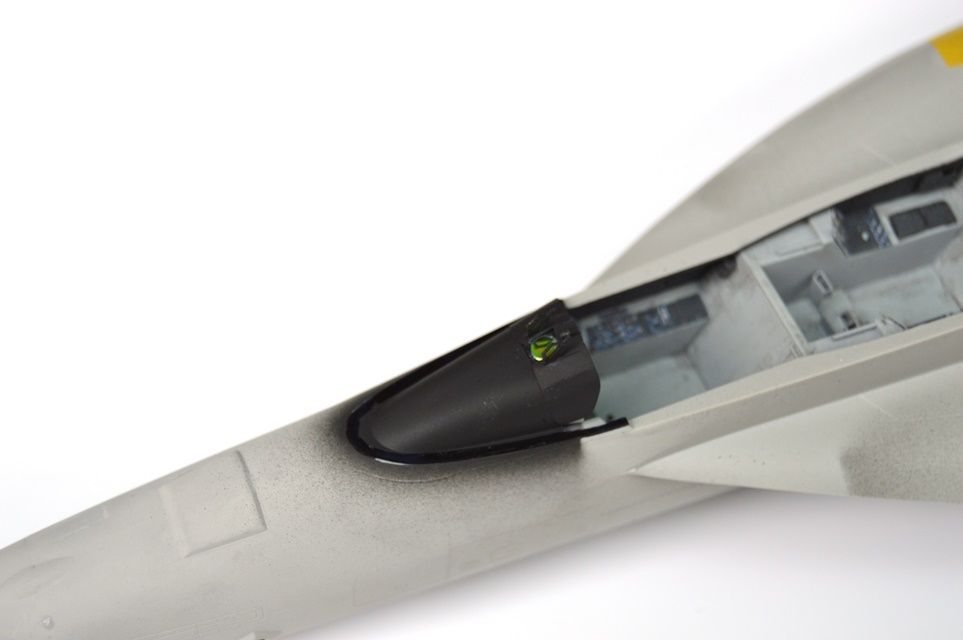
Thx for looking,
Marcel
-
That will be one heavy model!!!
Yep, that's a Major concern, hope those funny bent legs can handle.
Marcel
-
With its high wing load
The F-15 has a very low wing load i.e. aircraft mass / wing surface area is very low. ... because the wing is huge.
Marcel
-
I hope those will be a highlight on the finished airframe.
Harold, they definitely will be
Marcel
-
Wow, huge effort on this kit so far, great to see!
Marcel
-
Thx Rambler, thx Karl!
nice job on the pylons. i chickened out and ordered the resin pylons...Ha, that is the only sensible thing to do, I wasn't aware of any aftermarket pylons, I would have definitely used those had I known.
Speaking of awareness of aftermarket goodies, I have recently come across this, which would have saved me a bunch of work had I known about it a little earlier:
http://www.steel-beach.com/132-resin.html
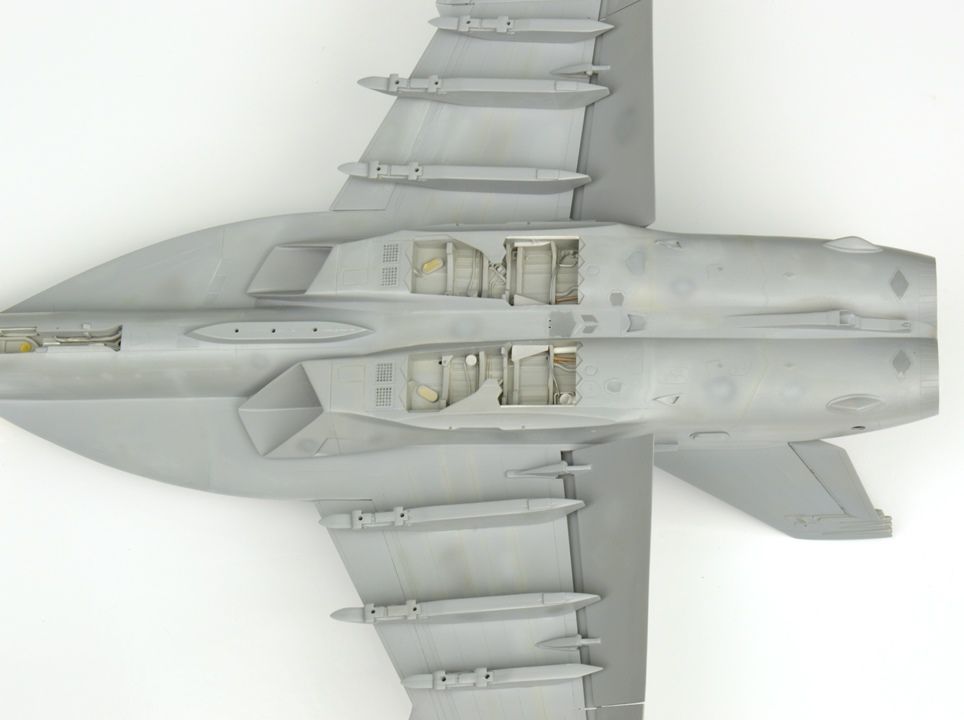
As it is, I have been whiling away doing these things from scratch. Construction of the lower rear fuselarge mounted Blisters:
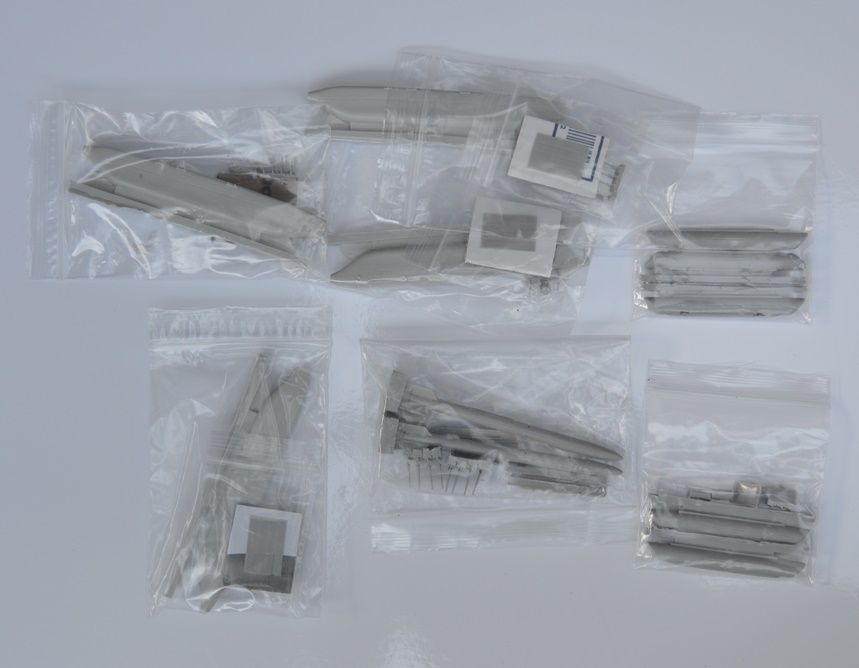
On the Major-plus side, I received a huge bag of goodies from Harold: Harms, wingtip pods and ALQ-99's... :banana:/>
:cheers:/>
Marcel
-
Wow, it's been over a month since my last update. A few things have happened since. For starters, I joined the mile high club... which is to say I modelled while sitting in an airplane crossing the Atlantic. Been travelling quite a bit, so I thought I'd pack the pylons and a bunch of sandpaper and get that tedious work done while away from home. Worked too, more on that below:
The Trumpeter pylons feature two bumps on one side of each pylon, these don't exist on the real thing and have to consequently be sanded off... a really boring job and I am proud to say I got it all done while on the road.
After the bumps are removed, detail needs to be added on both sides of the pylons. A lot of repetitive work...
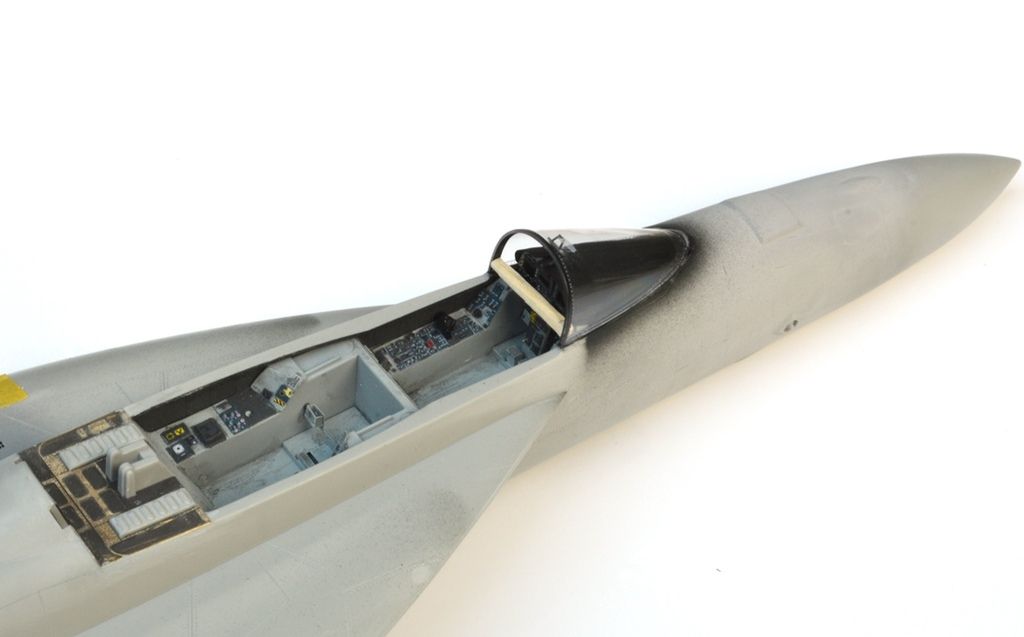
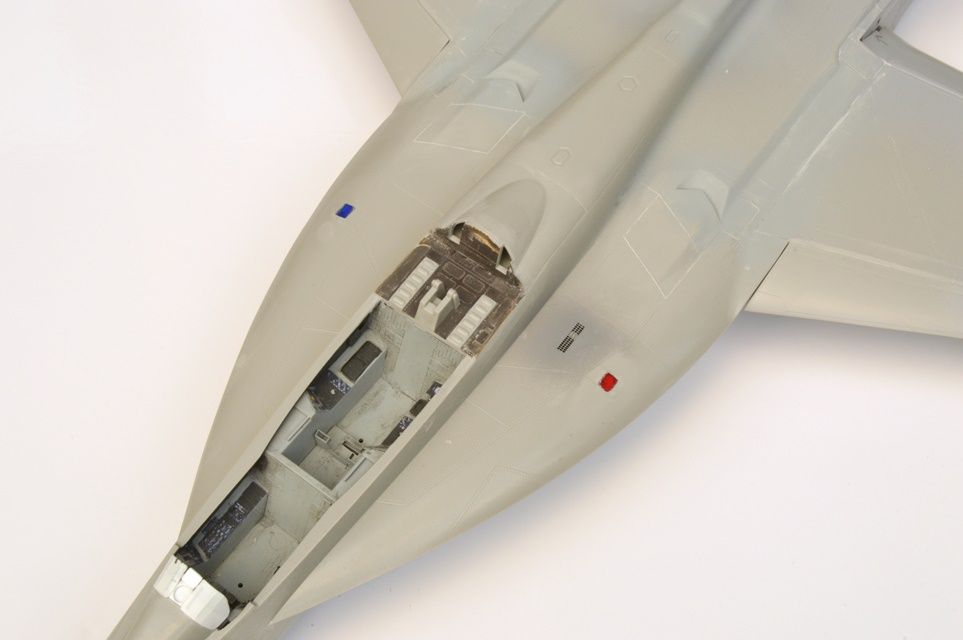
I cut off the instrument coaming and rebuilt it:
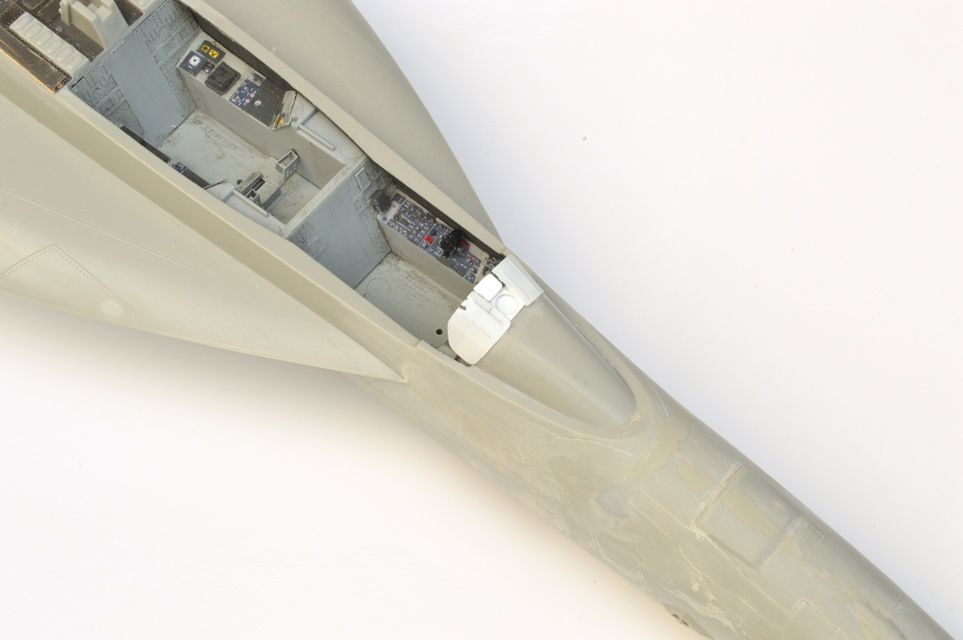
The raised ribs in the coaming were done by pushing a blunt scribing tool from the opposite side.
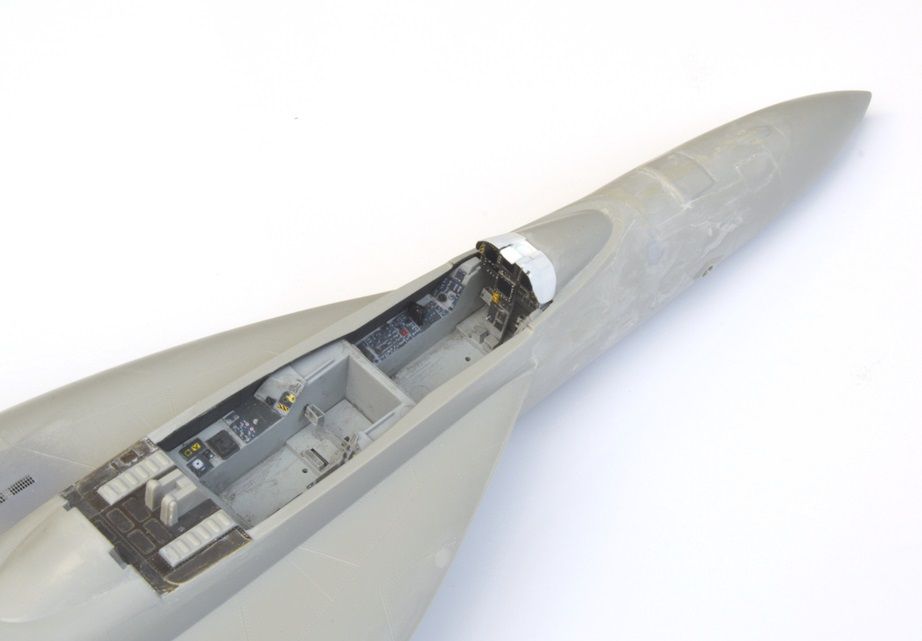
The area behind the rear seat is built up with the Eduard set.
:cheers:/>/>
Marcel


1/32 Su-27 Ukraine "56" (Blue Splinter)
in The Display Case
Posted
Thx guys, always very encouraging to see more comments. This build remains my favorite completed model, it has been in the topmshelf of my display cabinet since I finished it.
Cheers,
Marcel