


Barneydhc82
-
Content Count
1,721 -
Joined
-
Last visited
Content Type
Profiles
Forums
Calendar
Posts posted by Barneydhc82
-
-
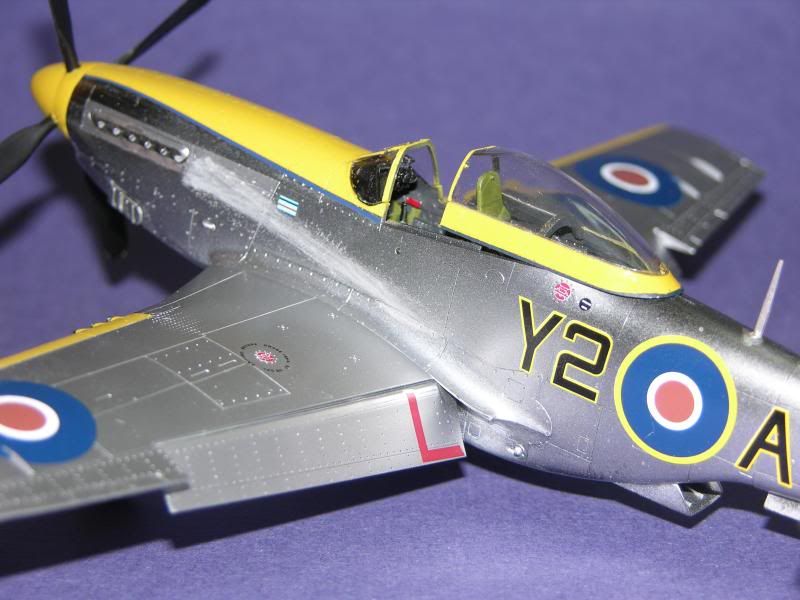
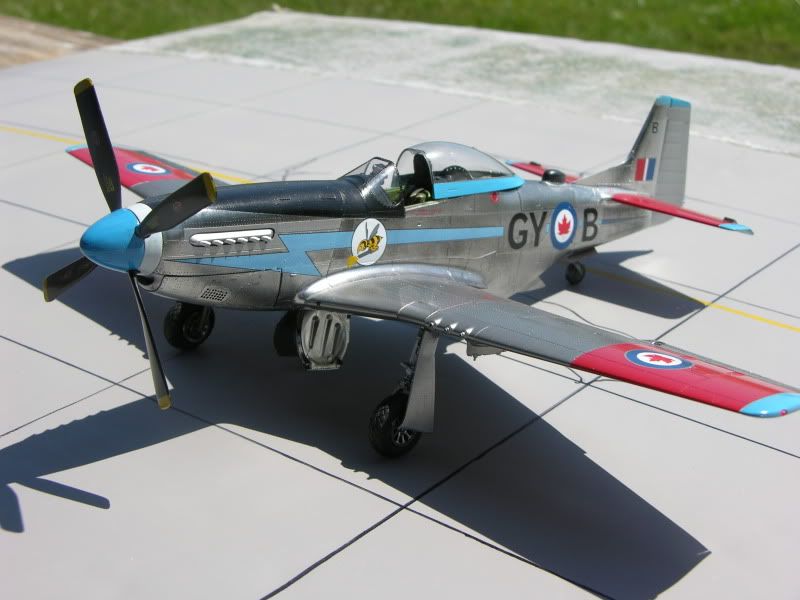
And here is the 1:48 scale Tamiya P-51D using the same technique: Tamiya TS-14..Alclad II Airframe Aluminum..Duraluminum on the rudder and elevator. No gloss coating of any kind and no decal solvent of any kind. HTHs
Barney
-
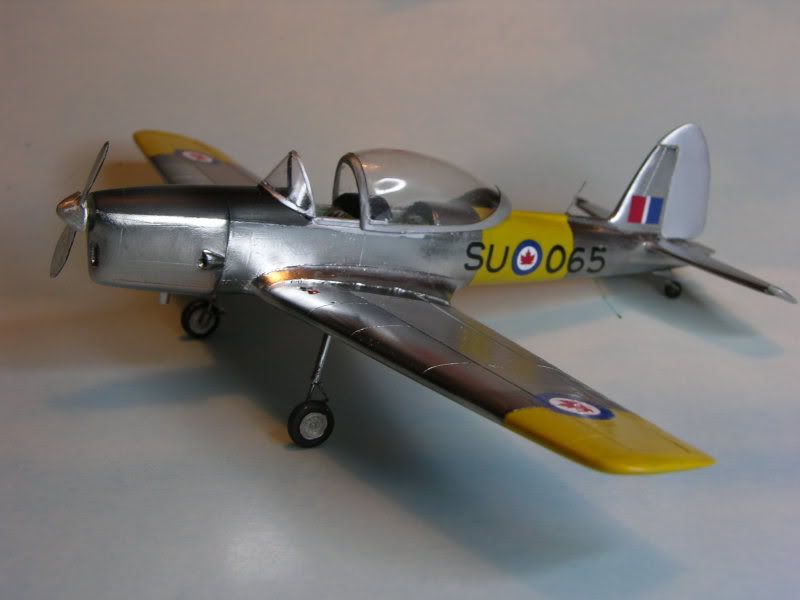
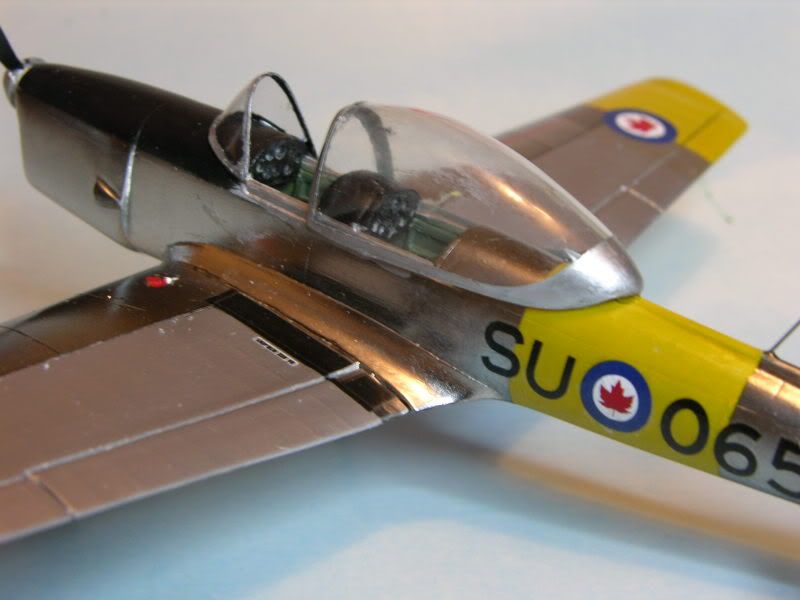
ALF: There is no need to apply floor finish over the TS-14 as it is very shiny when dry. Here is a pic of my 1:48 Chipmunk with Airframe Aluminum on the metal areas and Duraluminum on the fabric covered portions of the wing and control surfaces...no clear gloss coat of any kind.
Barney
-
ALF: I always impressed on my student pilots, "Learn from the mistakes of others 'cause you wont live long enough to make them all yourself"..and I've made plenty believe me. Decant the TS-14 into your airbrush cup and let it sit for 5 minutes or so until the gas quits bubbling off then spray away. But first scrub that sucker with liquid dish soap, I use Sunlight, and a toothbrush. rinse with warm water and let it air dry for a day or so before applying the TS-14.
The Tamiya paint goes on very well at about 12-15 psi with my Iwata about 4-6 inches away from the model. I'll re-spray my -104 tomorrow and post a pic of the results if you don't mind.
Best of luck
Barney
-
Beautiful Sword!
Barney
-
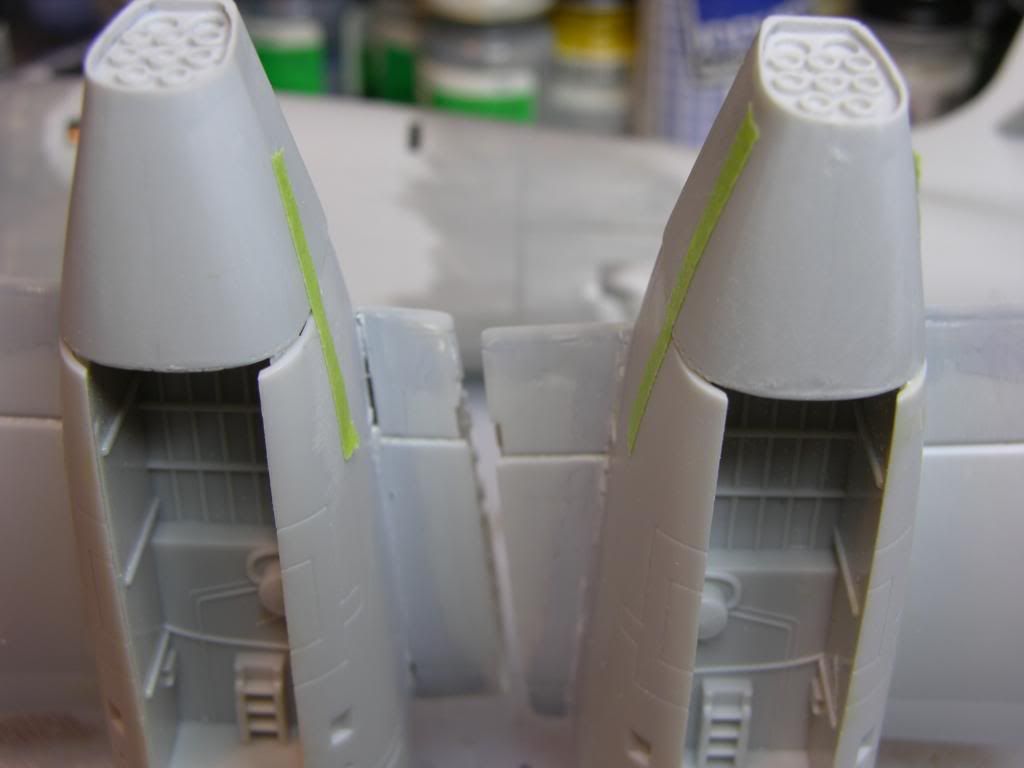
After what you have been through, I can only say sorry. Having a paint job go sour like that is very frustrating as I have had problems with the big -104 finish as well...but not with the base coat. First it was the Airframe Aluminum looking like a very bad case of the pox..because of the wopn out Paasche VL airbrush..then the custom decals went and turned black after using a decal solvent on them.
The nose section has been scrapped down to bare plastic and sanded and will now receive a 3rd respraying of black and Alclad. I only use Tamiya TS-14 Gloss Black decanted from the rattle can into the Iwata airbrush. The Tamiya Black gives the best finish and it is a lacquer base which is compatible with the Alclad.
Good luck my friend
Barney
-
Gotta love the Dak..it was born the same year as myself and we're both still flying high. Very nice model Yves.
Barney
-
I've had very good results using Tamiya TS14 Gloss Black as a primer for Alclad II Airframe Aluminum. I decant a cupgul into the Iwata CS, wait 5 minutes to gas-off and spray away. The only time there was a mess was when I tried spraying the Alclad with the old Pasche VL at too high a pressure
Good luck with stripping with Easy-Off, It ate an old (same generation) model of the P-=26 in 1:32 scale.
Barney
-
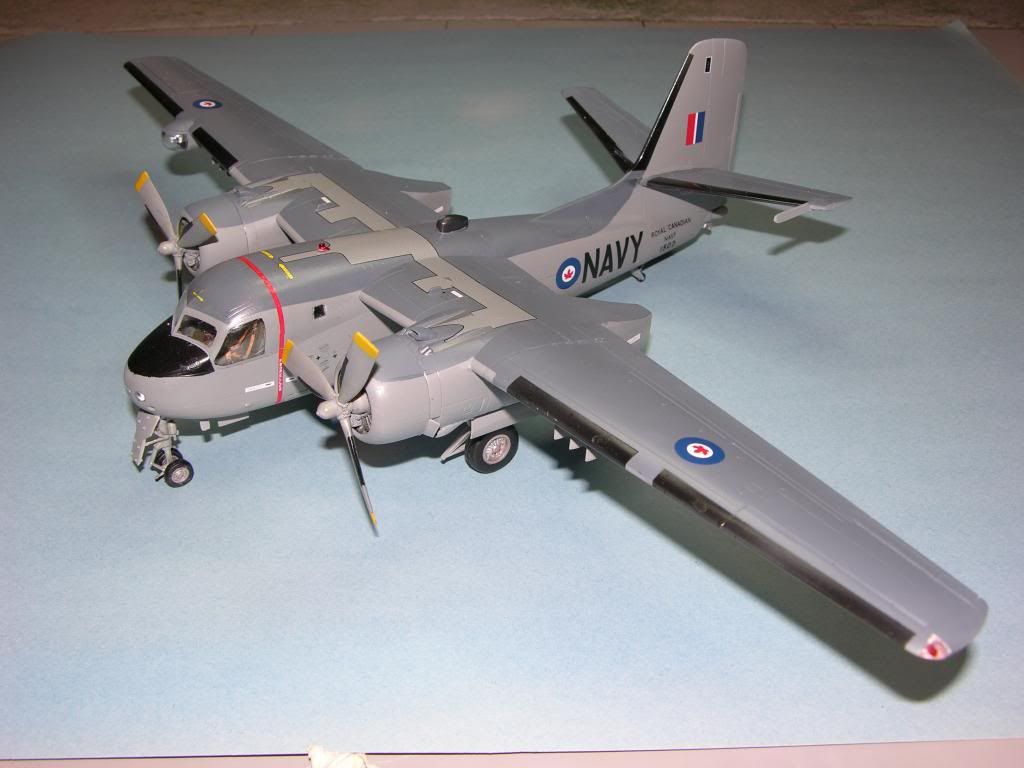
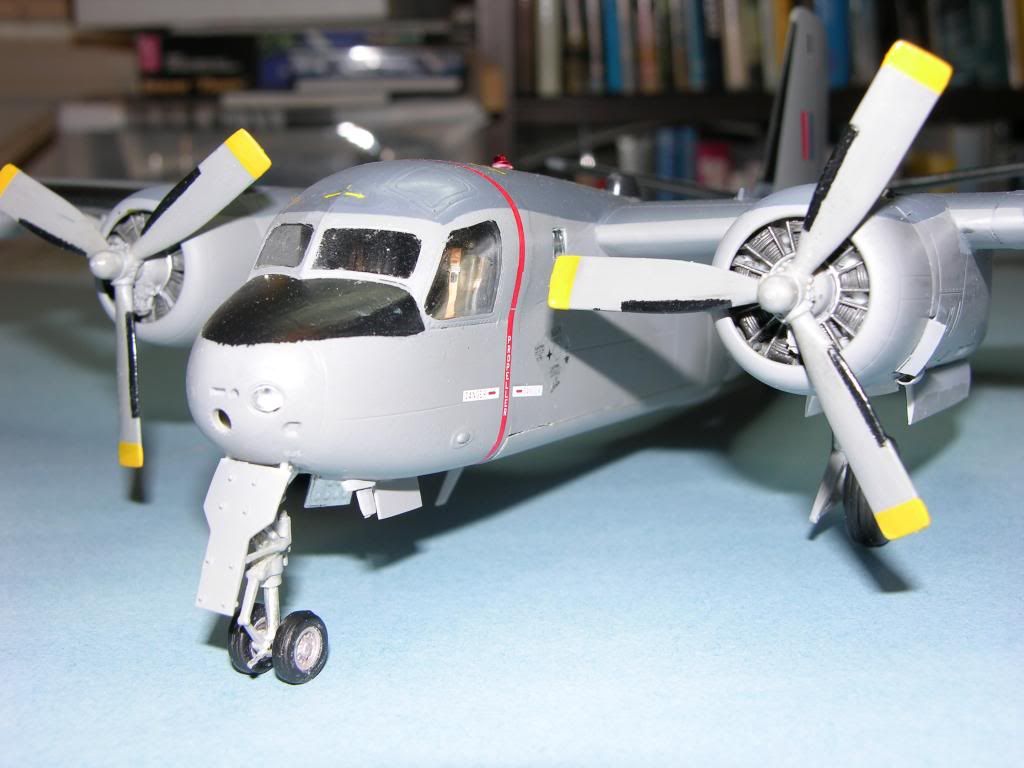
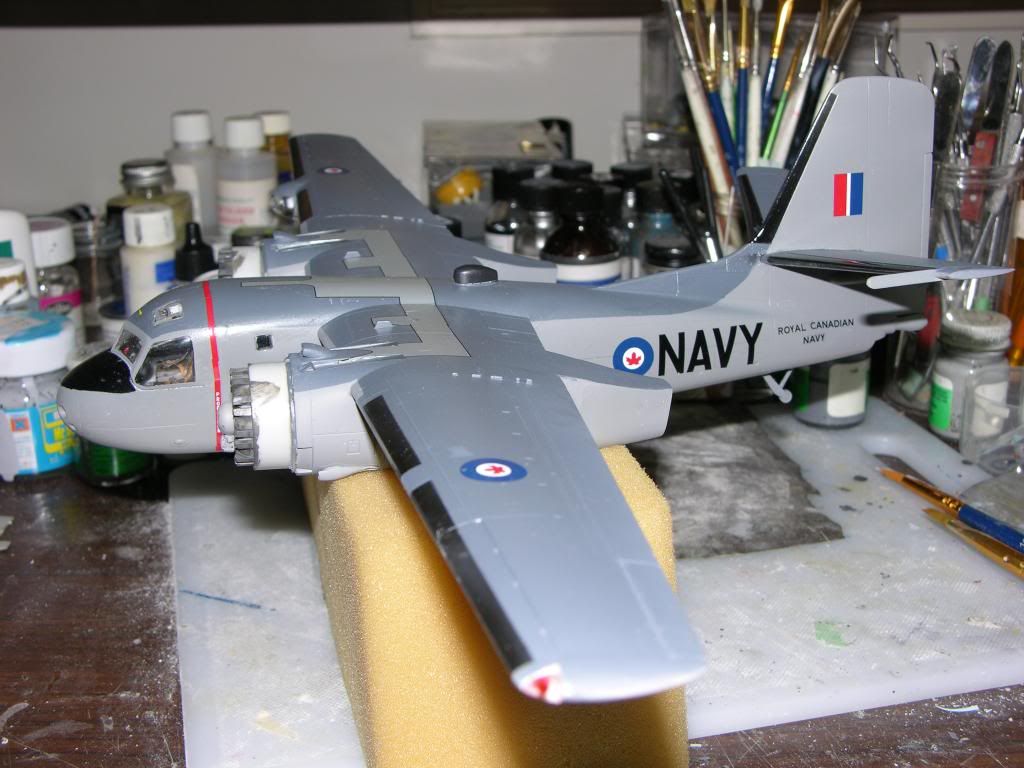
Thanks for the kind comments guys. DHC built 100 Trackers under licence from Grumman with the first Tracker, 1502, being delivered in Oct, 1956..and I was working in the Tower at Downsview during the time.
I had a great view of all of DHC's work on a daily basis
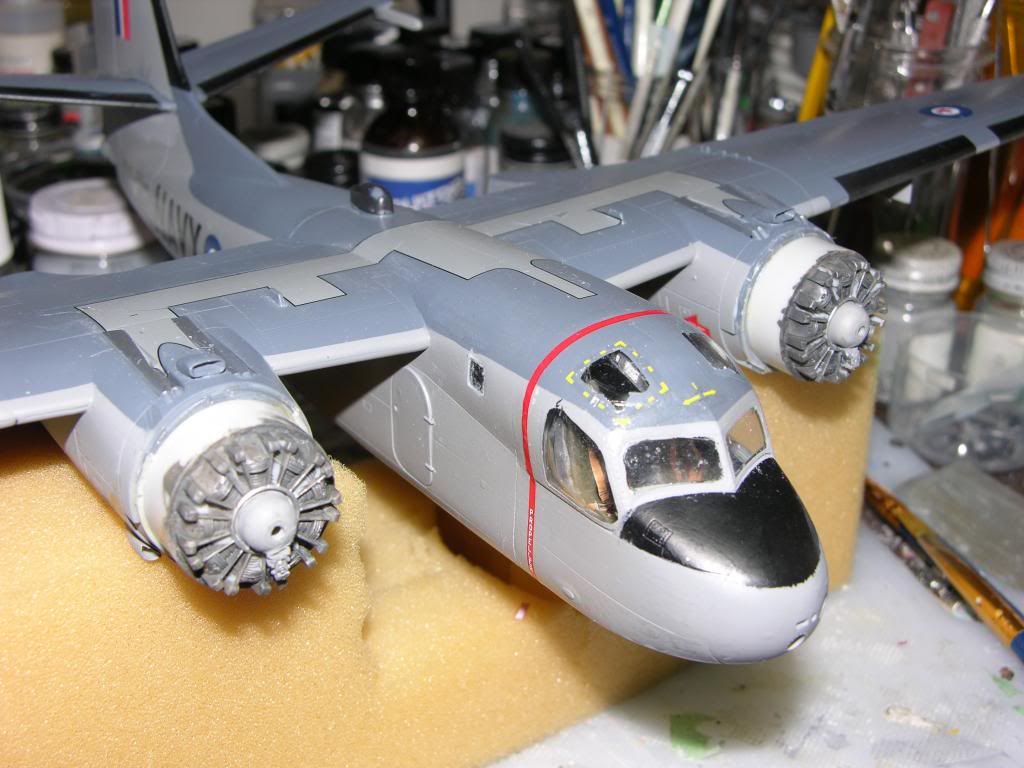
Faust: This is the 1:48 scale Kinetic kit with major modifications to the fuselage, rear sonobouy fairings and wingtips. The first 12 aircraft did not have glass in the cockpit overhead escape hatches
Barney
-
The Tracker, s/n 1502,the very first Tracker built by DeHavilland Canada at Downsview, ON, is now finished although missing a few details. My hands are in terrible shape and I've been unable to handle many of the tiny pieces such as the masts and antennae wires on the top of the fuselage and the saftey straps on the sonobouy tubes.
Barney
-
That work area looks far too clean to me!
Barney
-
Erik, as I said previously the first 12 aircraft did not have the glass overhead so I guess that I'll get out the paint and brush on a couple of coats of Extra Dark Sea Grey

Barney
-
Erik: I really do not know . The -1 Trackers did not have glass in the over-head hatches..at least the first 12. And this beast is really tail heavy so adjust the rear bumber wheel accordingly. I packed the nose and the engine cases with lead but to no avail but the rear wheel saved the day. For this I cut off the kit strut, drilled out the strut location, set the model on its gear and adjusted the new strut to suit.
Mine is no where on a level with your masterpiece
Barney
-
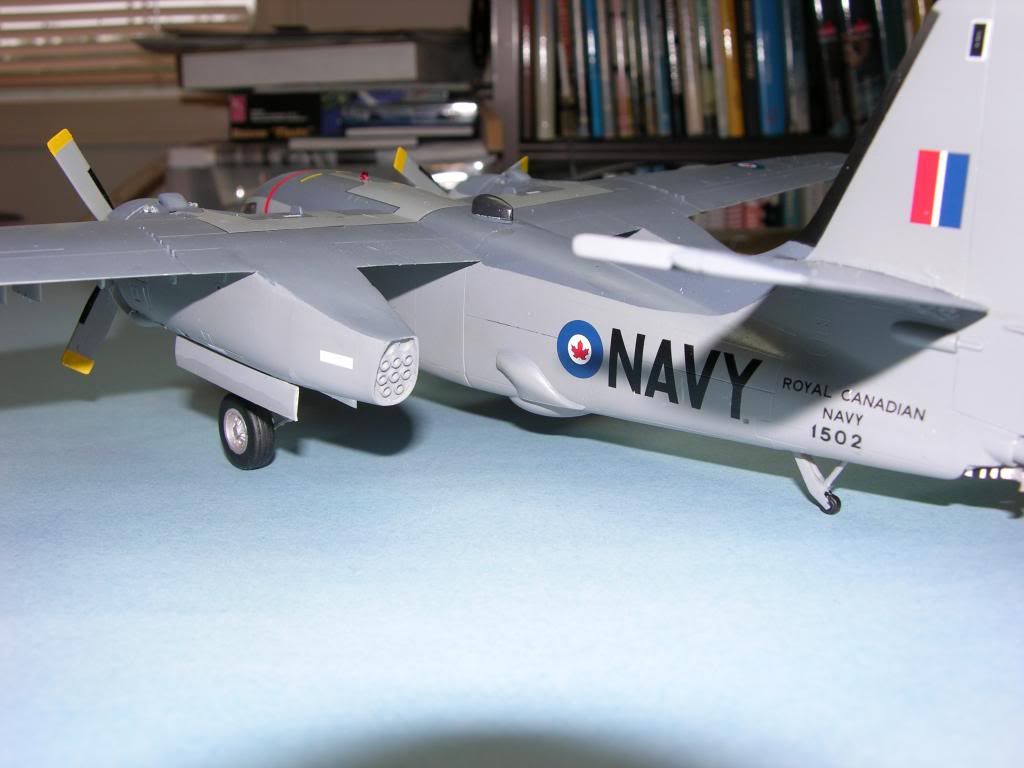
Thanks Brad, it's not my best but what the.....I'll have it on the gear this morning then the tiny details will be taken care of. The serial, 1502, is going to be a problem because the very small individual numerals have to be applied by a one eyed old geezer.
Cheers
Barney
-
A couple of photos during the decalling process. The Belcher Bits decals for the RCN CS2F-1 are very thin and flow off of the backing sheet very quickly but as I mentioned before the emergency rescue decals around the side windows and overhead escape hatches are a problem. Because these decals are very thin and there is minimum carrier film, they tend to roll up into an unusable lump. After destroying the port side window markings, I coated the other window/hatch decals with Microscale Decal film which helped somewhat but still not satisfactory.
The "propeller warning stripes" broke into many small pieces and I was able to salvage most of them using a flat sable brush. As this represents 1502, the first DeHavilland built Tracker I should have painted over the escape hatch windows as the first few Trackers did not have glass in the hatches. Learning something new every day..but usually after I've completed some phase or another!
Barney...still more decals and wee pieces to go.
-
Good morning guys. The Tracker now has some colour to it with the application of decals. I used the kit over-wing walk-way decal and it was terrible. It is a large decal so I cut it into three pieces. It was too large for the area to be covered and required a bit of trimming, then on application, it stuck as soon as it hit the model even though I used Micro Set and flooded the surface with water. It eventually laid down but I could not fine tune the positioning.
On the other hand Belcher's decals went on without a problem but as they are very delicate, we'll have to see what happens when the yellow rescue stripes are applied.
One thing that came to my attention, there is no landing light provided for the port wing! Oh well!
More later
Barney
-
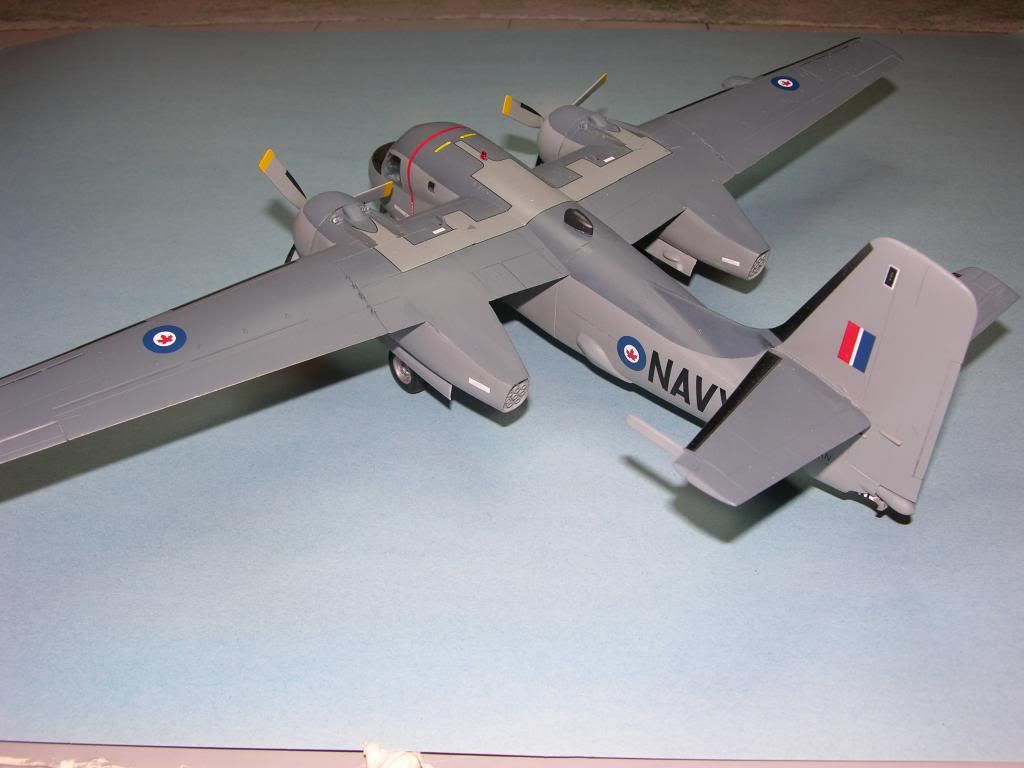
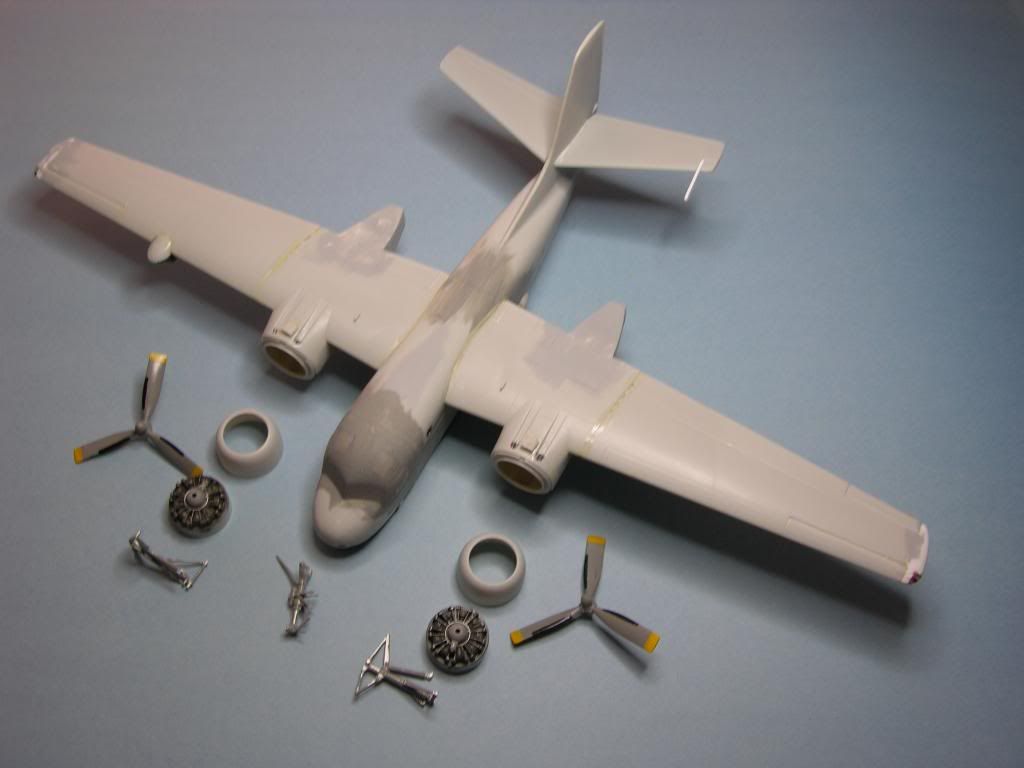
The painting is now finished..except for a couple of small repairs. The Extra Dark Sea Grey upper and Sea Grey Medium are Polly Scale, the Deicing boots Model Master enamel and the exhaust shields Alclad II Dark Aluminum. Wheel Wells painted with MM White.
Belcher's decals will be started later..Mike, I hope that you are watching

Barney
-
The missing piece was , I think, the anti-servo tab on the stabilator which applies a load on the tail to prevent over controlling in pitch.
Barney
-
I am looking at Patrick Martin's book and the aft section of the flying tail(not elevators) was bare metal
Barney
-
The mention of "elevators" on the Mk5 are a bit misleading as the horizontal tail on the aircraft was all-flying..a stabilator so to speak.
Barney
-
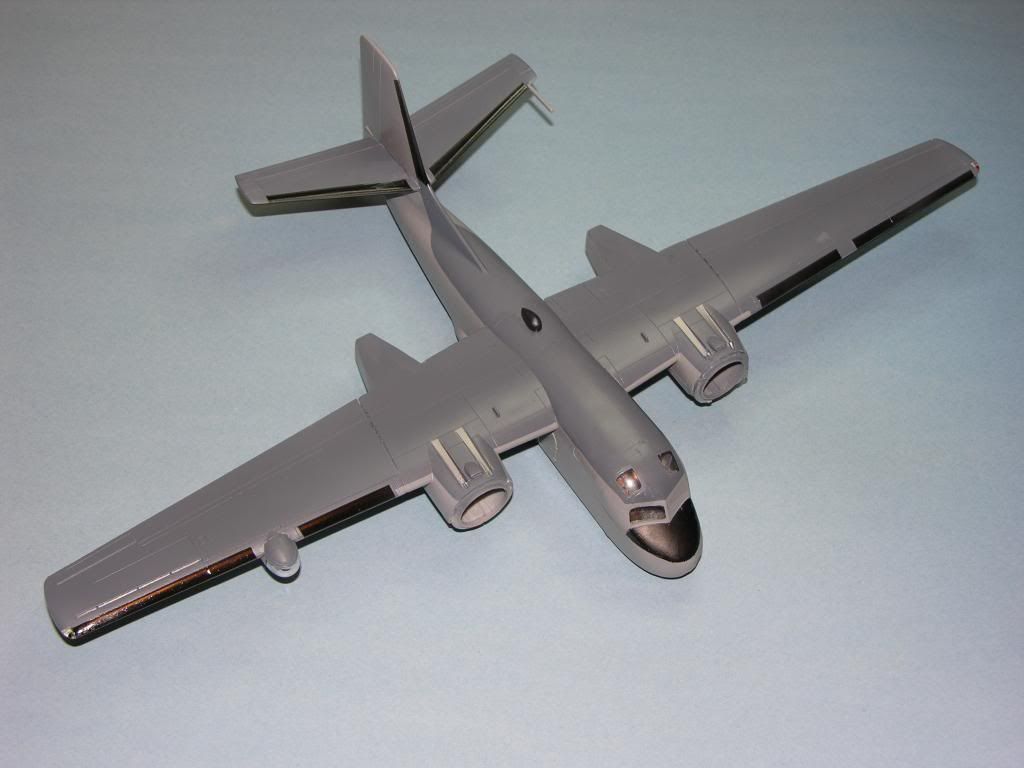
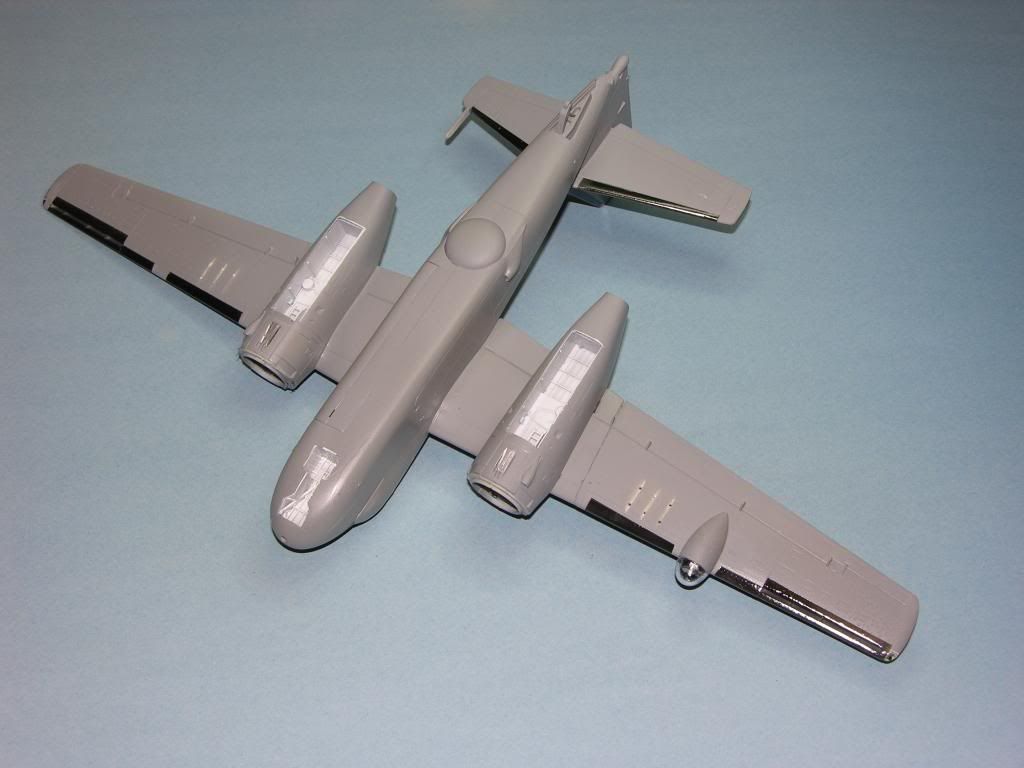
The major assembly is now complete and it is time for painting..when it warms up a bit as I have to spray out in the garage!

The cowlings will be painted seperately then added along with the slightly modified kit engines, props and landing gear etc. As for the props ..yes the tips on the early NAVY Trackers were Yellow. The Red, White, Red tips came into vogue with unification.
1502 was not only the first DeHavilland built Tracker but also the first aircraft to land on HMCS Bonaventure in 1957.
-
Jackman: The "Z" cut is used for a couple of reasons but mainly because of the taper of the rear fuselage but also to clear the radome.
Barney
-
The resin kit and decals from Belcher Bits arrived this morning and they are beautiful! There was only a tiny bit of flashing on the necelles and a few swipes of the scriber got rid of the casting blocks on the stabilizers, followed by a few seconds of sanding.

The nacelles were taped to the forward sections only to find that there was a noticable lack of alignment on the bottom sides. Once the resin part was correctly aligned with the bottom, the change required was easily identified..a .020" error in the original chop job. If you are going to do an early version Tracker, wait until you have the corrected sonobouy nacelles on hand before cutting plastic. The repair will only take a few minutes to fix.
This model will be of NAVY 1502, the first DeHavilland Canada built CS2F Tracker which flew during my posting at Downsview.
Barney
-
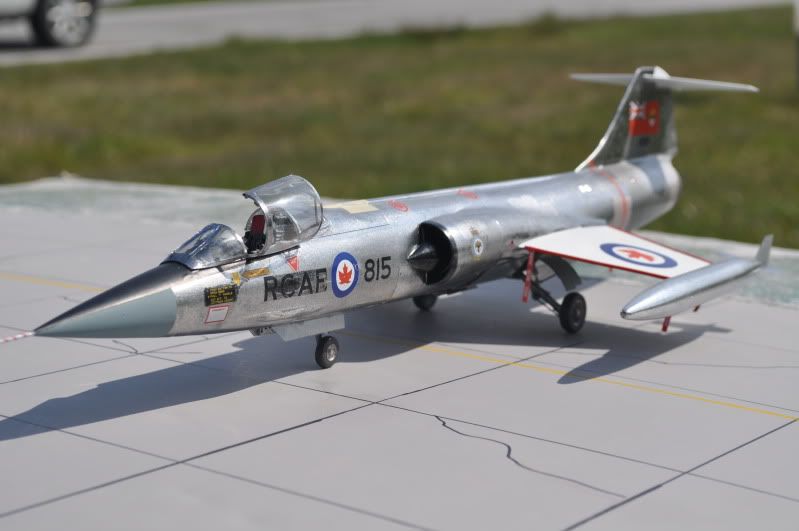
ALF: When I did my big Starfighter in the original Air Div scheme, I went out to the museum at Langley to have a look at"654, a dual that I flew out of 3 Wing..and the seat was a Dirty Black.Might want to check on this.
Barney
Here is the same kit in Alclad II and CanNilAir decals but be warned DO NOT use a decal solution with Alclad as you see on the model, the RCAF has already started turning black. It wll have to be resprayed and new decals applied
-
the past year was not a good one for model production what with arthritic hands and diminishing eyesight...but we carry on!
1:32 scale Tamiya P-51-D in the markings of 443 Sqn RCAF..City of New Westminster
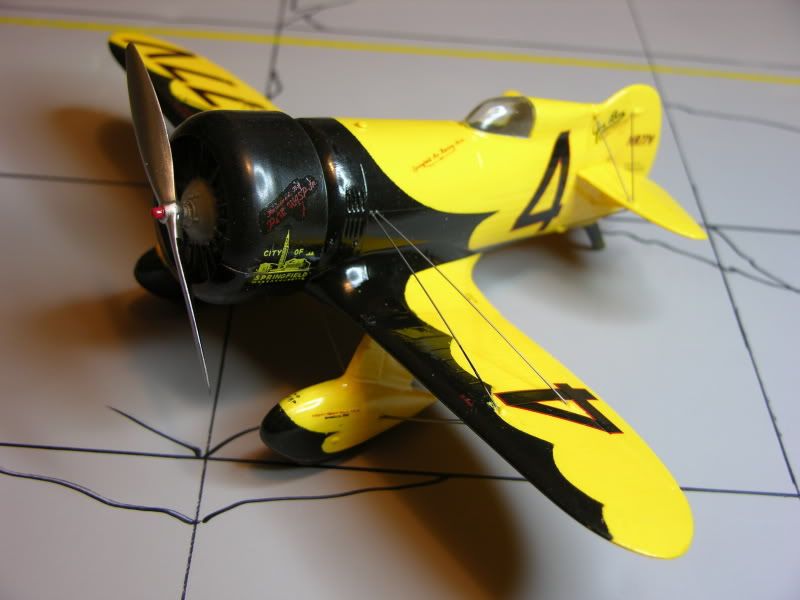
1:32 Scale Williams Bros Gee Bee Z
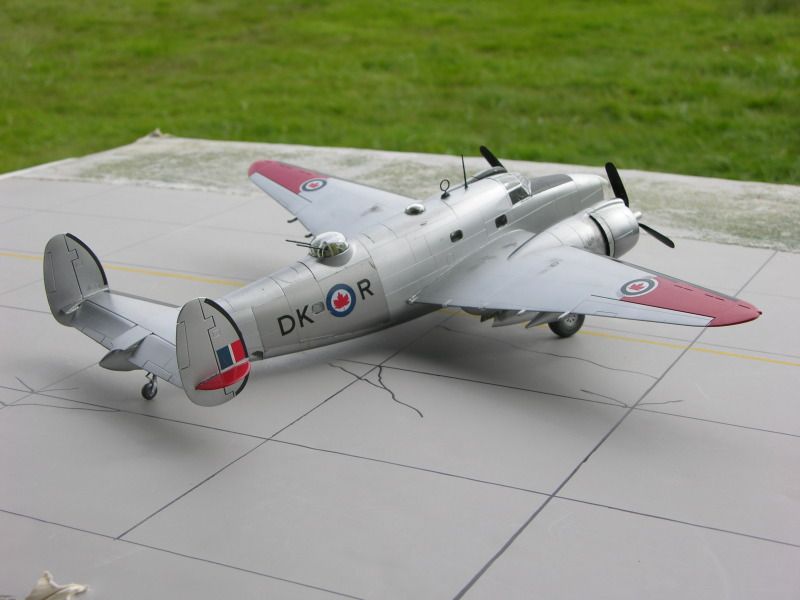
1:48 scale Revell PV-1 Ventura No.1 Air Armament School RCAF Stn Trenton 1948
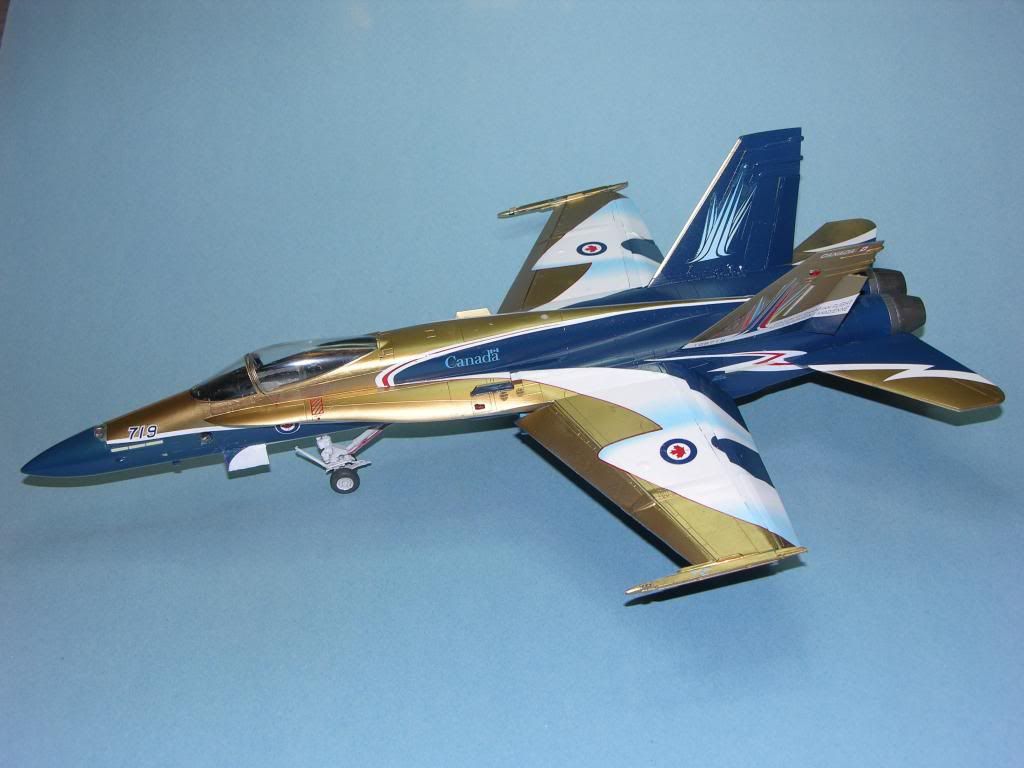
And my most colourful bird of all; the 1:48 scale Hasegawa CF-188 Hornet in the 2009 Century of Flight markings
Barney
1/32 Hasegawa CF-104
in Yes, size DOES matter (Ended)
Posted
ALF18 and Gang: Here is what my Big Starfighter went through this morning; First pic, left side with decal blackened by softening solution,
Pis #2: Scrapped and sanded
Masked and wiped down