


hooknladderno1
-
Content Count
245 -
Joined
-
Last visited
Content Type
Profiles
Forums
Calendar
Posts posted by hooknladderno1
-
-
Well, I hesitate to even call it a 'kit', but there is the ATTIC 1/48 resin HH-3. Anyone with any experience with ATTIC kits will run away screaming, but it IS out there. General consensus, though, is that it's easier to convert a Hasegawa SH-3 into an HH-3 than make a presentable model from the ATTIC kit...
In an attempt to get one of the Attic conversion kits to use to make a USCG Pelican, several attempts to contact them were left unanswered. I have also searched for people trying to unload the Attic conversion set. Anyone here have one that they want to get rid of?
David
-
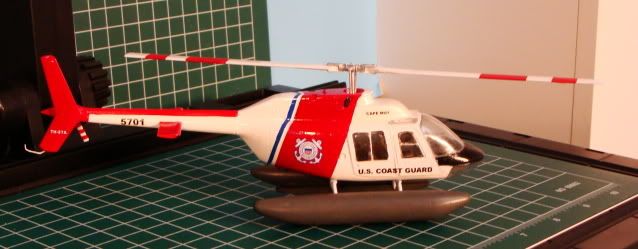
You guys may recall having seen this one before. It is my first rotorcraft model. As I have always been a fan of USCG aircraft, I thought that I would do a fictitious Bell 206 Jetranger.
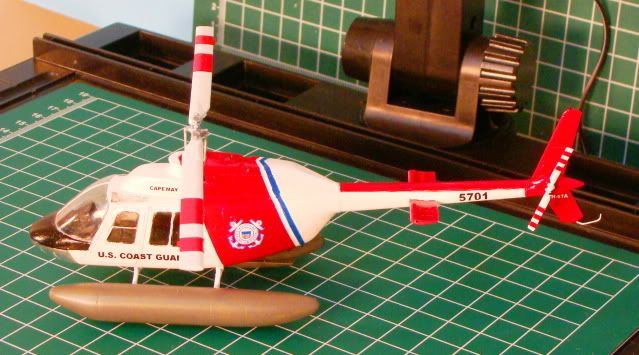
Haven't yet gotten around to completing the display base for it. I plan on doing a "what if" EC-135 medical helicopter for the new Nemours Children's Hospital that I work at. I am a transport nurse there. Since we just opened in October, it will be a while before we start our own flight program. BUT, that doesn't mean that I can't come up with a graphics scheme for our first rotorcraft... :D/> May give the "higher ups" something to shoot for...
David
-
I didn't want to hijack the current "MH-60L DAP loadout" thread, so I will post this separately. After seeing Gino's USCG MH-60J build, I have wanted to do one myself. I have already bought an Academy 1/35 AH-60L DAP kit. I am slowly gathering reference material for the project. Any hints or tips, measurements or other resources would be greatly appreciated! Thanks in advance.
David
-
I too would be very excited to see a 407 kit! The Delaware State Police have been flying them for several years since they were introduced. Like Gino, I had considered attempting a conversion of the Academy kit, but think for now, it is a little beyond my skills. I would look forward to following such a conversion if anyone does decide to do one. You know, it just might hasten the release of a 407 kit! You know how once you complete a major conersion, they release it in kit form? :bandhead2:/>
David
-
Hi Gang,
Anyone happen to have a copy of the above magazine? I am looking to get the following article: "Conversion: Revell Sikorsky HH-3 - US Coast Guard Pelican". Any help would be greatly appreciated. Thanks!
David
-
Hi Guys,
It is hard to tell from photos of the kit, but could you take the tail end of the CH-53E SUPER SEA STALLION USMC 1/48 12209 kit and graft it onto the Hasegawa front? The modifcations to the front length, doors and windows would still need to be done as in the Italian modeler's build above, but it appears that it might work... Any thoughts?
David
-
Hi Gents,
To the best of my knowledge, no kit exists for a 1/48 scale HH-3F Pelican. While I have seen some 1/72 scale versions crafted with kits avaiable in that scale, I was wondering if anyone here had built/kitbashed one in 1/48? If so, what kits did you use? Any assistance would be greatly appreciated! Thanks.
David
-
Hi Floyd,
Have you ever considered converting an EC-135 to a 120? While I am not intimately familair with the 120's design(flew on an EC-135 in Philadelphia for 7 years)it looks like there would be a fair amount of conversion work to do. I guess before I start suggesting that others work on building their aircraft, I should finish my EC-135... Floyd, thanks to you for both your public service, as well as to the service that you provide to use rotor wing modelers!
Sincerely,
David
-
Hi All,
I thought a thread like this might be useful to those looking to get in on making homemade decals. Would some of the homebrew guys out there like to share whats in your tool box? Maybe post a few pictures of your decals in action? I'm interested to know:
what printer you use (along with inks, standard OEM, refill, etc),
what papers you use,
any programs you use to create decals,
and any extra stuff like maybe a scanner?
Any insight would be appreciated. Id really like to see what you guys have put out there both on paper and on an actual model.
Cheers,
Eddie
Eddie,
I am Blessed to have an old ALPS printer. It worked just fine prior to packing it up for a recent move. I pray that it continues to work once unpacked and connected. I have an old desktop dedicated just to decal printing. I prefer Tango Papa decal paper. I use an old version of CorelDRAW. It has many features, and does everything that I need. There is a "group" over on Yahoo Groups called "ALPS decal". Hope this helps.
David
-
Daywalker,
PM me. We'll see what mutually agreeable solution we can work out.
David
-
Looking for Italeri 978 Fuel Tanker. Wish to trade within the US. Hope to convert the 978 into a civilian fire service water tanker/tender. Thanks in advance for looking.
Sincerely,
David
-
Hey Guys,
Looking for feedback from anyone who has used the Miter Rite tool. I have used the Chopper, Midwest, Zona, and X-acto miter boxes. Looking for a durable tool that will allow cutting of multiple angles on small pieces of styrene stock. Any feedback would be appreciated Thanks.
David
-
Hi David,
I have had an MD-1000 for several years. I LOVE IT! I do keep my fingers crossed every time that I fire it up though. As stated above, there is no longer support for them. They are a unique and one of a kind printer. As with anything, there is a learning curve, but the decal results are amazing! I would suggest going over to Yahoo.com. There is a "group" there called "ALPS Decal" as well as a sister group. There is a ton of information on ALPS printers, solutions, drivers, etc. It is well worth the time to visit before you make the investment. While not all helicopter decals, this will show you a few examples of ALPS printed decals:
All of the black lettering was done by me on this fictitious USCG Jetranger. The USCG logos were from Joseph Osborne. I believe that they too were done on an ALPS.
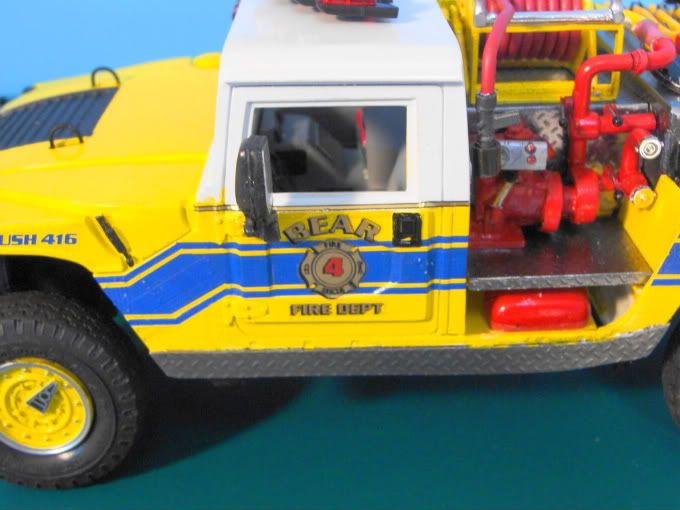
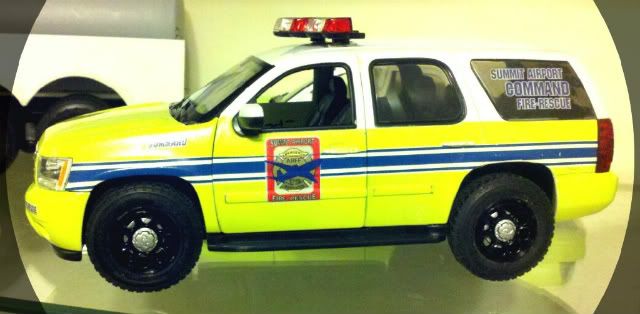
These fire vehicles are also custom ALPS printed decals. All striping, logos, and lettering were done by me on the MD-1000.
Hope this helps.
David
-
Hi Guys,
So, I am sitting here at work going through "plastic withdrawl". My schedule has prevented me from visiting my workbench for over a month. As I am daydreaming, I have been thinking about a "long planned" Bell 407 conversion. The Delaware State Police flies several of them, which I would like to someday replicate. They have many different versions of paint schemes, door configurations, etc. I believe a couple of years ago the subject came up, and different option were discussed.
http://www.airliners.net/photo/Delaware-State-Police/Bell-407/0446458/&sid=c98c0b23482ac2d0a027368752bd18c2 Photo credit to Tom Turner - airliners.net.
My question is this: I am thinking that the best base kit for this would be the Academy OH-58D kit. I prefer a bigger scale, especially as this project will require many modifications. Right off the bat, I can see that the fuselage will need to be lengthened, new main rotor/engine/transmission cowling created, doors/windows created/modified, new high skids fashioned and new horizontal stabilizers made. As it appears to my untrained eye, the basic body shape is similar, it has the four bladed rotor system, and that is about it. But, it appears to be a better "starting point" than the venerable Bell 206 kit that has been around for years... Any suggestions would be appreciated. Thanks.
David
-
Does anybody happen to know of any bucket truck kits that are out there. Or even a heavy duty International cab, something I could use as a base for a scratch built bucket and boom assembly. Any help would be very much appreciated.
Your friend has probably long retired, but FYI there used to be a company called DG Productions that made 1/25 scale utility/power company equipment trucks. They were a series of auger and bucket trucks based on GMC Topkick and International chassis. You may be able to do a search and see what you can come up with. HTH.
David
-
John,
Sorry I am a little late to the party on this one. I would think that you could start with one of the many recently re-released cabovers. The bodywork looks pretty simple to build using some Evergreen .040 or .060 sheet plastic. May wnat to use the single axle from the Ford Shorthauler kit that you replaced with a dual axle one. Neat subject. Good luck on your project.
David
-
Terry,
She's looking great! One suggestion for the future-attach a piece of sandpaper to a brass tube with double sided carpet tape. Used this technique many times.
David
-
Why not use a white or grey primer first.
I plan to use a white base for the aircraft and accent it with medium to dark blue graphics. Thus, a white or light gray plastic would be great.Gents,
Thanks for the confirmation! Tank - As per the quote above, I was trying to eliminate the amount of paint that had to be applied to the model. I plan to use many of the appropriate parts from the ADAC kit on my EC-135 conversion. :D
David
-
Hi Guys,
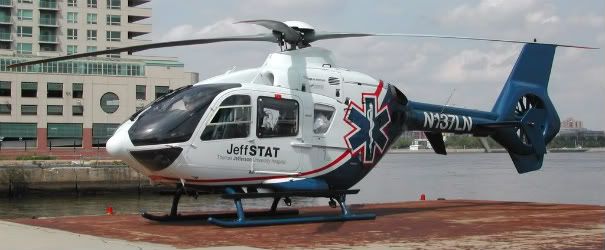
Does anyone know what color the kit is molded in? I am planning on building an aircraft for the Pediatric Critical Care Transport Team that I work for. We currently contract with Stat Medevac for flight services, but are doing more and more flights. There is scuttlebut that in the next few years, that we may eventually have our own aircraft. I plan to come up a graphic scheme similar to what is on our ambulances. They are only a few months old, and feature full graphics wraps. I plan to use a white base for the aircraft and accent it with medium to dark blue graphics. Thus, a white or light gray plastic would be great. I do own one of the early ADAC EC-145 releases, but do not look forward to having to cover the bright yellow plastic. I will probably use much of the kit on my EC135 project. Sorry for rambling on, just excited about another new project on the drawing board... Thanks. :D
David
-
Well Guys,
After 6 years, I have finally begun working on building a replica of the aircraft that I fly on... :D
I actually took these photos a few months ago, and just downloaded them from my camera. Originally, this project was going to be a simple version without opening doors or interior details.
After seeing Gerald from Hawkeye's Squawkbox utilize thread and a Flex-i-file frame to open up doors, I thought I would give it a try. The recessed panel lines were scribed through with a scribing tool. The corners required a little extra help with an X-acto knife.
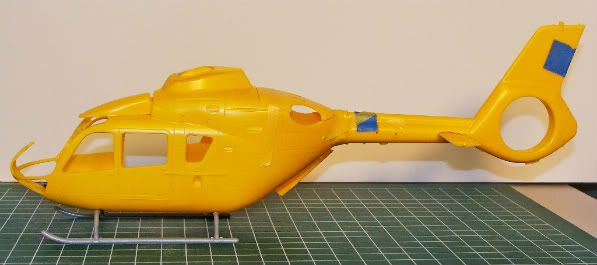
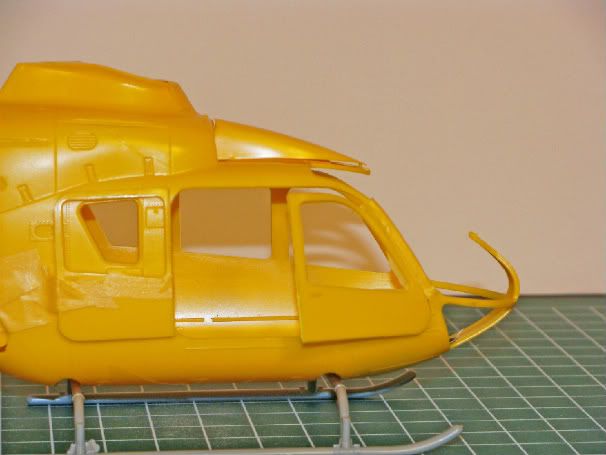
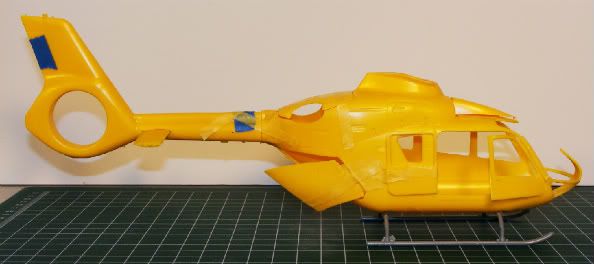
The process went pretty smoothly with the exception of the rear clam shell doors. They had raised panel lines, and were a little more complicated. I made a small mistake with one side, but it should be easily correctable with a little Evergreen stock and some sanding... Keep in mind that the the doors are all loosely held in place with bits of tape just to see what they will look like. I am looking for a way to replicate the door hinges without having to buy the complete Renaissance EC-145 PE kit. I have some friends who have been working on the graphics for the standard "Air Methods" paint scheme. Accurate factory colors can be purchased from Scale Finishes. Will post more updates as progress is made... Thanks for looking!
David
-
Yeah that's what I did. I masked off the radiator scoop at the bottom of a P-51D and hit it with gloss gull grey just to see if it changes the appearance of the Alclad. I'll respray the clad over it later today.
I absolutely LOVE Alclad! After spraying white aluminum the other day on roll-up doors of a fire truck project, I scratched two of the doors while handling them. I sanded the areas with sheets from a MicroMesh polishing kit. The panels were rinsed and dried, then resprayed with the white aluminum. The repaired areas are undistinguishable from the originals! Great stuff!
David
-
Hi Gents,
Finally some pictures:
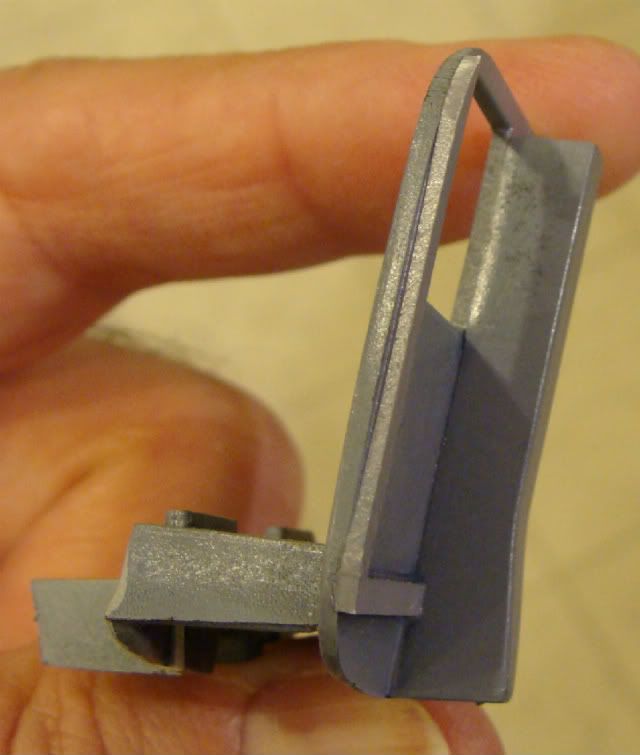
I started off with the IMC/Testors/Revell 1/32 scale Jetranger kit. As this aircraft was delivered in 1971, it is correct for the period. Here you will see where I filled in the co-pilot side stick control:
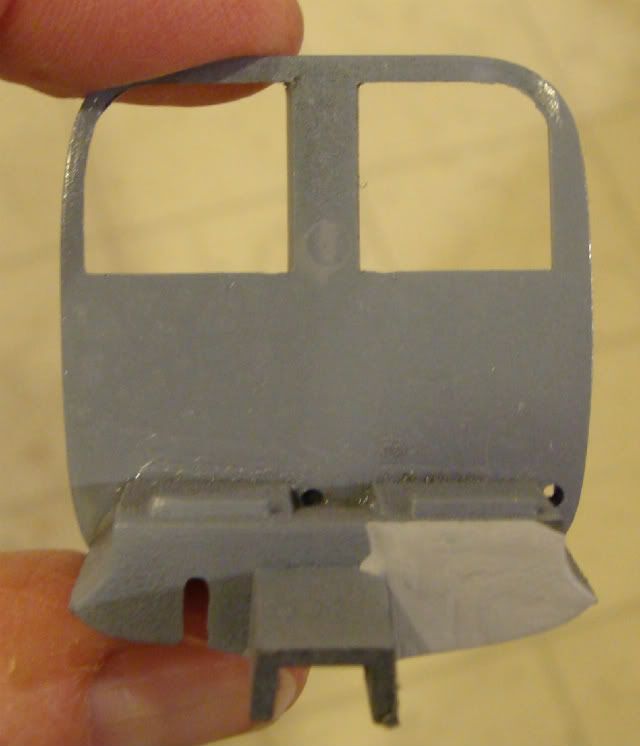
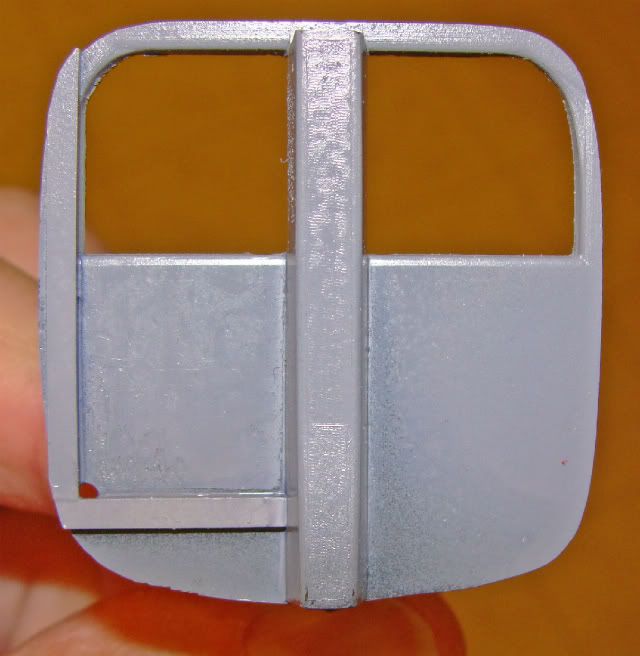
Side view of the front seat/bulkhead:
view of the front bulkhead from the rear:
You will note the "L" shaped bracket that I originally placed to "give the impression" that the aircraft was equipped with a "litter kit". Since these photos were taken, I removed the bulkhead material above the "L" bracket, and will complete the modifications mentioned in an earlier post. Thanks to Winnie, Ray and the photos borrowed from the Internet, I now have a fair idea of what the litter kit configuration looks like.
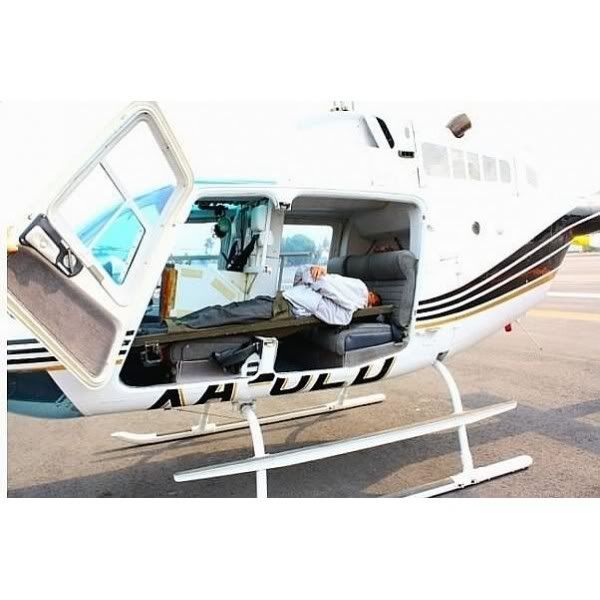
credit to online helicopter traderwebsite.
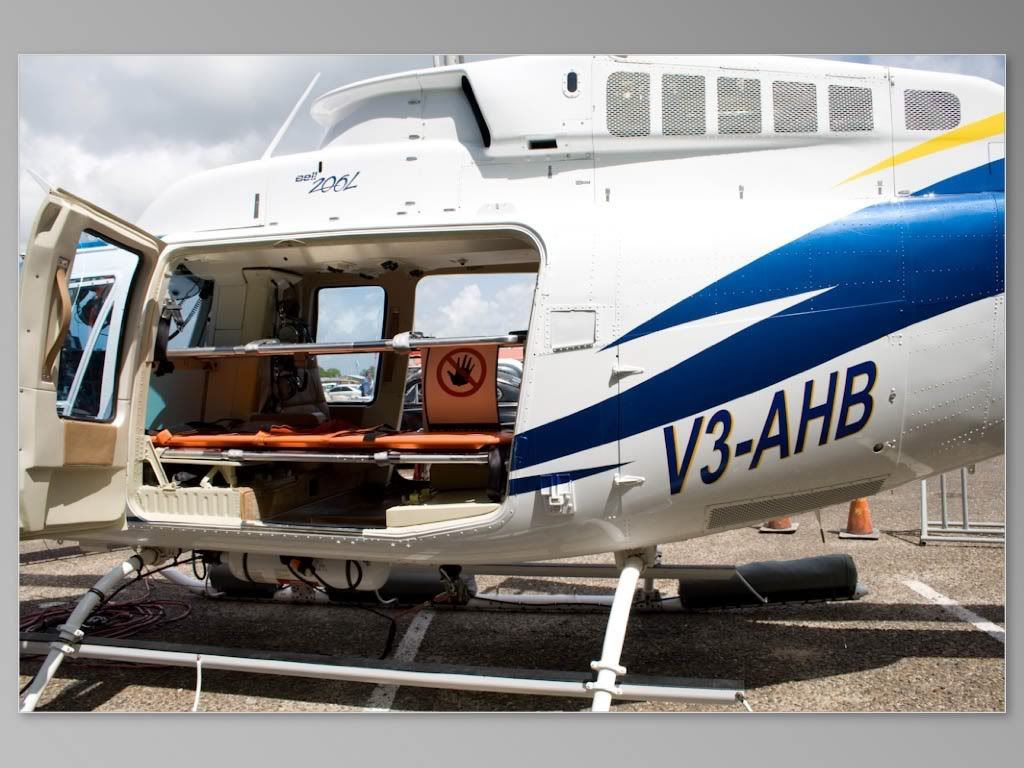
credit to aviation display heli.com.
Now that I have some reference material, as well as EWD Matt's info on the interior colors, I have a direction in which to proceed! The parts pictured have taken a bath in the "purple pond", and will be repainted an off white. Modifications will be made to the interior to more closely match the photos. I realize that the second "litter kit" photo is of a Longranger, but the basic idea is there. Hope to make some progress this weekend as long as I am not busy bailing out from the hurricaine...
David
-
Anthony,
Great to see you back! Glad to hear that you are doing well. Look forward to seeing your updates as time permits. I know the feeling of not wanting to make a mistake on a project. This is what has kept me from finishing sooooo many projects. I am working through this though... I am trying to wrap up many existing projects - some over twenty years in the making. Welcome back my friend!
David
-
1/32 scale is my preference. Mostly due to poor eyesight, and big hands. I also build 1/25 scale emergency vehicles so the scale isn't too far off. Space is not a problem as I am a slowwwww builder. Even if I were able to build smaller scales, often the subjects that I want aren't offered... So conversions are also easier to accomplish in 1/32.
David
Announced Revell New Tool 1/32 EC-135 - Updates?
in Helicopter Modeling
Posted
Hi Guys,
Any updates on this reported "new tooling"? I have not seen or heard anything since the announcement at the Toy Show last Fall... Thanks
David