


Old Man
-
Content Count
1,555 -
Joined
-
Last visited
Content Type
Profiles
Forums
Calendar
Posts posted by Old Man
-
-
Thank you very much for the added data! That makes sense. I have been gathering info on how to do a BMF with foil for a while now. I have an Eduard Mirage IIIC in my stash and I'm toying with the idea of using this technique on it but my dream is to do a B-58 in 1/48 scale with foil. I think that'd make an impressive piece on anybody's shelf.
Thanks again for sharing and have fun finishing your B-17. I'll be watching! :)
Happy to be of some assistance, Sir. A 'Hustler' in foil in 1/48 would be a sight to see....
-
Great looking B-17!
And thanks for the tutorial on using foil. But I have two questions: why the steel-wool sanding and why the boiling with egg shells? I think I read somewhere that the kitchen foil can be used as is, without sanding. And that boiling with egg-shells is used to change the aspect/color of the foil for panel variation but you seem to boil the entire bunch of foil you're using so I'm wondering if there is another purpose to that procedure.
Thanks is advance.
Thank you, Sir!
The steel wool treatment grew out of my desire to have the dull side of the foil exposed. The adhesive does not grip so well on the shiny side, so I tried roughing the shiny side up with steel wool, and found this did the trick, and let me put the adhesive to the originally shiny side successfully. I noticed that it also made the foil more flexible, or at least it seemed to me that after the foil treatment it went over things like blisters and strakes better. So I kept at it, and took to doing it on both sides. The stuff can certainly be used 'as is', but thinner is better. It is a good idea to wipe down with a damp cloth, or rinse under running water, after you have done the steel wool step, to be sure any little fragments are gone.
My main aim with the eggshell treatment is to dull the foil somewhat. Even the dull side of foil as it comes off the roll is just too bright, at least for my tastes, and does not look quite right to me on a model. It is sort of like 'scale effect' with paint. When putting multiple pieces of foil to the eggshell treatment, there will be variations in color, as they will not all be in for the same length of time, nor will the strength of the shell liquid remain the same. So there are appreciable differences between the tones of the sheets. The alteration in the color from the eggshells is not so much a 'greying' but a 'browning', by the way, and if you have to try and match the tone with paint, a touch of deck tan in silver paint comes pretty close....
-
Beautiful work!
Thank you, Sir.
-
Old Man..
That is a BEAUTY ....SHE LOOKS REAL NICE..Good Job Sir.

Thank you, Sir.
Glad you liked it.
-
Wow! what a job that must be to cover the whole thing in foil. Do you have any pics of you applying the foil? It looks really cool!
Glad you like it, Sir.
I have no pictures that are that in-progress, but it putting the foil on is not that hard, though it takes practice. Basically you cut a piece to the approximate size you need (a little over-size), put it on the plastic, and burnish it down with a Q-Tip and toothpicks. Start at the center of the piece and work outwards (usually). If you get a bit of 'bubble', just prick it with the knife-point and press down again. You do have to be sure there is nothing on the surface, and that the surface is smooth, but I do not think it needs to be quite so mirror finish as the metallizer paints require. Once it is down, cut along the panel lines that define the edges of the area you set out to cover (you want a new or at least new-ish #11 blade for this). Pick up the excess with the tip of the blade and a tweezers, then repeat....
In preparing the foil, I take regular kitchen foil, sand it pretty thoroughly with fine steel wool on both sides, boil it with a lot of egg-shells for a few minutes in a little water, then hit it again with the steel wool, and once it is dry, press it flat in a heavy book, then tape a piece of it to a piece of tempered glass, and apply the Micro-Scale adhesive lavishly. The rest is just cutting and rubbing with Q-tips and toothpicks, and sometimes keeping an eye out for where you have to cut a slit to let the stuff lay down right. If you have to take stuff up, CA kicker washes off any adhesive residue readily.
Nothing looks quite so much like metal as metal does....
-
Pretty much my period, Sir. I would be very happy to see this start up, and participate.
-
It's funny 'cause it's true, Sir....
"Stan Mack Funnies ... all dialogue guaranteed over-heard verbatim."
-
Looking good ! Keep it going!
Thank you, Sir.
I expect to have it done in a couple of weeks. There really is not that much left to do on it. It has been quite a bit of fun so far....
-
Excellent work, Sir!
Wonderful subject, one a lot of people seem to have shed any memory of at all.
-
I join in the thanks to our host, Mr. Mikkel. This was a great idea, and a lot of fun. I have been wanting to do a Chilean Hawk for some time, and it was good to get off-center on it and actually do the thing.
-
Yeah, but I figured this would be more appropriate, but I guess I could ask there too.
Armor people might be able to help, too. There just isn't much over-lap in shapes between automobiles and airplanes. And you have to have most of the thing hollow, for the passenger compartment and 'under the hood'; usually in an airplane it hardly matters what is under the surface for just about the whole thing.
-
I'm actually trying to scratch-out a bodykit for the Revell '79 Camaro 3-n-1 as well as hood and engine details. Theoretically a pretty simple project but I'm concerned about some complex curves.
That is a bit out of my field, Sir. I expect you are going to have to look into vacu-forming, and carve everything out in bass-wood.
I expect the engines are not that much different from aircraft engines where it comes to detailing. Lots of sizes of wire (look into beading wire at a craft store, and rip up lengths of electrical cord), and Plastruct or Evergreen rod and sheet in various sizes, are the basic materials. The saving grace of scratching detail is that, if you decide you don't like it, or you drop it, you can just chalk it up to experience and do it again.
Have you looked into the Automotive forums here?
http://s362974870.onlinehome.us/forums/air/index.php?showforum=193
Someone there might be able to help you more.
-
Well it just occurred to me that all I've ever done are out of the box projects (or used aftermarket suppliments) without having to do much in the way of scratchbuilding and now I'm on a project where I'm pretty much going to have to scratchbuild regardless.
So I have to ask, what are the basics of scratchbuilding? What kind of material you use, etc.? And how do you shape new parts when you're not vac-forming?
And speaking of vac-forming, I've never done it but I'm technically familiar with the concept. I'm wondering if I should just do that.
Here is an excellent primer to the subject, Sir:
http://www.wwi-n-plastic.com/Book/harry/contents.htm
It focuses on the use of plastic sheet, in 1/48 scale, but much can be adapted to other scales.
Much does depend on the scale you build in, and of course, your subject.
I do quite a bit of scratch-building, always in 1/72, and usually of biplanes of the WWI period, or a little later.
What exactly is it you are setting out to build?
-
Very nice, indeed, OM! It certainly looks like a P-1A. Great job on scratchbuilding the cowling!
Regards,
Jason
Thank you, Sir.
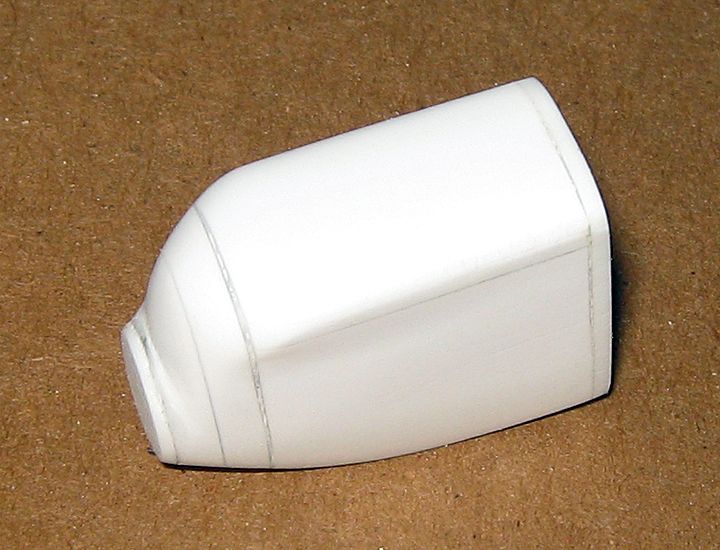
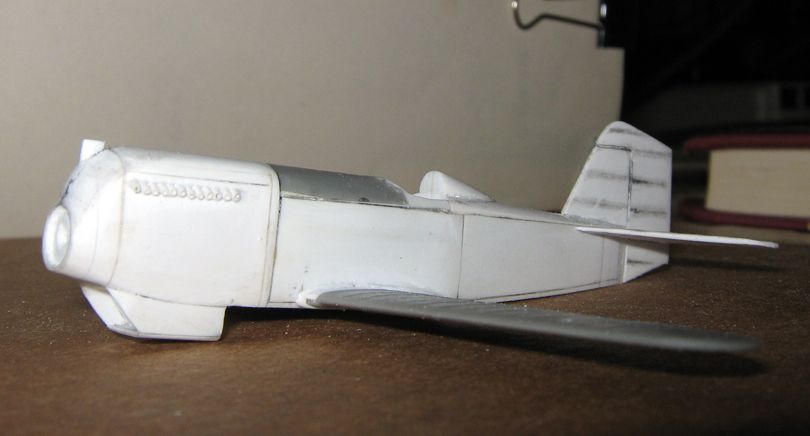
Just for the memories, here is a picture of how the cowling started out....
-
Espléndido!

Gracias, Senor!
It was a good group build, and I am glad indeed of the extension we had....
http://s362974870.onlinehome.us/forums/air/index.php?showforum=253
-
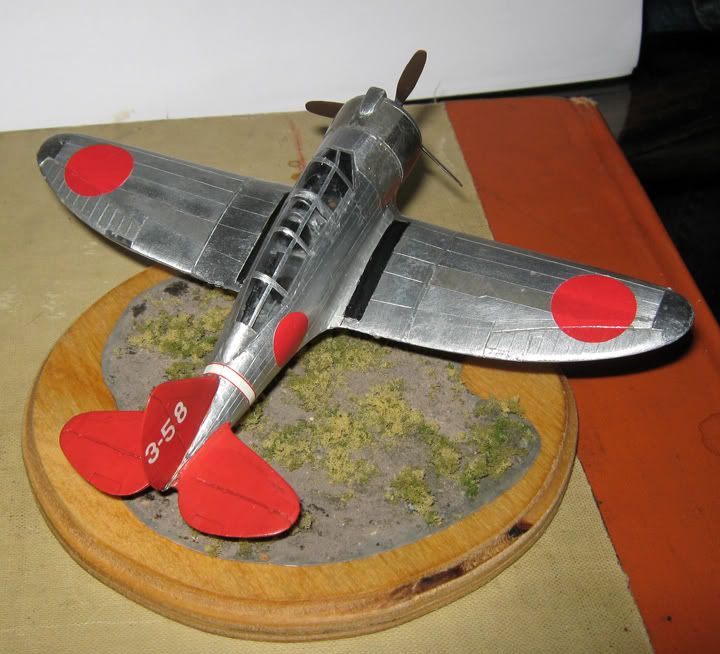
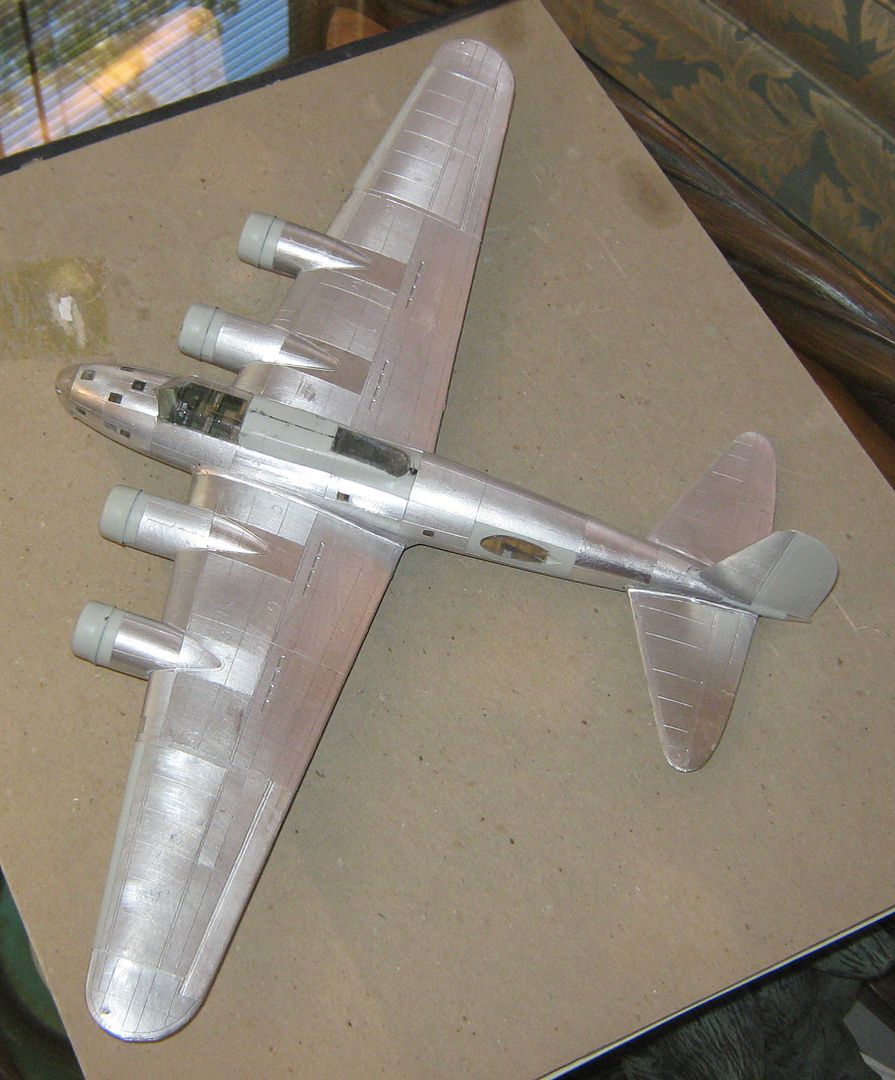
This is a bit out of my usual run, but I have wanted to do one of these, and do it in bare metal, for a long time. I was hoping to get it done in time for the Fourth, and took a solid two-week rush at doing so, but could not quite manage it (in part because of the damned heat). However, here are a couple of pictures of how far I have gotten....
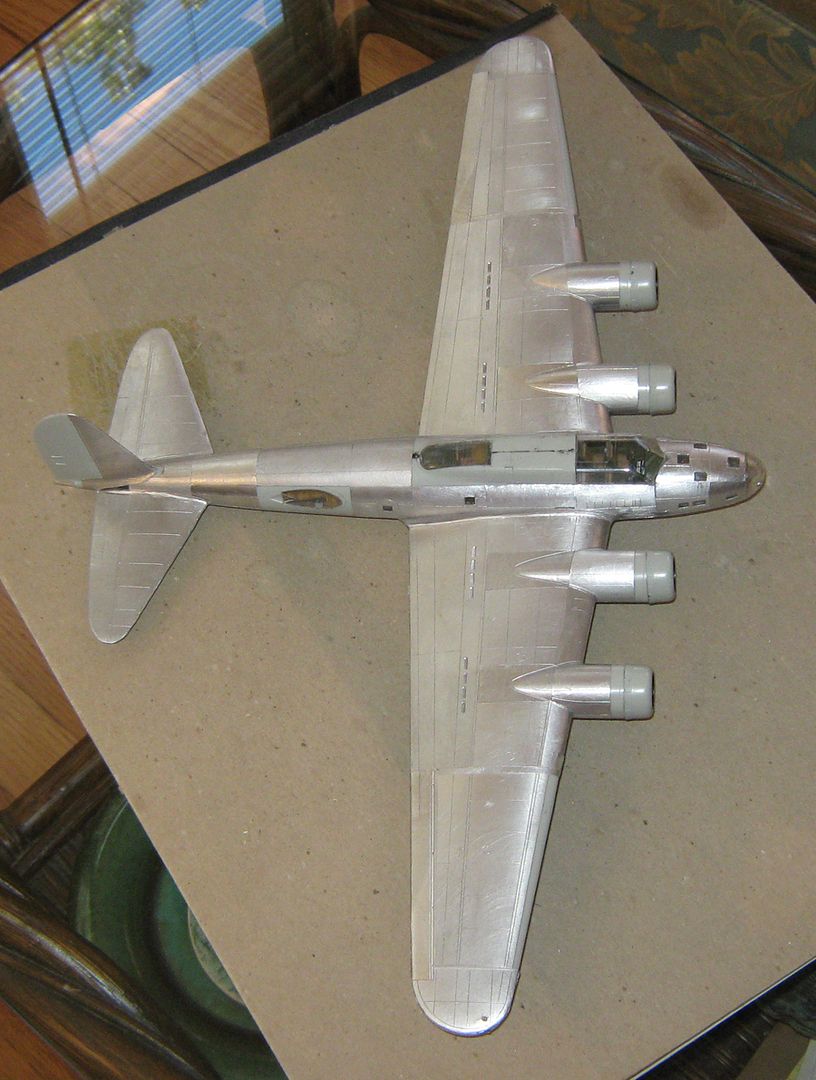
It will be finished as a machine of the 50th Reconnaissance Squadron at Hickam Field in the summer of 1941.
I want to thank Mr. Aitken and Mr. Matsuoka for cuing me in to a genuine Pearl Harbor subject (the kit markings were spurious and only D-types were at Hickam in bare metal that spring and summer), and especially to thank HyperScaler Steve Nelson, who was kind enough to send me gilled cowlings for a D (my old 17C boxing had only the solid cowls included).
-
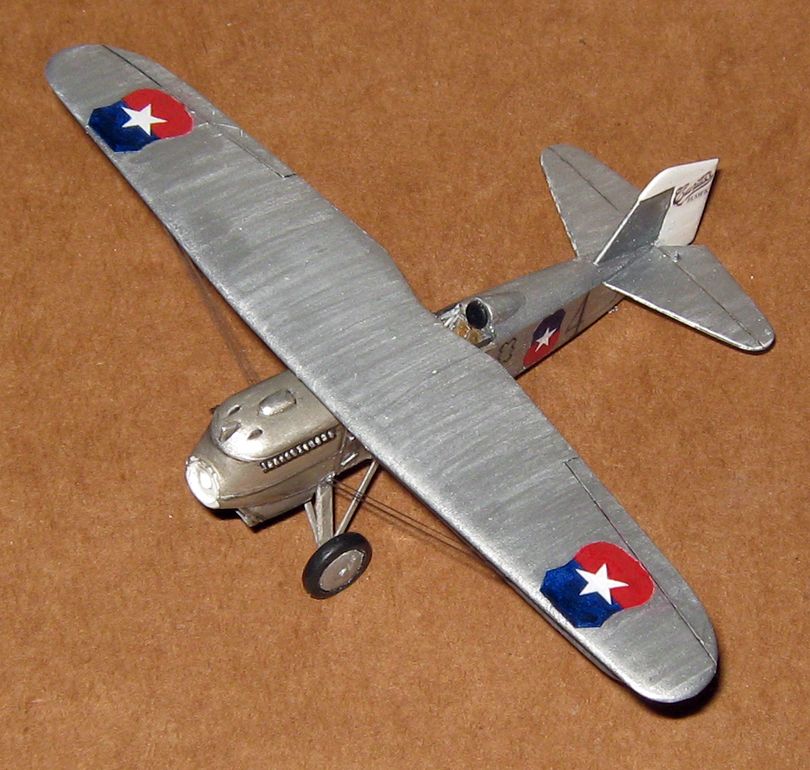
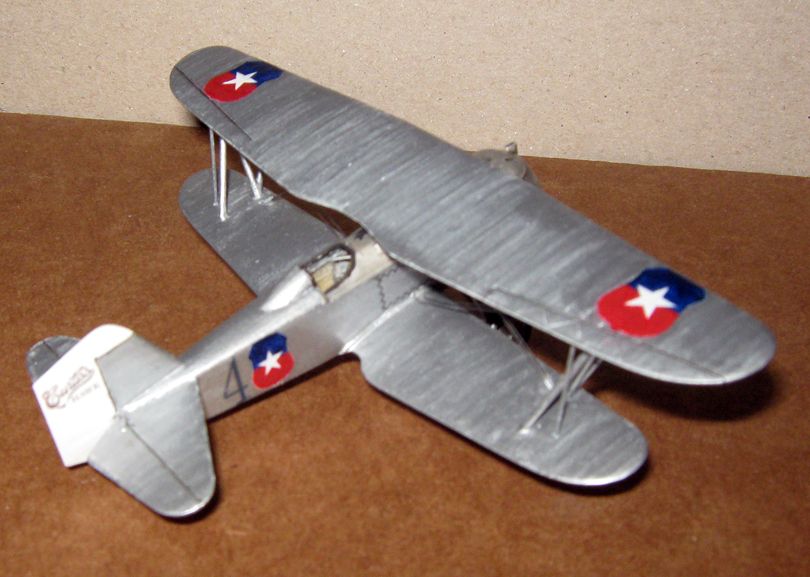
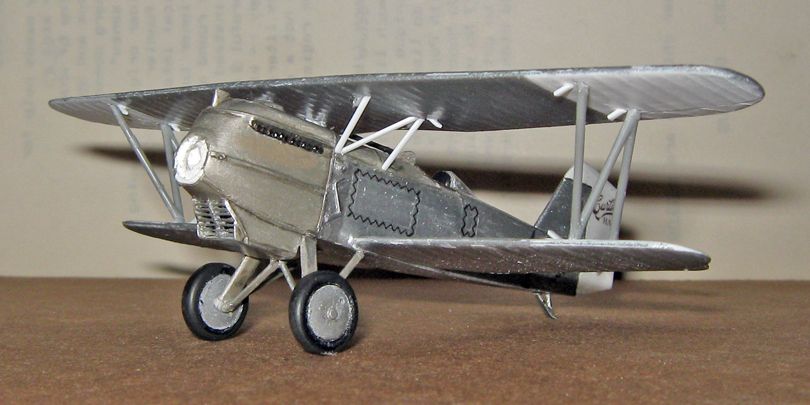
Curtiss sold nearly as many 'Hawk' fighters abroad as it did to the U.S. Army and Navy combined. Chile's order for eight P-1A Hawks, followed by an order for eight P-1B Hawks, was the first substantial foreign order for fighter planes Curtiss received.
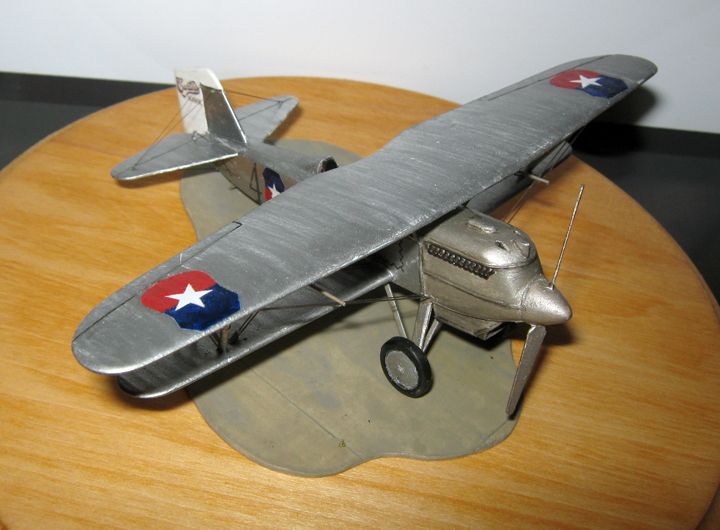
This build is something between an extreme conversion and a scratch-build: it employs the wings of a Monogram P-6E kit, as well as that kit's interplane struts and a portion of its forward decking (much altered); the rest is scratch-built, save the spinner and wheels, pinched from the spares box.

Decals are home-made. Wife worked wonders setting up Curtiss logo, number, lacings, and the shields (these were of different proportion than at present back then). The Testor's material I have, though, is really not very good, and I had to do some over-painting on the shields, even though they were printed on white film. The best I can say about the Testor's stuff is that it is rwadily available, and can be made to work....

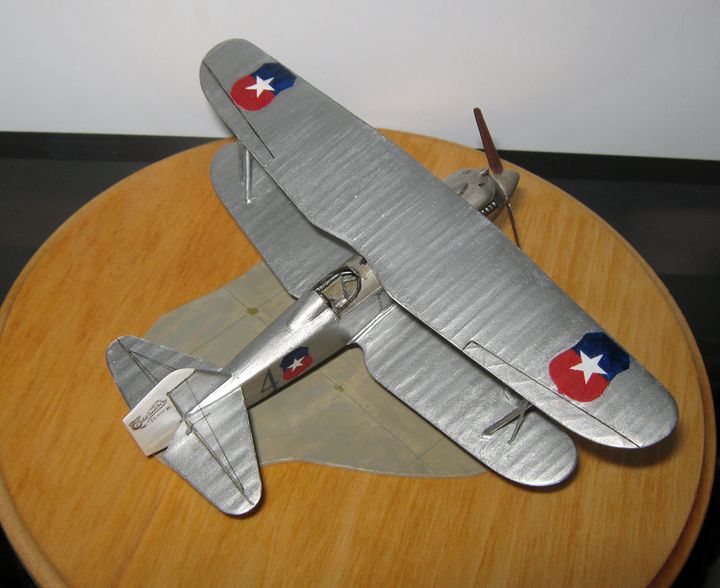
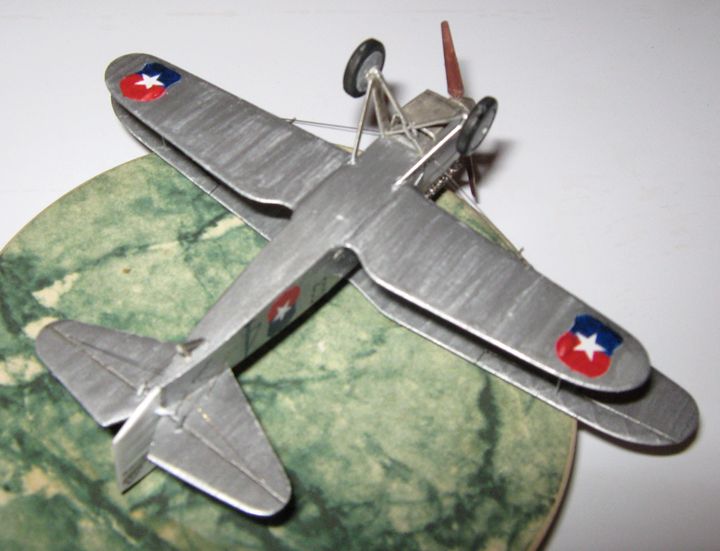
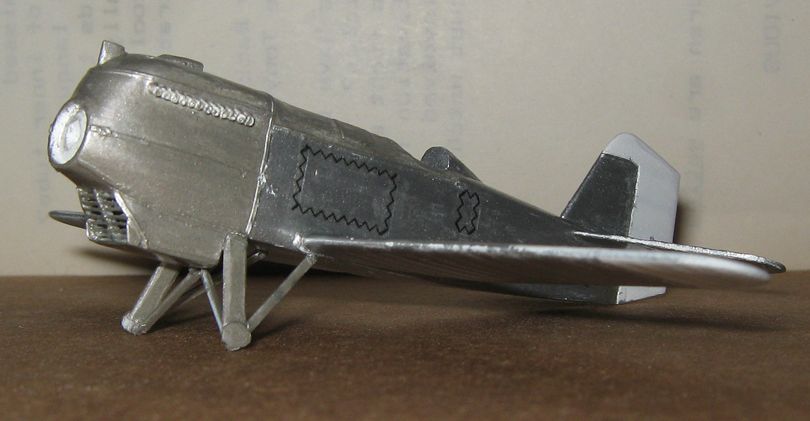
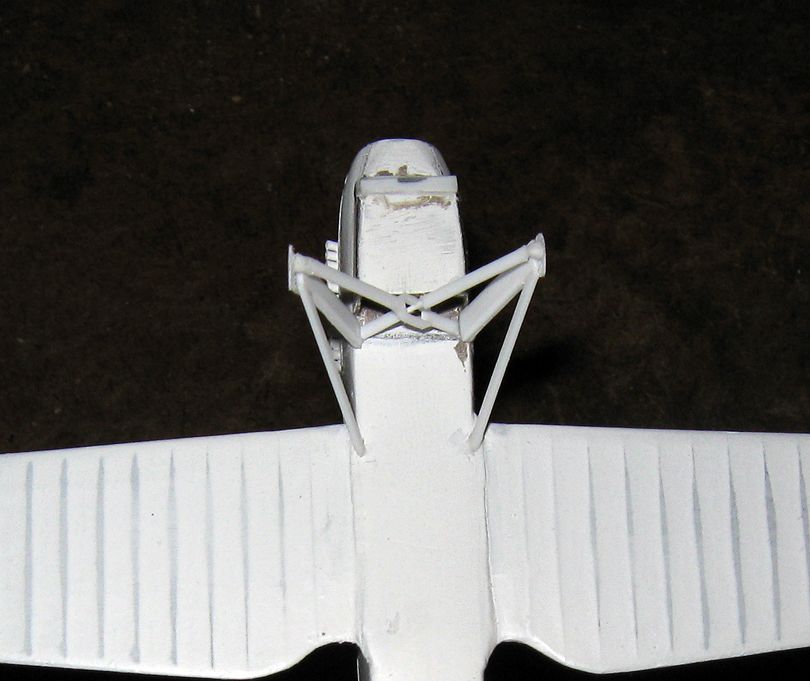
Here is a look at the under-side, showing the 'pass through' arrangement of the under-carriage legs, and the fairings for the bell-cranks actuating the ailerons....
-
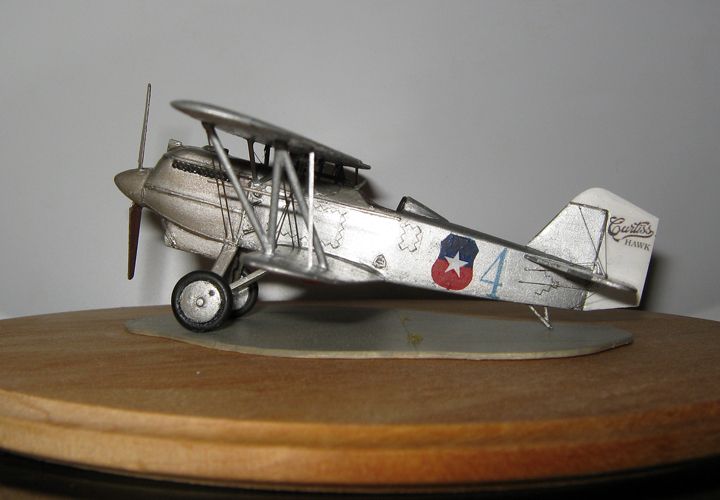
Curtiss P--1A Hawk, Groupo de Aviacion No. 1, Alto Hospicio, Iquique, Chilean Air Force, 1929.
-
Finished under the wire, Gentlemen....
More pictures in the Finished thread above....
-
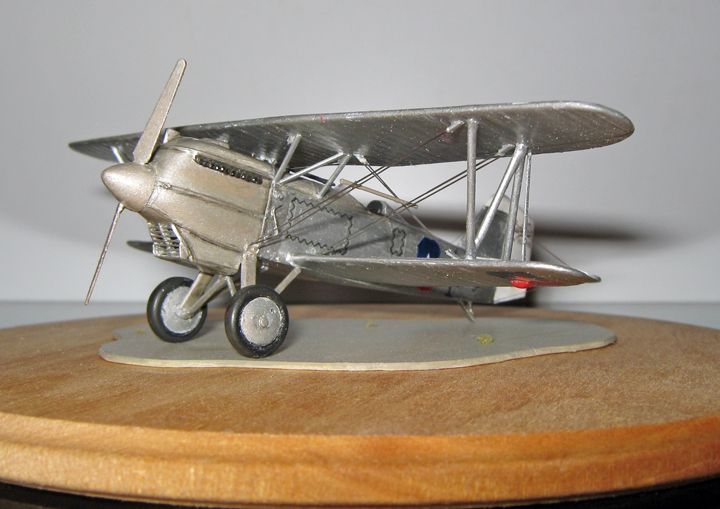
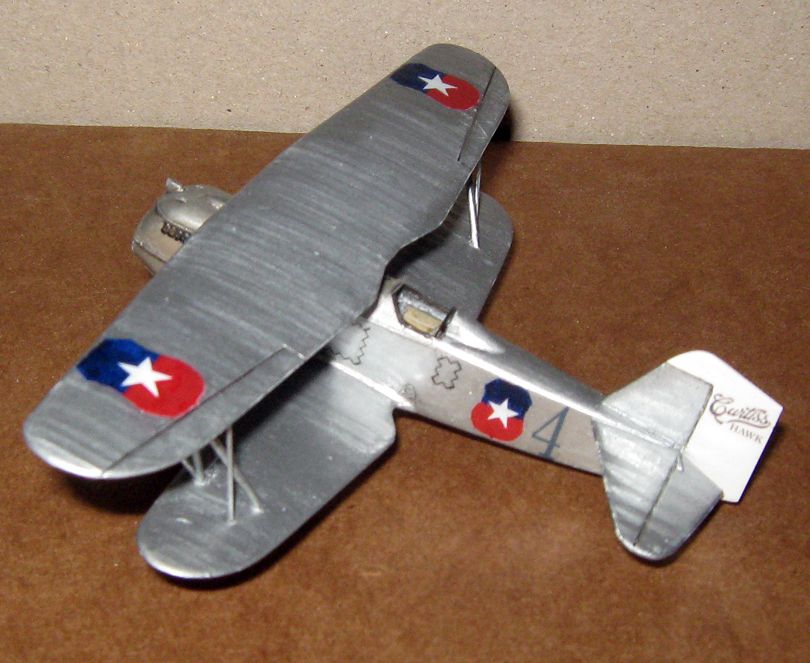
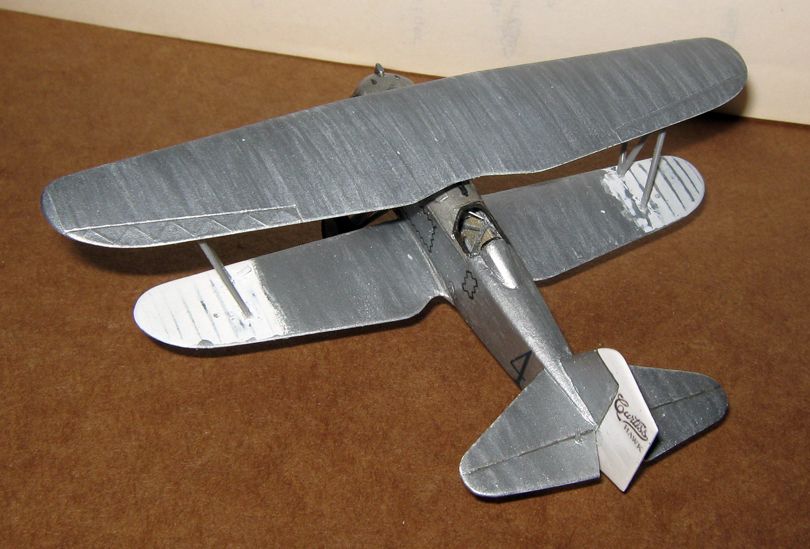
I have slowed down a bit on this, but am pretty near done. Painting, rigging, and decaling are complete, and aileron actuating struts have been applied.
The best thing I can say about the Testor's decal material is that it is readily available. There was some bleed in some of the decals, even after a week's drying for the ink, and for the sealant coat. It was not immediate, but became apparent ask the decal settled in drying after placement. One was bad enough it had to be removed, but otherwise it could be dealt with by over-painting. I usually over-paint a bit anyway with these, as it eliminates the bit of white edging from the thickness of the decal film itself that is often apparent when white film is used, as it often must be.
The rigging on this is a hair trickier than usual. All lines are doubled; the landing wires must past between the rear flying wires, and the front flying wires are not parallel.
All that remains is doing the propeller (the Hamilton-Standard forging employed with the D-12 motor has a distinctive appearance), add the bell-crank fairings under the lower wing tips, and put in the bracing wires and control wires at the tail. Hopefully this will be all in hand by next week.
-
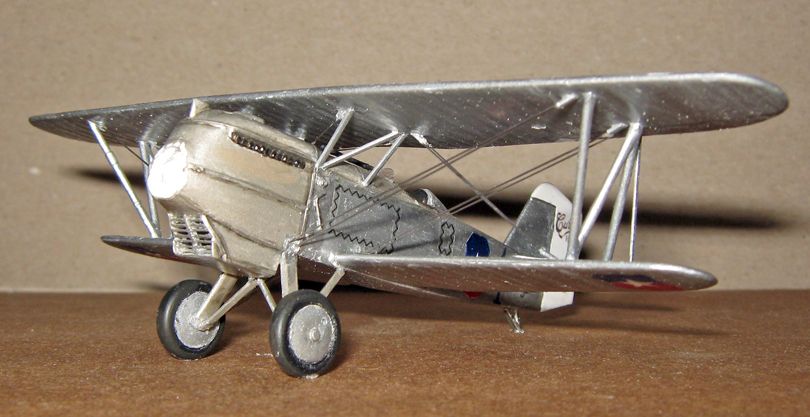
Here is a good look at the radiator front.
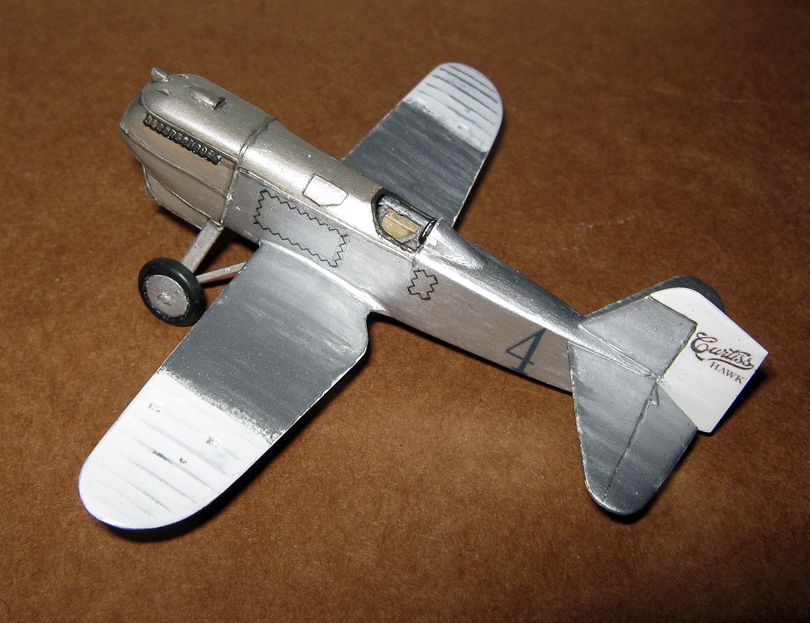
Wife has done wonders producing decals for me on this project (she is a true witch at photo-shop and manipulations). The national markings of the period had a different proportion than the modern ones, so some serious work was necessary. The tactical marking (or serial), and the Curtiss logo, have been applied. National markings will go on next week. The lacings are also her decal work.
Here is a good look at those of the decals already applied.
-
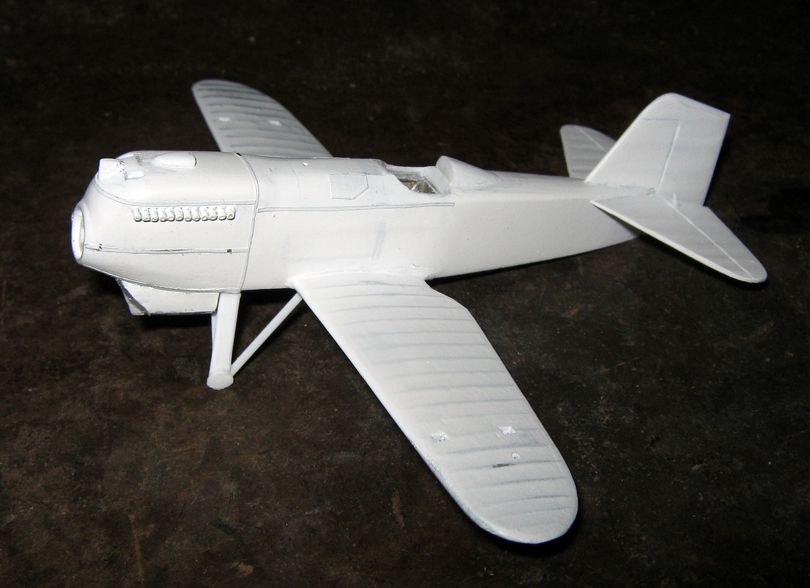
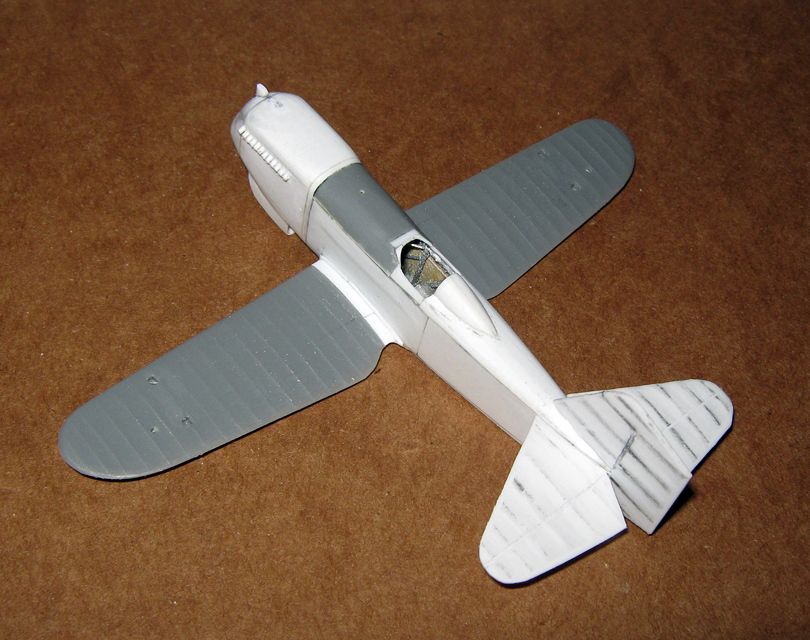
Here is the assembly under a first coat of primer.
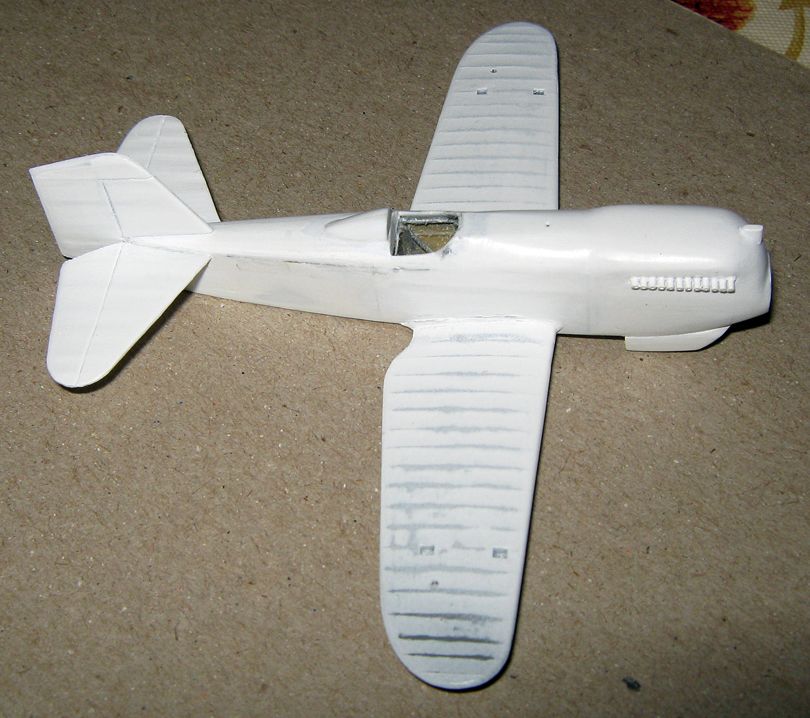
Here is the model re-primered, after adding raised detail from strips of foil tape, adding radiator shutters, and landing gear.
Here is a look at the landing gear, which is practically invisible at most angles on the model.
-
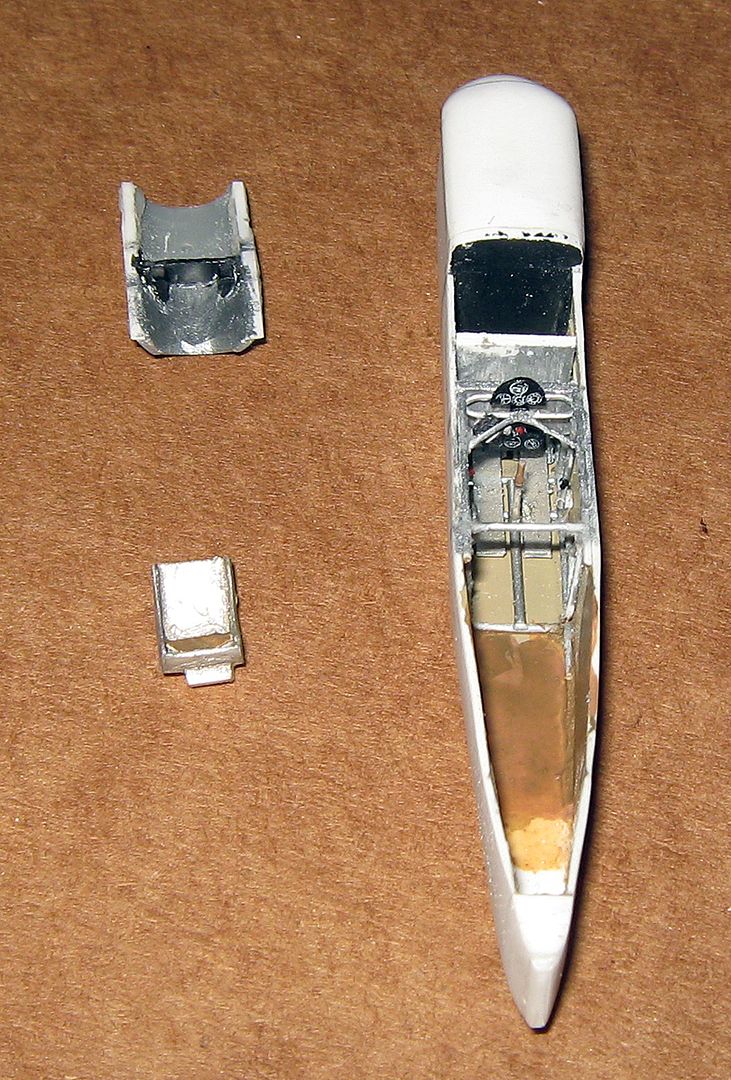
Here is most of the interior before the fuselage is closed. Gun breeches are tucked in under the fore-decking.
Here is the thing pretty much assembled. The exhaust runs are from .75mm rod. The lower wings are filled at the top to make up for root fillets moulded into the kit fuselage pieces. The turtleback is a solid piece, filed to shape. The tail surfaces are .375mm sheet. The radiator tunnel is assembled on the model.
-
Here is a good look at the radiator front.
Here is a good look at those of the decals already applied.
And now we are up to where the last posted pictures were...
Academy B-17 (early)
in In-Progress Pics
Posted · Edited by Old Man
Not sure, Sir. There are adhesives for putting down gold leaf, which I have seen modelers say they prefer for foiling, but the craft brands available here in the U.S. may not make it out there, either. Some of the larger hobby shops in Japan or Hong Kong or Australia might stock the Micro-Scale, and be able to mail order it.
Years ago, people used furniture varnish for the purpose, but from reading I gather that that is pretty tricky, though it does work: the stuff is not sticky for a while, and then sets pretty quickly, so that a practiced knack is definitely necessary.