

Giovanni
-
Content Count
336 -
Joined
-
Last visited
Content Type
Profiles
Forums
Calendar
Everything posted by Giovanni
-
Any release programs for March?
-
Thank You guys for leaving your nice comments. This weekend I'm going to compete on another modeling contest. Then I'll have a stop to turn back to the bench for other projects!
-
Thank You Cruiz Thank You Habu2 very kind of You! Giovanni
-
Hello, I won a "gold" at a scale modeling contest in Padova held by GMPAT on 8th of May. The organizers took the model this impressive picture that I'm delighted to share: https://www.gmpat.it/wp-content/uploads/2022/05/519-oro-cat-A-scaled.jpg
-
Thank You guys you're very very kind 😊
-
Hello mates, thank You for your nice comments. I'm really happy You appreciate my job. And I'll be happy to see other f-102 here on Arc so I hope my build may be of inspiration or may help while building yours. I still have a pair on my bench partially built but this one really proved myself and I need a break. I have also started an Hasegawa F-4d some time ago. Let's see... Again thank You and happy moodeling! Giovanni
-
Hello friends, I finally placed the speedbrakes and their actuators and added some minor detail on the parachute housing: While waiting for all to get dried I started working on a simple stand: Added some extra detail to the speedbrakes: And finally the detailed helmet, iff, tacan, alpha probe antennas... ... I cannot belive... the finished model! Hope You enjoy it! I will post some picture later on the
-
Hello! Some smoke and dirt effects were added while working on the undercarriage. I used oils tor them: it was time for the canopy to be glued in position at this point but before doing so I foud some time to prepare an helmet and oxygen mask: Some adaption work was needed to accomodate the canopy correctly to the airframe. But all went right in the end: At this moment I could feel the taste of the finished model with just the speedbrake and some minor bits mi
-
Hello mates, after a pretty long silence here's my update! Since all the subassemblies were ready I started to add them to the airframe. I started from the optical sight that proved to be impossible to be placed unless the use of a pin. So after same tests I drilled a little hole at the top of the windshield frame and another one on the sight and using a copper wire and cyano glue I got the desired joint. At this point I decided to go on with the undercarriage starting from the front one. No surprises here it went straightforwar
-
Hello Chris, At the moment it's sold out no copies remaining but I'm considering to produce a new batch. I have to produce new moulds first since some are no longer ok. But first I'd like to finish this model. Giovanni
-
Also the air intakes had the same oil wash to smooth down the excessive brightness and to improve the engravings: Bye Giovanni
-
Thank You guys for leaving your nice comments and sorry if I'm always late with my replies! I've found some time to go on with the project...and finally I got the exhaust painted. I used the AK X-treme metal range as usual again the steel color and then washed all with the oils. Here's the result: [ Hope you enjoy the result! Bye Giovanni
-
Hello modelers, today's update: After a satin coat masks had been removed to reveal again the inside detail: The last picture is just a dry test I couldn't resist to see the aspect with the radome in place. Tonight I starded highlightning the intakes detail with oils. Still the smoke effects are missing on the whole model. Stay tuned the model is nearly finished! Giovanni
-
Hello again! and here's the situation tonight with all the paneling done (ok, I'll have to use some more oil here and there and fix something but I consider it almost done). Next stage will be reproducing some smoking effects and weathering (very light, the airplane was well maintained and pristine to attend at the WT competition). Hope to conclude all soon. Stay in touch Giovanni
-
Thank You Dutch! I'm happy You're enjoying it! Now some more news. I started the panel lining from the bottom surfaces... Then I went on with fuselage... Giovanni
-
Ok now here's the update. I went decaling on and on... Got a little break by masking and painting the anti glare panels: And finally had my model ready for the oil panel highlightnig and here it is: Soon new updates Giovanni
-
Hello Storm, thank You for leaving Your nice comment. No particular tips for the decals, I just use to overcoat all the surfaces with Mr Color GX-100 gloss transparent before decalling. Then I use Mr sol and Mr set... Hello Gianni, thank You very much for your appreciation. You shouldn't be jelous your modeling skills are evident in all your jobs! Now I try to post my update since I encountered some server problems Stay tuned Giovanni
-
Thank You guys for the nice comments. First let me say Merry Christmas to the community! And now my winter update. I've been very busy with the decals trying to respect the original subject at the limits of my patience and skills! Here You are some shots: Much of the job is done. The areas where decals are still missing are nose sect
-
Hello dear collegues, thank You Sernak I'm happy my color mix recipe is turning helpful! Today's update: the decalling process started yesterday night. I'm using items from many different decal sheets: I've started from the beautifull tail markings. The serial comes from the excellent Turkish Hobbytime 72002 sheet (I've combined two serials to get this specific one). The checkered rudder and the Air defence command (eagle&shield) badge come from nr. 72002 Fundekals sheet. The outstanding unit ribbons come from Caracal
-
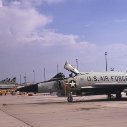
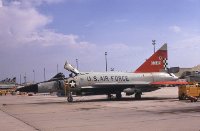
F-101B Voodoo 111th FIS Texas ANG "78/80 William Tell Champions"
Giovanni replied to Giovanni's topic in The Display Case
Sorry if I resume this. Just an update since I added a display base and some details recently: I promise: no more update on this! And thank You for all the kind comments you have left sofar. Giovanni -
Hello, I found some time to go on with the Dagger. So the situation is the following: ADC Gray: Mr Hobby H61 + White + a drop of blue. Artic Orange: Mr Hobby H-23 lightened with Tamya Orange X-6 and some Mr Hobby Yellow H329. The color tends to red but in the pictures I took tends to orange. I found some difficulties taking pictures. Look at the first two for a better corrispondence. This evening I ov
-
Hello Laz, thank You for resurrecting this thread. unfortunately I had no time for completing this project since my wife and I had a baby last February. At the moment it's almost painted but some work still is missing before decalling. All the bits are already ready including a whole set of home made stenciling. So it's just a matter of time and it'll be ready. After my summer holiday's I'll be on it again. Be patient Giovanni
-
Ciao Cursad, when will You release this? thank you Giovanni
-
-
Hello modelers! My little update: I worked on the air intakes painting the interior first in white FS17875 then masked and painted the splitter plates and lips in steel from the AK extreme color range. After all was dry I placed two custom made decals (laser printed on white decal film and cut out). I used the microscale softeners on them and when all was set and after washing the part in water I finally sprayed a layer of Mr Color Gloss GX100. The parts are delicate, I know, so every care will be used while masking. I really want to avoid any varn