

crackerjazz
-
Content Count
3,026 -
Joined
-
Last visited
Content Type
Profiles
Forums
Calendar
Everything posted by crackerjazz
-
Hi Tracy, thanks. The Saturn 2 8k is a nice printer! Got one as well still BNIB, an Elegoo Mars 3 and a Phrozen Sonic Mini 8k which is the main printer I'm using for the 1/24 build since the parts aren't too big. The Mars 3 and Saturn 2 basically have the same kind of build plate and leveling method so I can give you some tips if you need help. And yes, I can send those files over to you -- I just hope I have a backup as I've had several drive crashes : ) I think as long as you use maybe one of those tougher resins the printed front mount even with its spindly legs can be used on the mo
-
Hi Manfred, thanks! : ) Printing has some limitations, unfortunately, so some things have to be enlarged a wee bit for them to print and for them to remain visible to the naked eye when printed. I've tried doing rivets in actual scaled-down size and though they may be visible when the photo is blown up, they are hard to see on the actual model without a magnifying glass, which we don't always carry. Highlighting them during painting or weathering using our modeling implements might prove impossible, too, if they sit so close to the surface so compromises have to be made. Wall thickne
-
You guys are not tired of seeing printed parts on supports? : ) Size comparison of 1/24 and 1/18 engine subassemblies. I got careless with the 1/18 -- dropped it and lost the cone and now I couldn't find it anywhere. It was a true labor of love built with bulkheads, putty and lots of sanding. The 1/24 cone is a labor of the printer : ) By the way I noticed the cone shouldn't be that pointed. The very tip is actually supposed to be flat with a small hole in the middle -- will need to correct i
-

Revell 1/48 F-15E Mudhen OIF "Shangri La II"
crackerjazz replied to Drew T.'s topic in In-Progress Pics
Just love your work, Drew. Your precision work is surgical and the realism of your weathering is astonishing. -
Fantastic stuff, Shaw! I've always wanted to build the HL-10 from The Six Million Dollar Man : ) I bought a vacuform machine for the purpose of building a 1/18 or 1/32 model and tried to build the buck but gave up. The vac form machine's been sitting there for more than a decade waiting for the right buck to come along, lol. Then 3D printing came and offered hope in being able to print the whole airframe -- the only problem being I'm terrible with surfaces and complex curves so I couldn't model the body. So there you have it - a vacuform machine with no buck to form and a 3D printer wi
-
Excellent job, Tony! Read the novel and saw the movie, too, which came a few years following Lt. Belenko's defection.
-
Wow, thanks, habu2 -- ordered! : )
-
Hi AV O, that's quite a collection : ) The Prowler does look huge compared to the the others. Hi Caudleryan, gotta to look those up, thanks. I know I have a Tamiya scriber somewhere -- if only I could find it. I faintly recall it had sort of a triangular tip. Some progress shots. It does look better at normal viewing distance. Close-up pics magnify the slip-ups too much : ) I like the long straight lines - I wish they were all like that : ) Box shapes are still ok as long as they're in open spaces. It's when they ar
-
Hi Mr Happy, thanks! : ) I've never heard of it called by that name before, but I looked it up and you're right : ) I'm looking at more pics of the tadpole and it's really starting to look like a mean war machine with an imposing stance, even when just tied down on a carrier deck with its wings folded. Just an update to the scribing work -- I didn't think it would be this difficult especially since some areas are hard to reach for sanding like those around the intakes or those that are too curved, but I'm chipping away at it...
-
Kike wow that's what I want! : ) Hey, you rescribed it, too -- that gives me hope : ) How'd you do your rivets?
-
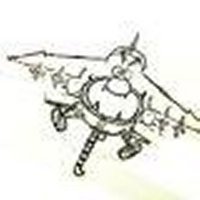
Pencil drawing of an A-10C demo jet special scheme
crackerjazz replied to joeltc's topic in Aviation Art
Very nice artwork, Joel! 👌 -
Hi, I'm constantly inspired by wardog's super-detailed build which is a rescribed Revell-Monogram A-6E TRAM so I'm going to try and do the same -- the rescribing portion, I mean : ). I also got to thinking about the various kits in my stash after reading Dai Phan's thread. They won't be built because I'm so pampered by modern kits with perfect engraved panel lines : ) I did think about just getting the Hobby Boss kit but that will kill my purpose. This isn't a full build - I just want to practice and get better at rescribing to hopefully pick up some techniques along the
-
Thanks, guys! : ) Thanks, habu2, I remember my drafting days, too, with the T-square and technical pens that leak or clog and need shaking everytime you lift them off the paper -- those were fun times for sure : ) Printing technology seems to advance by leaps and bounds, I'm excited to see what lies ahead -- especially when supports become archaic : ) Breaking down that intake thing: Breaking this down into 2 parts so that they can be printed in an orientation that will allow the riv
-
My experience with white is that it has a tendency to pool in crevices, so be prepared to apply several coats. I, too, have had great success with Tamiya white primer. Don't spray too close or you'll flood the surface. But not too far or it will dry up before touching the model and it will dry rough. Just mist it on first sort of and let each coat dry thoroughly before re-spraying. I like to wait 5 min or so before re-coating. The first couple coats have almost no coverage but you'll be surprised how the next coats build up nicely. I like Tamiya primer, too, in that the shade is almos
-
Cool stuff! : )
-
I didn't care as a kid - I found joy in building models raised panels or not. I blame the internet for the loss of my innocence with all those model reviews, forums like these that discussed about panel lines and made me see the truth that I now can't unsee, lol. Now I aim to rescribe and it has only made my life miserable : )
-
Wow, will you lookee that : 0 I was actually mentally prepared to start scraping off blades from the FEP when the printer beeped "done". But when I peeked up at the build plate the fans were fully grown and smiling at me. I'm tempted to delete the photos showing me pulling off all those blade supports but it'll be fun to look back on. It did help that the blades didn't have any "islands" and the lowest layer was fully connected to the body but I'm surpised that at that length and being that thin, they didn't need supports and can be pulled off the FEP from only one end wit
-
Thanks, Bill and CaptKirk! : ) I was trying to recall where the fans are on the Falcon's engine and just remembered -- the engine deck : ) That's a cool technique using the rotary tool, thanks! I'm also thinking about how far a fan blade can extend outwards without supports. Once the first layer of blade prints on the FEP, the body can still peel it off the FEP from one side. The blade extends outward less than 4mm so maybe it can do without them? Will risk a failed print and see : ) The worst thing that can happen is I'll be peeling off little lines of bl
-
Hi mhvink, thanks! : ) Thanks, Pete : ) Technology sure has helped move this project along in ways I never imagined. Hopefully I can get it done by 2024 for the LLRV's first flight anniversary : ) That's a nice round goal - 10 years for building and in time for the 60th anniversary : ) Ten years -- wow, that's a big chunk of my life, lol. You know, everyday I gently run my hands on the printer's cover and tell her not to break down on me : ) Hi Manfred thanks -- I did take a photo but I figured you guys were tired of seeing prints with supports on the build plate : )
-
Hi Spacecraftguy, Spaceman, thanks! : ) 1/24 engine aft section parts after support cleanup and curing. Had to be very careful with the support removal on the blades which were very thin -- you cut the supports and they push up on the blades. I did manage to break a couple blades and had to replace them with carved up sprue (er, supports, rather : ). This is deja vu.. I remember doing this i
-
Thanks, Manfred! : ) Some progress on the GE CF700-2V engine aft section parts. Spent some time working on the breakdown and thicknesses to make sure they print. One of my considerations was to keep the walls as thin as possible to keep the weight down, as I'm not sure how much load the frame can take. The parts are light, but you never know. I don't want to end up with an LLRV with splayed legs : ) I made the walls of these parts thick enough, though, for cleaner support removal. Many of the supports will be situated on mating surfaces so I have to make sure the supports
-
Hi CaptKirk, Manfred, Pete, thanks, guys! : ) So much waste, right? Some structures allow for the use of minimal supports but in the case of skeletal trusses like these there seems to be no way around it. Solidworks shows the volume of just the parts but the slicer software calculates the total volume (supports included) to identify the amount of resin you'll need to pour into the vat. I'm terrible at judging price -- not sure yet. I wasn't really planning on selling these initially. I was doing the 3D work for this (man, was that back in 2014 -- time really flies) at fi
-
Thanks, Manfred! : ) Was trying out different support setups. I could get away with those side-pointing boltheads even without support. Worked also on the square piece on top. Experimenting on how to eliminate the ridges on the tubes caused by supports. I put a break-off tab on the bottom of the tube where the supports can connect to. I've done this before for some small part number tabs on some Cassini parts but wanted to find out how well it would work on longer tubes like this.
-
Hi, John, thanks! How are you set for ventilation, by the way? I'm currently using plant-based resin and print in the basement (no real ventilation to the outside) but I'm thinking about using ABS-like resin. But then I may have to print in the garage and with the weather getting colder that won't be good for both the resin and myself. I'd really like to continue printing in the basement where I have everything I need. Some more progress shots. I used medium thickness supports this time and had to snip off a few at the bottom bef
-
Those are actually good : ) You can drop 'em, fling 'em and they just survive. And batteries just last for years and years.