


David Rapasi
-
Content Count
227 -
Joined
-
Last visited
Content Type
Profiles
Forums
Calendar
Posts posted by David Rapasi
-
-
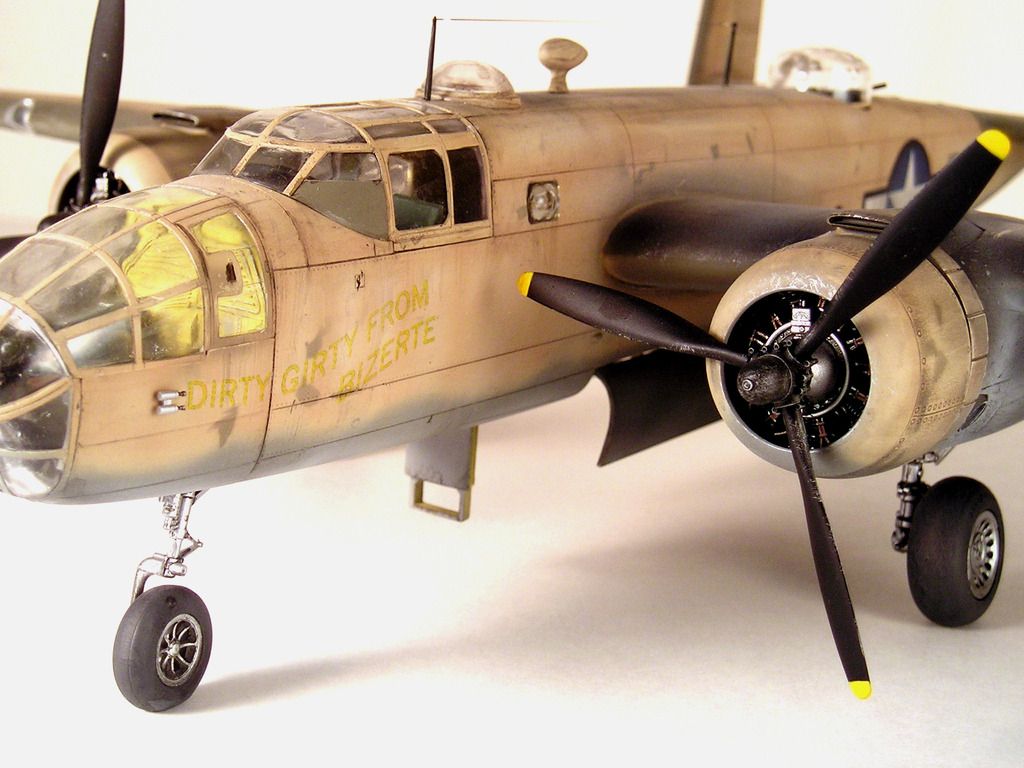
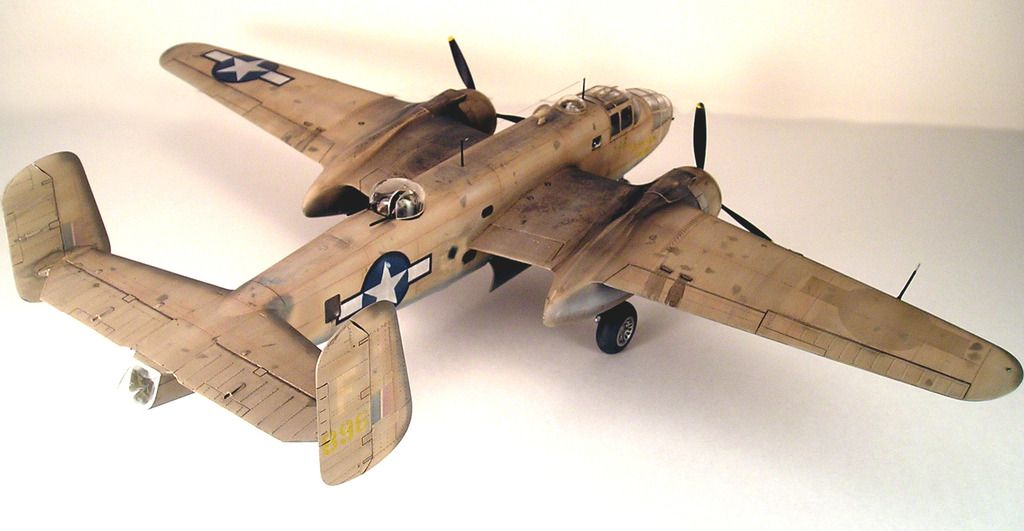
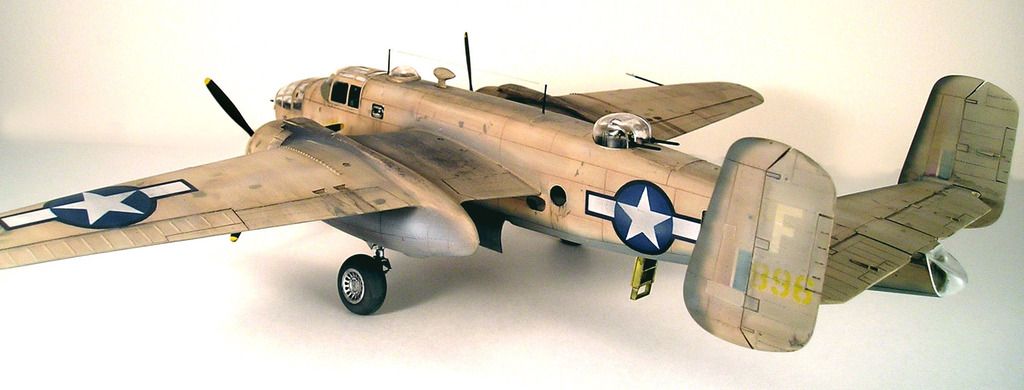
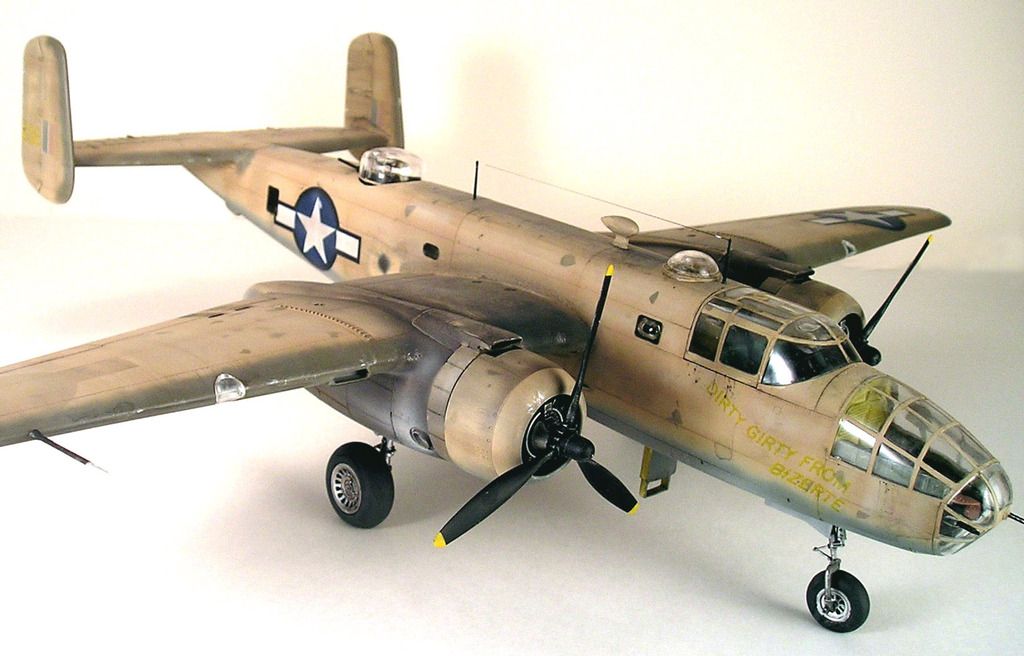
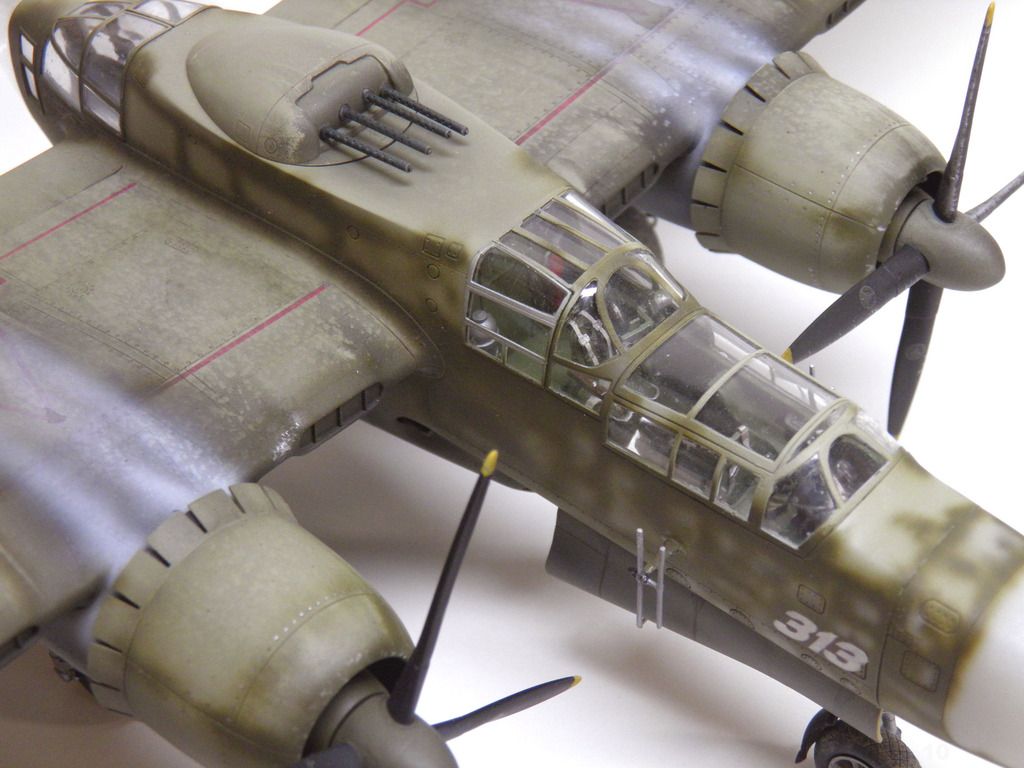
B 25 D DIRTY GIRTY FROM BIZERTY
1/48th Accurate Miniatures B25-D Mitchell 129896
This model depicts an aircraft that was possibly flown by the 340th Bomb Group in late 1943.
The aircraft exhibit’s the wear and tear typical of the Mediterranean Theater.
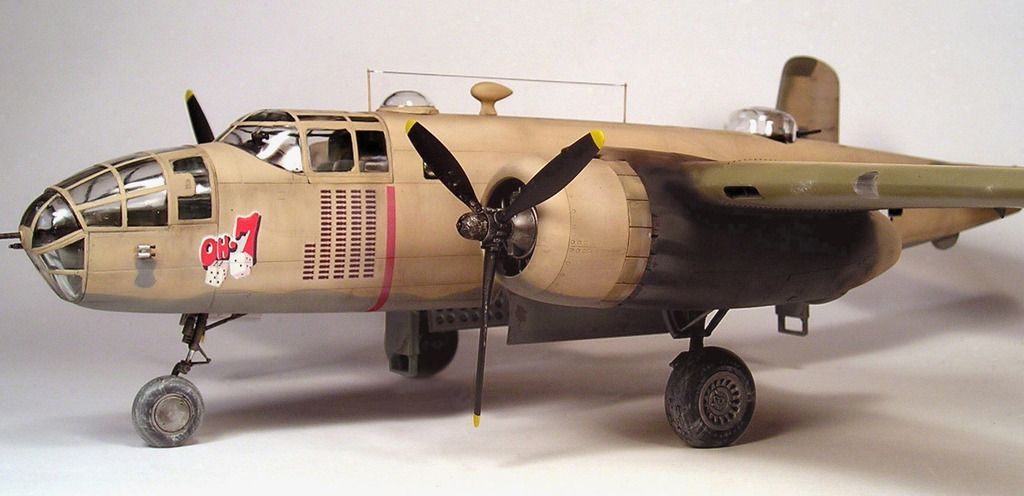
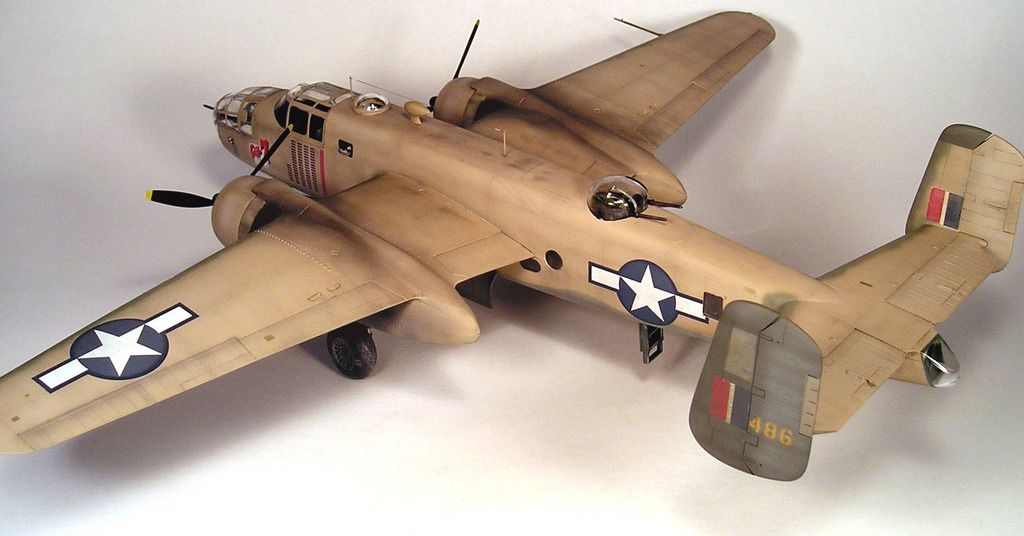
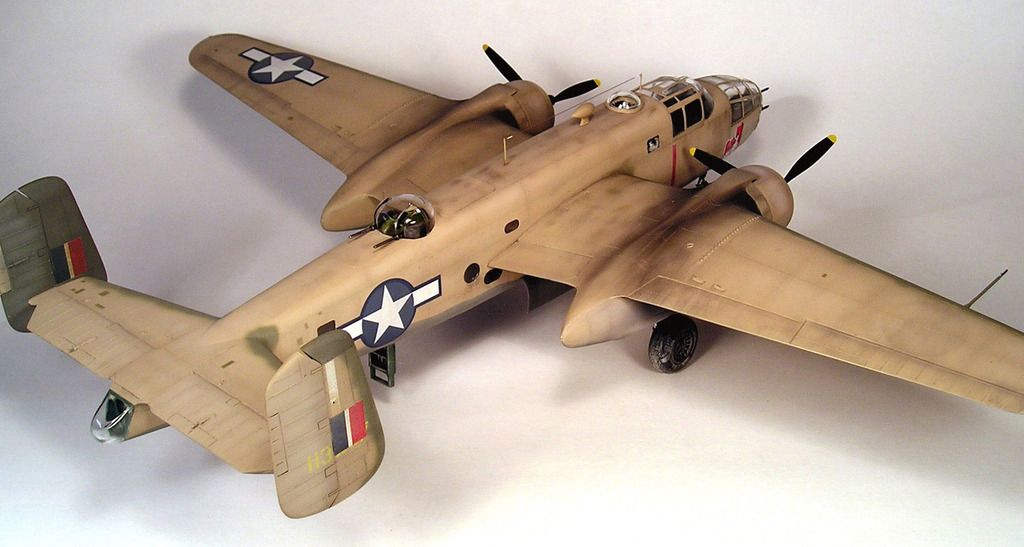
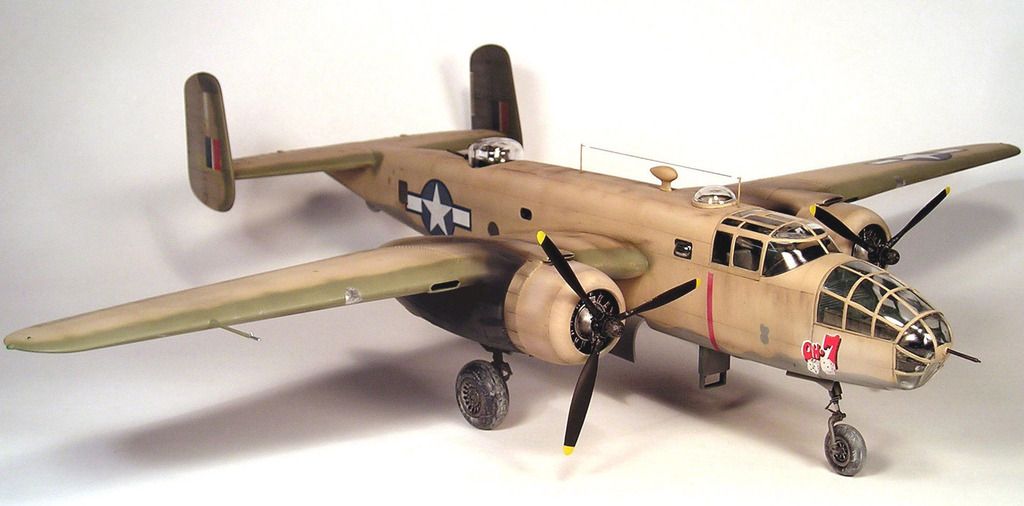
1/48th Accurate Miniatures B25-C Mitchell 113207
This model depicts “OH-7” late in it‘s career.
This was a B25-C that flew over 80 missions in North Africa and Italy from March 1943 to January 1944.
OH-7 was an original 445th BS aircraft that made the trip to North Africa in late February 1943 when the 321st Bomb Group transferred from the United States to North Africa.
Along with the severe weathering of the Mediterranean theater, the left rudder assembly was replaced with one from another aircraft toward the end of it’s career.
-
YanK
Send me a pm and I will be glad to answer any questions.
Rocat
I use Model Master Enamel Paints for everything.
Dave
-
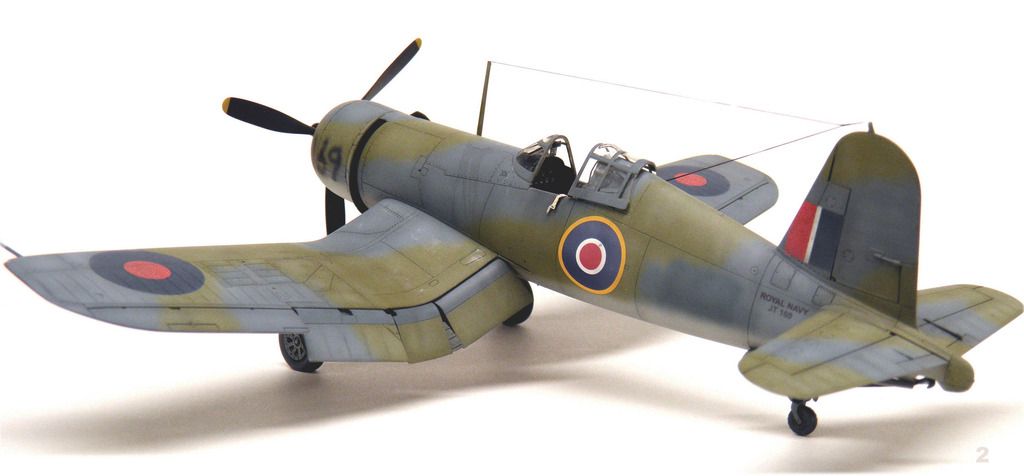
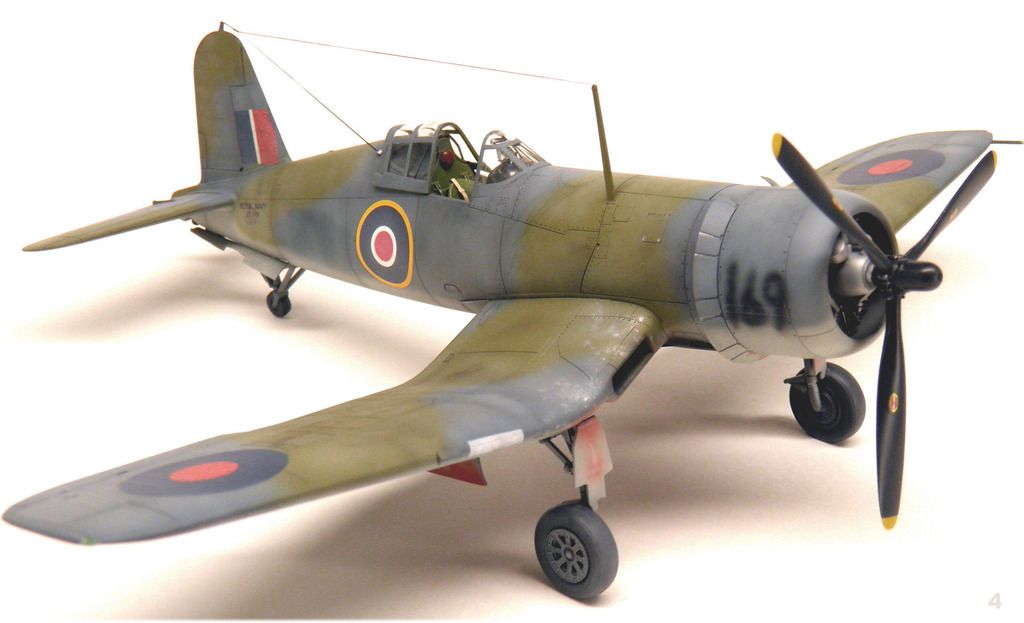
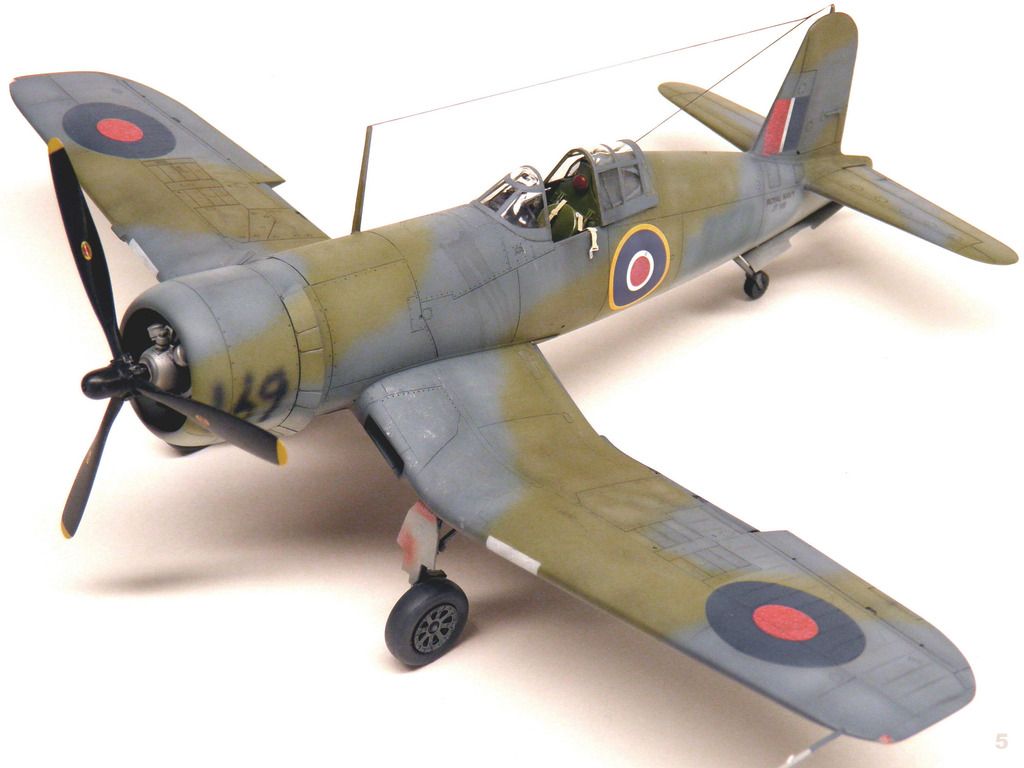
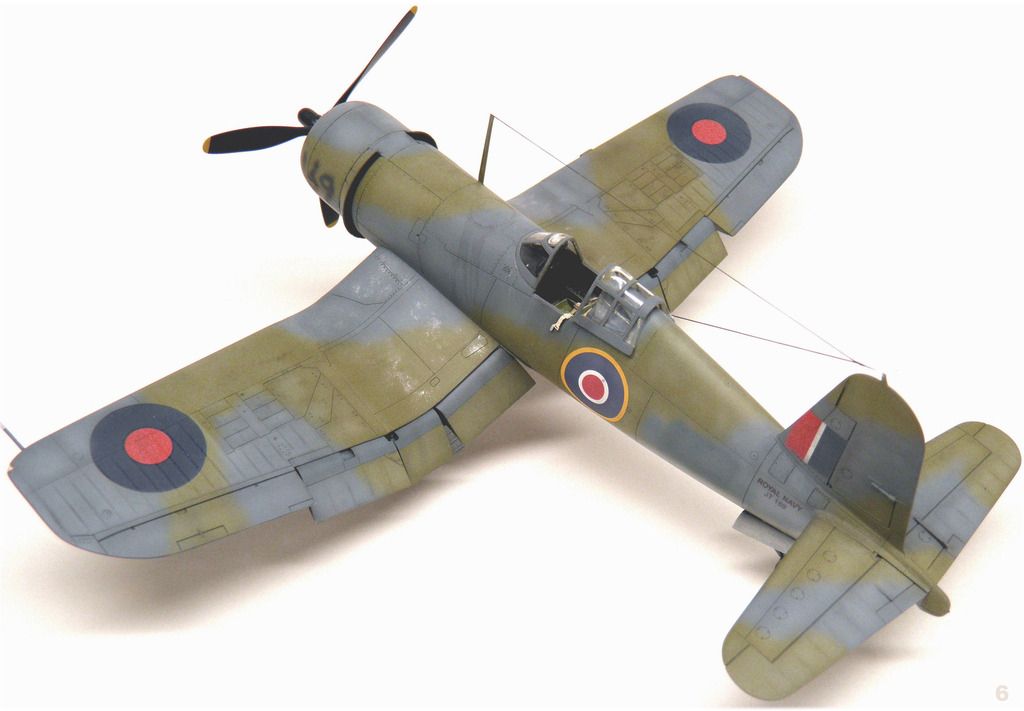
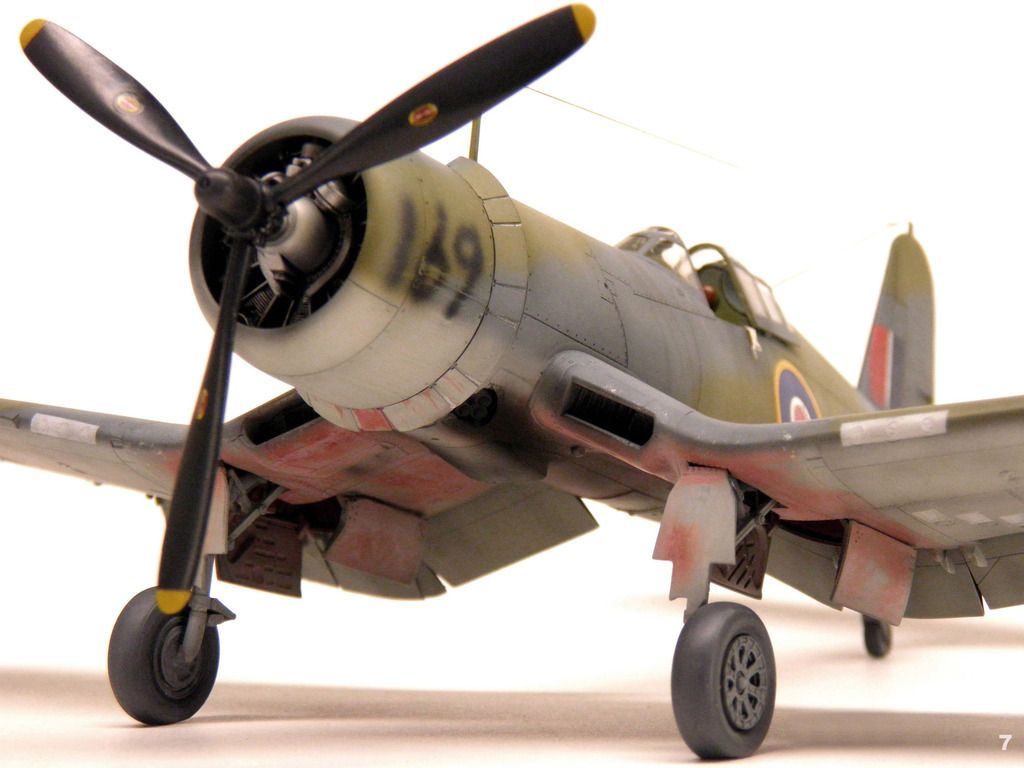
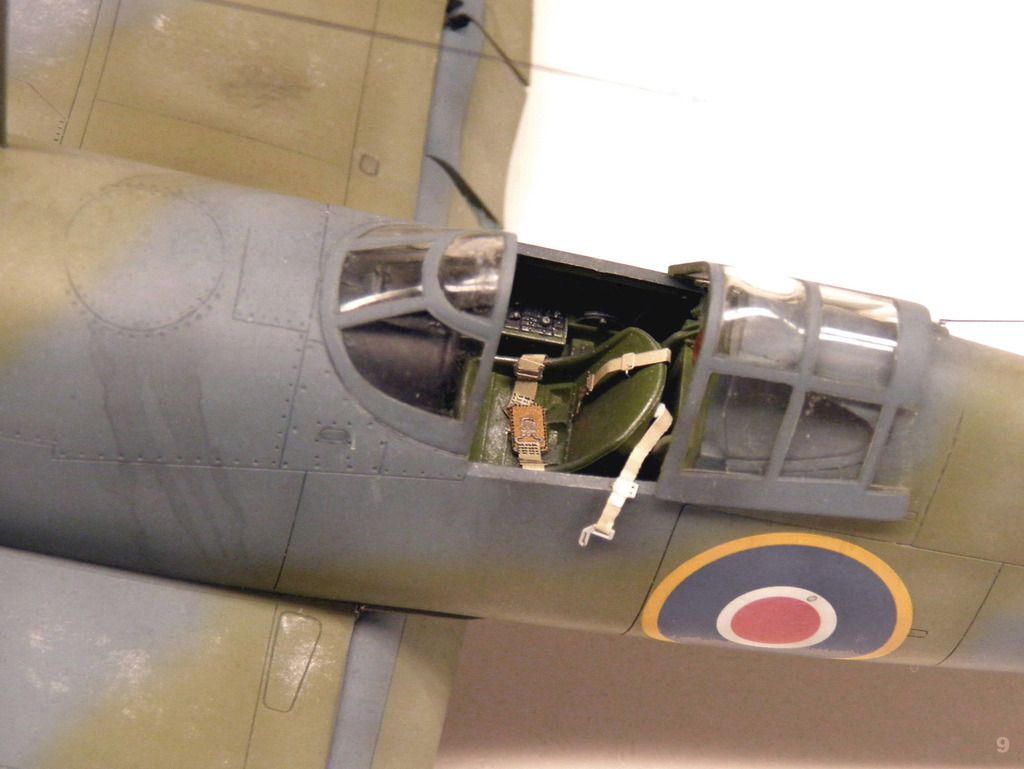
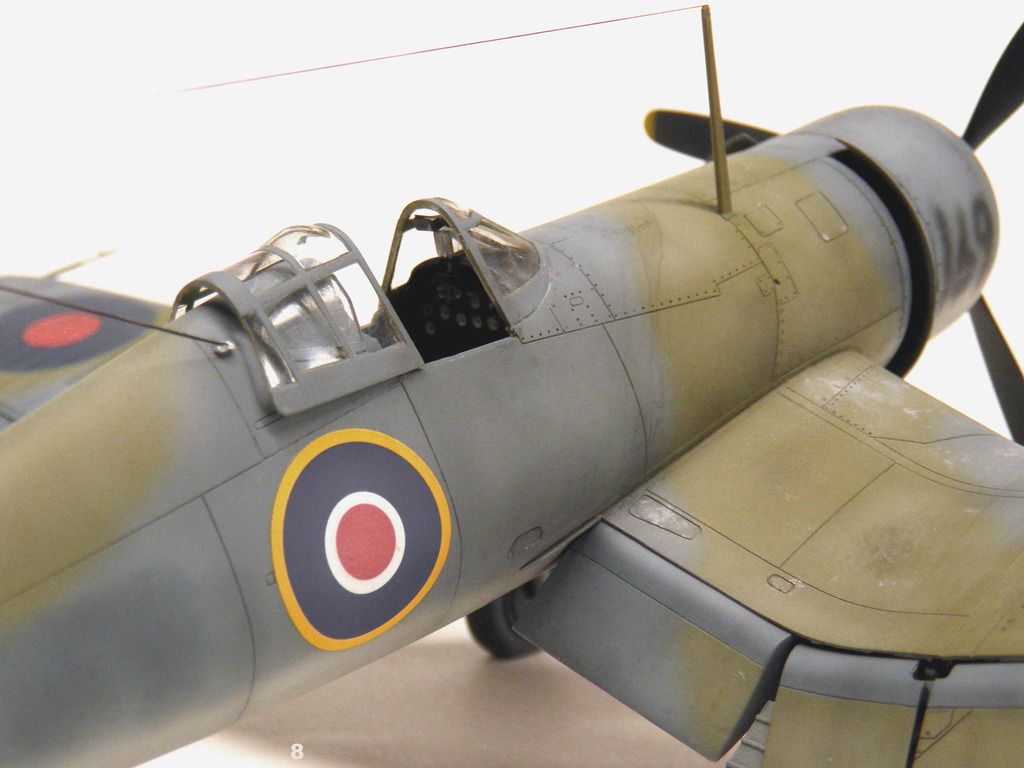
1/48th Tamiya Corsair Mark I
This model depicts a British Corsair Mark I (F4U-1) stationed at Brunswick, Maine in 1944.
JT 169 (18191) was the last Birdcage Corsair built by Vought for the British.
This aircraft was destroyed when it collided with another Corsair and crashed into the sea off Pemaquid Point, New Harbor, Main, June of 1944.FAA Corsairs originally fought in a camouflage scheme, with a dark gray / olive-drab disruptive pattern on top and a light gray belly; the early Navy scheme with the O.D. added, but were later painted overall blue. It is unclear if the stateside squadron training scheme was retained for all British Corsair squadrons
All but initial deliveries of FAA Corsairs had 20 centimeters (8 inches) clipped from the wingtips to permit storage in British carrier hangar decks.
The higher sink rate of the clipped wing combat aircraft caused problems for new pilots when landing on carriers. Eventually all the training aircraft had their wings clipped to alleviate this problem.
The surviving Corsair Mark Is were returned to the Navy in August of 1945.
The Corsair Mark II (F4U-1A) and Mark IV (FG-1D) were the only version used in combat.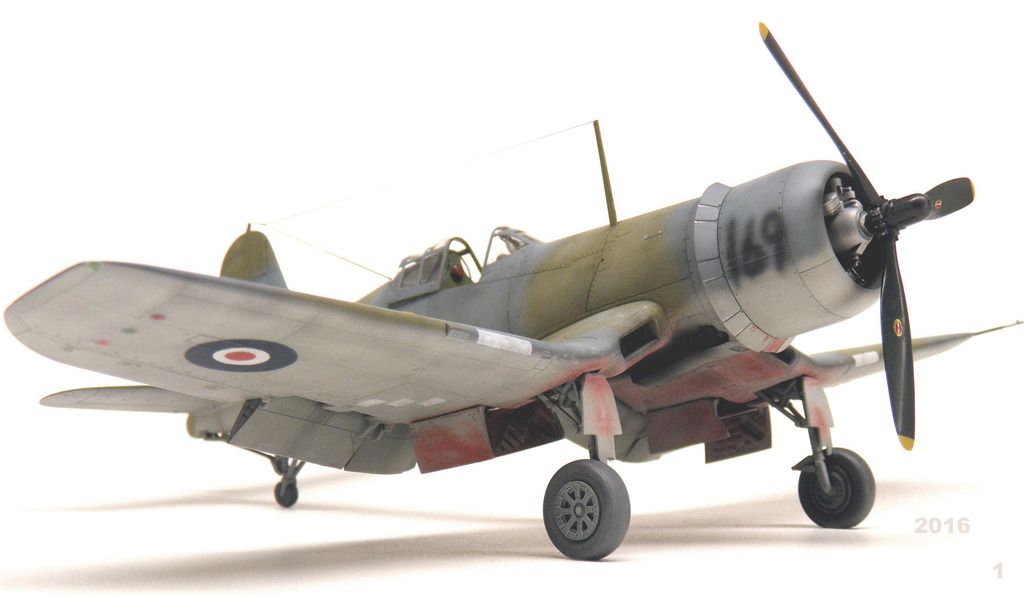

-
Thanks
The article was called Weathering With Dullcote.
The third part is missing from the forum
The link is to the gallery article, but it can be confusing because of the photo layout.
Dave
http://www.aircraftresourcecenter.com/tnt1/101-200/tnt177-tnt-weathering-Rapasi/00.shtm
-
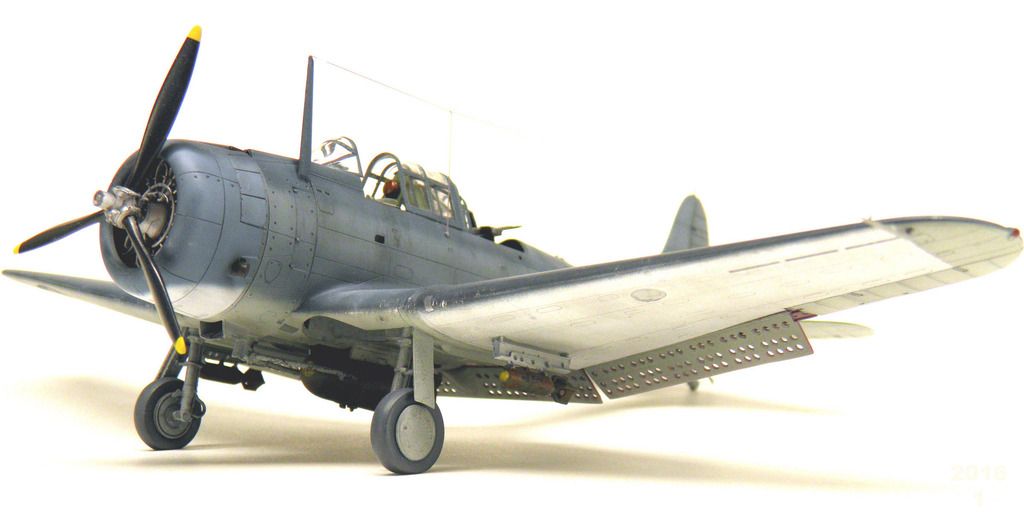
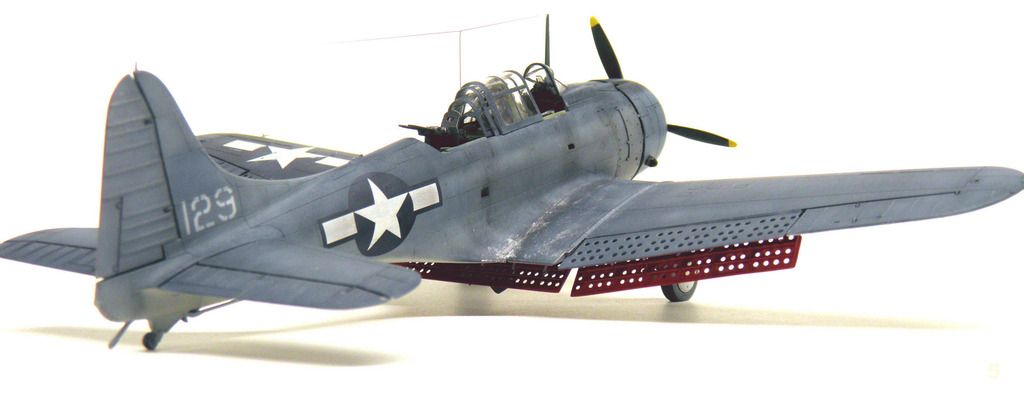
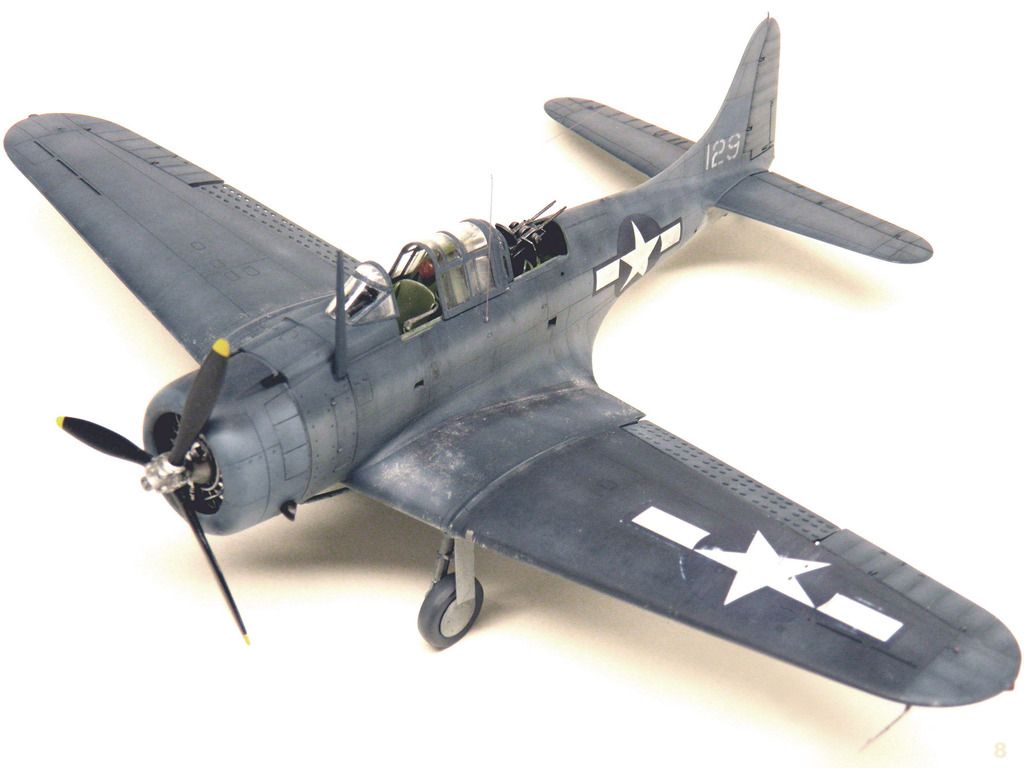
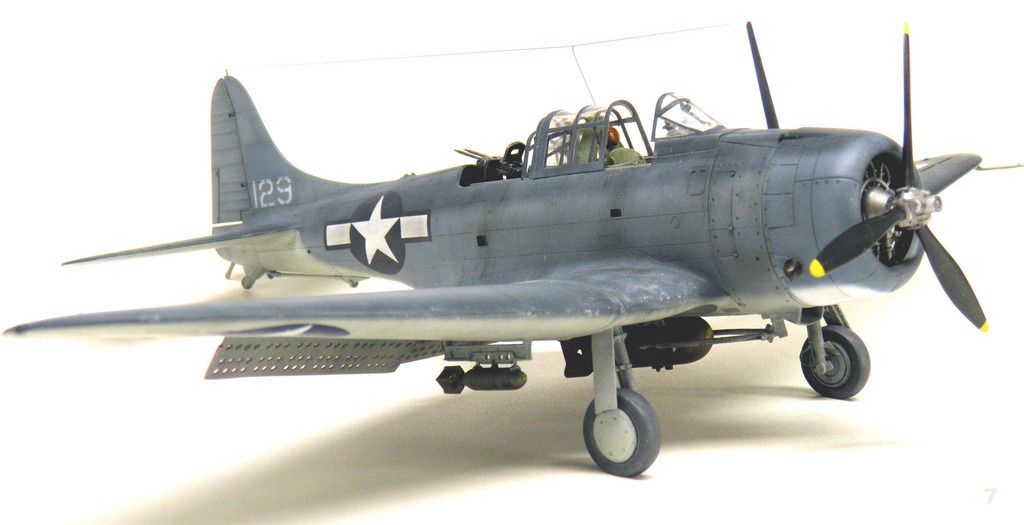
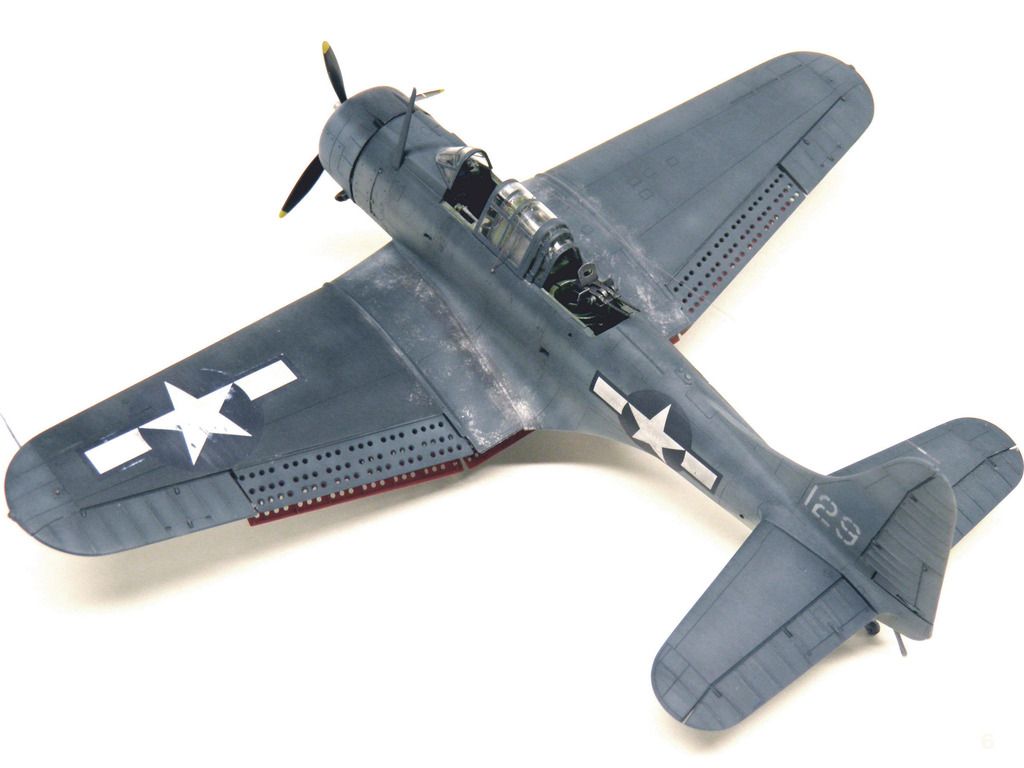
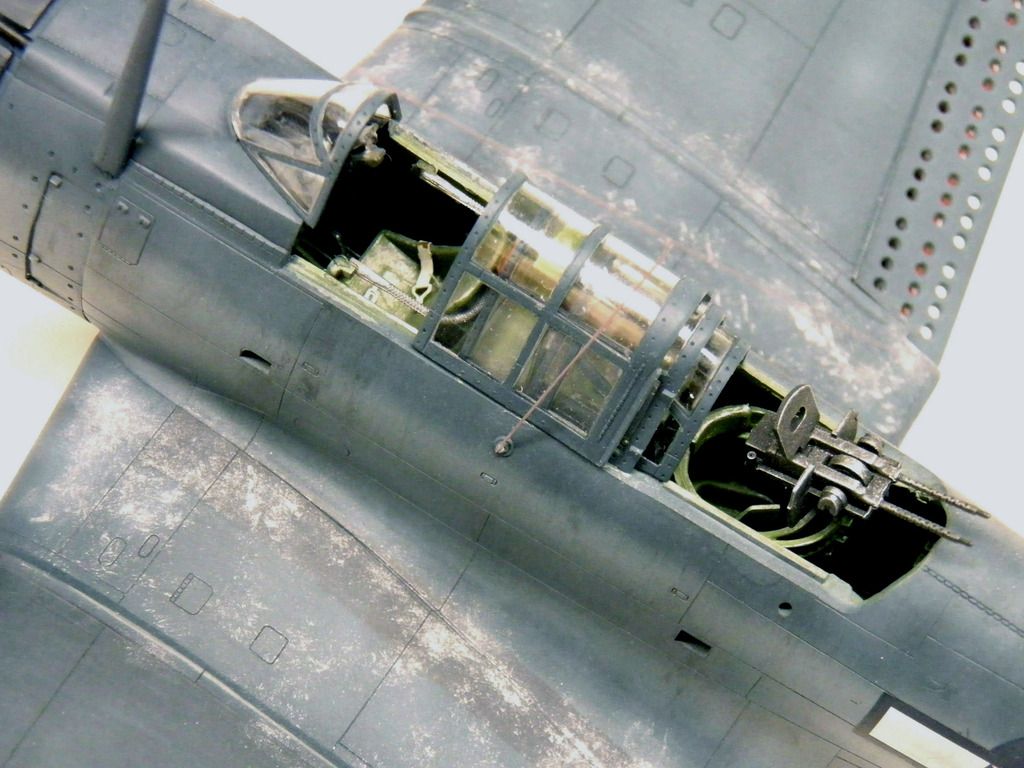
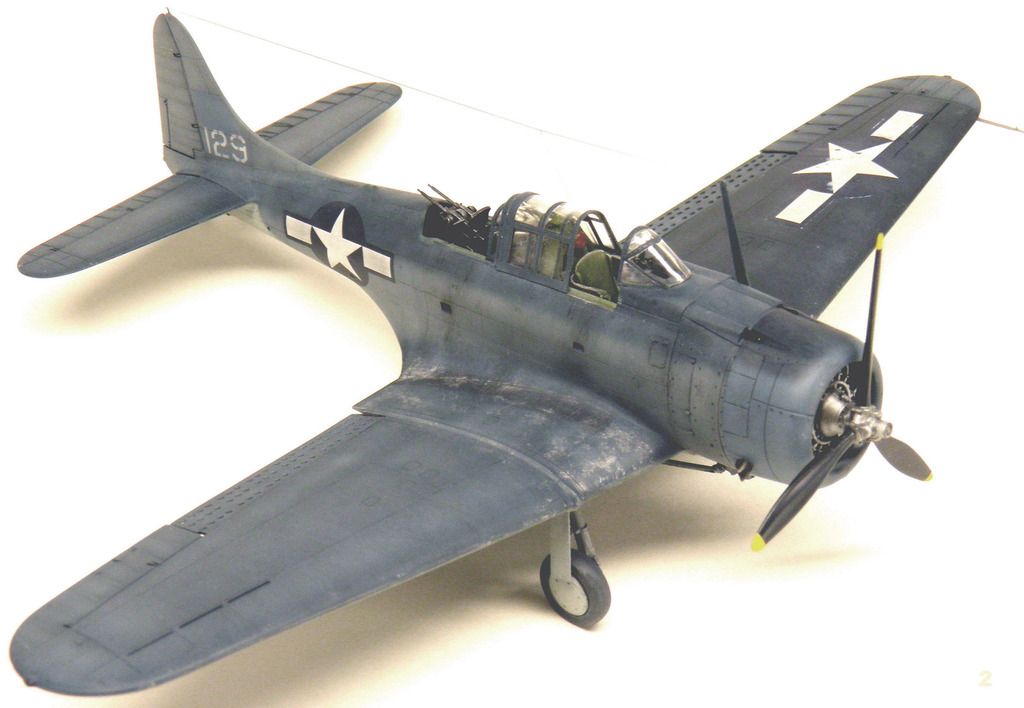
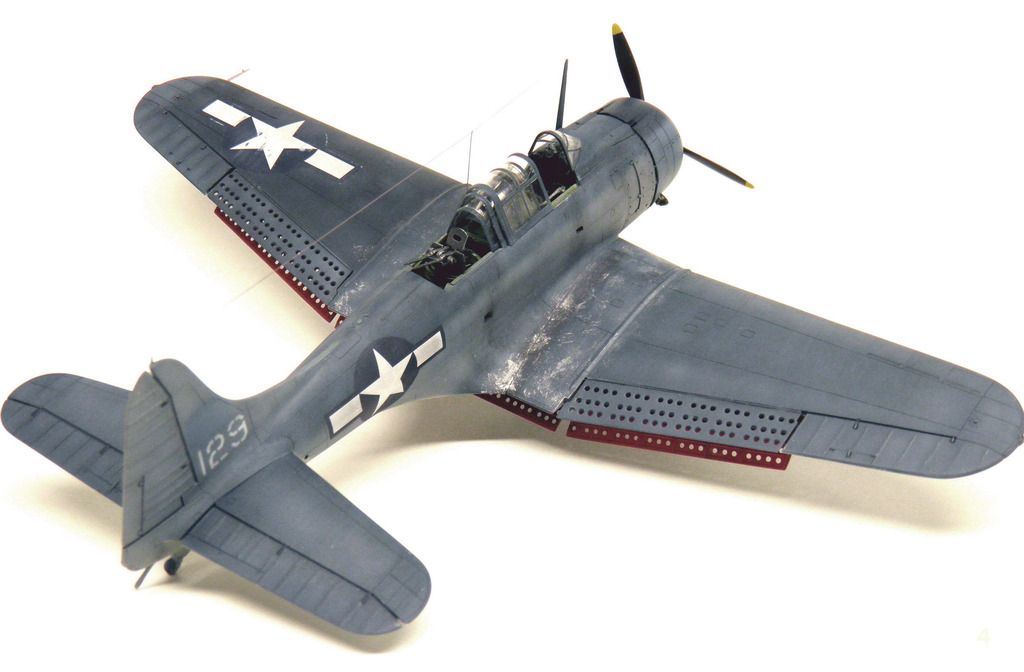
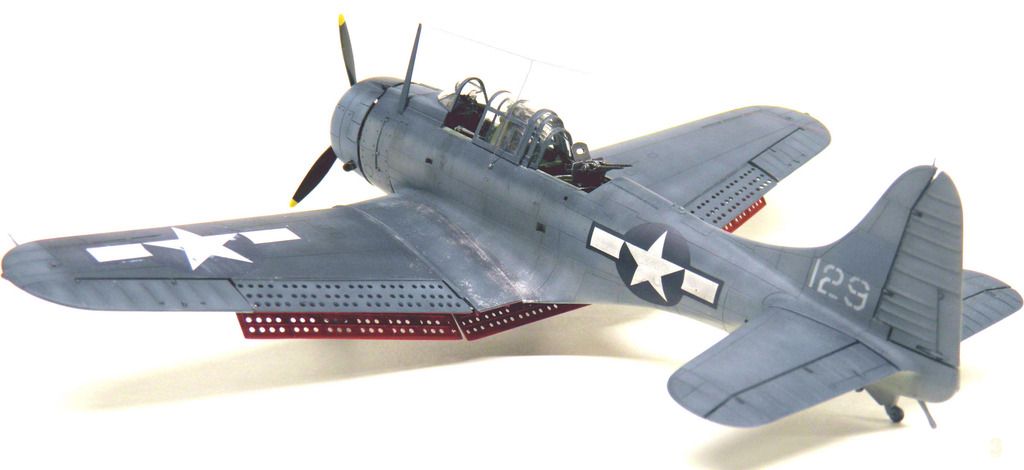
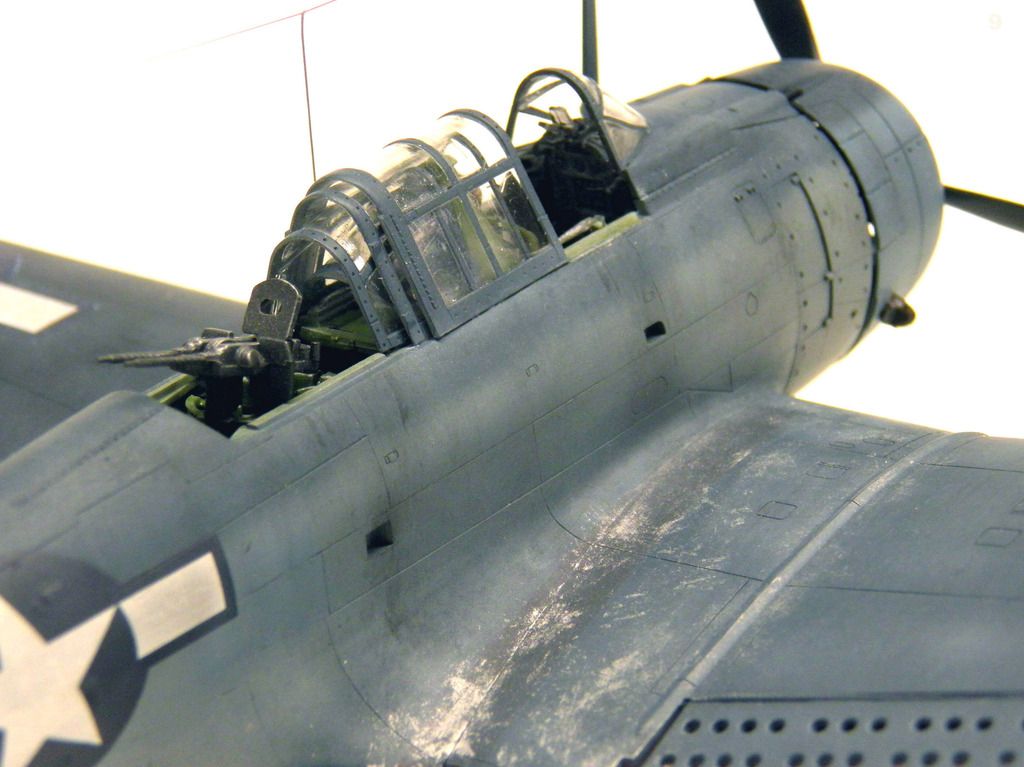
1/48th Accurate Miniatures SBD Dauntless
This model depicts one of the SBD Dauntless stationed on Bougainville in the Spring of 1944.
The Marines flew these aircraft on an almost daily “Milk Run” to Rabaul and other bypassed Japanese held islands.
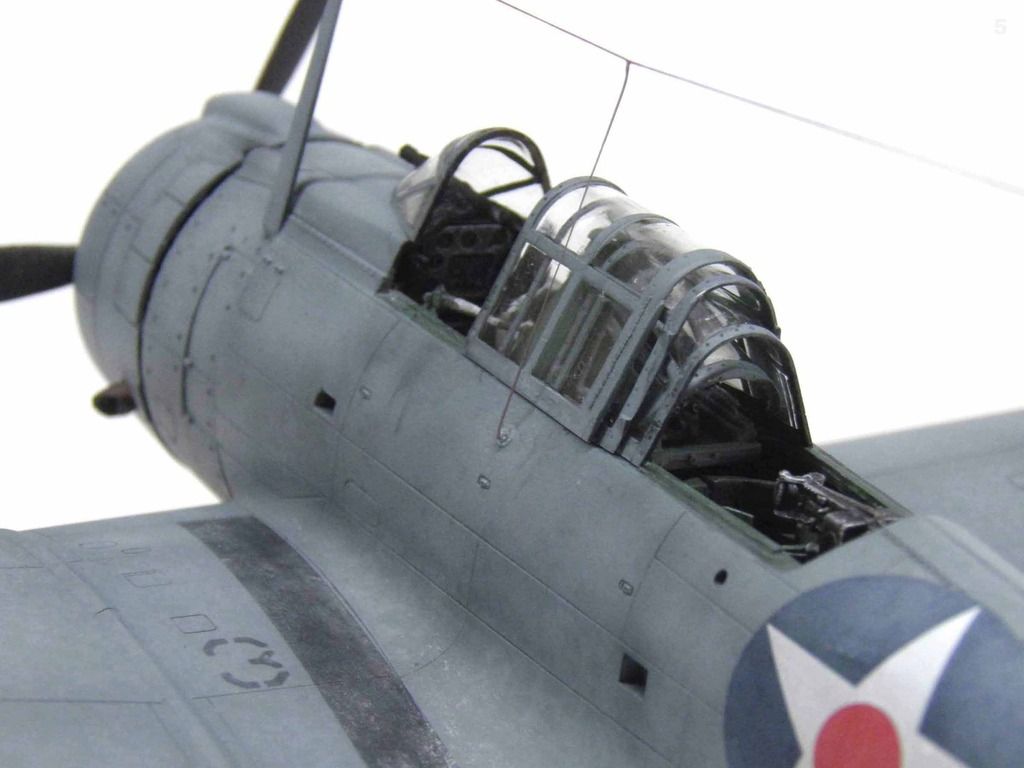
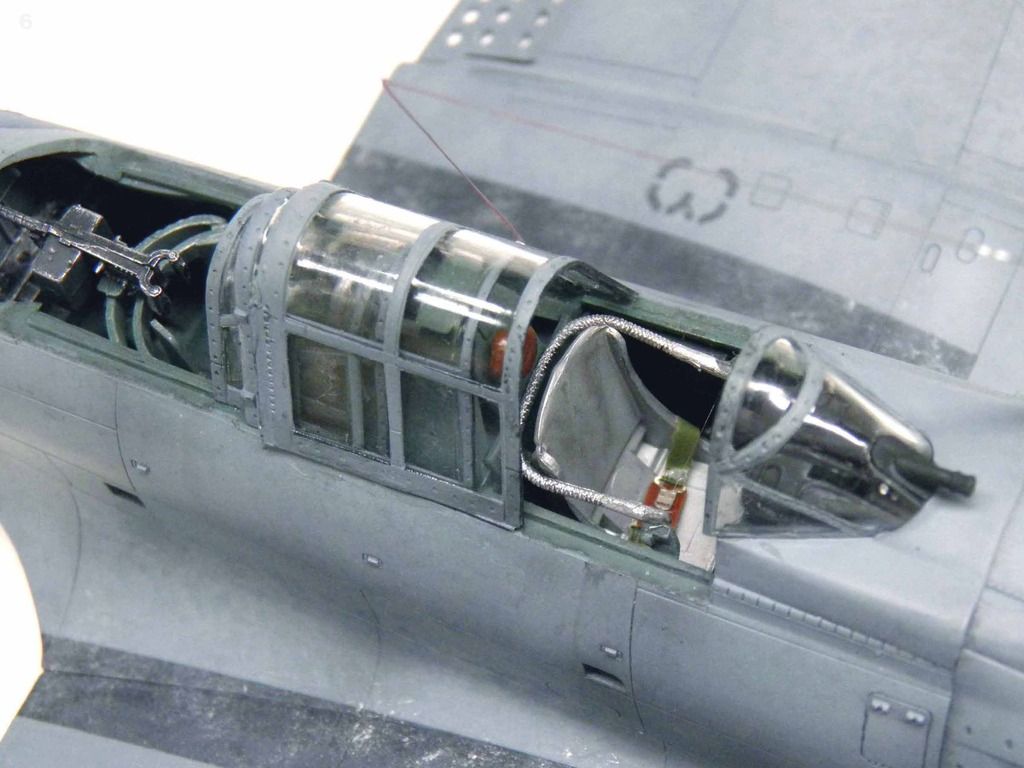
The SBD-4 fuselage has the faded factory applied Blue Gray over Light Gray paint scheme. The Sea Blue paint on the surfaces viewed from above was applied in the field.
The engine cowling and left main wing panel are from a SBD-5 that has the factory applied Tri-Color paint scheme. The windscreen and gun sight are also from a SBD-5.
The term “Milk Run” was used to describe missions to bypassed Japanese islands that had little or no aircraft for protection.
-
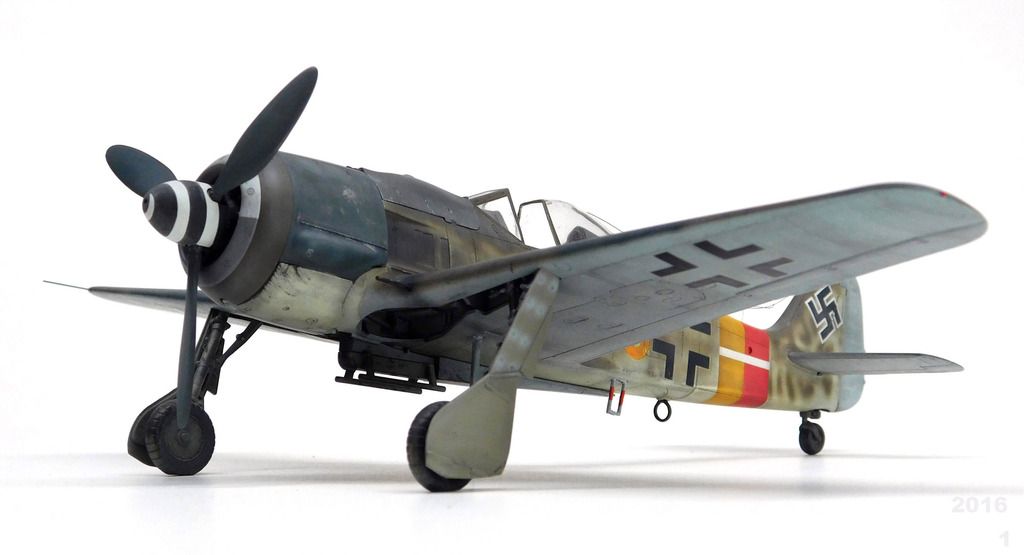
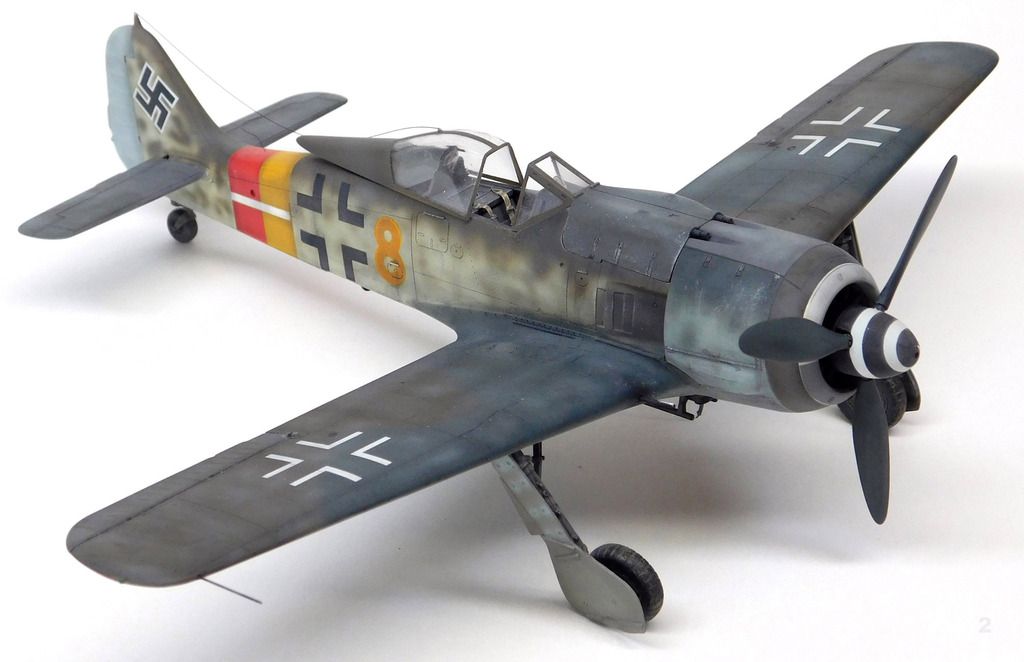
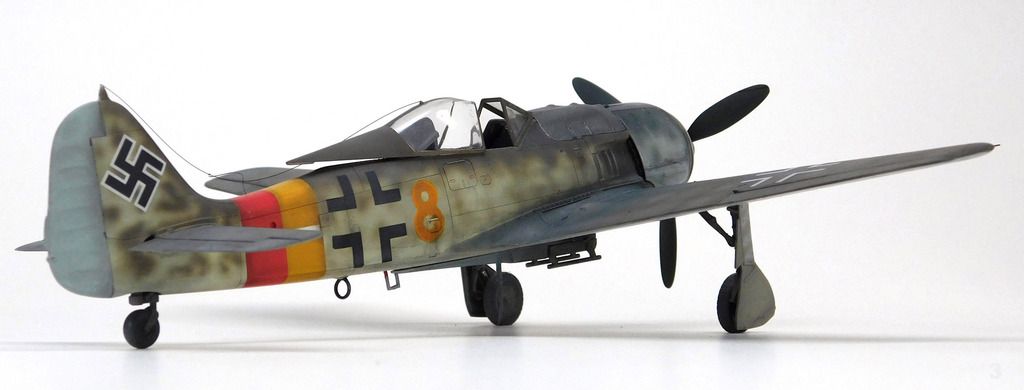
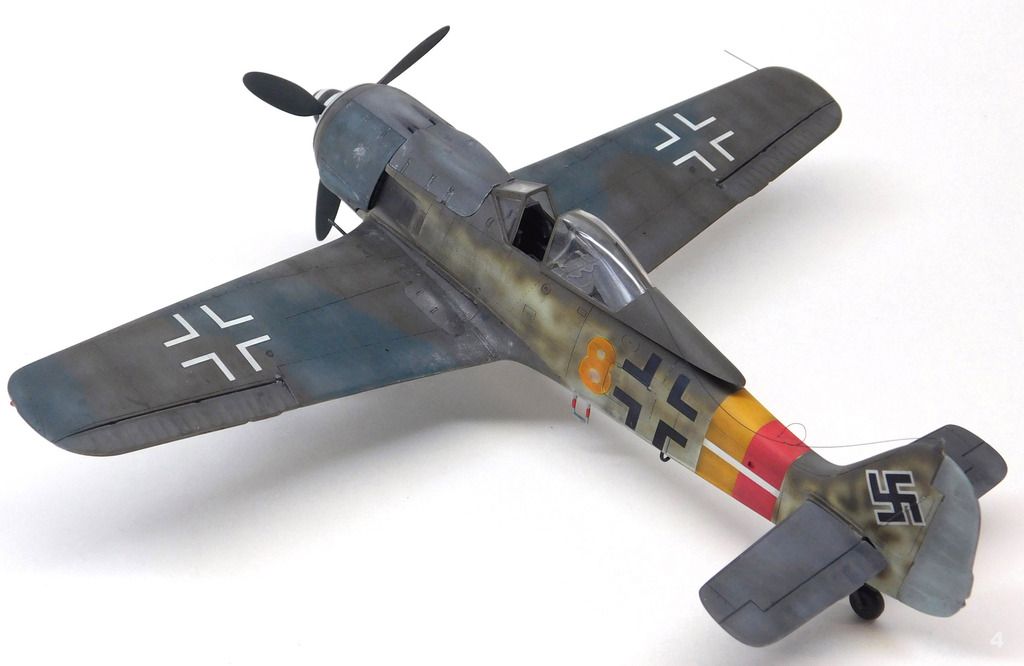
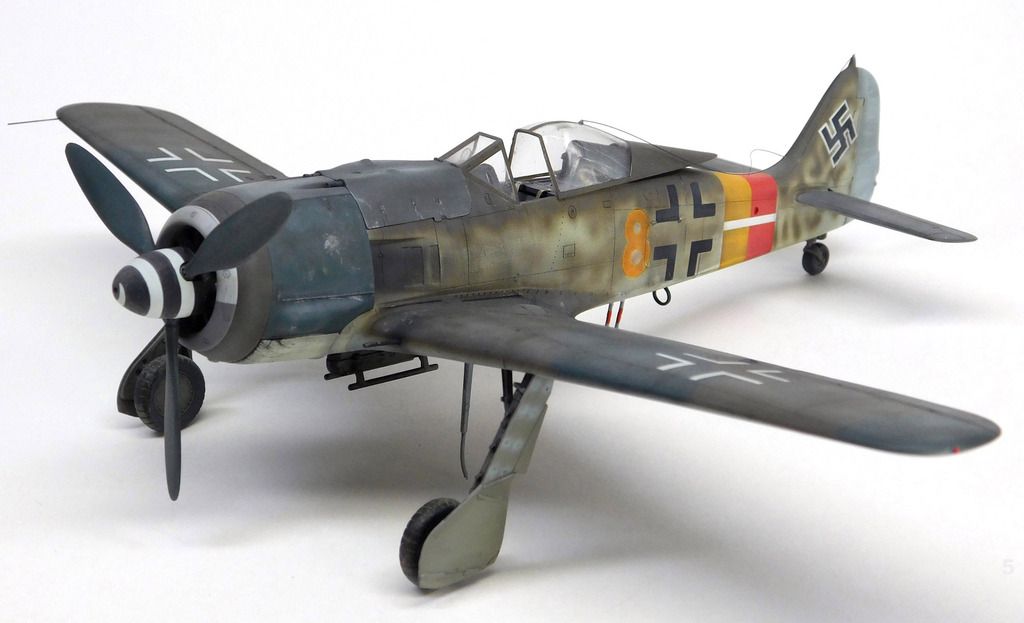
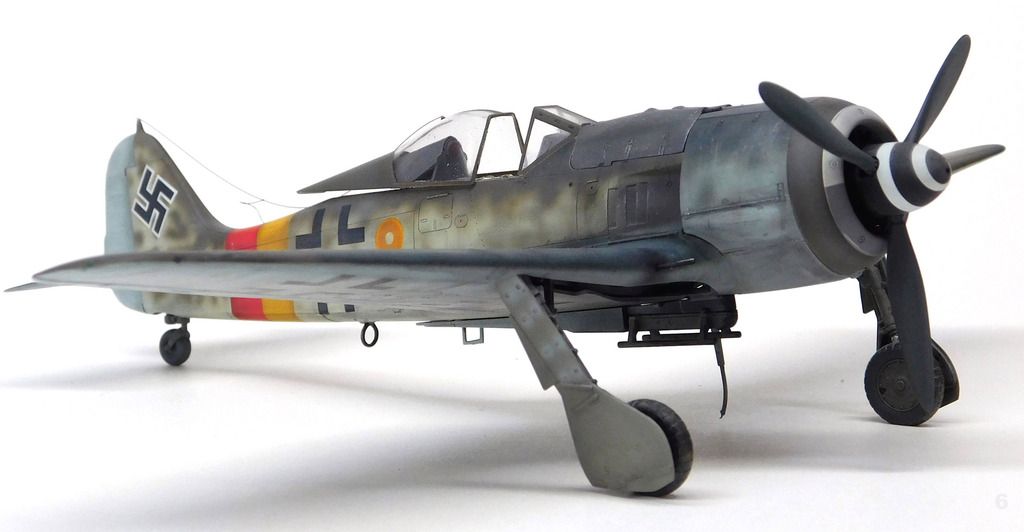
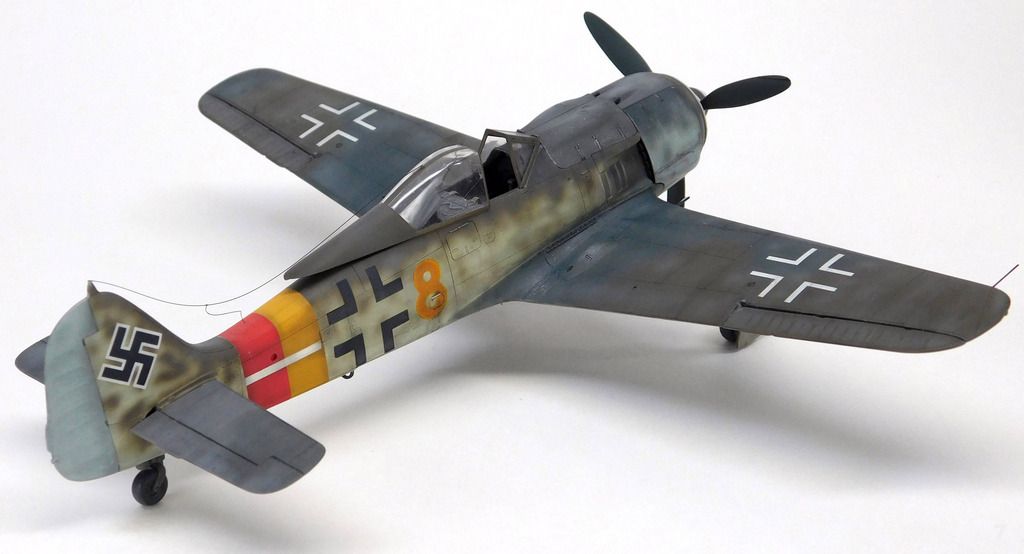
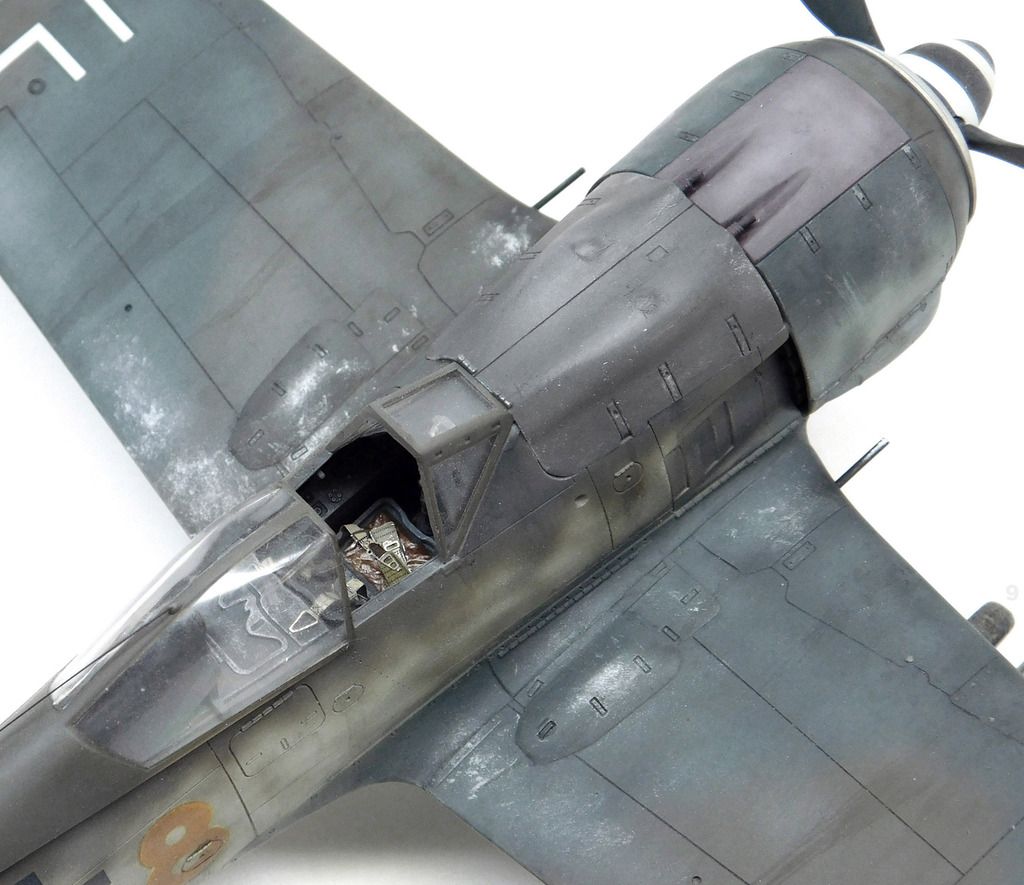
This model represents an example of a pieced-together aircraft, built with parts from different aircraft, and assembled in the field.
Pilot and W/Nr. are unknown, I./JG 301, May 1945.

-
“In May of 1942 the Joint Aircraft Committee’s Subcommittee on Standardization agreed to eliminate redundant paints needed for camouflaging AAF, U.S. Navy, and British aircraft produced in the US.
Under this plan AAF Neutral Gray and Navy Blue Gray were to be superseded by RAF Extra Dark Sea Gray, which became known simply as “Sea Gray”. (ANA603)
However, enough Neutral Gray had been stockpiled by ‘42 that some aircraft produced in 1944 were still being painted the older color”.
Quote from Dana Bell, Air Force Colors Vol.2.
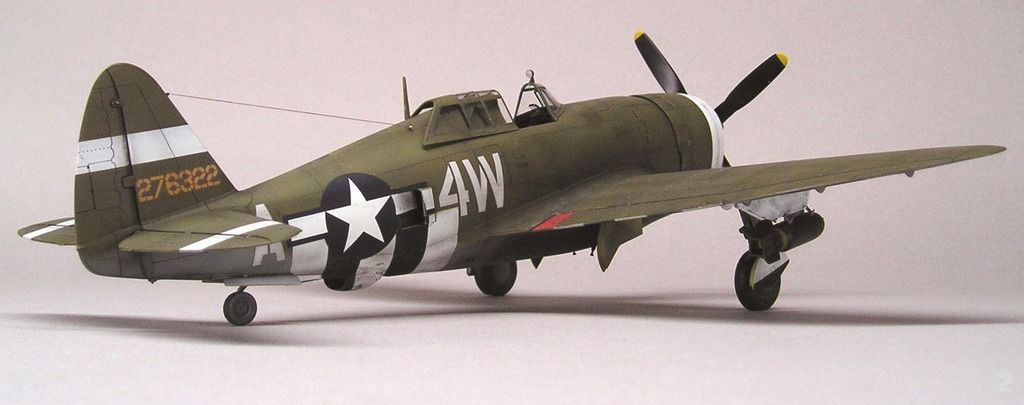
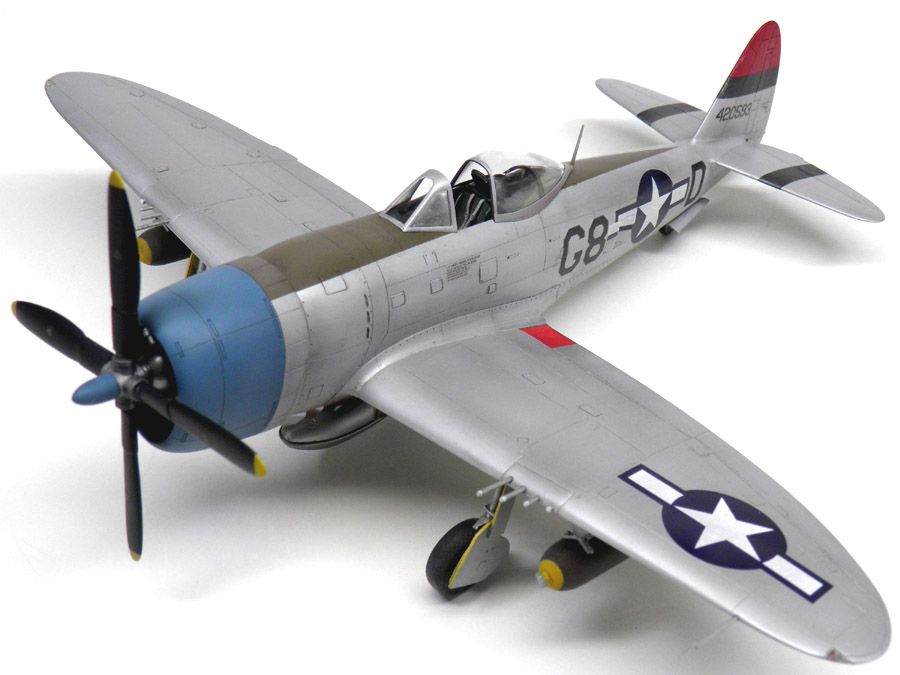
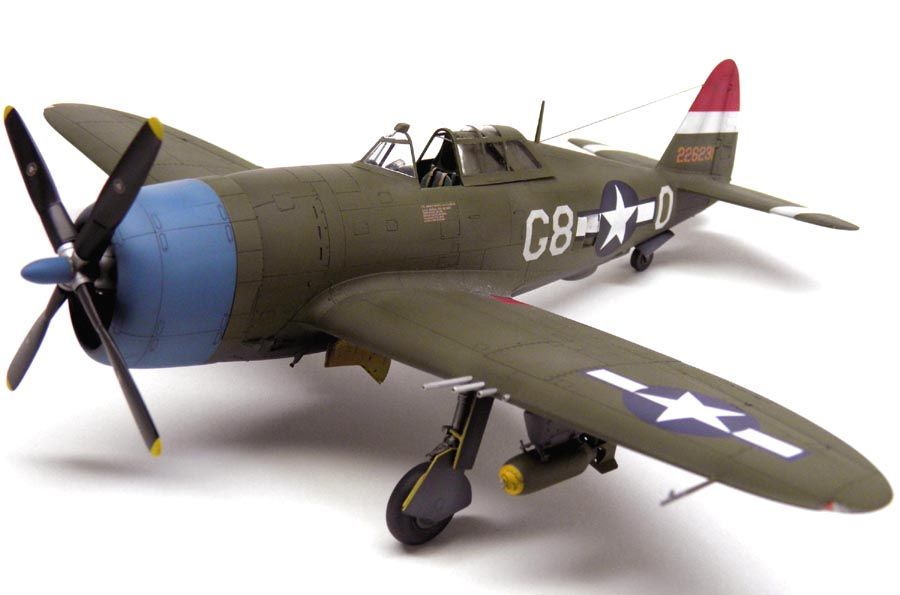
P-47D 15-RE 276322 was factory painted. The 371st was a Fighter Group in the Ninth Air Force that flew fighter sweeps, dive-bombing, and escort missions prior to the invasion of the Continent. After the Normandy invasion the Group moved to bases in France and had the upper invasion stripes painted over.
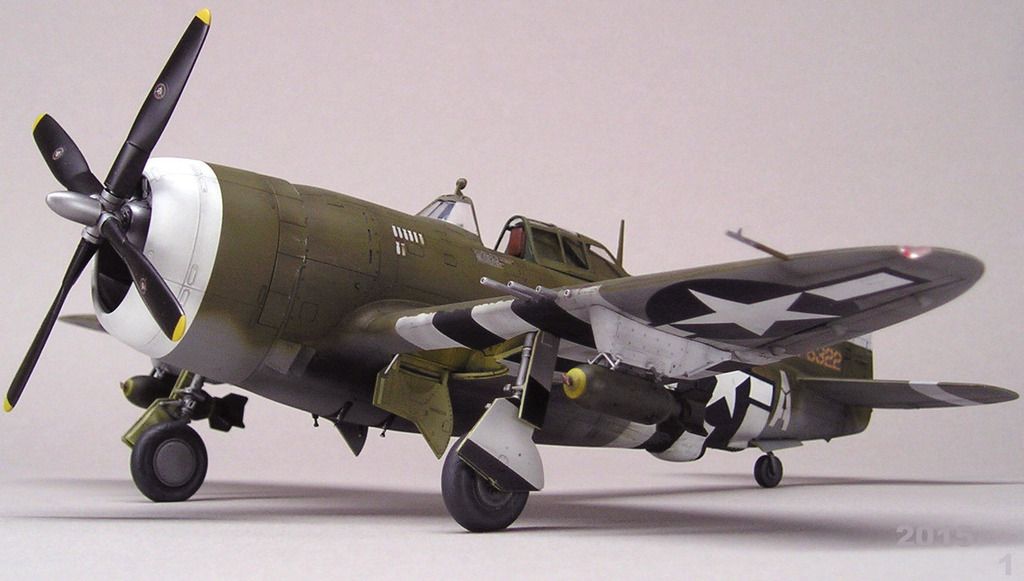
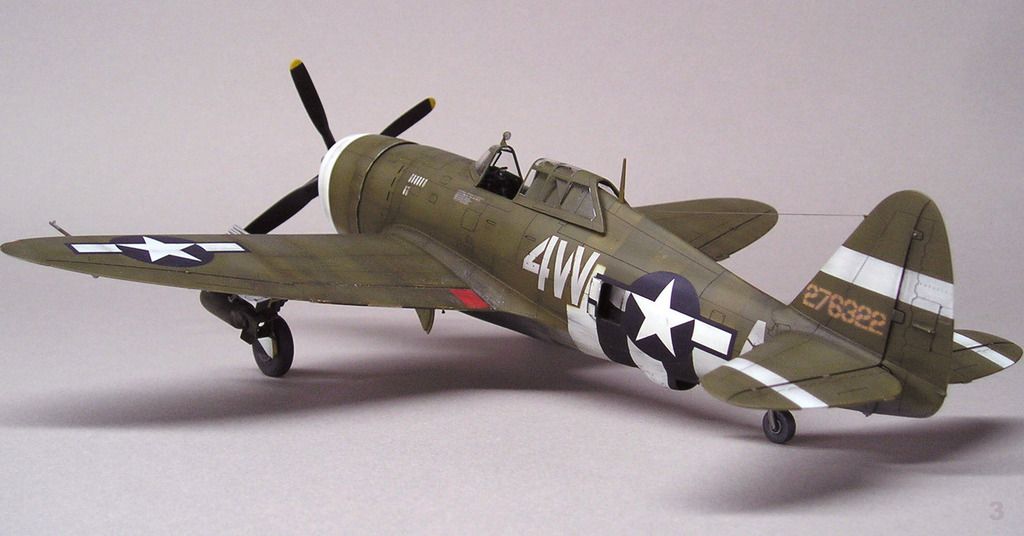
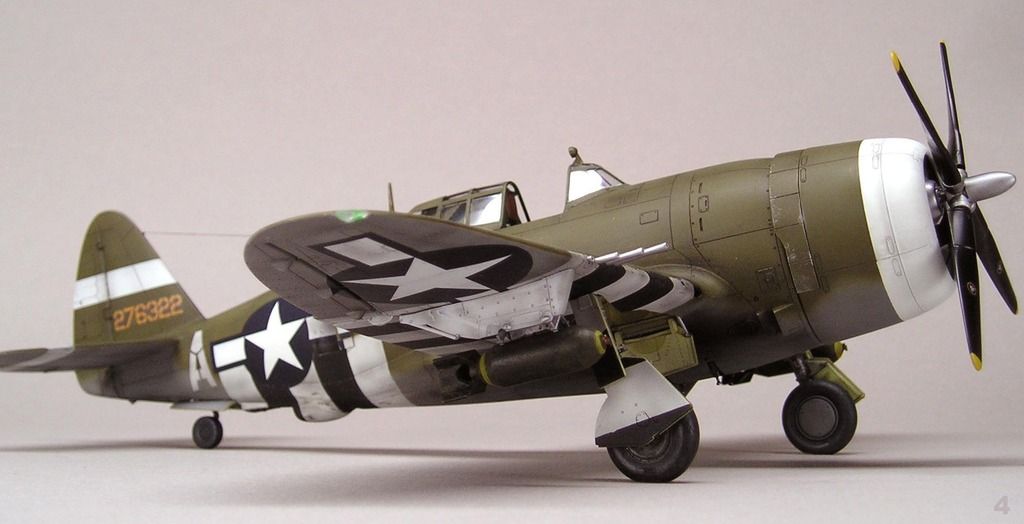
P-47D 22-RE 226231 was shipped unpainted. The 362nd F.G. was transferred to the 9th Air Force in April 44’for the invasion of France. They escorted C-47s on June 6-7. The aircraft were then to be used for tactical missions and were camouflaged for low level operations. The Group was moved to bases in France where they flew continuous missions until wars end.
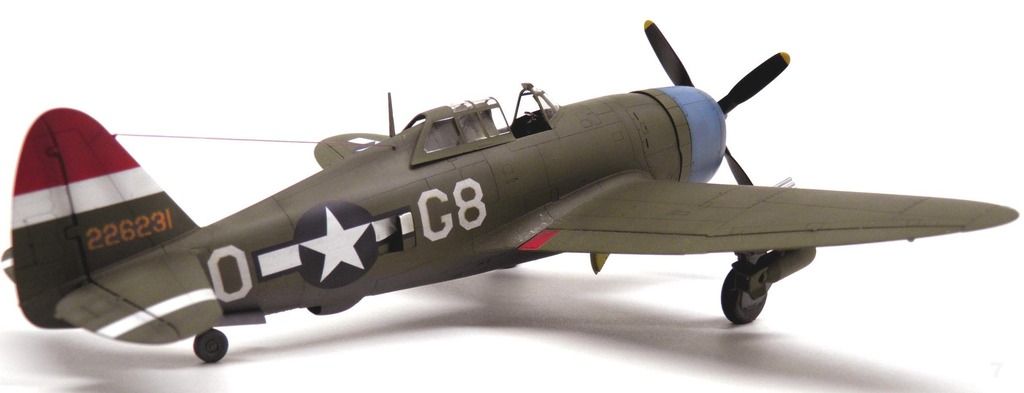
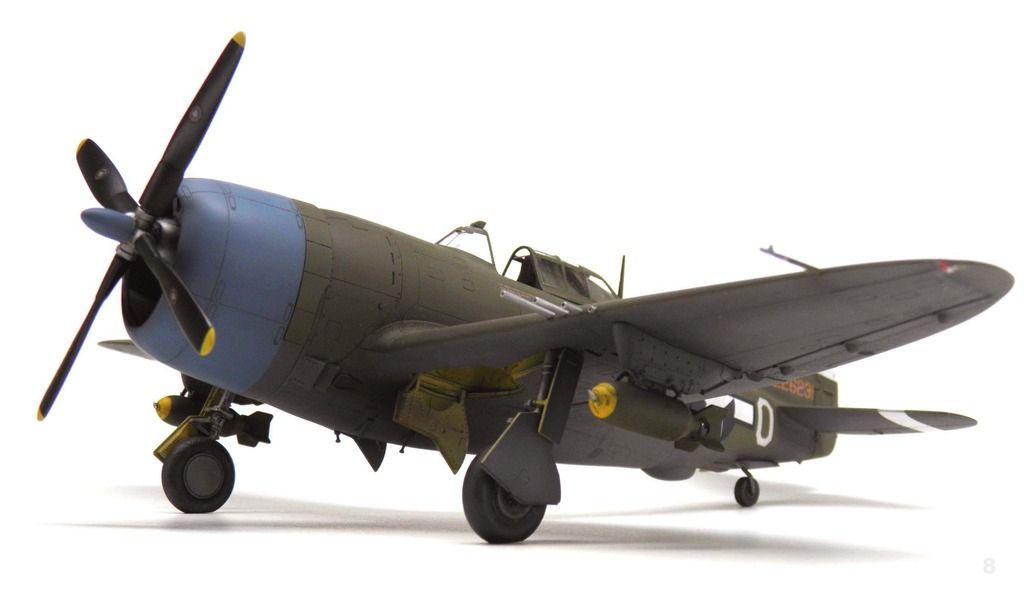
P-47D 20-RE 42-25274 was the first aircraft that had all the factory camouflage deleted.
-
This model depicts a SBD-2 Dauntless aboard the U.S.S. Enterprise, late Spring, 1942.
On January 5, 1942 a directive called for the U.S. Insignia to be placed on the top and bottom of both wings. They were to be of the maximum diameter possible without overflowing onto the aileron. The fuselage Insignia was to be no larger than 24 inches. The thirteen horizontal rudder stripes were added at this time.
On January 17, 1942 the Bureau approved the use of a 50 inch fuselage insignia. At this time they did not approve the wing insignia from leading edge to trailing edge, but did ok the insignia from the leading edge to the aileron cut out.
Early in 1942, after a friendly fire incident aboard the U.S.S. Enterprise, the Insignias on all aircraft were directed to be as large as possible, including over the flaps and ailerons.

After the battle of Coral Sea, 4-8 May, 1942 and some lesser battles, thoughts of removing these very colorful markings became prevalent.
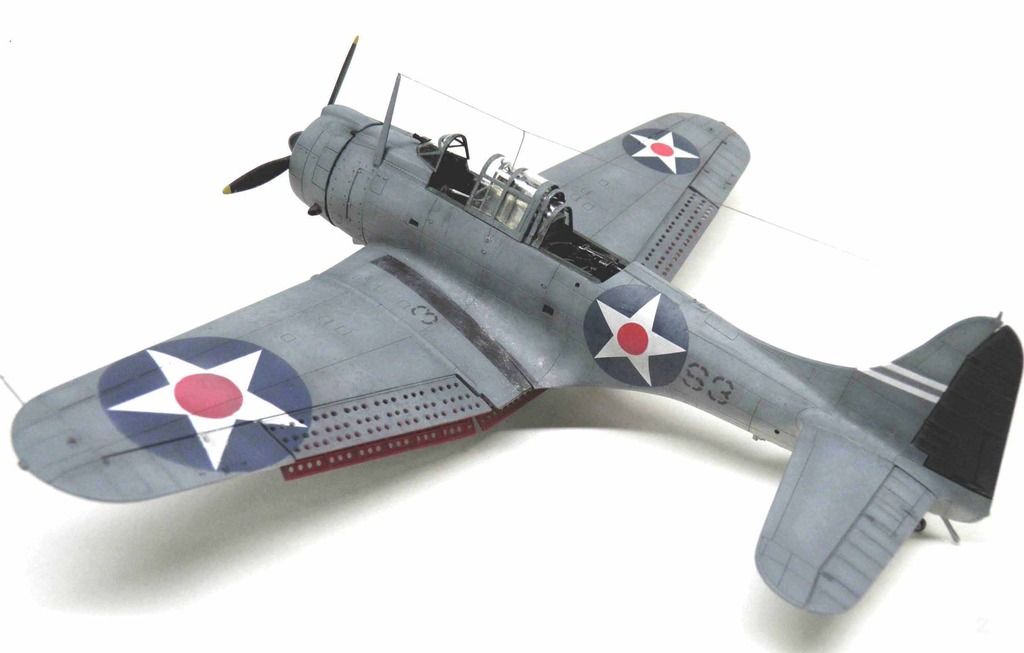
On May 15, 1942 a dispatch was issued for the removal of the rudder stripes and the red disc from the National Insignia.
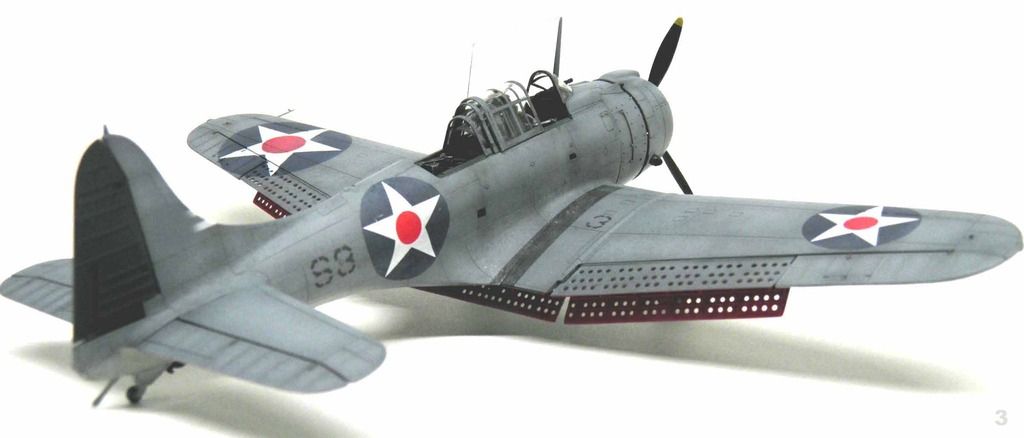
At this same time the wing Insignias were to be no larger than 60 inches and fit between the aileron leading edge and the leading edge of the wing. The fuselage Insignia was to be no larger than 24 inches.
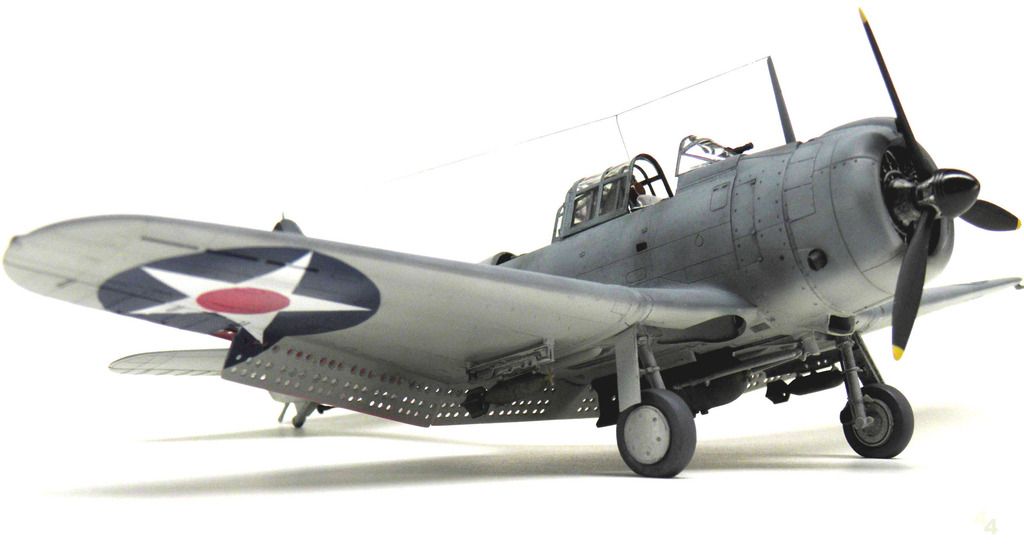
Between this time and the Battle of Midway there were a variety of National Insignias on carrier based aircraft.
The red discs on this aircraft were removed before the Battle of Midway.
Colors used on this model;
QMS #10 LIGHT GRAY
QMS #12 BLUE GRAY
QMS # 42 MEDIUM GREEN
-
Great build David, is this really only one model!!!
Very cool concept!
yes
-
The research started in the early ‘50s when I started my collection of aircraft books and models.
This model took about a week to finish.
Dave
-
This model depicts the "LIFE" of a Marine F4U -1 Birdcage Corsair (02576), from it’s early days in the Solomon’s, until it’s final days when it crash landed on Torokina, December 1943 .
Early in the war the shade of QMS #12 Blue Gray was found to be to light when viewed from above over the waters of the South West Pacific.
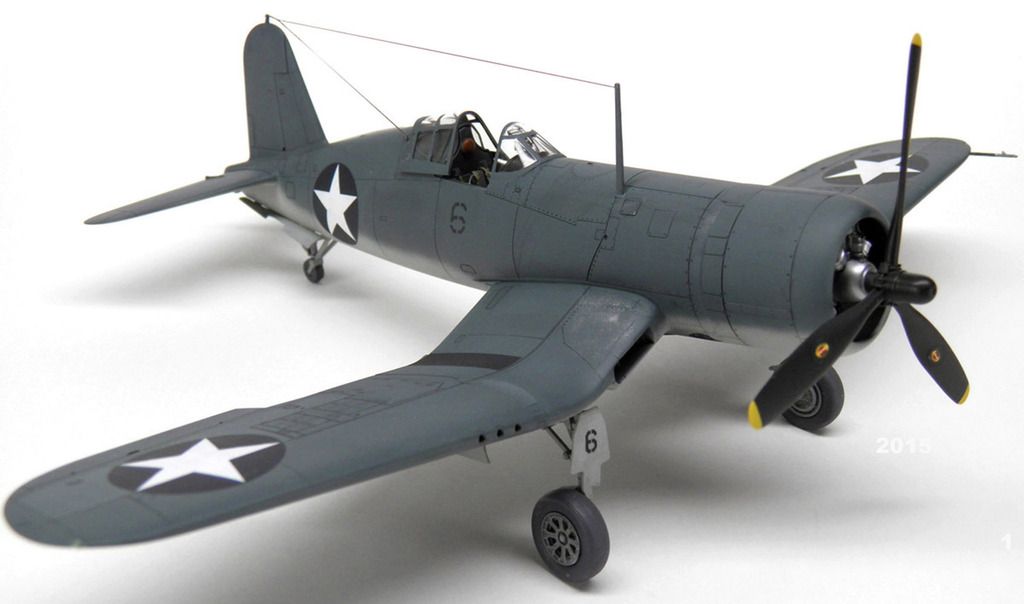
In October of 1942 the Navy issued a directive to formulate the shade of Blue Gray to match Munsell 5.5PB 2.6/3.3
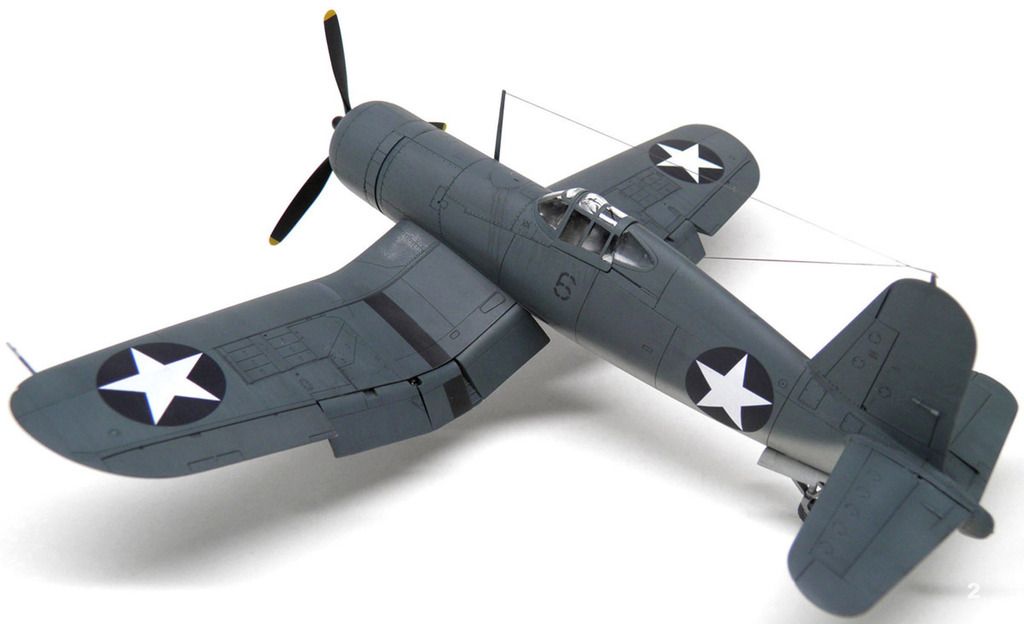
Early missions showed that the black aircraft numbers were hard to distinguish, as a result the numbers were painted in white and moved towards the rear of the aircraft.
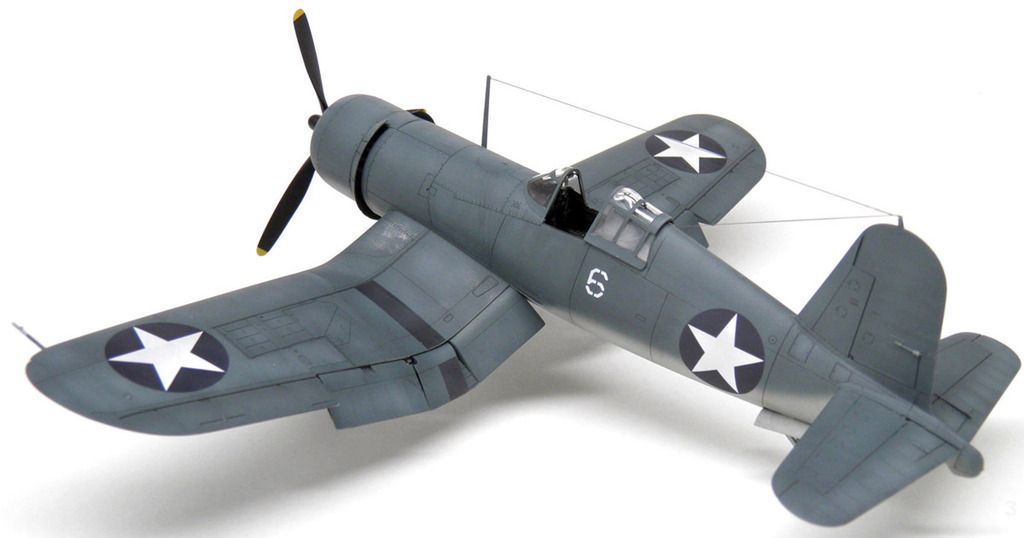
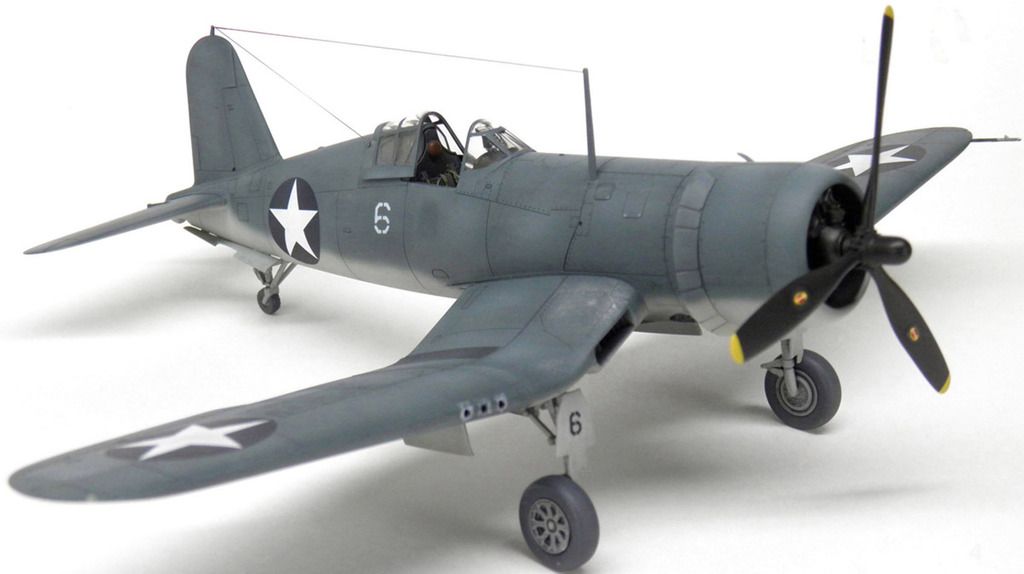
To avoid confusion when more Corsair squadrons became operational at Munda, the one and two digit aircraft numbers were replaced with a three digit number. These were usually the last three digits of the BuNo.
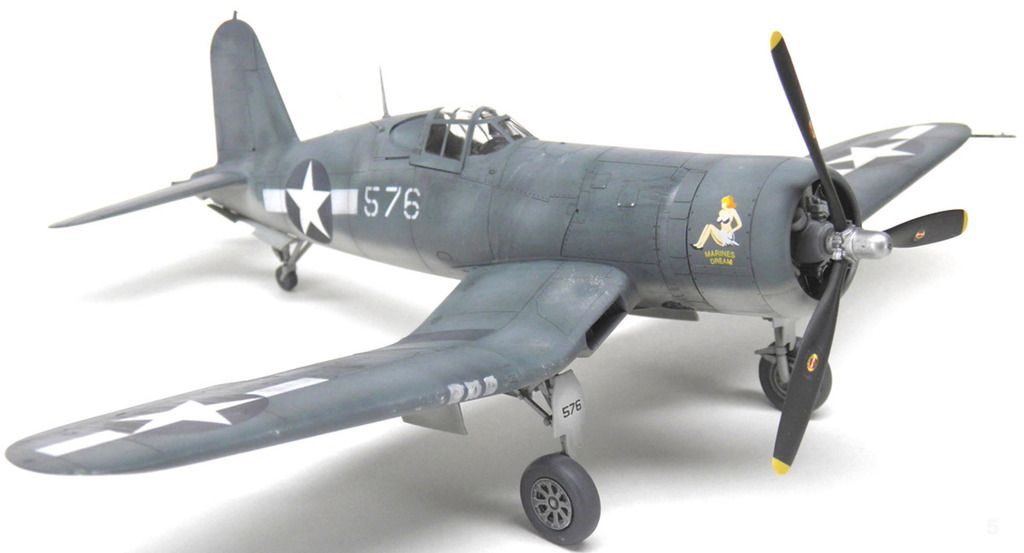
With the changes to the national insignia in June of ‘43, only the white bars were added to this aircraft.
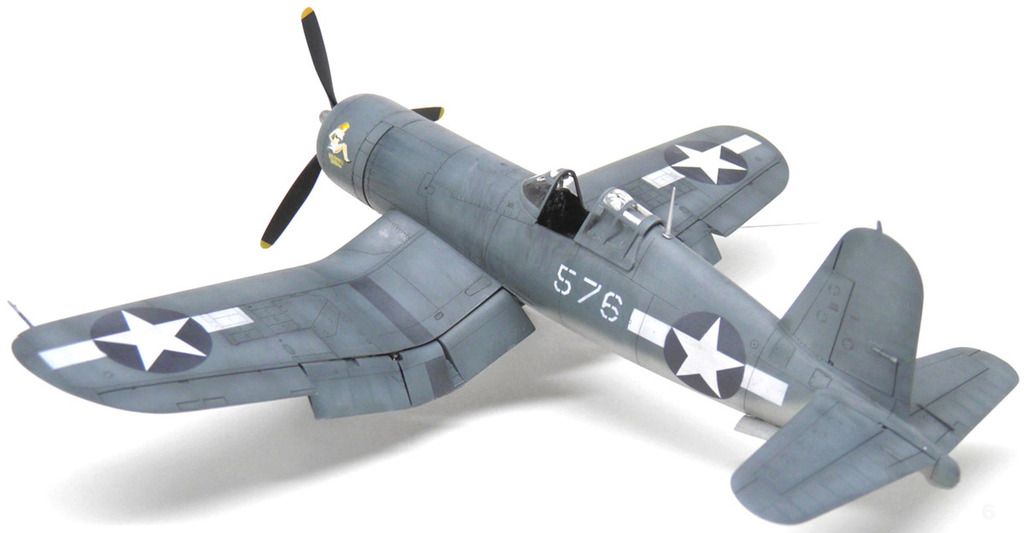
To comply with the change to the tri-color paint scheme, the areas viewed from above were painted in the field with a Sea Blue paint mix.
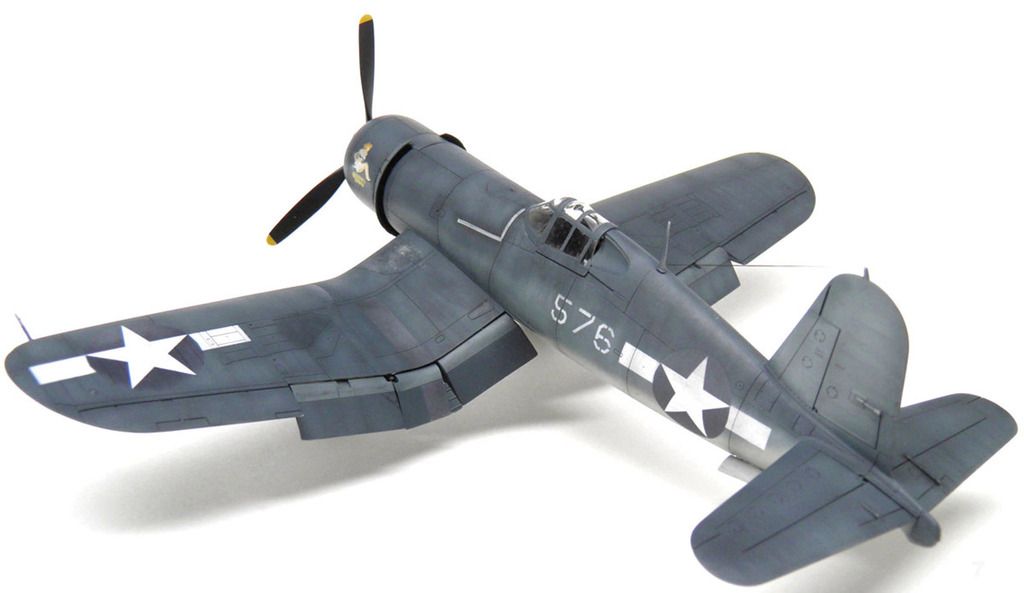
The rest of the aircraft retained it’s faded Blue Gray / Light Gray finish.

To create the changing weathered appearance of the model, it’s entire finish was faded by over-spraying with Dullcote plus a few drops of white mixed in.
A few reasons for the unkempt appearance of the aircraft in the Solomon Islands.
Quotes are from the excellent book, Corsair Aces of World War 2 by Mark Styling.
"When operating from Munda our beautifully marked planes were put into a pool and assigned to different pilots from different squadrons every morning. That alone was enough to break our hearts, but when the SEEBEEs (who had been pressed into service as mechanics) asked us where to inject the gas and oil we were almost tempted to draw our pay and go home. There were a few bona-fide mechanics on the strip, but they had always worked on Grummans, so our sleek little planes went without much maintenance. They rapidly became dirty and undependable. They always kept going, but little things were always cropping up to annoy you."
Major Bob Owens, July 1943;
Reason for the three digit numbers.
“When we went into Munda it was the first time ( since Gaudalcanal) that there was a group of squadrons flying similar machines. Each aeroplane had a number from 1 to 16. Having been assigned to fly a mission in “No 5”, I’d get out there on the line and there would be five “No 5s”- five squadrons each with a ‘No 5”! So we repainted the aircraft with numbers that weren’t like those of other units, most squadrons tending to use the last three digits of the BuNo.”
Capt. James N. Cupp, August 1943;
Capt. Ed Olander claimed a Zero on 17 October 1943 on a fighter sweep over Kahili flying this aircraft.
-
This model depicts a Northrop P-61A-1-NO Black Widow, 42-5508, that was flown by the 419th Night Fighter Squadron from Carney Airfield, Guadalcanal, Solomon Islands.
42-5508 was condemned salvage obsolete Guadalcanal Sept. 27, 1945.
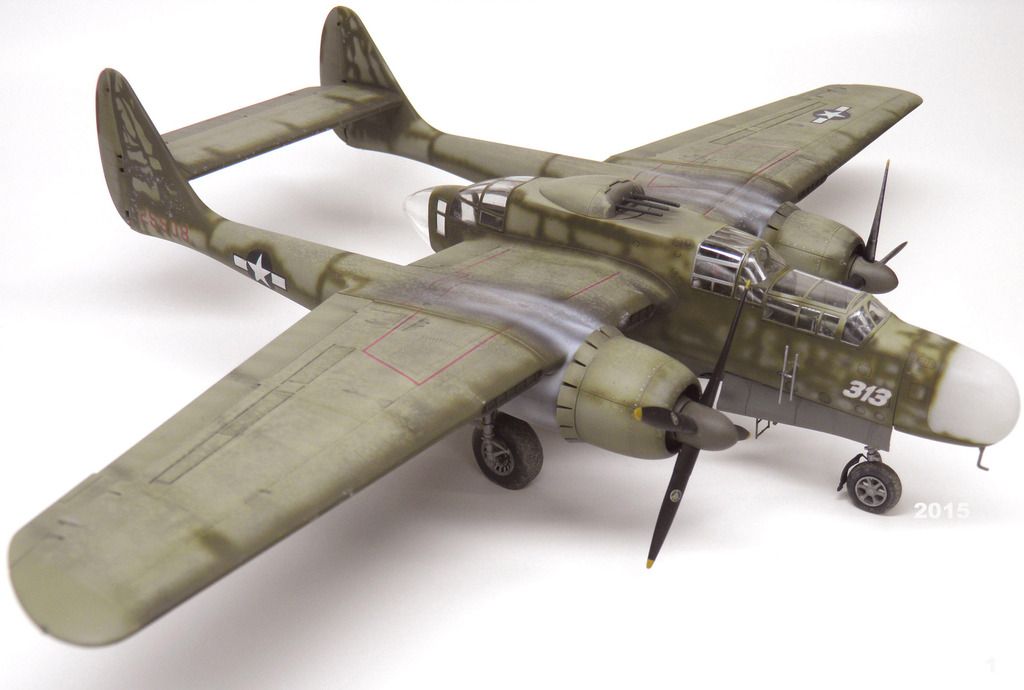
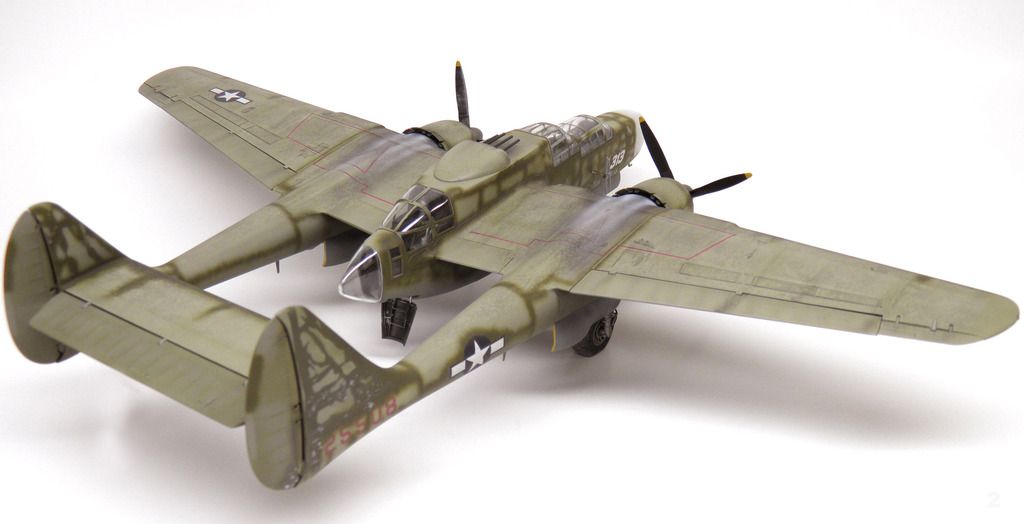
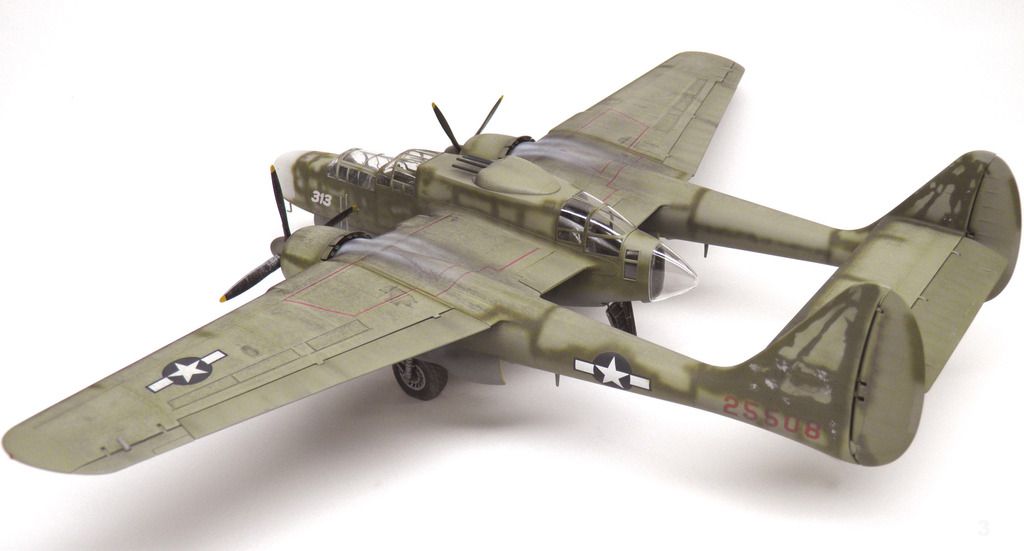
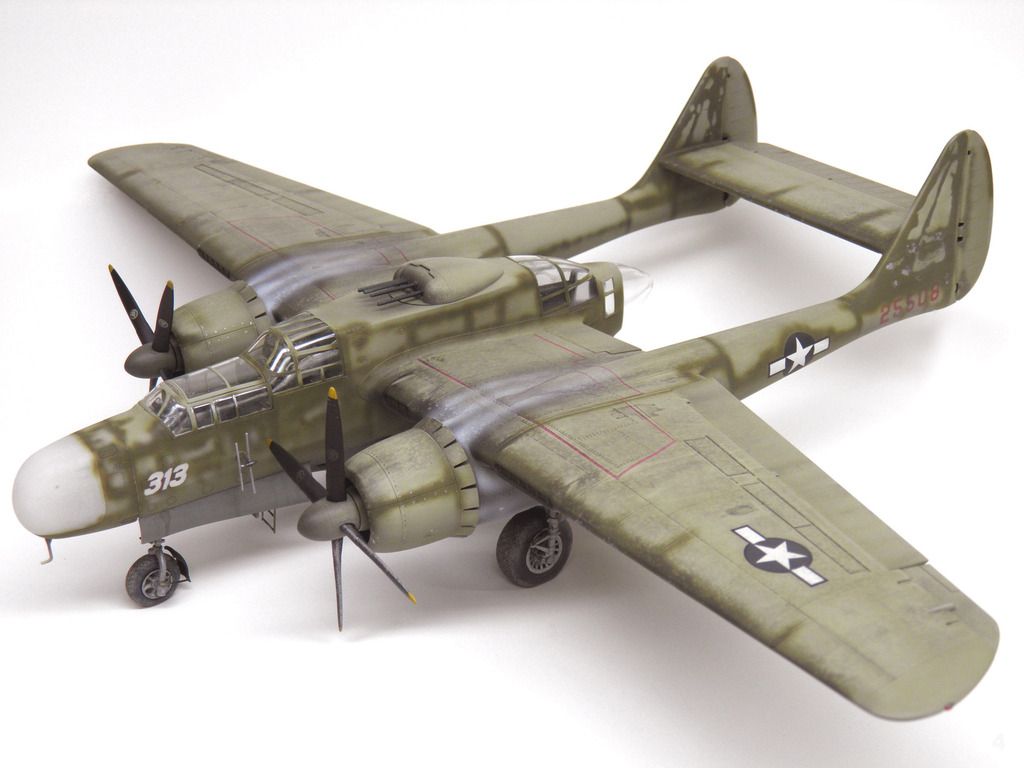
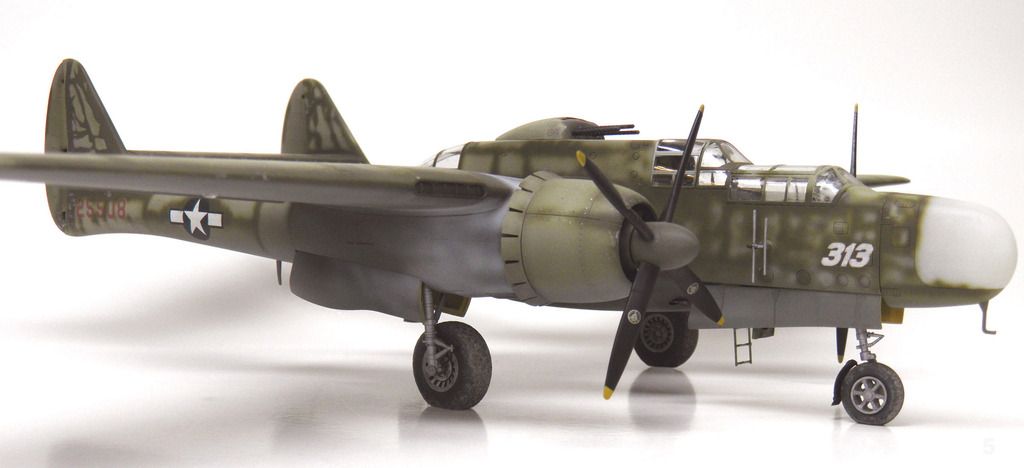
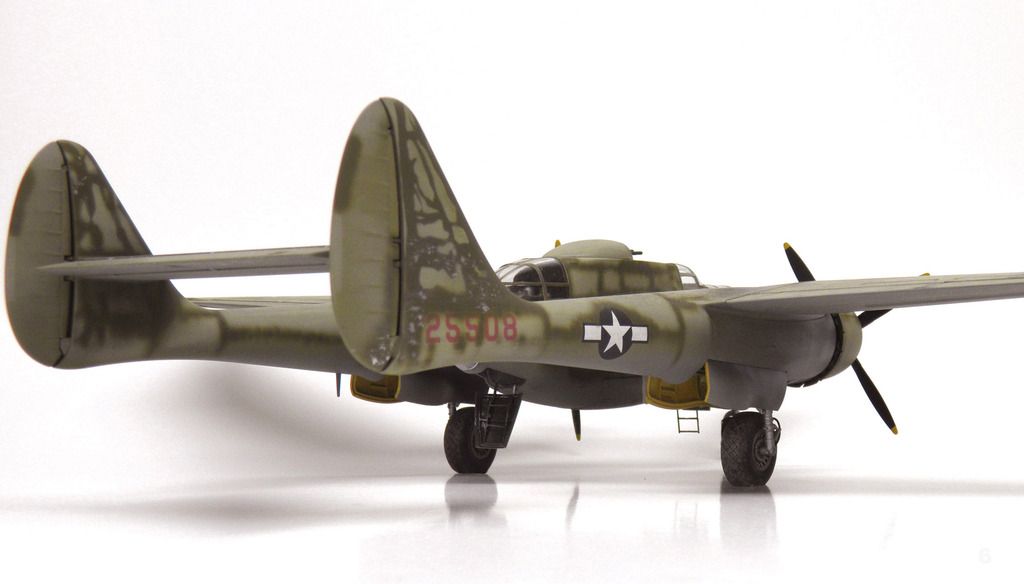


This model was finished with Model Master Enamels, kit and homemade decals.
Colors used on this model;
QMS # 43 Neutral Gray
ANA 613 Olive Drab
ANA 611 Interior Green; Front Cockpit
ANA 611 mixed 50/50 with Black; Radar Cockpit
Yellow Zinc Chromate; Landing Gear Doors, Gun Bays, and Tail Booms
Zinc Chromate tinted ANA 613; Wheel Wells
-
For RLM 75 Grauviolett I use Model Masters Enamel 2085, the same color is available in MM Acrylic 4785.
MM 2085 is a close match to Don Color chip for RLM 75.
Dave
-
The Hasegawa F6F has 24†wheels and 32†tires.
The Accurate Miniatures TBF has 24†wheels and 33†tires.
Dave
-
Hi Dave
Your posting of this, has come at a good time.
I have been playing around with some colours to mix some paint, and going no where fast.
I really need the paint to be spot on, (AMS I know, but I need to do this)
Your post has opened up a whole new realm for me!!!
Many thanks
Alan
Alan
You’re welcome.
Good luck with your new adventure into another aspect of model building.
Dave
-
I use Model Master Enamel paints because they easily mix with lacquer thinner and I can spray a fine line without splatter.
I use Testors Gloss Enamels for gloss paint jobs and for tinting military colors because they are almost a pure color with a low percentage of gray.
Dave
-
Matching FS 33538 or similar colors by eye isn’t to difficult because of their high color hue saturation and the brightness of the color.
It becomes more difficult when trying to match dark camouflage colors by eye because of the low saturation of color hue and the darkness of the color.
This is where Adobe Photo Shop Color Picker becomes valuable.
I can measure the color Hue of the paint chip and know what base color to use when I start mixing that particular color.
The examples below demonstrate this.
All six colors look relatively close, but when the Hue is measured it becomes apparent some are not.
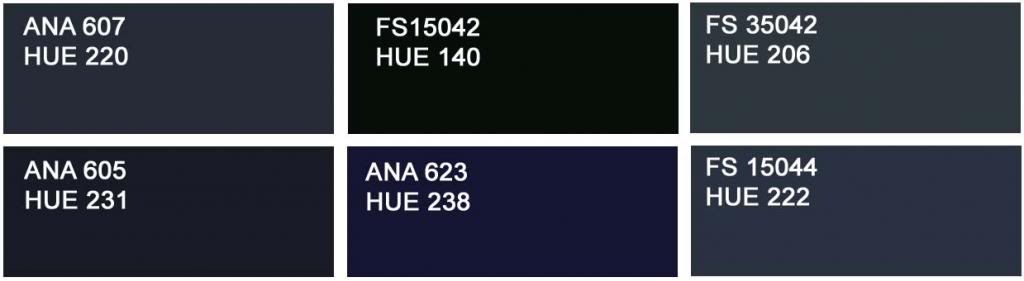
When the color chips are made 20% lighter to simulate fading, the difference in some chips is more visible to the eye.
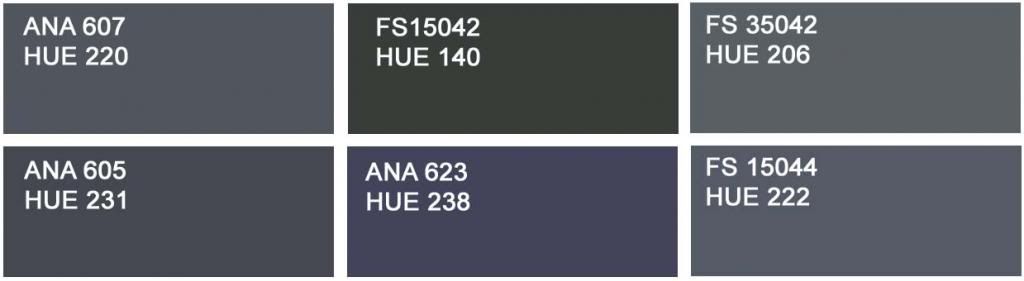
It also is difficult to mix very light camouflage colors with low color hue saturation by eye, because it is almost as hard to detect the color Hue.
Dave
-
Some basics I learned in 60+ years of matching / mixing paint by EYE.
Or more significant, what I learned in recent years using Adobe Photo Shop.
The colors we see have three components;
Their Color Hue, their Saturation, and their Brightness .
The Color Hue is created by the pigments used in the process of making paint.
The Saturation of a color mixture is determined by the percentage of Color Hue to the percentage of Gray. ( Munsell Color System “Chroma†)
The of Brightness of a color mixture is determined by the percentage of Black to the percentage of White. ( Munsell Color System “Value†)
The three primary colors RED, YELLOW, and BLUE are shown in the three pictures of the Adobe Photo Shop Color Picker below.
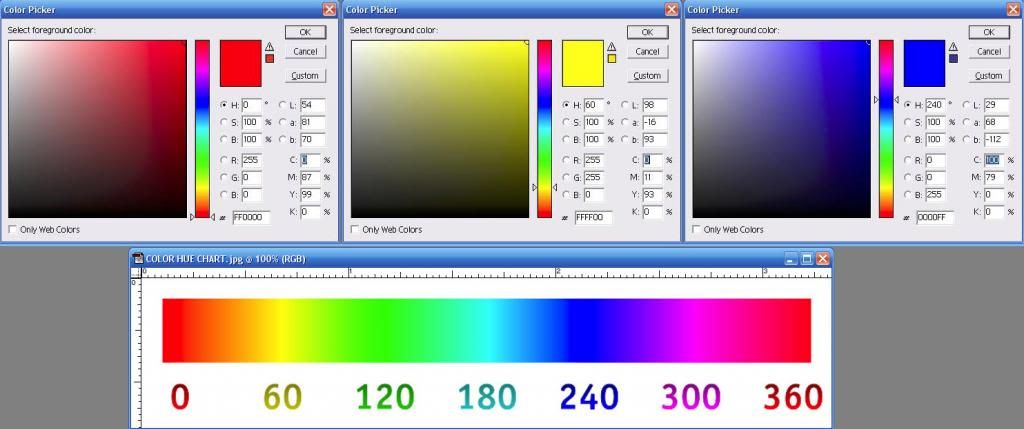
RYB Primary Colors are used in subtractive color mixing primarily for mixing paint.
In the three pictures above, the vertical Color Hue bar to the left of the HSB column shows the 360 degrees of Color Hue.
The Color Hue Chart is also shown at the bottom of the three Picker photos.
Red can be either 0 or 360 degrees.
In the three pictures the Primary Color can be changed to 10,000 different shades of color by changing the percentage of Saturation and/or Brightness.
With the 360 degrees of Color Hue, multiplied by 10,000 Shades, we have 3.6 Million colors.
............................................................
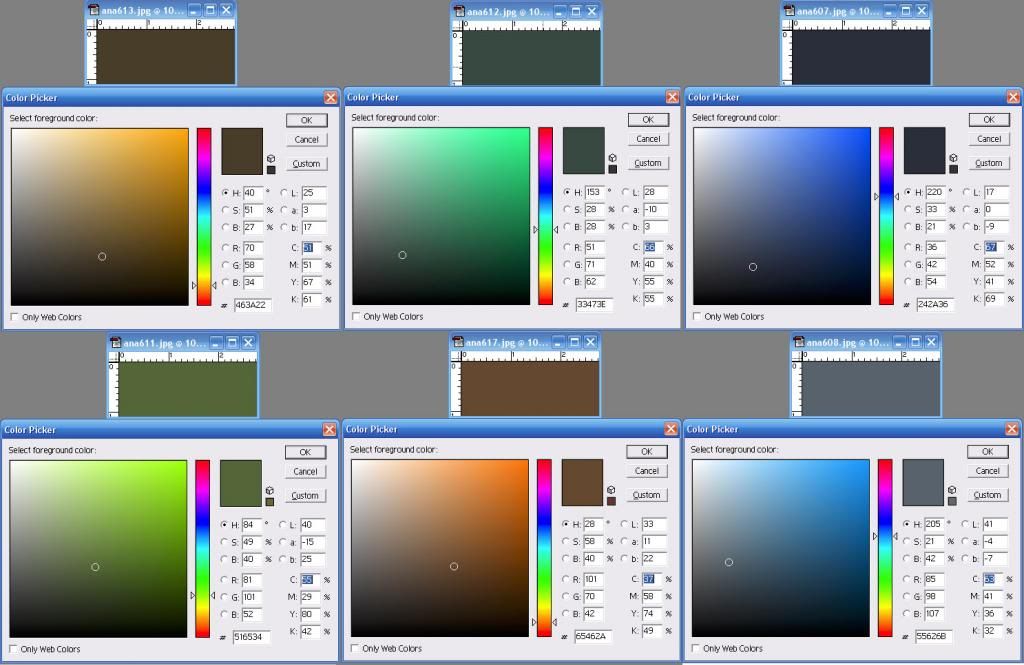
The six color chips below are samples to demonstrate how the color picker measures different colors to get the HSB Numbers.
About 15%-20% of the 3.6 million color shades produced can’t be perceived by the human eye, either they are to dark, to light, or to low in Color Hue saturation.
Using Photo Shop to match paint has replace hours of (sometimes agony ) trying to match paint by EYE.
Now I can take the HSB numbers of a paint chip and produce a paint mixture close to that chip.
Then I compare the mixed paint to a computer printed chip and adjust the paint mixture accordingly.
For a final check I compare the original chip to a spray painted chip that was scanned into Photo Shop.
Sample colors;
ANA 607 NS SEA BLUE
ANA 608 INTERMEDIATE BLUE
ANA 611 INTERIOR GREEN
ANA 612 MEDIUM / DARK GREEN
ANA 613 OLIVE DRAB
ANA 617 DARK EARTH
………………………………..................................................
The 1966 Federal Standard Paint Chip Catalogue that I had gave specific instructions on how to match paint by EYE. ( the method used in the old days )
A notice in this catalogue specifically stated that the catalogue should only be used as a reference guide because the 1 x ½†chips were ink reproductions.
If colors were to be matched for Government use, the 3†x 5†color cards, or one foot square color tiles had to be ordered.
Federal Standard Catalogue Specified Color Matching Method;
To match two or more colors, the color cards or tiles had to be placed horizontally next to each other and viewed at a 45 degree angle, facing North, around noon on an overcast day.
Back then I only ordered about ten of the most commonly used color cards at a Dollar apiece. (About $10.00 in today’s money)
As far as I could see the colors on the one 1 x ½†ink color chips were an exact match to the 3 x 5 color cards using the specified method in the FS 595 Catalogue.
Dave
-
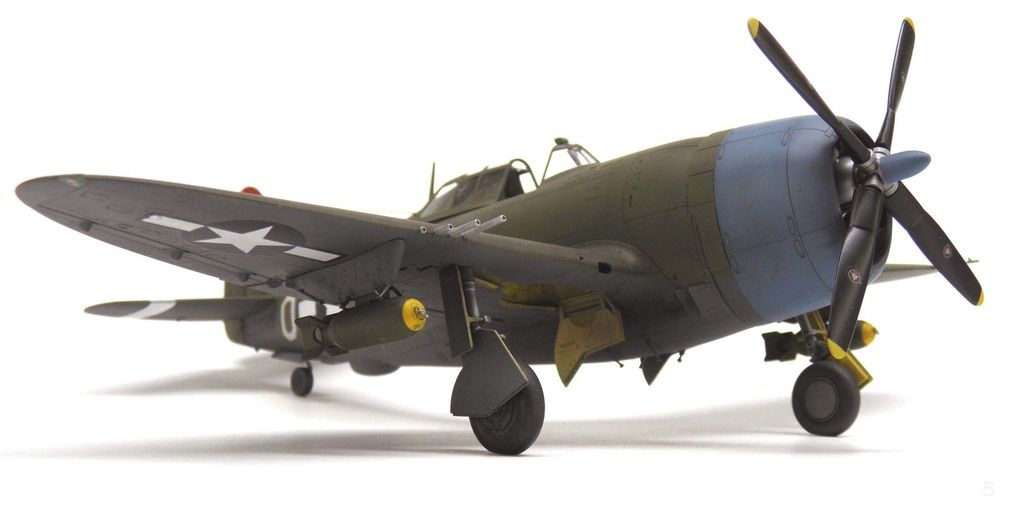
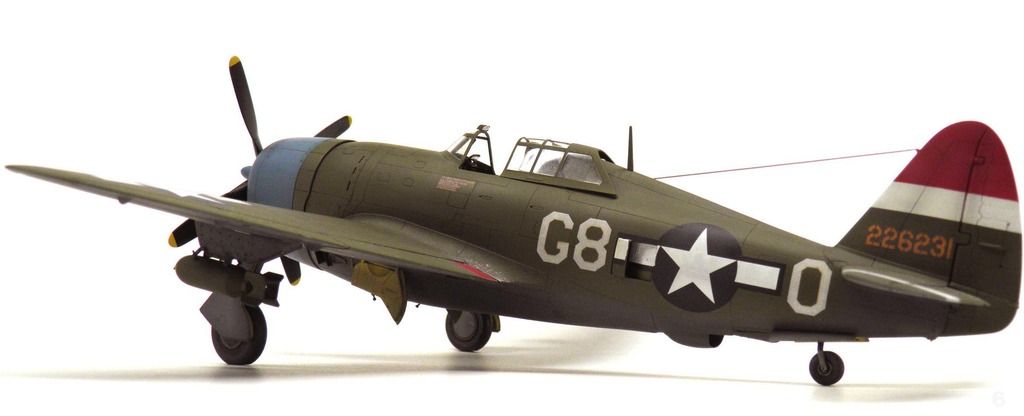
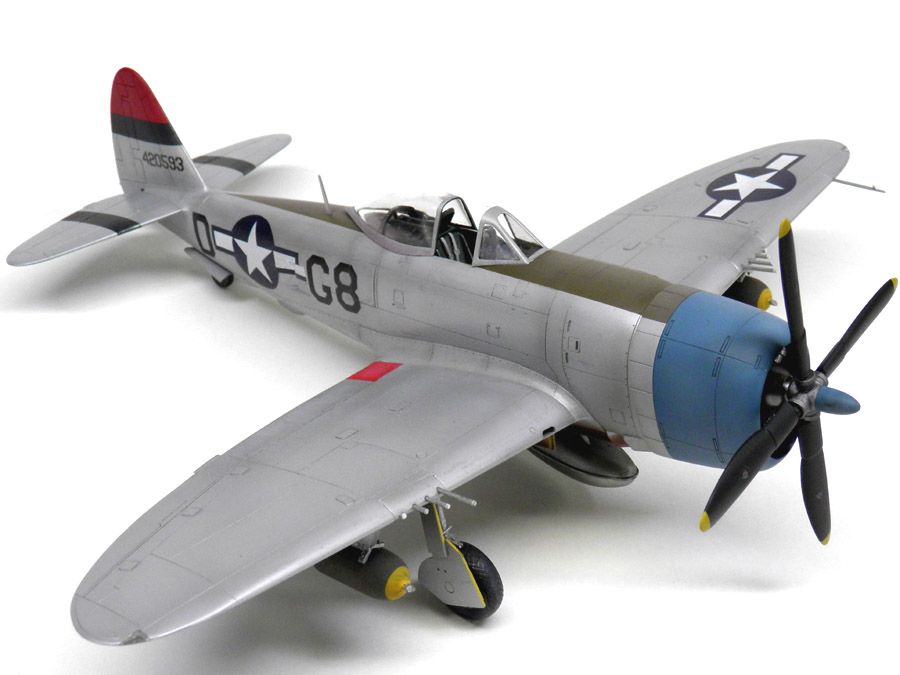
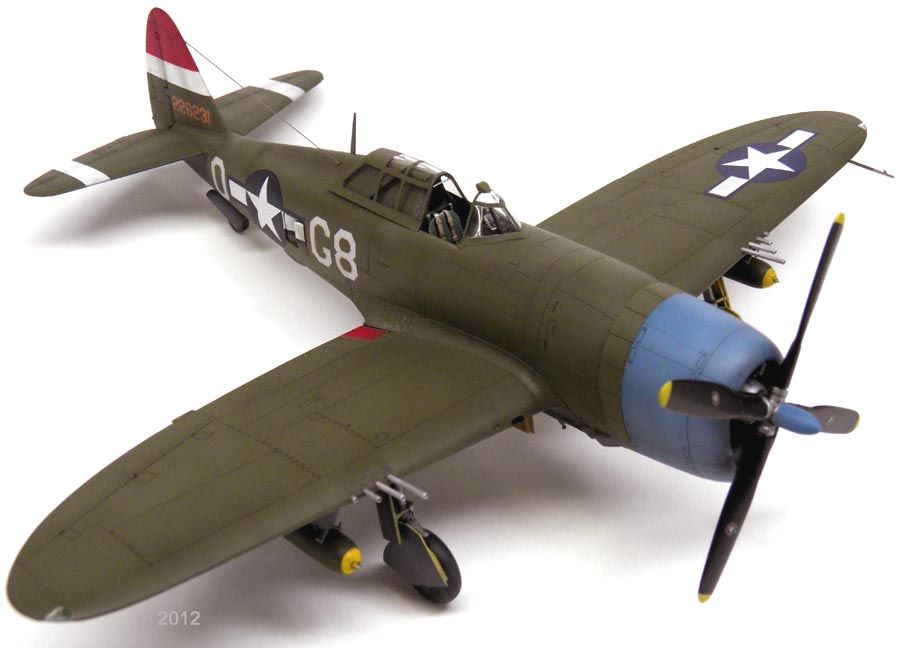
These are a few photos of the finished 378th FS P-47s models.
The D-22 was a bare metal replacement painted in the field.
Colors used on the model;
ANA 603 Sea Gray / Neutral Gray
ANA 613 Olive Drab
The Cobalt Blue color used on the nose of the 378th Squadron models was a custom mix using Model Master 2031 Blue FS 35109 as the base color that I tinted to match the color photos.
Dave
-
Hal
Comparing the Model Master 1717 FS 15042 paint in the bottle to the ANA 623 Gloss Sea Blue paint chip, I added a few drops at a time of Testors 1103 Gloss Red to shift the color Hue from 225 to 238, plus a little flat white to lighten the color.
Dave

-
I have been using Model Master Enamel Paints exclusively since I got back into this hobby in 2003.
All of the FS, or ANA colors produced by Model Masters that I use, and have compared the paint in the bottle to color chips, are a very close match.
A few colors needed a slight tinting to be a perfect match.
A few colors needed to be grayed out a little.
Some of the very dark colors are lightened a bit for scale effect.
The only paints I mix anymore are colors that aren’t produced by Model Master.
Dave
-
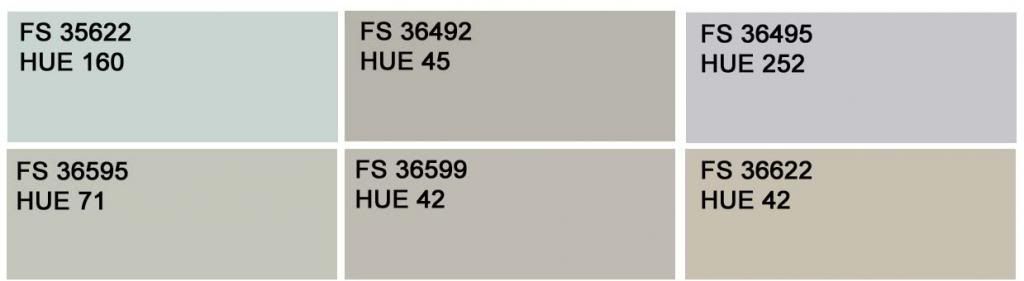
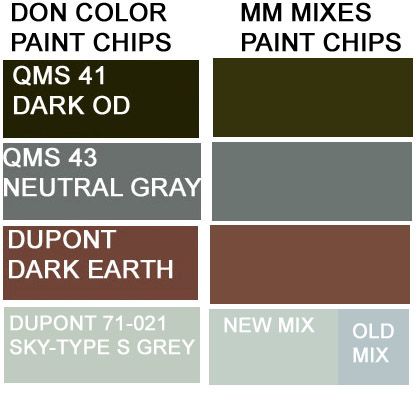
With all of the information I received, and the results of research online, I now have;
Five colors for 71-013 Dark Green
Eight colors for 71-009 Dark Earth
Six color for 71-021 Sky - Type S
I think I will stay with the colors I originally mixed and the color from Alan for 71-021.
Dave
-
Not to mention those chips include colours that are not actual standard RAF, MAP or Dupont colours, as has previously been mentioned. Those chips are completely useless even for something like doing a repaint of a simulator aircraft skin.
RGB colour chips are complete bollocks unless you also know the colour space they're in and what they were matched to. It is possible to produce usable RGB colour chips (but not to do paint matches from them), but these chips certainly are no such thing given that lack of colour space info (and the fact that browsers normally don't display in a standard colour space. Firefox and Chrome can be set to respect ICC profiles though). But that also requires a properly profiled display, which most don't have.
Note that to get accurate colour printouts of your chips you also need a profile for your printer (not model, actual printer as this varies by device, particularly with consumer printers), ink and paper as well as the above mentioned profile and colour space info required for accurate monitor display. There's no benefit in matching to an RGB chip printed out on an unprofiled printer with generic paper, you can't expect to have something more than vaguely similar to what the individual who made the chips saw.
The same goes for scanning. You need a accurate ICC profile for your scanner to reliably match colour on your monitor (in addition to the monitor profile and colour space info for the colour chip)
Getting accurate colour in a repeatable fashion on your monitor and prints is a complex issue which requires a fair bit of investment and study. Serious photographers struggle with this constantly.
I am not using RGB Numbers to mix paint.
RBG numbers are used only in electronic applications and cannot be used to mix paint.
I use the HSB numbers to get the correct Color Hue, Saturation, and Brightness.
Knowing these numbers I can almost mix the color without using a paint chip.
When I print a paint chip on printer paper I scan it back into Photo Shop and compare the printed chip to the original paint chip for verification.
Normally for every color I have used to paint a model, the match is close enough to get an accurate paint mix for a base color.
When the model is finished, the Hue, Saturation, and Brightness usually change somewhat due to the method I use for weathering. Weathering
The only function the monitor has in all of this is to observe the work I am doing, it has no bearing on the color of the chips, or the color of the paint mix.
Dave
-
Hi Dave
Glad to be able to help.
One thing that has been mentioned previous, about chips is gaining an exact colour profile.
However not all is lost, as the RNZAF actually received a number of Cutiss P40E's
in 1942, built to RAF spec and wait for, it painted in Dupont Colours with appropiate
paper work stating what paints were used.
This attached photo is a restored P40E at MOTAT in DuPont colours.
Obviously there will some who will state, that a 'Restoration" is not the same as the original and that is true.
However the paints have been matched as close to the original, going by Curtiss documents.
But it will give you some idea of what the original colour looked like.
In the photo of said P40E - note the colour of the "Sky" (being matched to DuPont 71-021).
What is interesting about this photo is it gives you a variety of
colourings with the light.
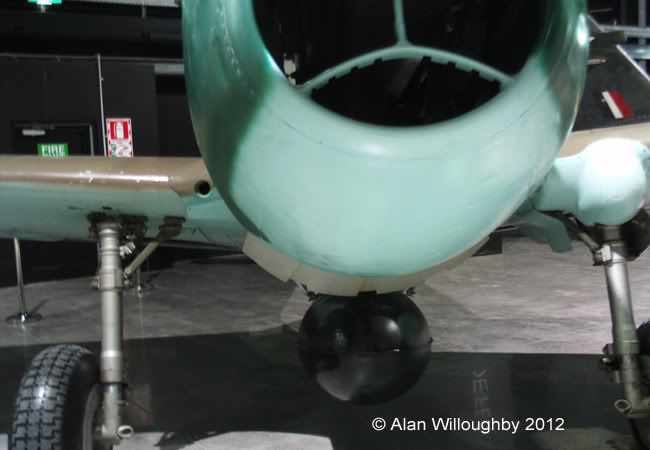
Now this next photo is under the shadow, note the colour- looks more grey does it not?
Hope that helps you some?
Regards
Alan
Alan
If the chips from Don Color are incorrect could you, if possible, post the color chips for DuPont 71-013 Dark Green and DuPont 71-009 Dark Earth, it would be helpful for mixing the paint colors.
Thanks
Dave
Mosquito 2-Stage Merlin conversion complete
in The Display Case
Posted
Try this method, it helped me allot.
http://www.arcair.com/tnt1/201-300/tnt202-masking-Rapasi/00.shtm
Dave