


vacinotac
-
Content Count
48 -
Joined
-
Last visited
Content Type
Profiles
Forums
Calendar
Posts posted by vacinotac
-
-
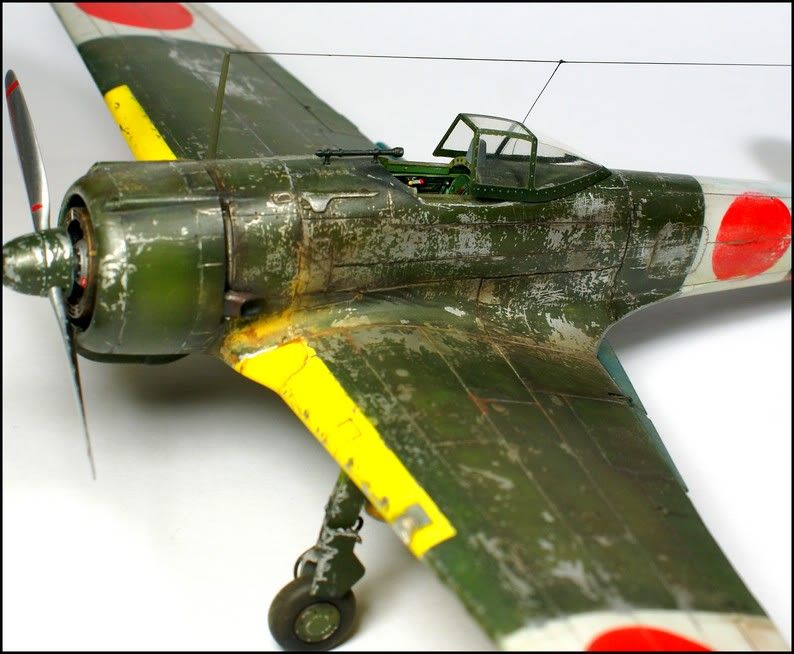
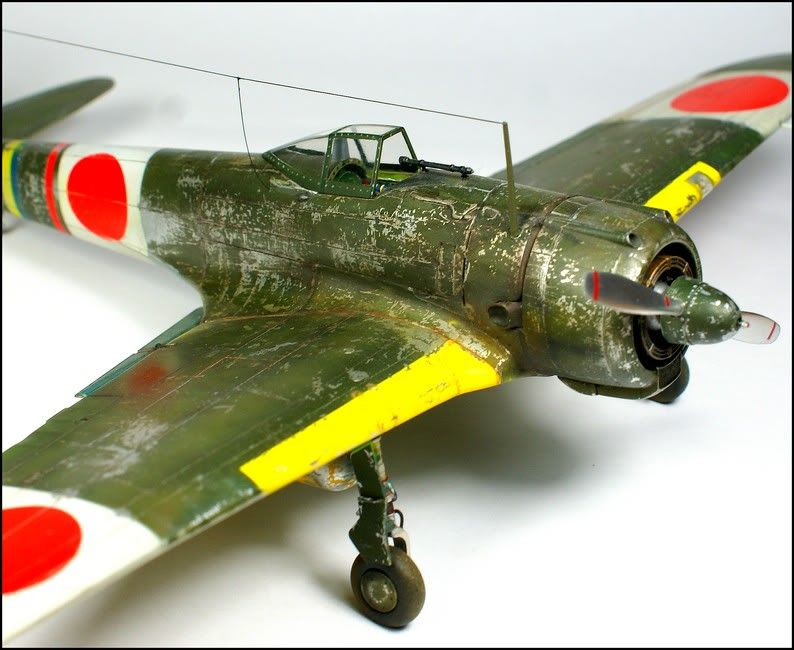
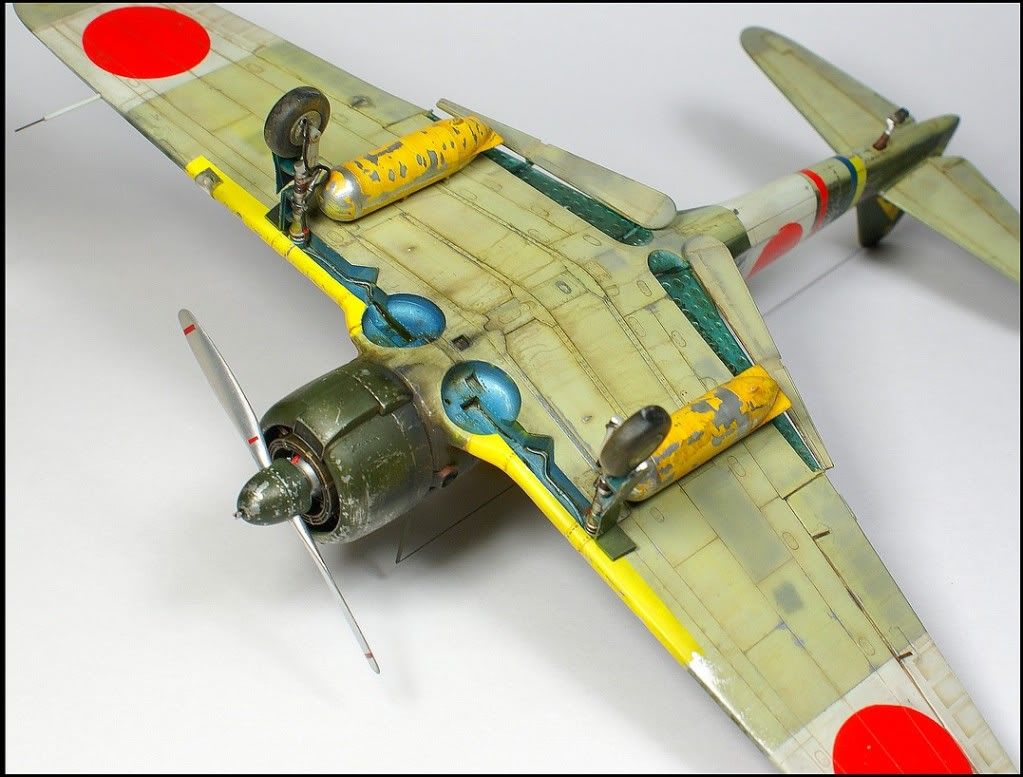
Hello !
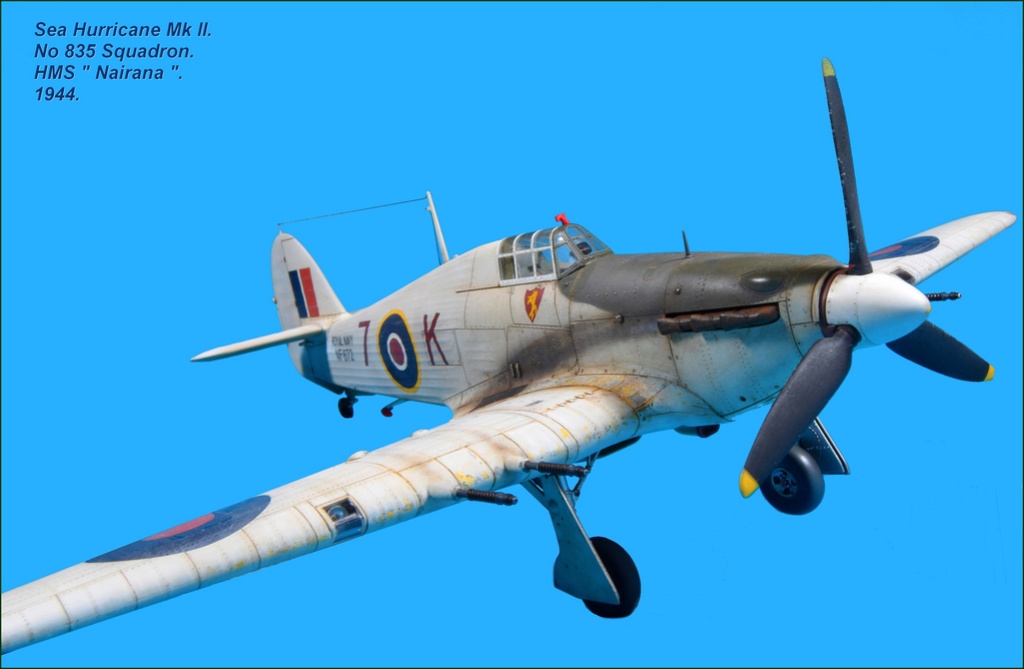
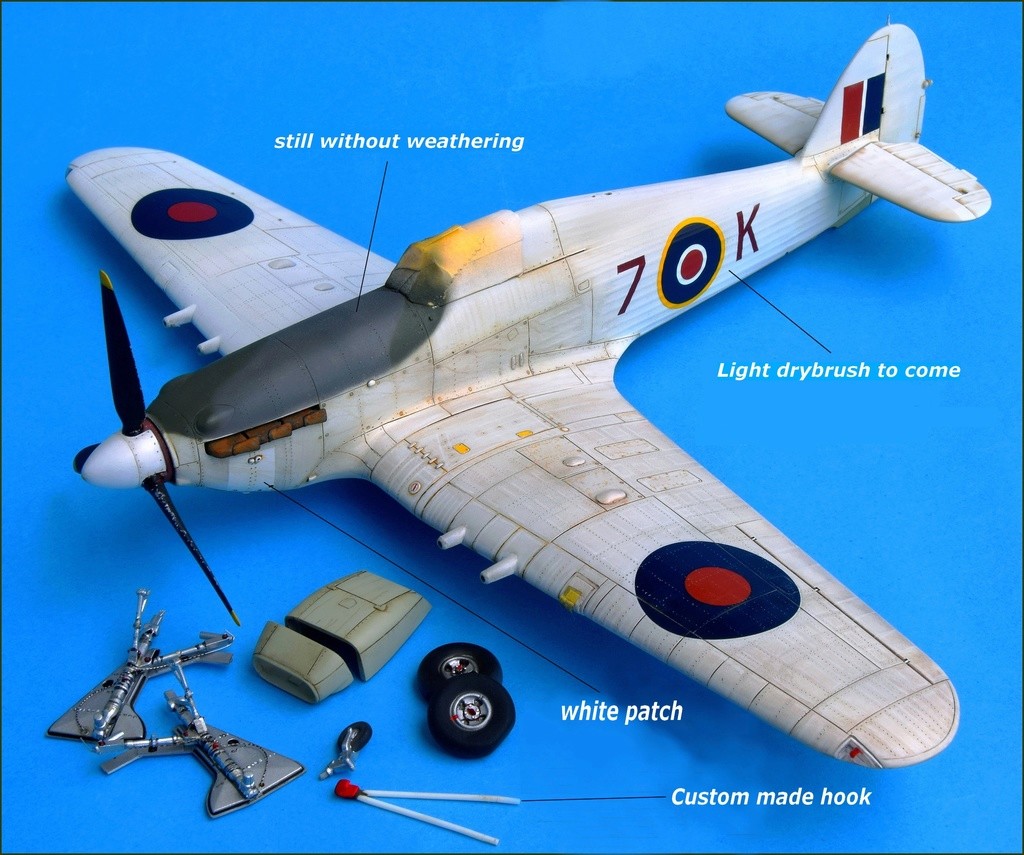
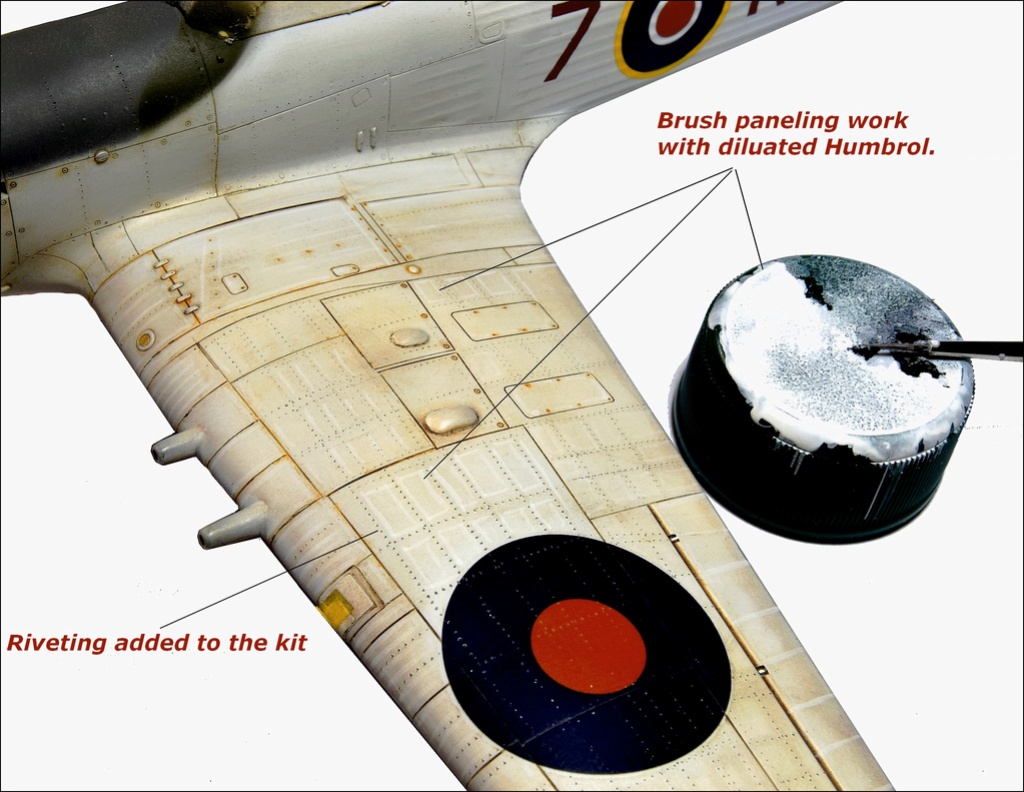
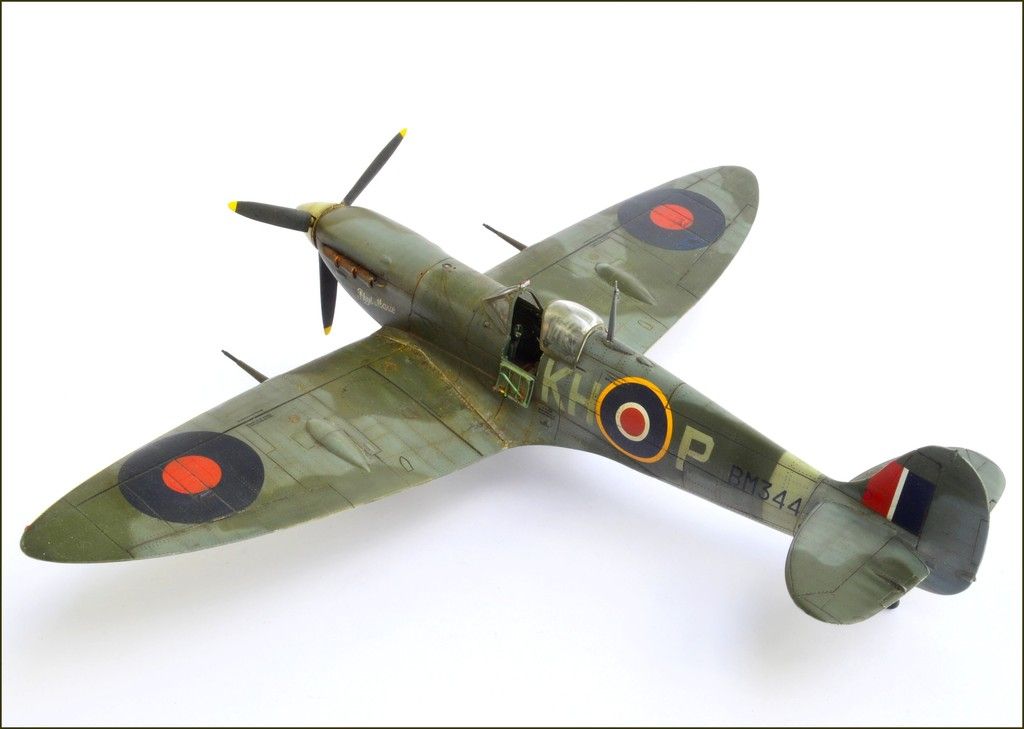
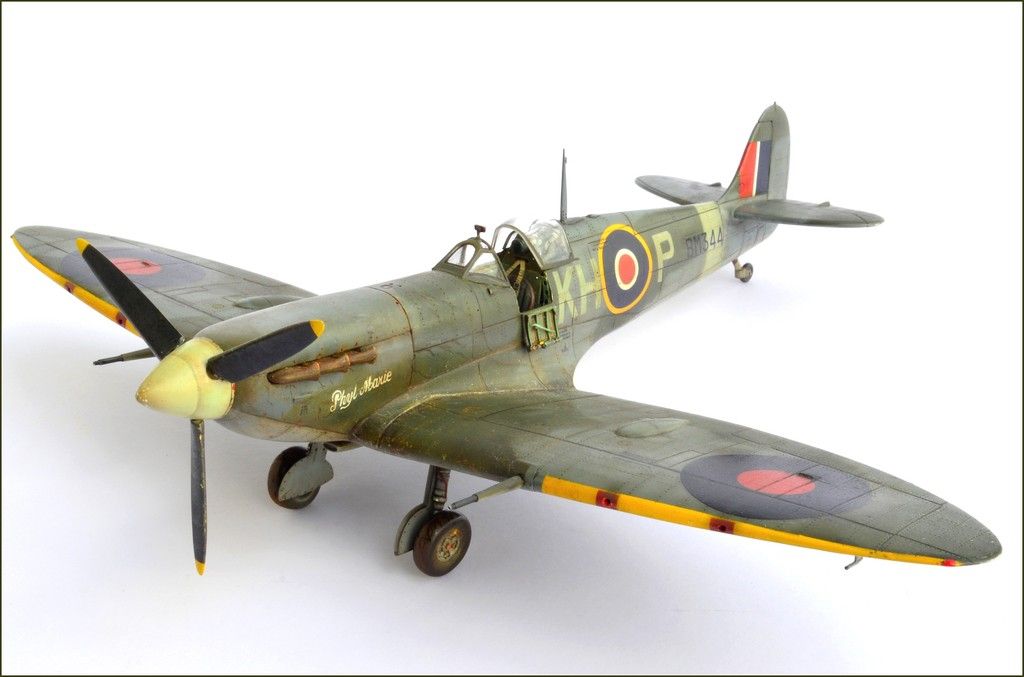
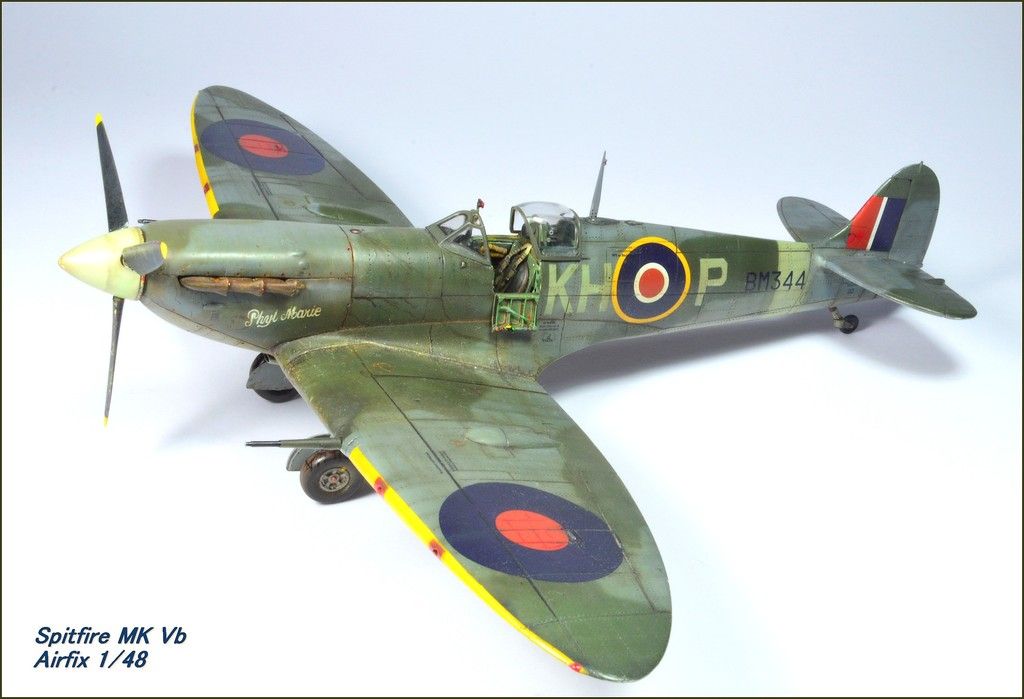
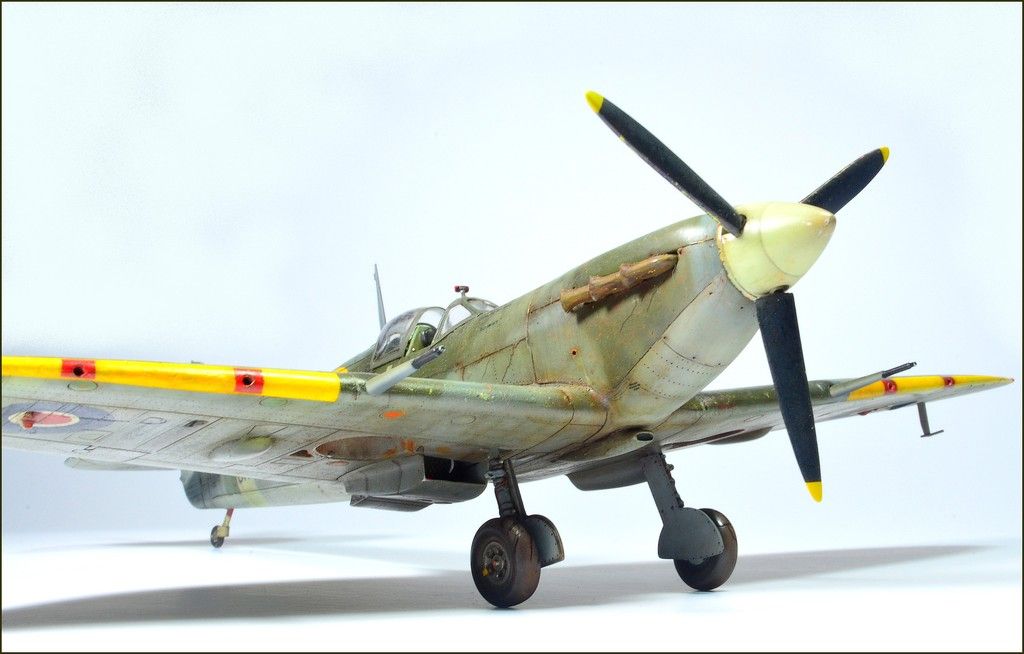
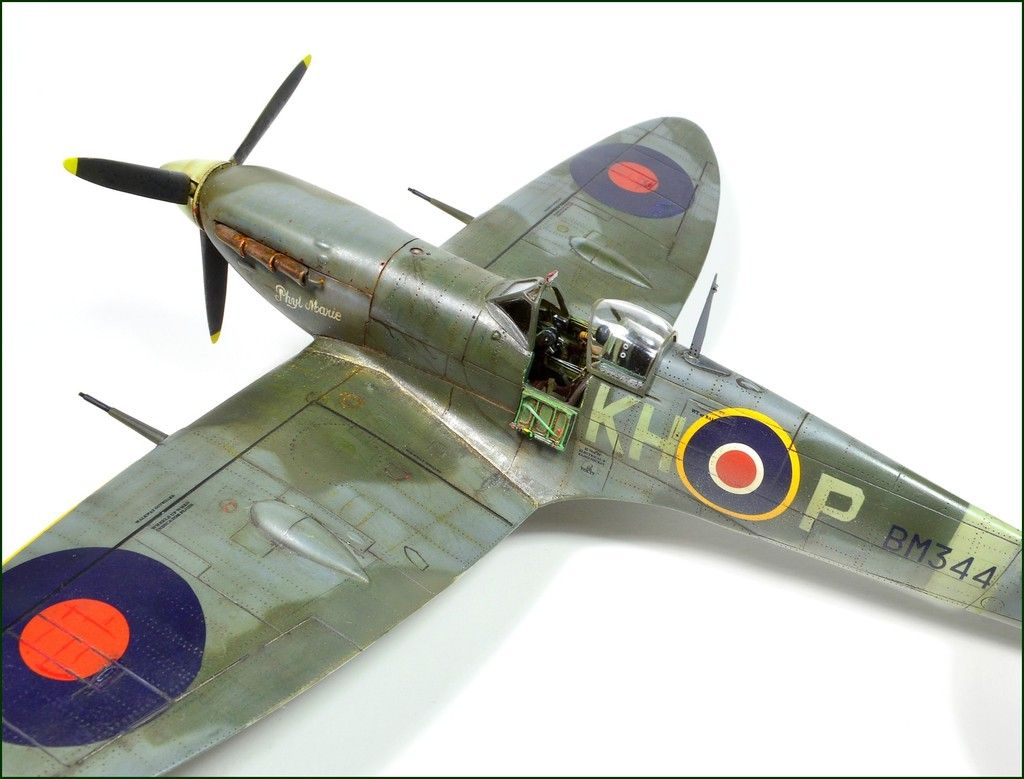
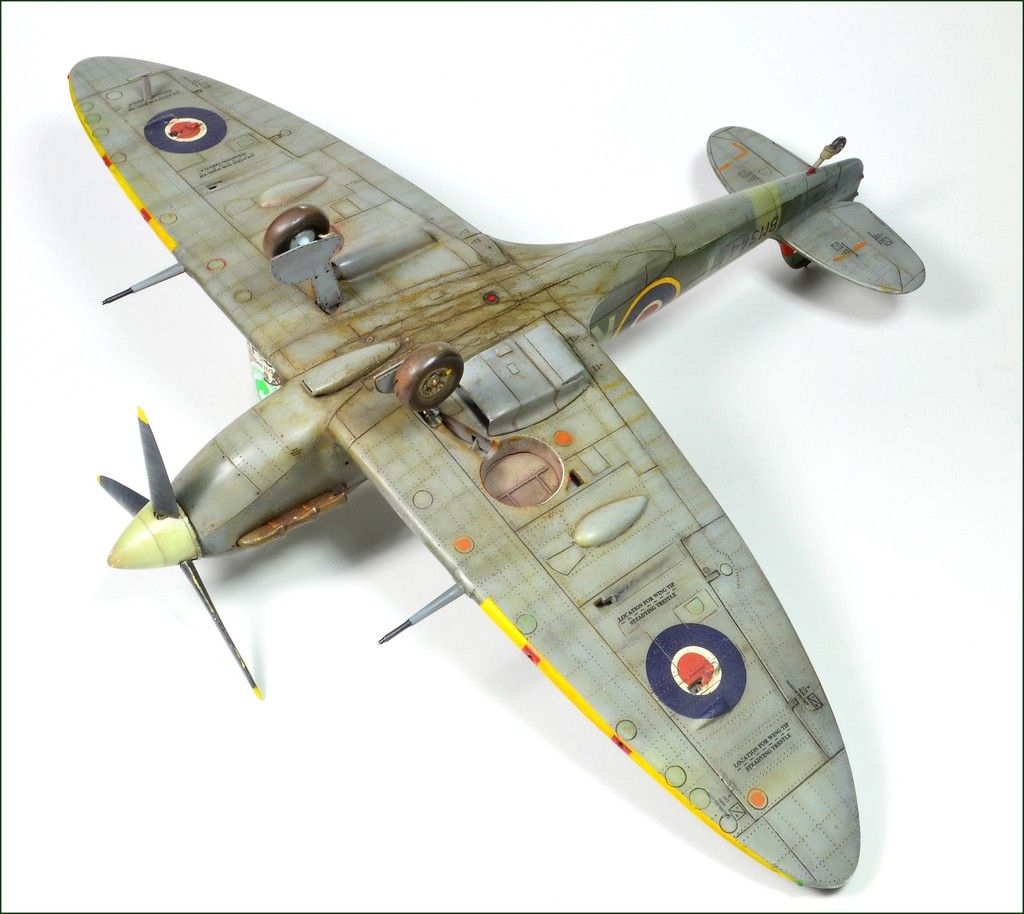
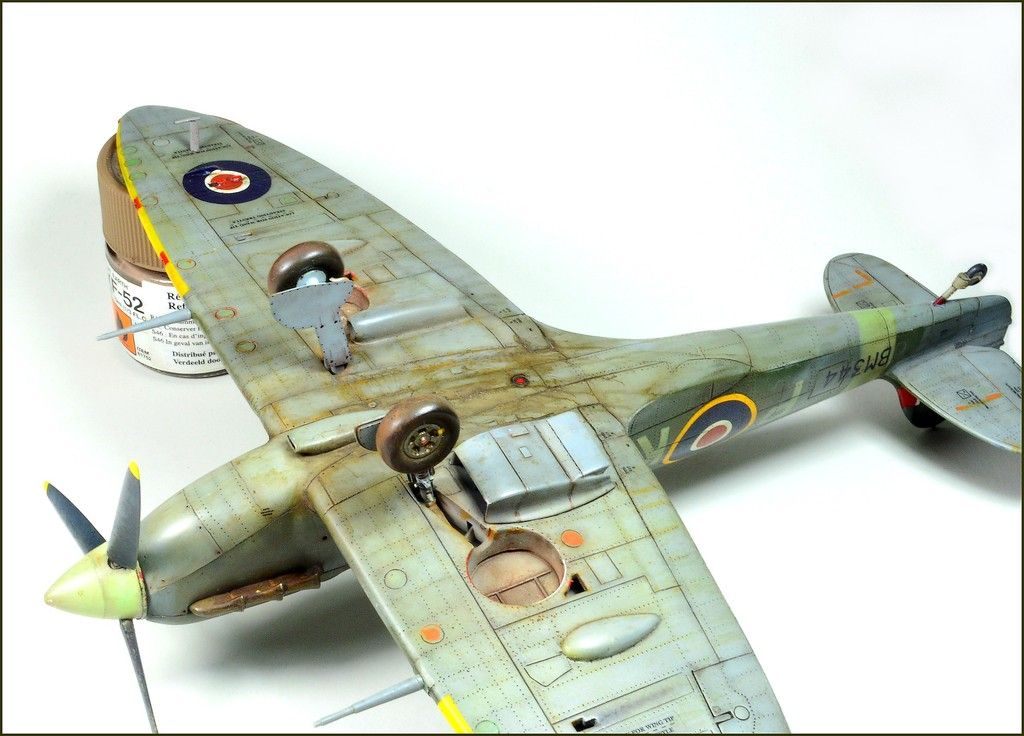
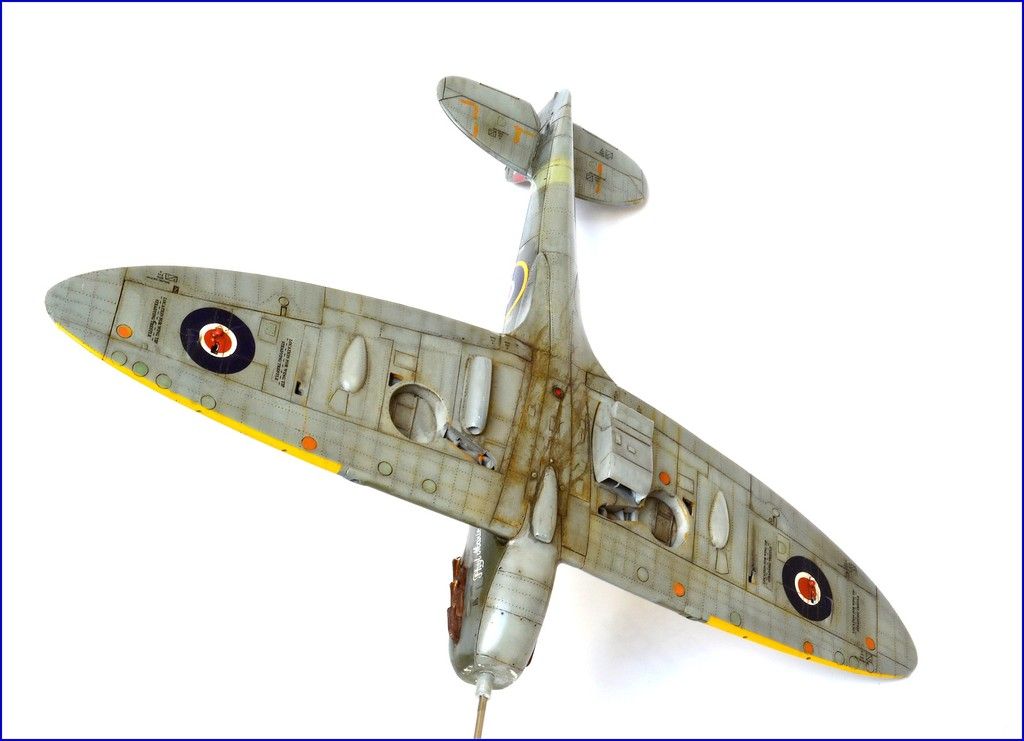
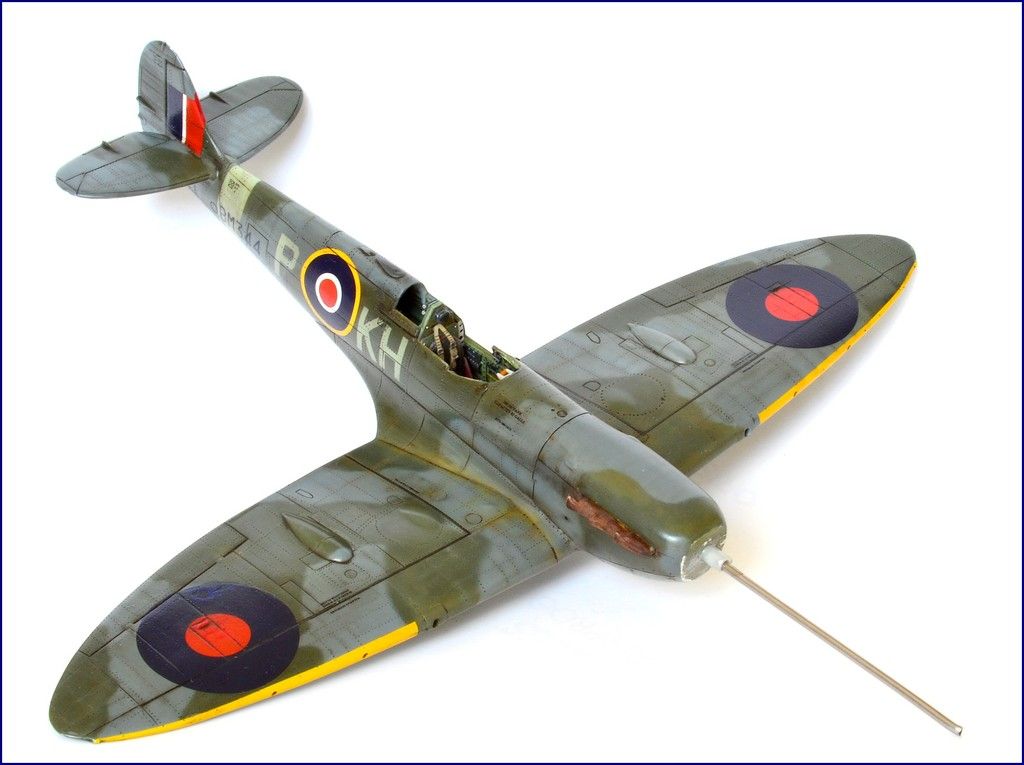
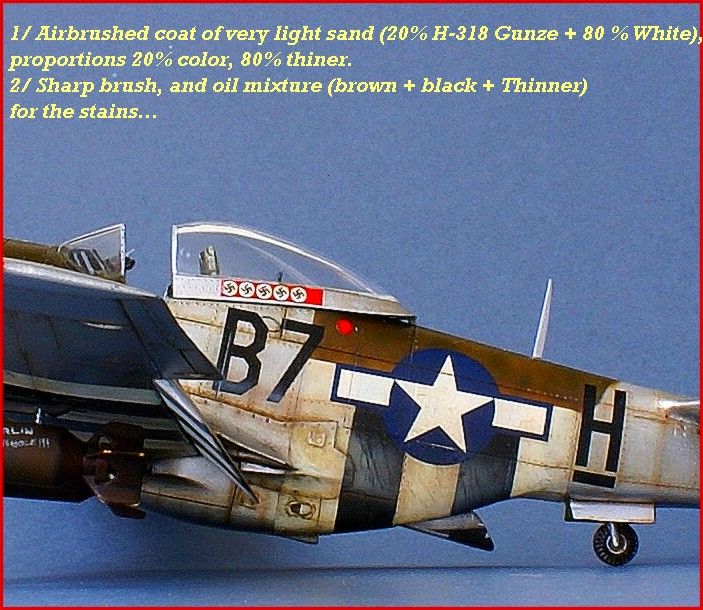
One of the last finished in 2006. Some scratch, riveting, and small added details in landing struts.
Funny to paint !
Have a nice day
Anis.
-
Splendid job! Love the combo of camos!
Hy Sebastijan,
I've visited your blog. Very pretty nice stuff, the MiG 31 is great. BTW, i'm also from the former YU... At least partly
-
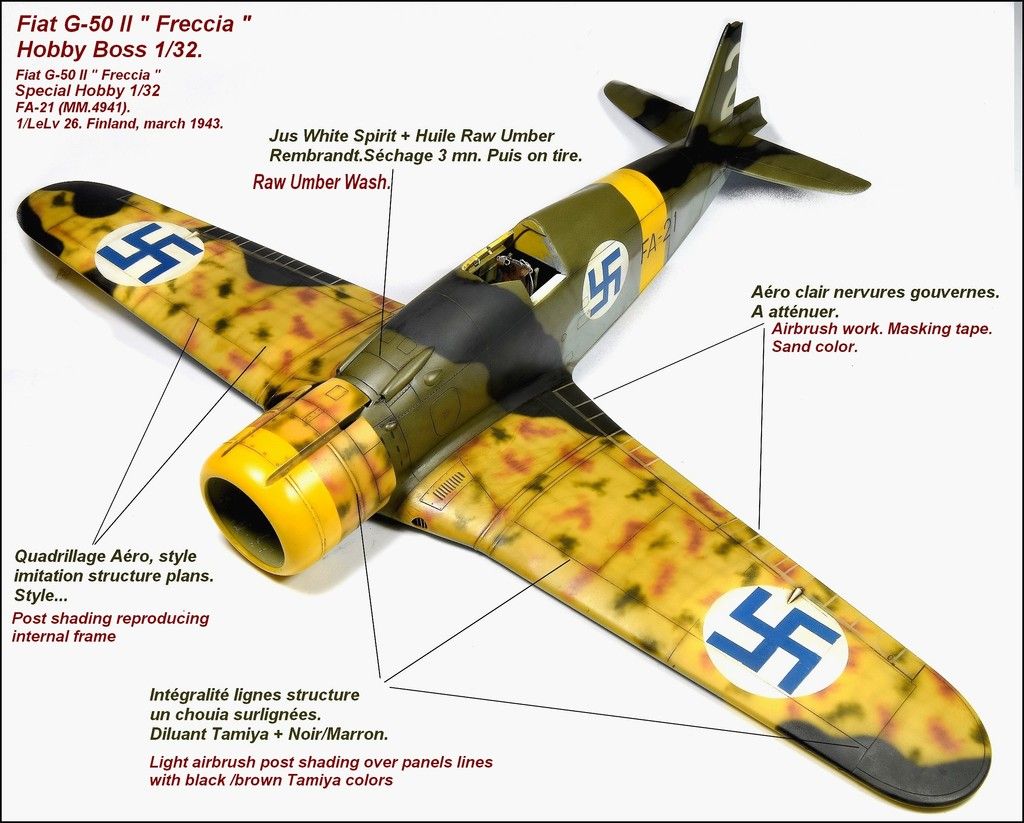
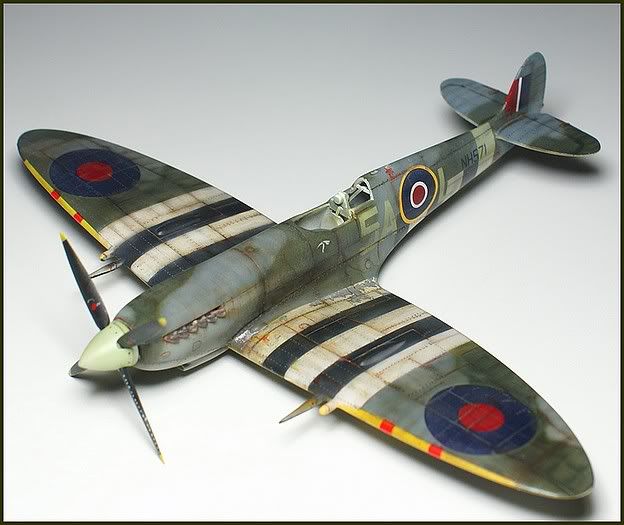
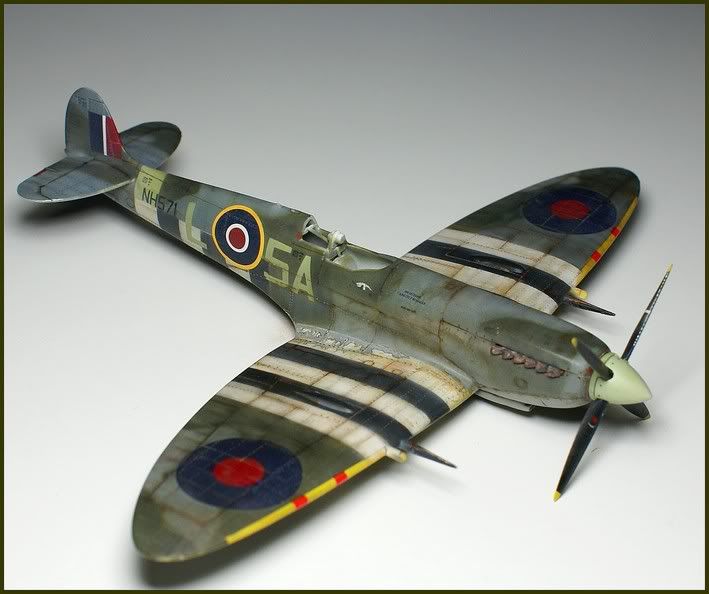
Hello,
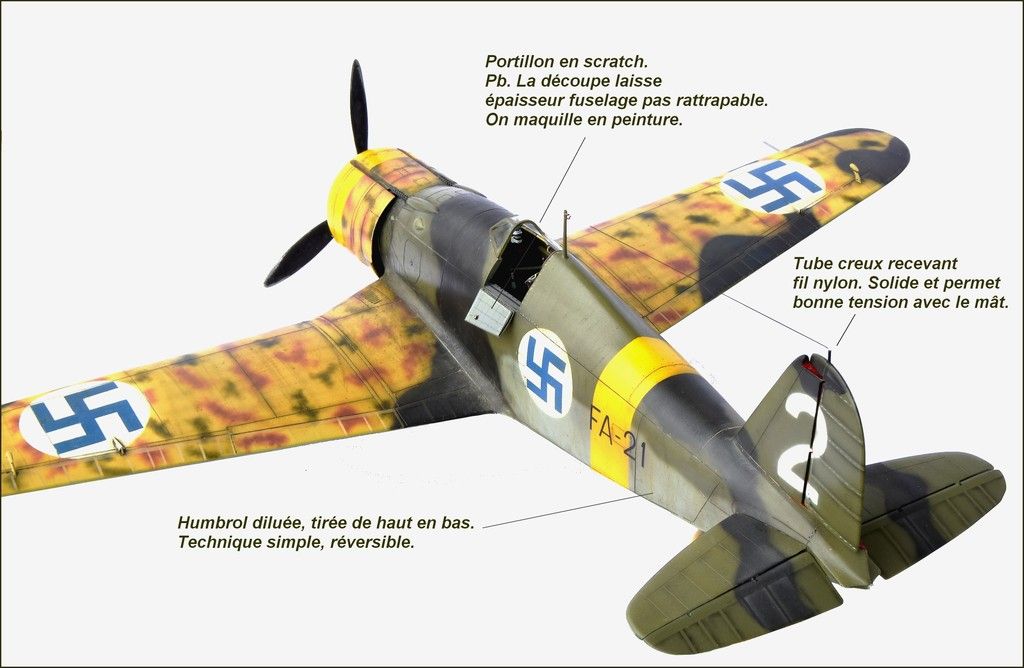
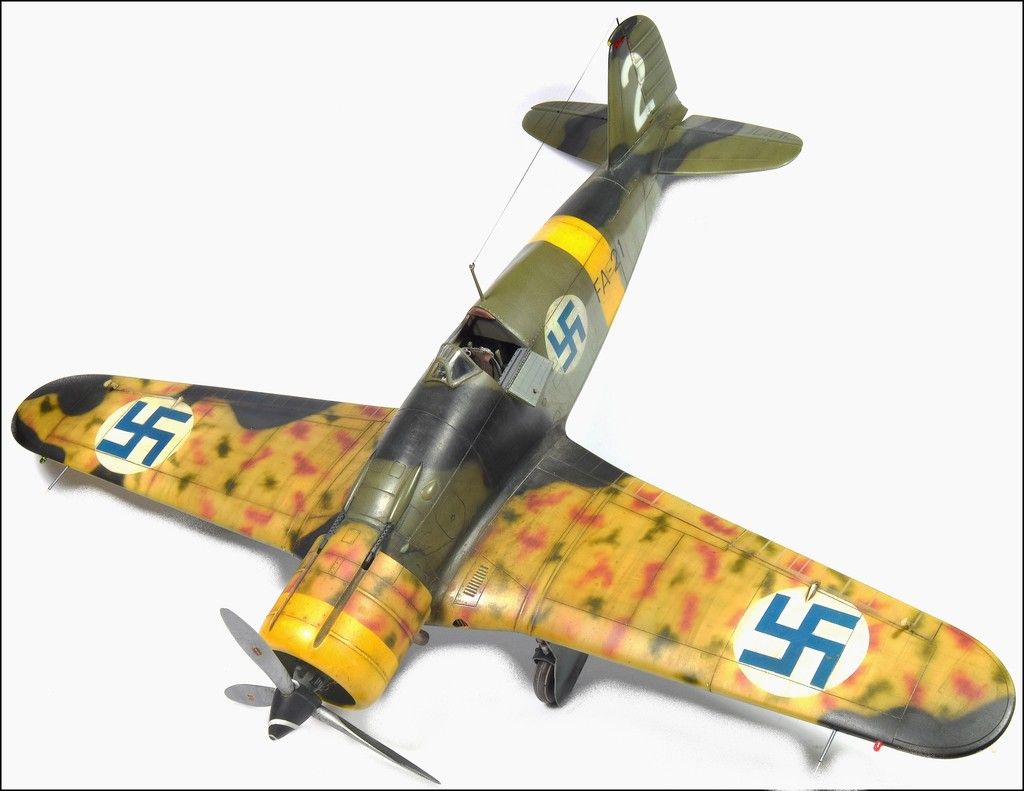
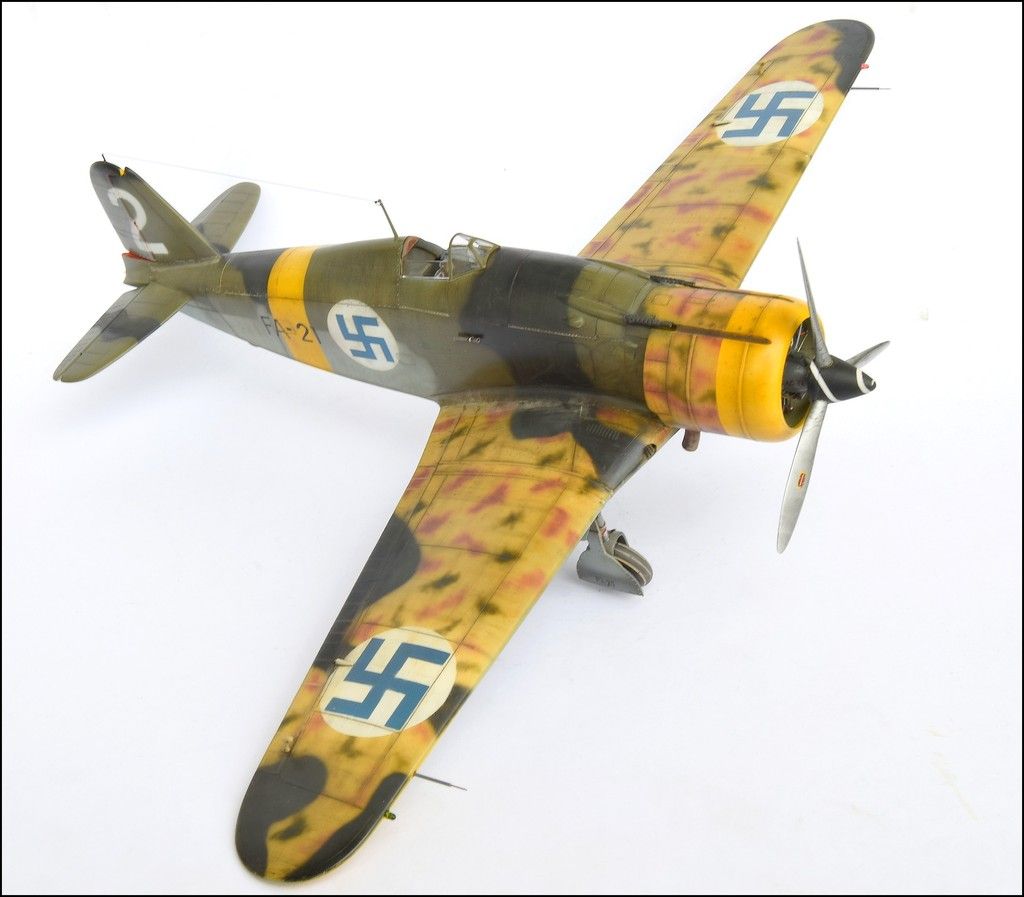
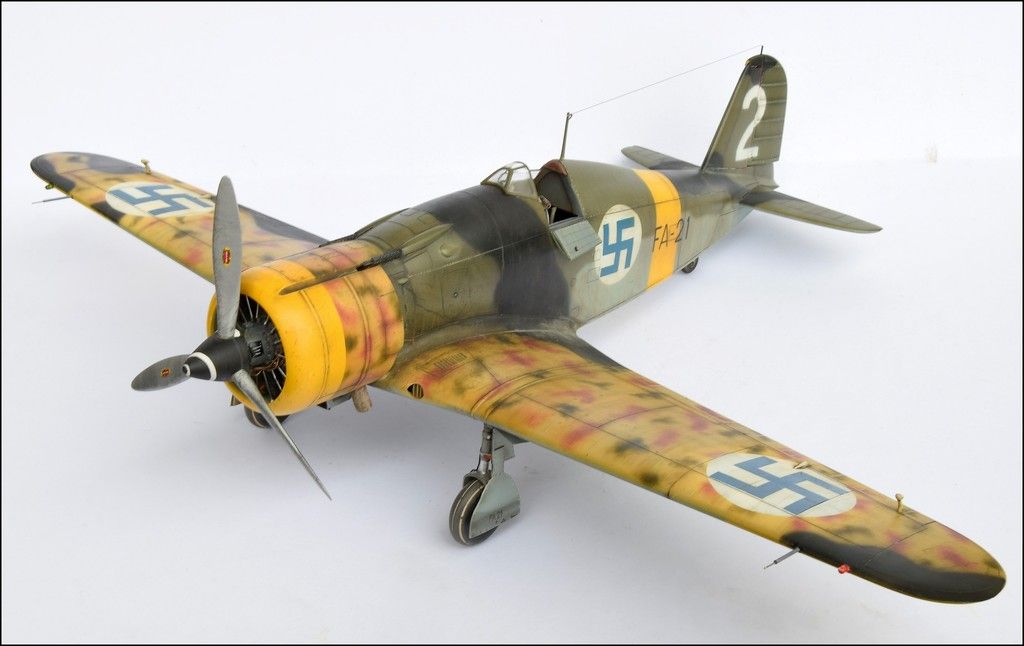
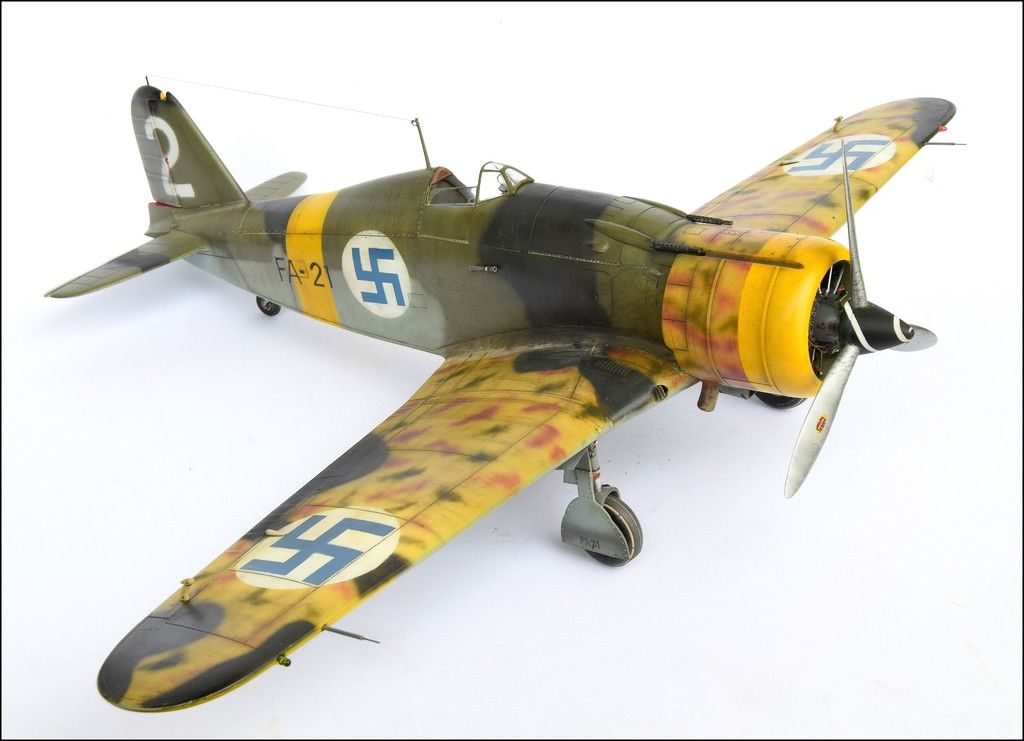
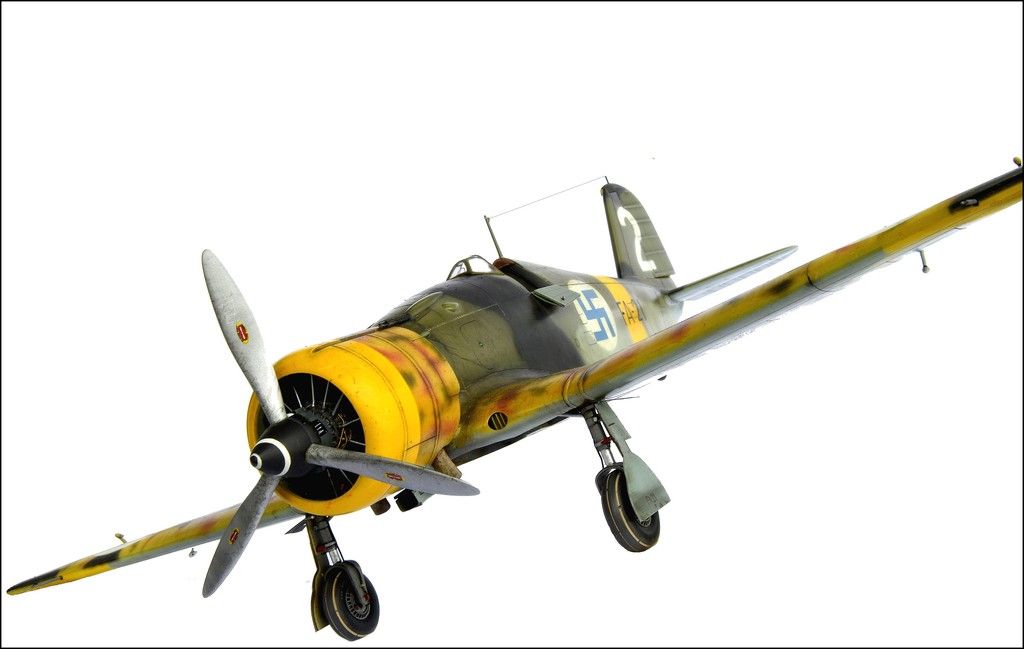
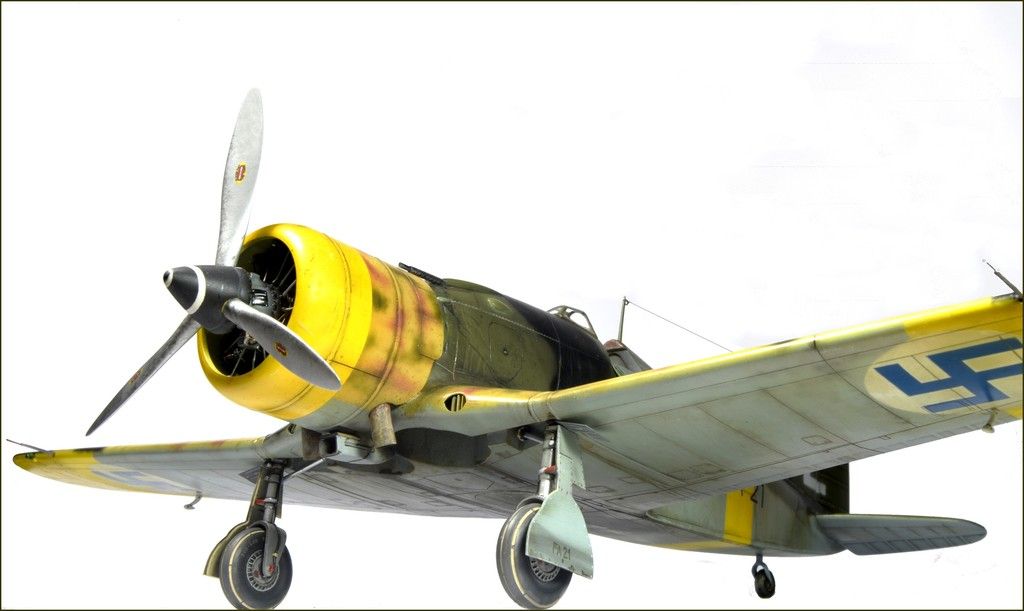
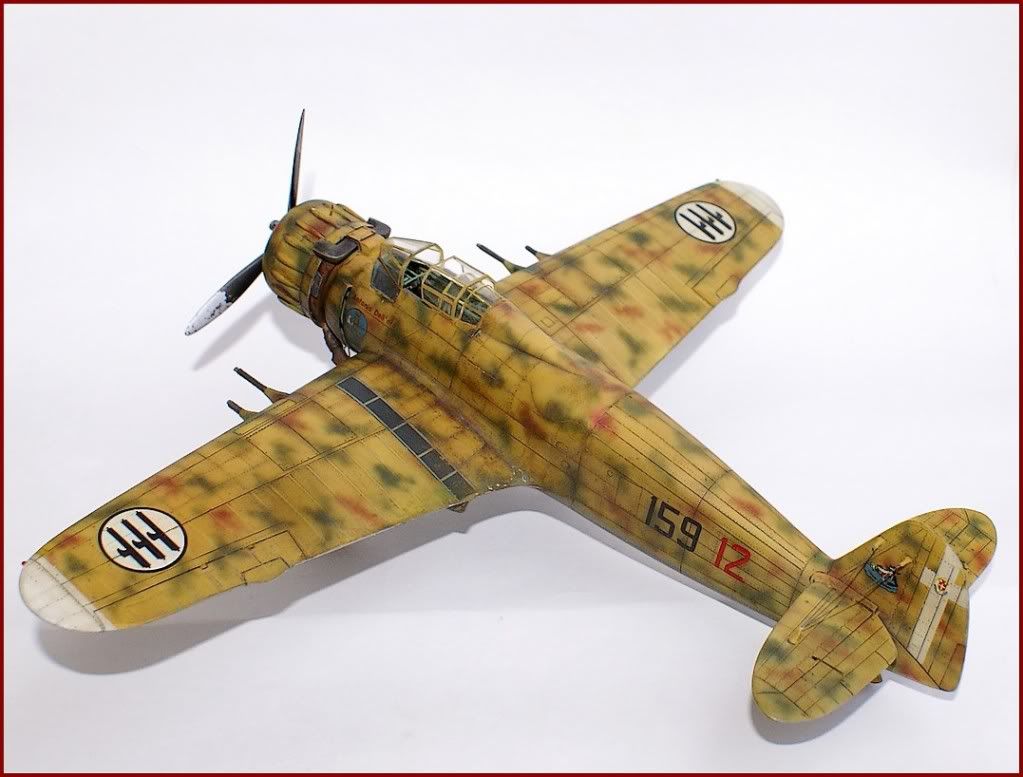
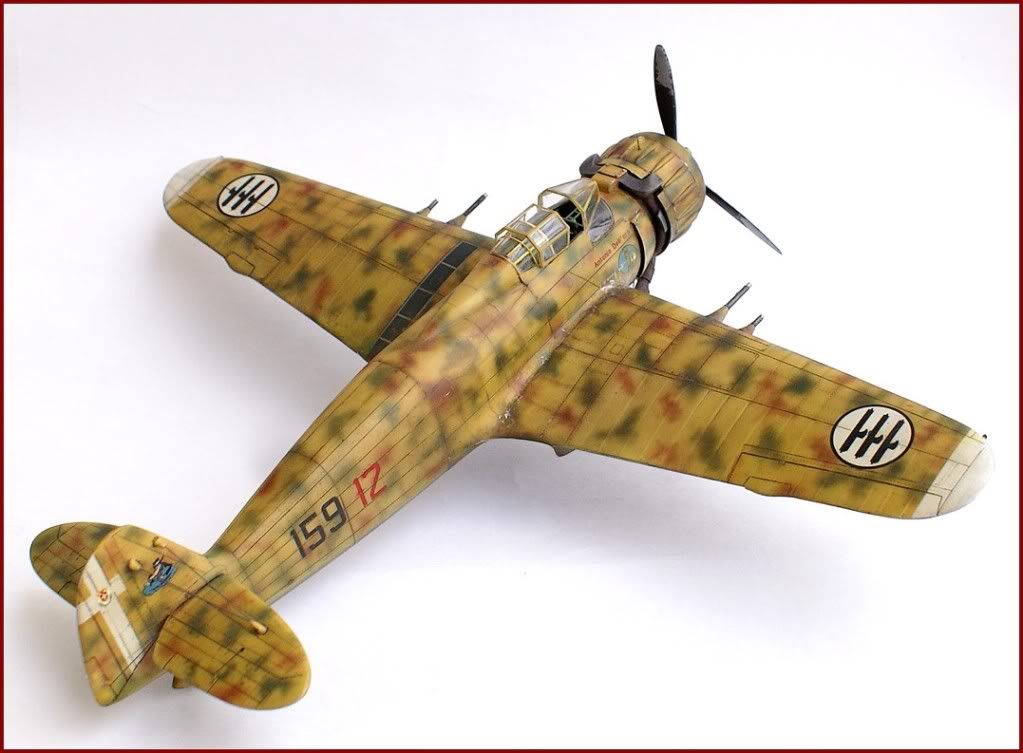
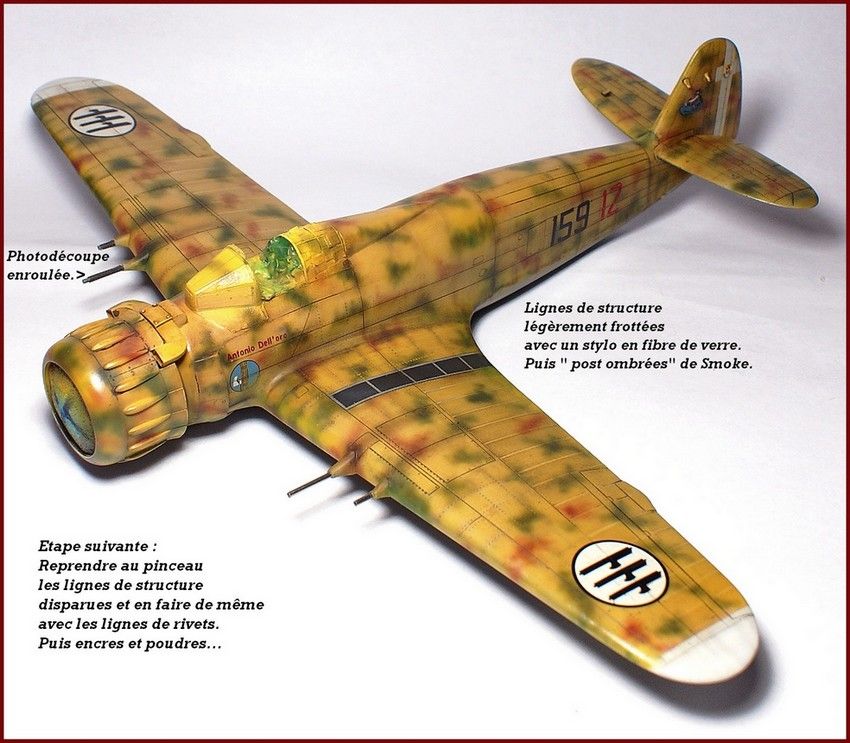
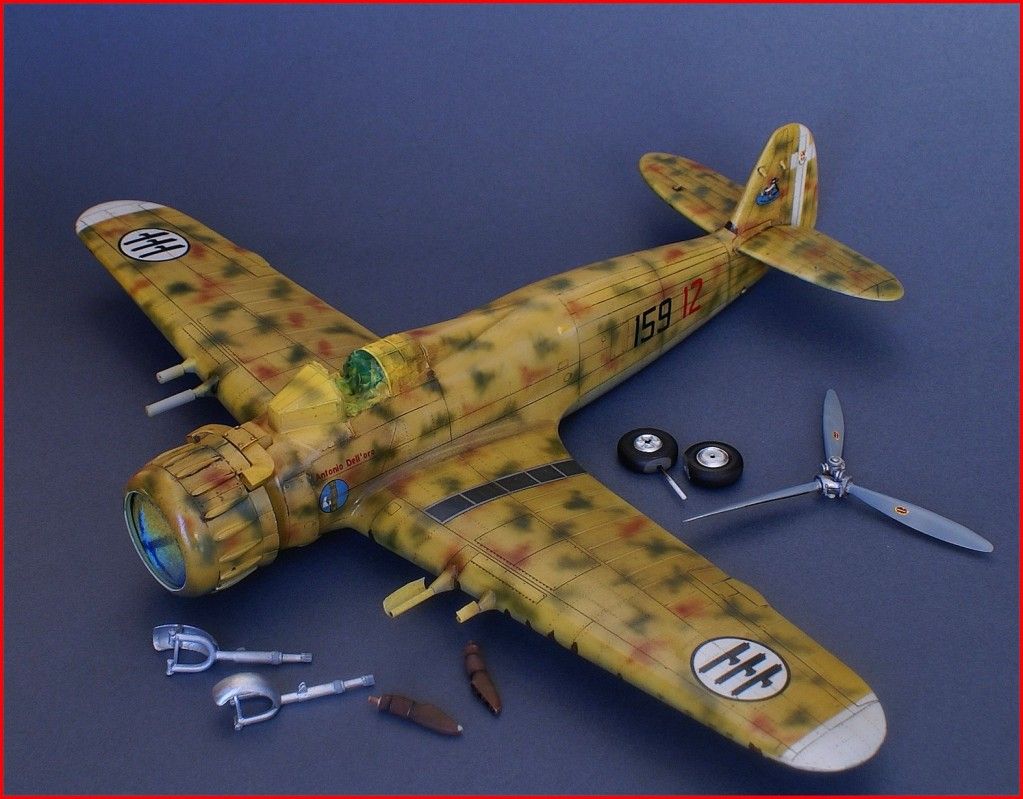
My last one, in Suomen Ilmavoimat/original italian colors,1/LeLv 26, april 1943.
Special Hobby short run kit. Painted markings. Acrylics Tamiya/Gunze.
Hope you like it ! B)/>/>/>
Anis.


-
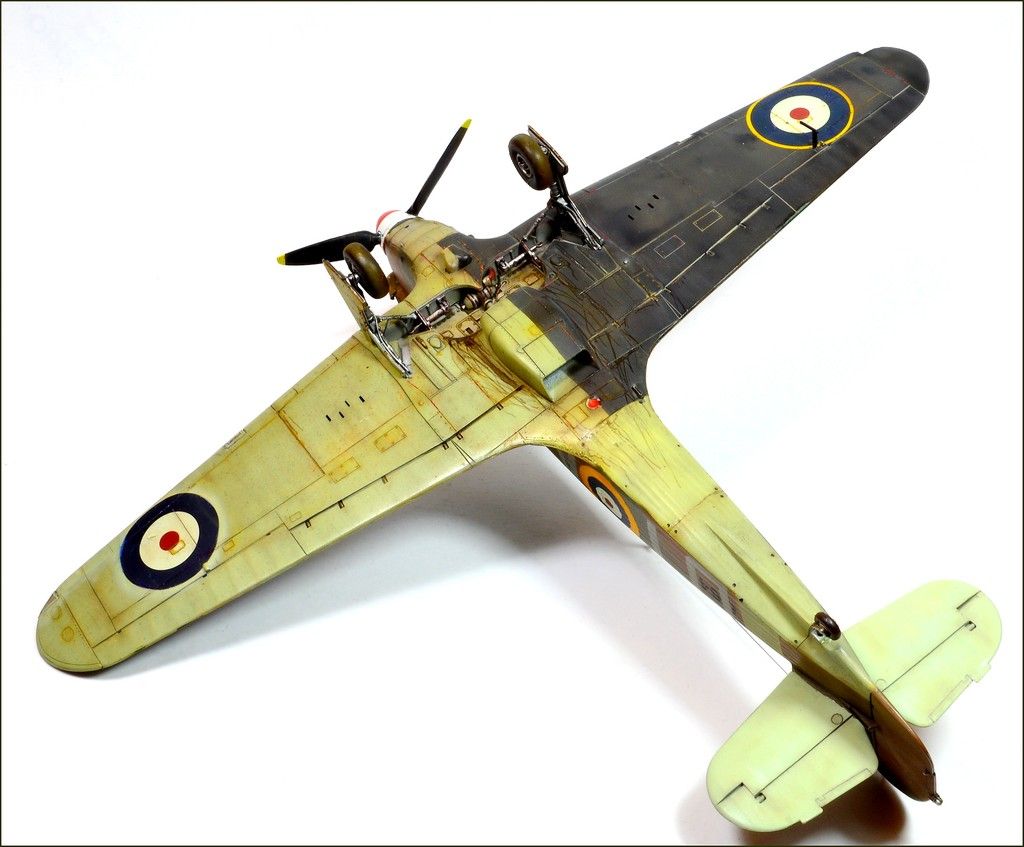
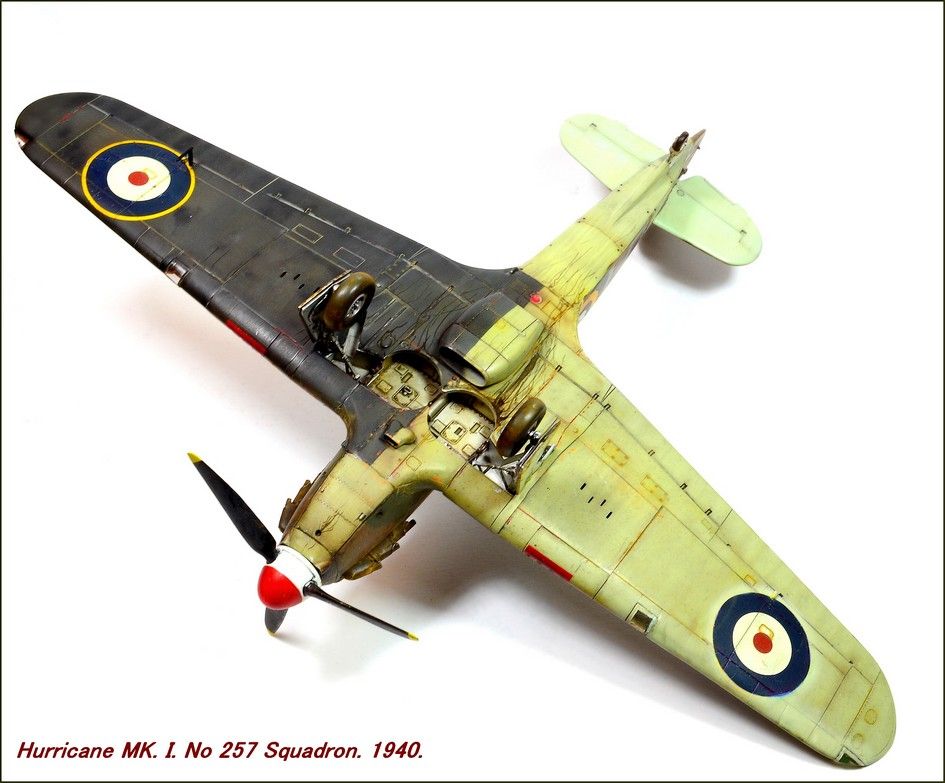
And concerning the relative clean appearence of Grumman fighters, have a look at this footage starting from 7'40...
-
Sorry but for me it's a lot too dirty!!!
I think that the mechanics who would have left flying an aircraft in such a state
would have been sacked at once.
What DO YOU think about it????
OK for dirty but not too much!!!
I think that you can be right as i can be right another day. Modeling is fun and also an interpretation of various states.
Everyone is free. You of course, and me also.
Cheers
-
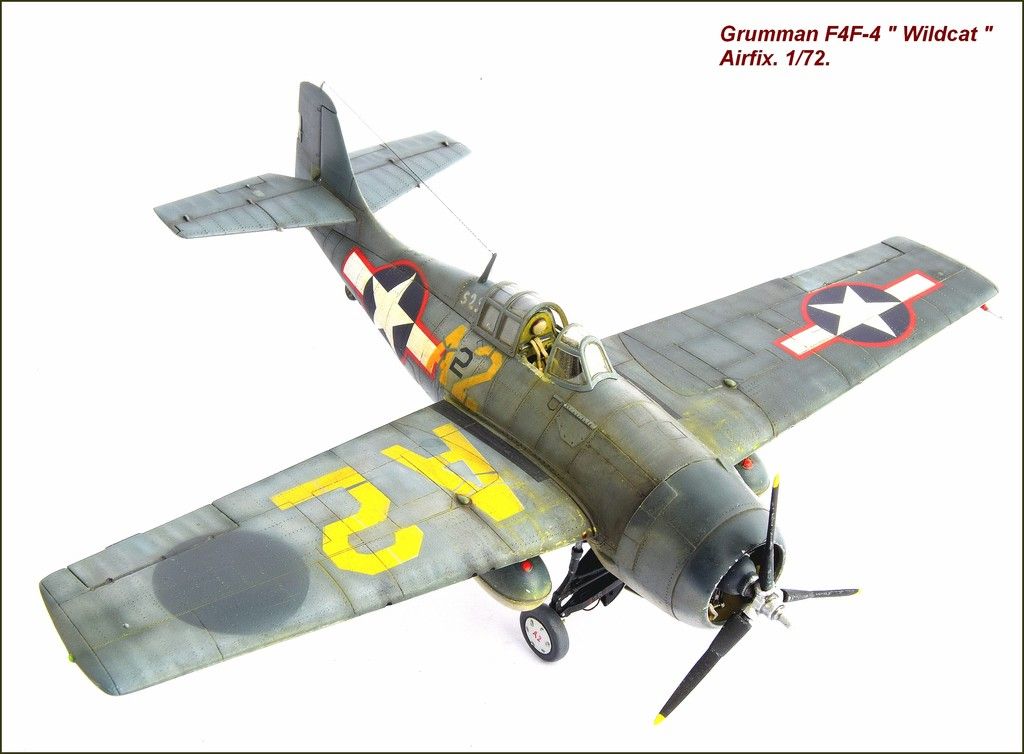
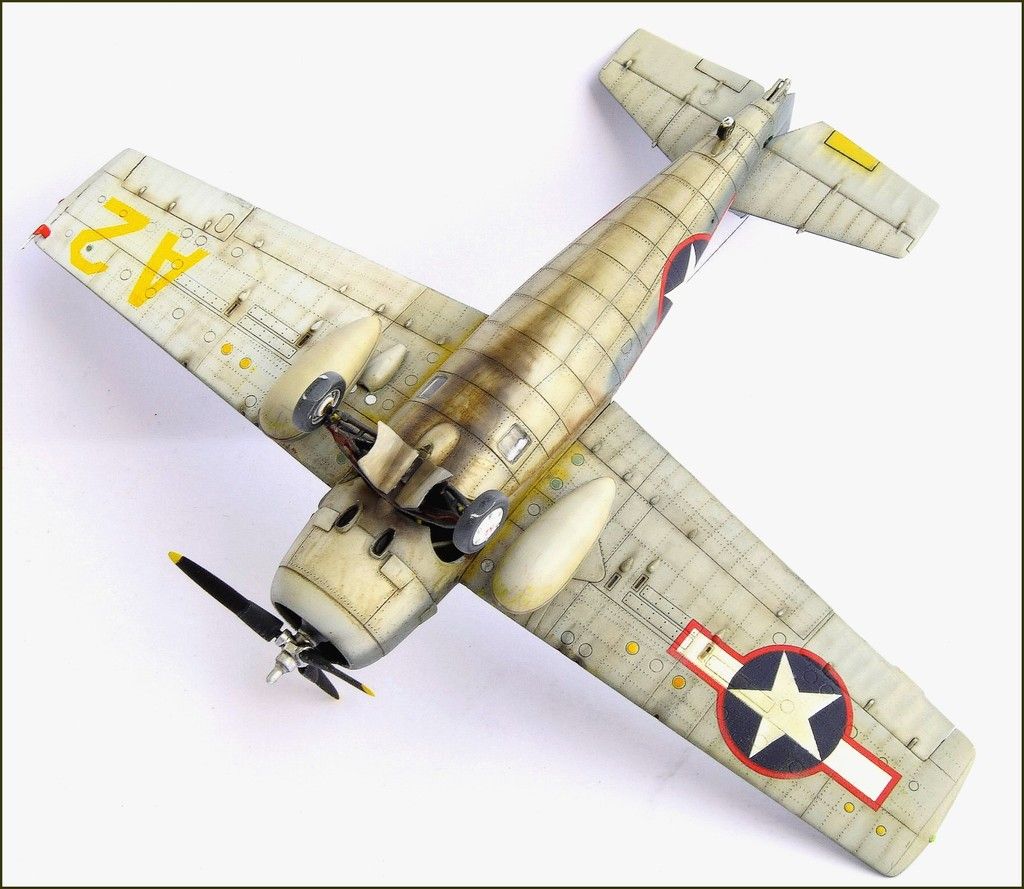
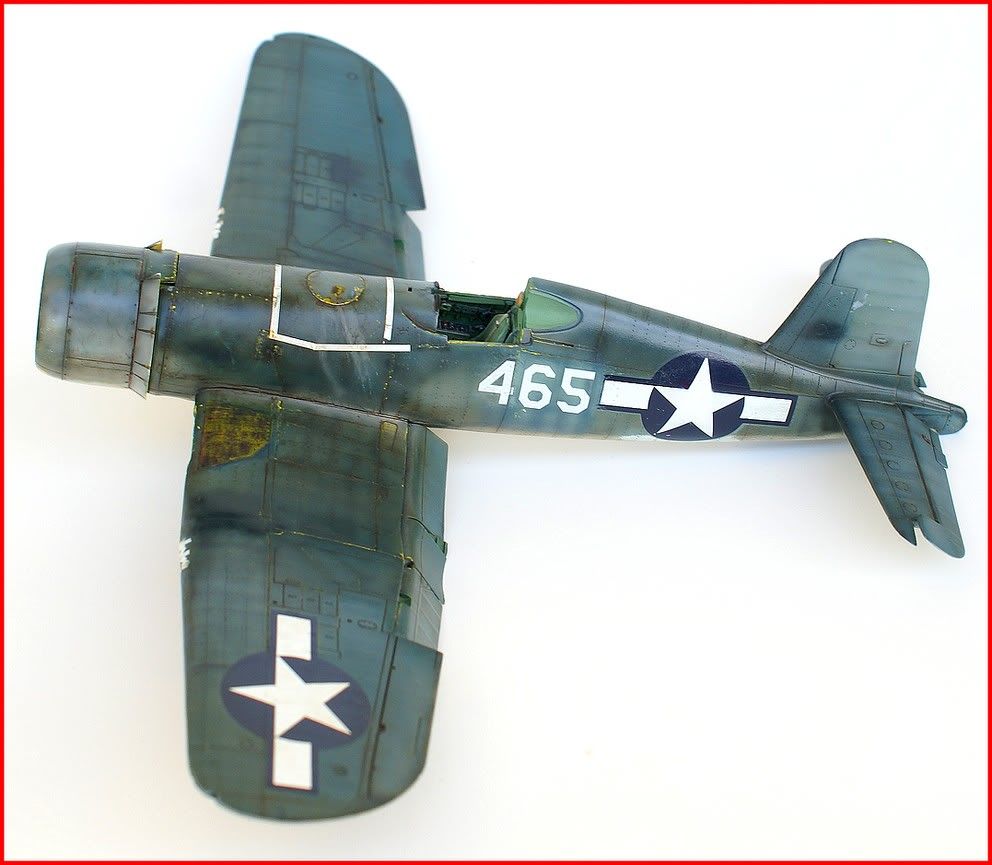
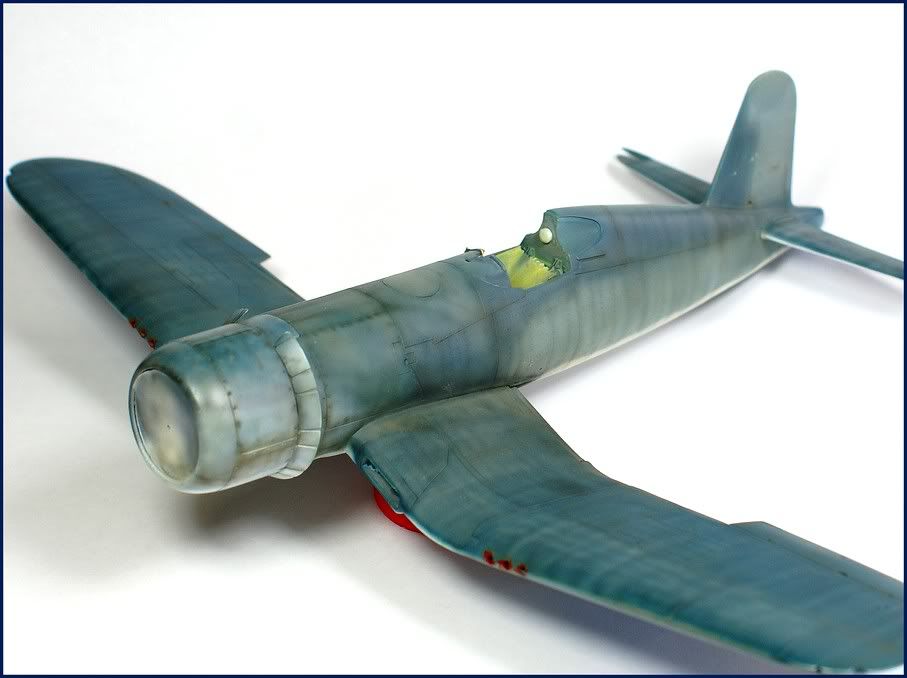
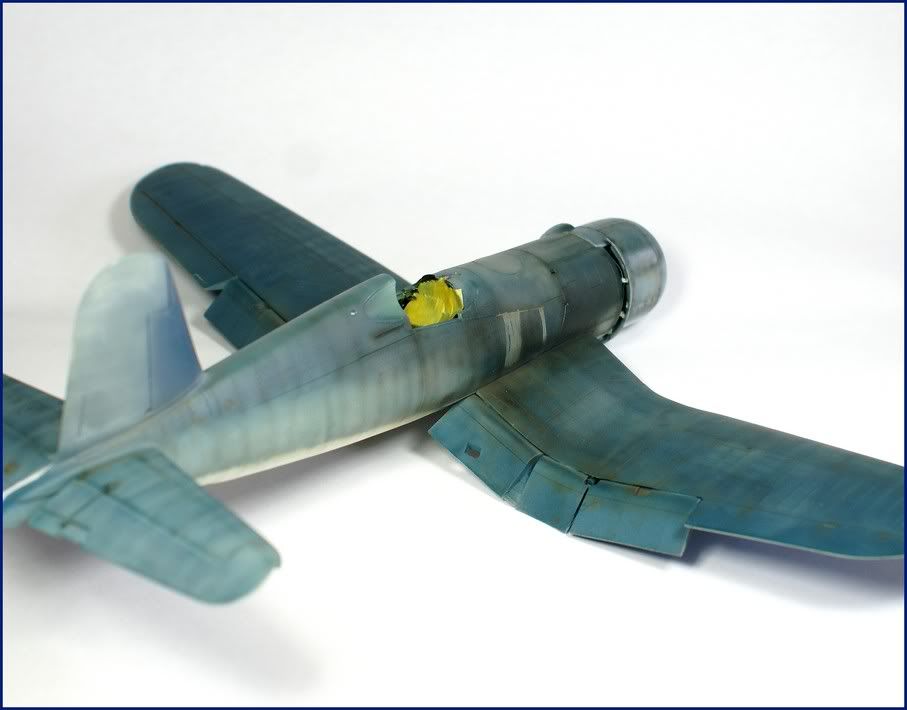
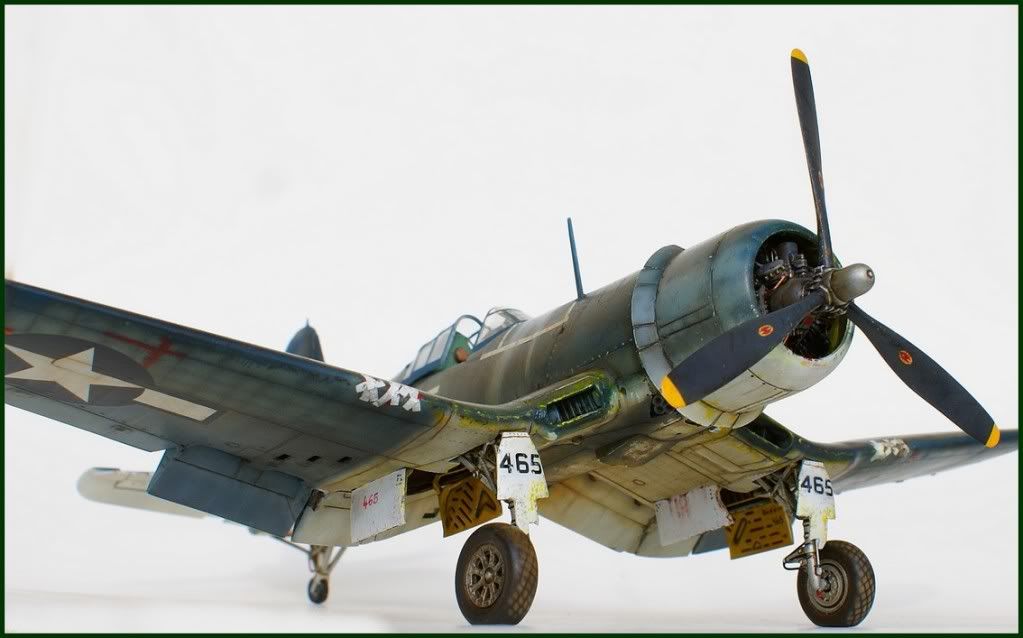
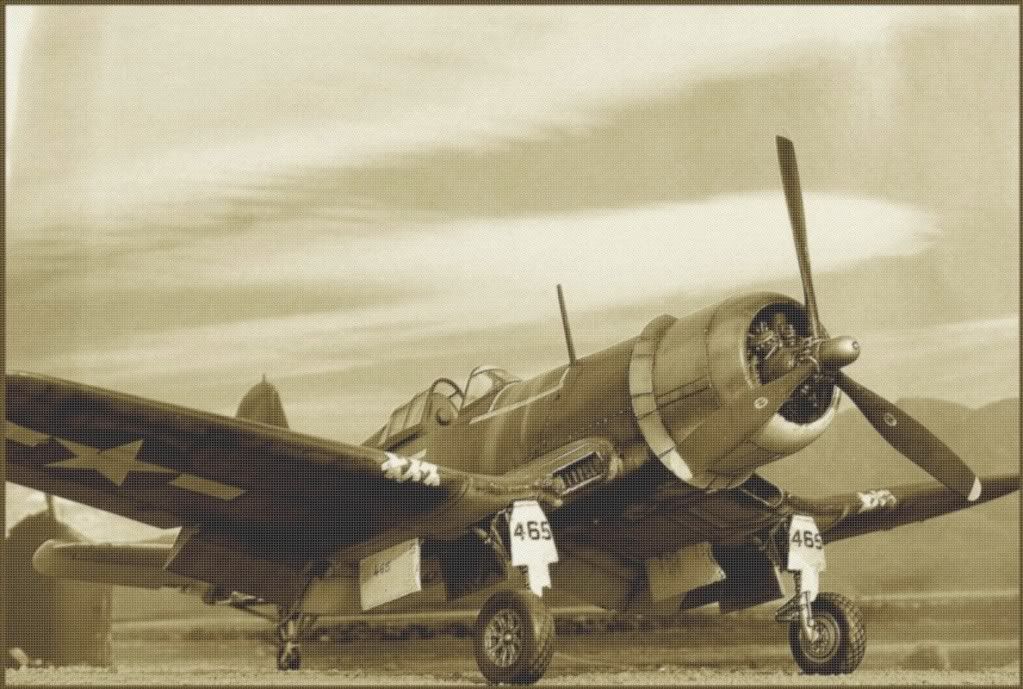
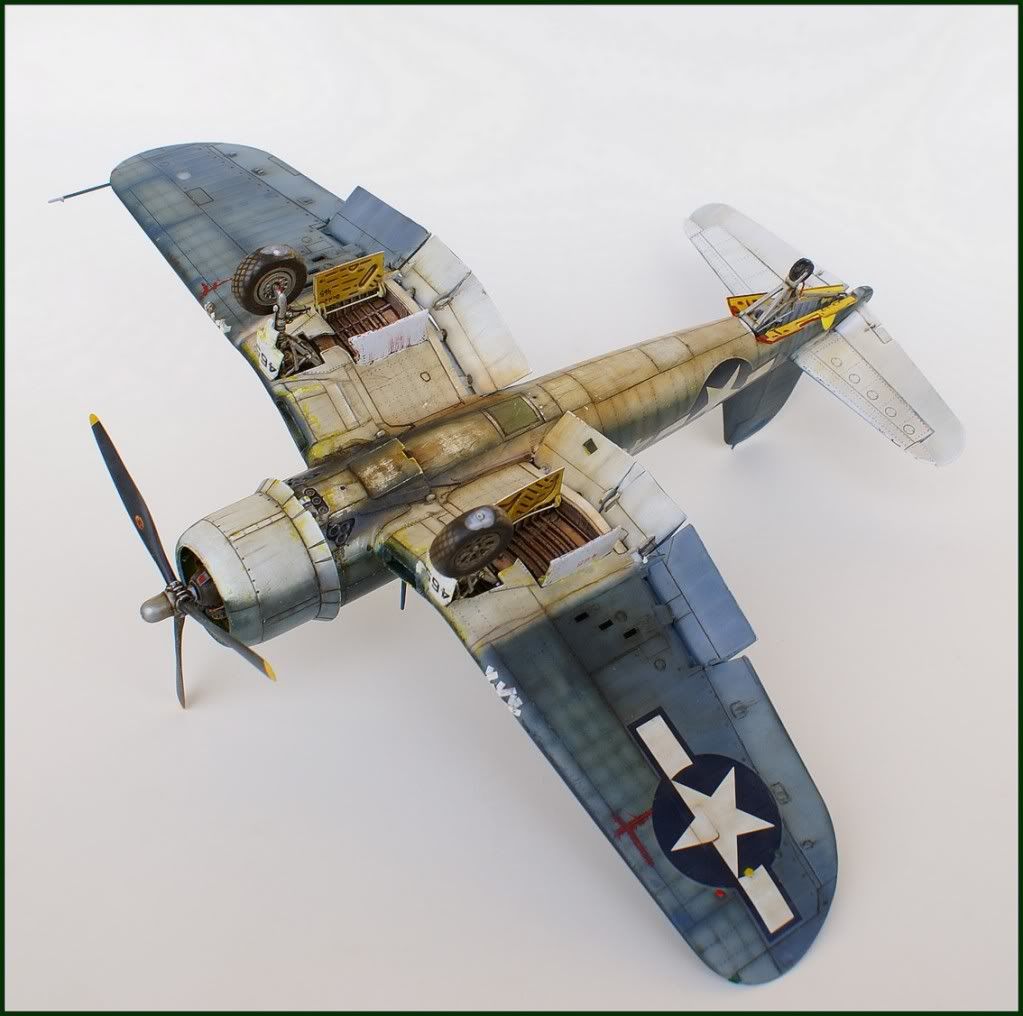
Hello,
This is the new F4F-4. Riveted and markings for a training aircraft on the CVE Tripoli, circa 1943.
Thanks for looking at !
AE
-
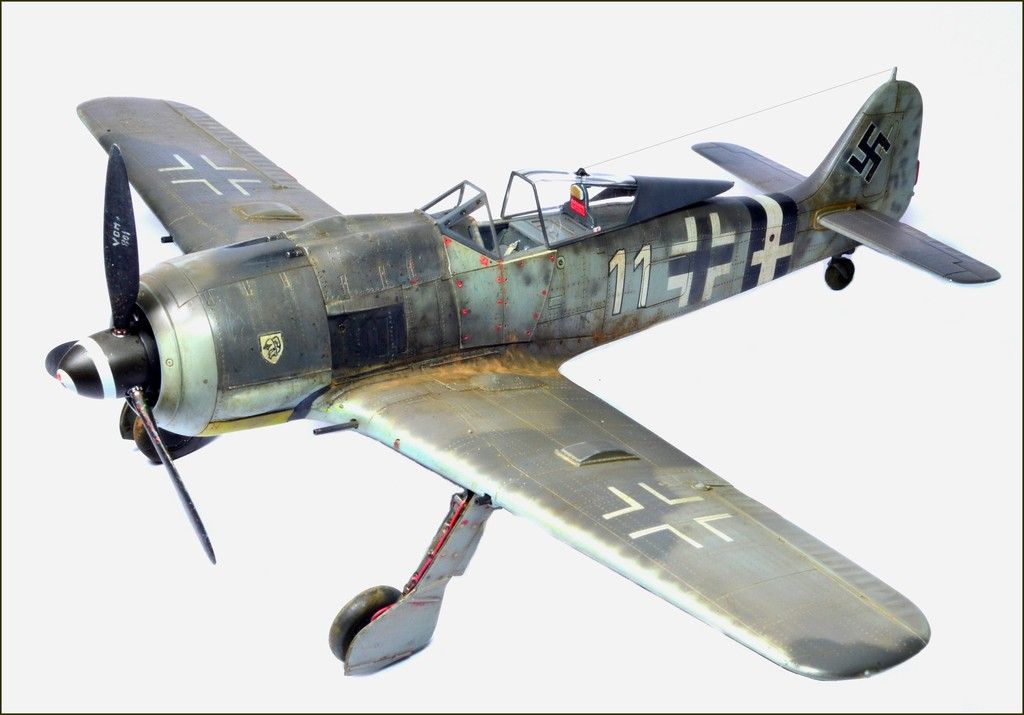
Wow! Nicely done, that's one of the best WWII Luftwaffe camo jobs I've ever seen. Would you talk a little more about the painting process you used?
Hello,
I'm working with highly diluated Gunze Tamiya colors (80%) with a hansa airbrush (0.2 mm). Then, the weathering is a mix of different technics (pencils, inks, very thin oil washes and powders like Mig products). There is no particular order in their applying. Question of feeling and what you have in mind or what the original pics are suggesting to you !

-
Hello !
Thanks. This is the Tamiya model !
-
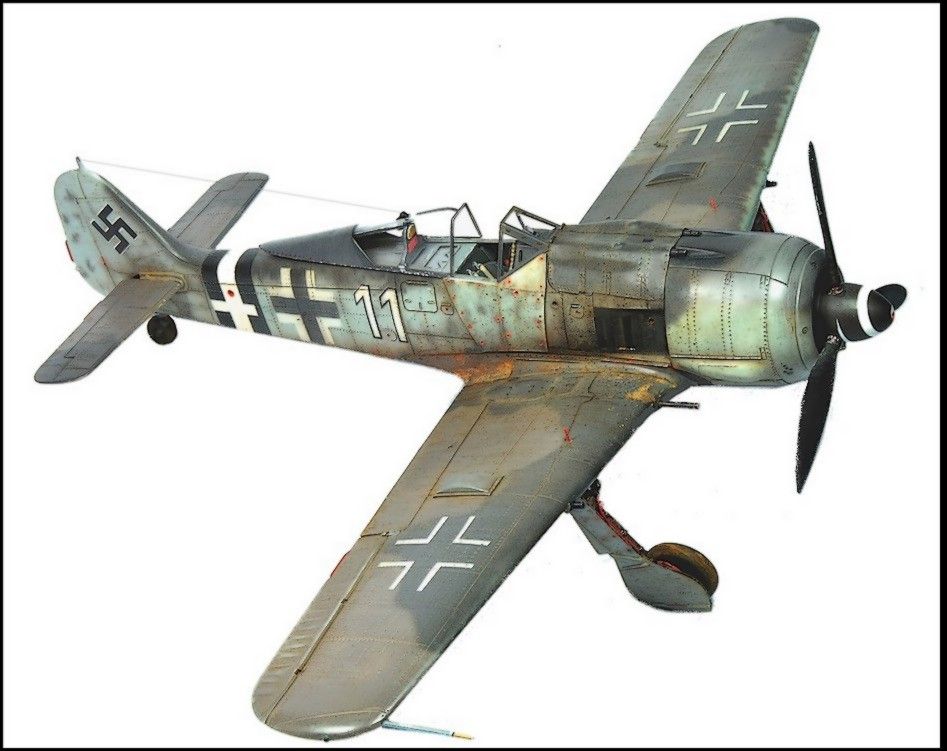
Hello,
My latest model. Riveted with airbrushed markings for a 5./JG4 fighter captured in january 1945 during the Bodenplatte operation againt allied airfields.
Thanks for looking at !
Anis. :coolio:/>
-
Hello,
An oldie but refreashed with rescribing riveting job, plus some new items !
Hope you like it.
AE
-
Hey !
Sorry,
I've been out for a while.
Thanks a lot. i'll post again some new stuff.

-
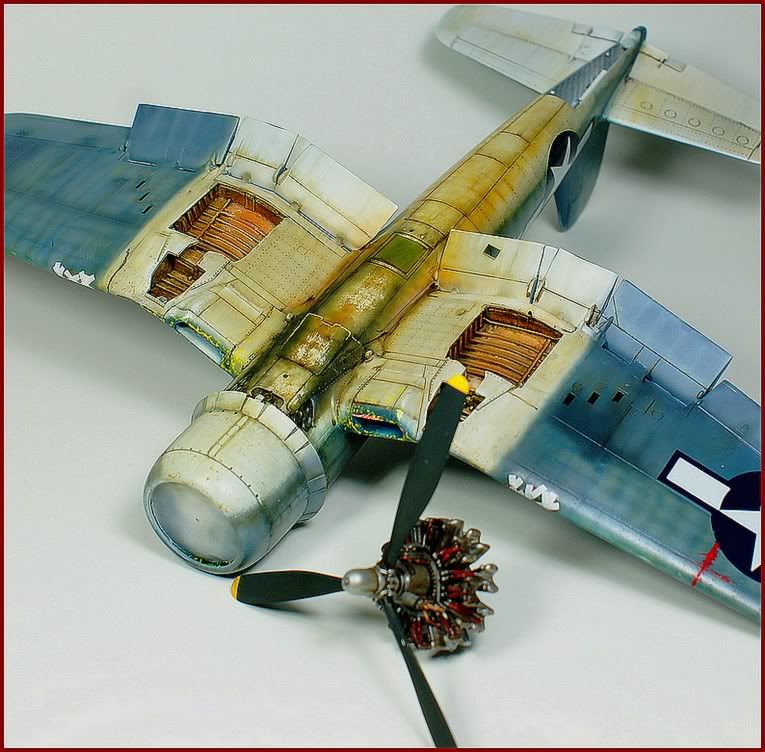
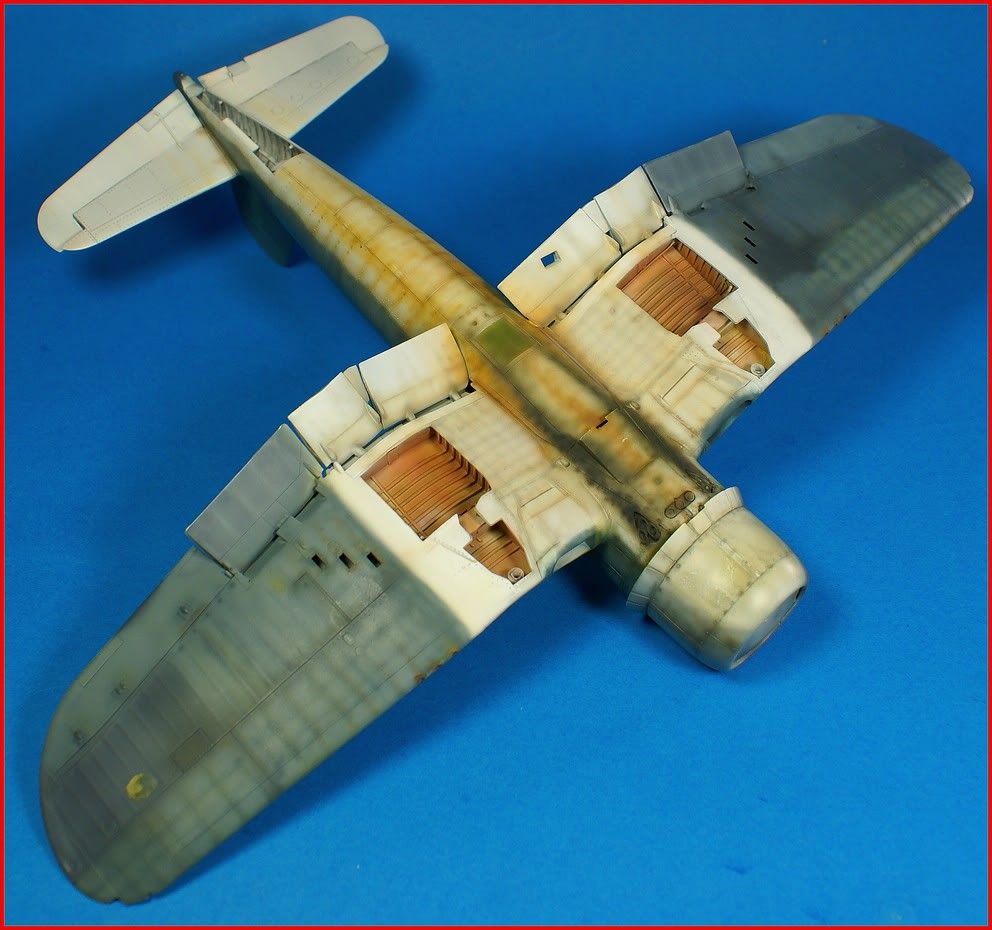
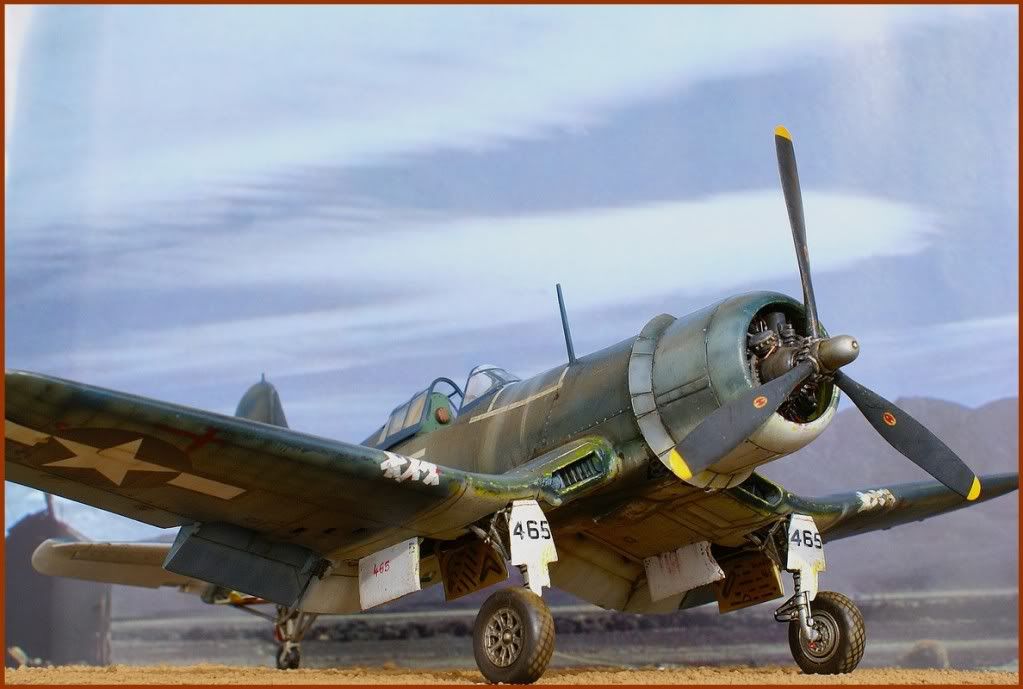
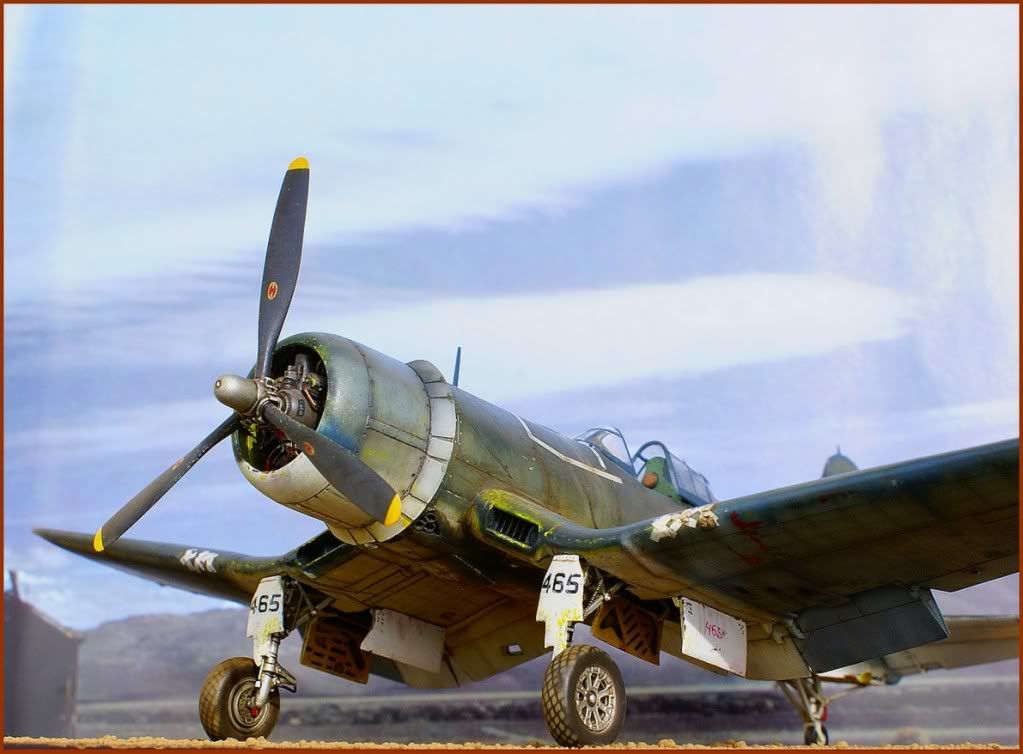
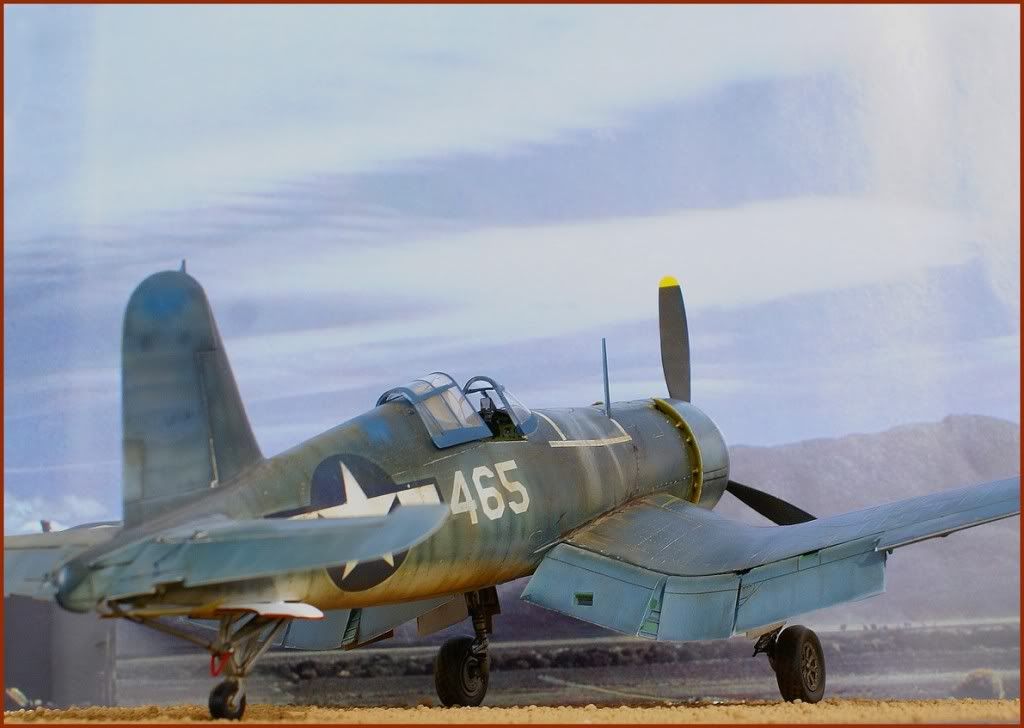
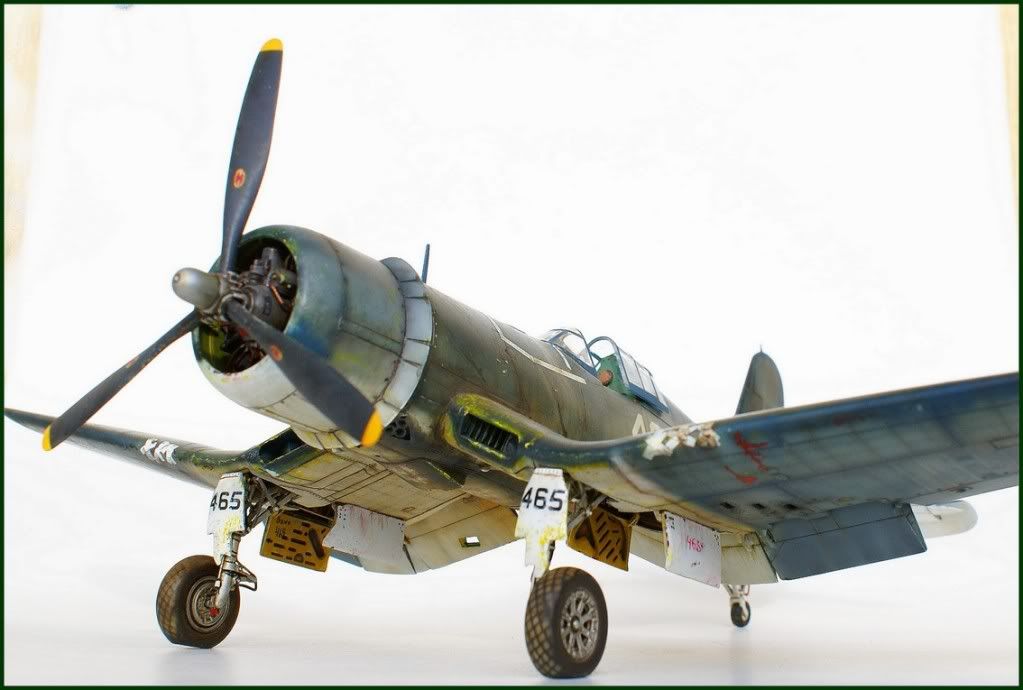
Hello,
Ths is one of my last builds ! Nice and easy to built kit. My usual heavy weathering.
Thanks for looking...
AE
:rolleyes:/>
-
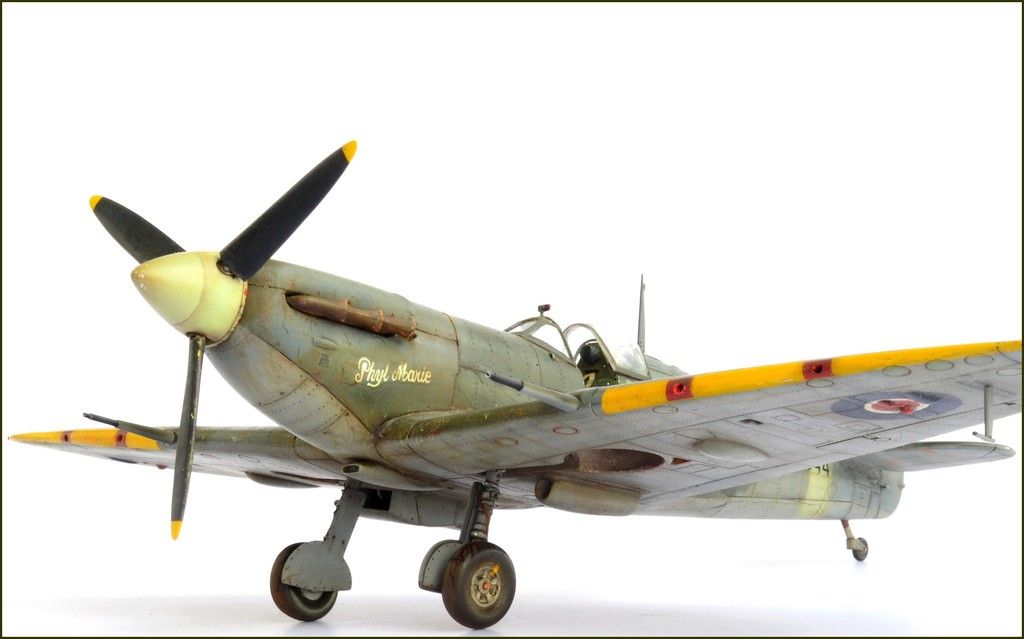
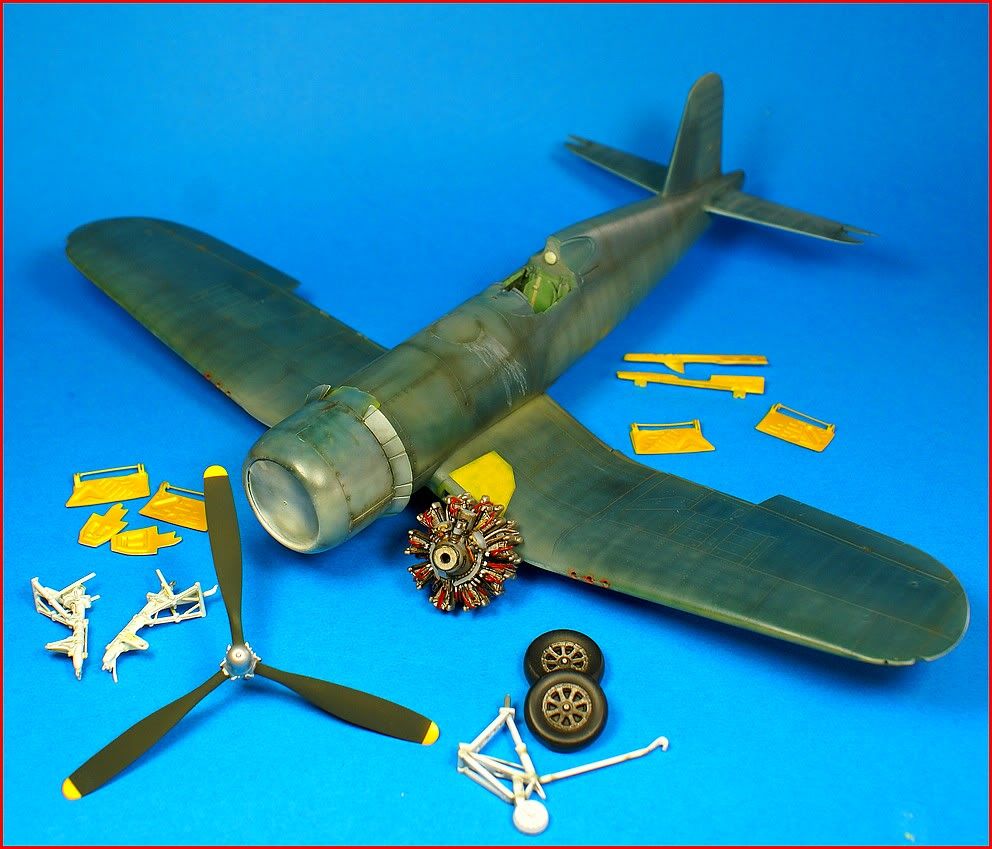
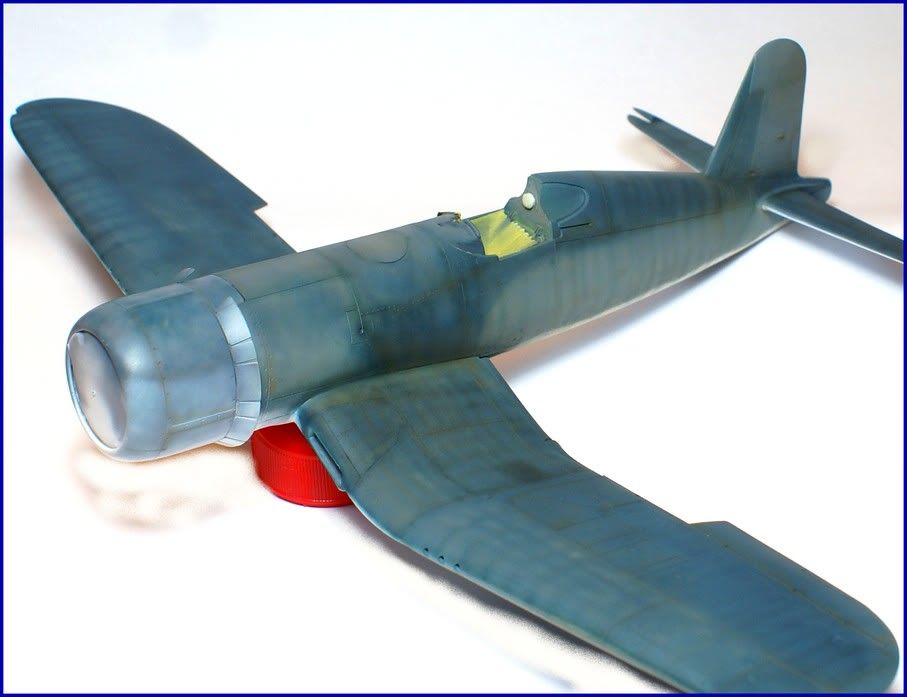
Hello !
My last build.Good short run model with photoeched and resin parts. Fine fitting and interesting weathering experience as well !
Thanks for looking !
AE
-
hey i love this build!, question. i noticed in your WOP post that you had an india ink artist pen in the photo. did you use that for the panel lines or oil streaks? i have the same pen set so just curious.
Well, in fact you can use it for both purposes. Just be reactiv, if you dont like the result or you put to much ink, a weet finger will help you !
-
Hello,
The model has been sent this friday to its owner. I made those just to conclude also the topic here !
Thanks for looking...
AE
BTW (Monogram model, AMD decal sheet, Alclad, Tamiya colors, usual (for me) weathering job. The position of the left undercarriage corrected since after a shock !

-
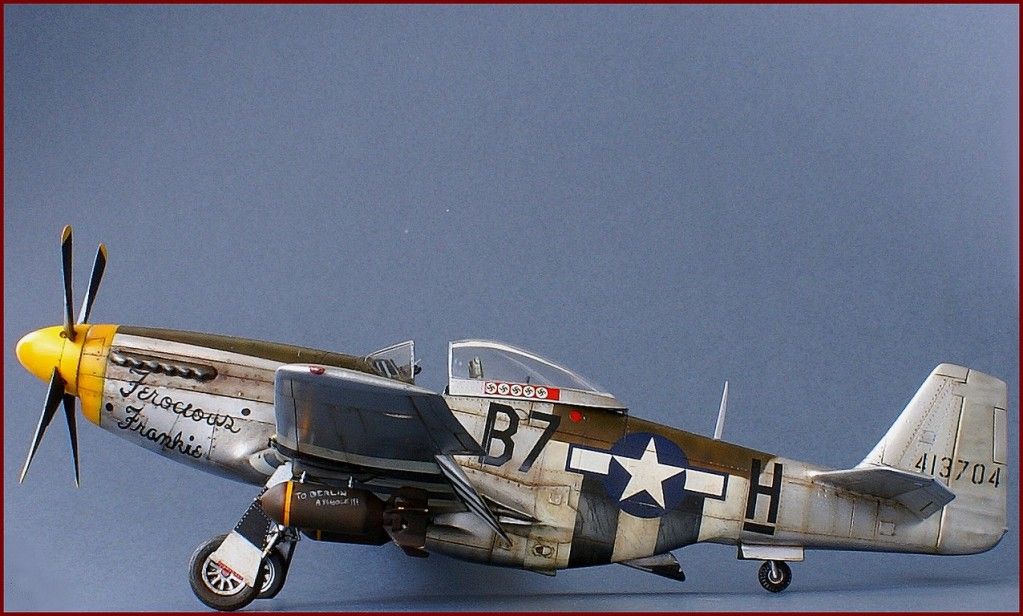
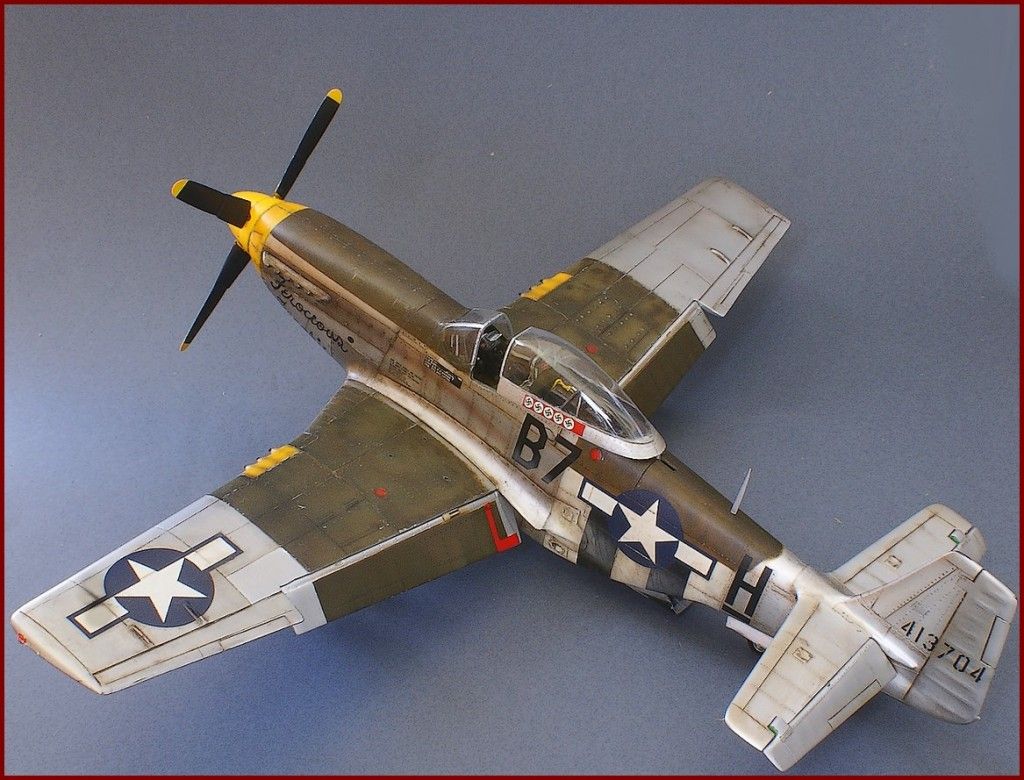
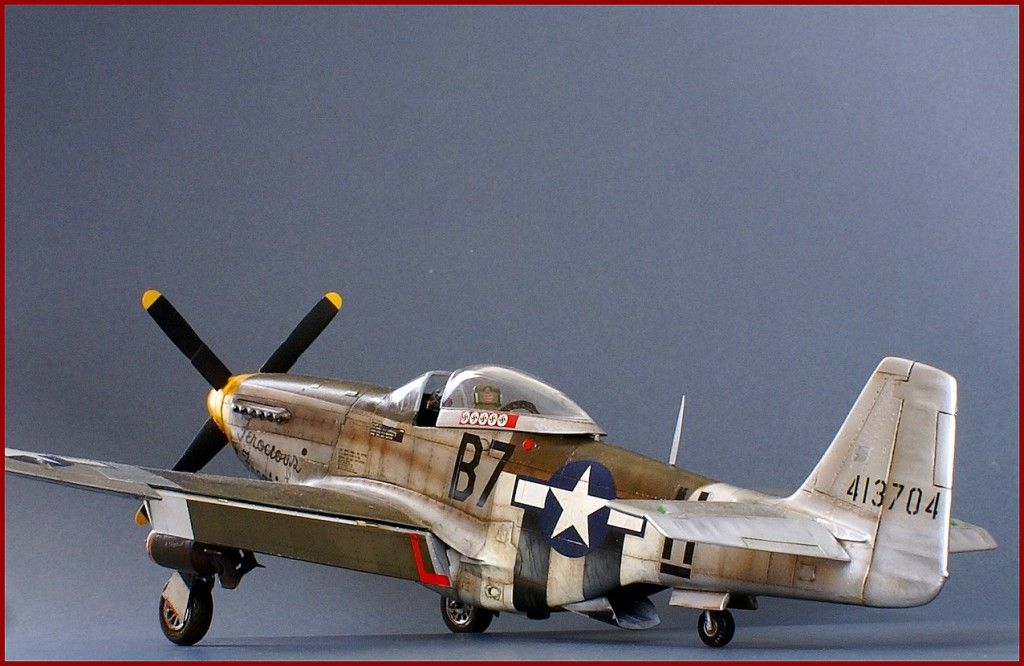
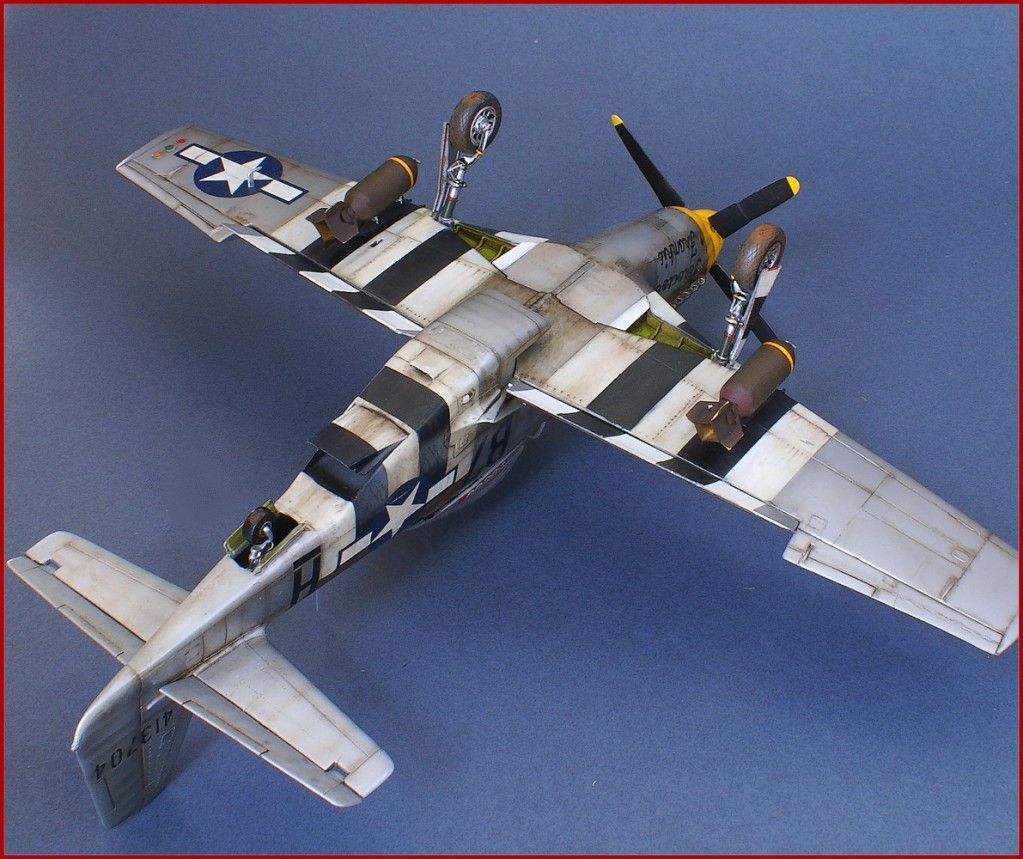
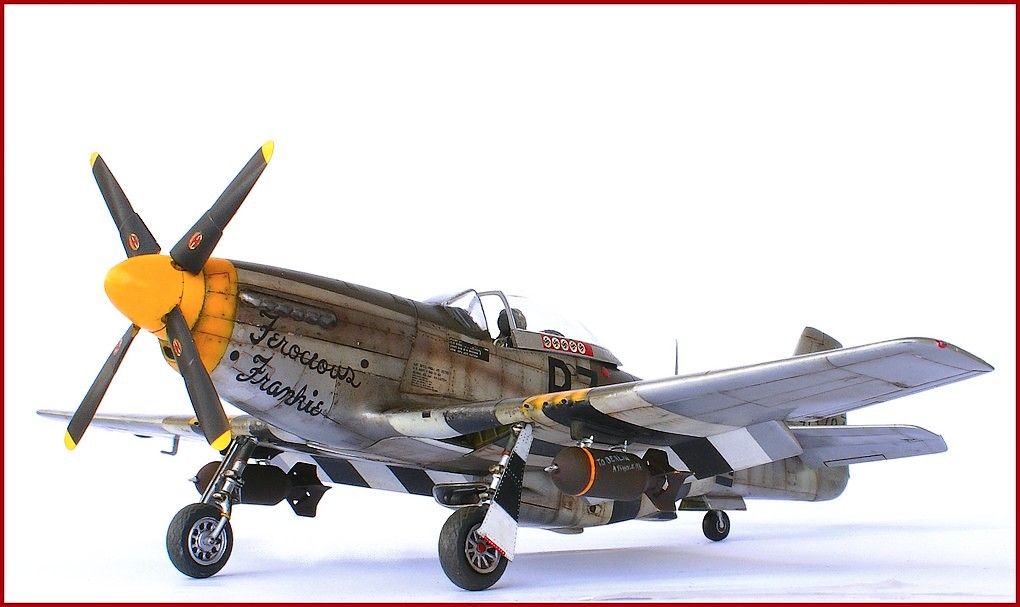
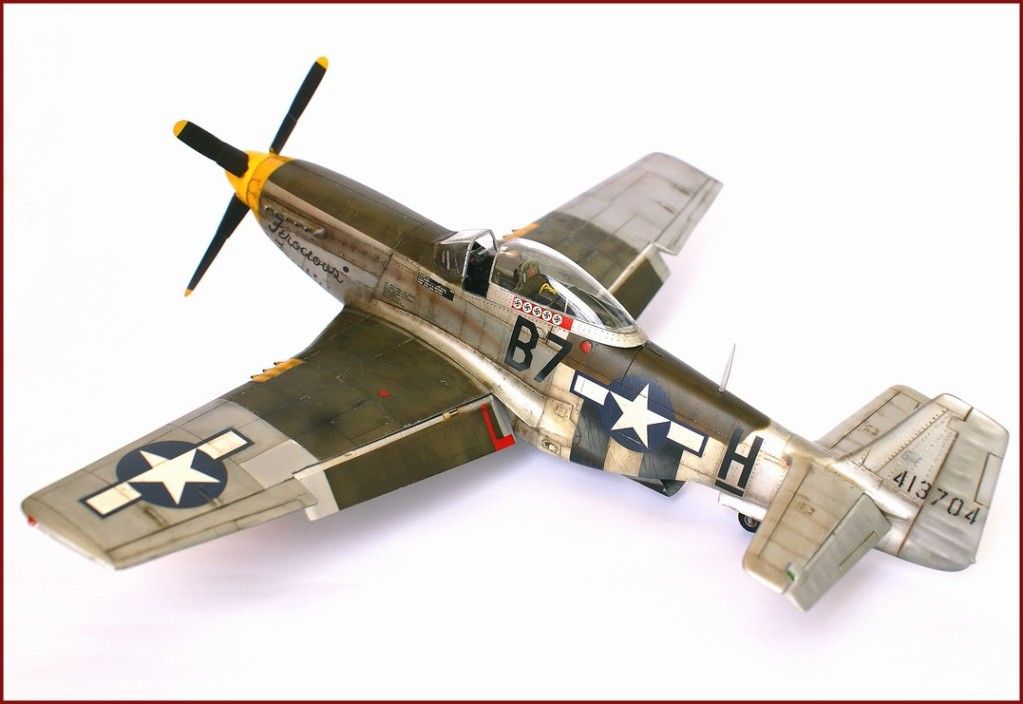
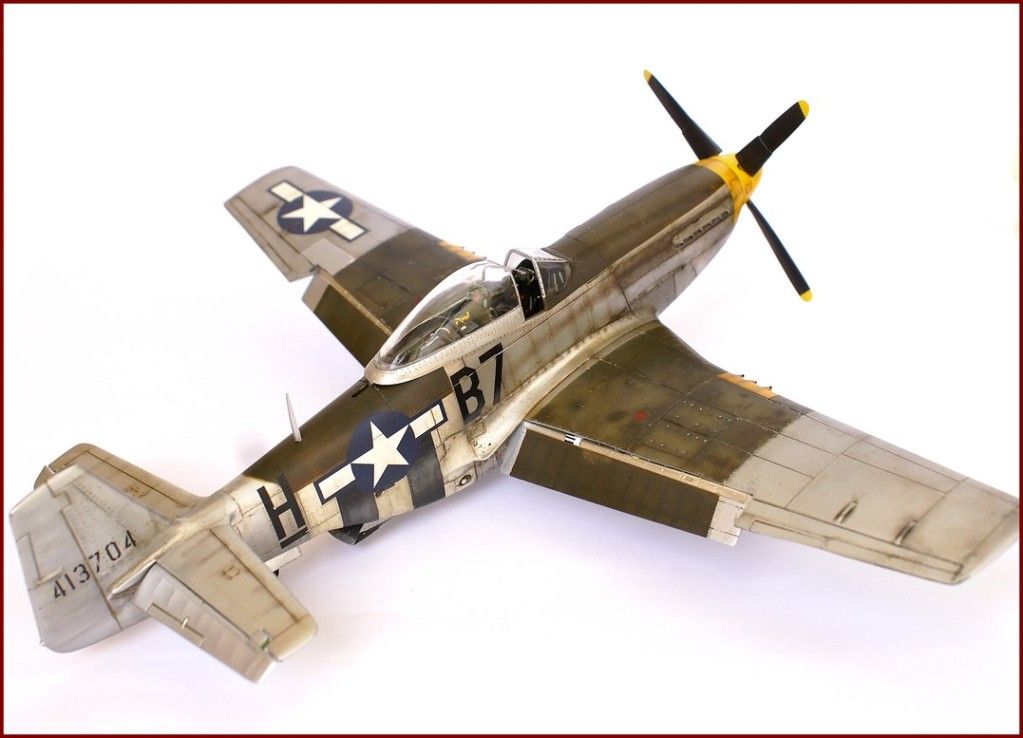
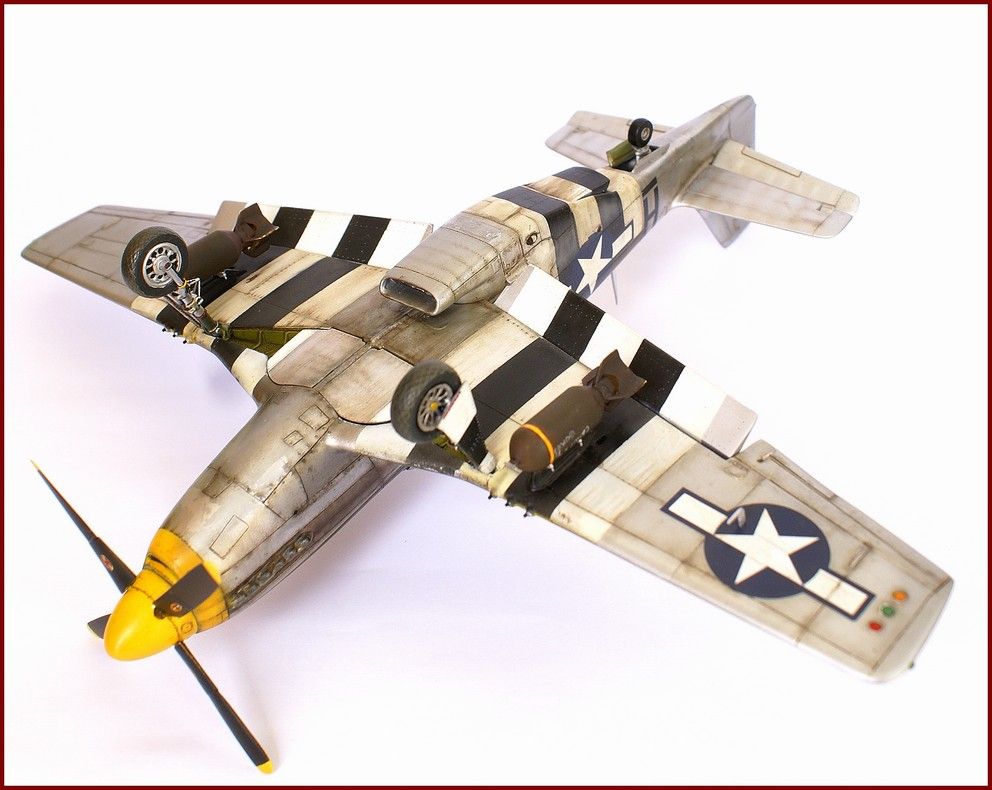
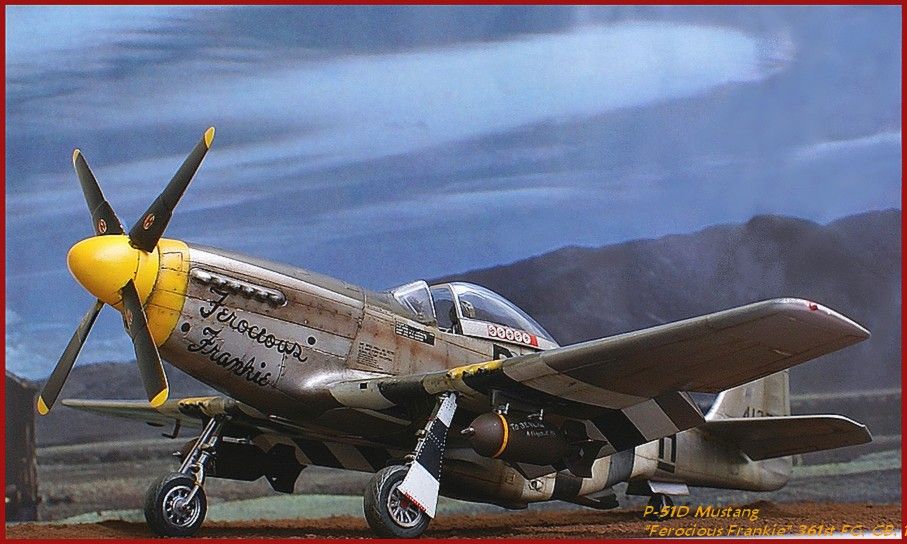
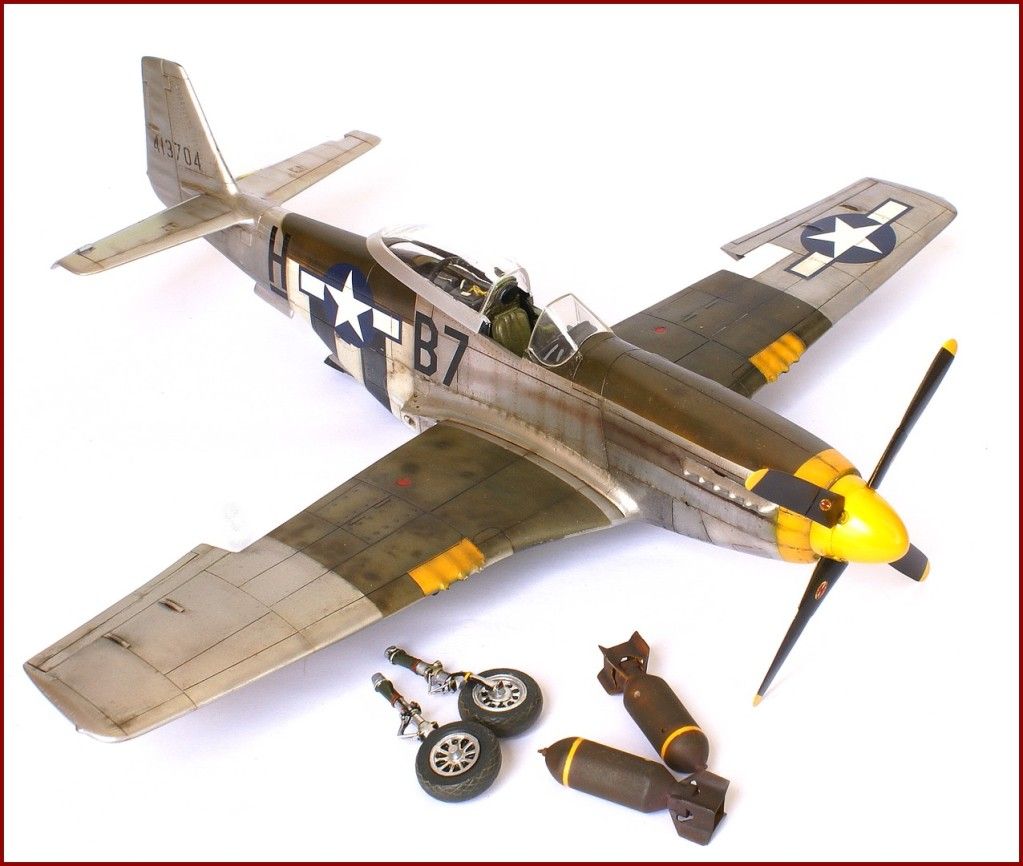
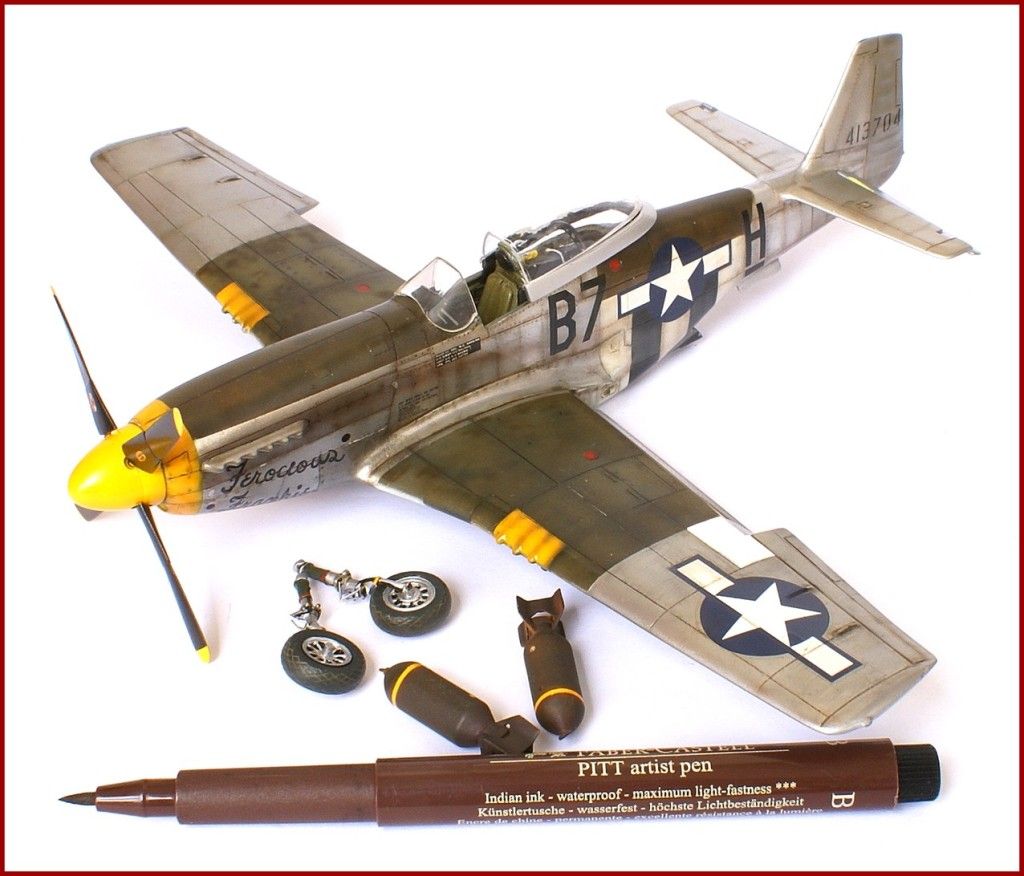
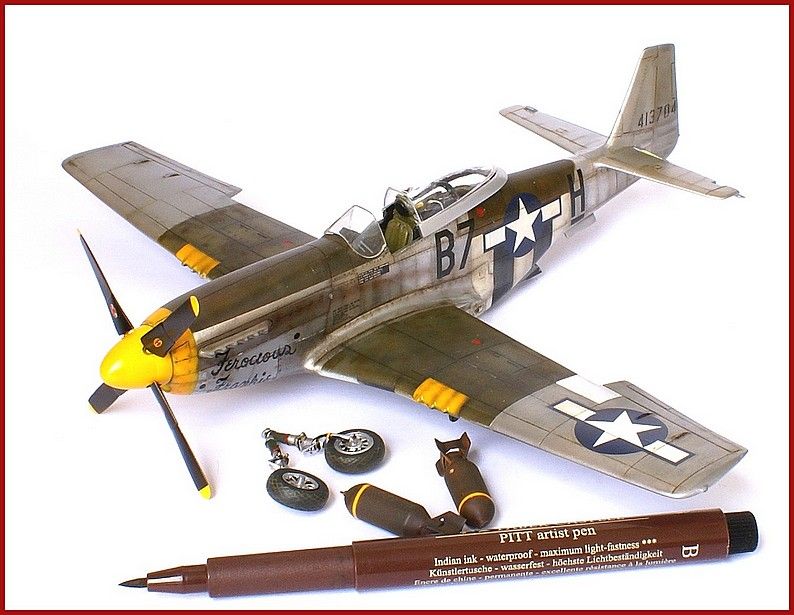
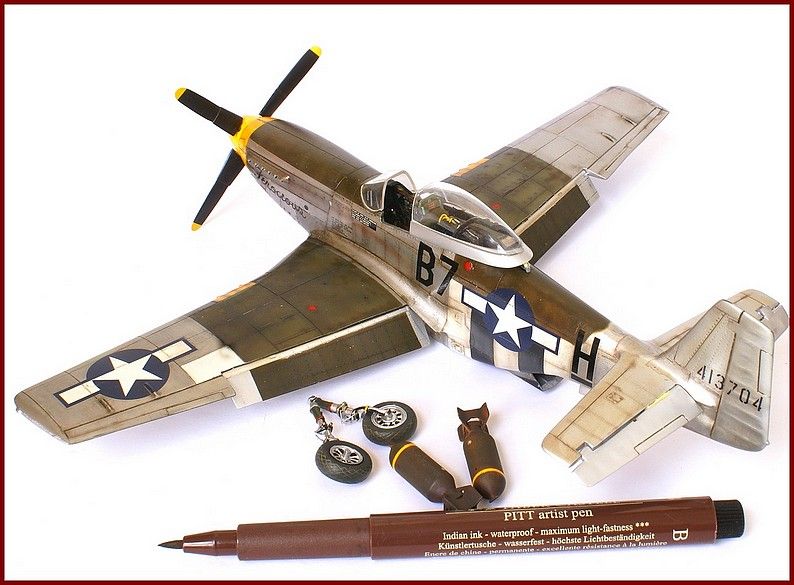
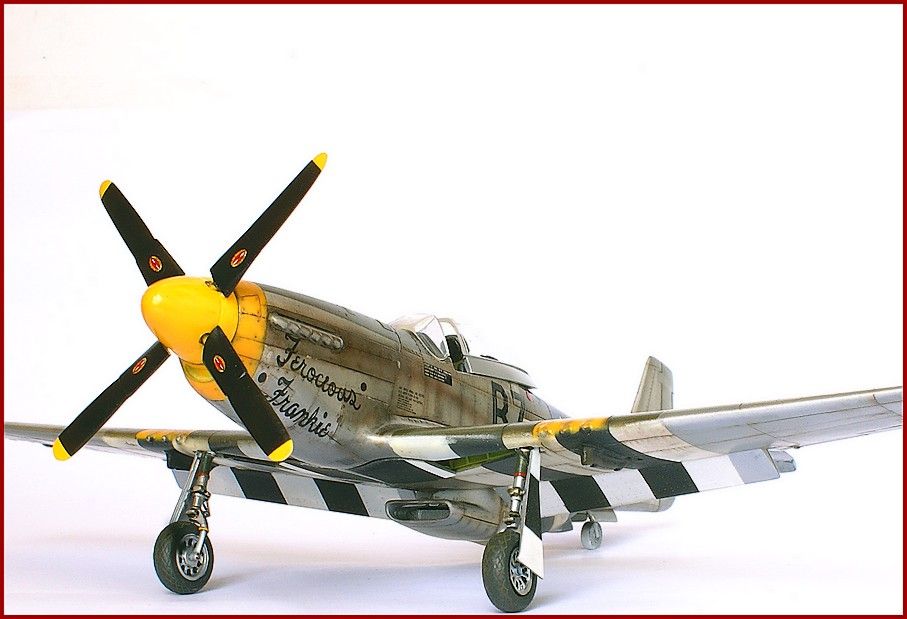
Hello,
The last one finished few days ago...
Good model, but poor fitting. All panel rescribed,riveted, the spinner changed (I took the Hasagawa one), flaps replaced and tail control areas cutted;
Alclad NMF, Tamiya for the OD and post weathering work using two color pics i found.
361st FS " Ferociuos Frankie", England, summer 1944. BTW the dorsal fin was removed to represent a P-51D from the first batches...
Thanks for looking !
AE

Some in process now

-
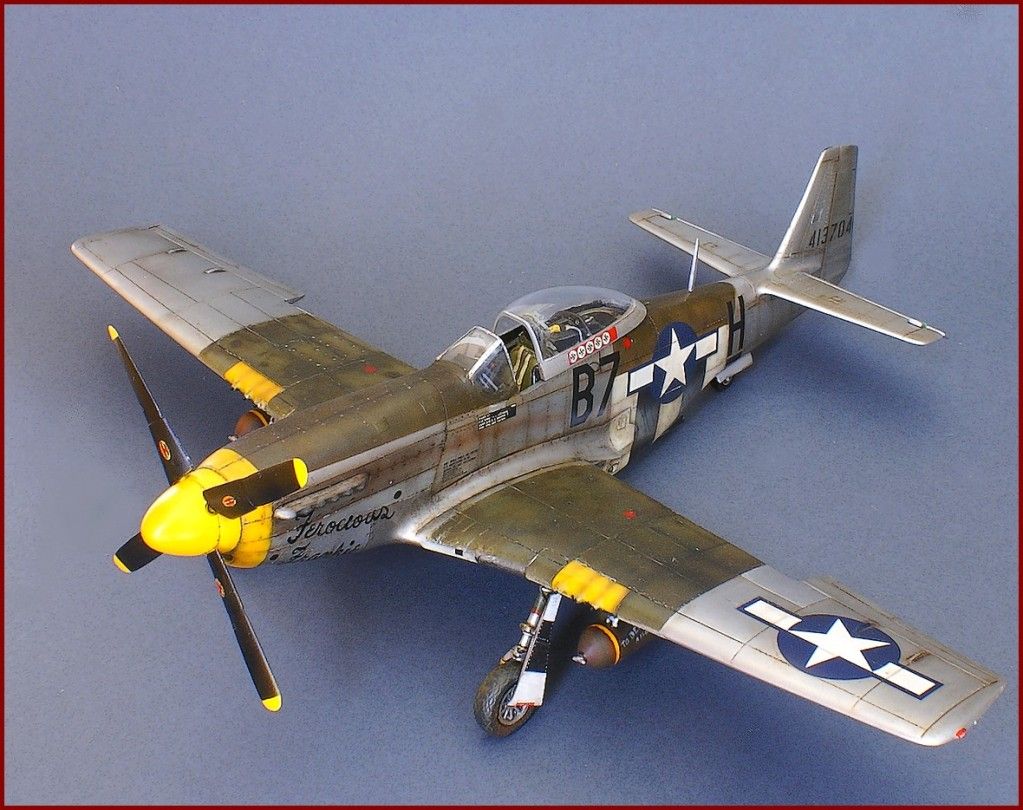
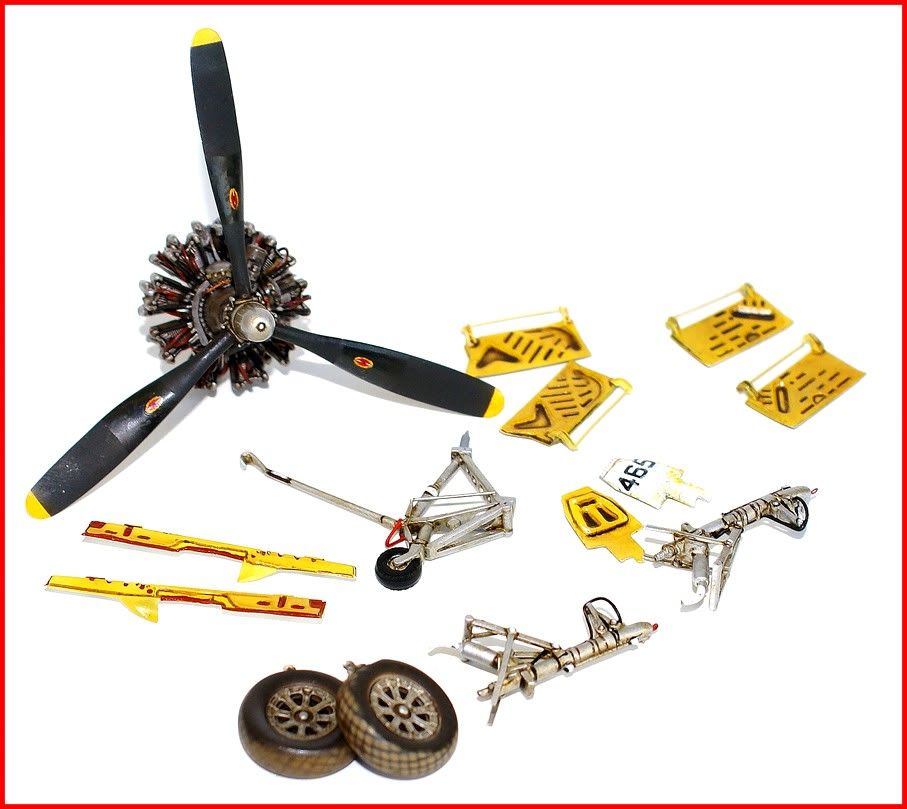
Hello !
This is the Monogram model with some improvments.
Flaps cutted and changed, new spinner, cutted tail surfaces and few things more that I don't remenber.
Rescribed and riveted. Painted with Alclad colors for the NMF and Tamiya's acrylics (OD/Yellox, post shading work).
The model featured has not yet it's final weathering aspect. Furthermore, on the last pictures, canopy, and landing gears are just quickly glued.
AMD decal sheet : 48-692
Thanks for having a lock !
AE


-
Far away of normal modeling, just art, intelligence of colors and enthousiasm !!!
Even a blind and dirty midget will look like Clark Gable with Diego.
A humble opinion of a great admirer.
Cheers Friend.
Anis
PS : No ice of course with this beverage
-
Hello,
Back from the deads !!!
Some process pics as required. Not specially in logical order but illustrating the way I paint finishing with the stamp size work desk..
Bye !

-
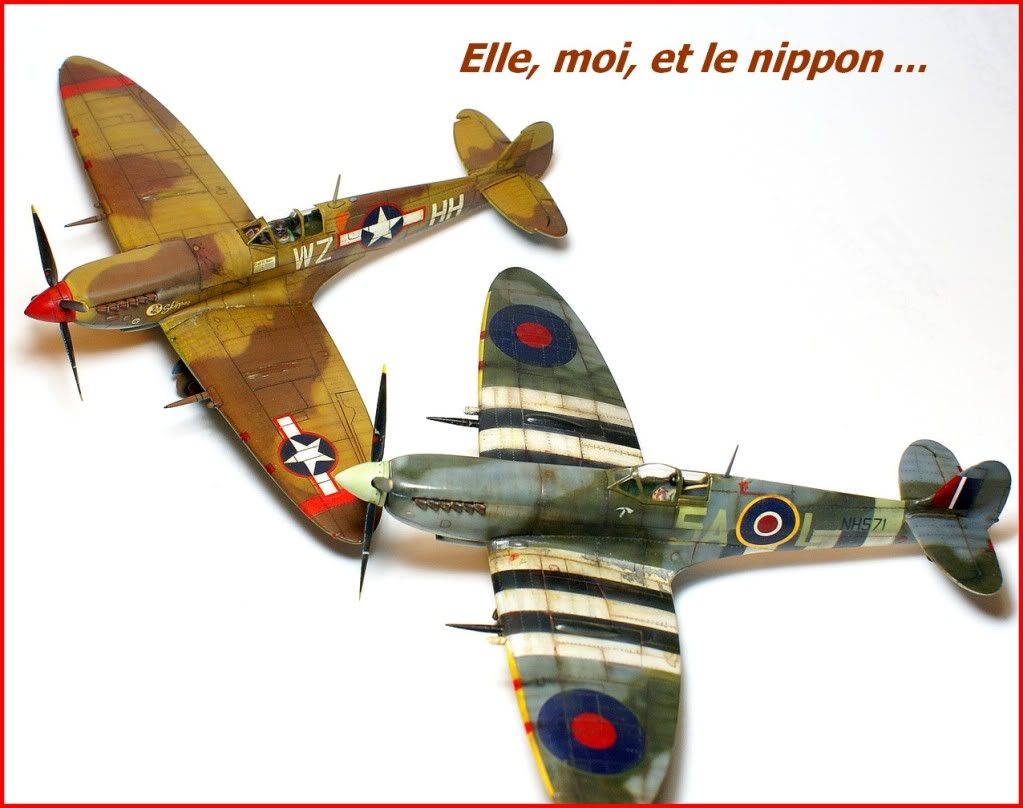
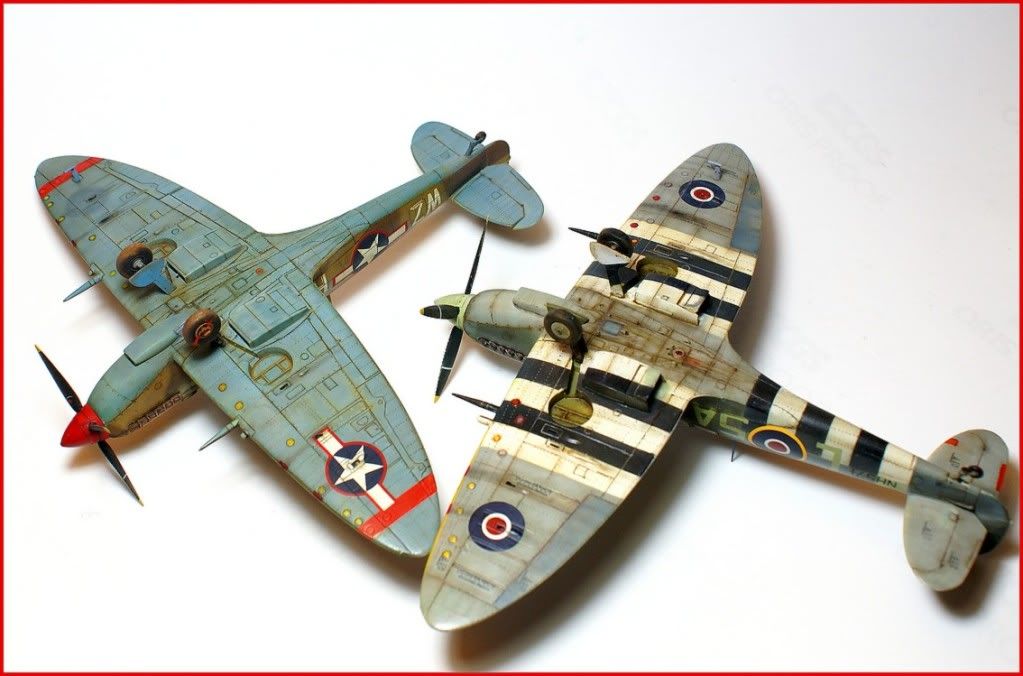
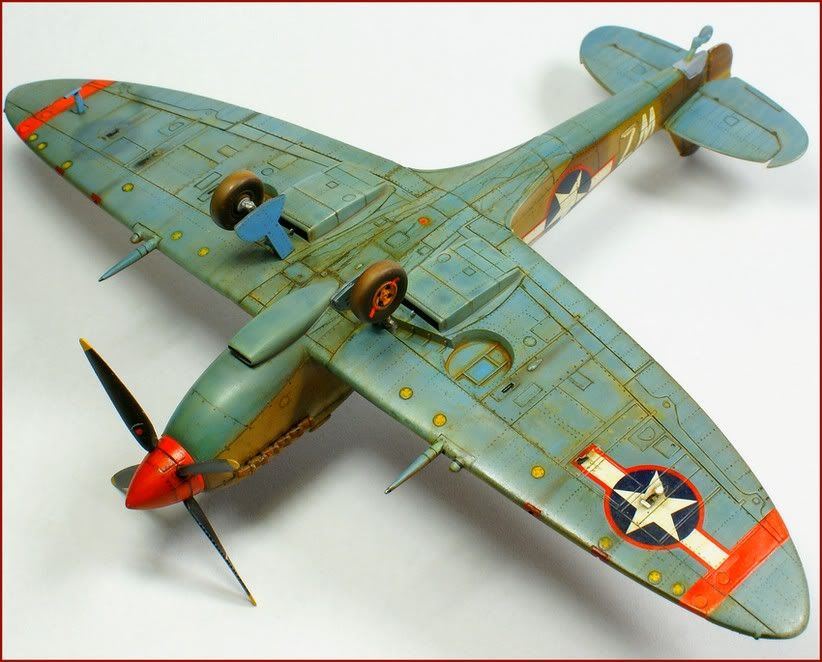
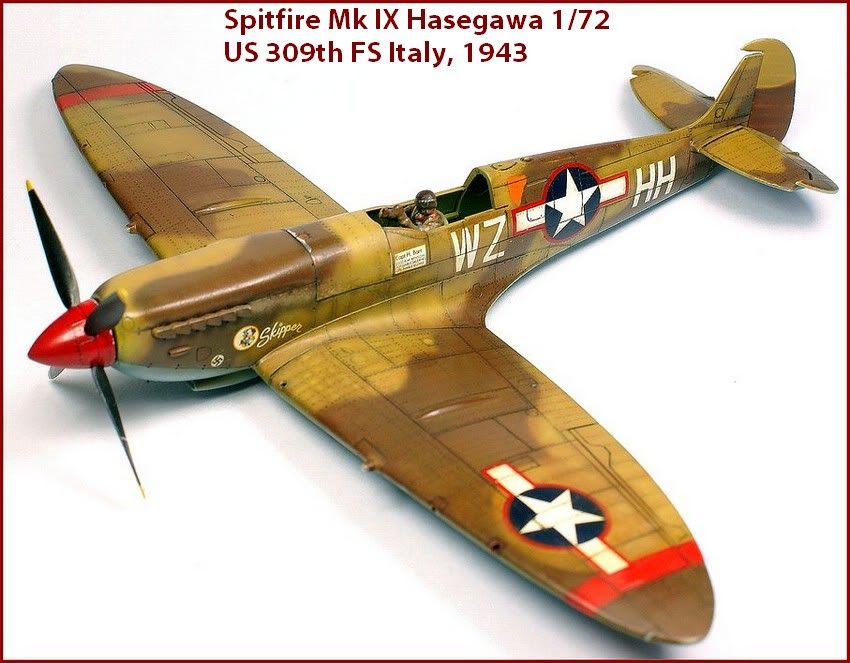
Hello !
Those two are my last 1/72 scale builds.
Hasegawa model for the US
Airfix for the brit.
Thanks for looking !
AE
-
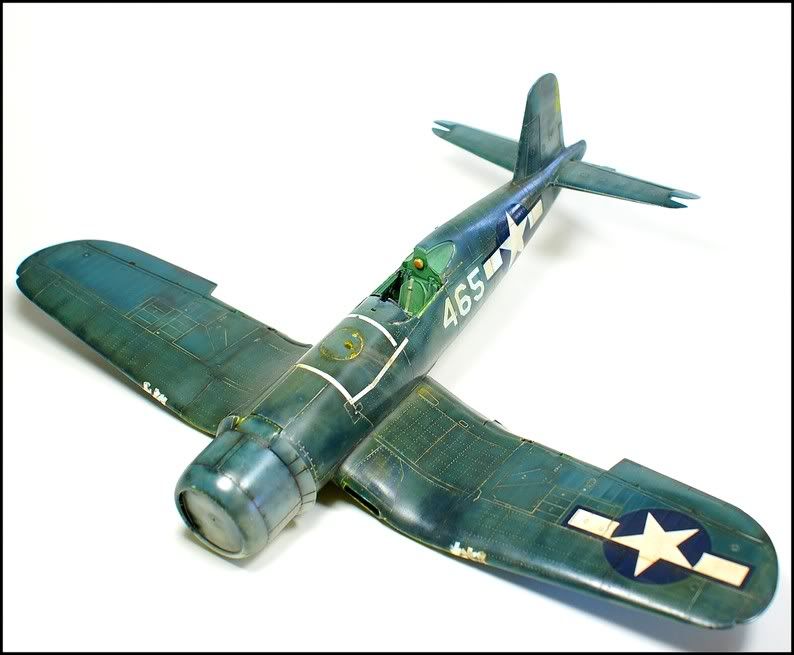
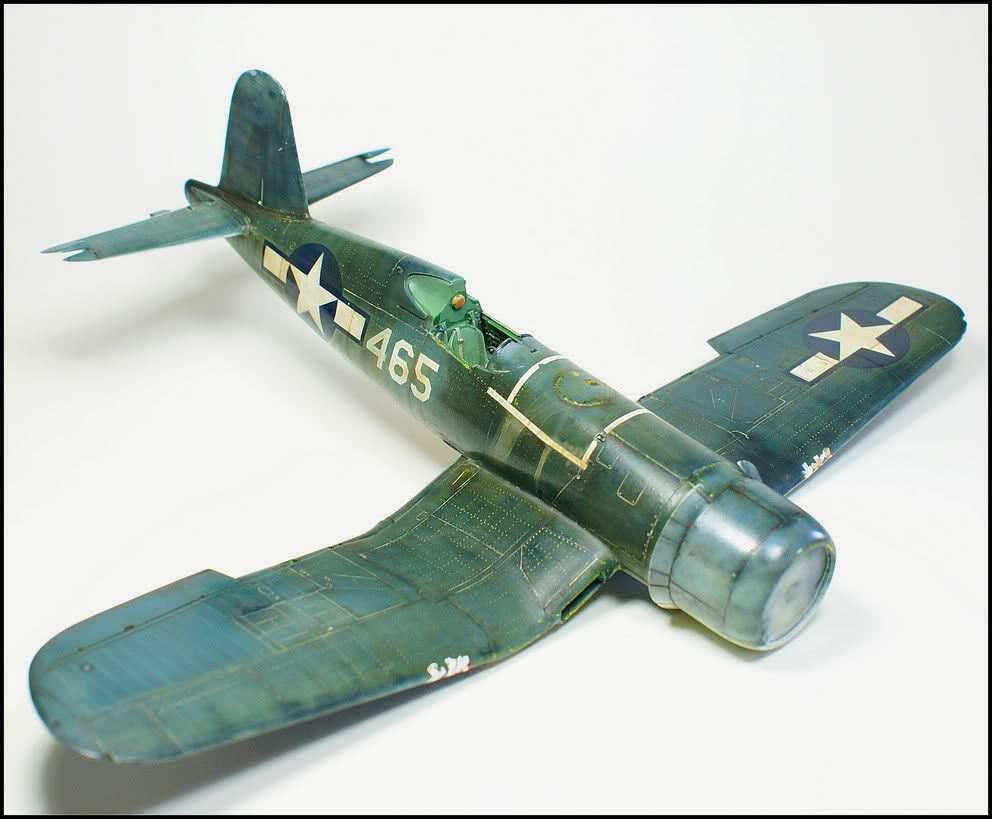
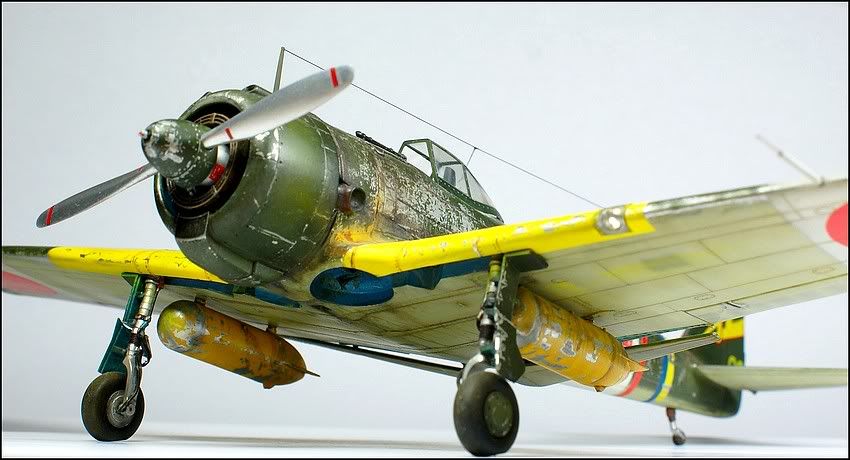
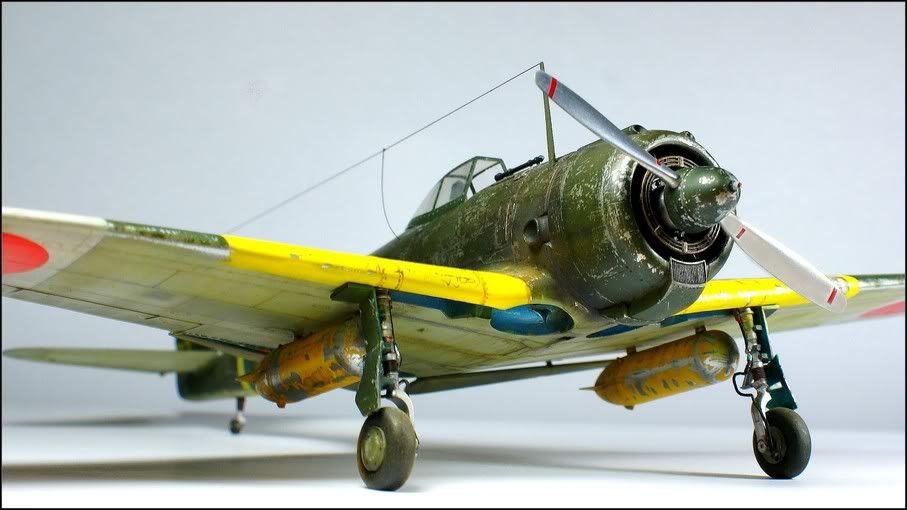
Hello,
The last model finished last month.
Fitting perfect, heavy painting style based on some colors documents (WWII color movie for the undersides...)
Bird from the VMF 222 circa 1943.
Bye and thanks for looking !!!
AE

-
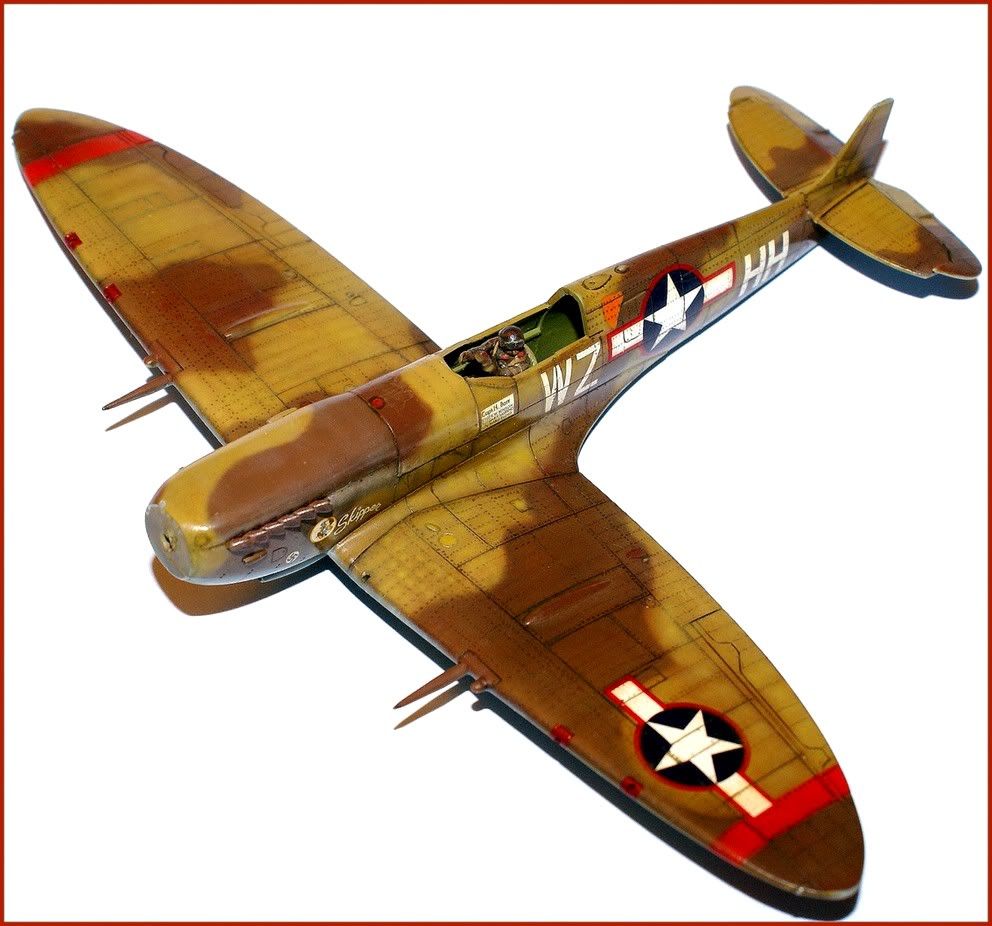
Hello,
At least, almost, finished (need to paint the tail gear).
Nice little kit with some attention to painting job. Riveting with pencil and inks, many washes,inks again, some oil stains, and free airbrish painting for the most important layers.
Thanks for looking !
Bye

AE
-
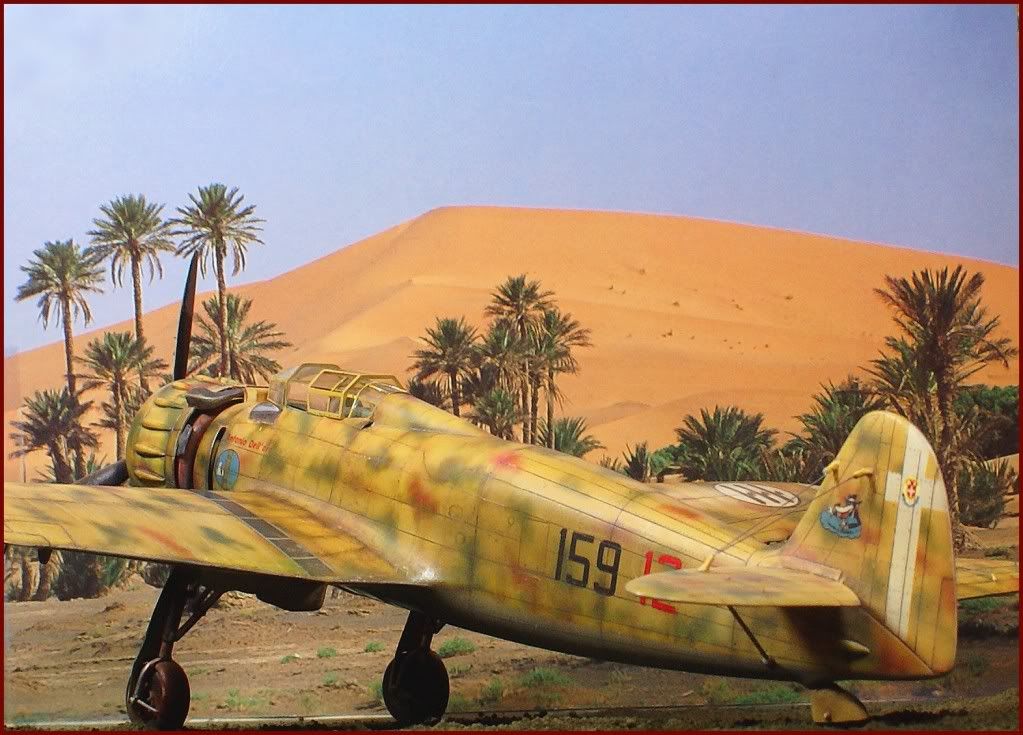
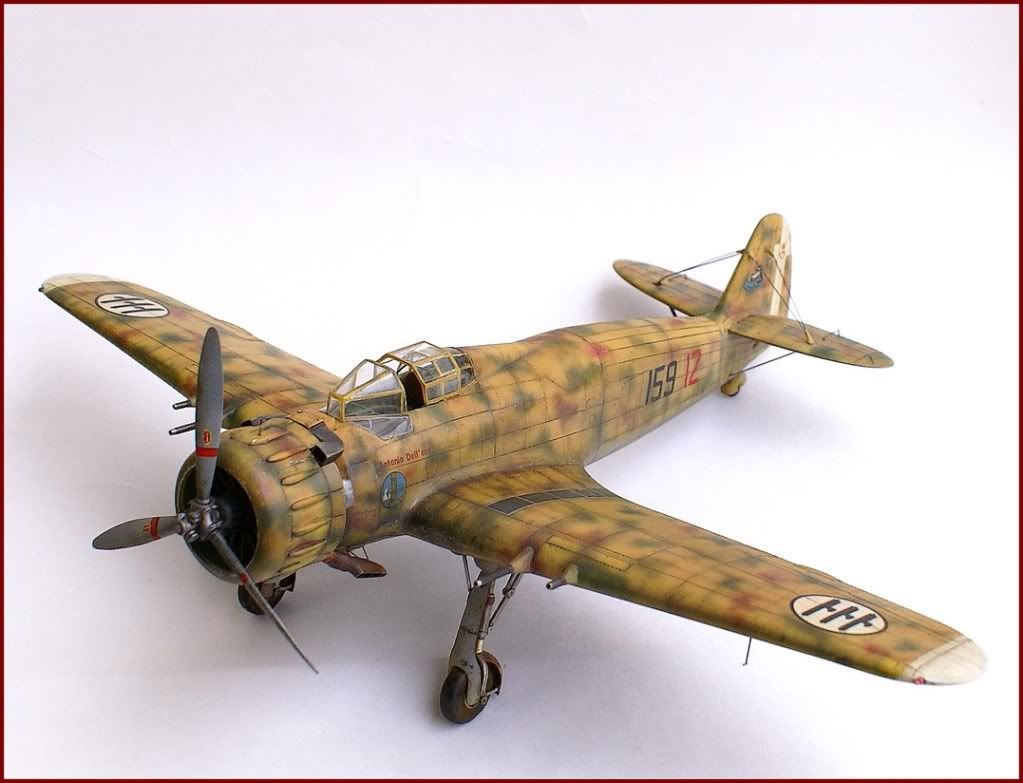
This is very well done. Desert birds were heavily weathered and you've captured the look well. Good work.
I see you're using a quill pen to apply your wash. What are the advantages of it over a brush? Any advice on using them?
Hello Folks,
First of all : thank you for commenting this build.
2/ I have absolutely no problems with critics. Anybody can feel free to say what ever he wants, of course it shoud just be said in correct terms. On the other hand, about Mario, I can understand that the spanish school that I defended many years ago in a magazine can produce some over reactions. The only thing i'd like to focus on, not to defend them, but to espress the way they work is that they are above all painters and they love to test different weathering technics. Now, I hope that this new pic will show you the reduced effect of the riveting job and that Mario reacted only on an intermediat step.
Finally, the advantage of the quill pen is to make some small rivets with diluated ink. You can also use it to enhance recessed panels but the advantage is minor.
Bye and thanks again...
Anis.
-
Hello,
This is an old one, but I took some pics to show how you could eventually proceed to reproduce natural metal finish under the camouflage layers.
So, start with the NMF shades. Two coats are enough. One to control the surfaces and correct scratches, the other for the finish. Theen comes the green coat. Smooth, well diluated. Gunze acrylics are good. Let it dry few minuts, you finger can help you to feel that its not completly dry. Very important because the green color has to be removable with tape. Then you can start the removing job with some Tamiya tape. Work slowly but with quick movements. The green colors comes then and you can finish the job with sharp pencil and some Humbrol silver. That's it. Then washes and normal finishing process.
Bye and sorry for the front windshield. dont know were it is !!! !


Henschel Hs 129 winter
in The Display Case
Posted
Hello again,
The old Hasegawa model in romanian colors !