

Hooker169
-
Content Count
720 -
Joined
-
Last visited
Content Type
Profiles
Forums
Calendar
Posts posted by Hooker169
-
-
Good luck with the move and we hope you come back to producing great resin products sometime in the future.
I literally just finished putting your ECM Blisters on my Revell Tomcat 5 minutes ago. Top notch stuff for sure!
-
8 hours ago, Darren Roberts said:
I love KC too much to move away!
Especially with that fat SB ring weighing you down!!
Signed,
A jealous Pats fan😢
-
Done.
Request sent via messenger. -
I think it’s great stuff.
I’ve recently used the .010 on a 1/72 KC-135R and a 1/48 C-2A Grayhound for the HF antennas. The .010 looks really good on 1/72 kits but appears a tad thin on 1/48 kits. I’m ordering .020 to remedy that.
Its similar to a fine thread, very smooth and extremely elastic.
-
Pm sent on B-47E
-
3 hours ago, picknpluck said:
Hey Mason, following up on this conversation...I'm looking at riveting tools now (Rosie the Riveter) and the 1/48 scale wheels come in three sizes: .50, .55, and .60. Which size would you recommend?
I suppose it would be entirely subjective and what ‘looks right’.
Real-time rivet spacing is usually around 1 inch depending on diameter of the rivet used so in actuality replicating that would be impossible.
I’d prolly roll with the .50,,,,,,,,,,,,,,,,,,, see what I did there?
-
7 hours ago, Dutch said:
A big Ooorah! Especially for "Pterodactyl Courier" of the 42nd BW, Loring AFB, ME. And eventually scale these down to 1/144, please?
Sweet!!Thanks Kursad! You’re sure making us New England boys happy the last few sheets!!
-
2 minutes ago, Trojan Thunder said:
I built one prior to the Caracal sheet being released, but I have another in the stash with plans to do a Singapore Air Force version one day

Sweet!!
Nice work.
-
46 minutes ago, Drifterdon said:
Finishing up the 1/144 Minicraft KC-135R using Kursads decals in this scale. It's a tribute build of Shell 77 that was lost over Kyrgyzstan in 2013. Details here: https://www.baaa-acro.com/crash/crash-boeing-kc-135r-near-chorgolu-3-killed
An admirable tribute indeed.
Can’t wait to see it!
-
On 2/3/2020 at 10:26 PM, Trojan Thunder said:
Looks great! Nice work
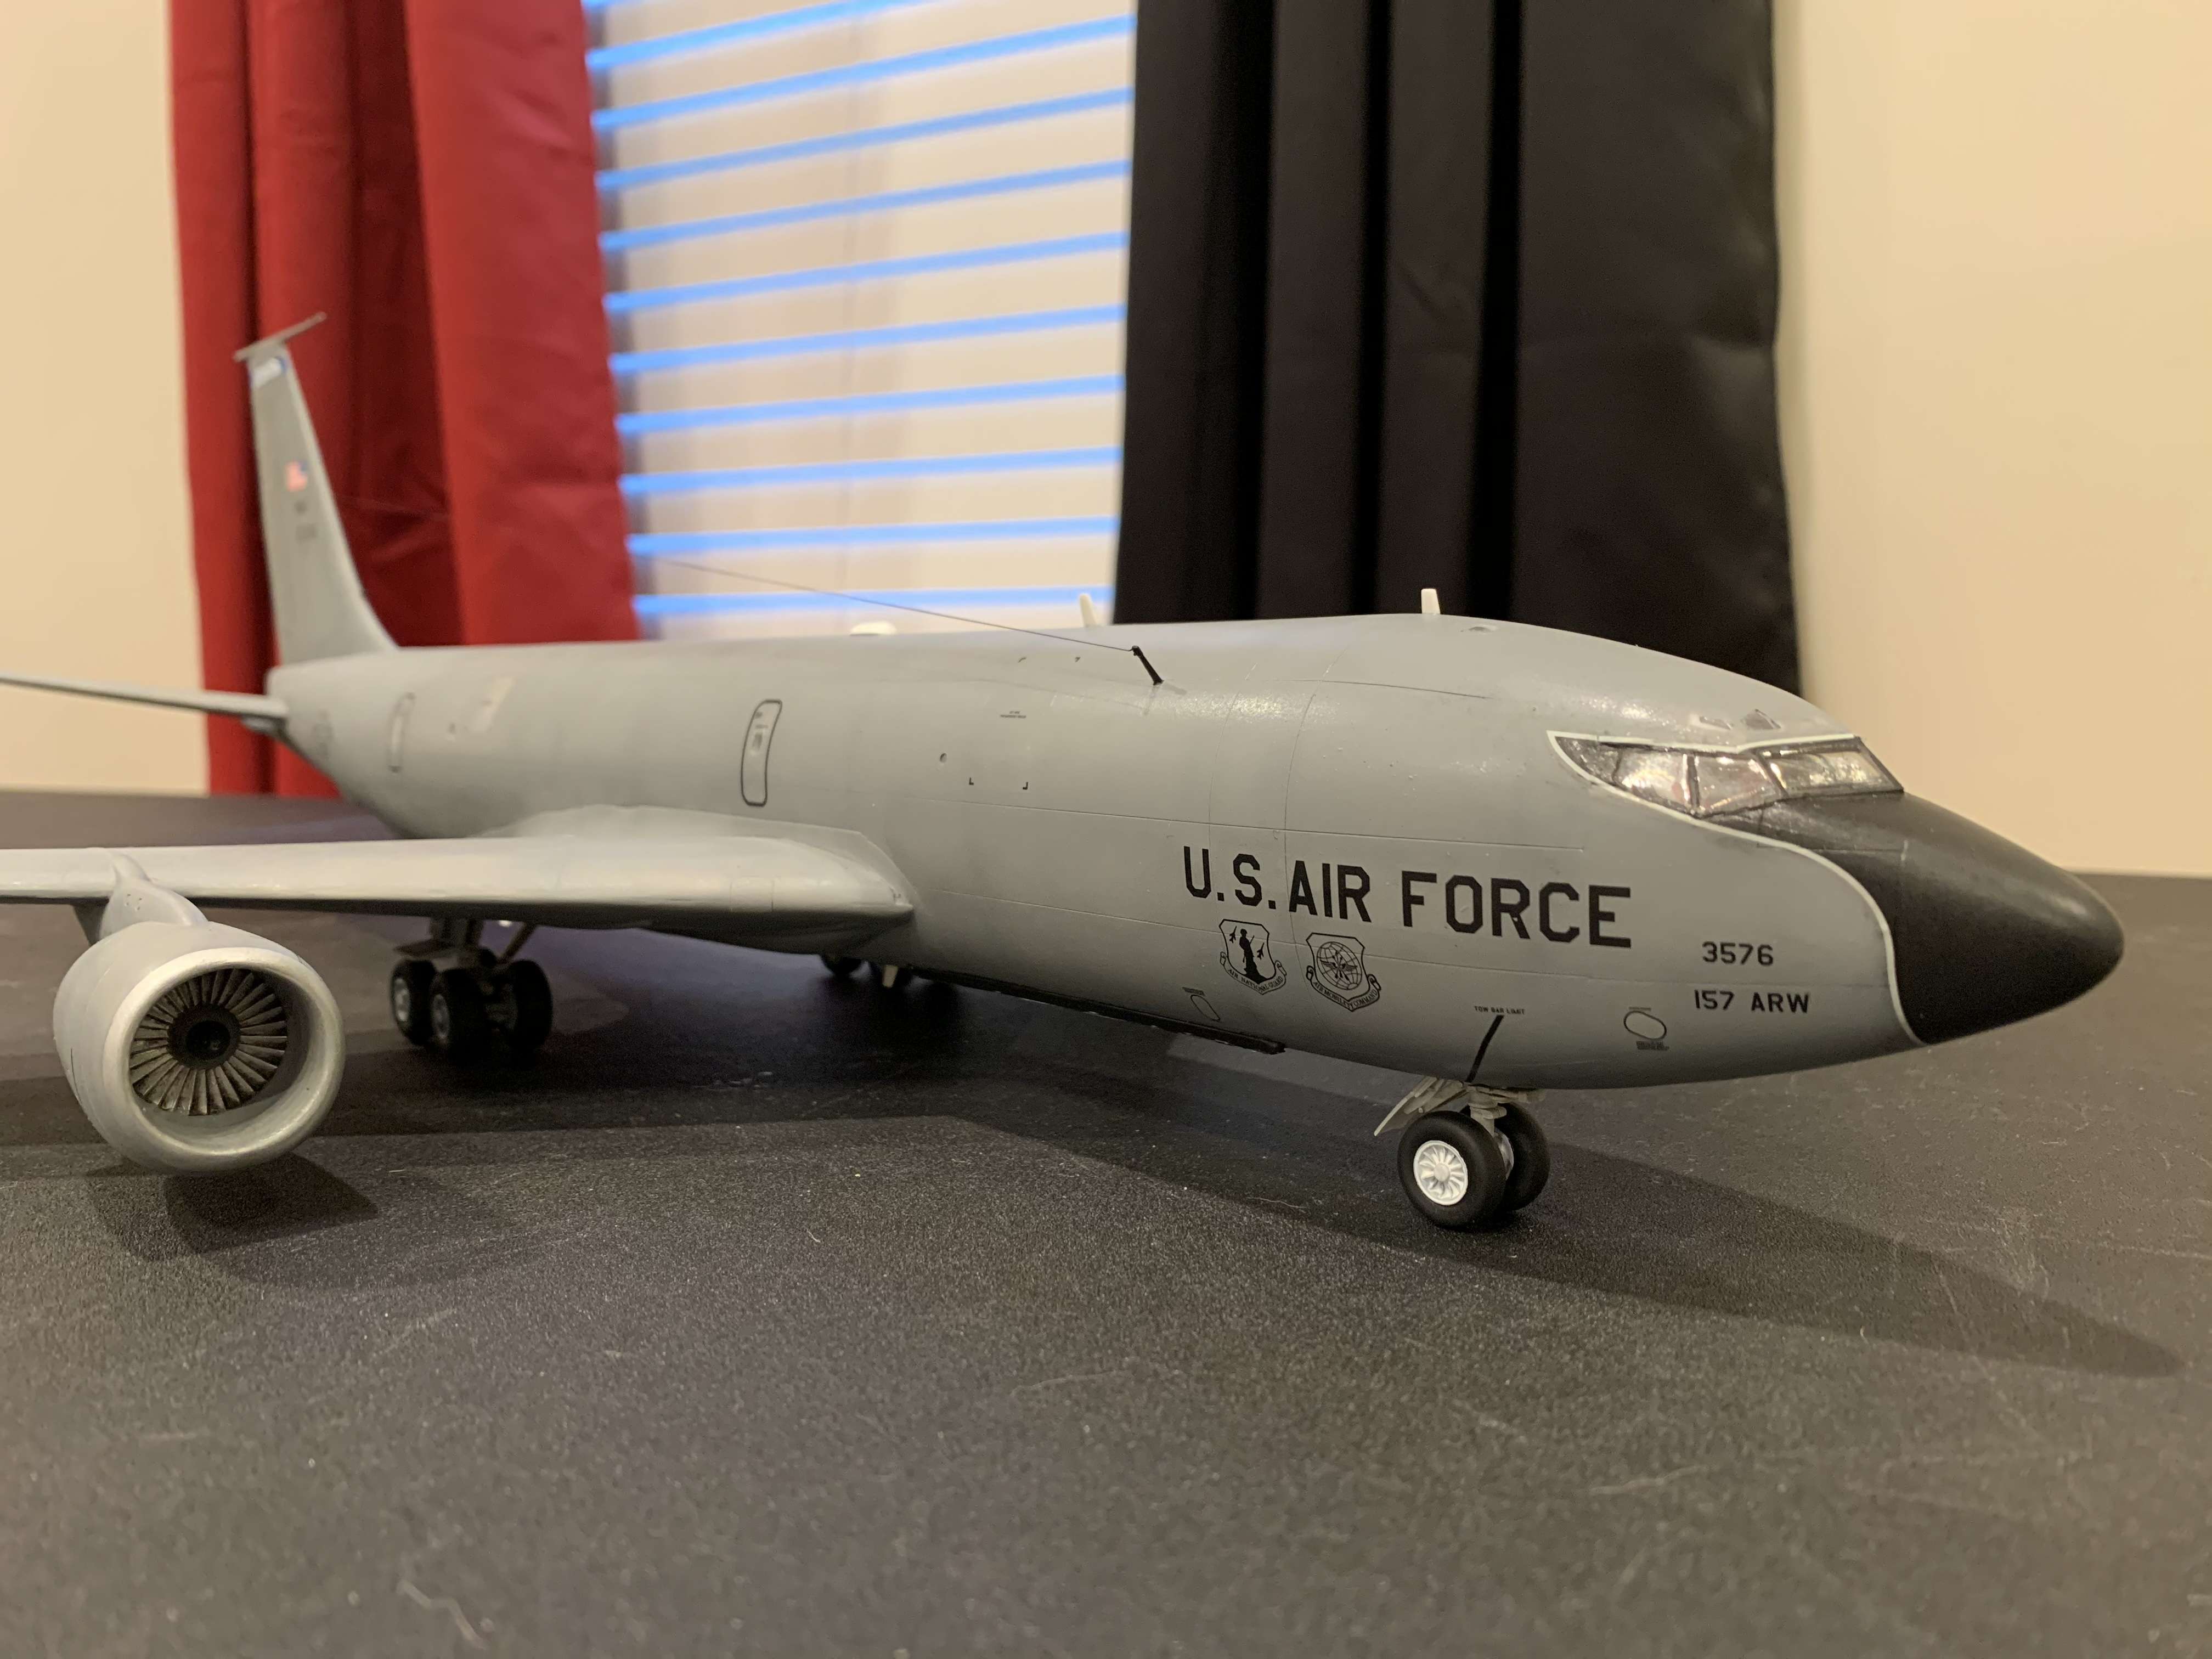
1 hour ago, Drifterdon said:Great job Hooker. You really nailed it.

Thanks boys!!Your turn, let’s see some AMT KC’s with Caracal decals!!
-
2 hours ago, Dutch said:
Woohoo! Way to go, Hooker! Way to motivate me. Ayuh! K/r, Dutch
Thanks Dutch! It’s not perfect by any stretch but I’ve GOT to start building AND finishing these things or my stash will out live me!! -
1 hour ago, KursadA said:
Are you using CD72030 for your build? Didn't the main sheet come with stencils in the first place?
Current KC-135R stencils are available now as part of CD72066 - it is the same sheet that was included in CD72030.
Yes sir, but it only came with one set of General markings. I used them for the 157th ARW jet but need several more general markings sets for the other awesome subjects on the sheet.
-
5 minutes ago, ElectroSoldier said:
Are they all AMC grey?
Yes, all the options on this sheet are AMC gray.
-
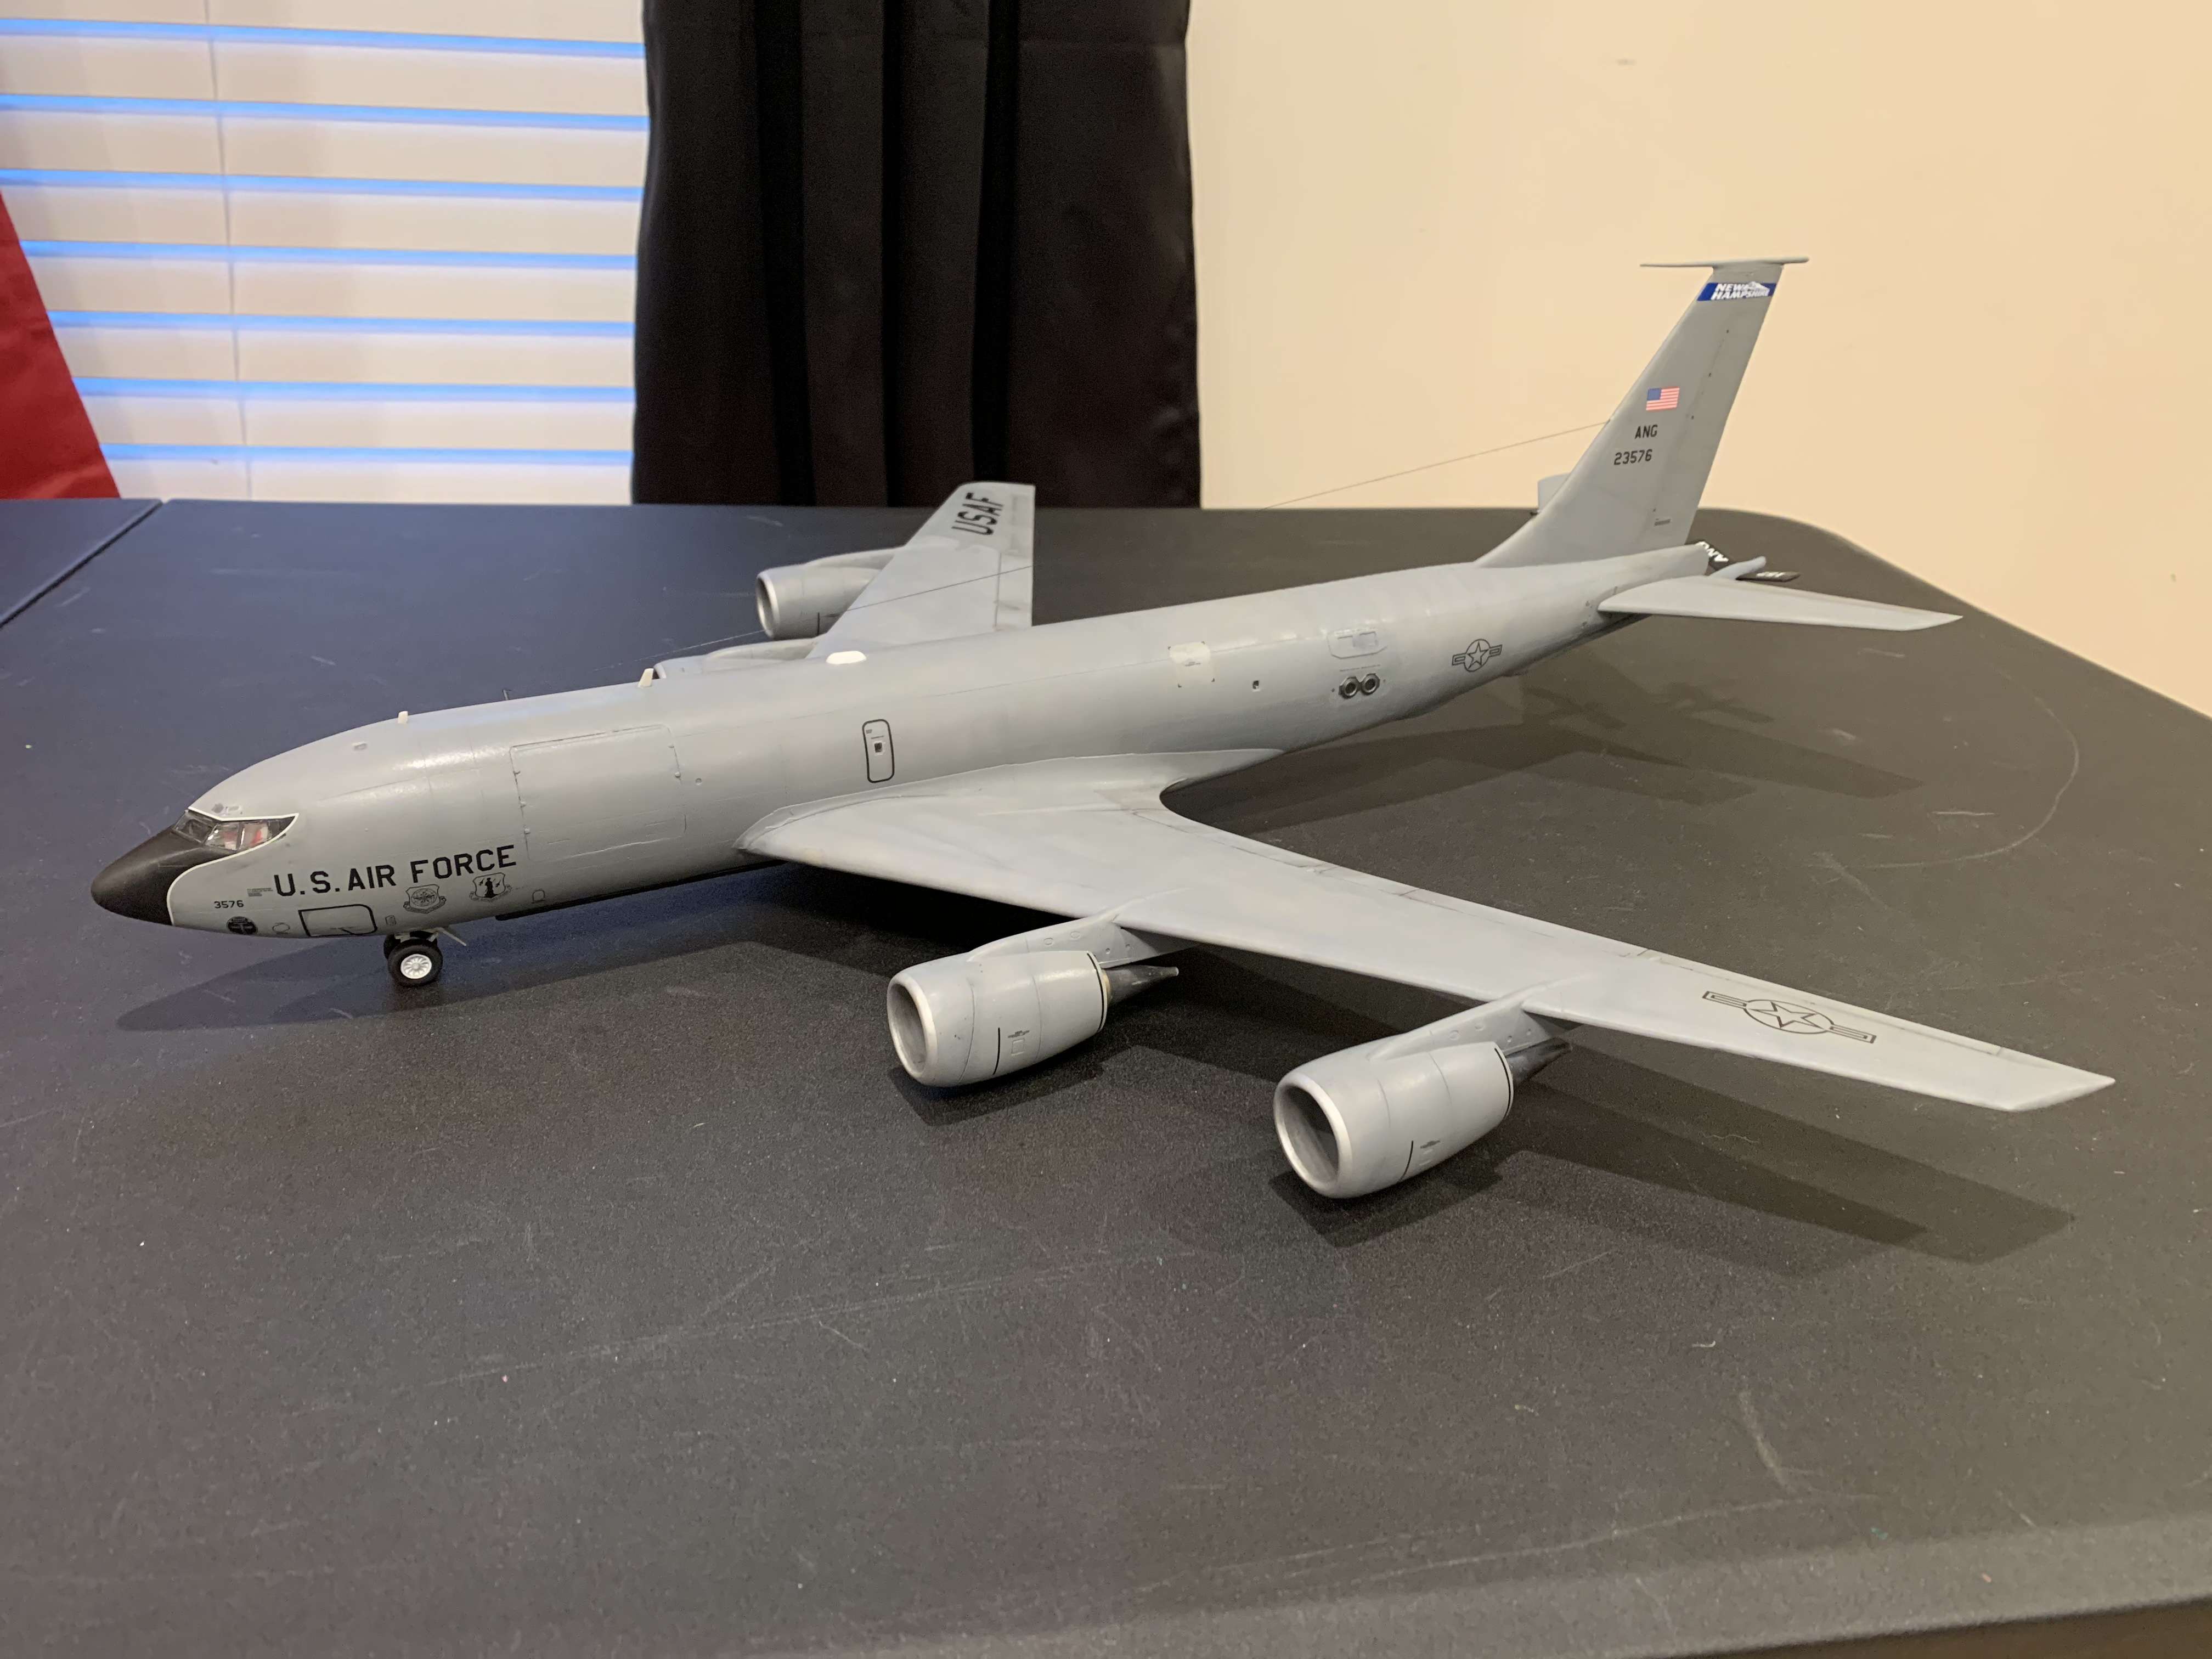
Any word on this sheet Kursad?
I need the basic stencils to do my MAINEiacs build, no pressure 😜
-
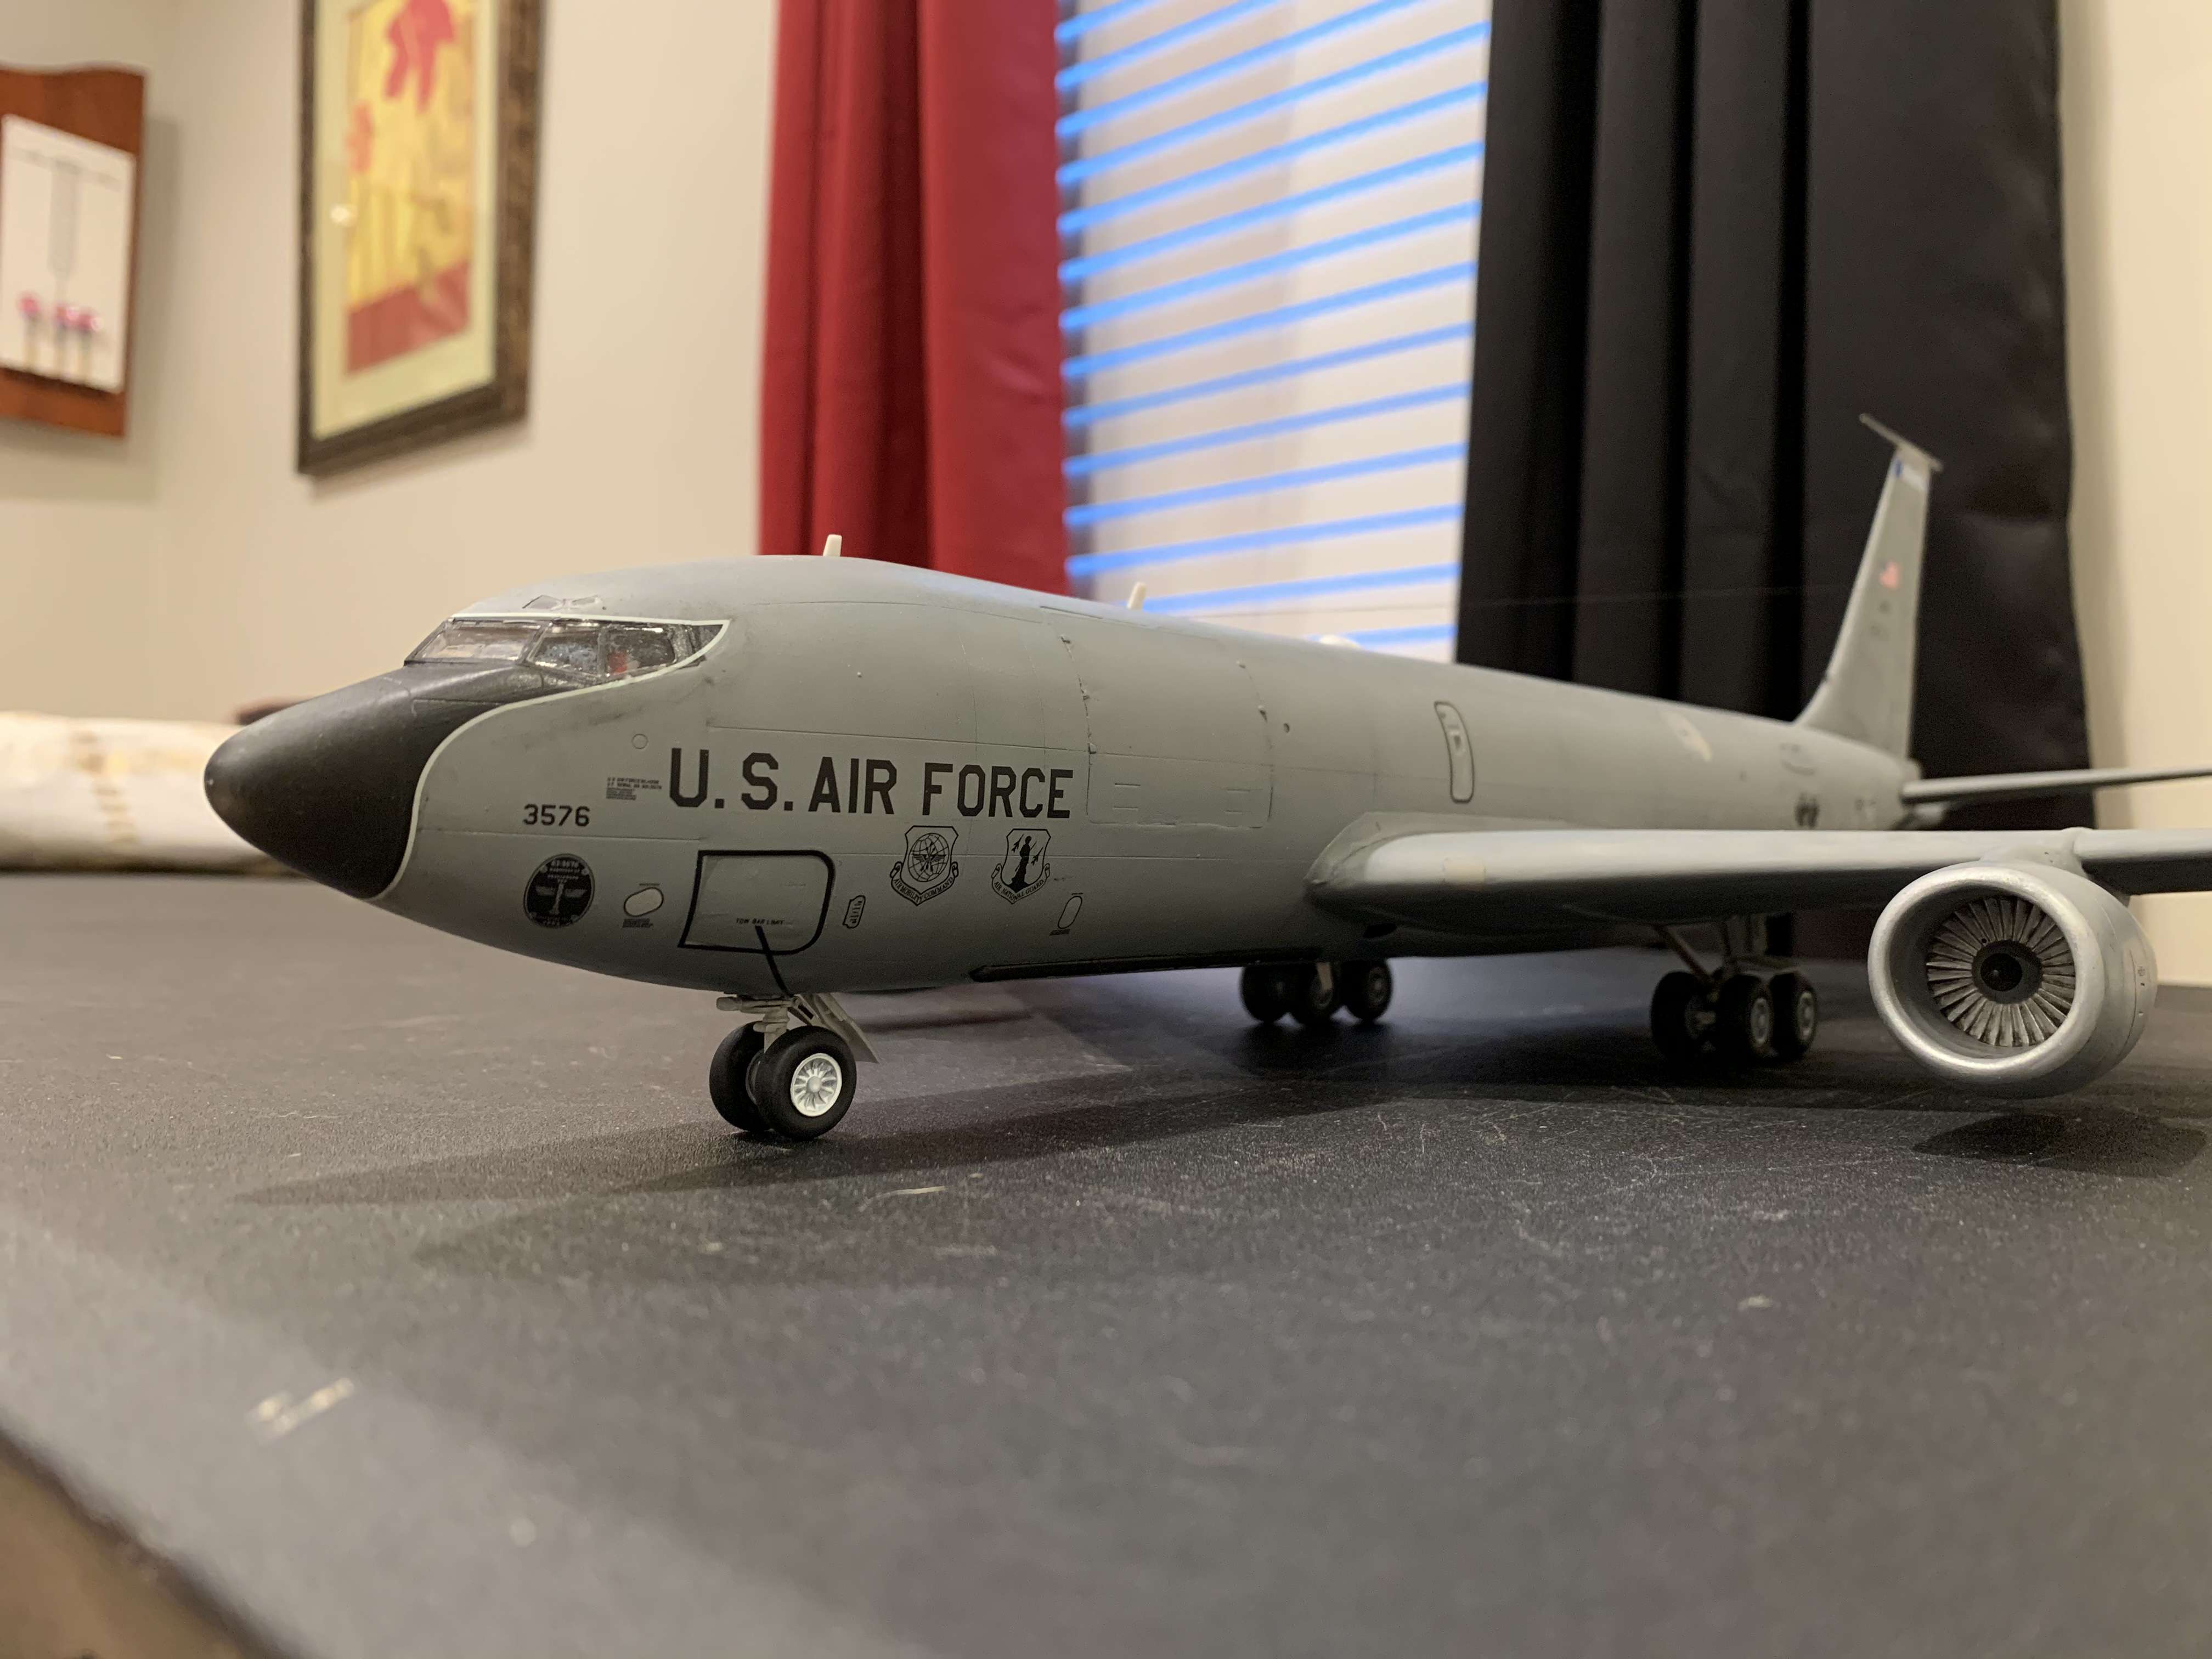
Finished my NHANG KC-135R using this sheet. Literally the best decals on the market I might add.
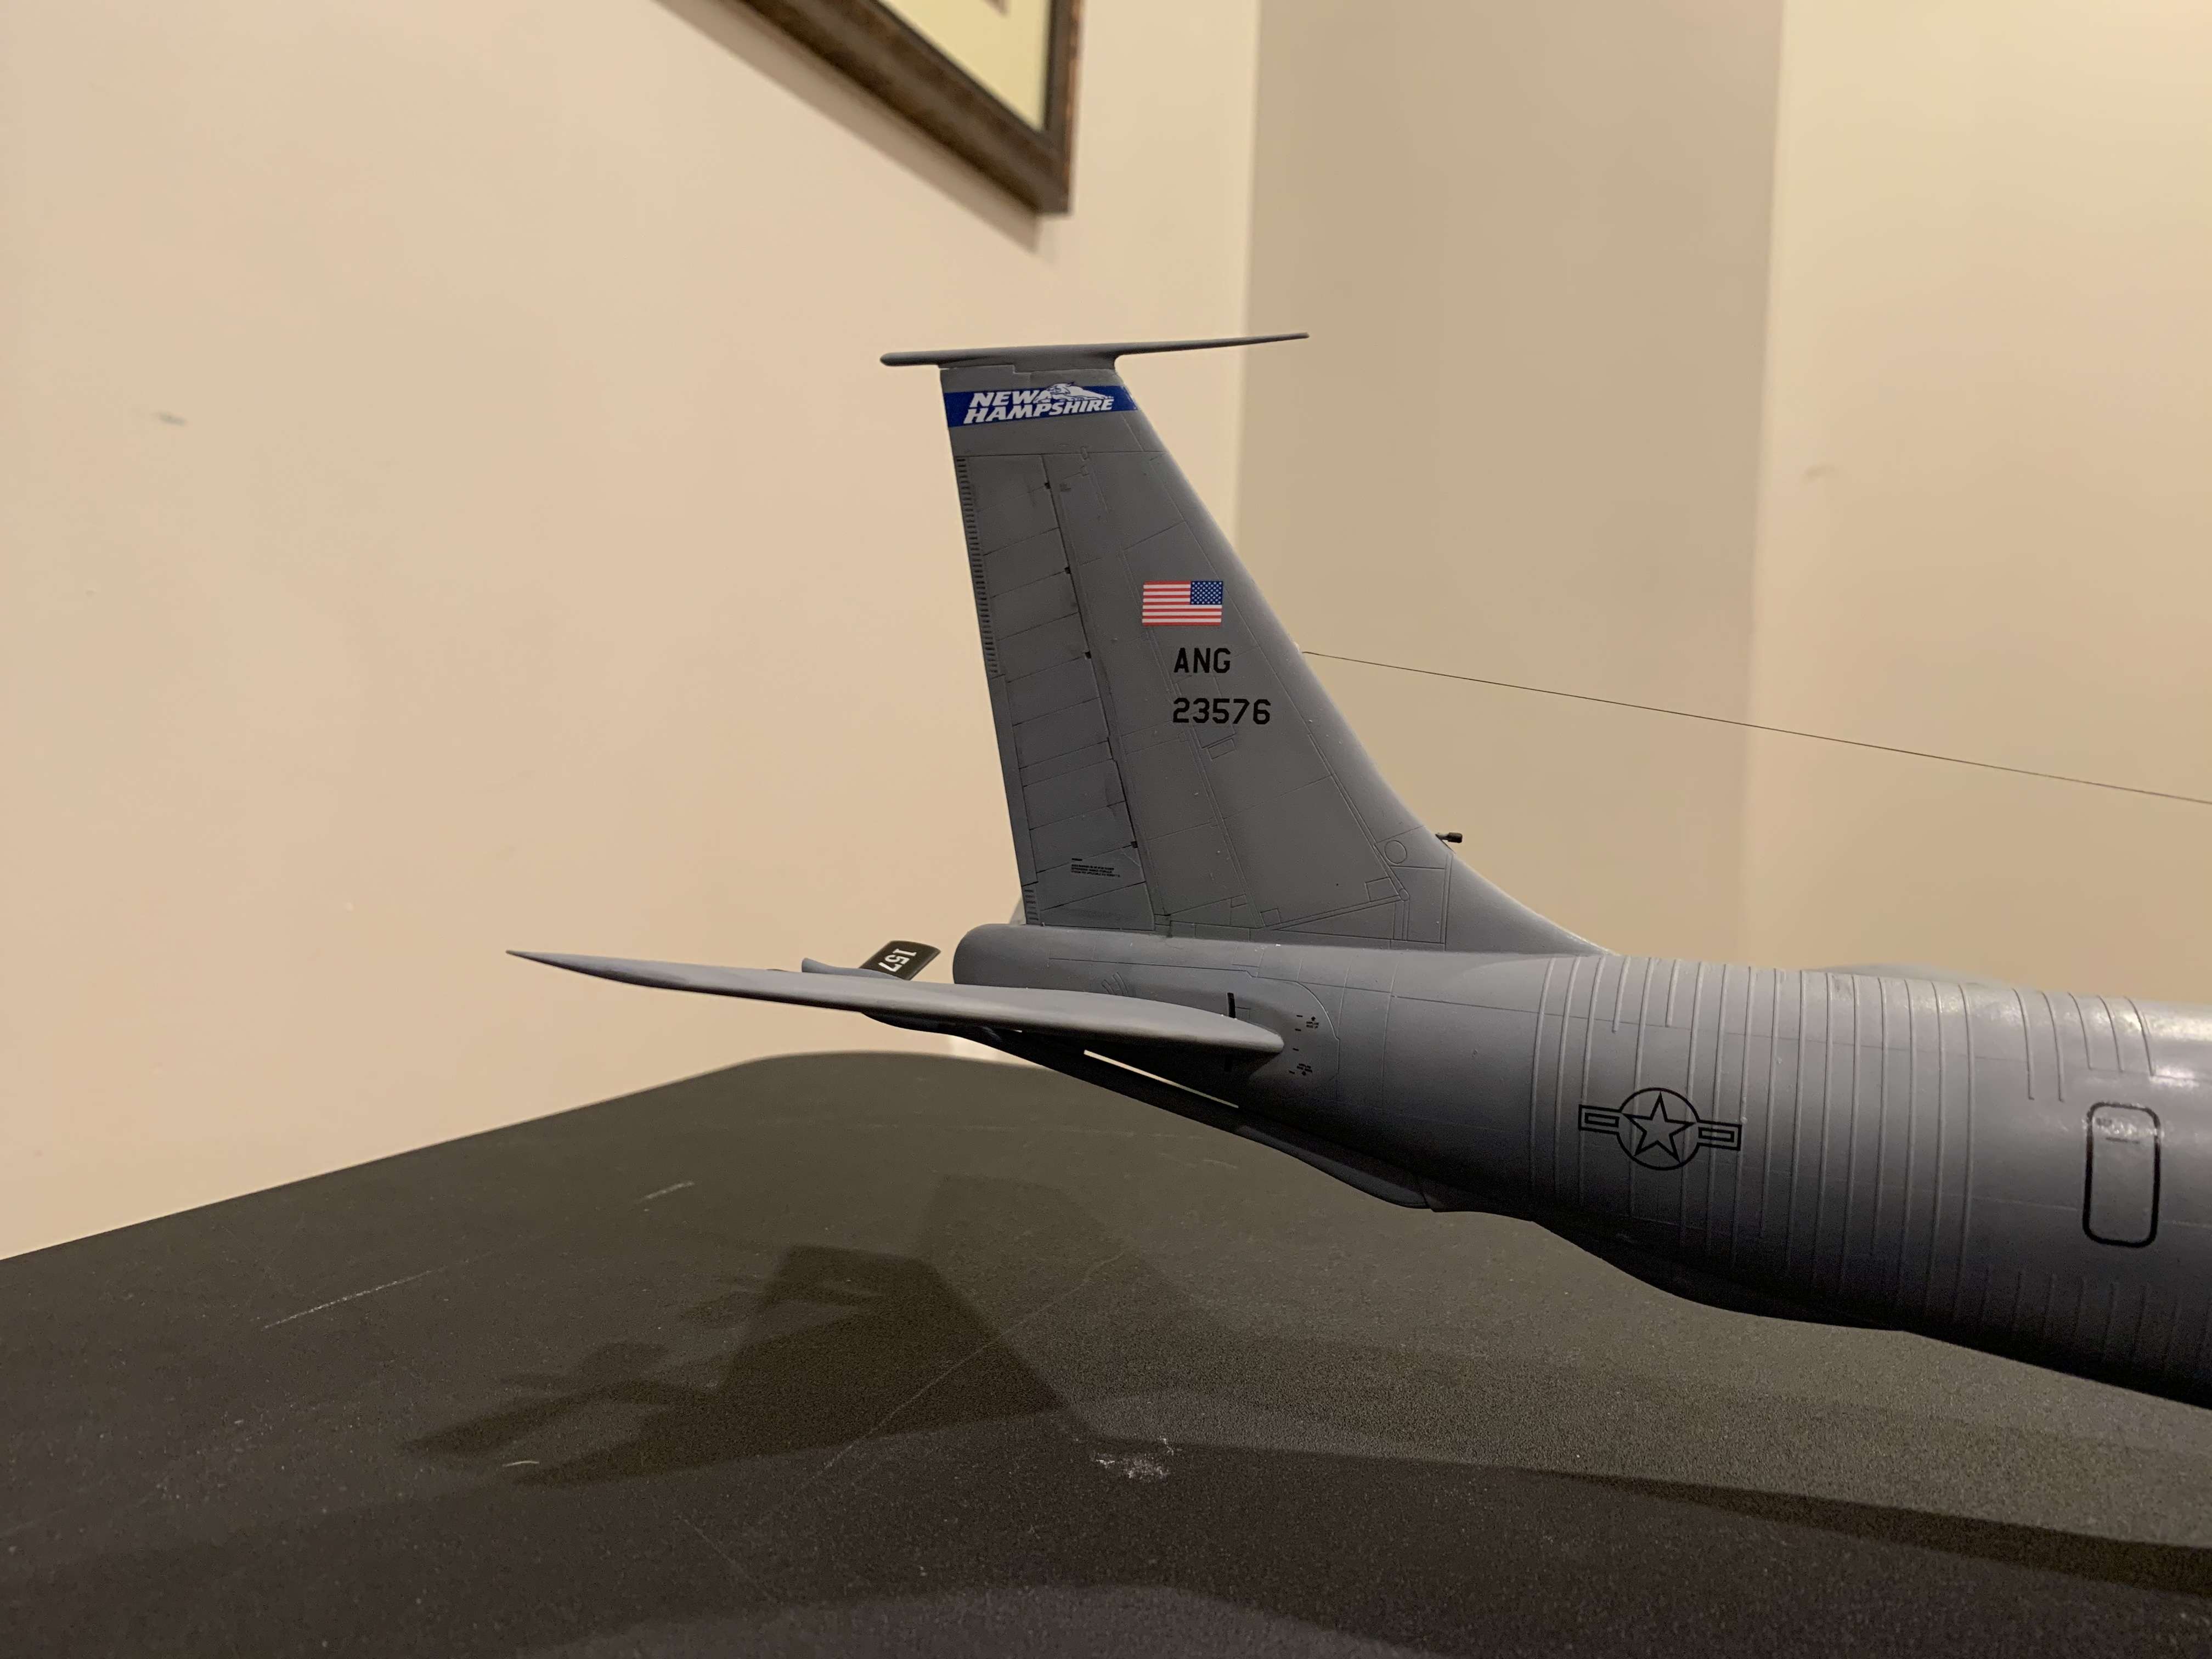
The decals went down smooth using future as a setting solution. I was worried about the nose decal wrapping around the radome and up under the sliding window because of all the angles but they were literally perfect!
I botched the decal above the wind screen but it was my fault. I had it basically perfect but tried to move it one last time,,,,,,, and promptly tore it and was never able to get it back to where it needed to be.
Awesome job Kursad! Now we need the 1/72 KC-135 General markings sheet so I can build my ‘MAINEiacs’ jet on this sheet.
-
12 hours ago, Winnie said:
@Paul Boyer (Can't believe i'm communicating with THE Paul Boyer...) The seats from the Nav compartment can be utilized up top as they have the correct headrest, but they lack the arm rests and parachute pack/survival kit. This may be moot as extremely little appears to be visible through the windows.
Anybody know the size of the star/bar for wings and fuselage, and USAF titles for wings for SIOP camouflage?
Cheers
Harald
I don’t know the exact size but Caracal’s B-52 sheet 72077 has a SIOP scheme. His research is top notch so they should be the correct size.
-
21 hours ago, Griffin2929 said:
Hey guys, not sure if this is the correct place to post this question, but I was wondering if anyone could shed some light on the scheme featured on the boxart for modelcollects upcoming kit of the B-52G as it appeared during Linebacker II. I've never seen a photo of this actual aircraft in this paint scheme and I've only ever seen B-52Gs that took part in Linebacker painted with white undersides. Anyone have any info on this unique bird?
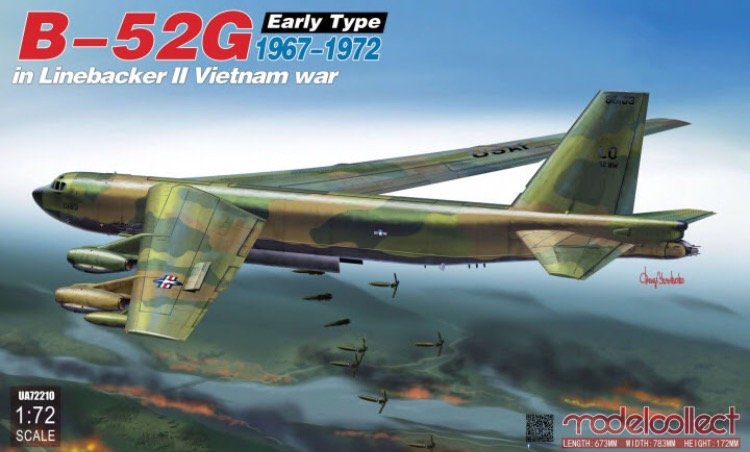
It looks like the artist fixed the underside but that tan isn’t supposed to be there.....
-
14 hours ago, Gator52 said:
On the early G with B28s...does it include the 4-carry clip in racks, and if so, how do they look?
Thanks, and again very nice work on your late G Patrick!
Jonah
It looks like only 2 racks are included. They’re pretty vanilla but they’ll mostly be hidden anyway.
-
36 minutes ago, ElectroSoldier said:
So the Curise missiles and Tomahawks on the box arent in it?
Sorry, I thought you asked what was is the Early G boxing.
The Late G has the ALCM’s and AGM-109 Tomahawks.
-
3 hours ago, ElectroSoldier said:
What are the bomb options in that kit?
8 x B28 gravity nukes,
VG, I’m impressed with you scratch building skills! Well done my friend!
-
4 hours ago, Murph said:
Does that mean the early B-52G "Broken Arrow" does not have the longer fuselage?
Regards,
Murph
That’s correct, Murph. The MC early G properly omitted the 40 inch plug and added the optical lense for the tail gun.
-
On 1/5/2020 at 10:13 AM, ElectroSoldier said:
Oh right I see.
So Modelcollect didnt have the tail plug extension on their late version?
Does the correction set include this?The G correction set supplied by MC corrected the nose, tail gun (with 40 inch plug) and strakelets (wing root fairings). Most also came with new flaps with tracks since the original kit flaps didn’t.
-
I’ll see what I can dig up for you but Caracal is supposed to include a Loring bird on part two of his B-52G/H sheet later this year.
-
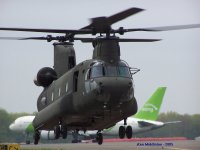
I experimented a bit with an old 1/72 kit this morning, thanks to motivation from @janman
The kit was original built 20 years ago and painted with MM Olive drab FS34087, no weathering or washes, just clear coated with Testors Dullcoat. The decals had silvered and the seem work was terrible so it seemed a suitable sacrificial lamb.
What I'm trying to achieve is a finish similar to the one below. A well worn "Dirty D" look. You can see that the green CARC paint weathers and fades relatively quickly in service. Random touch-ups were added from CARC rattle cans by the crews. Add leaking engines, dripping rotor heads, soap stains and blobs of WTR (grease) and you get this.

This is what I came up with. Keep in mind that I tried several different products and techniques. This is a test piece so Ill try to detail which ones worked and which didn't.
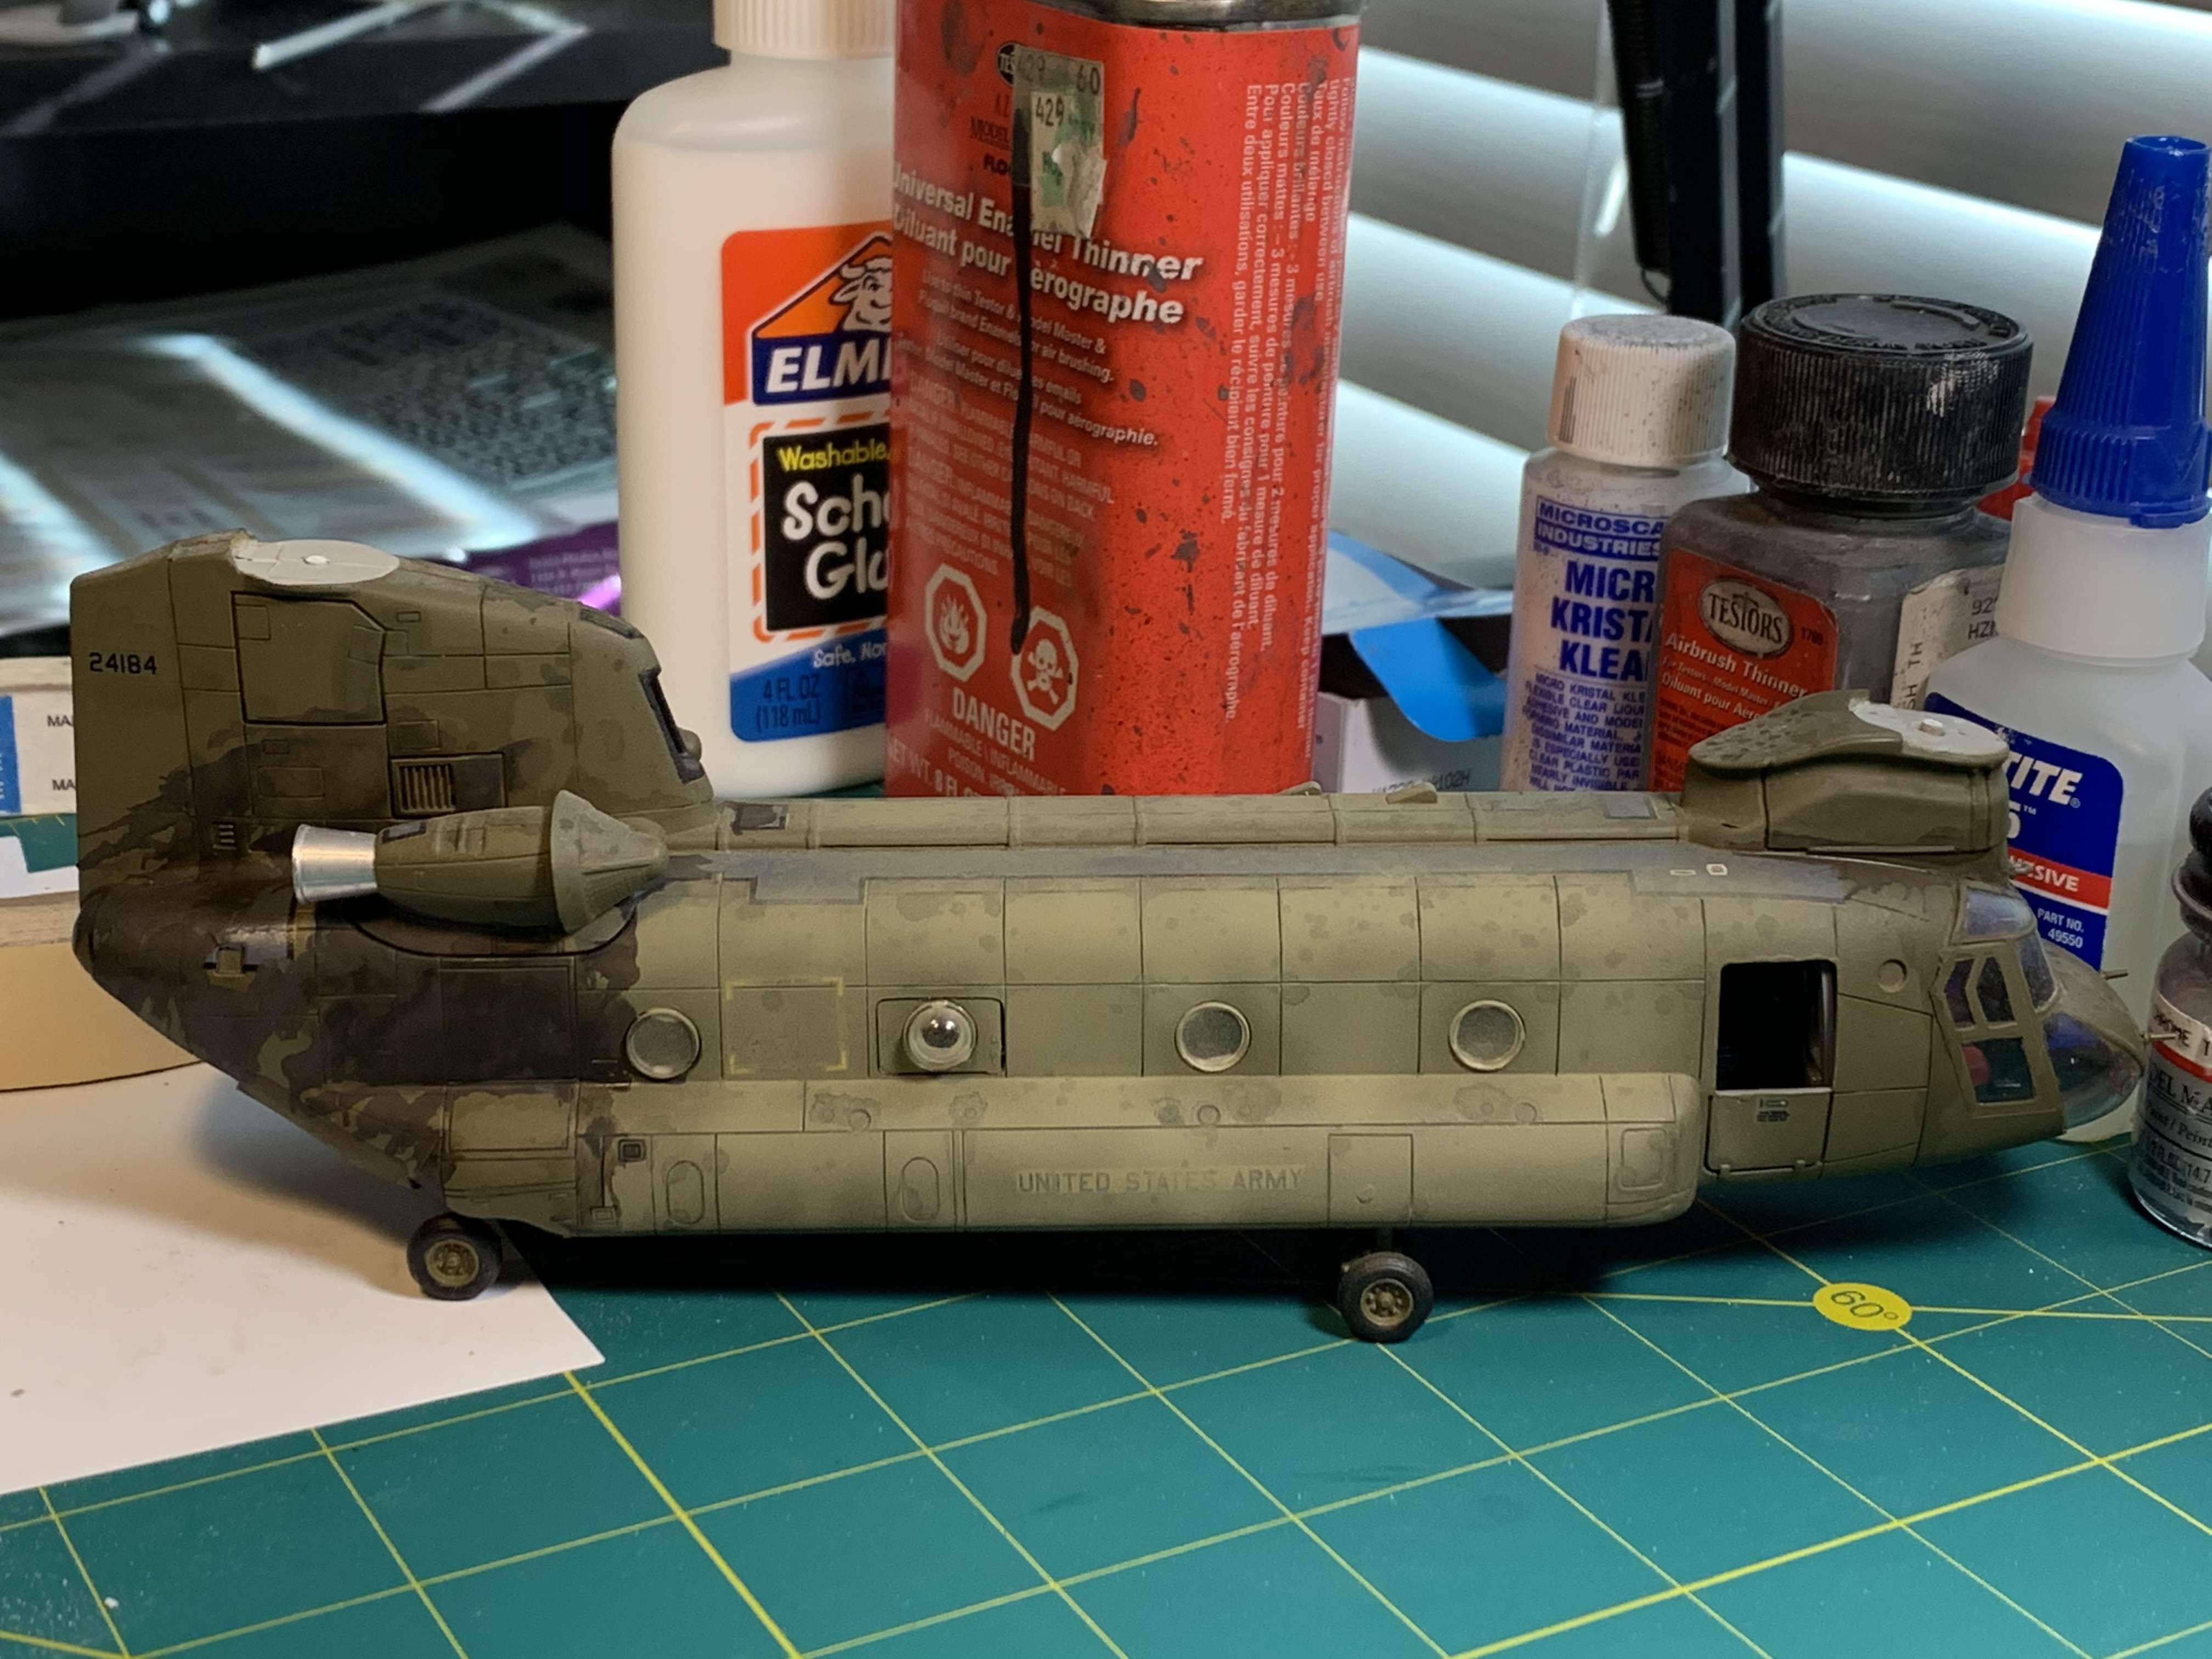
Off the bat, the oil under the engine and aft pylon is too dark IMO but I'll get to that a bit later. First I had to lighten the middle of the fuselage since this seemed to fade faster and wasn't really effected by the hydraulic fluid or engine oil. I chose Field Green at first but it didn't seem right so I used FS34201 SAC Bomber tan to lighten the OD.
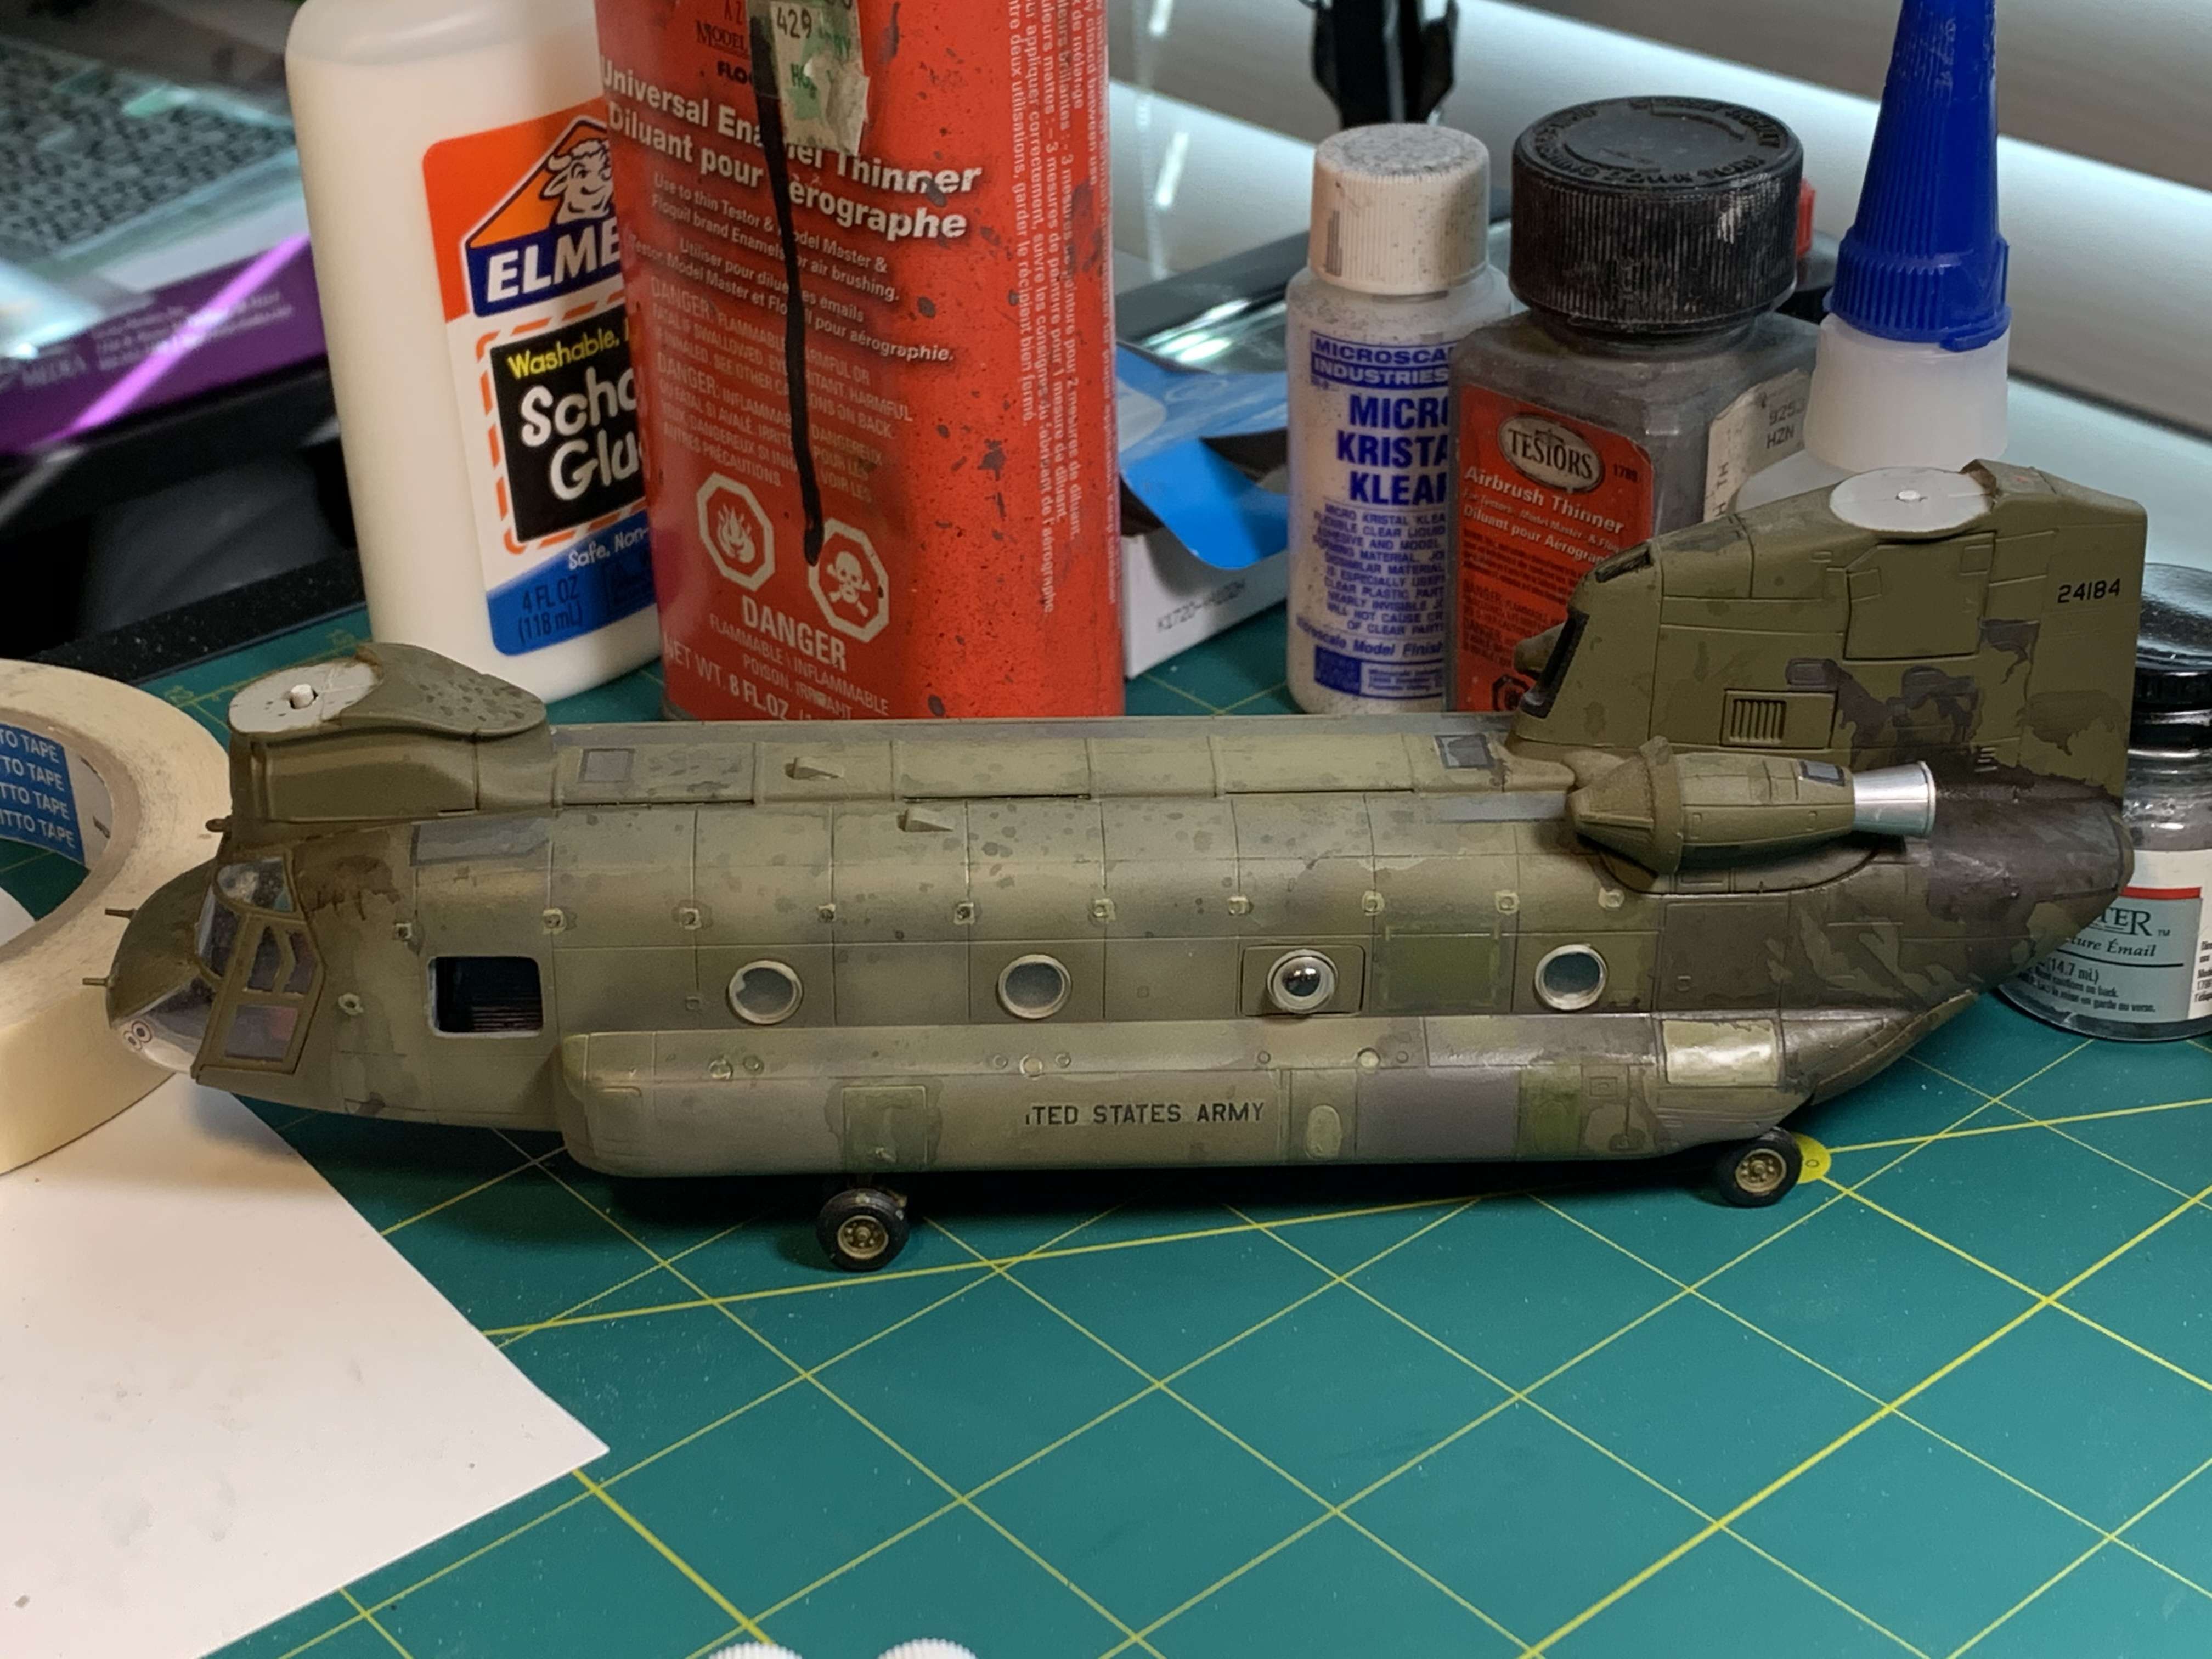
You can see on this side the areas where Field Green didn't really work. SAC tan seemed to be the ticket. I also tried some Army Helo Drab in spots to simulate recently painted or replacement panels.
So for the things that didn't work:
For the really dark areas on the right side, which I personally don't like, I used Testors CreateFX black acrylic wash straight from the bottle. I blew it around with airbrush air but when it dried it was obviously too dark.
On the left side you can see where I thinned the FX wash with acrylic thinner and again blew it around with airbrush air. This seemed to work pretty well for really oily areas. I guess the trick is to thin well and add layers slowly to achieve the desired look.
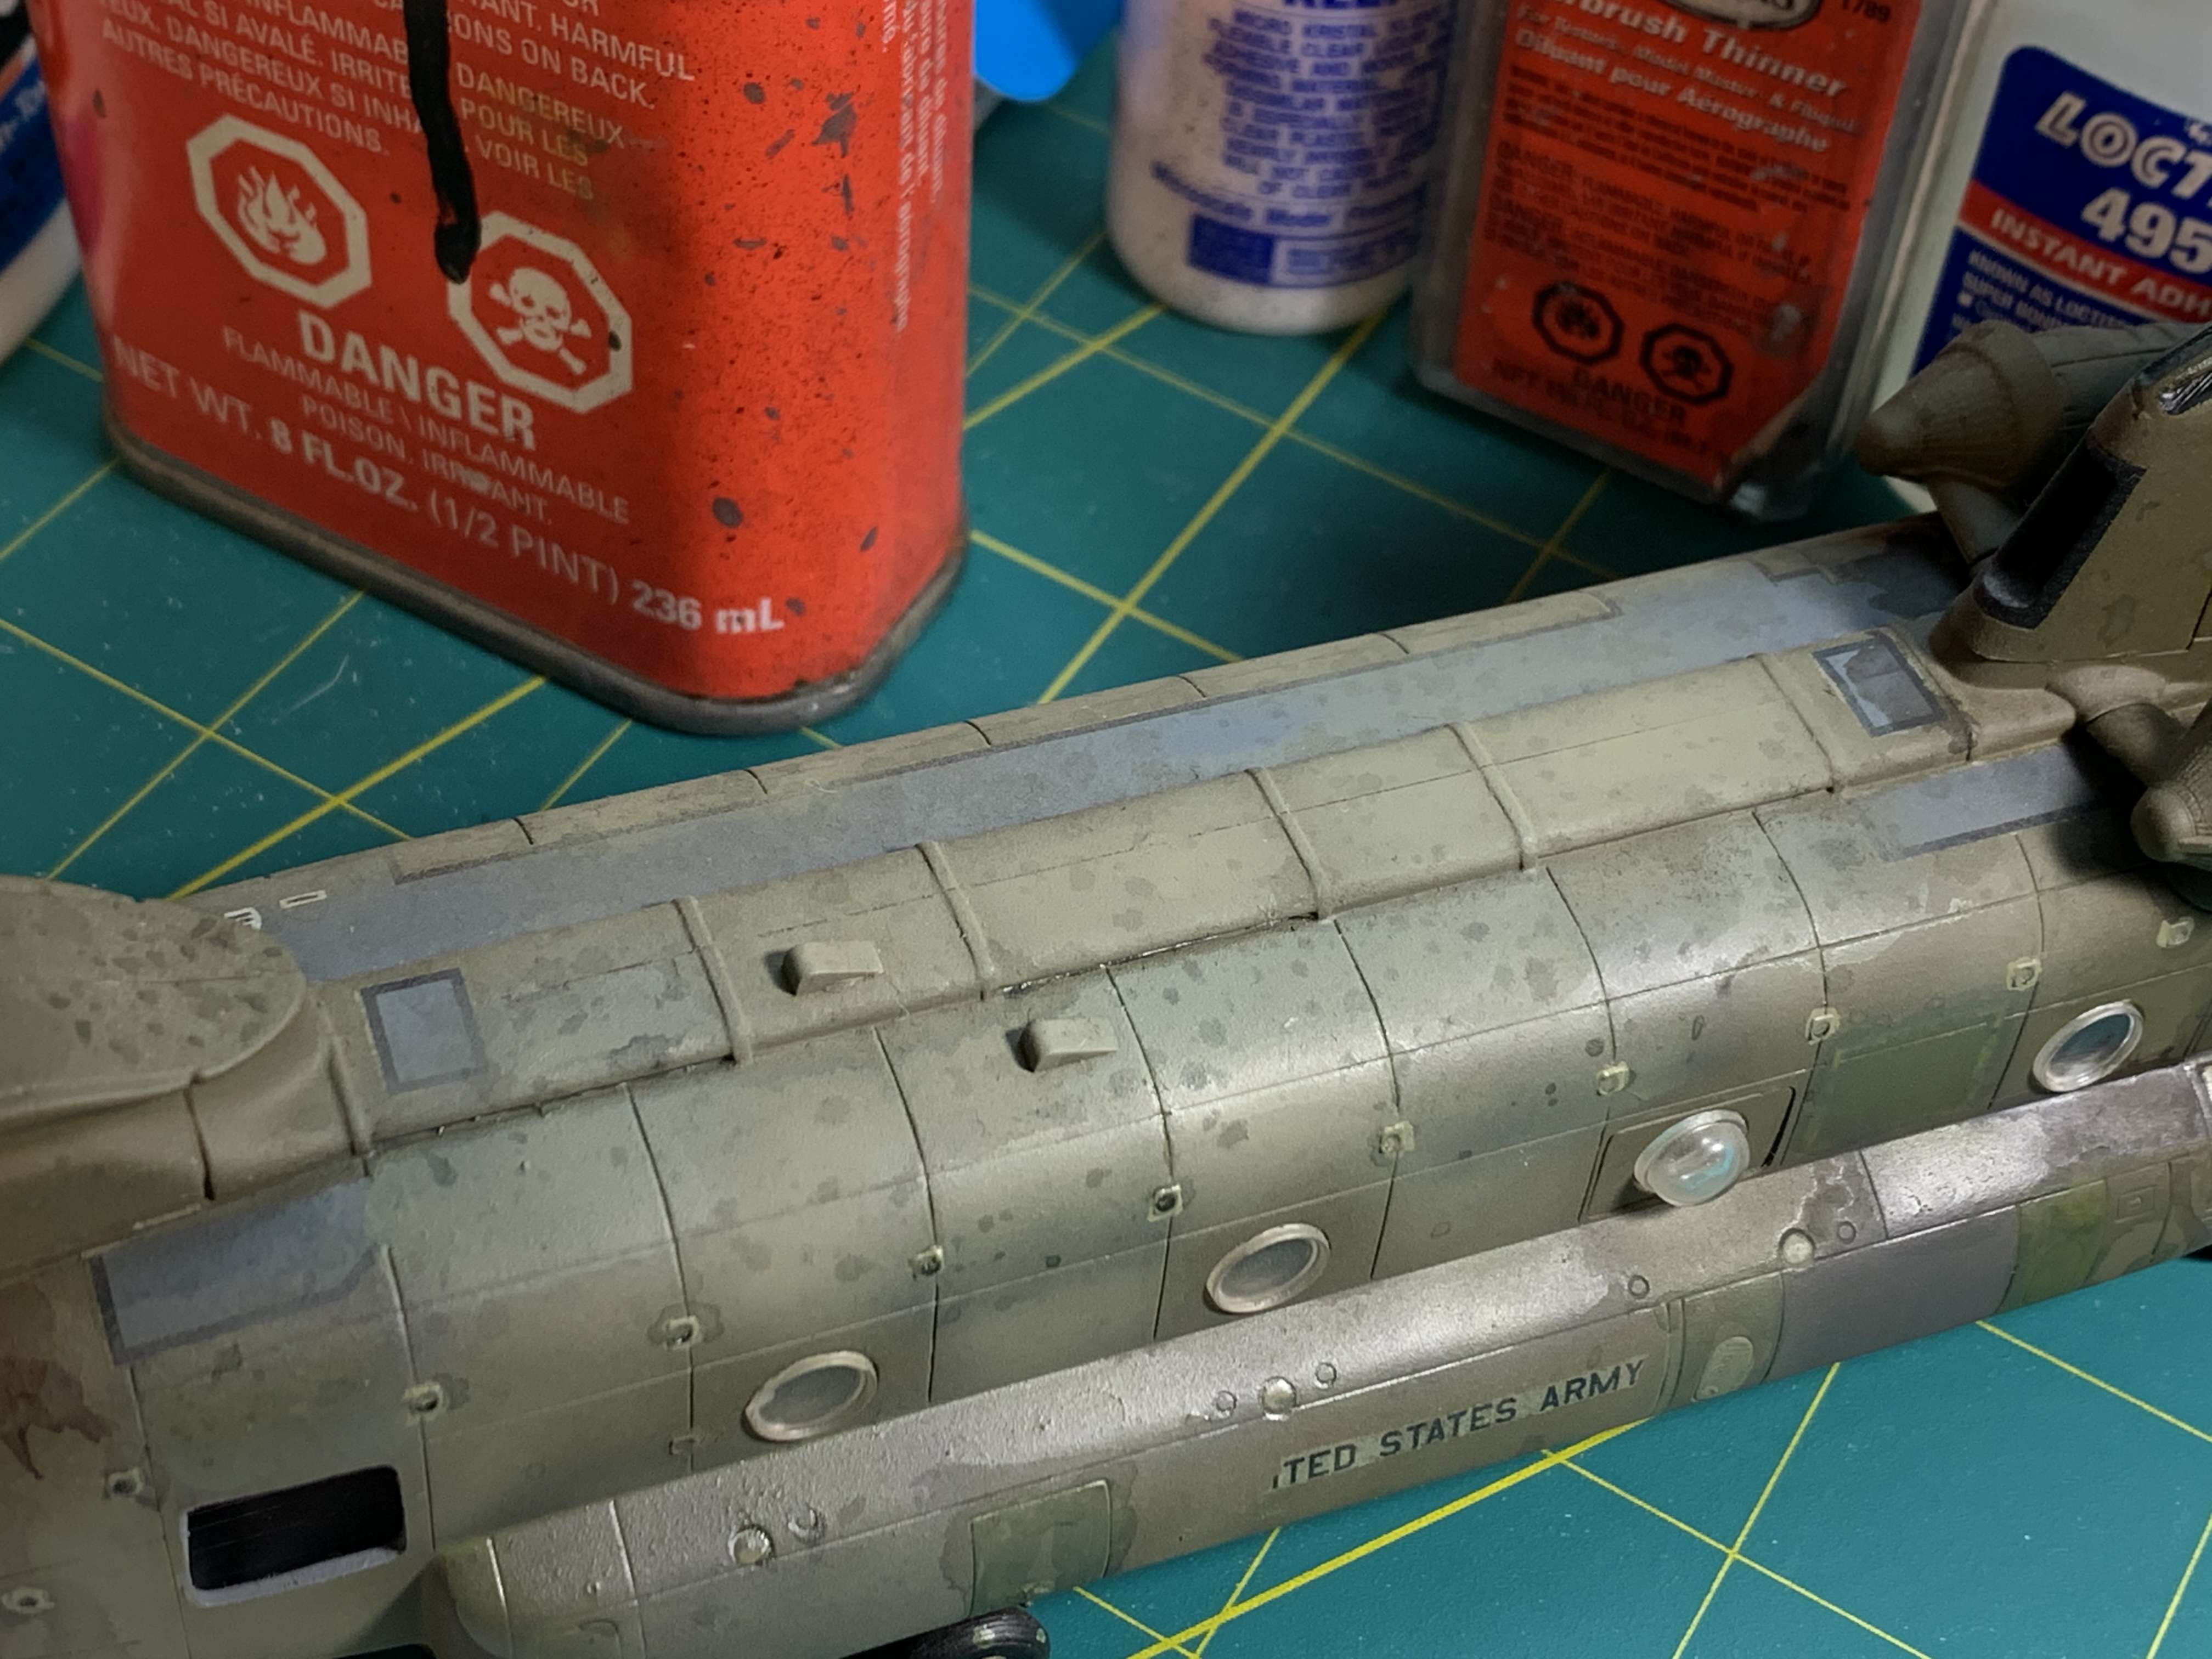
What worked:
I used artist oils, (black and green thinned with mineral spirits). I thinned it to basically make a filter or so I thought. While doing a few panels under the engine I accidentally flicked my brush on the edge of the cup and splashed droplets on the tunnel covers. Eureka, a leaking hinge pin seal!!! It instantly soaked into the finish and created the soaked in oil spots I was after!
You can also see on the aft pylon the subtle areas where I used the artist oils effectively.
All in all, I learned a lot. Both what works, what doesn't and what might if adjusted properly.
Thoughts?
WTB: 1/48 Cobra company HH-65C Interior set
in Buy and sell - add scale to your title
Posted · Edited by Hooker169
Title says it all. I know it’s a long shot but I’m looking for this set numbered 48056.
Lonestar models bought the molds but hasn’t reproduced this set yet but I’m ready to start my conversion soon.
Thanks in advance