

The Madhatter
-
Content Count
1,256 -
Joined
-
Last visited
Content Type
Profiles
Forums
Calendar
Posts posted by The Madhatter
-
-
Thanks Thommo. Yeah. I'd have to add a plate of styrene to the bottom of it to make it work and I don't think I can get them to sit flush with the surface without the need to add some filler
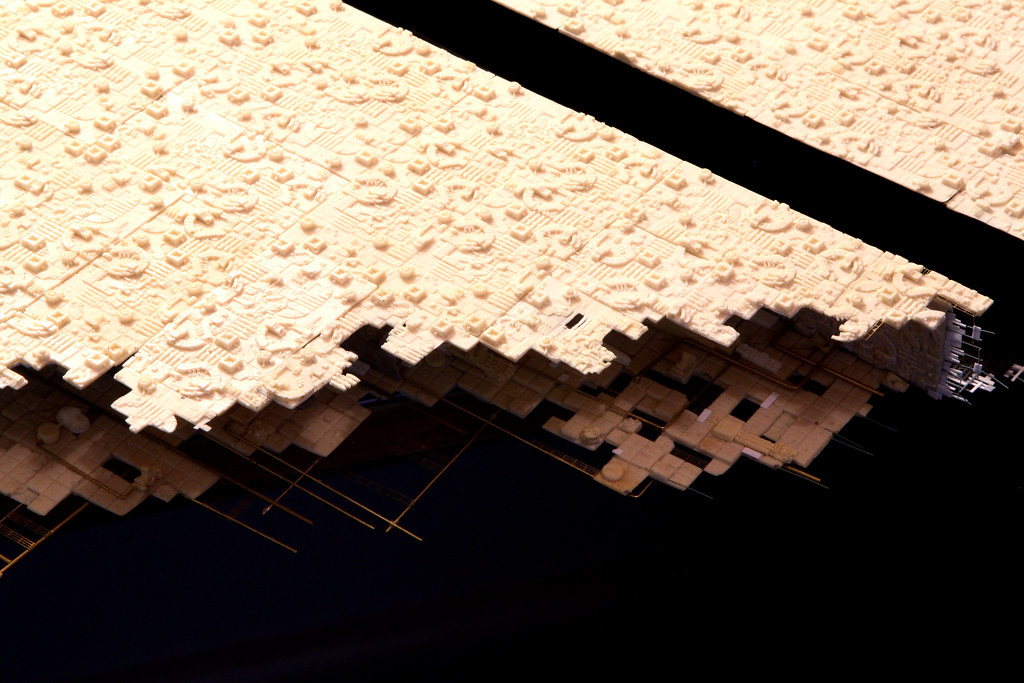
Quick couple of extra shots showing how high the SD sits above the base:


-
hey again
Got one building done and primed and have started on the second one. I'm hoping to have the first one painted by the weekend. I have already drilled out the holes where the fibers will be going. I lost count after 50 and 8 drill bits later
The good news is it won't require a lot big lengths of fiber. I am contemplating sticking in just little bits of fiber and flood lighting the entire inside but I am not sure I can get much light through the top sections. They'd require longer lengths I think. Also, there would not be enough room to angle an LED bright enough to fill the space... unless I used SMD strip?
Enough pondering, here are the pics. I used my phone and not my proper camera coz I can't be faffed getting it all set up


In black primer with a very light white primer highlight coat brings it all together nicely


And together with the new building. I drilled out some vents on the side of the tower and I'll stick in some strips of clear sanded styrene to cover the openings from the inside. With a red LED shining up from the bottom it'll look pretty cool with the sanded styrene diffusing the light nicely. At least - that's the plan


and lastly, the new position of both on the surface:
Well, I think I have bored you all enough, but as always, please feel free to critique or suggest anything that could be improved.
Thanks for looking
-
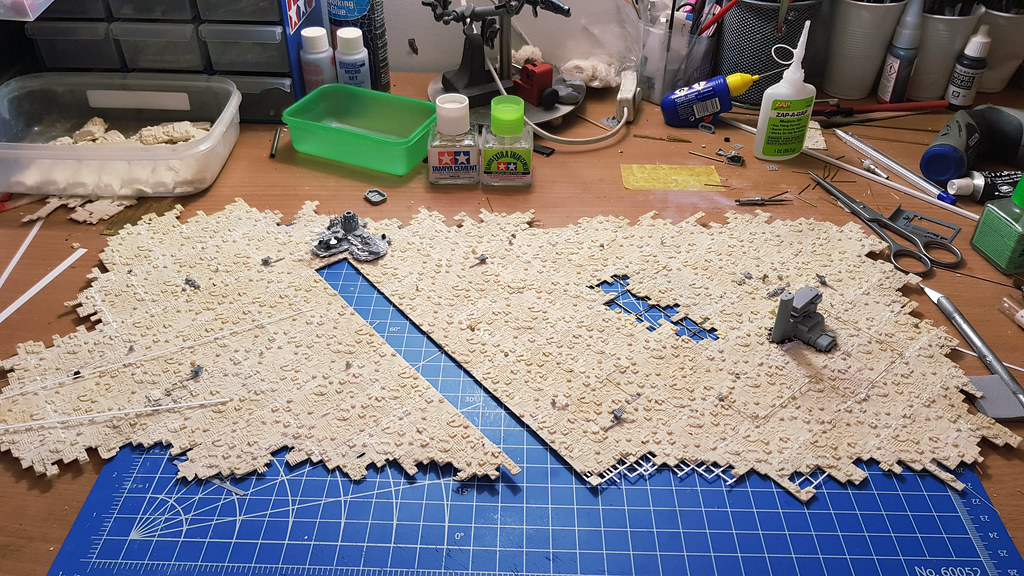
Hi again all
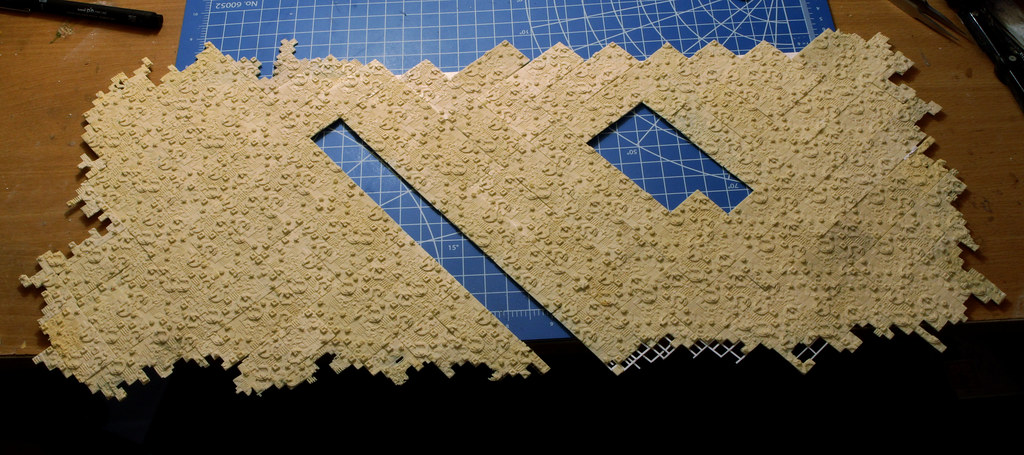
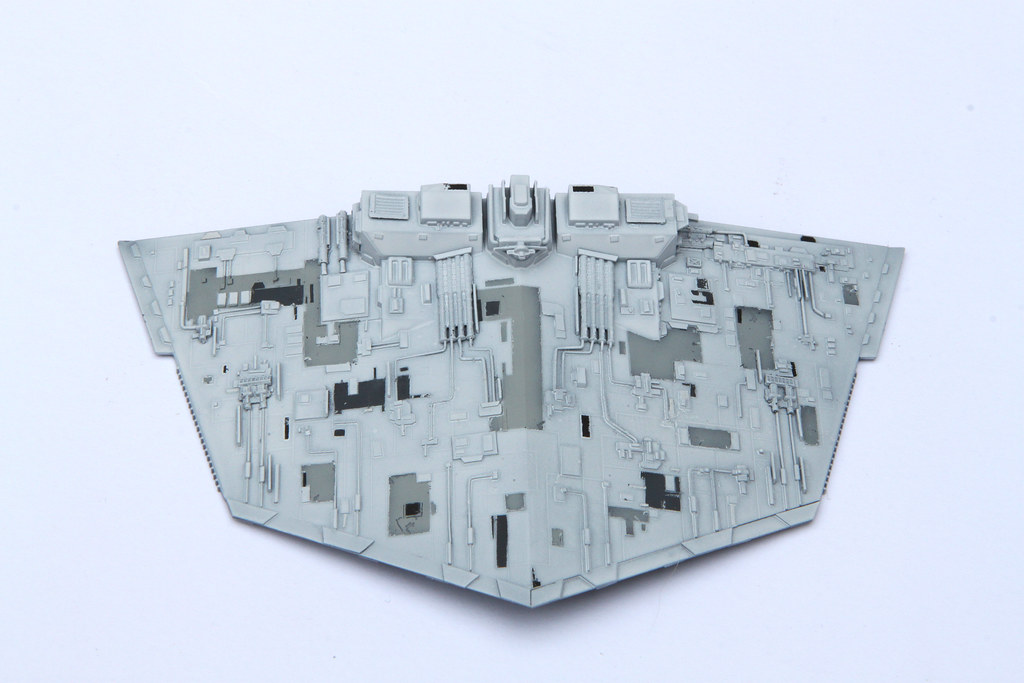
For the past 2 weeks (well, more like 6 days when combined) I have been working away on the top plate. I decided to make something to go on top as I feel it needs more visual interest. Yeah, I know its the DS tiles I'm using but I don't really want this to BE the Death Star - more, my own interpretation. I wouldn't go calling my display a battle-station. Probably more a mechanical planet
")
It's far from being finished - I still have heaps to do, but before I really get lost in this and put more energy into it, I thought l'd just get a general gauge if this is a good idea or not
It's basically superstructure parts from my ill-fated Bismark and other bits and bobs. My favorite bit is the landing platforms


This is where Im intending to put it

If all else fails, it could always be a new hull part of a space ship
Well, that's it for now, but feel free to let me know what you think.
As always, thanks for stopping by and having a look
-
thanks mate, appreciate it
Hi all
Quick update
The edging is all done and putty applied. Still a couple of spots to clean up but nothing dramatic.
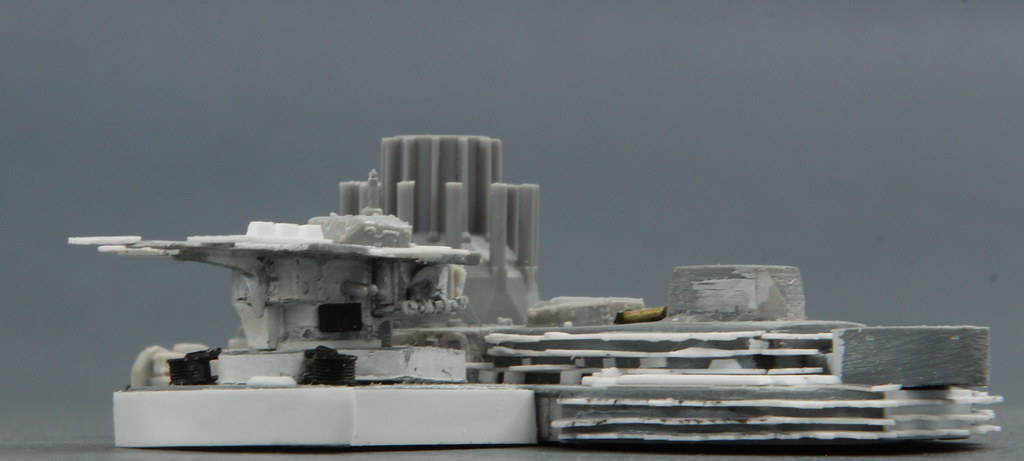
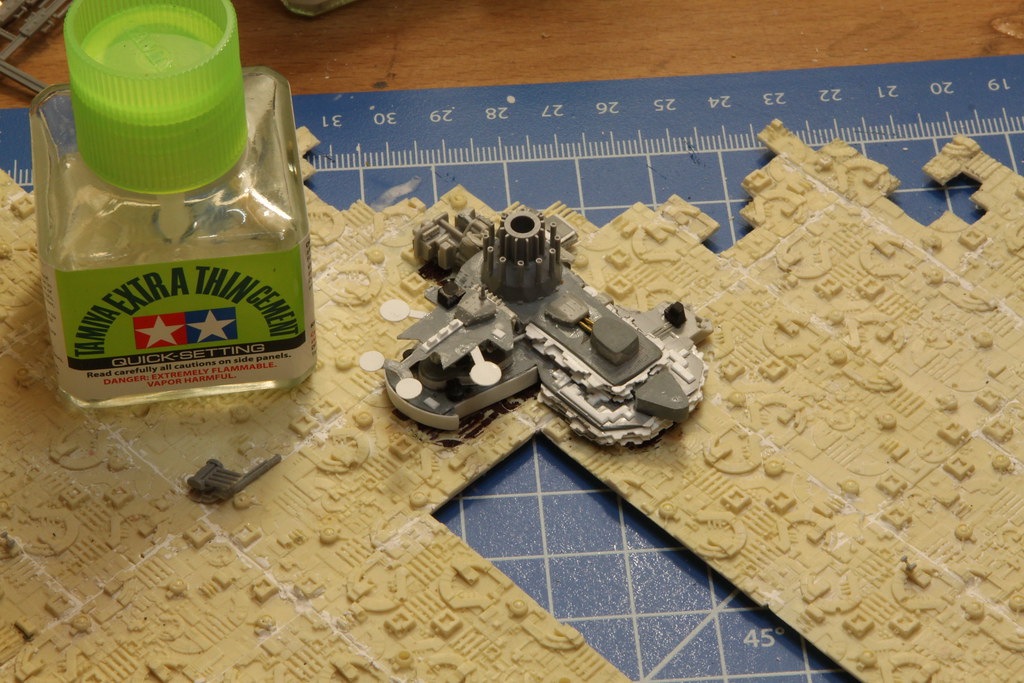
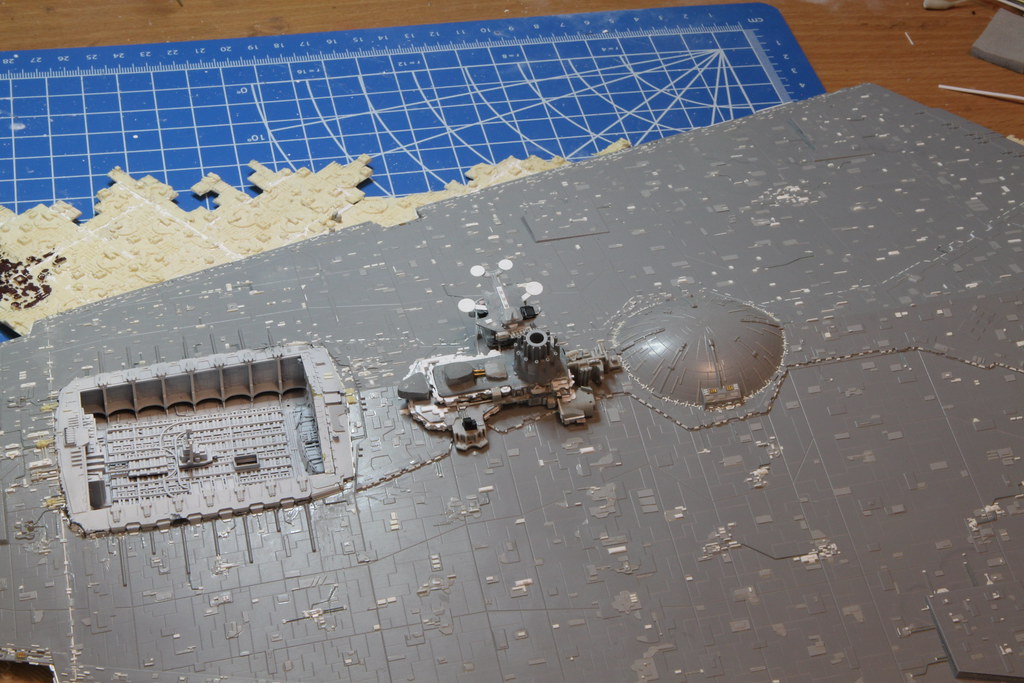
I've started to add some more detailing to the surface, with some gun batteries which i thought could be quite cool. I'm not trying to replicate the DS or its surface to its filming parents, so the relevancy of their existence is mute. Looking at them, I do need to change the shape slightly to mask their origins though. Just on the bottom front corners I think
I'm looking at making some kind of central building structure, like a control center of sorts, again, just to break up the surface more. Not too high, but high enough. I've been furiously rummaging through the spares box looking for something suitable but nothing is matching my idea, so I think it'll have to be scratch built.
Anyways, enough words


I just started the detailing, but you get the idea of where its going


That's all for now, but open to ideas, suggestions or constructive critique
Cheers
-
2 hours ago, Thommo said:
University of New England. I did both my degrees there in the 80's when it was really good. From all accounts, it has gone downhill a bit lately. Covid did not help. Staff redundancies. Online courses. Colleges closing. A VC who seems crazy as a cut snake (why do Uni's not vet better people who they are going to pay $600K pa???).
The old New England Hobbies were in Armidale & Inverell but both gone now (owners retired, Armidale closed first then Inverell).
There is a new New England Hobbies just down the road from us in Uralla - https://newenglandmodelsandhobbies.com.au/
Well, its good to now there is at least somewhere relatively local you can go to to get supplies!
1 hour ago, ExchefAndy said:Ah yes... Brisbane.
When arriving in the sunshine state make sure you wind back your watch one hour, and your life 50yrs!
The sunny state for shady people... There are loads of these, some are closer to the truth than I would care to admit. But I'll admit, it was one of the better decisions in my life when I moved here.
In regards to hobby shops, there are a few but I tend to frequent two in particular. Hobby One on the south side, and Hobbyrama on the north side. Hobby One has gradually down sized over the years and caters for RC mostly but has a fairly good inventory of paints, thinners etc. Its the closest to me and I've never had a bad experience there. Hobbyrama is a two story affair that caters for all aspects of the hobby whether it be RC, trains, planes, cars and supplies. Its a place you can wonder around and easily spend an hour before emptying your wallet on things you think you'll need.
You asked about any hobby shows up here and the only one that occurs is at the end of August called The Queensland Hobby Expo. It's gotten bigger over the last ten years, but it probably doesn't compare to the Melbourne one. Its still a great display of skills though and a fun weekend, if you've got farce-book all the info is posted there.
I'll keep posting things on occasion as things pop into me head that you might find interesting!
Andy
Yes please! Hobbyrama sounds like my kind of place alright. 🙂 I was hoping to display this one at Melbourne but very likely, it's just not going to happen, so it'll be Brisbane that gets to see it in the plastic. Lucky you guys 😄
As for the shady people, mate, sadly, they are everywhere - including Melbourne. In saying that, I am glad I haven't experienced the "eshays" (?)..... I have so much to look forward to 😄
What kills me about Queensland is the wet heat. I'm a kiwi, I come from the land of the long white rain cloud. I tend to melt when exposed to the intense and oppressive humidity of Brisbane. 😄
Nah, I'll be alright - I'll acclimatise soon enough.
Thanks heaps though for the info - at least now I'll have an idea where to start
How about clubs? Do you know of any?
-
Been there a few times. Good uni there from all accounts. We actually looked at moving there at one point but it didnt eventuate. Is New England Hobbies still in existence?
-
Where abouts in NSW do you live? My wife is from Inverell
-
I genuinely laughed out loud at that Thommo - I drove in Brisbane just a few weeks ago and was astounded at how bad a lot of QLD drivers are, but I could also say the same for some Victorians too. The worst thing about Brisbane I found was the very confusing road layouts - especially in the city. Personally, I find that's where Melbourne did it right - a proper block system, like New York in a way - not the wild spaghetti junction that is Brisbane. I guess I'll need to adjust to it though
-
thanks guys! Andy, when I get up there, you'll have to recommend a club or hobby shop in Brisbane that I can go to. I'll miss Melbourne a lot, but we're going up for family, so its for a good reason. Does Brisbane have an Expo/show event?
-
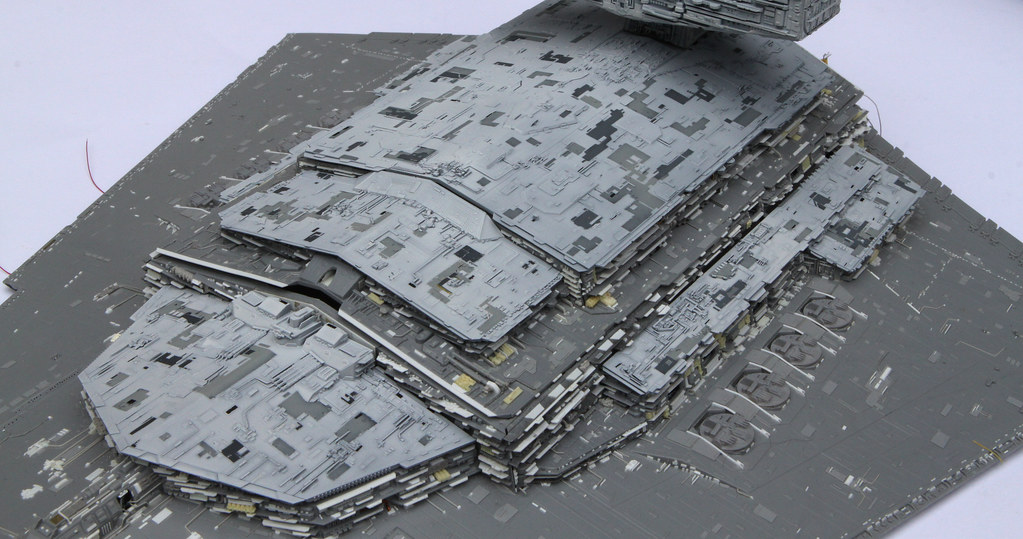
wow - it has been a while hasn't it? Hi all, and thanks for stopping in. First of, sorry for the really long delay in doing anything to it until recently. RL has interfered a lot as have other projects blah blah. We all know the reasons why etc that things go on hold but, I do have an update that's worth showing
So, I am unable to paint anything ATM due to weather and other such stuff like getting ready to move up north to Brisbane at the end of the year, plus a reno and as such, that limited my options. But I have been chomping at the bit to get restarted on just something to do with this build as its just dragging on and on (rather my my words) so I thought I would continue on with the base.
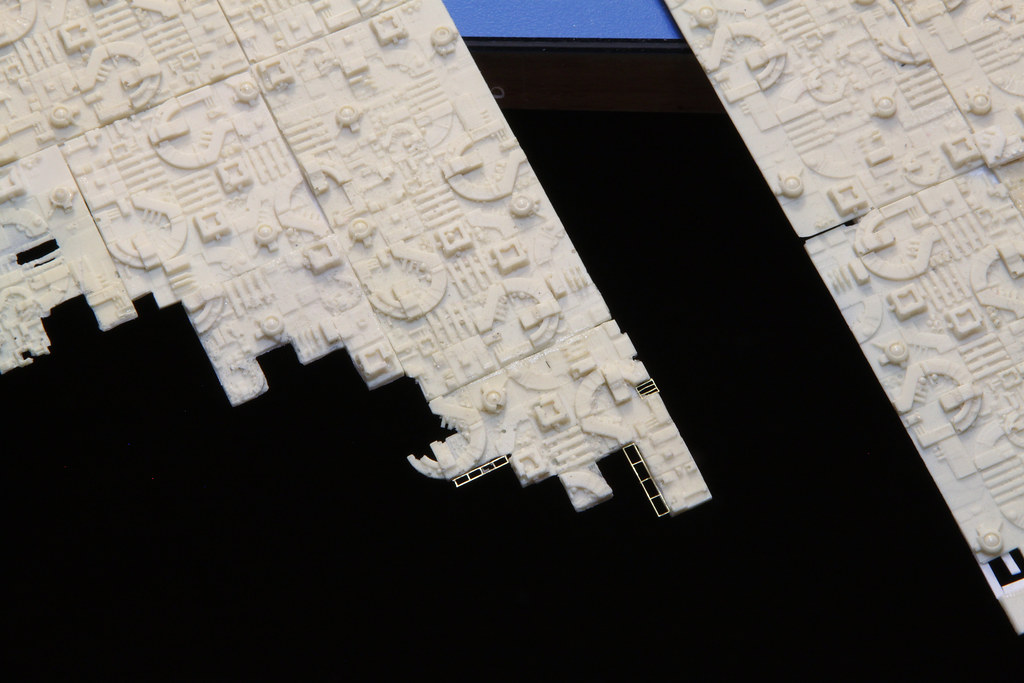
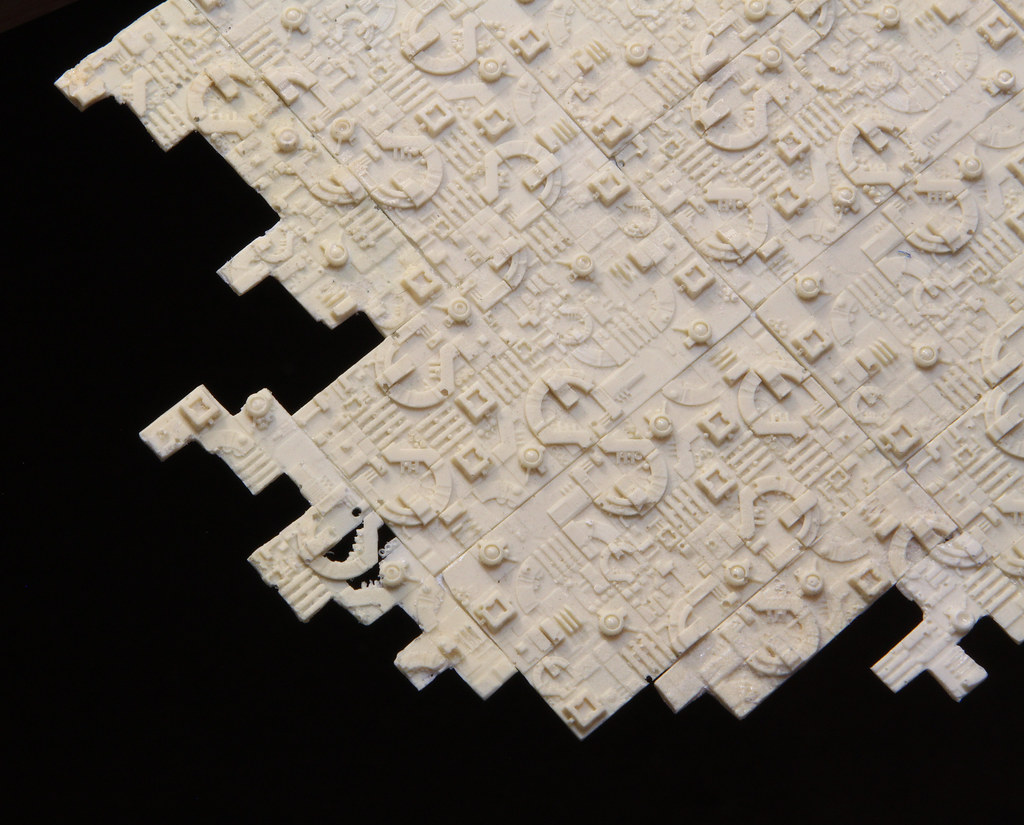
And I must say, so far, I am super happy with it. It's coming out way better than I had hoped so far! I am almost finished the edging on the top plate as you'll see in a sec and the shape of it is working perfectly. I will need to cast another 2 or 3 plates and some more of the original plating for the bottom and mid tiers, but that won't take too long
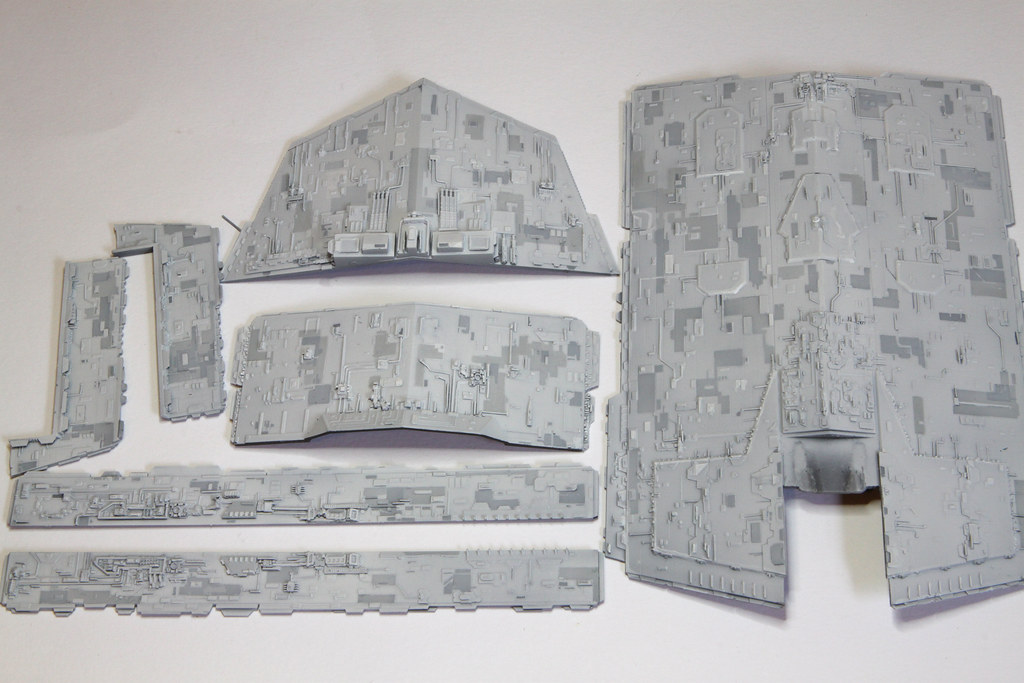
So, first up, the top plate as it is now:
The advantages of using resin is you can sand it super thin and then remove excess bits with a sharp knife to create new shapes


And the bottom plate has also had some treatment started to it. There is HEAPS more to do of course

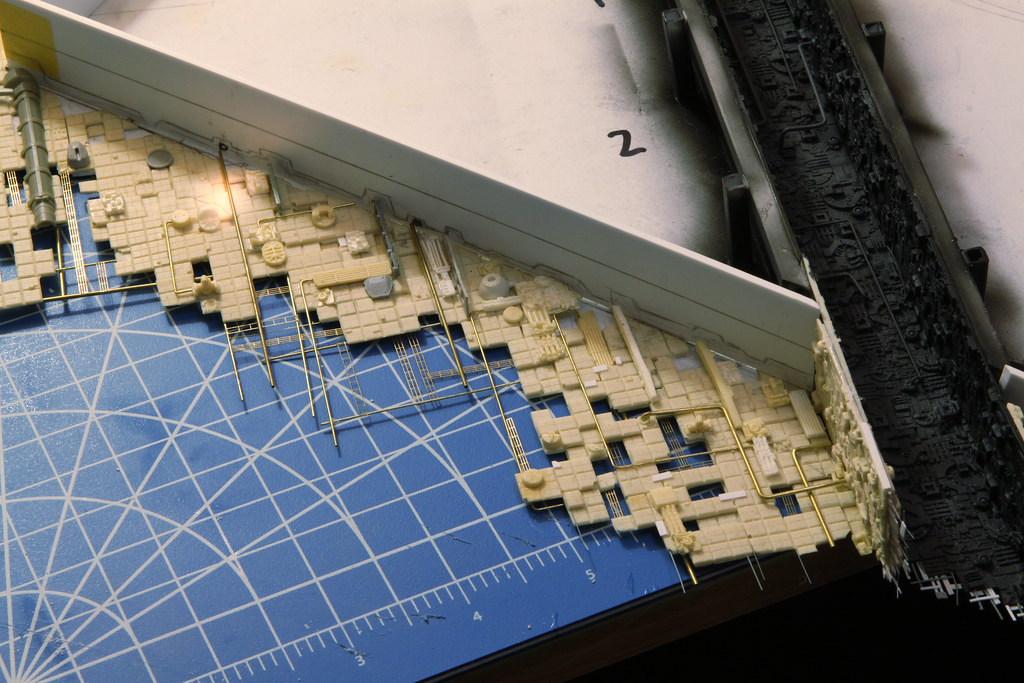
And combined, it starts to take shape. There is a tier to go in between them but not there just yet


Well, that's it now for the next 3 months.... nah, just kidding. It's 7 if you're lucky
Hopefully the next update will come sooner rather than later.
Thanks for any continued interest
Till then!
-
Hi Ben
You could also sand the LED itself which helps with diffusion. Putting a thin piece of white or clear sanded plastic can also do the job
-
LOL, sorry mate, I haven't touched it since the last update. I've had other things take priority. Hopefully I will be coming back to this one soon but it'll be a little while before it comes out from under cover.
-
Thanks Alex! I just hope it comes out the way I envision it
-
Hi all
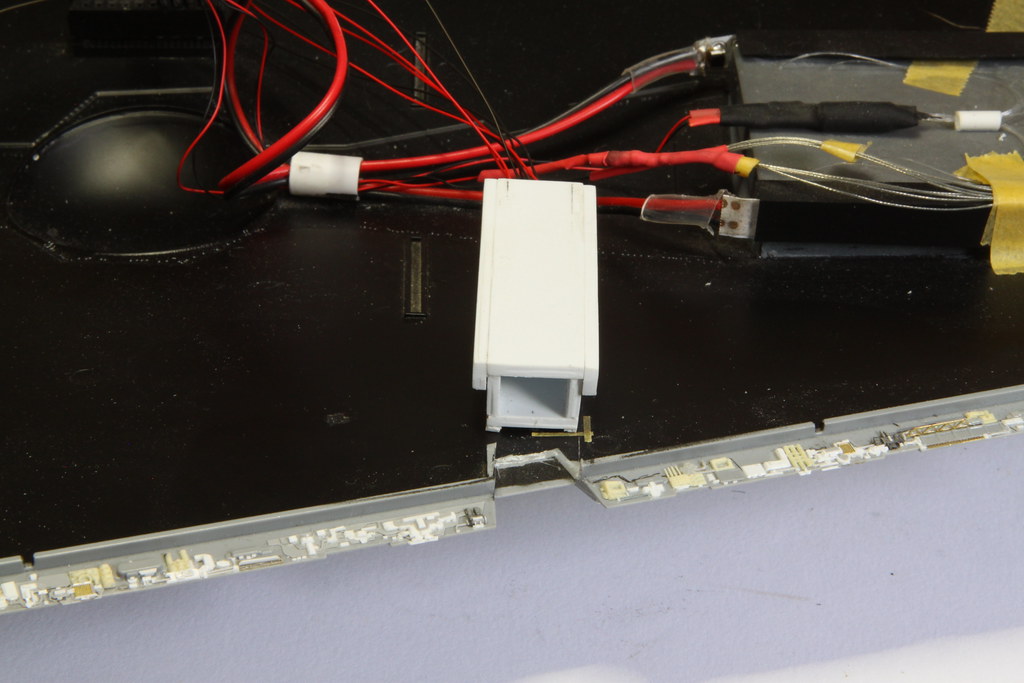
Well, I have finally sorted out my last remaining hurdle and it's onto the final stretch - more or less. Yep, I have finally sorted out my mounting device and at long last, I will be able to slip the ship on and off it's mount (I'm not sure how many times I would want to but for transportation this will be invaluable)
all I have to do is attach the sleeve onto the bottom of the ship and we're good to go. I've got it so I have 4 separate power lines which I will be able to distribute to hangar bay lights, engines, superstructure and floodlights.
It's by no means pretty but it works which is more important. The wires will travel down the back side of the armature into the base. Once I have the last bit of wire covered, I'll paint it all black

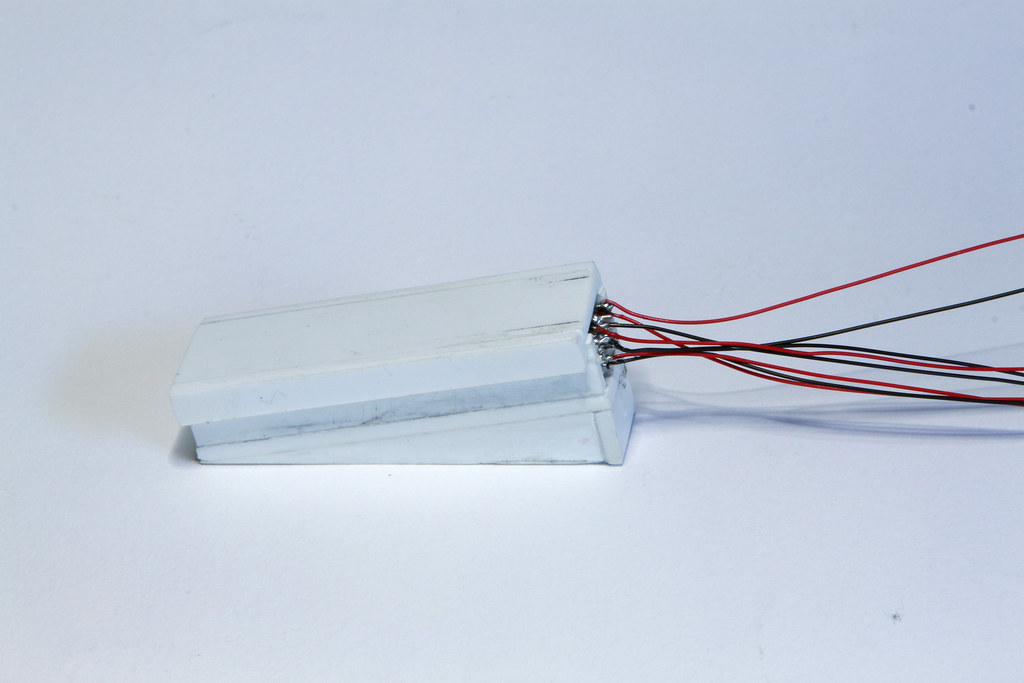

As I said, not the prettiest stuff ever but I had to make do with what I had
Anyway, that's it for now.
As always, thanks for looking
Si
-
Thanks guys! Am quite looking forward to the weathering stage for once
-
Yep, that's exactly what I mean. Its just a light very heavily thinned base colour coat. Does precisely what you said. It's just the base paint work. Next is washing , dry brush and pencil in some panel lines
-
the effect is a lot more subtle in the plastic than in this photo
-
thanks bud! LOL, it is a bit like that - but not quite as intense
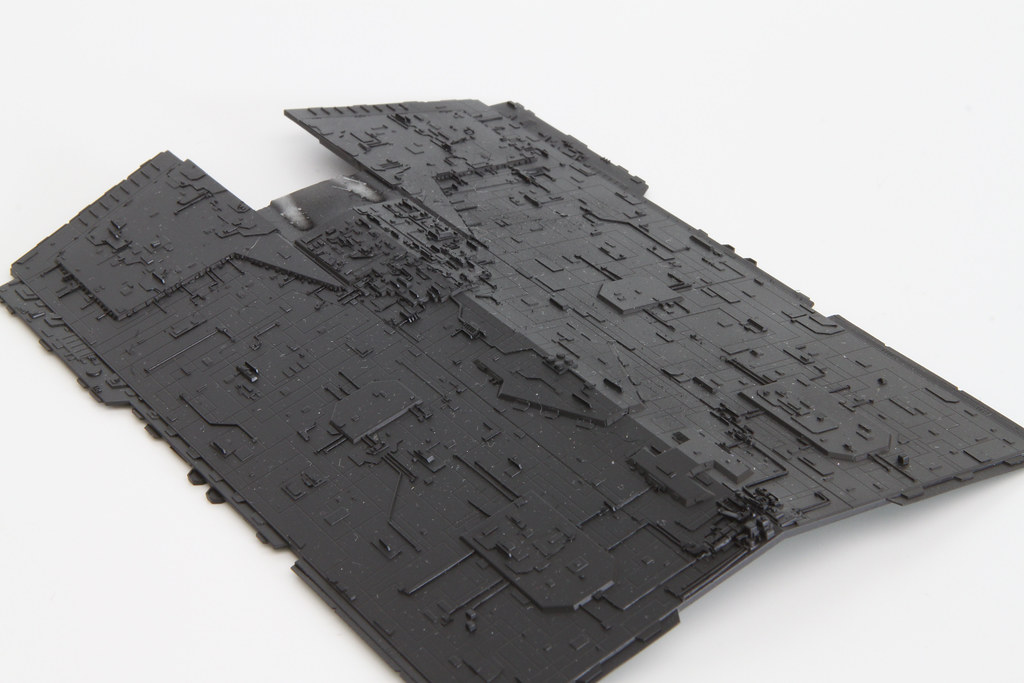
Well, the experimental masking is done and the results are here. There are some panels which require a paint touch up because - as feared - the paint was too thin for the masks and ran under them in places. Lifted the paint off in others.
Over all though, I am pleased with how its turned out. I'm still debating whether or not to run a very thin filter coat over the whole area to tone down the enhanced panels.
I still have small detail painting, washed and dry brushing yet to go, so the look will change even more but what do you guys think? Should I leave them like they are or run a filter over the top?


Those longer roof panels are on back to front, so ignore those and yes, I did see the tape I left behind which has since been removed
As always, thanks for stopping in and having a look
Till next time
-
Hey everyone
Some people have been wondering what kind of approach I'll be taking to painting, so for those who wanted to know, I took a couple of pics which should help answer it. I'm going to spare everyone the boredom of taking shots at every stage and just show you the first one. You'll get the idea from that. Needless to say, the painting process might take longer than first thought.


As this is as exciting as it gets, the next update should see these panels finished - or very close to it. It's going to be a lot of fine masking which I hope actually works. These photos also help me to remember where I placed all the masks.....
As always, thanks for stopping in and having a look
Si
-
yeah I've seen those - I just wish someone would up scale them to 1/2700
-
And everyone says I'm mad....

Actually you know what, I'd like to have a whole decal set for the panels like they do for the Enterprise (aztecking). That would be a massive time and money saver for sure
-
Thanks guys! I've maintained for many years that painting is my weak point in regards to modelling and I've often dreaded it, but on this occasion I can't wait to get some paint on.
-
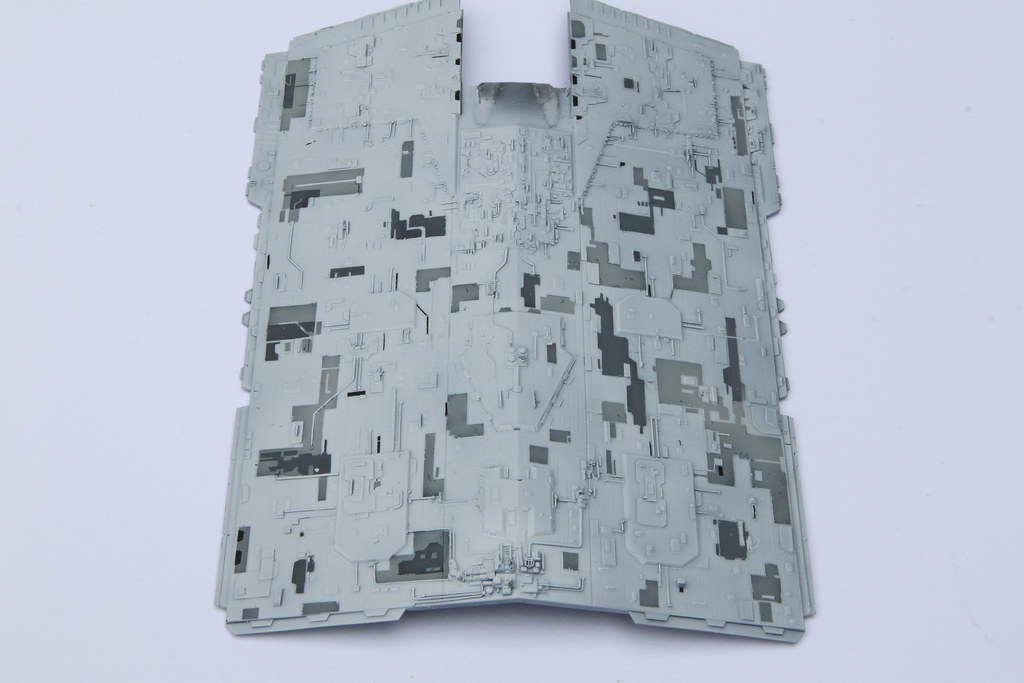
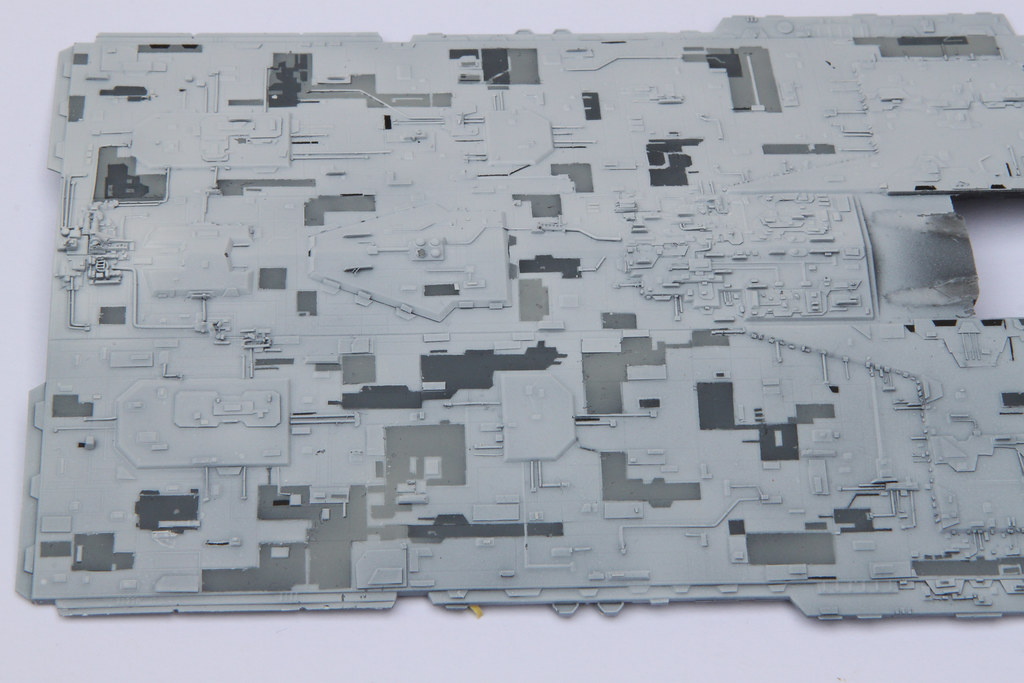
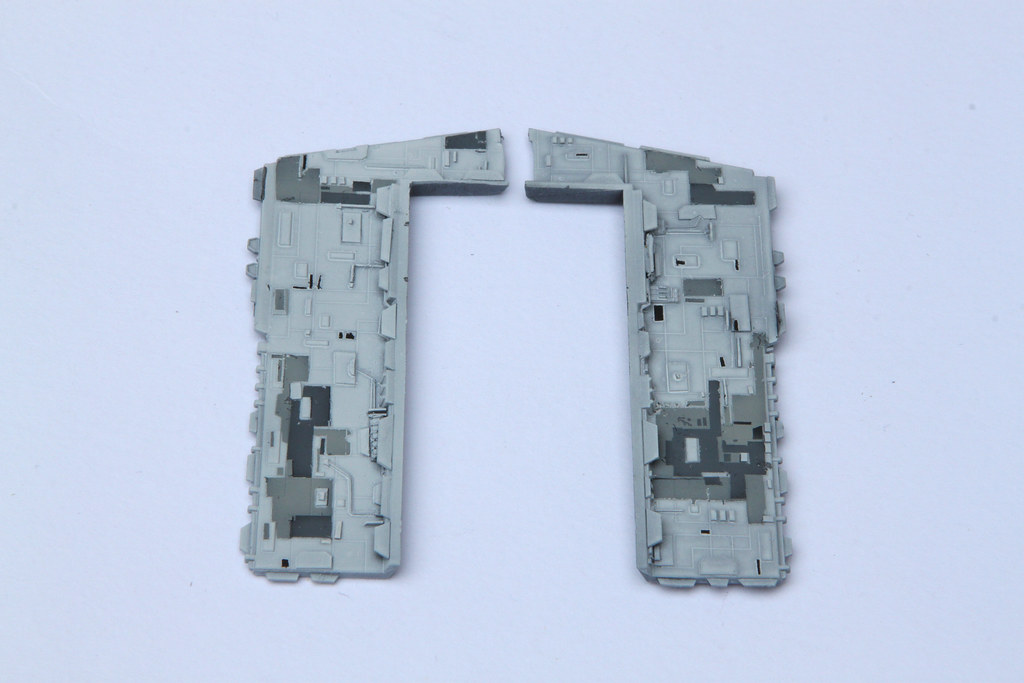
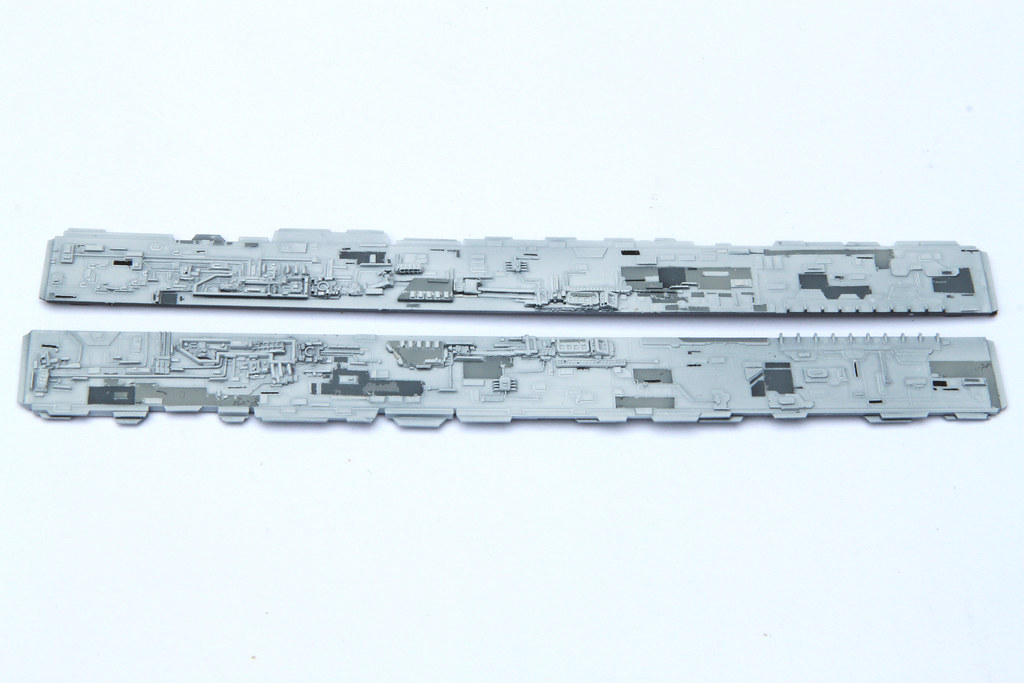
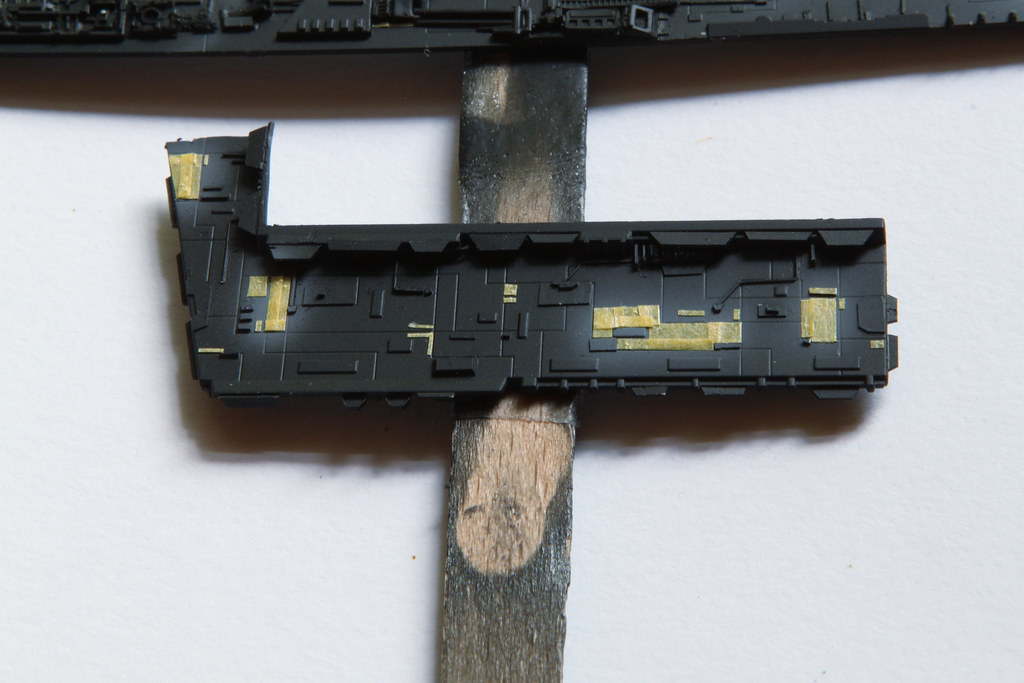
I had some free time this afternoon so I took a picture of the rook panels under the black base coat. Excuse the dust that seems to have settled on all of the pieces. I have no idea when or how it got there but the damp brush will be coming out after I've finished posting to clean them all up before the first splash of grey goes on


Anyways, that's it for now but thanks for stopping in and having a look
Til next time
Si -
thanks Janne - I appreciate the kind post 🙂 I haven't taken the pics of the roof panels yet but I will hopefully this afternoon
")
Zvezda Star Destroyer - a new detailing project
in Sci-Fi Modeling
Posted
Hi guys
Firstly, to those that have been watching this I am truly sorry I haven't updated this for a long time. I found it too hard to keep posting on multiple sites at once, so I had to drop a couple and I chose them through traffic basically. I should have said something earlier but I just haven't.
Yes, it is painted and in the process of receiving the Fibers which is currently on hold while I wait for more to arrive.
If you are keen to see what she looks like, check out LSP: https://forum.largescaleplanes.com/index.php?/topic/76130-zvezda-star-destroyer-a-new-detailing-project/
I'll post some finished pics when it comes time but it's unlikely I'll be adding any further WIP pics to this thread (sorry)