


zero77
-
Content Count
20 -
Joined
-
Last visited
Content Type
Profiles
Forums
Calendar
Posts posted by zero77
-
-
Hi,
I'm posting there as i cant have any contact from the website.
Some weeks ago, i've made an order on the site. But as you know, one cant pay directly, you have to wait for them to check the availability and how much would cost the shipment, so your order is pending, payment status "estimating". My problem is that it's now several weeks and nothing has changed.
I tried several time to send emails, but cant get any answer.
Looks like a deserted website.
It seems that i am not the only one in this situation (other people on LSP). So is there any one who know Kim, or who know what's happening at hobbydecals?
I am now building a 1/32 NMF P-47D,engine and cockpit are done, will soon close the fuse, and so will follow the painting. I've anticipate my order to get those dry transfer in time, but i am now desparing getting them...
Thank you in advance,
Nicolas
-
Thanks,
For the UK available booth, i have seen, and it is the same than in France or in Germany.
The airflow is 4m³/min, so it is 240m³/h, whereas the artograph one is 370CFM which make about 630m³/h. So even with 2 boots, it is below the artograph, and in addition the artograph airflow is downward, which is better i think.
But that is true the Euro one is quite cheaper (note that i need 2 in dimension consideration) and in the good voltage, but i think i will take the artograph.
I had several emails with them, they informed me that with a good voltage converter it will be ok, the only consequence of the frequency difference (50Hz in Europe while 60Hz in America) would be the motors to run a bit slower.
-
Without damaging them is a lot like tyring to get all the toothpaste back in the tube unfoturnatly.

I have had very limited success doing this. Yeah, I think Hot water is your best bet. It's hard to keep the water hot however on the surface as it's naturally going to keep cooling toward equalibrium. Dare to try a hot water bath? For example, dip the wing in a cirulating hot water stream?
Thank you, i will try it.
The concerned decals are the 2 "static vent..." and "do not paint - torque to 120/140 Lb. In." stencils on the nose of the F-4J's. I placed them too high.
I tried to reprint them on decal sheet, but it is too small, and the printing is not clean.
If i cant find any other solution, i would use those reprinted ones, anyway.
-
Thank you for your answers.
I got a response from artograph today :
Hello and thank you for your interest in the spray booths. Unfortunately, the spray booths are not CE approved so our importer in France does not carry them. If you have an interest in one of our projectors on the other hand, I would be happy to give you details of the ones that are CE approved!I really dont a projector, but i will ask them if it would be Ok to use it with an adapter, as i dont mind order it in the USA.
Marcelo, there is also the frequency to consider. I think frequency is 60Hz in the US and 50Hz in Europe, and i think it would impact the fan rotation speed or make them overheat. (but i have to confess i am a dumb in electricity...)
-
Yes to all the above. You may be able to salvage your current work by removing the decals by applying hot water and lightly scrubbing. Than doing the gloss/Future coat and applying a new set.
I have a different problem, i have to remove decals without damaging them, from a smooth futured area. I have placed them at the wrong place.
I tried with some microset but they dont want to move, while i even start to damage the paint underneath (no problem i will respray). Do you think it would be ok with some hot water?
-
Looking around the net, I read that using a step down transformer (220v to 110v) may be a possible solution.
When i start to paint with an airbrush, i bought my first air compressor in USA, and it was in 110v. I did not have any problem with a 110 to 220v adapter, and it even happend that i forgot to plug the adapter and directly plus the compressor to 220v without any damage (you quickly realize something is wrong when the motor turn twice its normal rpm...).
But in an amazon.com page for a artograph booth, it is clearly said :
* * * * C A U T I O N * * * * 110V Artograph Products are NOT designed to be used in 220/240V countries WITH or WITHOUT voltage transformers or adapters. Damage to the product will occur and IS NOT covered under WARRANTY. * * * *So i am worrying about using this kind of adapter...
-
Did you email artograph to see if the have a 220v version?
No i have not, but on the artograph site, it is said in the technical datas that it is 110v powered.
I will try to send them an email, and we will see....
Spray booth seems to be more common in America than in Europe or Asia. American lungs say "thanks".....
-
Hi,
I want to buy a spary booth in order to avoid breathing all of these toxic fumes, but i need a quite big one (30") because i only build 1/32 kits.
The artograph 1530 seems to be great, with its downward vacuum, but i cant find any one in 220v, and i live in Europe. On Ebay, it is written that even with a 110 to 220v adapter it would damage the booth.
So, is there any way to adapt it, or does it exist any large and good paint booth in european voltage?
-
Hello,
Desperatly looking for a set of pitzmodels photoetched Su-27 nozzles, i have just found that Nothern Star (from Latvia) is about to release that :
I dont know if it would be as good as pitzmodels was, but it seems that it could be a good alternative.
Hard to say with only the few pictures, but the shape seems to tend to be narrower at the extremity, like a kind of conic shape, while the pitzmodels was just a bit open just like the real thing. It has to be confirmed....
Anyway, this set still is not available yet, so perhaps we could have some more reviews soon.
I am about to begin the building of a Su-27 (waiting for some Zacto parts and new Akan paints, and also had to finish 2 phantoms...), so i find this new stuff very interesting !
-
Hi everybody,
Does anybody know if a 1/35 K-50 model exists or is intented to be released soon? I looked for it everywhere but found nothing. I cant understand why? There is many 1/72 models, some 1/48, but no 1/35.
Same thing for the Mi-28...
Another question : is there any conversion for the 1/35 Mi-24V from trumpeter in order to make a Mi-24P? (side mounted twin-barrel 30mm gun instead of the front mounted .50 gatling gun)
THank you by advance !
-
I've never seen such a clean work at this scale!
I would have never tell that it is 1/72 if i have not read it...
It is great !
-
Thank you,
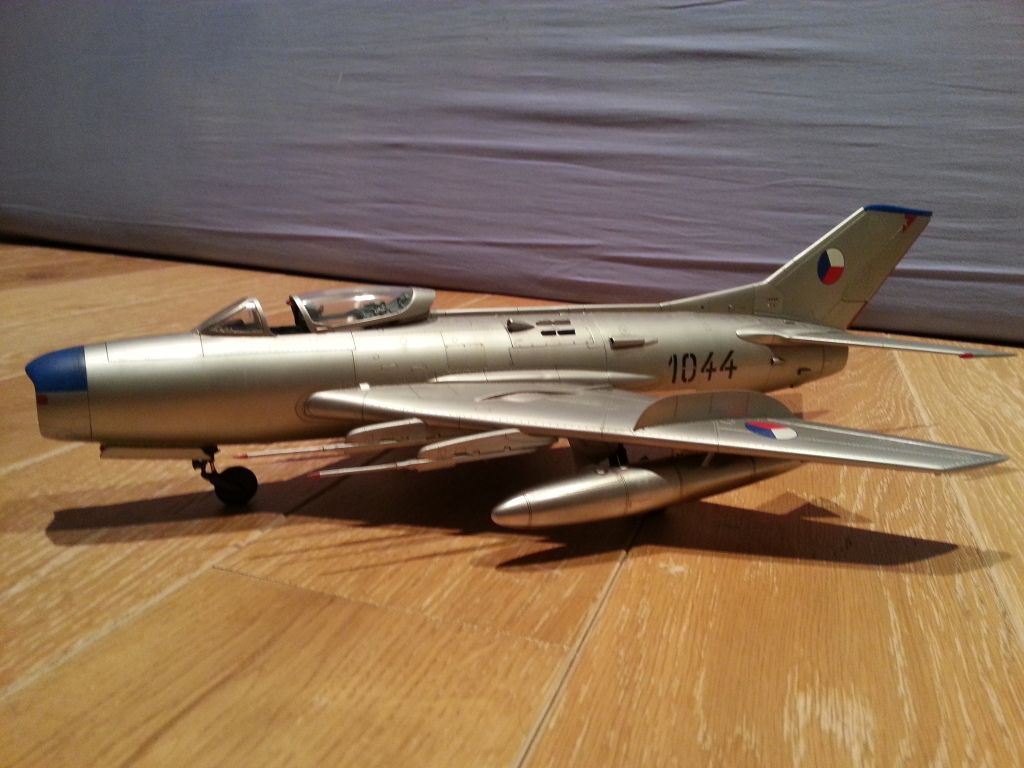
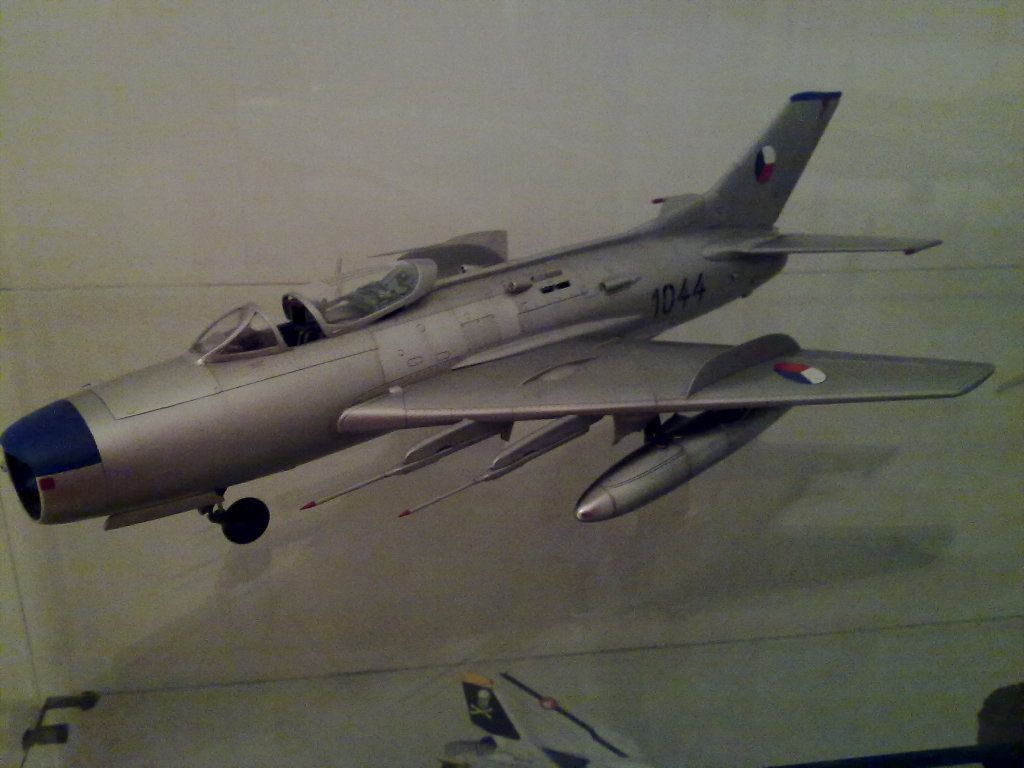
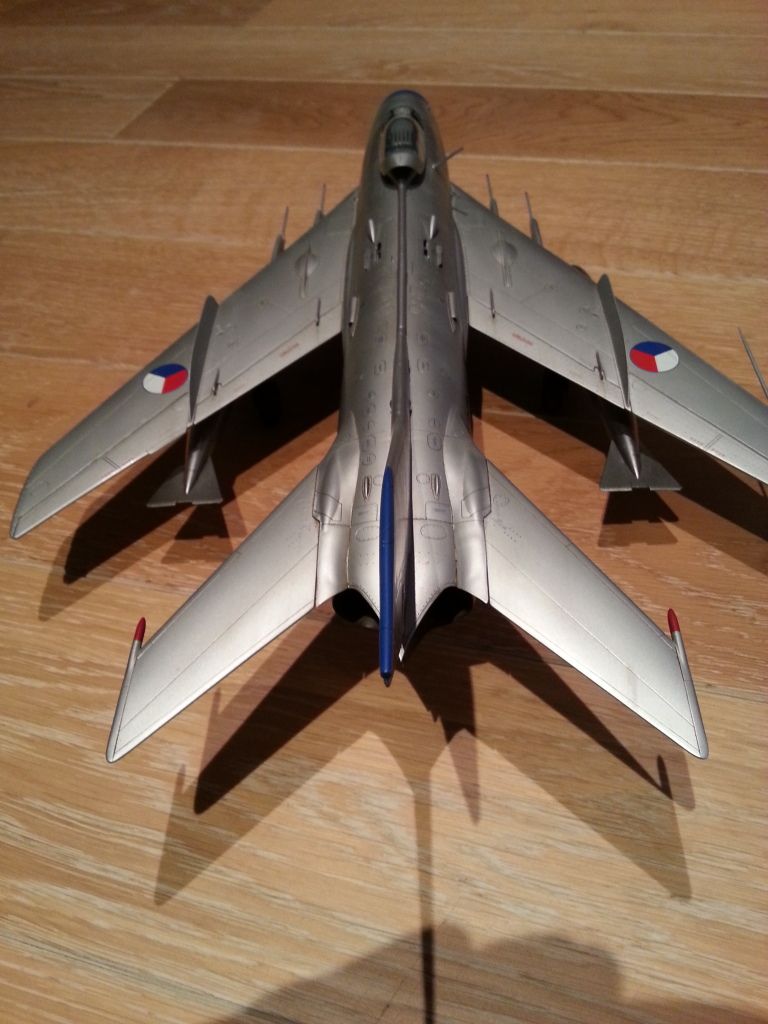
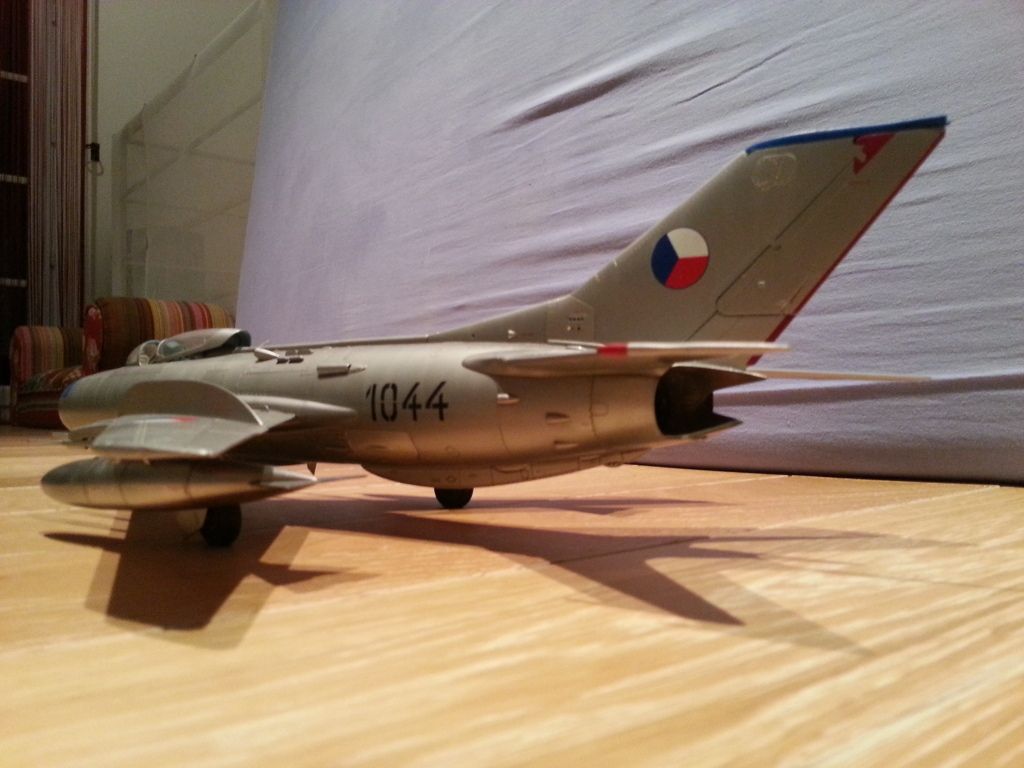
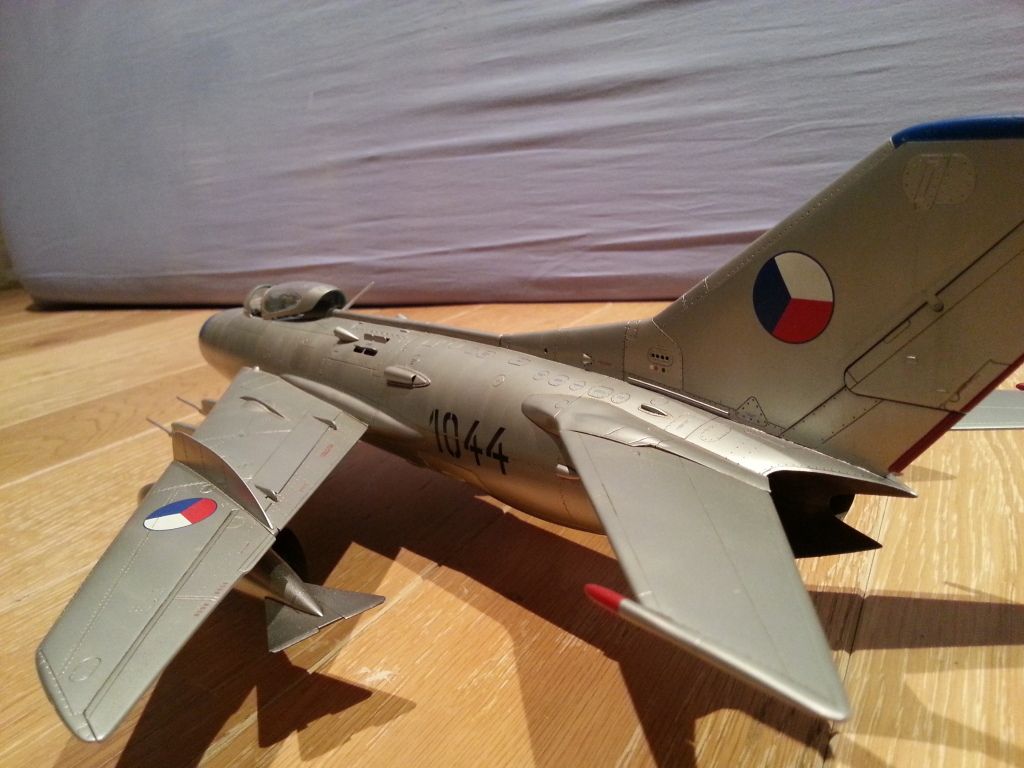
Just the angle of the camera, but in your fifth photo, the tail fin seems to leaning to the left???Yes, it is because of the angle of the camera. The picture was nos shot perfectly straight above.
I will try to make some few more shot, with a better light, because on those ones, the shades of metal finish are bitten by the excess of light, and the very slightly weathering, too. I tried to make this aircraft not so dirty, as it appeared on the original picture, but it is possible i was a bit too shy with that.
please tell me this trumpeter kit - is it quite good? I know its one of the earlier kits - but it looks really good ?It is both a good and a bad kit ! Yes it is one of the early trumpeter kits, with MIG-15's and MIG-17's. Actually, the kit is not so bad for its quite cheap price for this scale, but it is far from a tamiya or event a recent trumpeter kit.
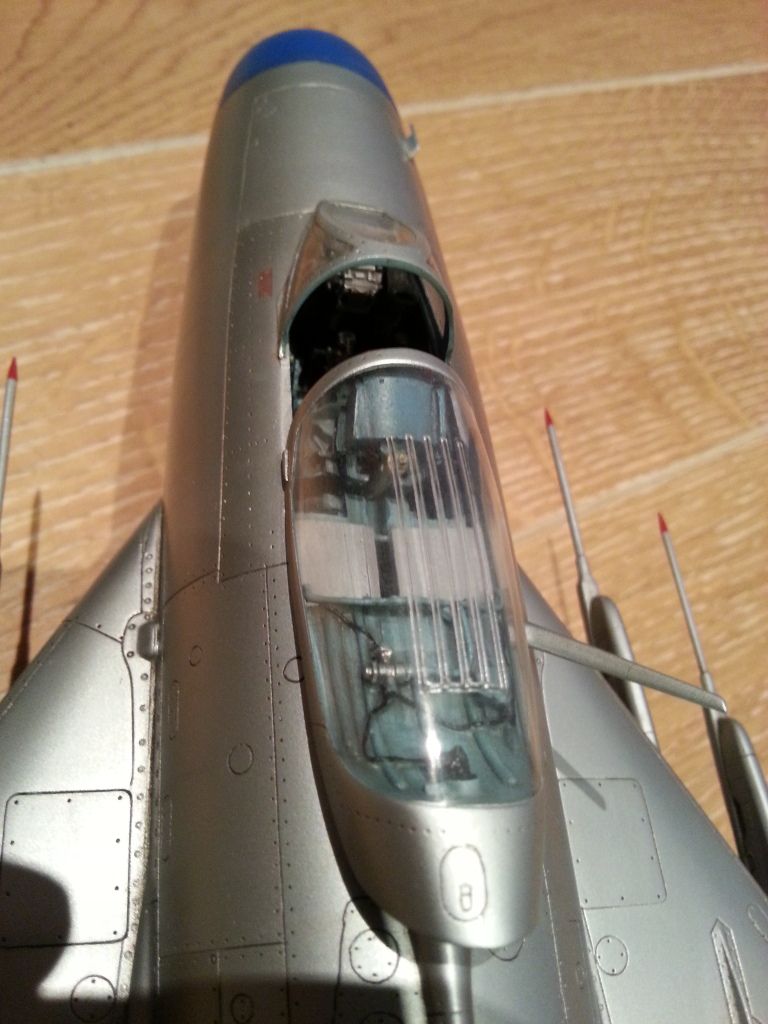
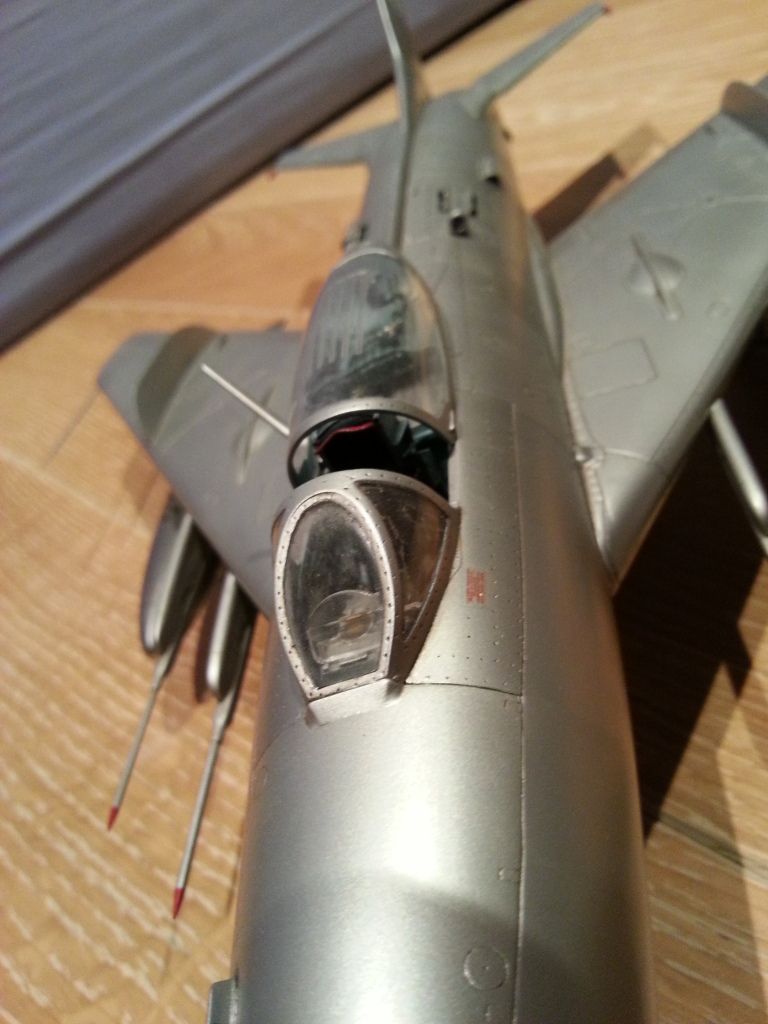
The dimensions seems to be good for me, excepted for the windscreen, which is too large compared to the real thing. There was a vaccum formed one with the pavla resin cockpit set, but it is exactly the same than the trumpeter one, but without the heating rails up the canopy, so i use the injected one from trumpeter.
The engraving is the bad thing of this kit. It is quite irregular, quite good on top of the fuse, but almost absent on some areas, especially on the sides. So i had to engrave it again as anyway it is a bit fuzzy and not so deep. Adjustments are quite ok, but needs quite a bit of putty, though.
The wing are only glued on the fuse, and i thought it should be a little fragile, so i made it stronger making somes holes through the fuse and putting 2 large pieces of sprue that could be glued inside wings. This way it is very strong.
The kit decals, especially stencils, are good quality, but they printed nonsense stencils... There is 3 aircraft to make : a East-german, a chinese and a soviet one. I cant tell for the chinese as i cant read it, but for the german the stencils are in english language ("no step" !), and for the russian, they are in a strange traduction of english written in cyrillic ! ("но стeп")
So i did use the russian ones as i had not anything else to do.
So this kit is quite good, but with some (very) little issues. Not so bad for the price, and quite fun ! For those who like early migs, those early trumpeter kits are the only ones existing anyway, but they are quite OK with a little work.
-
I also thing you should let it go.
I you only spotted it after building, priming, glossing, posing decals and varnishing your model, it is obvious that this seam must be very hard to spot.
I know that when we find a defect on our model it is then almost impossible to stop thinking about it, and we just only see it on the model. But you certainly will be almost the only one.
-
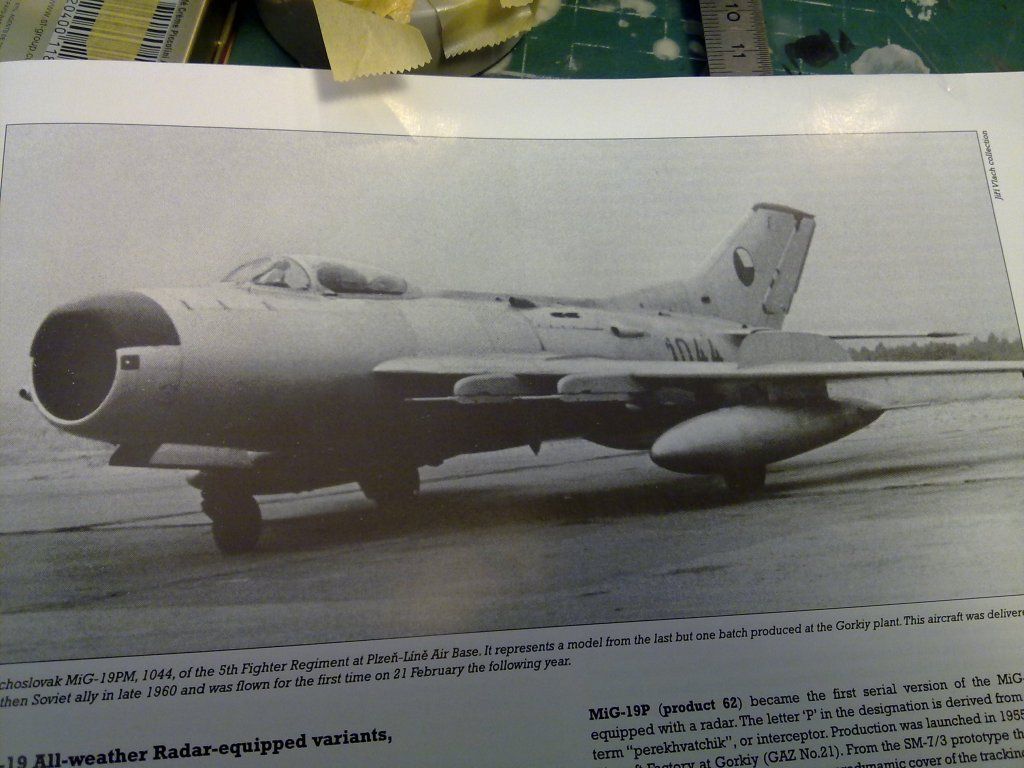
The full size one :
-
-
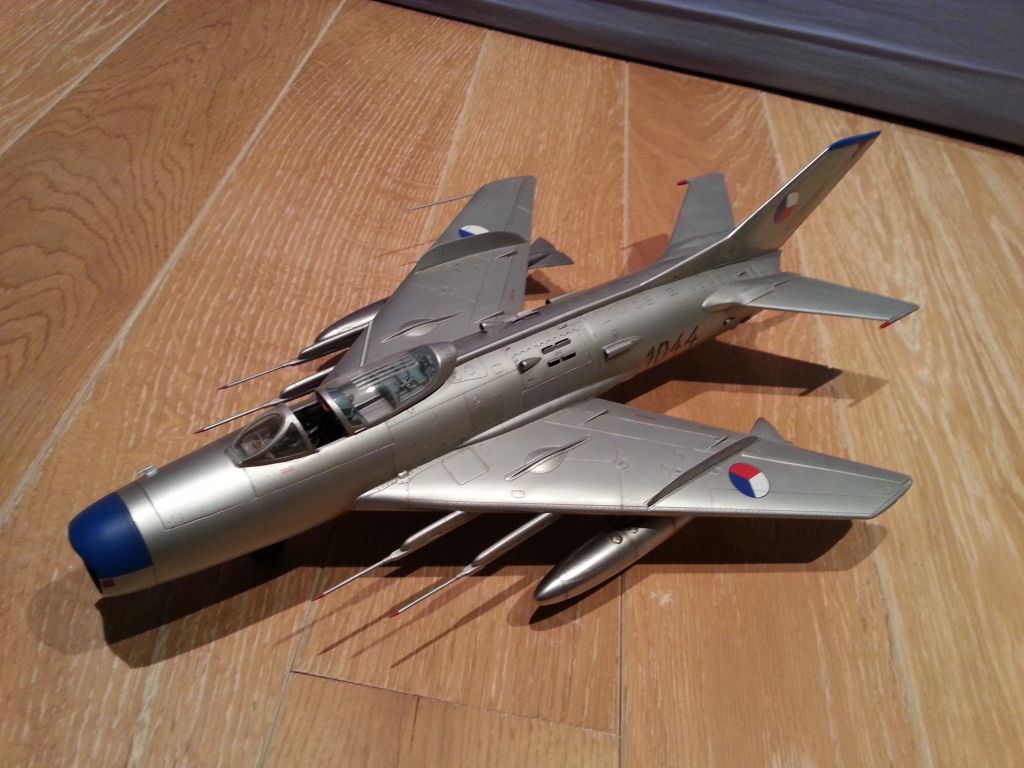
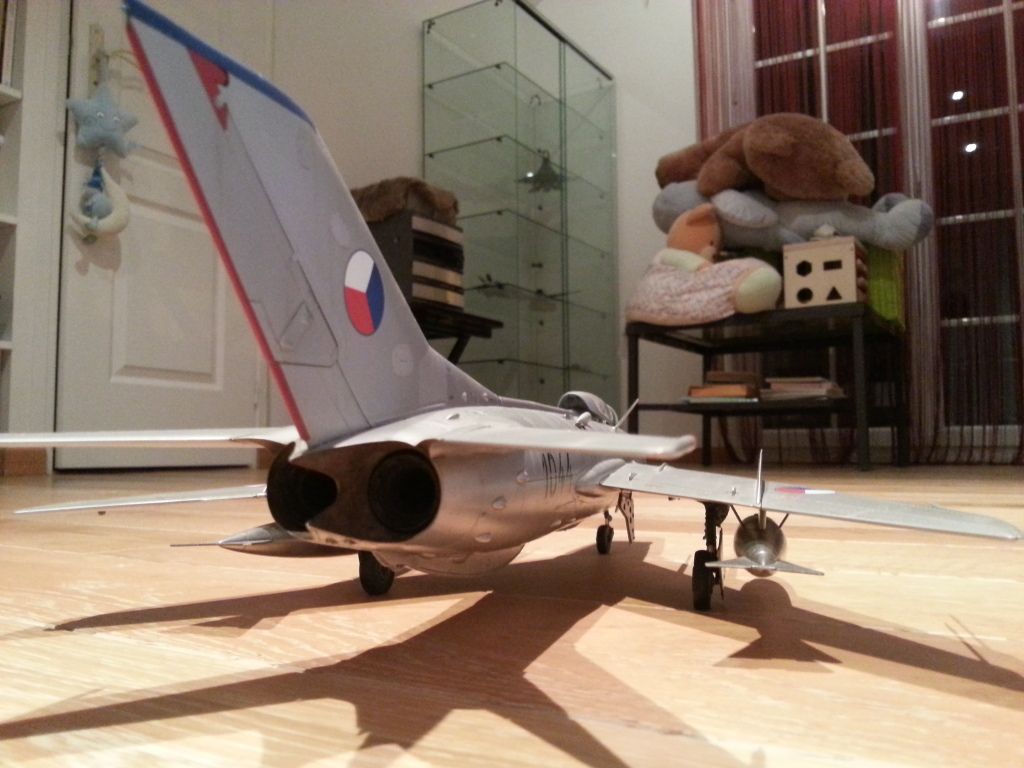
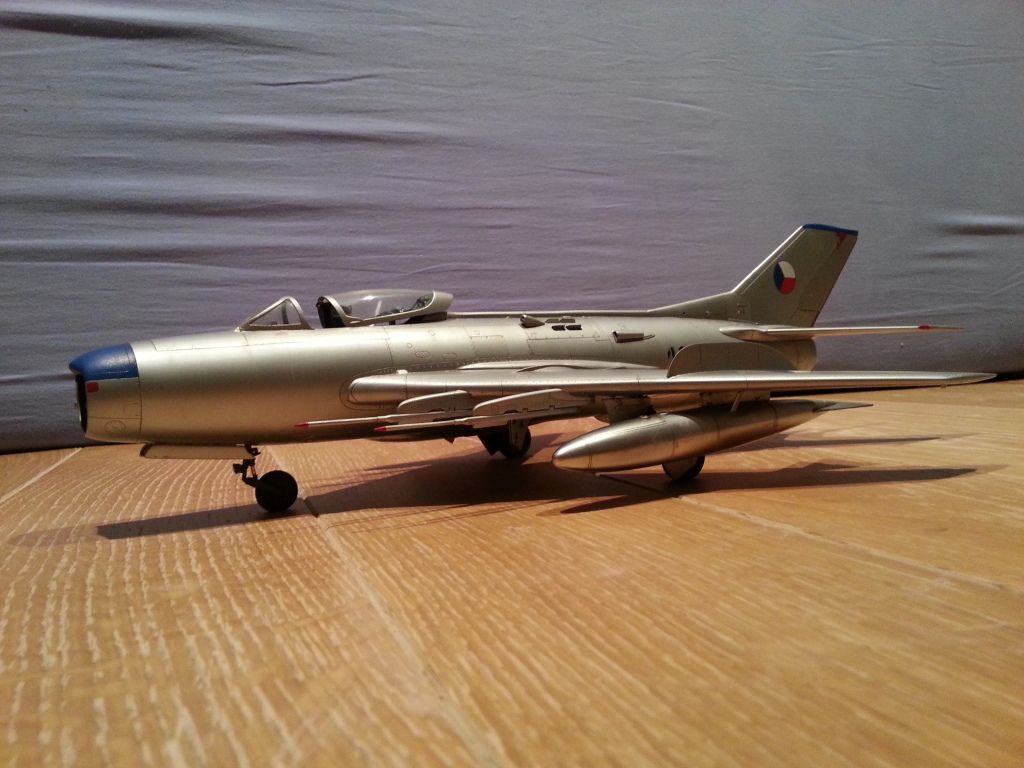
Hello,
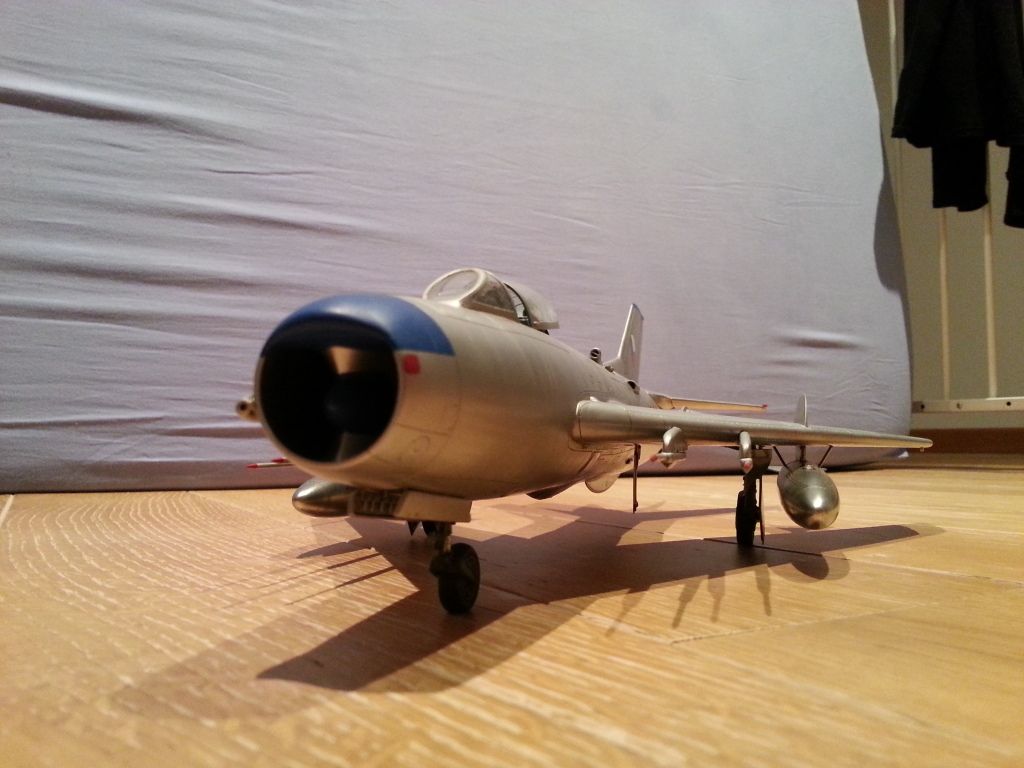
It is quite some time i have finished it, but i have decided to ask you what you think about.
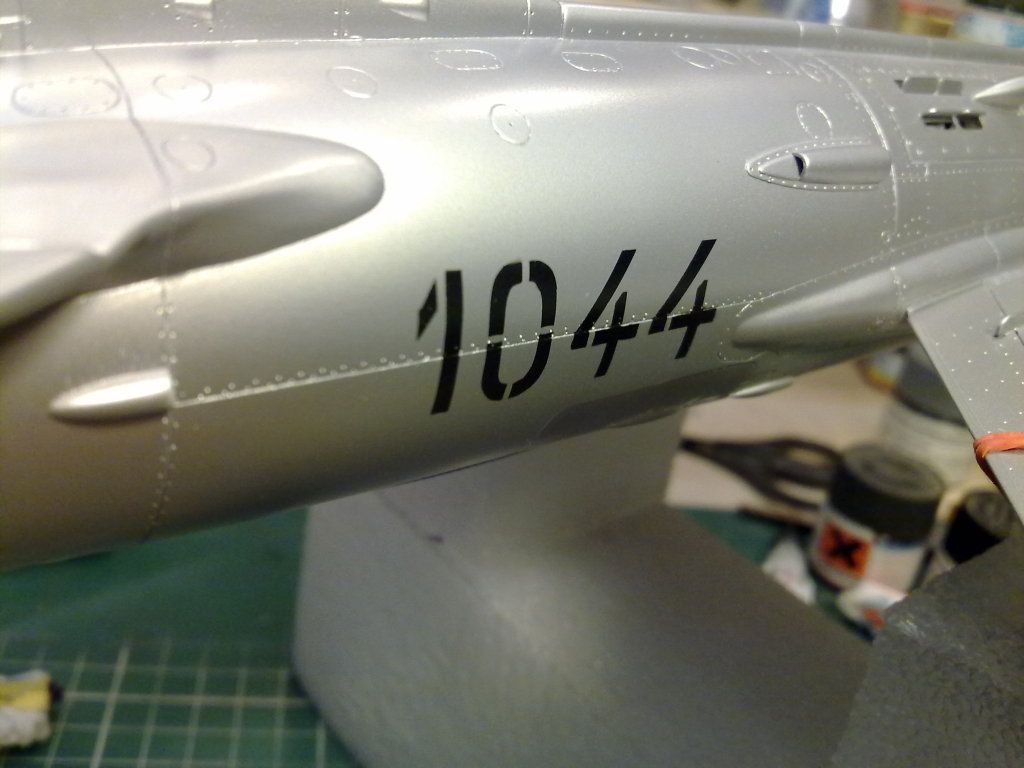
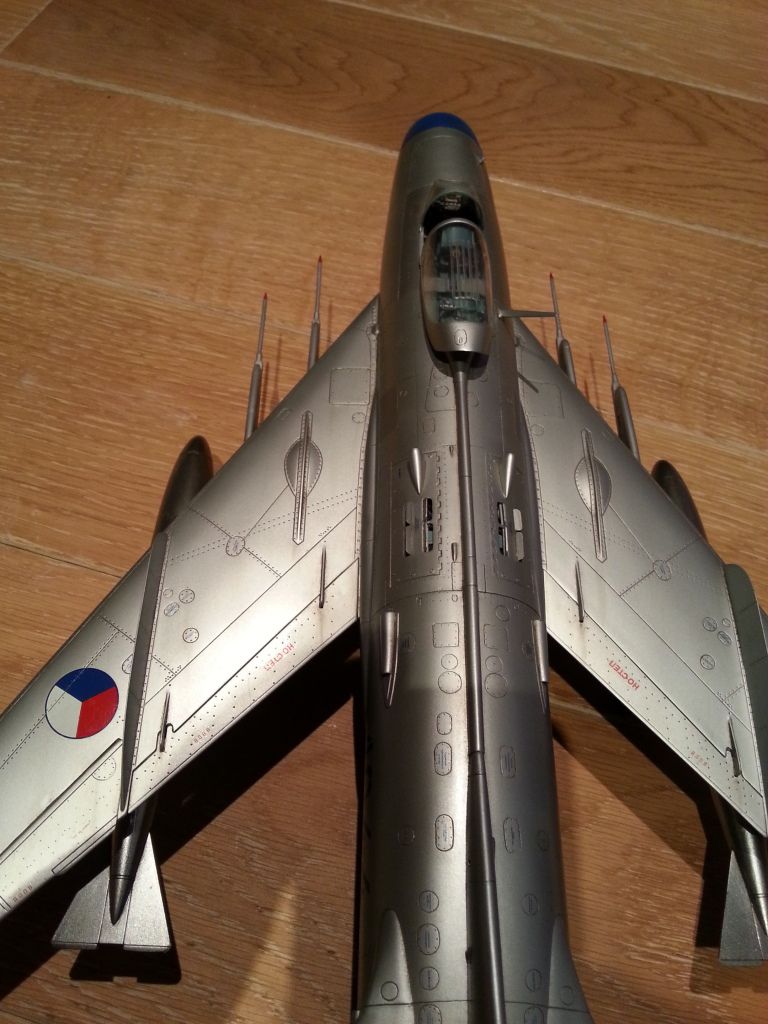
It is the 1/32 trumpeter Mig-19PM, with a PAVLA resin cockpit, and czech marking from a Mig-21 decals sheet. The number was painted with a custom made stencil as i did not have any decal for it.
I have rescribed almost all of the panel lines (as they were not as deep as i wanted), then sanded, puttyed, sanded again, polished, then i applied a coat of ALCLAD grey primer, then polished again (with micromesh), then painted with various shades of alclad.
I just think that it is not enough weathered. In addition, my light weathering almost dont show in the pictures (it is a bit better in real). I did not want to build a very dirty, weathered and used aircraft as one can see in the eastern museums or on the road sides, but neither a brand new one straight from the arsenal.
Please, let me know what you think ! Thanks !

-
Hi,
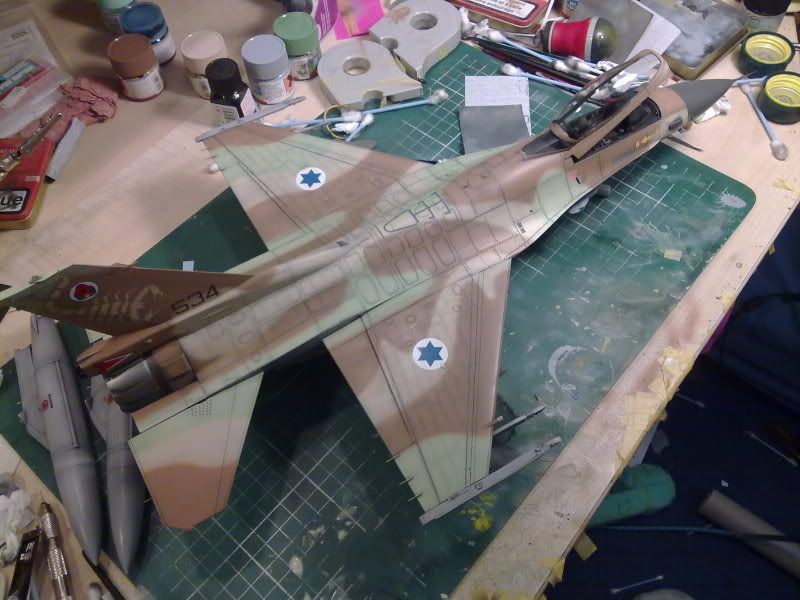
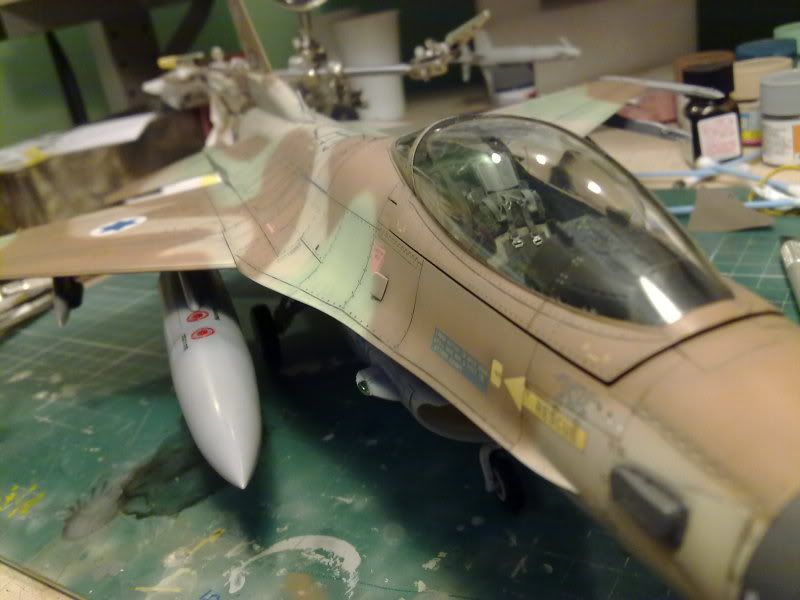
I have almost finished my F-16C barak, from tamiya F-16CJ 1/32. I will make a step by step review of this (i have taken many pics of all the process).
But i have got a problem : there is an axe on the flaps, that go in the body of the aircraft, with a little pin which is locked in a little rubber cylinder, in order to let the flaps movable.
I think one of these pins is broken on my right flap, as it is not tighten anymore. The flap is not locked, and go down by is own weight. There is quite a float and a little gap between the wing and the flap.
And now the plane is almost finished, painted and so, i dont know how to correct it. Maybe the only solution is to glue it to the wing, but it wont be movable anymore...
I will try to make pictures this evening, because my english is quite bad for this technical stuff.
But if anybody has met such a problem and have any idea, please let me know !

Thanks !
-
There is also a clear gloss coat from alclad. I think it should be adapted for metallic finishes. I bought one bottle, but have not try it yet.
My next project is a 1/32 MIG19, NMF, so i should be able to say what the result is.
-
Hi,
Very nice job, i love this version of the viper, and i'd like to build one soon.
I also think there may be not enough contrast between the green and the sand colors. What is strange is that i also use some gunze sky H74 on my barak, and it was not so bright as it is on your sufa. Anyway, i found it too bright however, and so i also add few drops of H312 in order to make it a little bit greener and more contrasted, and i think the result is not so far from the real stuff :

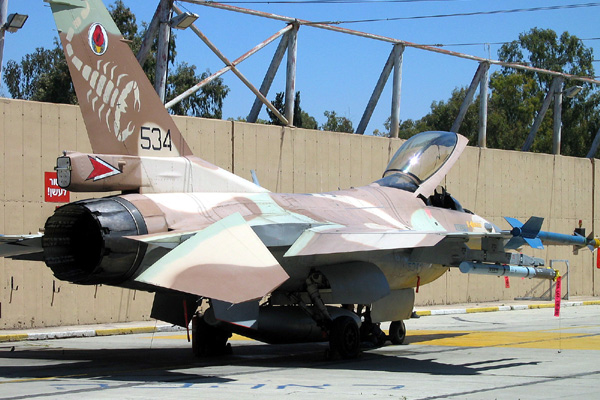
seems darker on some other photos :

On the other hand, my camo is too blury i think. Marcin's one is perfect, and yours is also very good.
Anyone dealt with Superbug Models (a.k.a Daniel E Phelps)?
in Bad Trader Alert
Posted
Hi,
I hope this post wont be misinterpreted. I dont want to speak ill of anybody, but in that case i think it is really justified. This guy is a crook and he sullies the reputation of all the nice and honest resin producers.
More than 2 years ago (31st March 2012) i've pre-order to Superbugmodels (Daniel Phelps) a full detail set for the F/A-18E. I paid $165 for it.
It was due to be released very soon, in early April.
But it hasn't. I wasn't too worry because Daniel Phelps always answered my emails and even sent me pictures of his WIP. He was saying that he was late for many reasons, but that the detail set would be release soon. He ave sweared that i WILL get my order.
One year passed. Then another year. I'm a really a nice guy, i know, you can even call me naive. (anyway i could not do anything else than waiting).
And now he does not answer anymore since late 2013.
This guy has ripped me off, and i am not the only one given all the topic about him that we can read on many forums.
But i've just have someone from paypal at the phone this morning. I've made a complaint about him (even if the 45 protection days are way over, a complaint is a complaint). And she told me that more numerous we are to make complaints toward him, more efficient will be the paypal action.
So i just want to say to all the other people who has been ripped off by this guy to go to paypal complaint. If we are dozens or even more, his paypal account can even be restrained or closed. That may not bring back our money but that's a bit of justice.
Thanks.