

Joel_W
-
Content Count
5,967 -
Joined
-
Last visited
Content Type
Profiles
Forums
Calendar
Posts posted by Joel_W
-
-
6 hours ago, pg265 said:
Hi Joel,
Great work in the Lotus!!
Bravo.
Pascal
Pascal,
thank you my friend. It's not up to your build standards, but I'm slowly, very slowly getting there.
Joel
-
Chuck,
While I've converted to auto modeling these days, I do follow a few builders here, and you're on the top of my list.
Just an outstanding tutorial and walk through on painting insignias, numbers, & Letters. Very well done, as well as how easy it is to understand and follow. There's been plenty of times I've tried my best to follow modelers using masks, but more often then not it got confusing to the point that I was just plain lost. Not so this time.
Joel
-
1 hour ago, Ben Brown said:
Joel,
You are certainly doing that beautiful car justice! I'm still taking notes for when I build mine. 😁
Ben
Ben,
Thanks for the vote of confidence. My only issue with the kit is the engine covering plate which is 100% fictitious, and looks the part. There is a AM engine for it, but it's sold out. I'm getting their engine for the Fujimi Ford GT40 MK1, but they don't make one for the MkII car.
Joel
-
8 hours ago, Slartibartfast said:
Looking good!
Startbarfast,
Thanks for your thumbs up. It's always much appreciated.
Joel
-
33 minutes ago, lockheed2004 said:
Email on Tamiya 1/48 scale P47D-25 Bubble top, shrink wrapped, Eduard cockpit masks $20
Brian
Brian,
Please email me your zip code so I can get you a price for shipping. I'm using USPS flat rate boxes.
Joel
-
I'm cleaning out the aircraft kits from my stash, as I've dedicated my retirement modeling to race & classic road cars. All open boxes have the sprue trees still in their sealed bags. Some come with AM parts as listed.
Sale and shipping to the lower 48 states only. Shipping is extra.
If interested in any of the kits please email me at:
jaw101@optonline.netNone of these kits are listed on ebay.
Method of payment to be worked out at time of sale.
thanks,
Joel
Academy 1/48 scale P51-B Blue nose. Shink wrapped. Yahu IP. $25
Academy 1/48 scale P51-B Blue Nose. Shrink wapped $20
Academy 1/48 scale SBD-2 Dauntless. Eduard glass masks. $20
Accurate Miniatures 1/48 scale SB2U-3 $25 PENDING SALE
Tamiya 1/48 scale P47-D-20 Razorback, Eduard cockpit masks, Quickboost seat, $25
Tamiya 1/48 scale P47D-25 Bubble top, shrink wrapped, Eduard cockpit masks $20 PENDING SALE
Airfix 1/48 scale Spitfire Mk IA, Eduard cockpit masks, Yahu IP $20
Eduard 1/48 scale Profipack Spitfire Mk VIII $15 PENDING SALE
Eduard 1/48 scale profipack F6F-5, Eduard Cockpit masks $15 PENDING SALE
Eduard 1/48 scale profipack F6F-5, $15 PENDING SALE
-
Chuck,
I'll be following your stencil adventures with much interest, as I've yet to try them myself
Joel
-
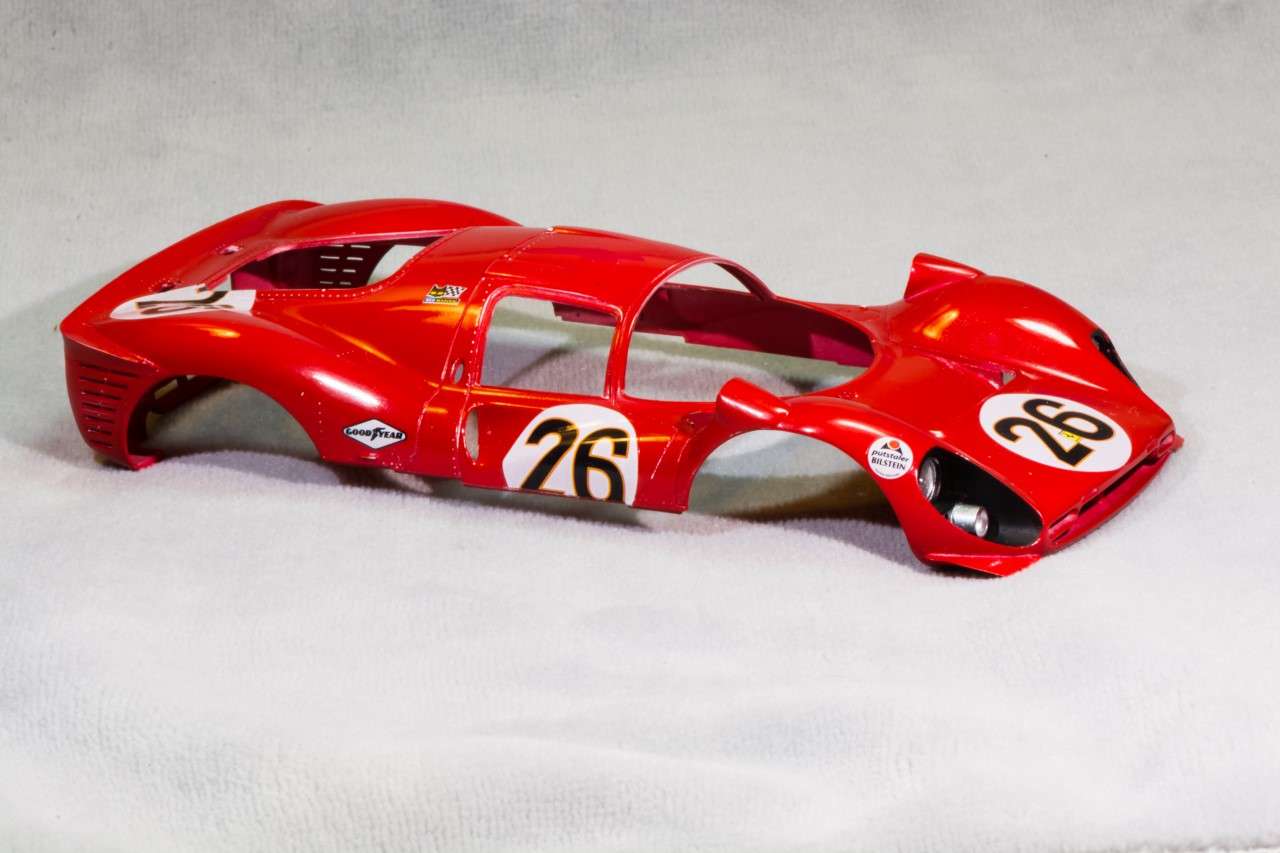
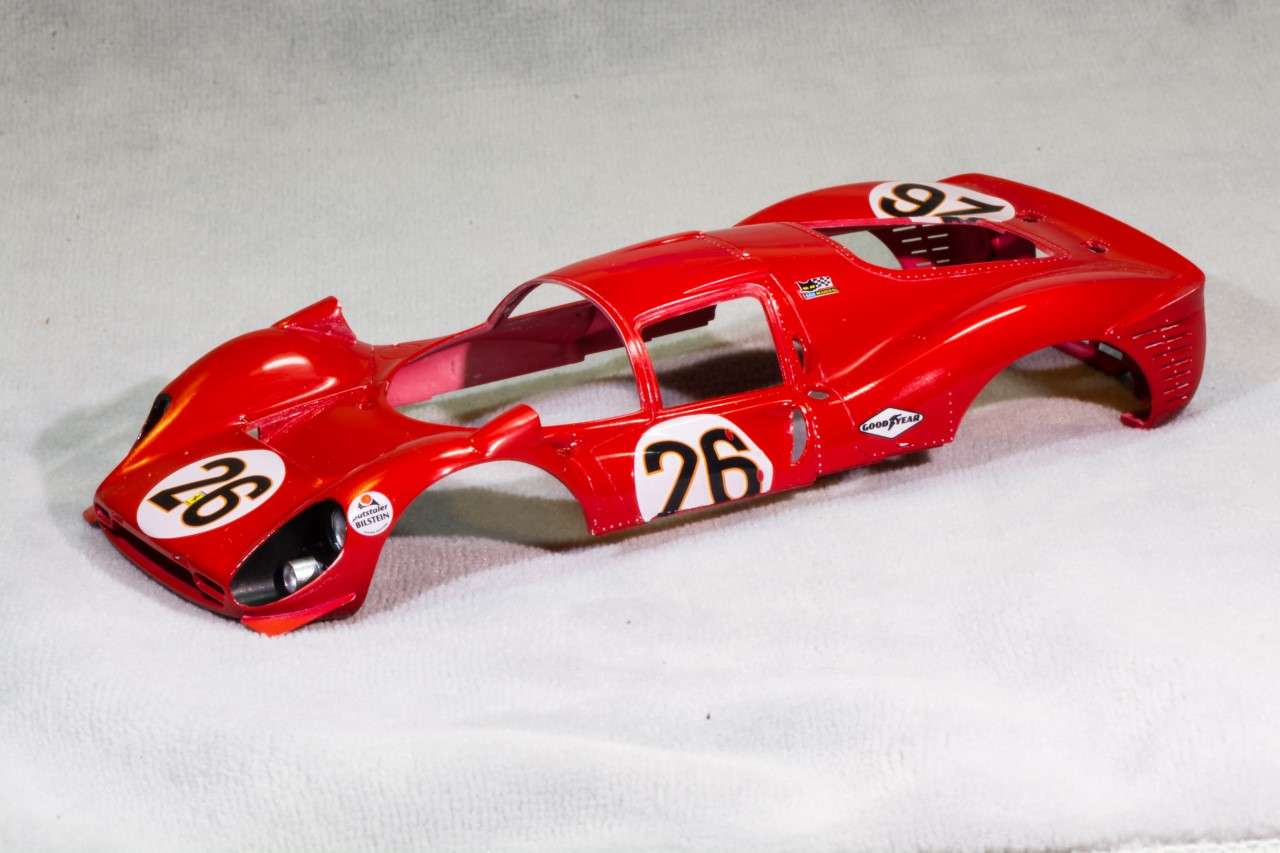
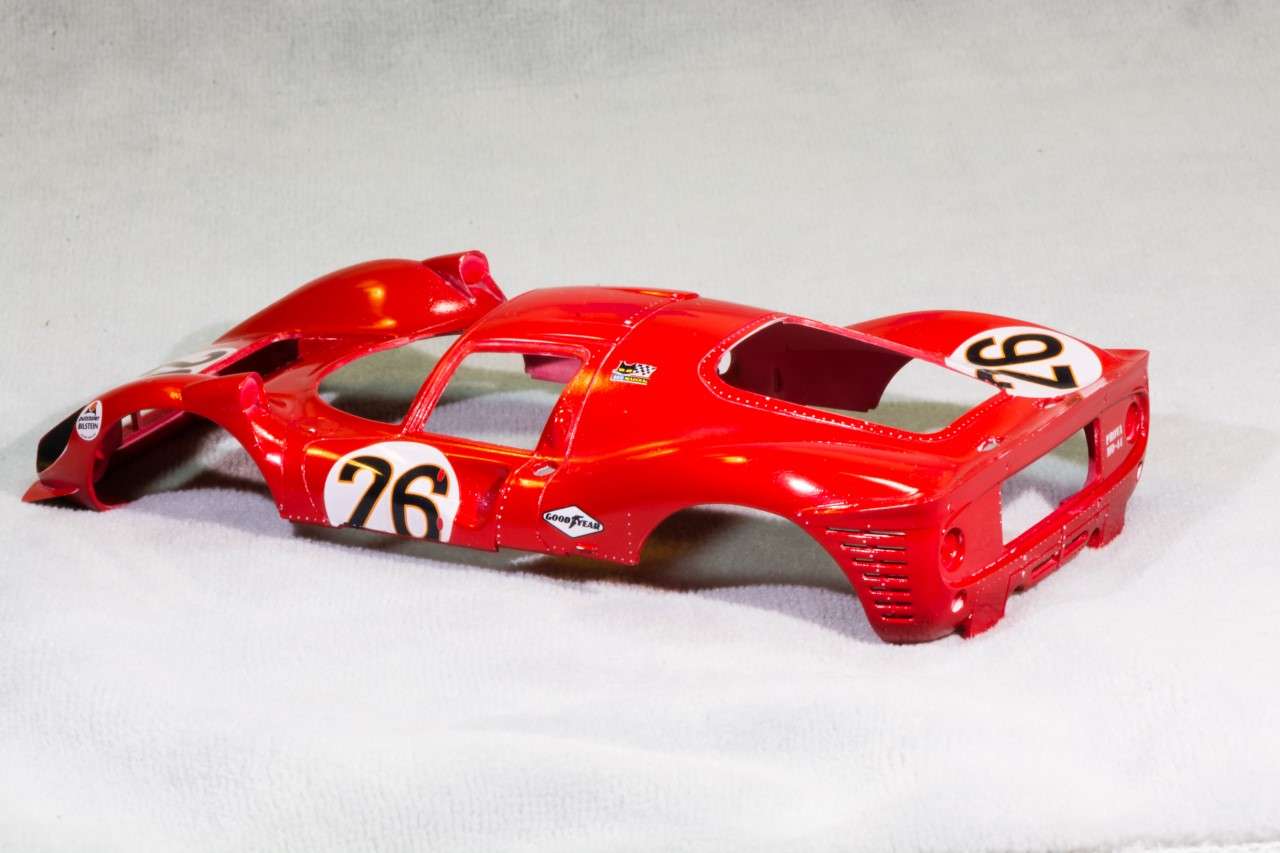
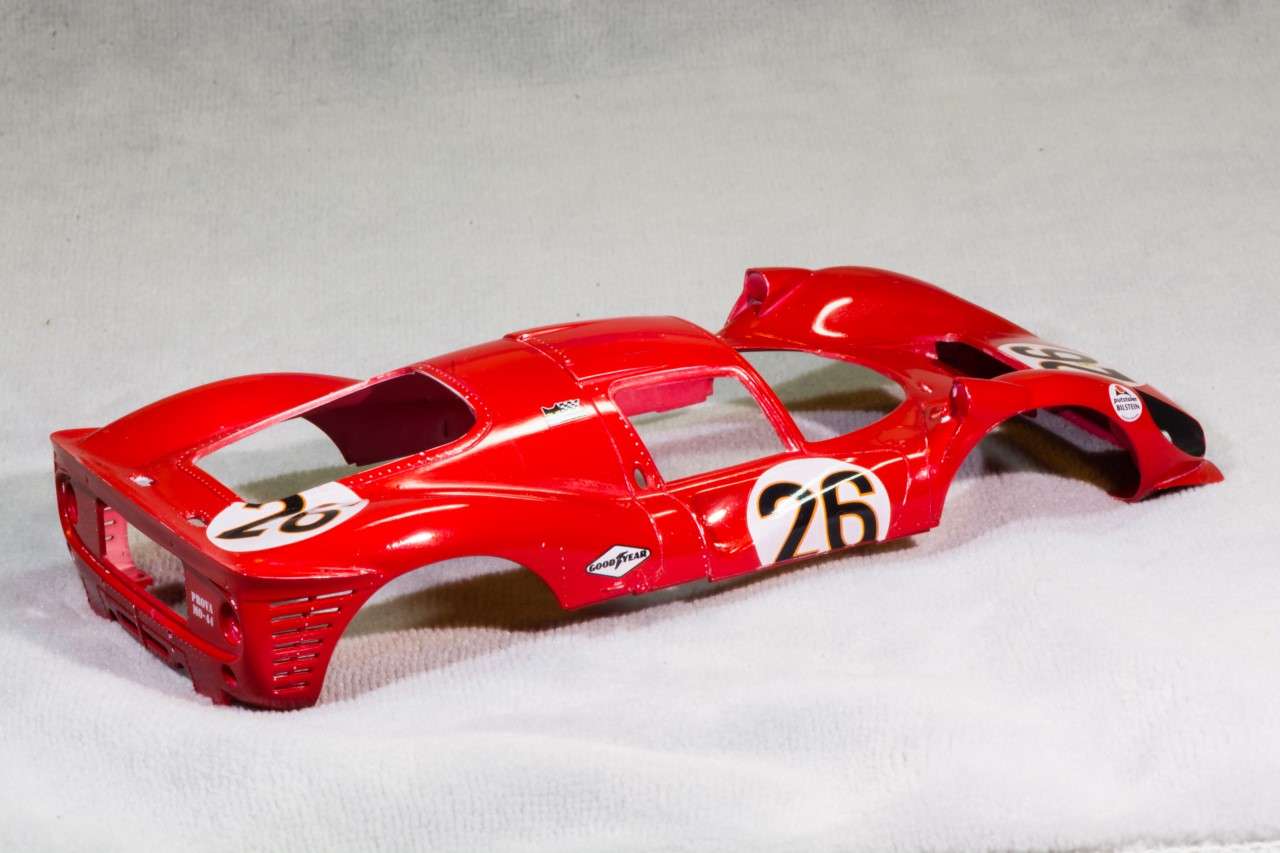
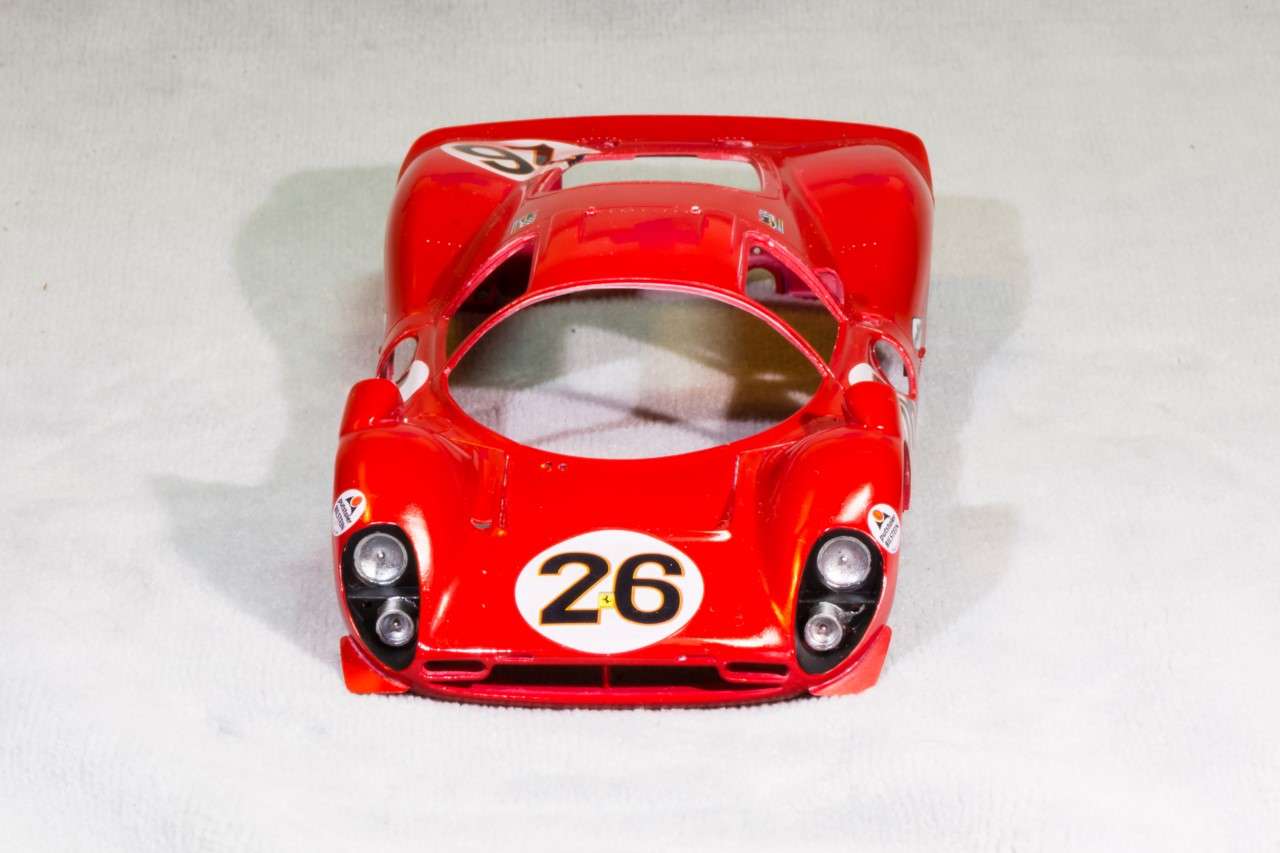
Well, another week and time for my next update on the 330 P4.
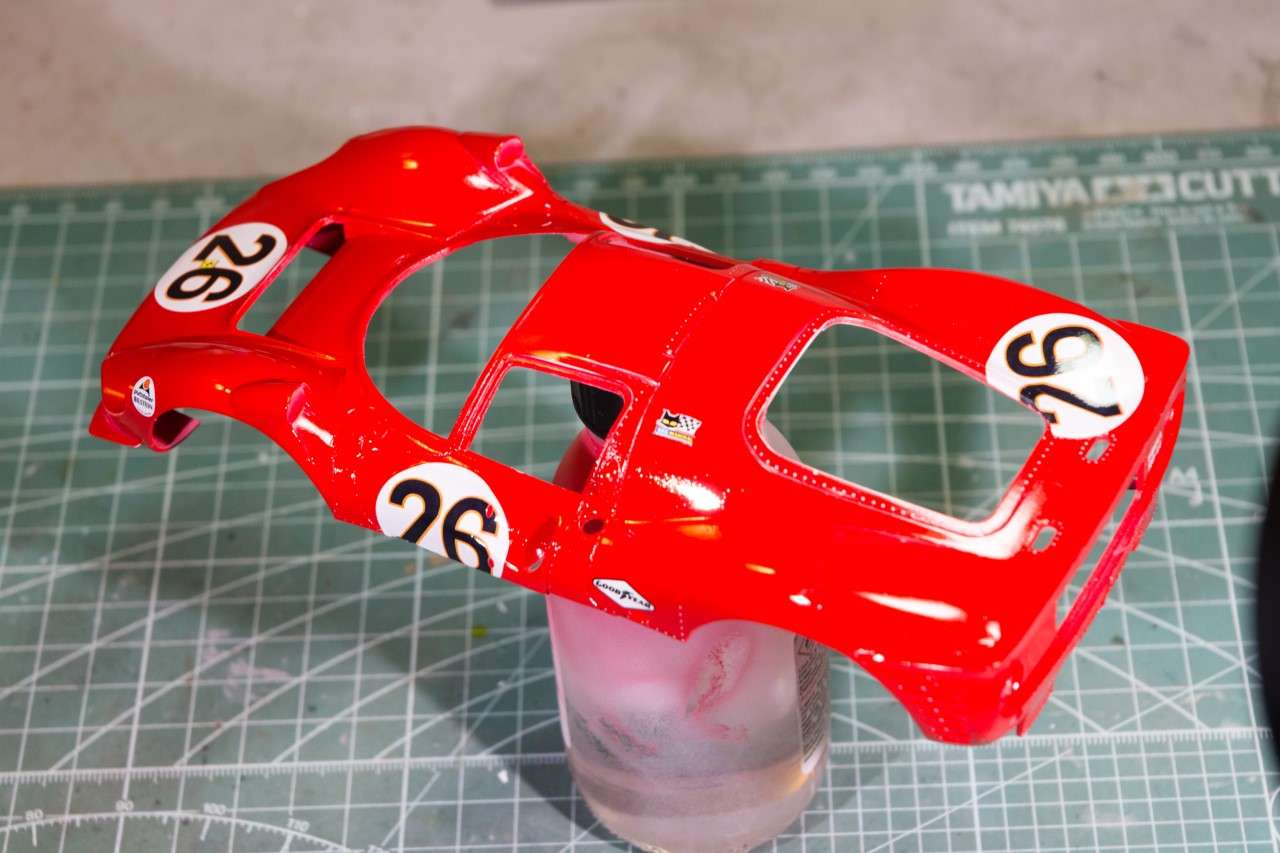
Since my last update where decaling was finally finished, and the Mr. Hobby/Mr. Color Clear Lacquer applied. I was really happy with how the clearcoat self leveled as I used their proprietary leveling thinner. As expected there is some slight Orange peel, and the shine wasn't as deep as I had wanted. So the final phase of the paint process was about to commence.
I very carefully with a lite touch, started to polish out the clearcoat with Tamiya 3,000 sponge wet, and washed off the residue as I went along. When I was finished with the wet sanding the decals looked more like they were painted on, but in all honesty, the IndyCal decals looked darn good before I wet sanded them.
Next up was the 3 part Gravity polishing system. When I was finally done, I just stared at the shell. I've never achieved a finish like this before.
But there's a lot of dried residue in the recessed panel lines, so I used a wet (with water only) Q-tip, but most of it still remained. So I got out my Iwata M1 AB, and simply air brushed close up those panel lines with plain old water. Cleaned all the recessed lines in two min. flat. the shell dried by the time I had cleaned the AB and put it ,as these days I use a pair of Grex ABs.
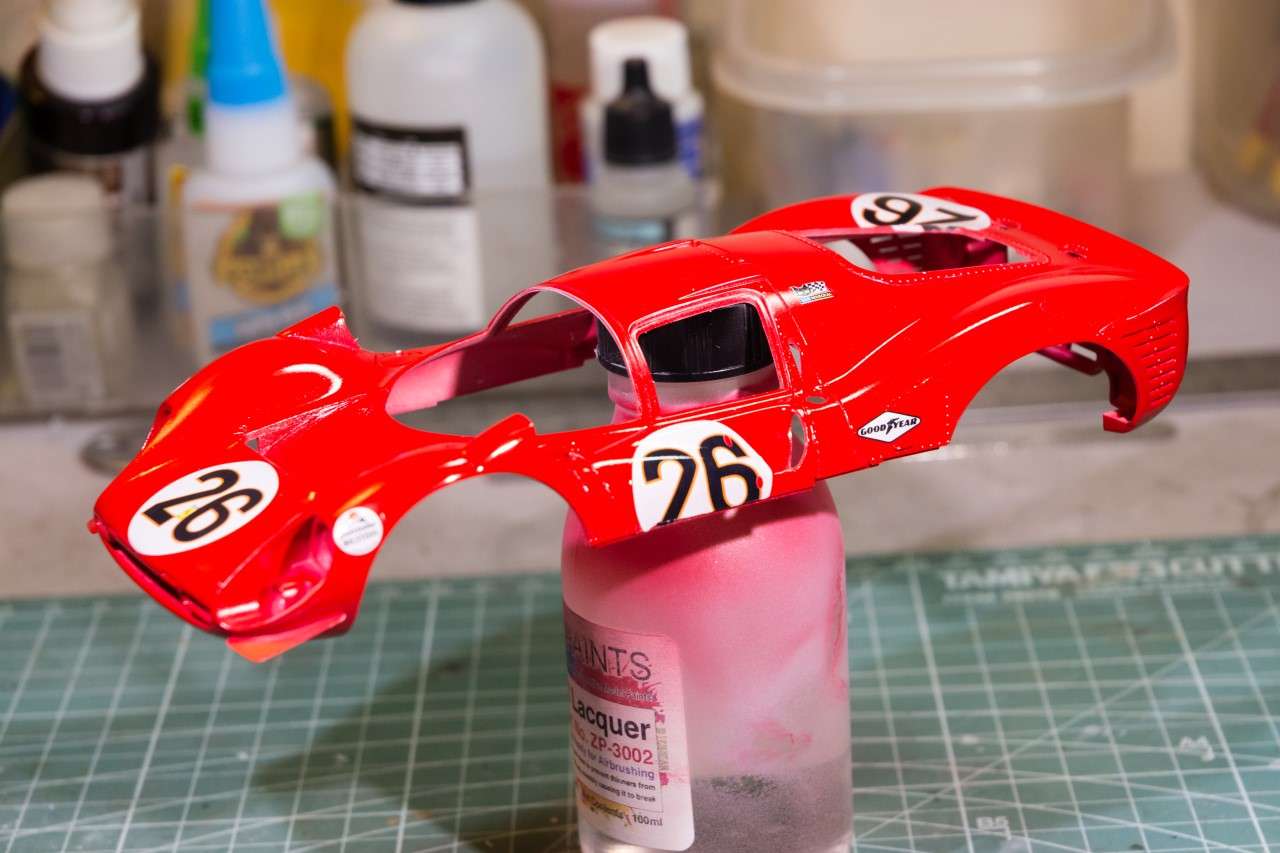
The Final step was the 1st of two coats of Gravity's synthetic wax. The end result was a shine even deeper then before.
The last coat & water rinse will be after the shell is installed on the chassis, but before the glass is glued into place.
I do have some raise areas and edges that will need touch up with Red or aluminum paint. Those spots will be dealt with by using an artist's extra fine tip magic marker.
Here's a few pictures of where I'm at now.
Thanks for stopping by,
Joel

-
Chuck,
Amazing paint work. You truly are a master at it.
Joel
-
4 hours ago, janman said:
Beautiful!
Janman,
Thank you my friend for that most positive and much appreciated post.
Joel
-
4 hours ago, CaptainObvious said:
Beautiful job on the prep and paint Joel.
-coHey Capt.
Always a pleasure to have you stop by. Thanks for the thumbs up.
Joel
-
On 10/29/2018 at 6:40 PM, Ben Brown said:
Looking good!

Ben
Ben,
So sorry I missed your post. Thanks for sticking in my corner throughout the build. It's much appreciated.
Joel
-
38 minutes ago, Ben Brown said:
Looking good!
Ben
Ben,
Thanks for stopping bye, and checking out the 330, it's greatly appreciated.
Joel
-
Being retired does have its pluses, and I've been able to consistently get more time at the bench, and still get my Honey to List chores done on a daily & timely basis.
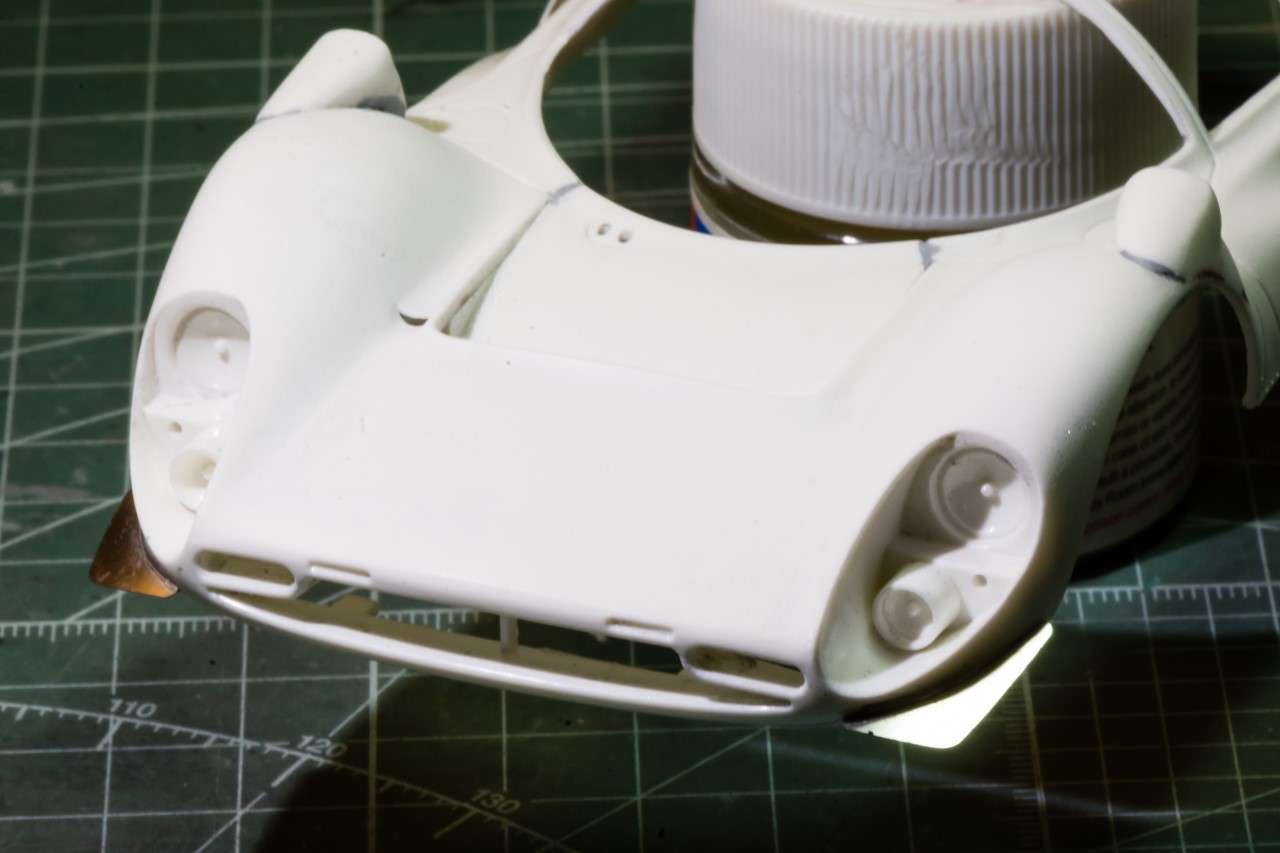
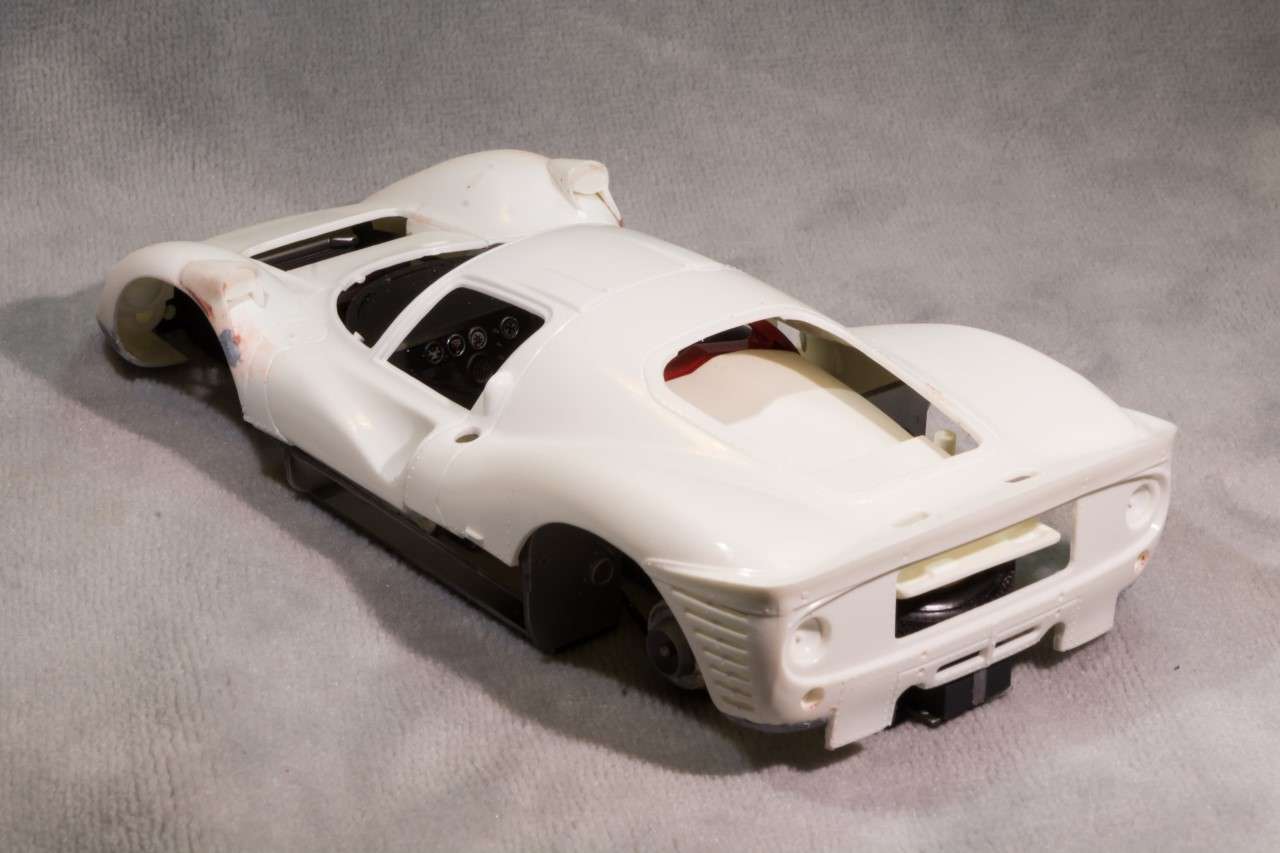
Work concentrated solely on the shell as there was a still plenty to do before priming could take place. There is an abundance of mold seams over the entire shell that had to be removed, as well as finishing up the blending in of the fender mirrors. The final body work was adding the PE front clip winglets that help to provide additional downforce at high speeds. They're actually well thought out as I'm not the greatest with PE bending especially when a curved surface needs to be created. But that surface adds quite a lot of gluing area which is a very good thing.
Here's one of the winglets pre-bend:
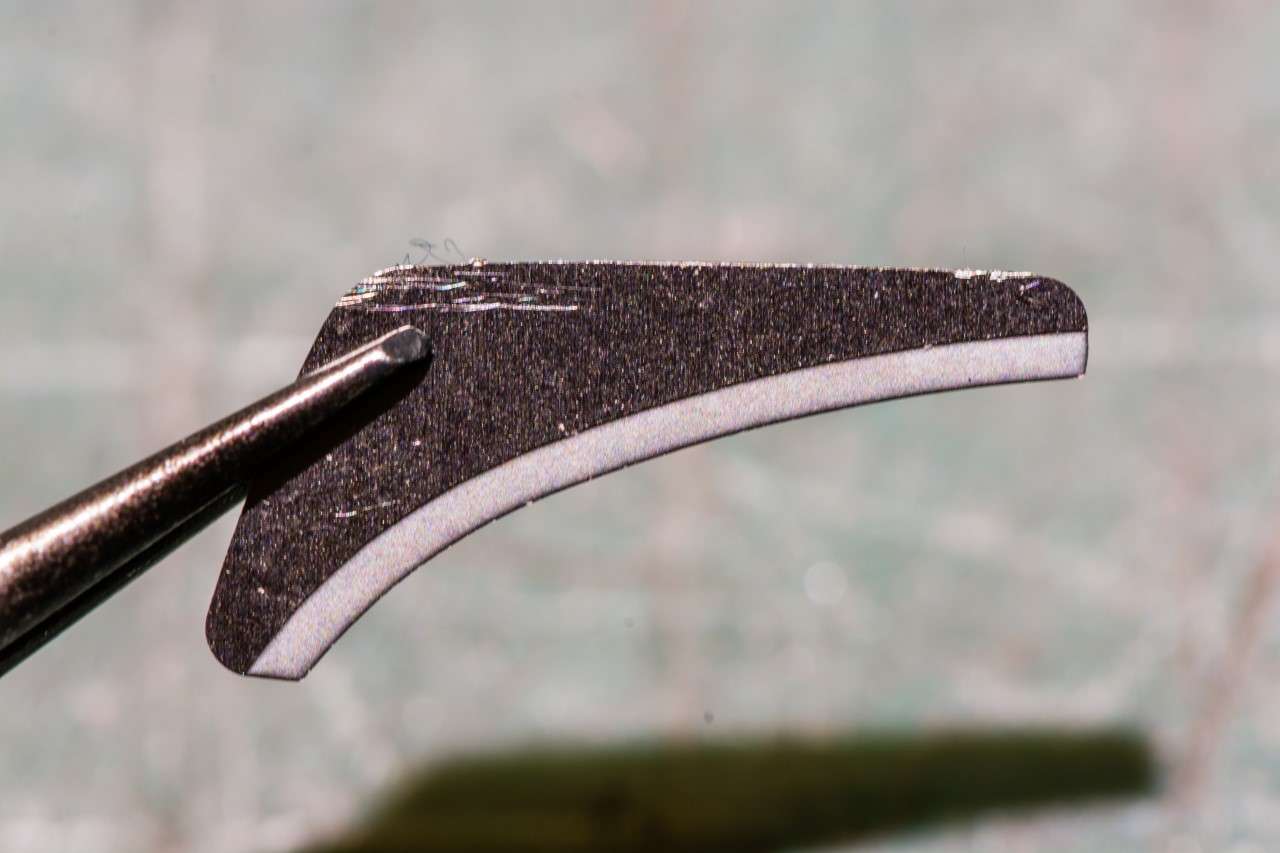
and here's one after I carefully worked the bend with a hand drill handle, followed by a the grip of a modeling hand file.
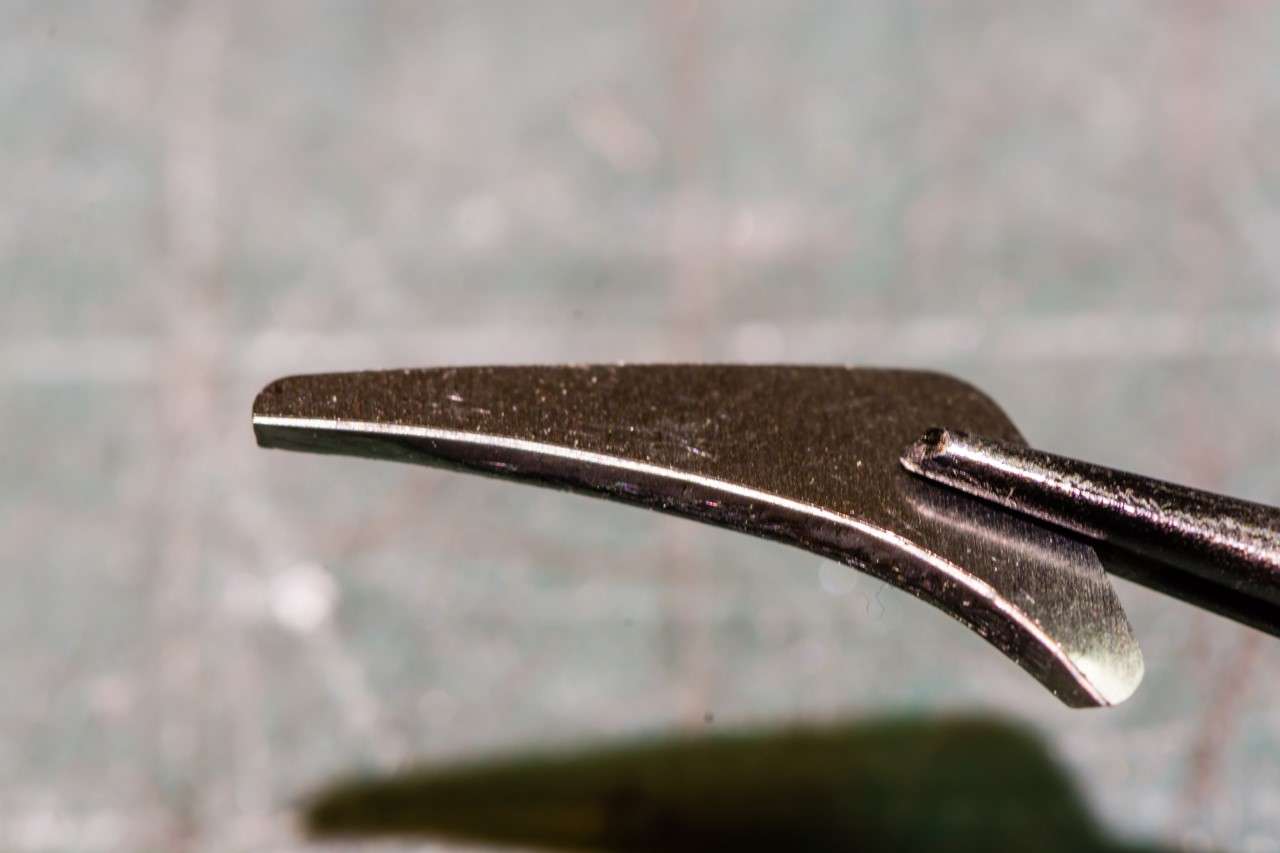
They're both glued up with Gorilla CCA glue, and once dry are there to stay.
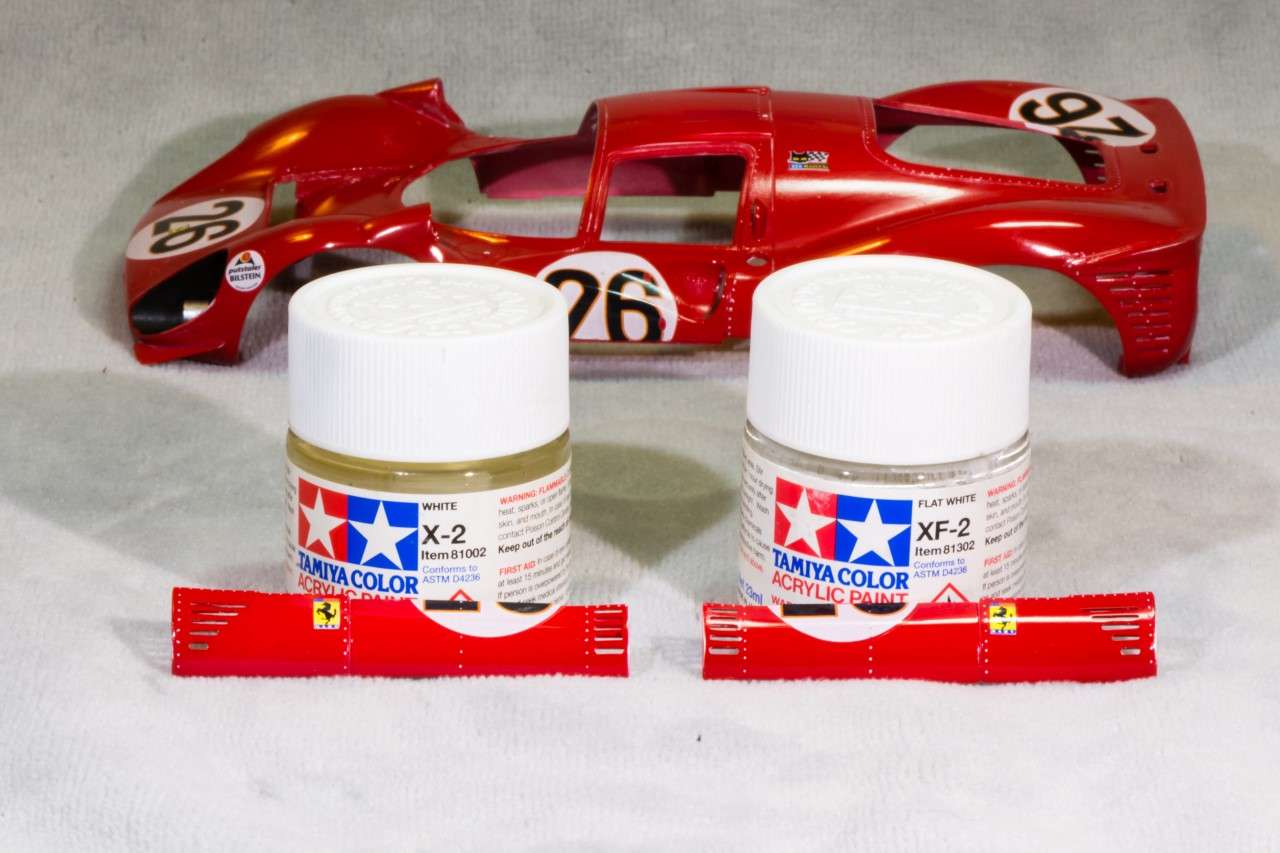
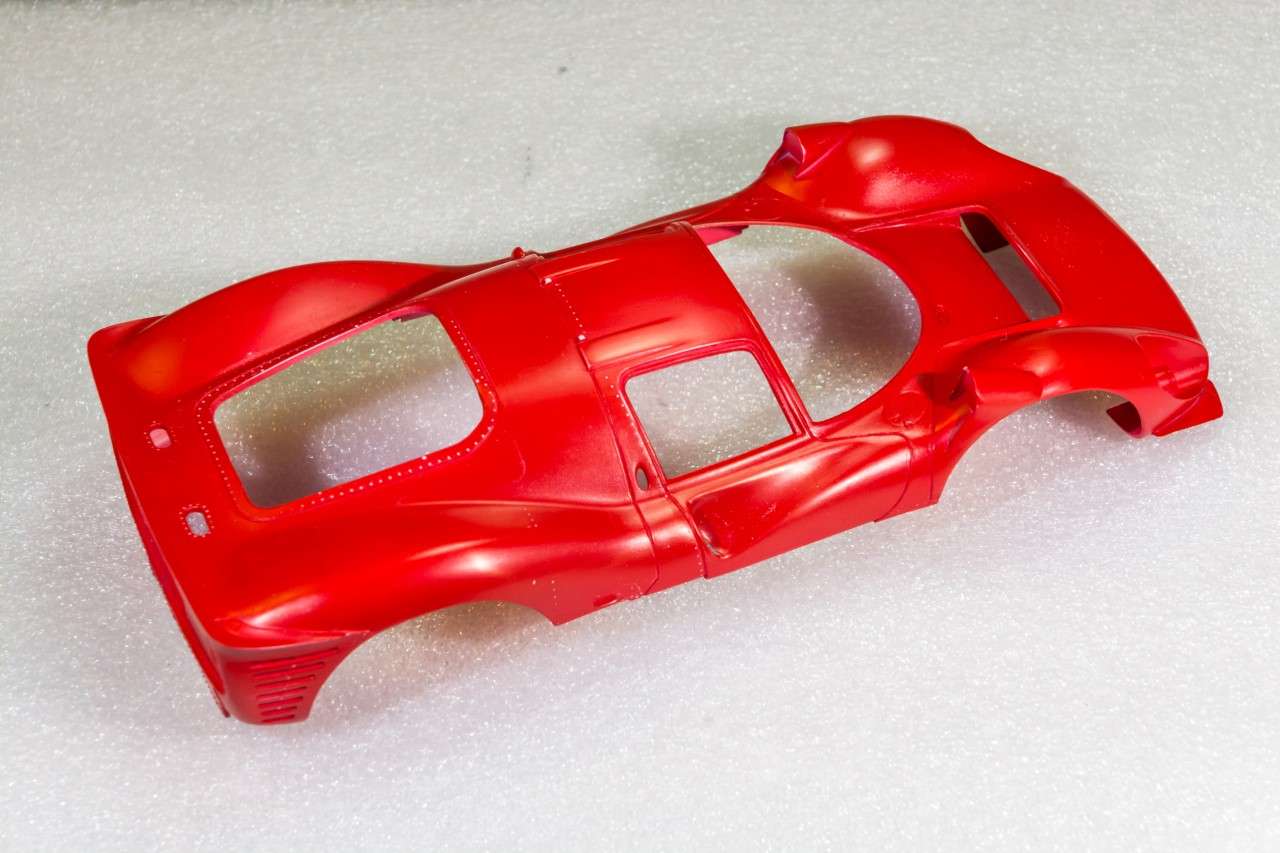
After washing down the shell with ISO Alcohol, followed by a quick wipe with a tack cloth, It's primer time. The paint of choice for the 330 is Gravity's Ferrari Rosso Corsa GC-107, which really needs a white primer, but the shell is molded in White. Having poor eyesight that's just not going to work for me, so I decided to do a little custom blending of Tamiya's Gray and White Lacquer primers. I just wanted it to be more like Off White then Gray. Took a while but I got there. Of course I totally forgot to write down the mixture, so I better not have to mix more or reply it later. Here's the shell after priming:
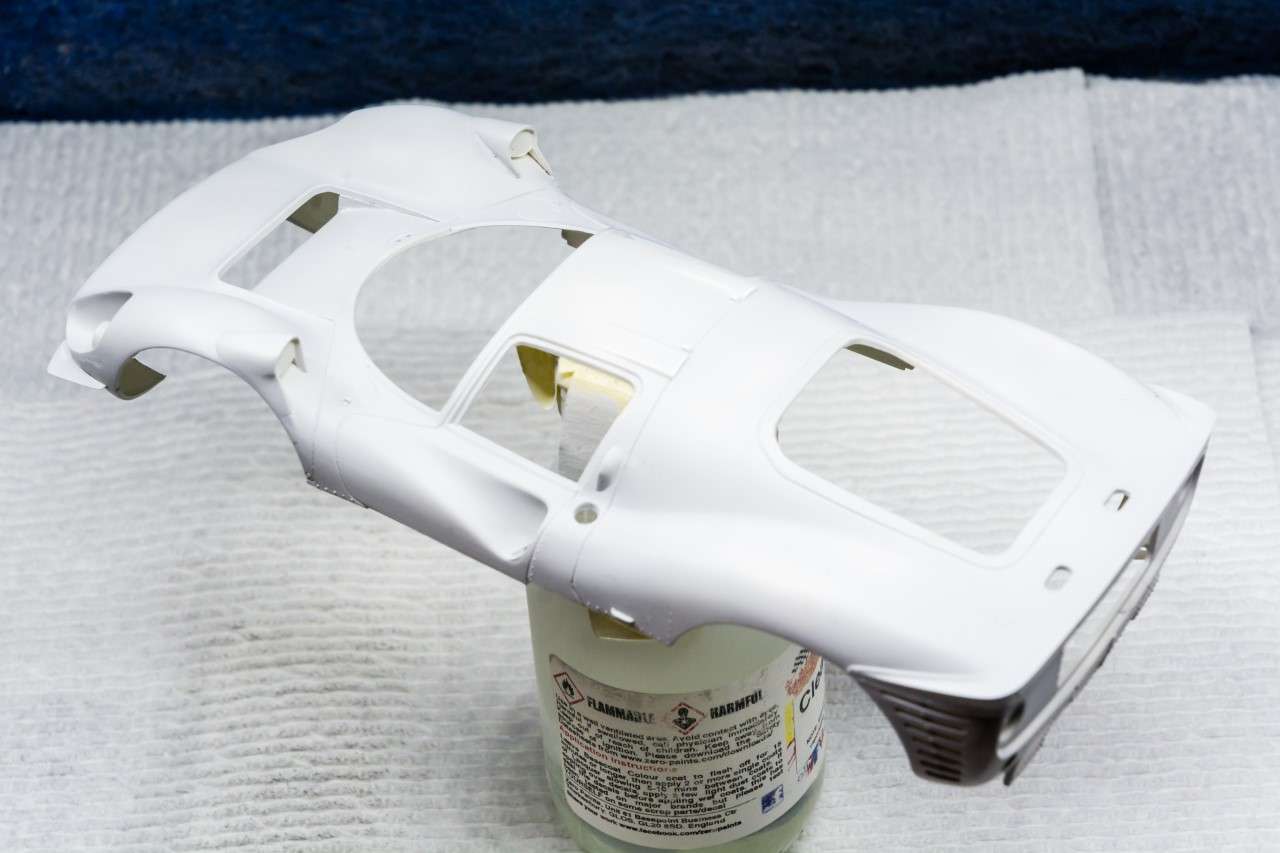

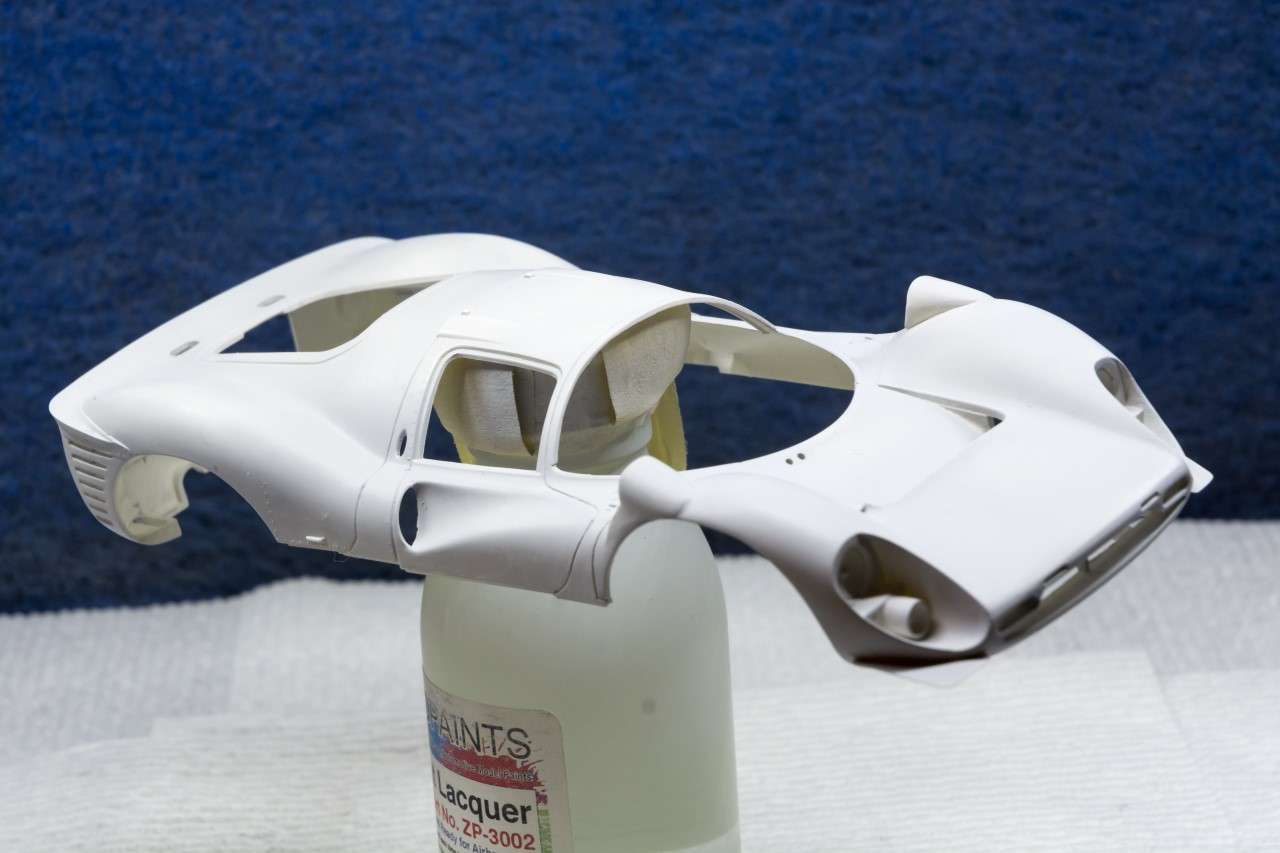
I gave the primer coat several hours to dry, then a lite sanding with Tamiya 3,000 grit sponge and warm water. Now the primer is really nice and smooth to the touch.
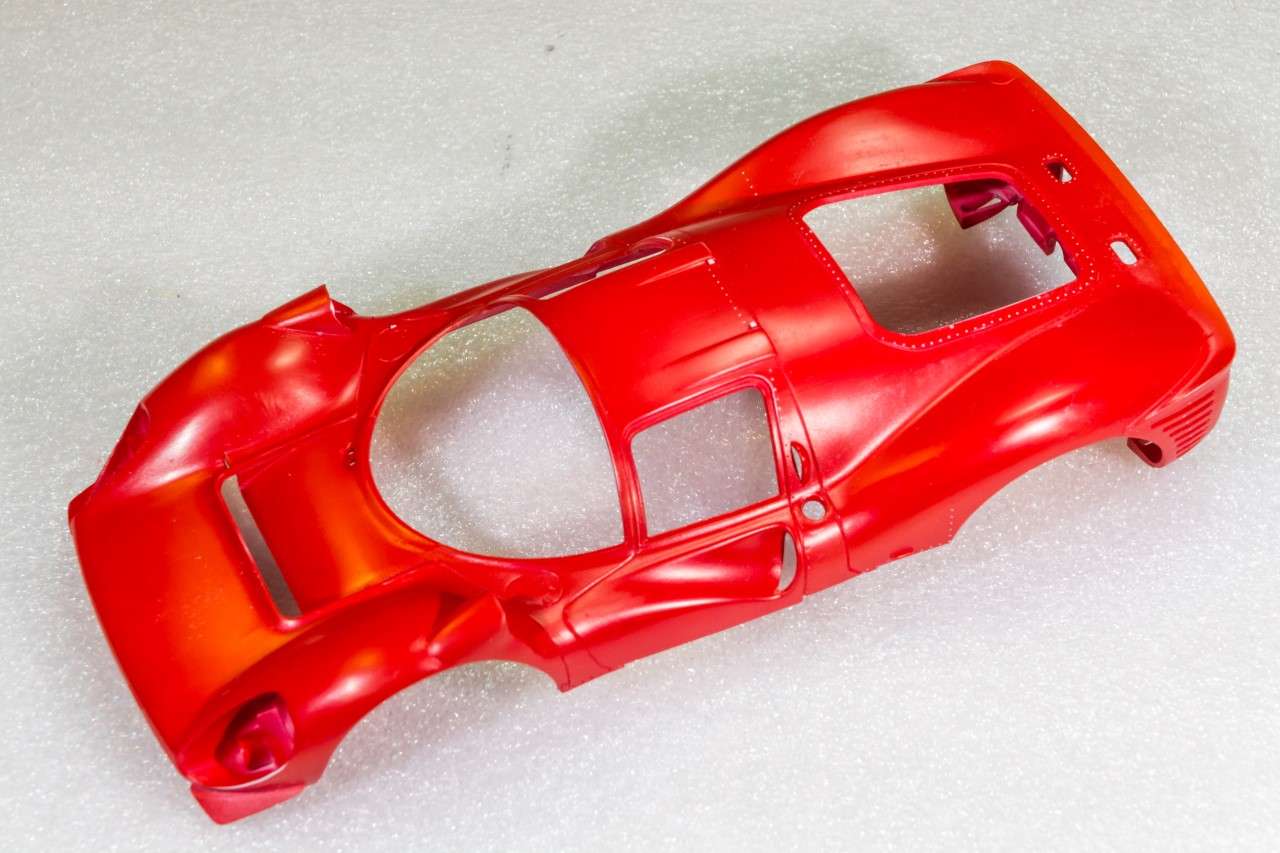
Next work session was applying the color coats. Nothing fancy here, as I just followed the procedures that seem to work well for me: Tack coat #1, 2-3 min tack coat #2, 2-3 min color coat #1, 5 min Color coat #2, 10 min final color coat as well as looking for drier spots. Now into the drying bin.
6 hrs later it's back to the rub with a wet piece of Tamiya 3,000 sponge.
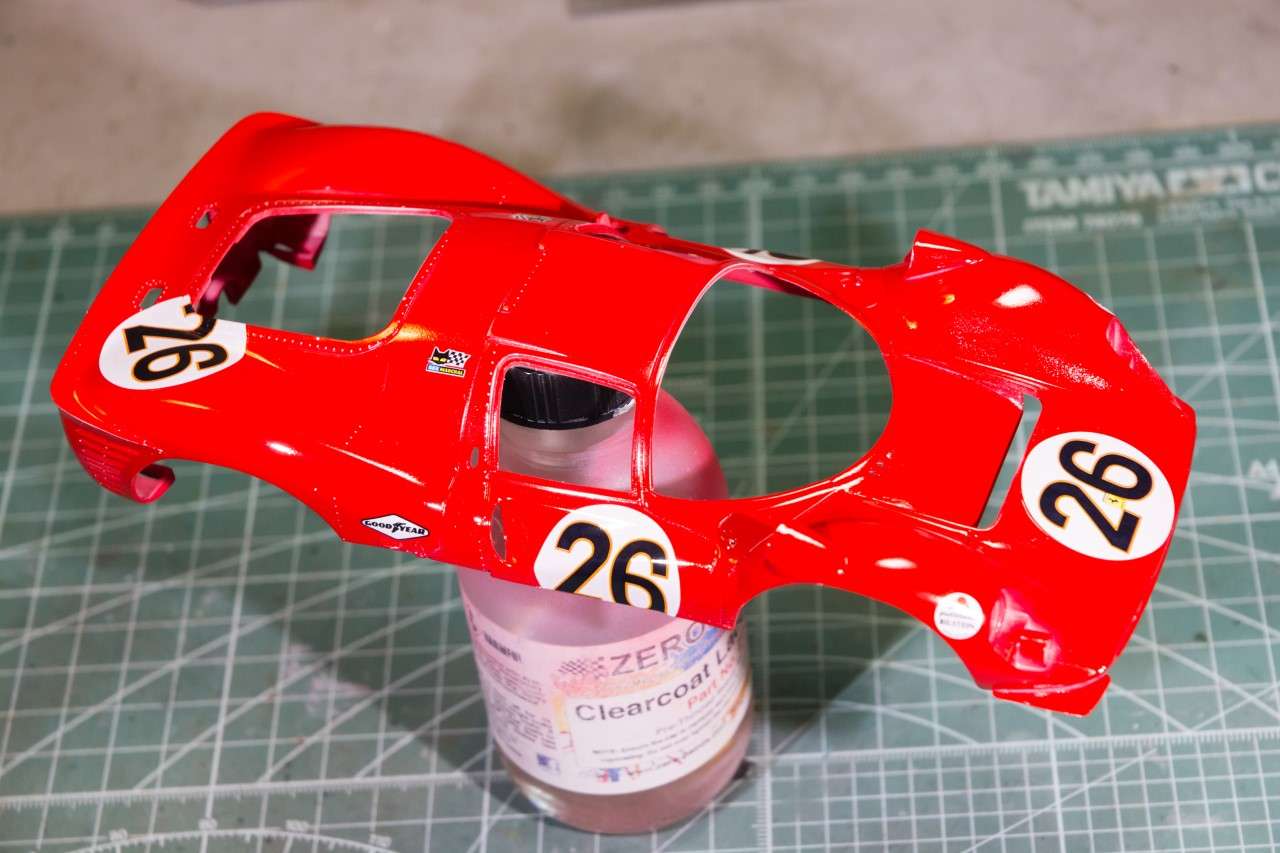
Next work session I applied the IndyCal decals, which preformed perfectly using Micro Set, Sol, and finally Solvaset. The only issue I have with them is that they're printed on a single sheet and you have to cut out each decal. Takes time and a steady hand, but certainly worth the effort.
I gave the decals two days to dry, then following the same exact air brush procedure as I used for the primer, & color coats, I applied Mr. Hobby/Mr.Color lacquer clear gloss. The results came out perfect. Here's the shell after the clearcoat with no polishing as yet.
Thanks for stopping by and checking out my build to date, as it's always much appreciated.
Joel
-
Impressive for sure. Must feel really nice to finally cross the finish line with not one, but two builds.
Joel
-
On 10/22/2018 at 10:58 AM, janman said:
Arguably one of my favourite racing Ferraris. The pit looks great and I especially like how the seats turned out.
Janman,
Thanks for the thumbs up on the pit and seats. Nothing like some Tamiya Black panel wash brushed over the whole seat, then rubbed off.
Joel
-
On 10/22/2018 at 10:50 AM, CaptainObvious said:
Really nice work on those tires Joel. The decals look painted on.
-coCapt.
let it be known that decaling tires is exactly the same as any model. done right, it's a no brainer. Done wrong, and who knows what they'll look like
Joel
-
John,
What a great update!!
Your weathering skills using multiple layers and techniques has produced a model that shows a well worn operational aircraft, yet hasn't been taken so far as to look like it's well past it's reliable service ceiling. I'm certainly looking forward to your next and most likely last update.
Joel
-
15 hours ago, Slartibartfast said:
Look forward to seeing the completed wheels/tires. I notice the rear corners have the same strakes as on the 512 BB street car.
Slartibartfast,
Ferrari was really big on those slates for all their street and road racing cars back in the 60s-70s as a efficient means to move both rear brake hot air and trapped air piling up in the rear of the car. The side skirts which aren't installed to the end of the build also as them as you can see in my signature picture.
Joel
-
1 hour ago, Ben Brown said:
Ordered tire decals from Indycals. The letters wouldn’t even come off of the paper on the ones I stole from the 330 P4 kit. One of these days I’ll learn that sometimes easy is better than cheaper! 😂
Pics coming soon.
Ben
Ben,
I've tried those weird letter sets from Fujimi, and while I can get them onto the tires, they usually come right off, and look like crap.
Joel
-
Well, another week of work on the 330 P4, and I've got just enough done for an update.
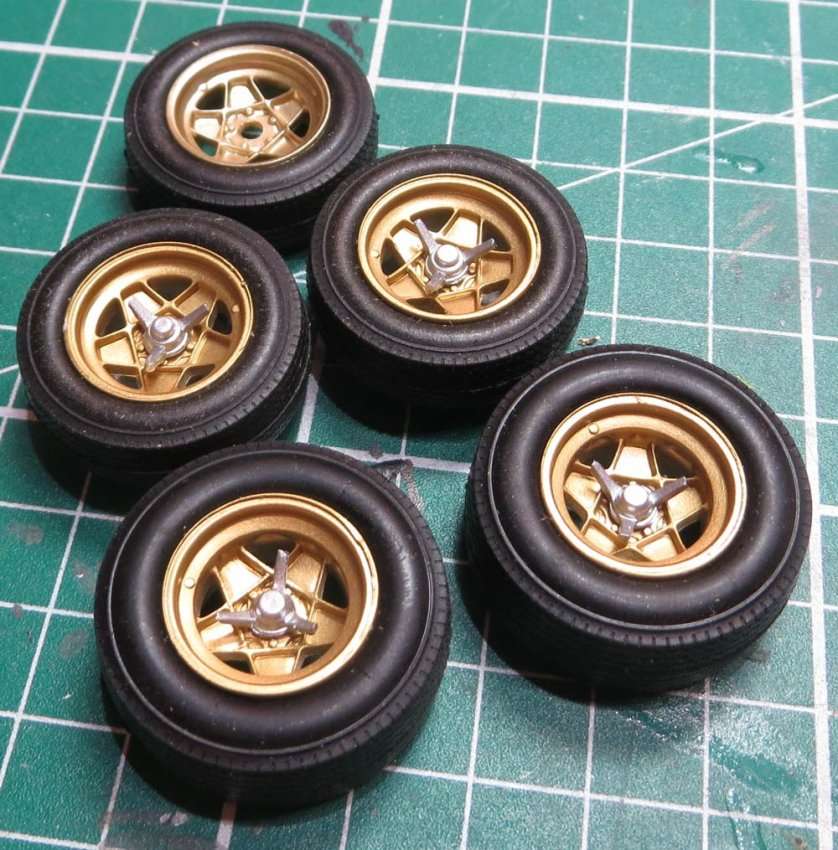
I decided that a little break was needed, so getting the 5 tires and wheels ready for installation would be a productive break from the Chassis/pit/suspension.
The tires are solid rubber with no side wall detail lettering, but the tread pattern looks pretty good. Since I'm modeling a pre-race version, the tires should be new, hence the molding seam down the middle. Fujimi gives you 4 Gold plated, & 1 non-plated 5 spoke Ferrari type wheels, with knock offs for 4 of them, but the wheel for the spare tire isn't plated, nor does it have a knock off. I air brushed it Testors enamel Gold which nicely matches the plated wheels. Some how I lost my picture of the 5 wheels, so I kind of borrowed one off the 'net.
then I hand glossed the sidewalls with Tamiya X-22 as I wanted a thick coat to decal on.
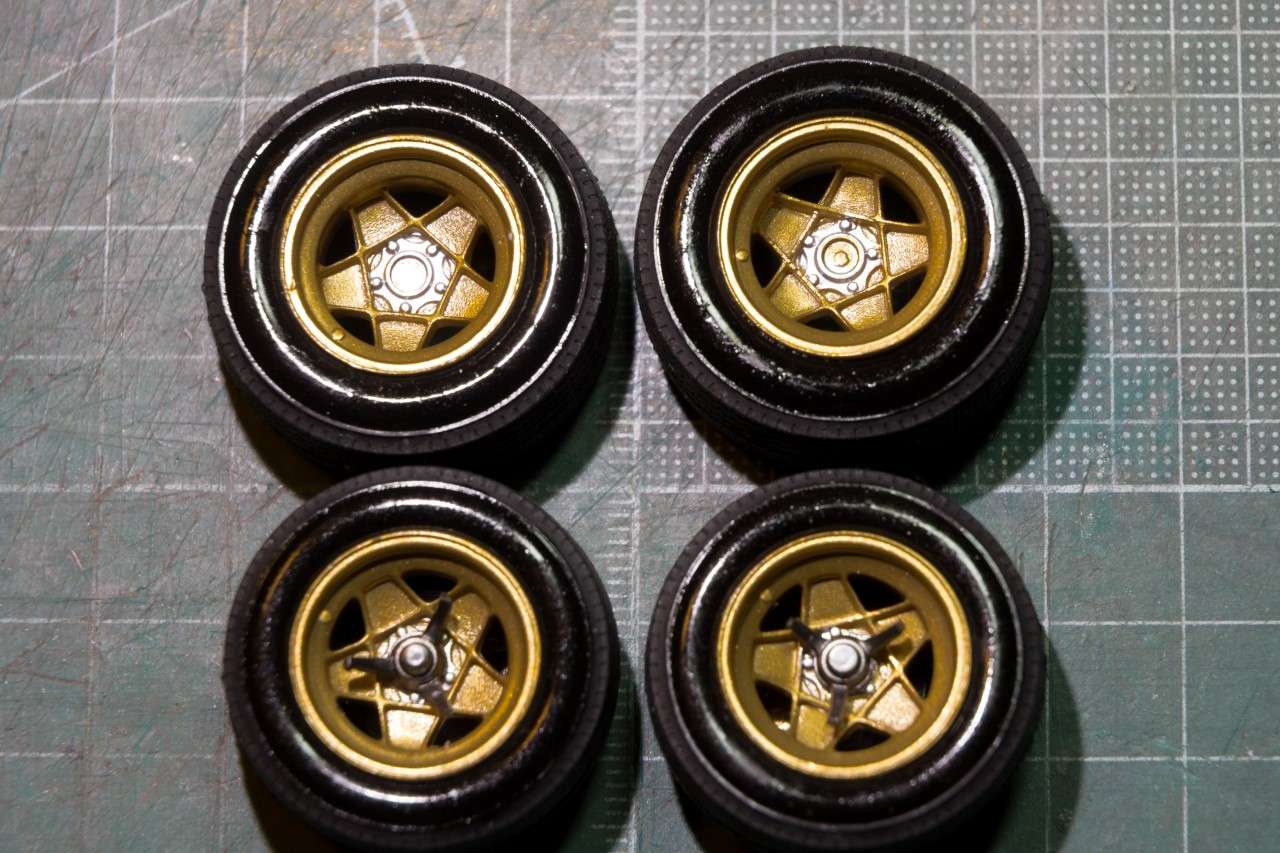
24 hrs later I decaled them with IndyCal decals.
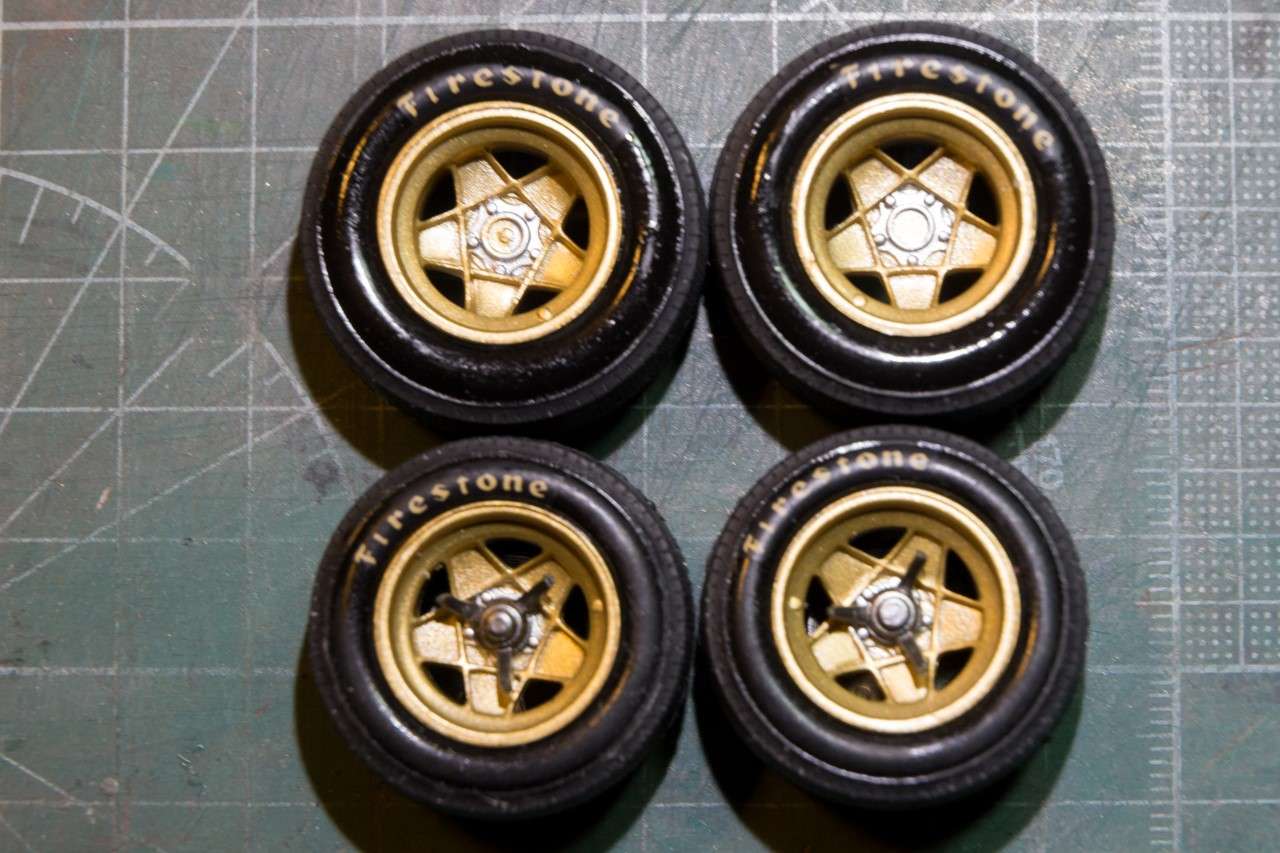
then after another 24 hrs I air brushed on a leveling coat of Testors Glosscoat to start blend the decals in.
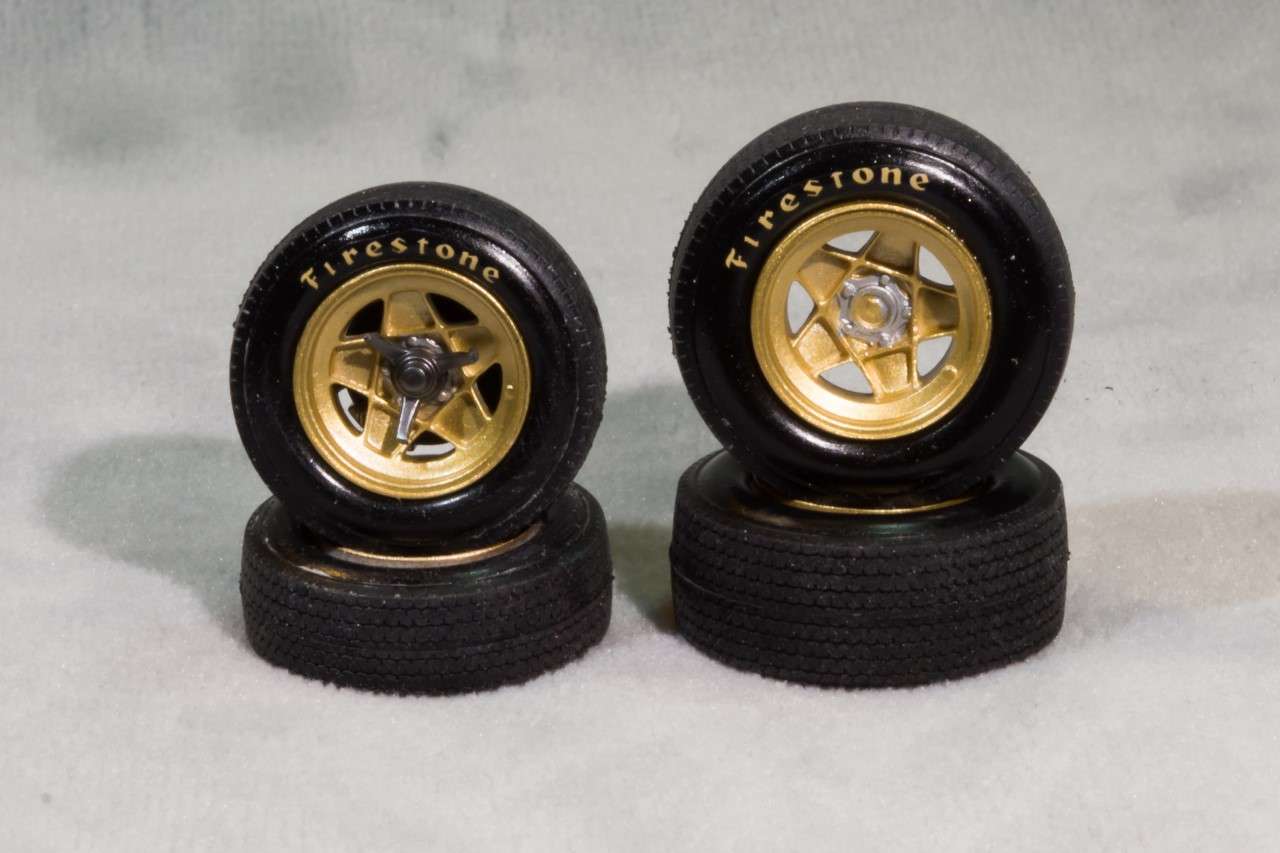
Once the gloss has cured for 24 hrs, I give each sidewall a easy rub with 3,000 grit so that the decals blend in, and then a coat of Dullcoat. Then they'll be ready for installation, which will let me complete the front suspension.
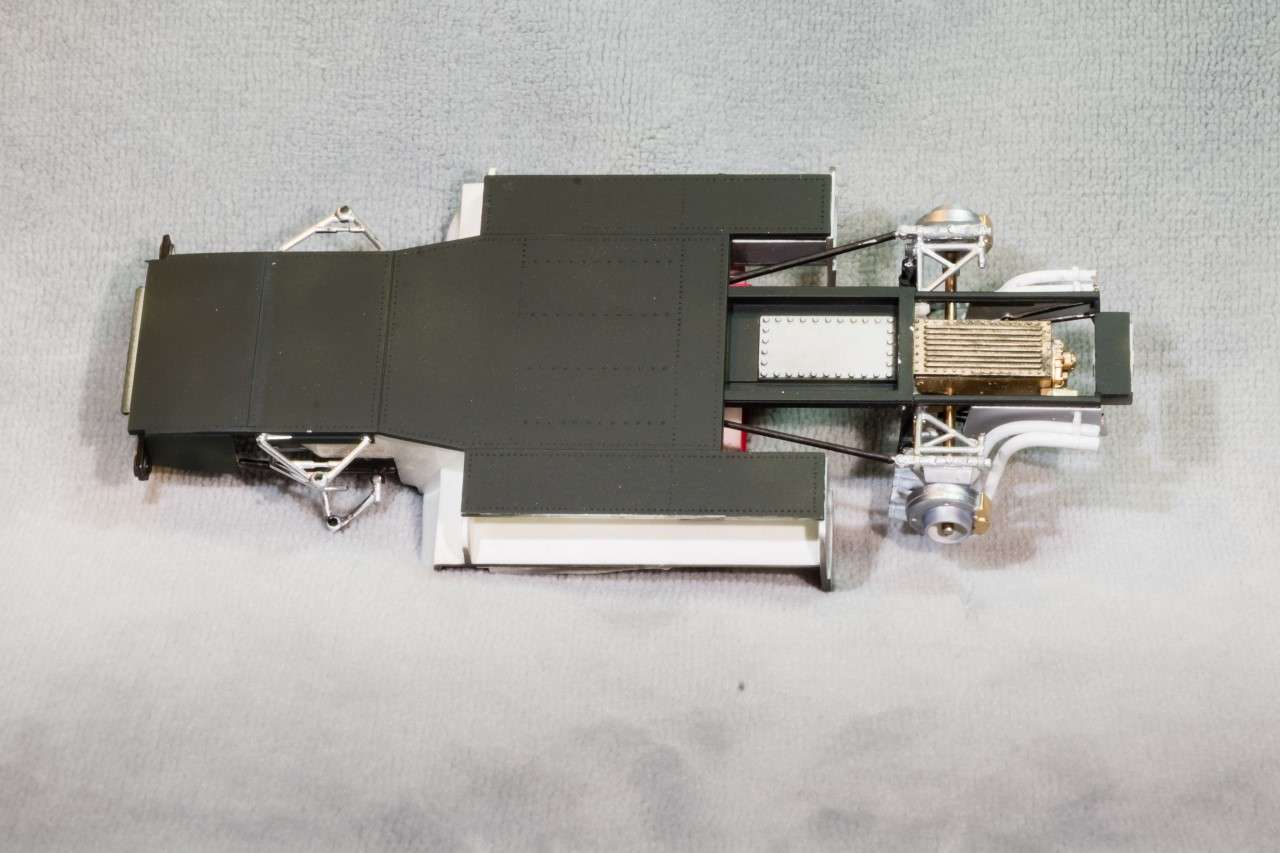
I finished up the rear suspension/transmission, which is kind of weird without an engine as it's just a big empty hole.
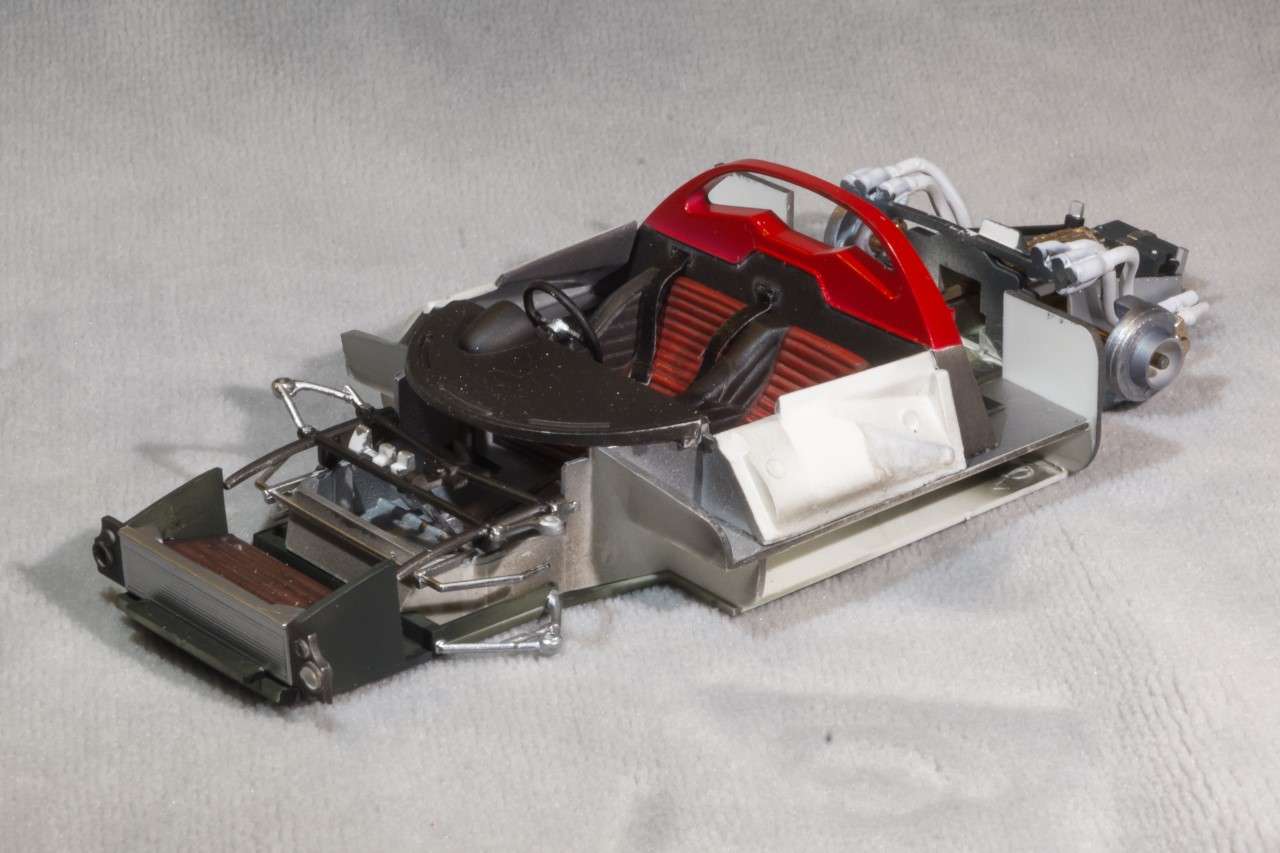
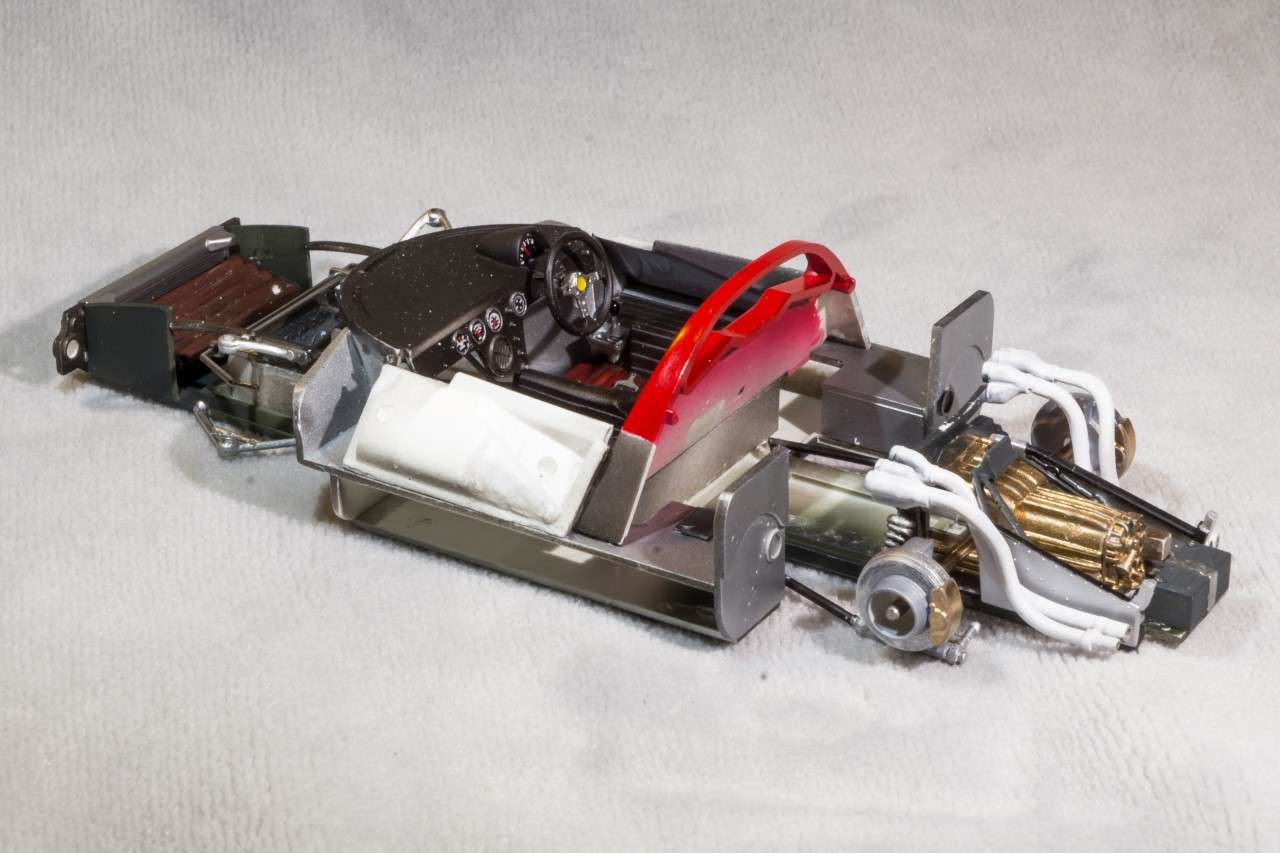
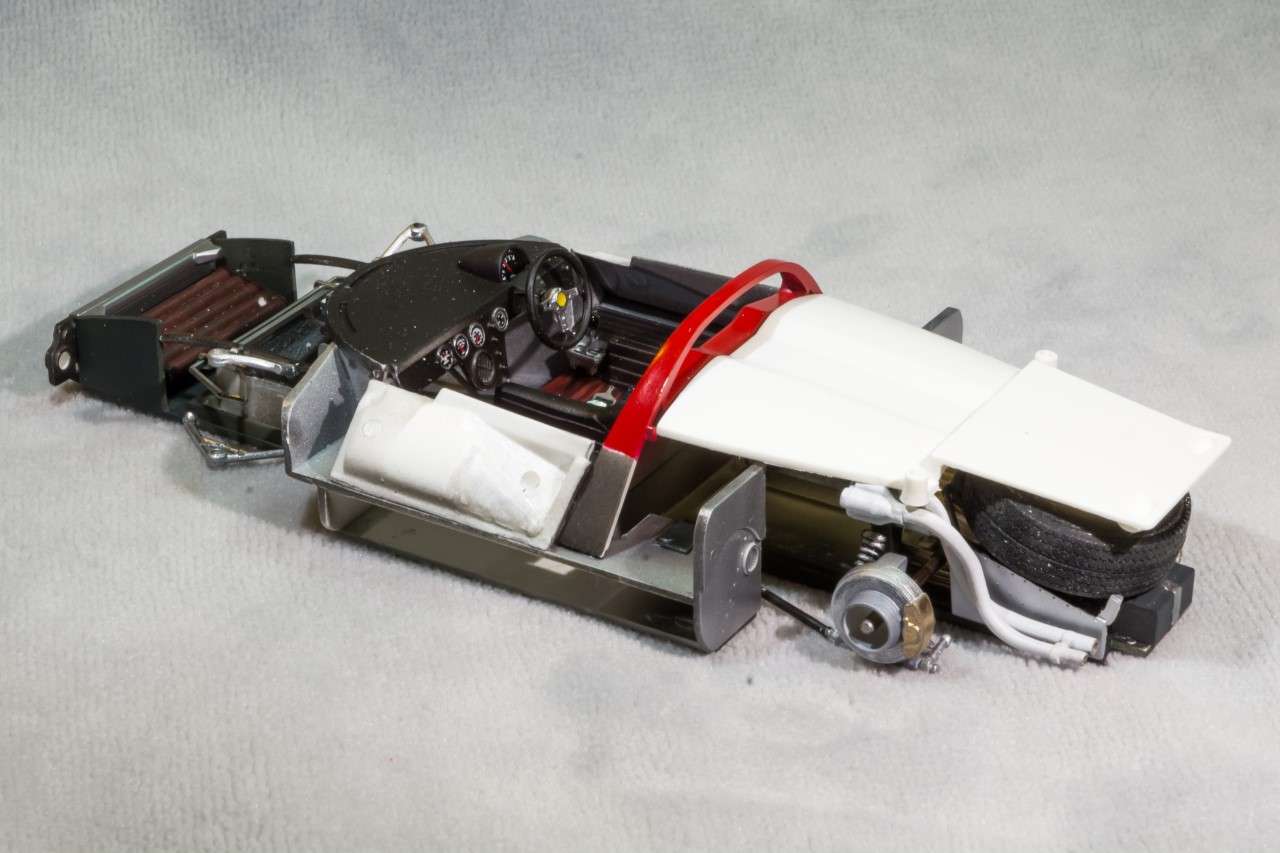
I test fit the spare tire into its holder over the transmission.
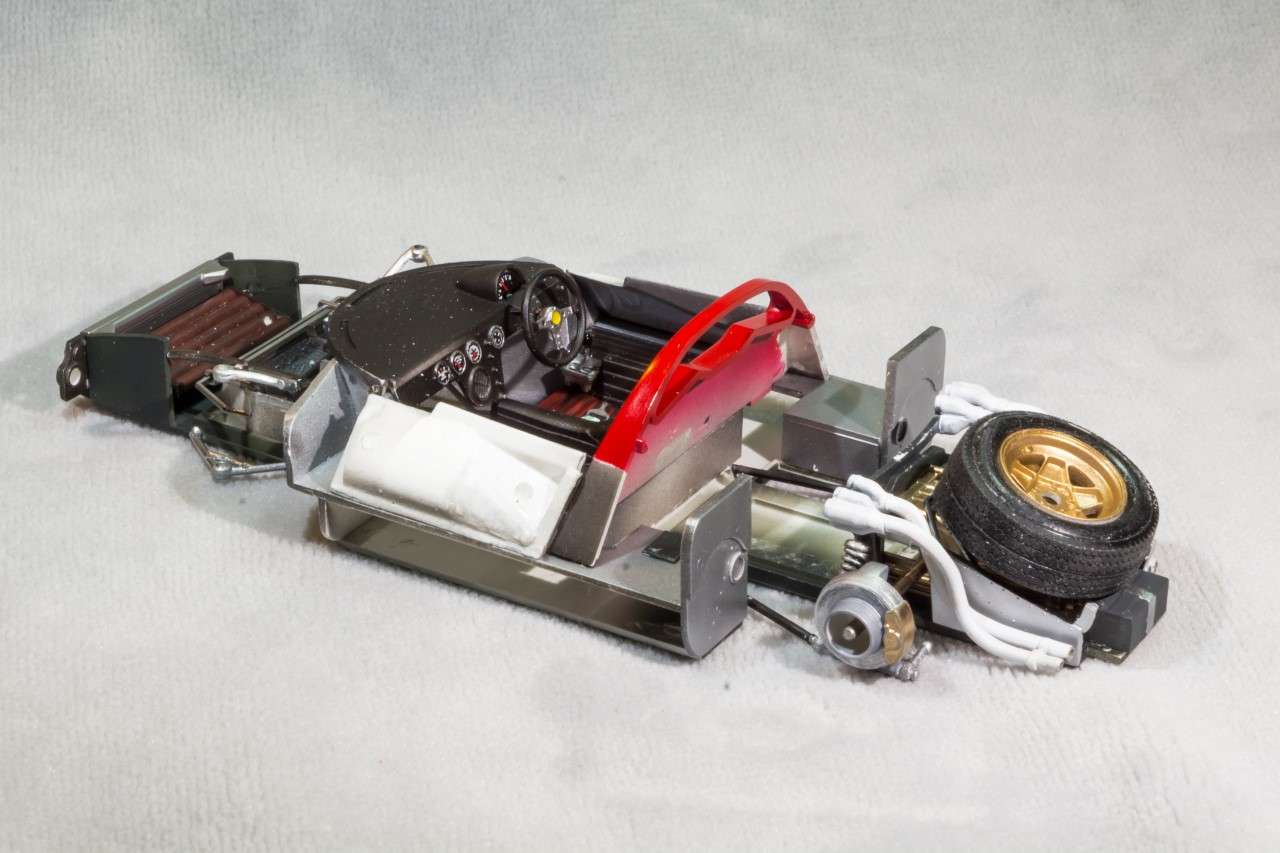
And it fit just fine, but now that huge empty engine space would be completely visible through the top rear window. So Fujimi came up with a 100%, totally factious cover plate that will be painted Gloss red.
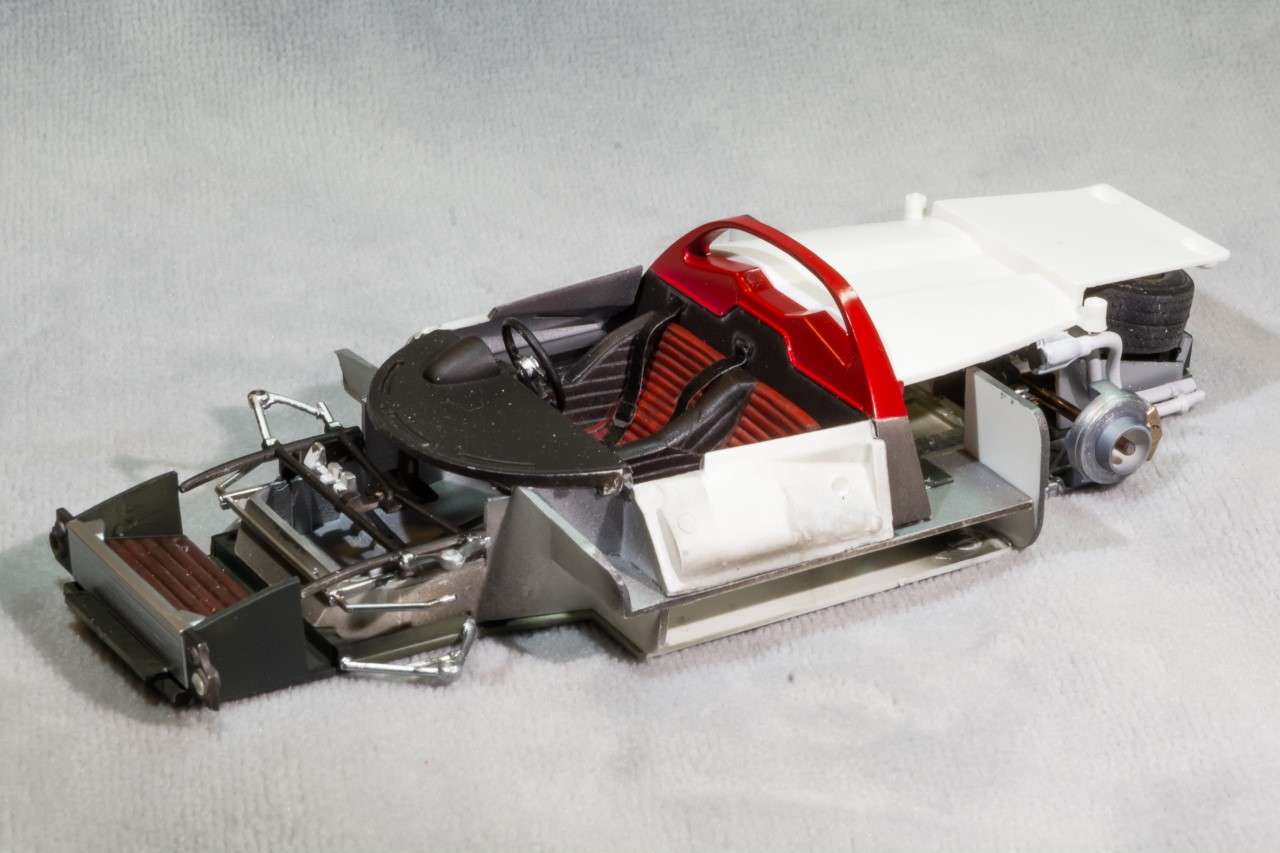
That will have to do for this build. I did find out that Historic Racing Miniatures makes a Resin/white metal engine but it was sold out, and I was really passed the point of installation. I'll keep that in mind for my Fujimi Ford Gt40s that also suffer from the missing engine syndrome.
From the bottom I will have to admit that it looks ok, not great, but the engine pan does block out a lot of the view.
I thought I'd test fit the shell that I've been working on, and see how my 330 P4 is starting to come together.
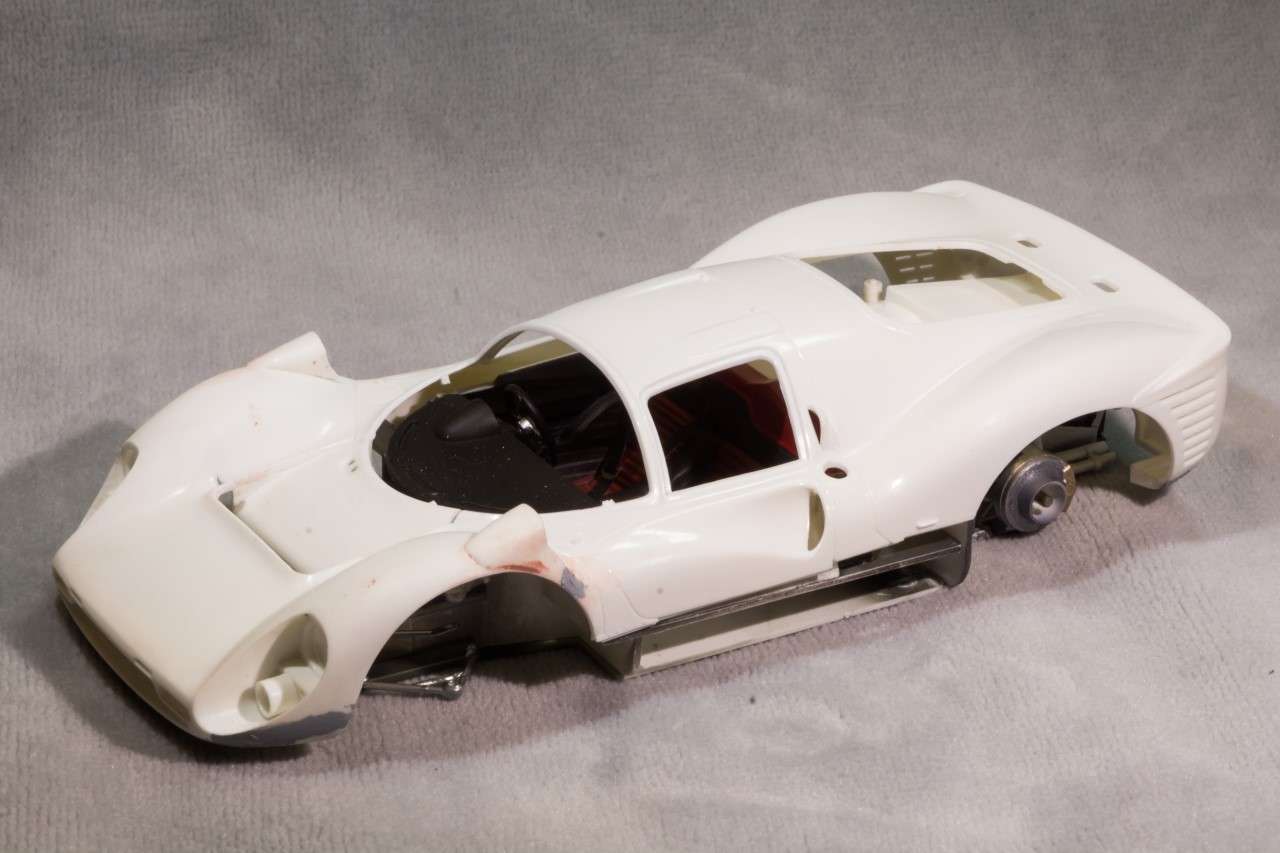
Thanks for stopping by, and checking out my progress, it's always much appreciated.
Joel
-
17 hours ago, chuck540z3 said:
Keep experimenting Joel, but do it between real modeling projects, where a screw up can be painful. There are no hard and fast rules, because airbrush painting is a complicated combination of:
- Air pressure (flowing, not shut-in)
- Amount of paint (as controlled by dual-action)
- Type of paint
- Viscosity of paint
- Type of thinner used
- Humidity
- Temperature
- Skill of the operator
Every modeler has their own "recipe" of how to airbrush, based upon the above and lots of experience- and I am still learning. While I have found a variety of techniques that work well with lacquers and enamels, I know some local modelers who do just as good a job (or better) with Tamiya acrylic paints thinned with Tamiya (yellow cap) lacquer.
One trick that I did learn by accident is to use a small space heater (no open flames) near where I'm painting. My paint booth is in my unheated garage and when it's cold outside, it's pretty cold inside the garage. Using the space heater, it allows me to paint throughout the winter, but it also allows me to dry the paint quicker than it would at room temperature. It's sort of like "baking it on", when I move the painted surface closer to the heater. The paint doesn't get a chance to run if I apply it a bit heavy and I can often shoot two coats in one spray session. If you're spraying something that dries quickly like acrylic paint, however, I don't recommend any heat. Heat will just dry up the atomized paint in the air before it hits the model, creating that dusty and rough finish we all try to avoid.
The overall goal is to get as wet of a surface as possible with the least air turbulence, then move on to another area so that the paint doesn't run. That's why spraying close to the surface with low air pressure is so important, which requires very thin paint so that the airbrush won't clog and sputter.
Cheers,
Chuck
Chuck,
I've pretty much standardized paint and procedures for both race cars and aircraft, as they're completely different. Just need to continue to refine them the best I can.
I guess I'm pretty lucky as I have not only my own modeling/computer room in the house, but my paint booth and venting system is in that room as well. The house has a 12 month temp control system, so we just set the temp and forget about it. Every room has vents that let your fine tune the heat or Air Conditioning (I'm always cold and my wife is always hot). Humidity is another issue. The house is to dry in the winter. I keep on saying I'm getting another humidifier but so far that hasn't happened. So the paint reacts differently depending on the season for me.
Since I need two different procedures for cars or aircraft, the thinning of the paints is also very different. The lacquer paints for cars are by Gravity and come pre-thinned. And they're really thin. For aircraft I use Mr. Color and their self leveling thinner at a ratio of 1:1. I still use Tamiya Acrylics as I have way to many bottles to just box up. I thin those 1:1 as well, but use either Mr. Color Self Leveling thinner or their Yellow cap. The other difference is that painting car bodies, it's more like scaling down how they paint real cars. Slow, even passes, building up layers of colors slowly.
Joel
-
35 minutes ago, Ben Brown said:
Crisis averted. I drilled a small pilot hole and then used a couple of cone-shaped Drexel bits to open up the hole by hand. Now, on to the seat belts!
Good luck with the Dzus fasteners!
Ben
Ben,
WTG!!
I keep on never seeming to get to them, but I will sooner or later.
The ChopperMan
-
11 minutes ago, chuck540z3 said:
Hi Joel,
While I need to "rub out" enamels and some of the Alclad flat/dull finishes, I never need to do so on the gloss Tamiya lacquers or the Alclad shiny lacquers. I still remove the odd bit of crap here and there, but overall buffing is usually not required. A big part of that is technology, because I splurged a few years ago and bought the Iwata Custom Micron CM-C plus airbrush, which has a very tiny 0.18mm needle (standard for this model is 0.23mm needle). Using very thin paint, low pressure and this airbrush, I can spray very close to the model without causing air turbulence, which often creates rough finishes.
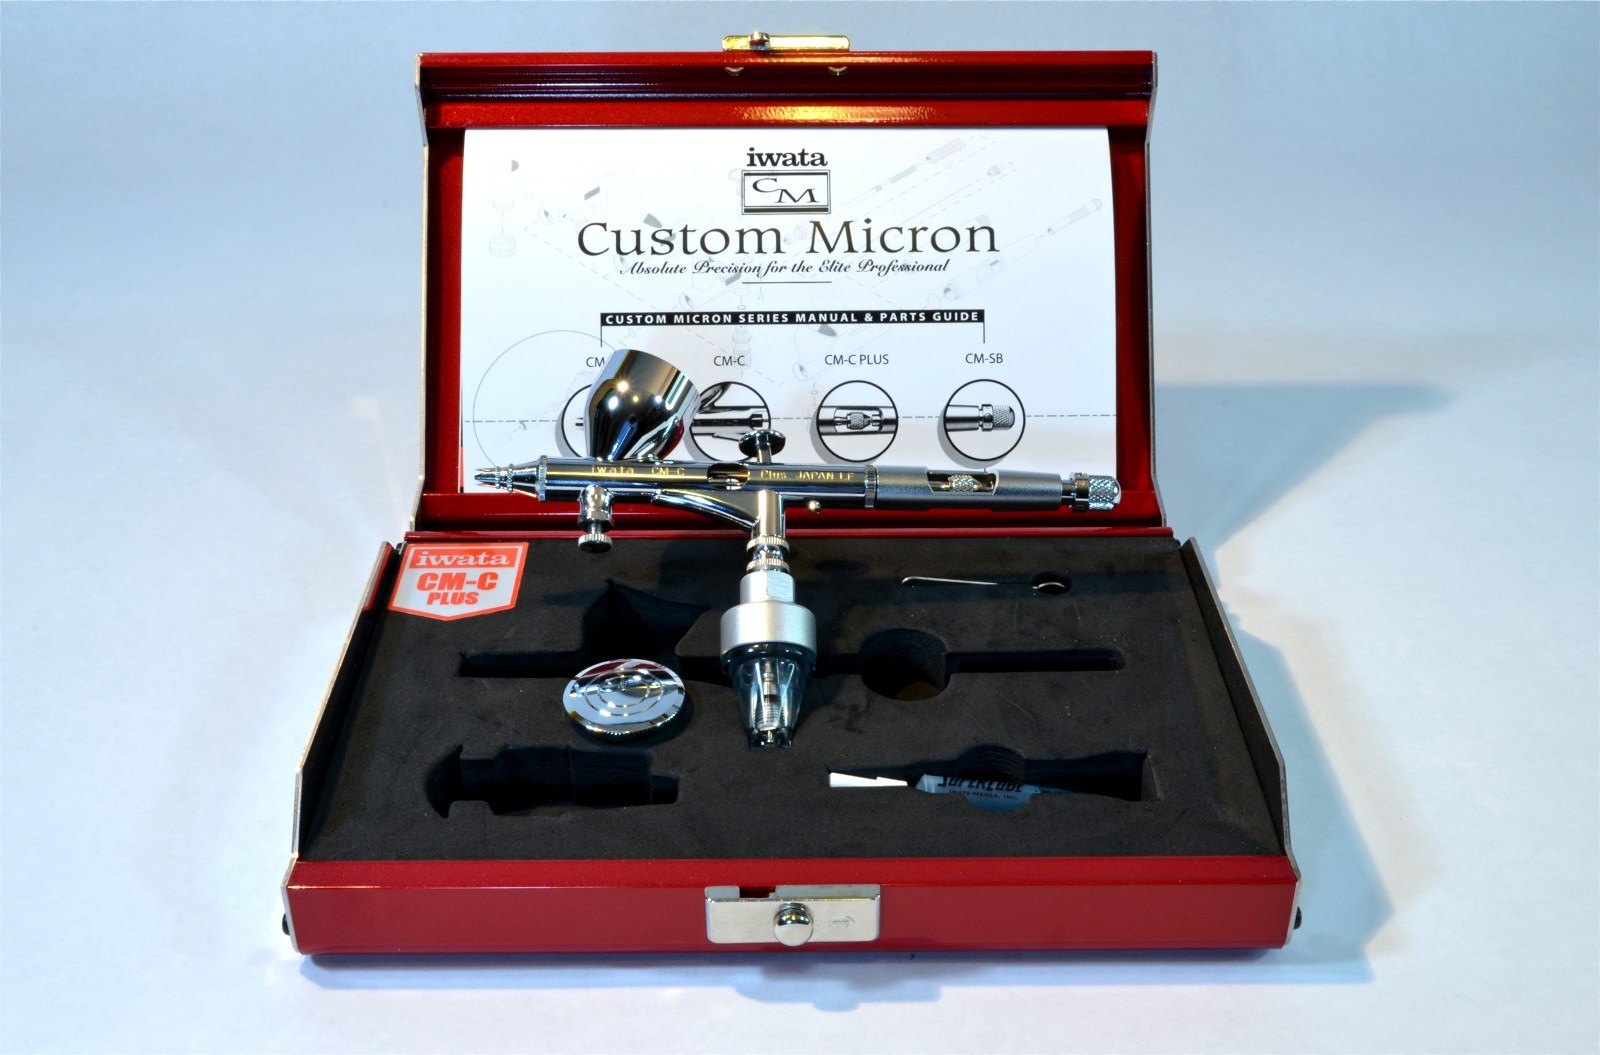
It's not a good airbrush for everything, however, because if I need to spray a large area and I'm using lots of paint, it can sputter too much. For that I use my standard Iwata HP-CH with a much larger 0.3mm needle, which is a good overall airbrush if you only use one.
Cheers,
Chuck
Chuck,
that's really big bucks. I've read a lot about it. and it's worth every penny for sure in the hands of a master.
I use two Grex Genesis XGI air brushes. One with a .3mm setup and one with a .5mm setup. The .5mm setup is for my race car bodies: Primer, color coats, and clear coats. All are true lacquer based paints. Aircraft and detail work is with the .3mm setup. My compressor has duel regulators, so both ABs are always ready to go. Grex also makes a .2mm setup for the Genesis series. I just may try it out. I just thought that it was so close to the .3mm that it's not worth the cost nor effort.
I've been slowly but steadily thinning my paints more and more, and dropping the flow psi rate. That has helped to some degree, but I still tend to build up the paint to quickly, and that's what gets me into trouble every time. Also, I still have issues with air turbulence causing the paint to swirl in tight areas, leaving a really rough surface that needs a lot of post painting work.
like I said, your Gloss black lacquer is just amazing. I might not ever get there, but I'm getting better following all your tips, which works for other plastic modeling besides aircraft.
Joel
Fujimi 1/24 scale Ferrari 330 P4
in Work in Progress
Posted
Pascal,
That's for sure. The 330 P4s were one of Ferrari's best and sexiest for sure.
Joel