


Lorebor
-
Content Count
52 -
Joined
-
Last visited
Content Type
Profiles
Forums
Calendar
Posts posted by Lorebor
-
-
Hi everybody, this is a Copper State Caudron G.IV in 1/48th. Figures are from Eduard...
-
14 hours ago, Piker38 said:
Which paints did you use ?
I used Mr. Paint set for Su-33:
The problem is that they don't have the correct hue: the 201 is a pure gray, while on the Su-33 has a blue hue. The 199 is too bright and a bit dark compared to the original. The 200 is the less correct because is extremely dark, much more than what you can see on the plastic spoon of the photo. I have corrected them all by mixing them with gray and blue Gunze but I can not tell you the precise percentage as I did it by trial and error...
-
-
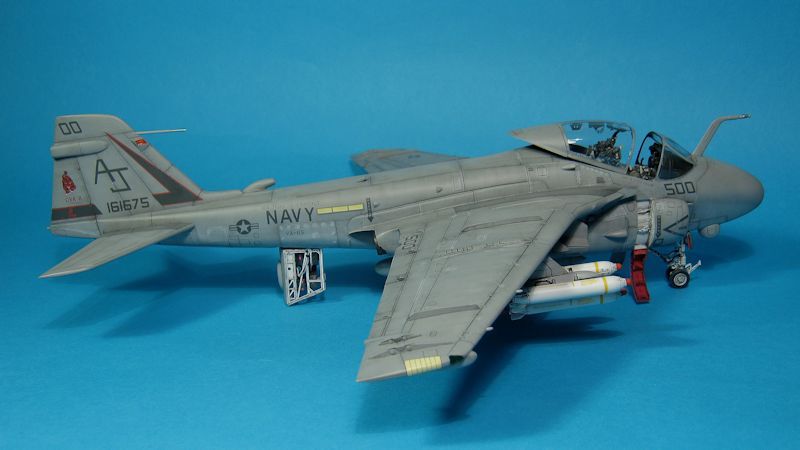
Hi everybody, this is my Su-33 in 1/48th; I obtained it from the Academy Su-27 with the Wolfpack resin conversion. Decals are from Begemot; the deck was scratchbuilt...
-
2 hours ago, wardog said:
It took me a long time to learn that items that should be painted flat black actually look better when painted either a very dark gray or lightened flat black followed by a pure black wash plus dry-brushing. It appears you did something similar here and the effects are outstanding; my apologies if I'm wrong.
You got it right: that's exactly what i did...
Lorenzo
-
8 hours ago, delayar said:
Is the IP cover scratch built, or did you use some aftermarket?
I improved the kit part; same thing for the rear section of the cockpit...
Cheers!
-
3 hours ago, Mr Matt Foley said:
Very nice. Are the Olimp Exhausts much of an improvement?
Yes, even though the Olimp parts are very poorly cast and need careful polish of the exhaust feathers...
-
Hi, this is a 1/48 Revell Eurofighter; I added Olimp exhaust and some Eduard photoetch in the cockpit...
-
On 28/1/2018 at 10:47 AM, Red Dog said:
Very nice, May I ask what base colour you used?
I'm struggling a bit with the Corsair TPS scheme. I always end up too blue and I think yours is spot on grey
Thanks
I used Gunze colors, that is Gunze H307 (FS 36320) over Gunze H308 (FS 36375). In order to achieve a barely visible demarcation line between the two colors, I added a few drops of H307 into a jar of H308 and a few drops of H308 into a jar of H307...
-
On 22/1/2018 at 4:32 PM, Tom said:
Any advice on the fitting of the Aires cockpit and avionics bays? Any in-progress shots of those areas?
Unfortunately i didn't take any in-progress pictures, but I remember that both the cockpit and the avionic bays fit quite well to the fuselage; same thing for the gear wells...You just have to carefully remove the plastic parts (instrument panel eyelid, ejector pins, moulded-on avionic bays and gear wells).
Lorenzo
-
1 hour ago, wardog said:
Very nice; I also would like to see some in-progress shots...especially your painting technique. Aside from that, excellent build!
-Elmo
I'm sorry, but this was a commission build that I tried to get off my workbench as fast as I could, so I didn't take any in-progress pic...
Anyway the weathering process I used is the same I applied on this F-104:
The only difference is that I used only black oil color; the oil stains on the panel lines were airbrushed with Gunze Smoke Gray and a 0.15mm airbrush...
-
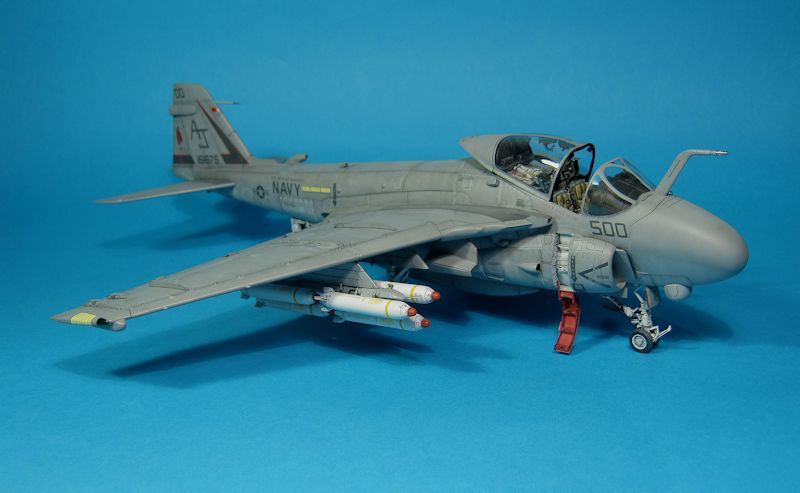
Hi everybody, this is a 1/48 Hasegawa A-7E.
I used Aires cockpit and avionic bays, Brassin bombs and AIM9, Airdoc decals...
Cheers!
-
Hi Jeffrey,
I have two books dealing with the Be-12, but they are quite old and not very useful for modelling purposes; I also have many pictures that I found on some websites and they are much more useful if you want to build the interiors.
The model has been published on an italian magazine; if you want, I can send you via Wetransfer the books, the picture and the magazine...just let me know...
-
Here's some other pictures...
-
Hi everybody, this is a 1/72nd Modelsvit Be-12.
I used NH Detail photoetched parts, a truck from ICM range and few Eduard figures; everything else was scratchbuilt...
-
17 hours ago, Tom said:
Lorebor,
Do you paint the model black before adding the camouflage?
Hi Tom, I didn't paint the model black; I just did a black preshading as you can see in the picture:
Cheers!
Lorenzo
-
5 hours ago, Jan said:
how do you treat decals? I use future->micro set->micro-sol->future, and I am sure decals would go off or get damaged if I used terpentyne to remove excess oil colour
P.S. the weathering looks beautiful!!!
Jan, I use your same method and never had any problems with the decals; I just make sure to be very gentle when I wipe the excess oli on the decals...
Sometimes, instead of Micro Set/Sol I use Gunze MrMark Softer and never had any problem with it...
-
On 29/10/2016 at 0:54 PM, Collin said:
Do you use a oil weathering technique? Any chance you can explain your painting method?
I deposit some oil color on the flat suface of the model...
...then I spread it around using a flat brush...
...and then, after about 5 minutes, I removed the oil color with a flat brush moistened with turpentine...
...trying to leave a very subtle white random pattern on the fuselage...
I did the same operation using black oil color before doing it with white...
Cheers!
Lorenzo
-
-
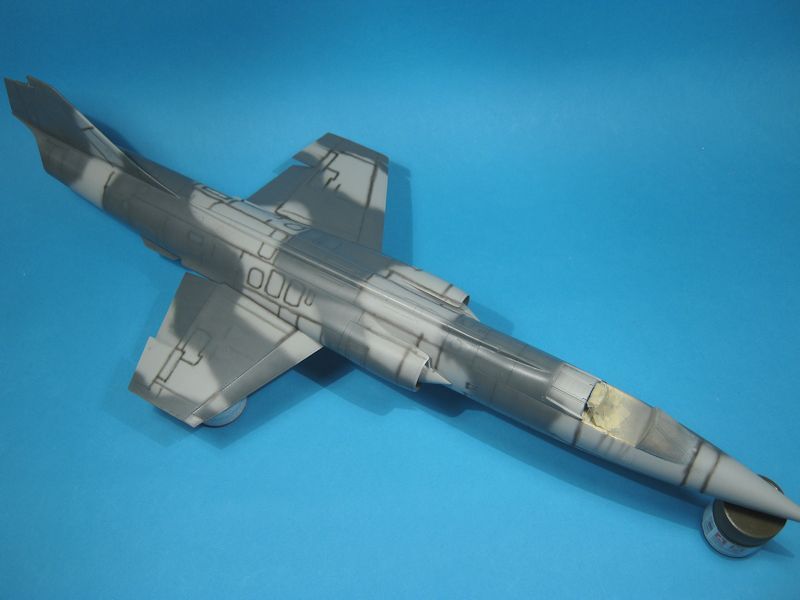
Hi, this is my Italeri 1/32 F-104S.
I used an Aires cockpit, Brassin wheels and engine exhaust and Videoaviation SUU-21 pod; the fire extinguisher was scratchbuilt...
-
Out of curiosity, did you use the kit windscreen? It's one of the worst fitting parts on these kits. The fit seems really good in the pic you posted.
Yes, I used the kit windscreen and it fit quite well to the fuselage; I just had to insert a piece of plasticard where the air refuelling probe was supposed to touch the windscreen because, as you can see in the picture, it left a hole...
Cheers!
-
Wow VERY nice
 ! I love the weathering and tasteful display. What tool did you use to rescribe the panel lines? They look awesome.
 Don.
Panel lines were rescribed using this old blade, drawn backward as shown by the arrow:
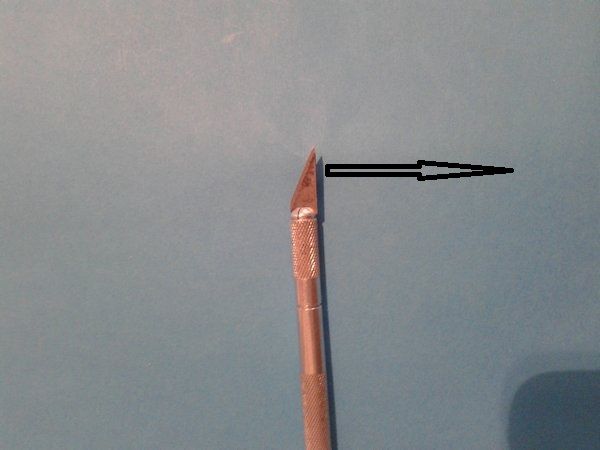
When I have to rescribe small circular or elliptical panels I change the triangular blade with a needle.
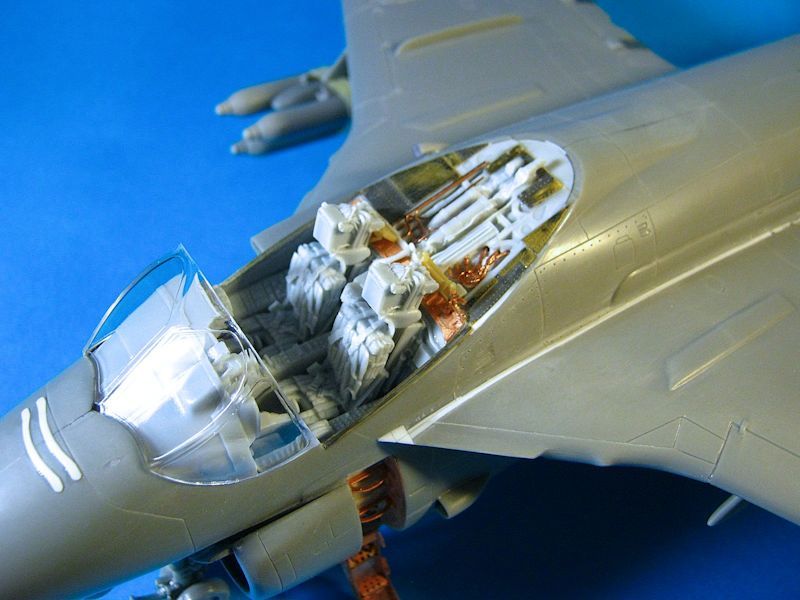
What did you think of the Wolfpack cockpit?
Even though on the Wolfpack set you can read "For Revell/Kinetic 1/48", the cockpit doesn't fit too well to the Revell kit; I had to do a lot of adjustment, especially around the rear part of the cockpit. As you can see in the following picture, most of the detail I lost was regained with photoetched parts coming from an Eduard fret. Since the cockpit is fairly wide, I've been able to build the entire model before painting it...
Verlinden cockpit fits a bit better the Revell kit, but the Wolfpack detail is much better...
-
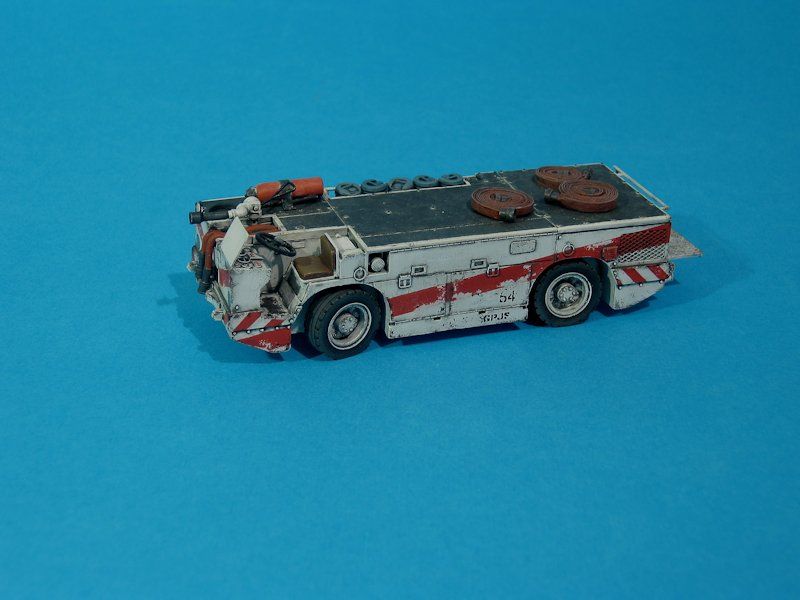
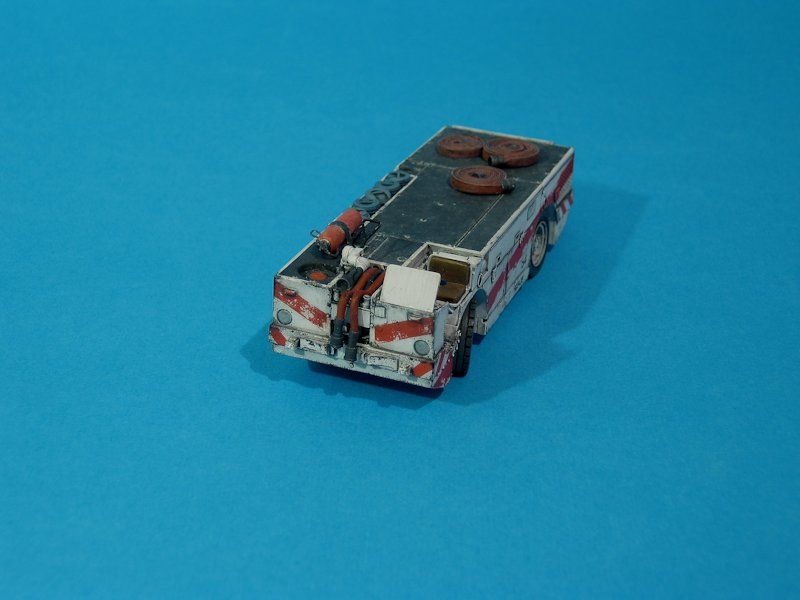
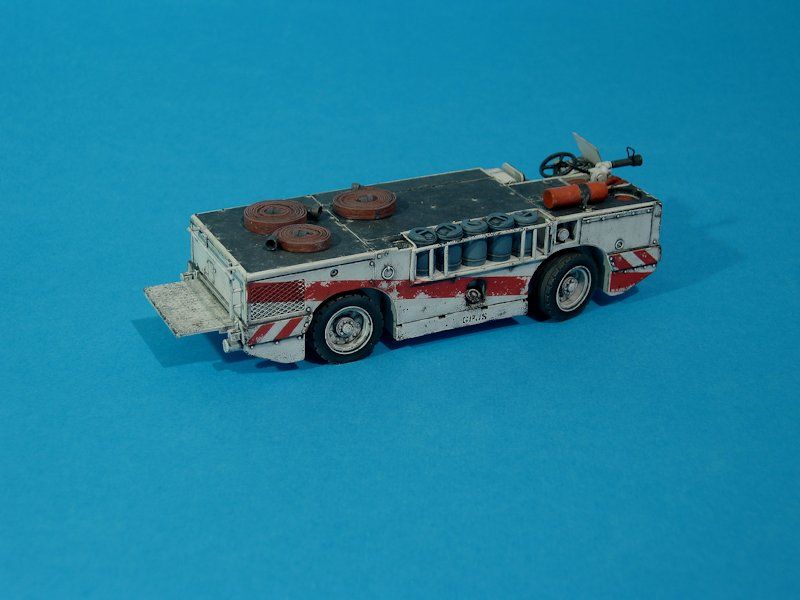
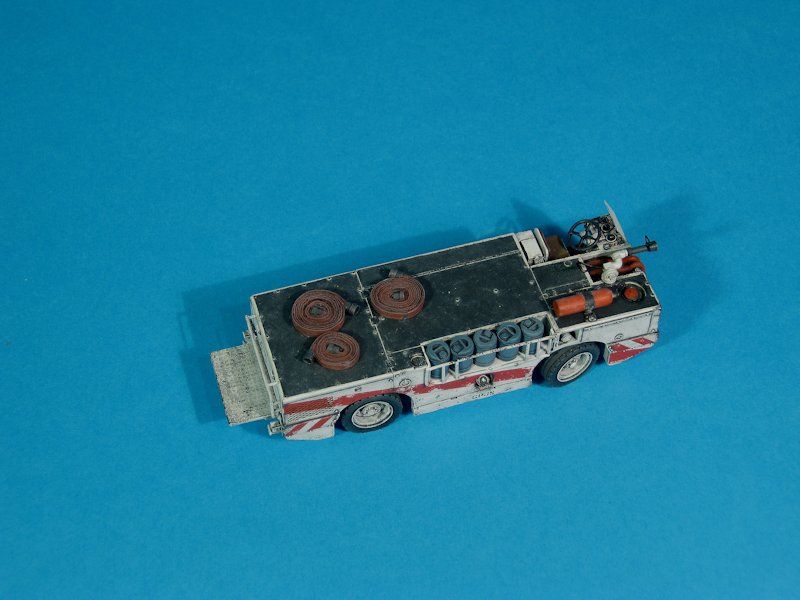
Can you explain how did you chip that red paint on the vehicle? It looks amazing!
The red paint on the vehicle was chipped with the hairspray technique: after painting white the whole vehicle, I masked the stripes with Tamiya tape and sprayed some hairspray where the red paint would go. I then I airbrushed the red paint, took away the mask and after a few minutes I started to scratch away the red paint, using a stiff brush dipped in warm water...
Cheers!
-
Cheers!
Caudron G.IV 1/48
in Critique Corner
Posted
Cheers!