


Lorebor
-
Content Count
52 -
Joined
-
Last visited
Content Type
Profiles
Forums
Calendar
Posts posted by Lorebor
-
-
I like it! Looks great

Any problems fitting the cockpit and exhausts?
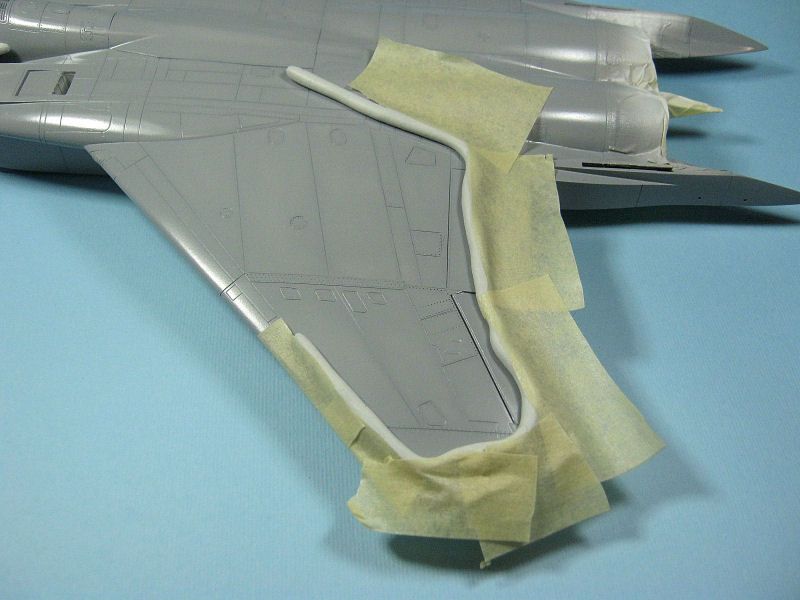
The cockpit and the exhausts fitted almost perfectly, I just had to trim a bit the glareshield location.
Cheers!
-
-
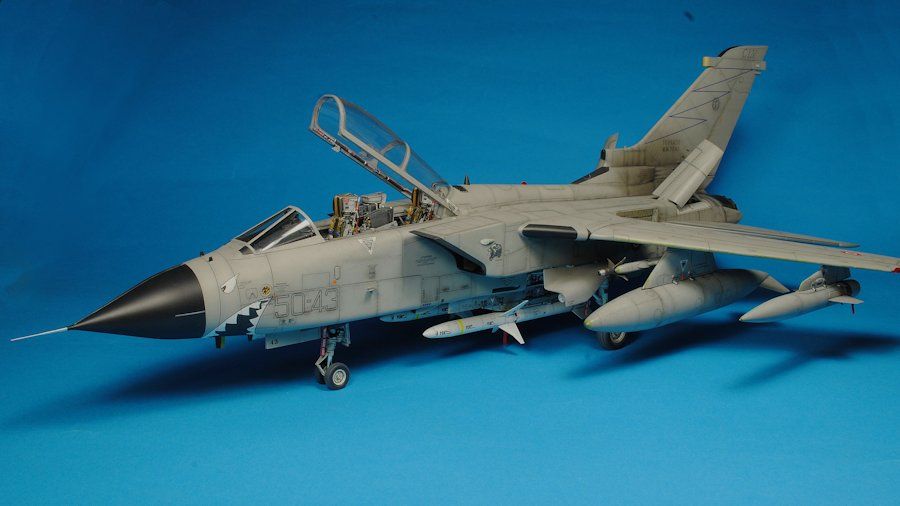
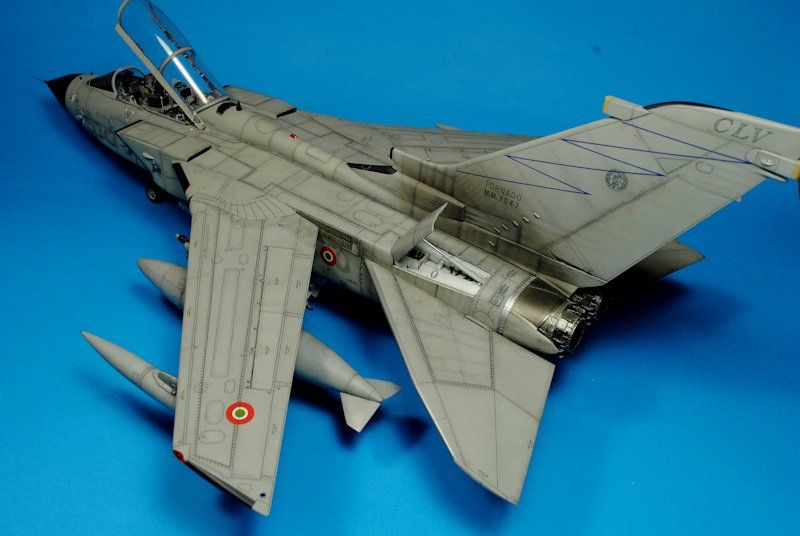
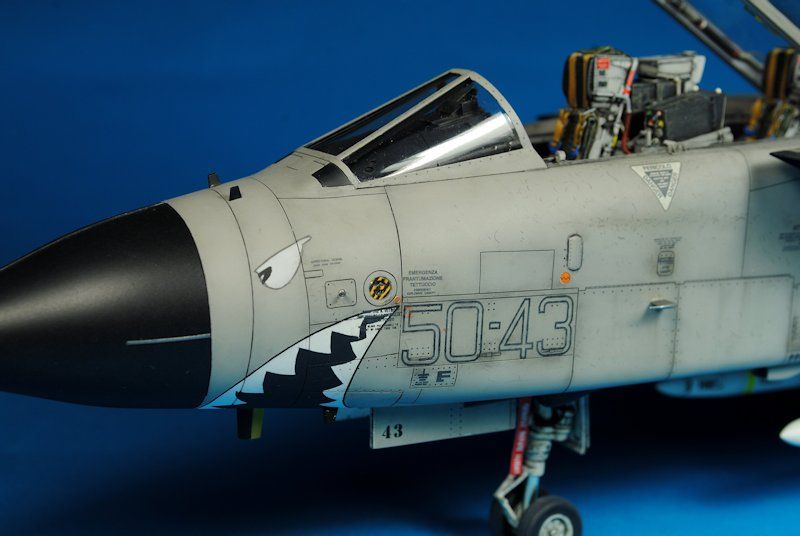
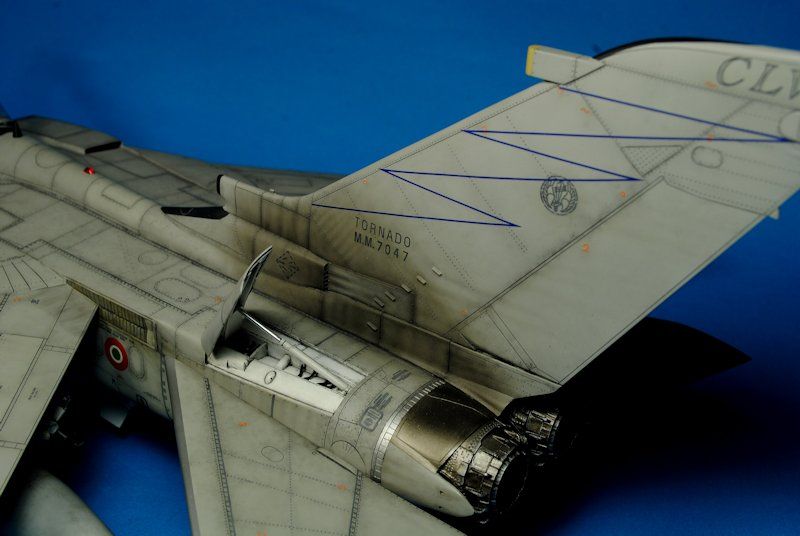
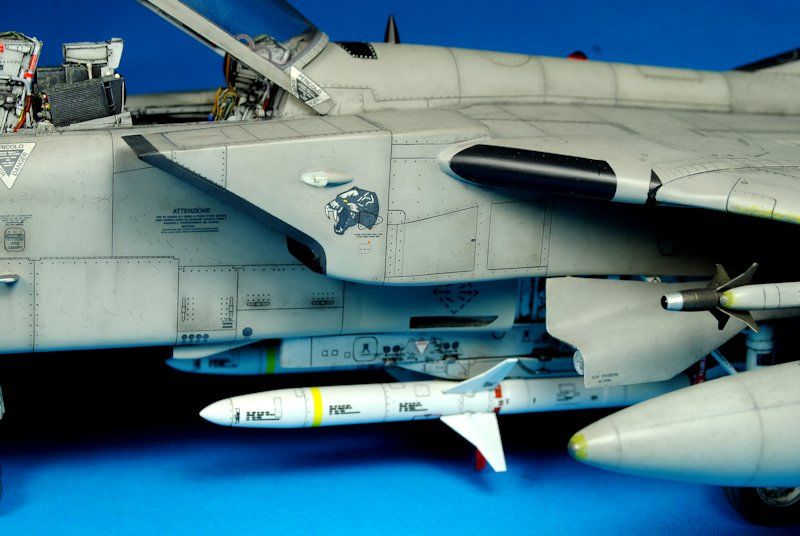
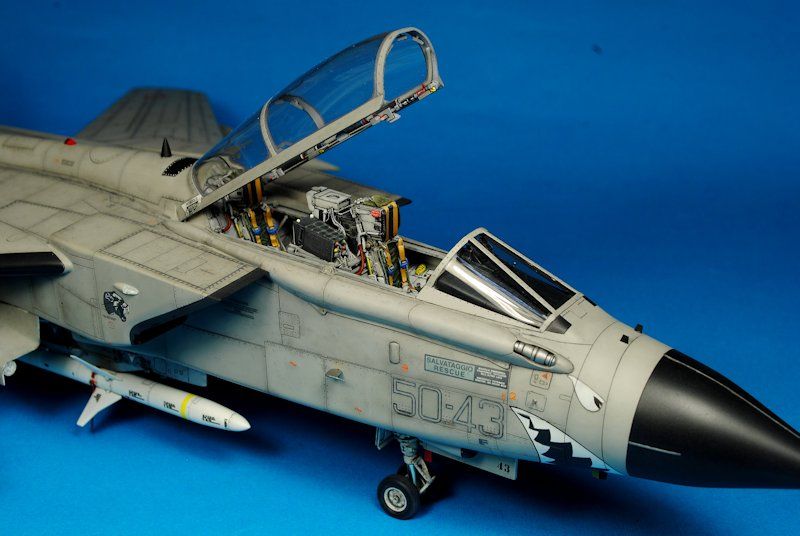
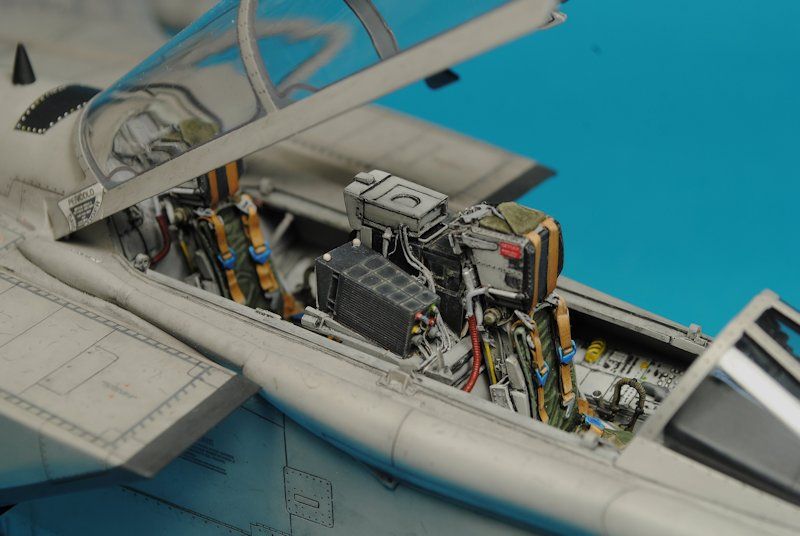
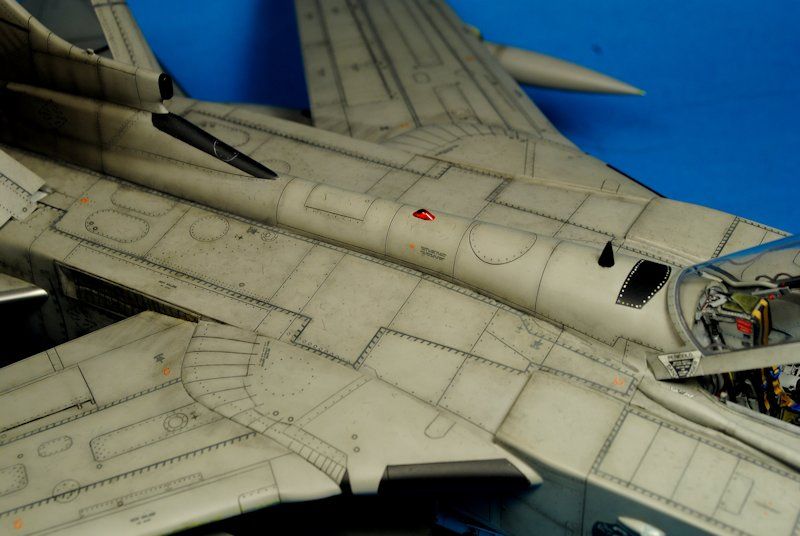
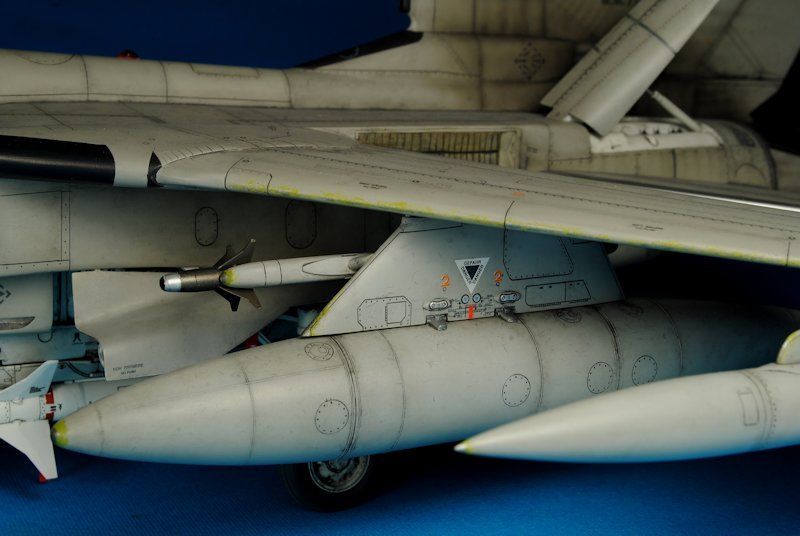
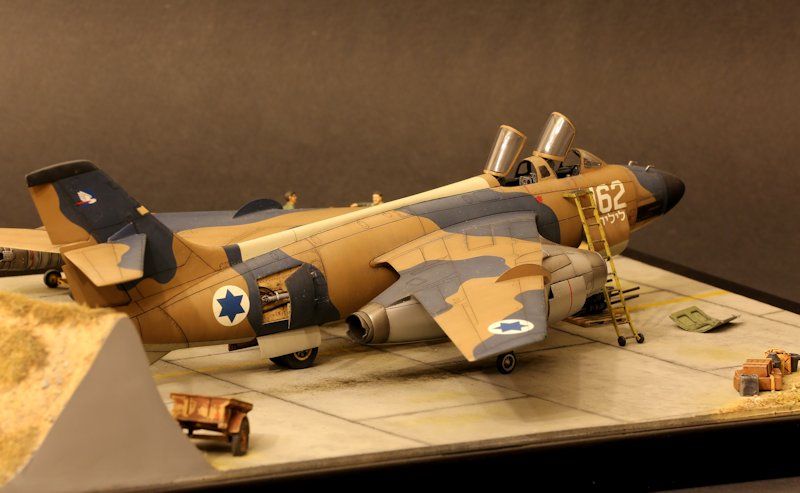
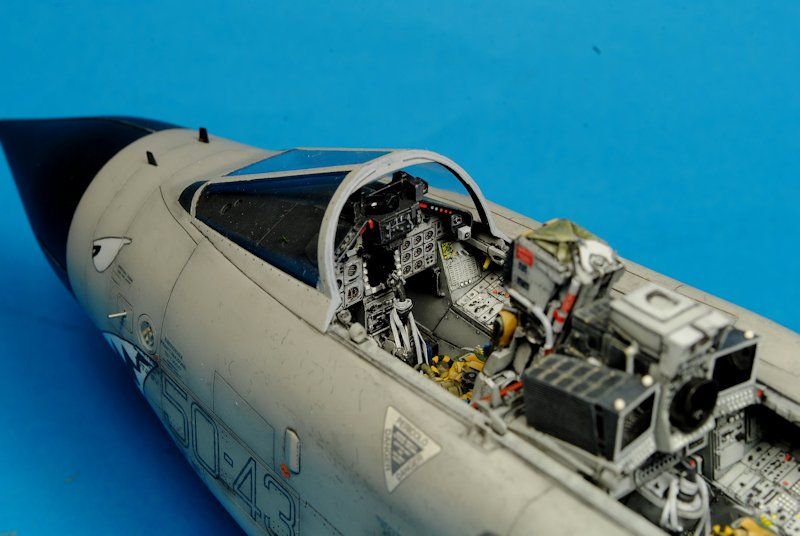
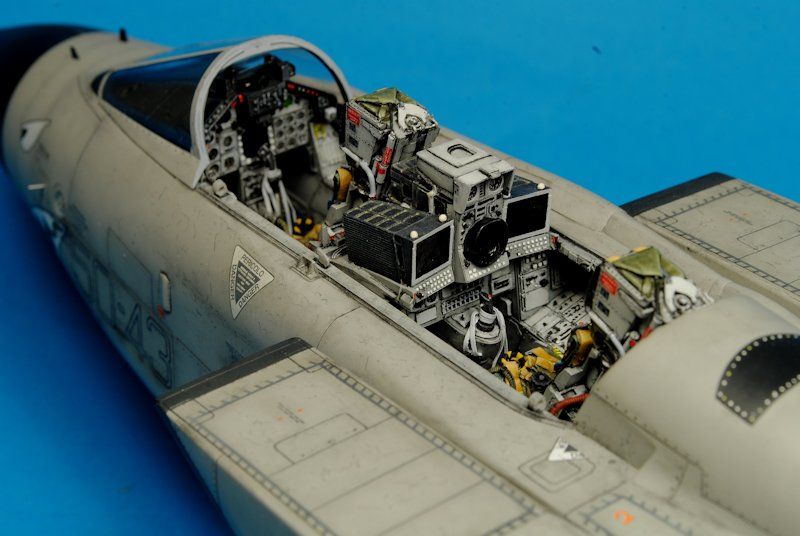
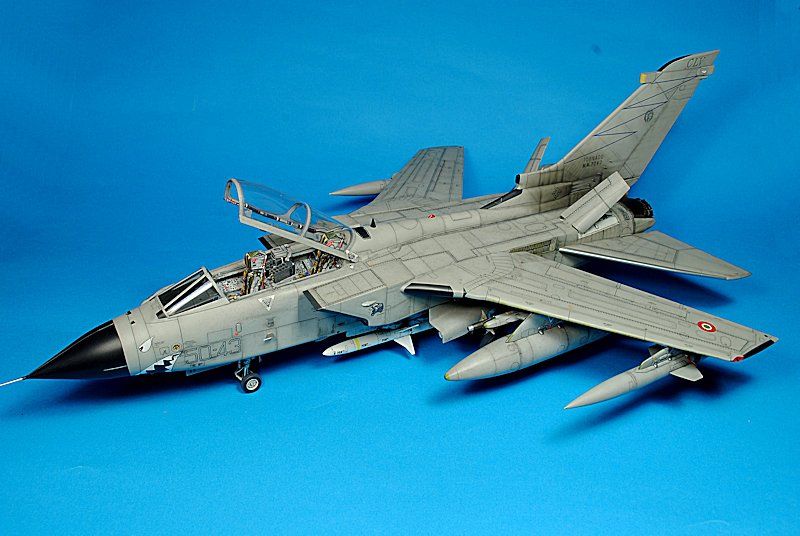
Hi everybody, this is my Tornado ECR; it's a Revell 1/32 kit with Aires cockpit and exhausts, CMK HARMs and Tauromodel decals...

-

Bye!
-
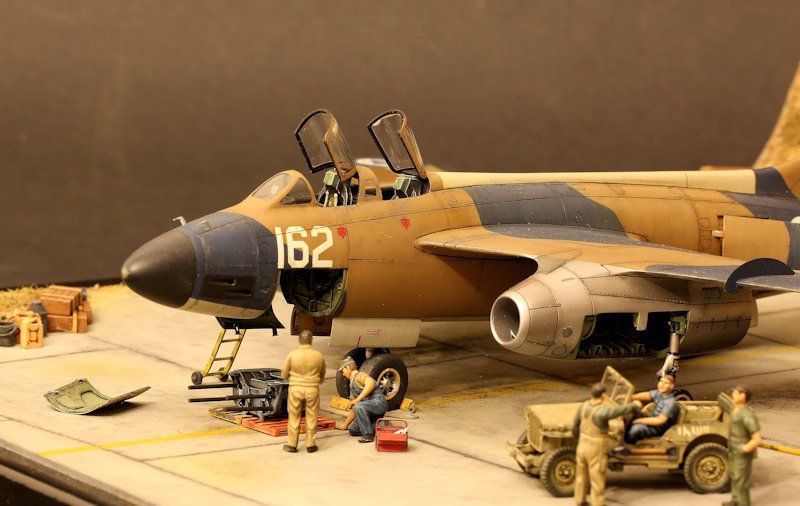
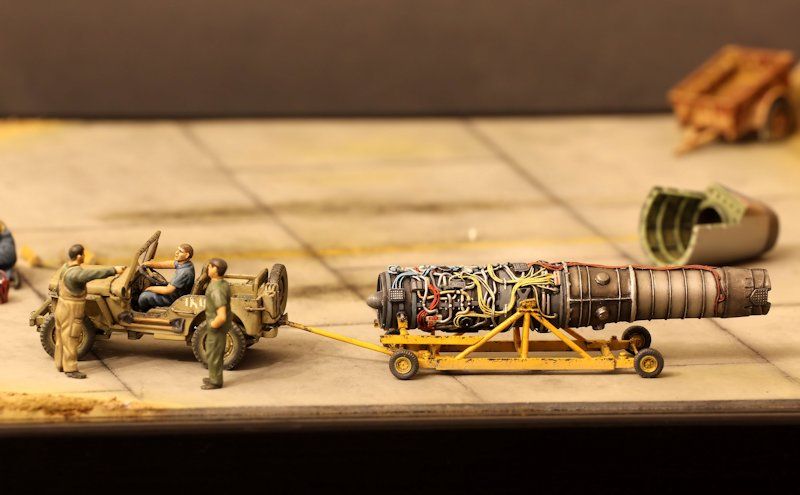
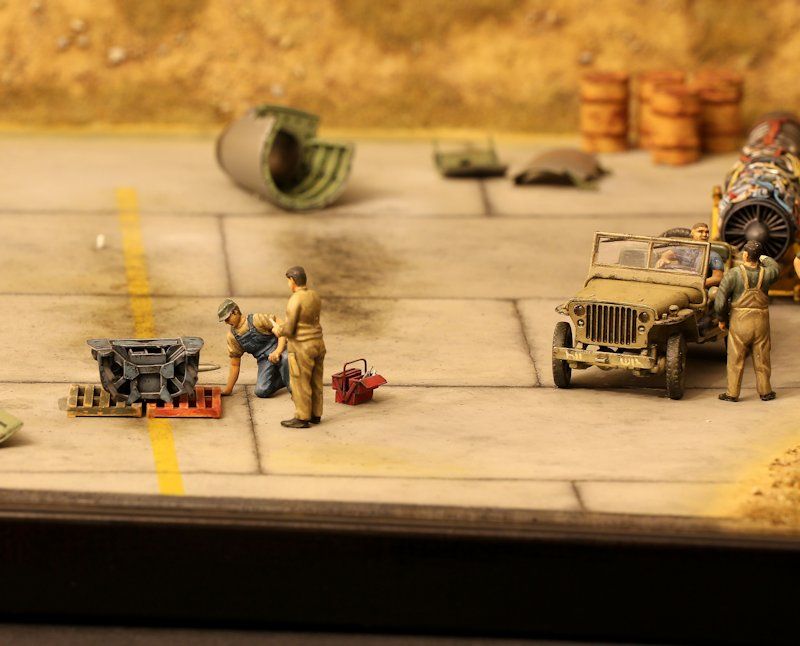
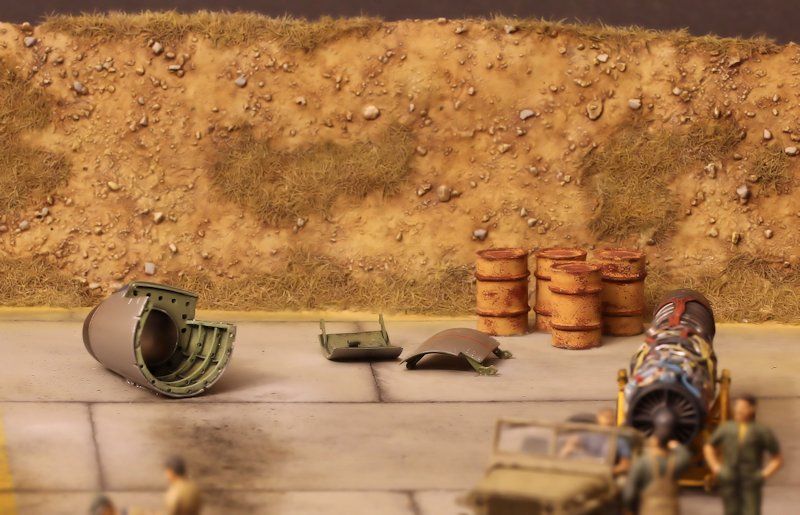
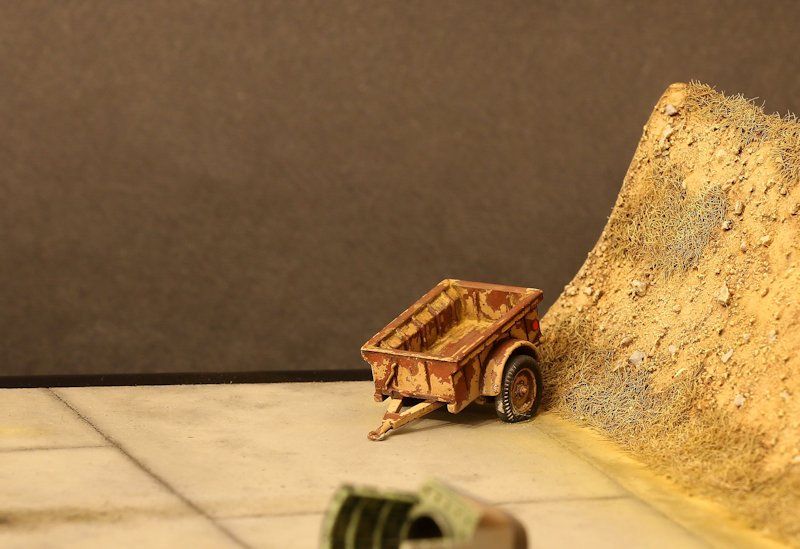
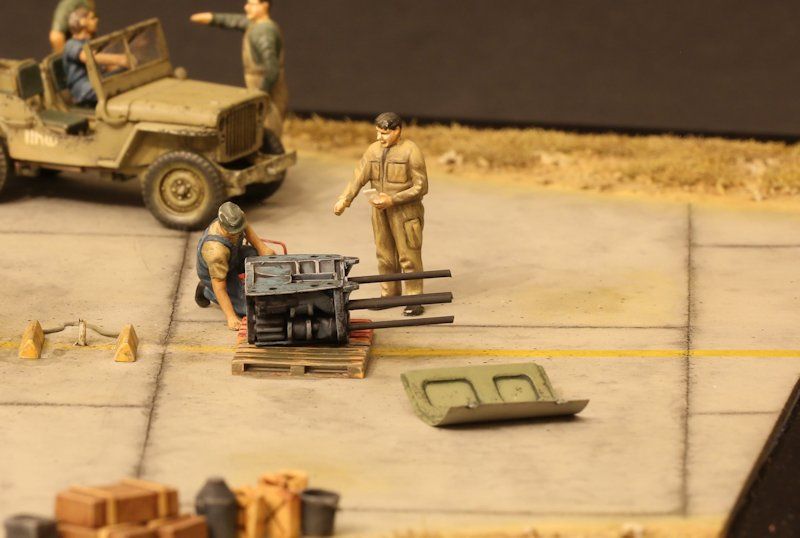
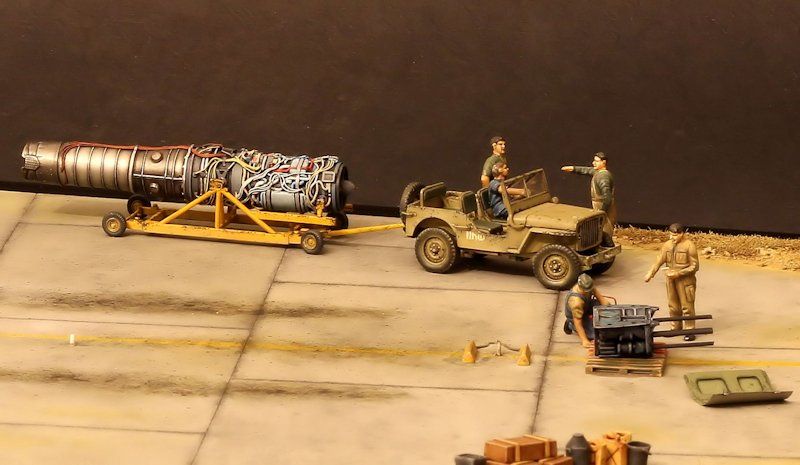
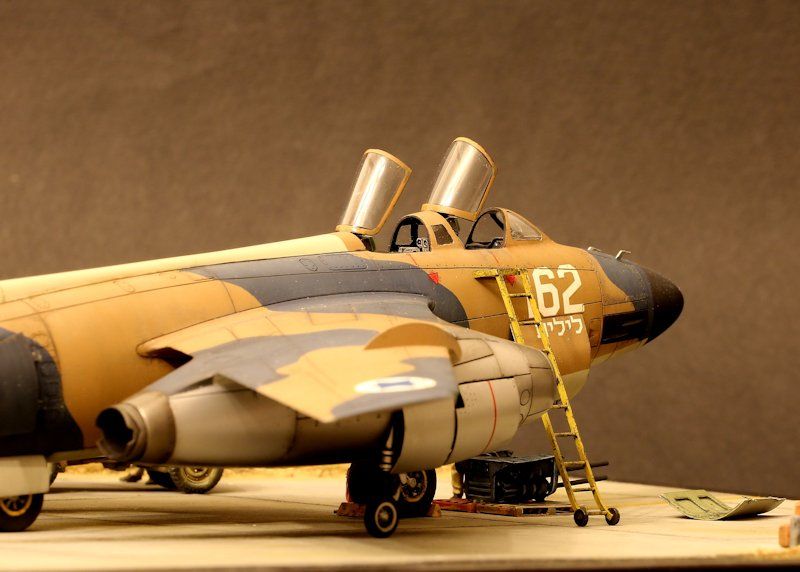
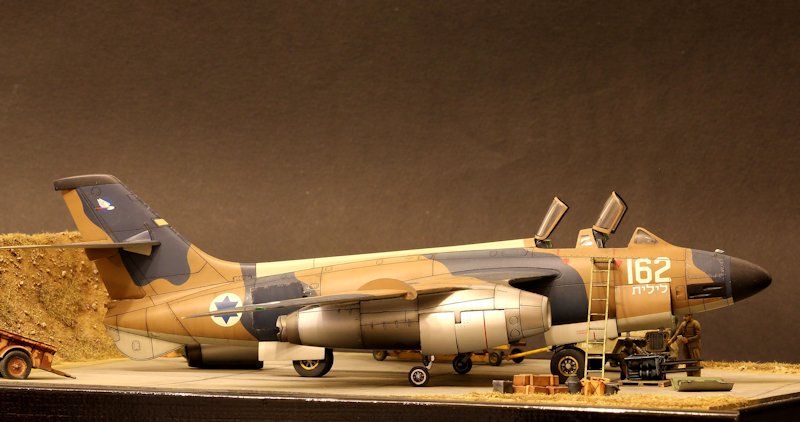
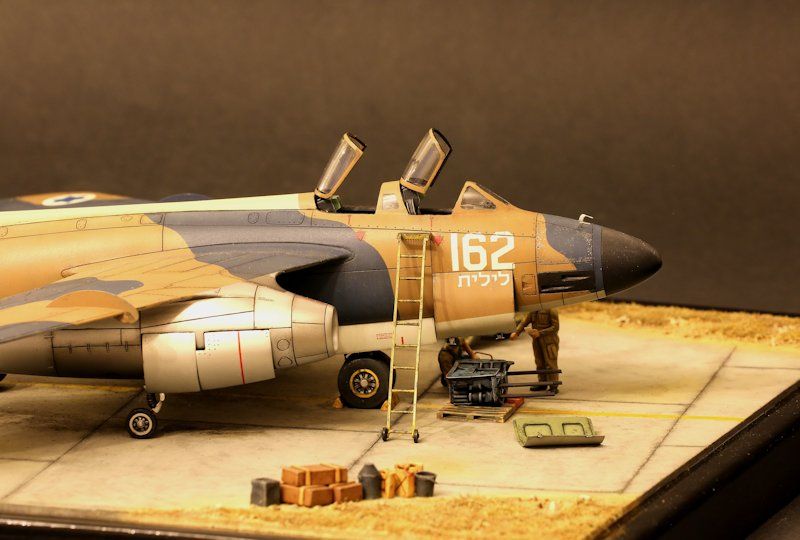
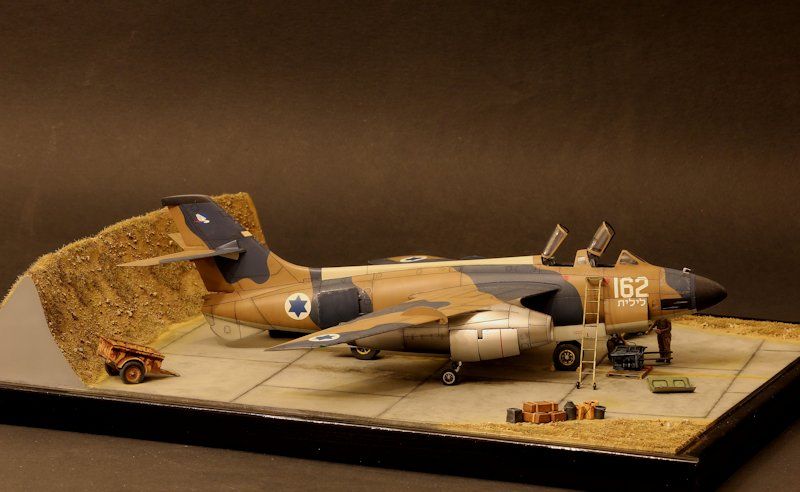
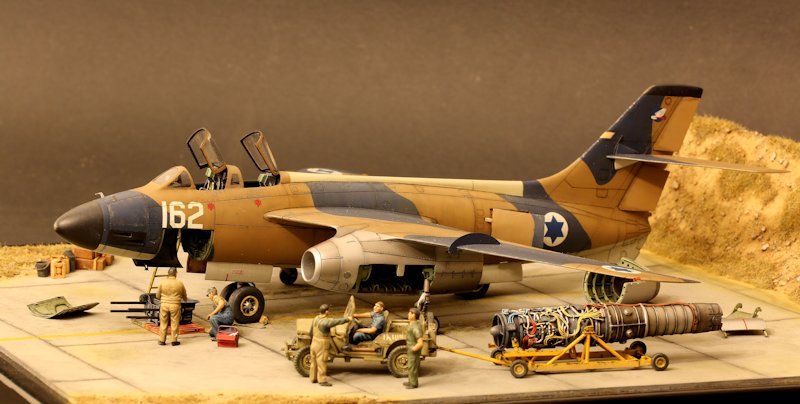
Hi everybody, I just finished a Vautour IIN; it's an Azur kit in 1/72.
The Willys and the trailer come from an Airfix set; figures are from Eduard range (except the guy driving the Willys that was scratchbuilt). Tanks, boxes and drums come from various resin sets ; everything else was scratchbuilt...

-
Jim, I airbrushed some Tamiya gloss black on a clear decal sheet, then I cut it in thin stripes (somewhere around 0.5 and 1mm wide); the stripes were cut in section not longer than 2cm, then I applied them to the model, using MicroSet to soften them in order to make it easier to curve them...
Cheers!
-
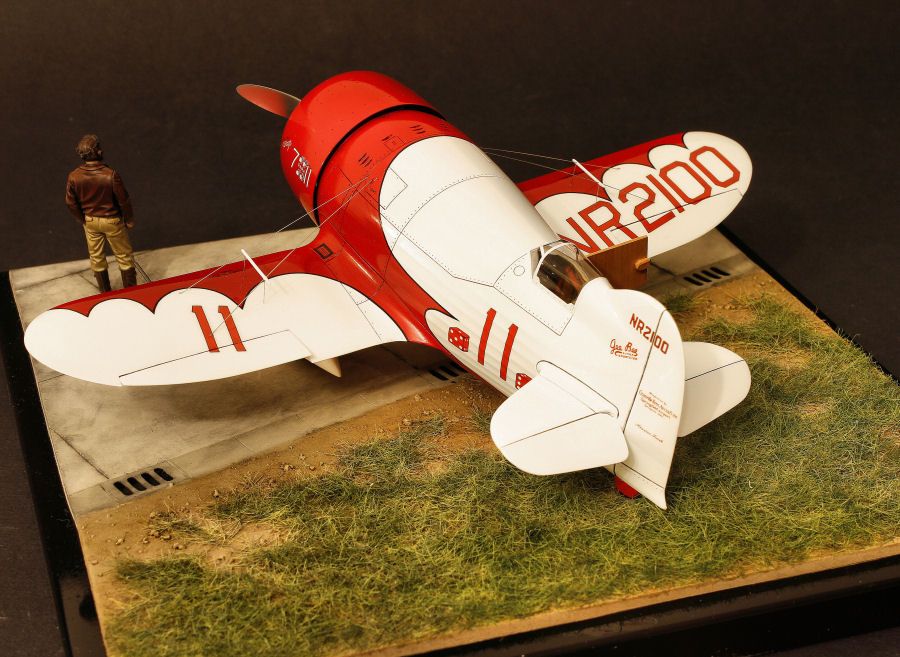
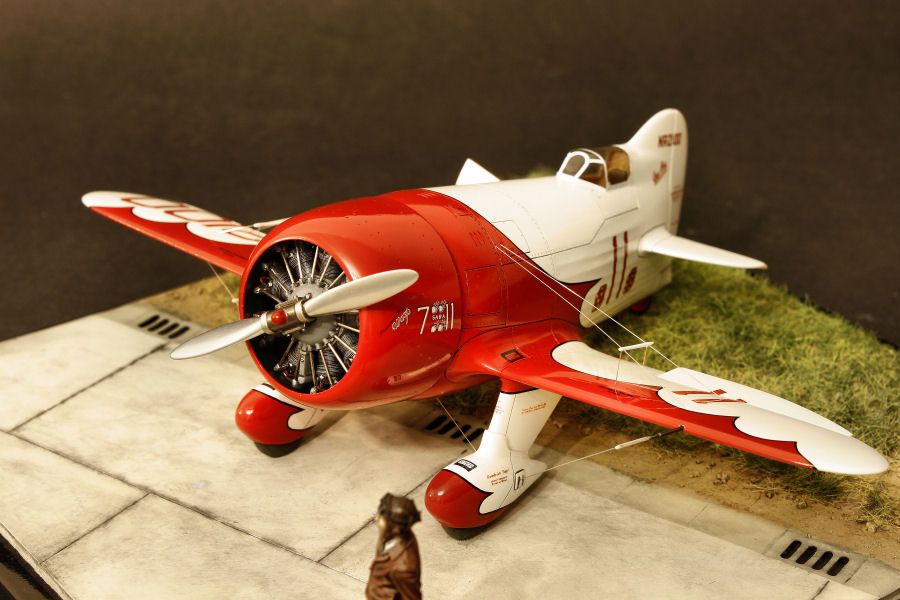
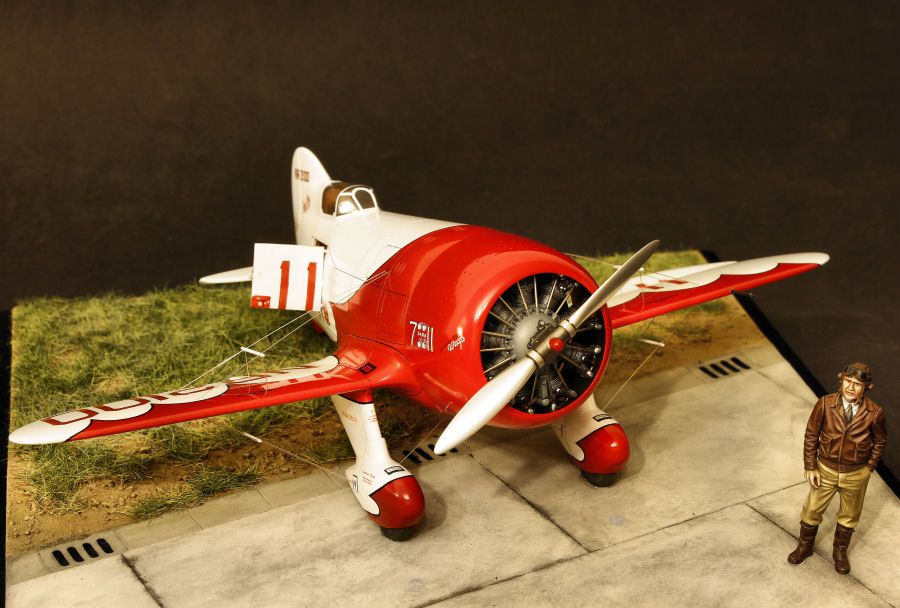
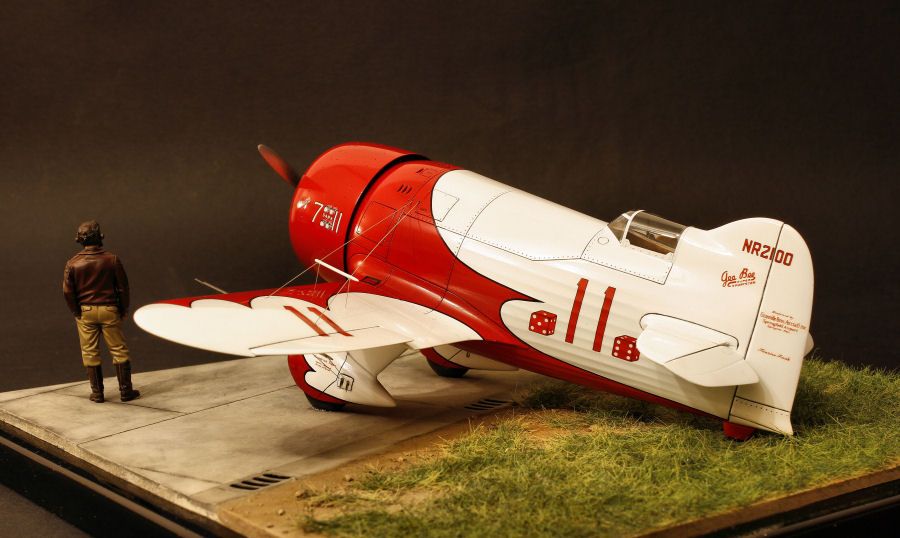
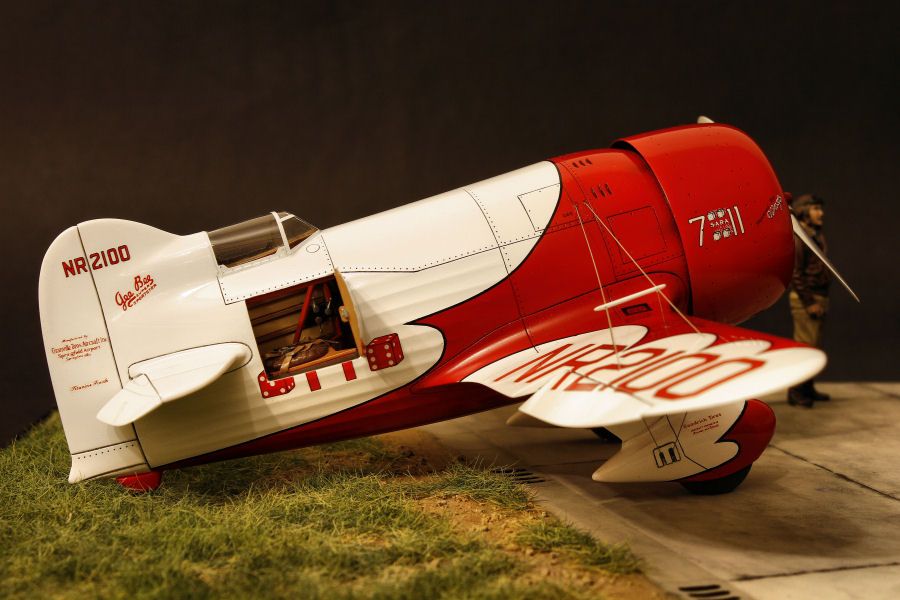
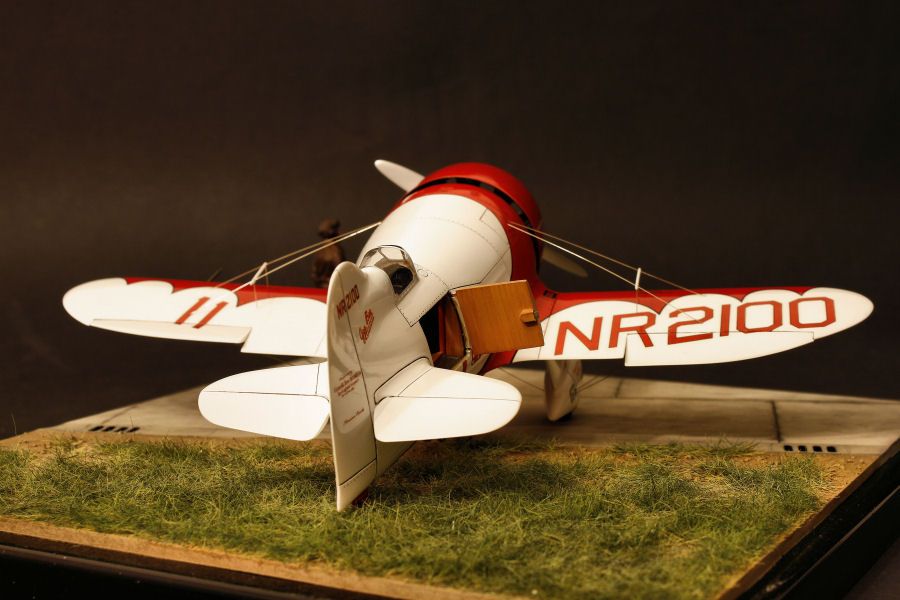
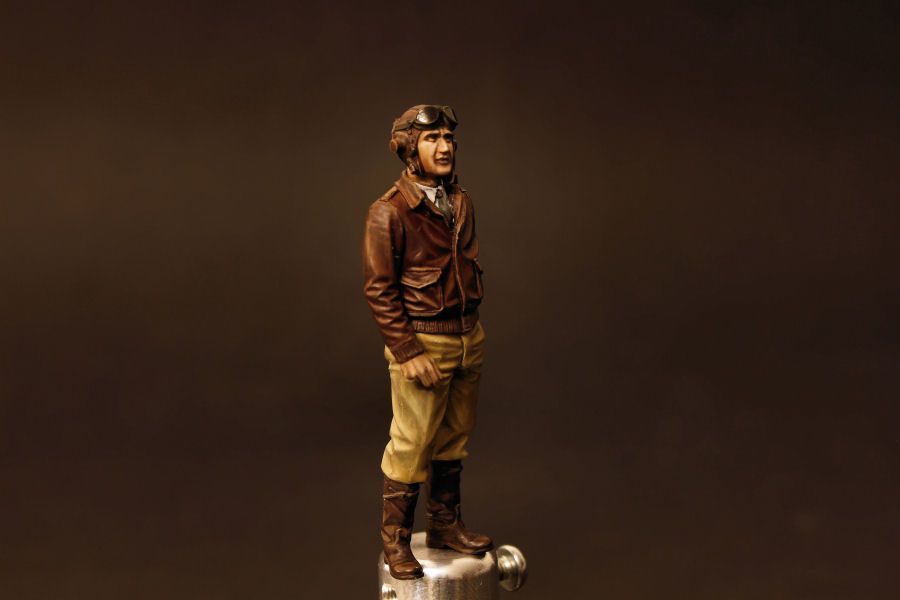
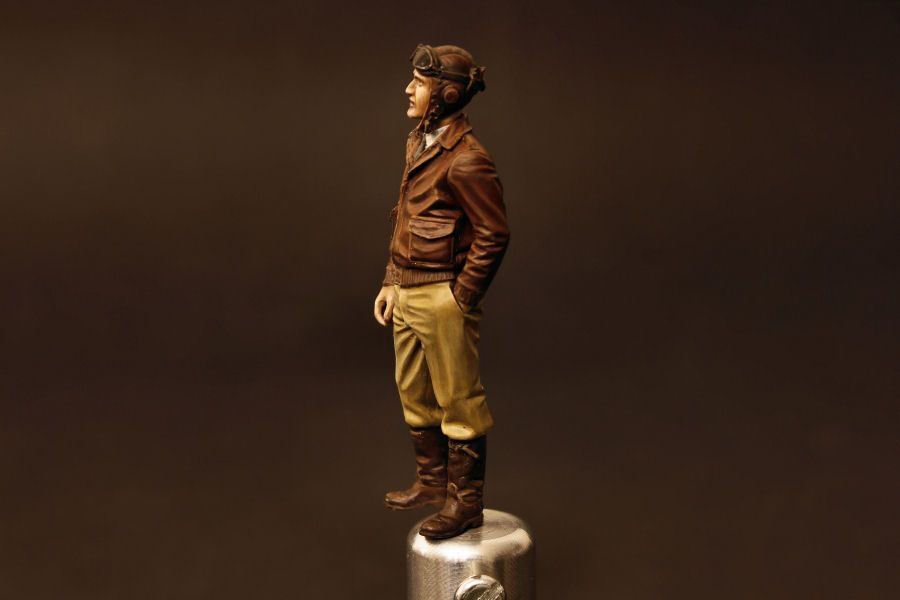
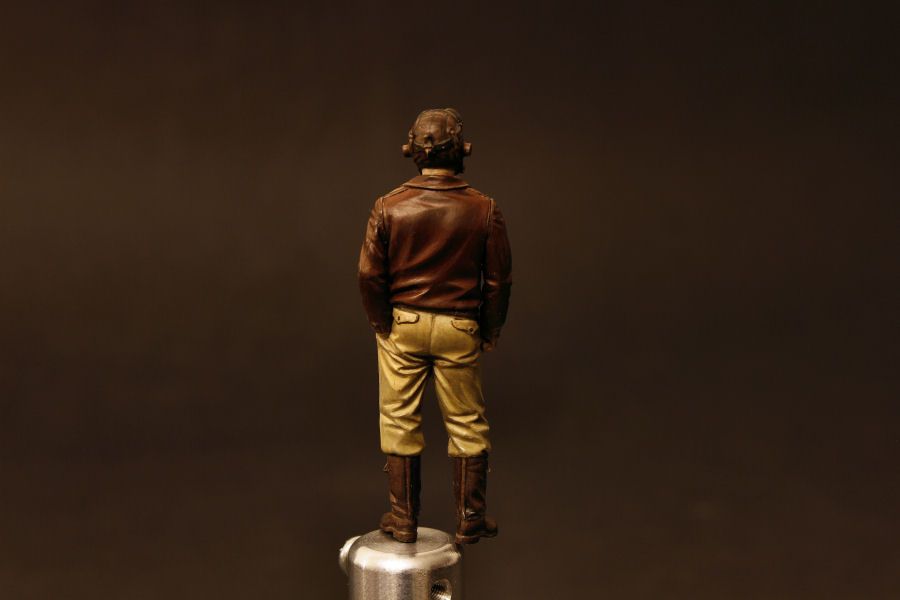
Hi everybody, this is my Gee Bee R-1; it's the classic 1/32 Williams Bros kit with an Ultracast figure...

Bye!
-
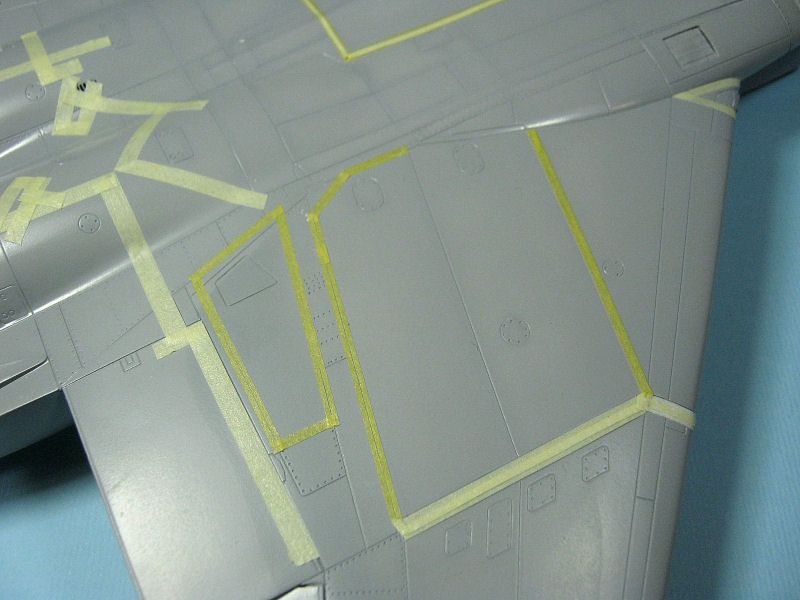
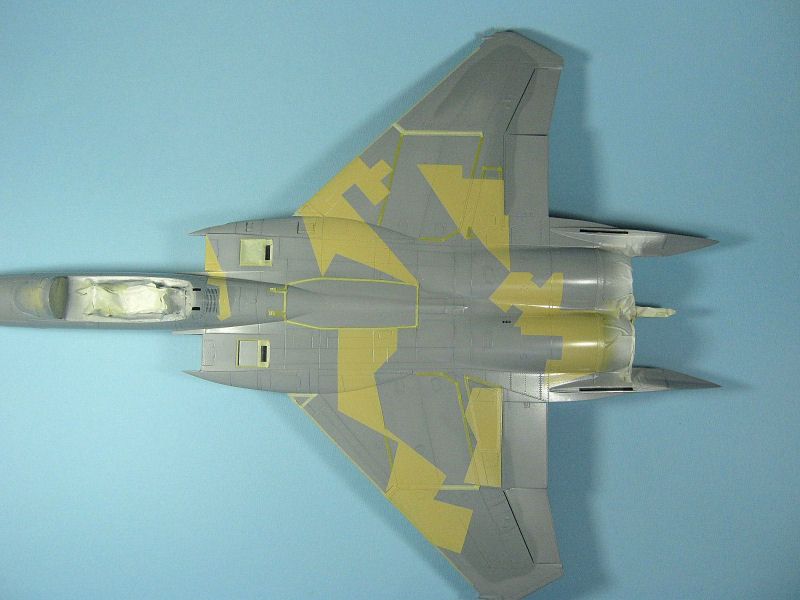
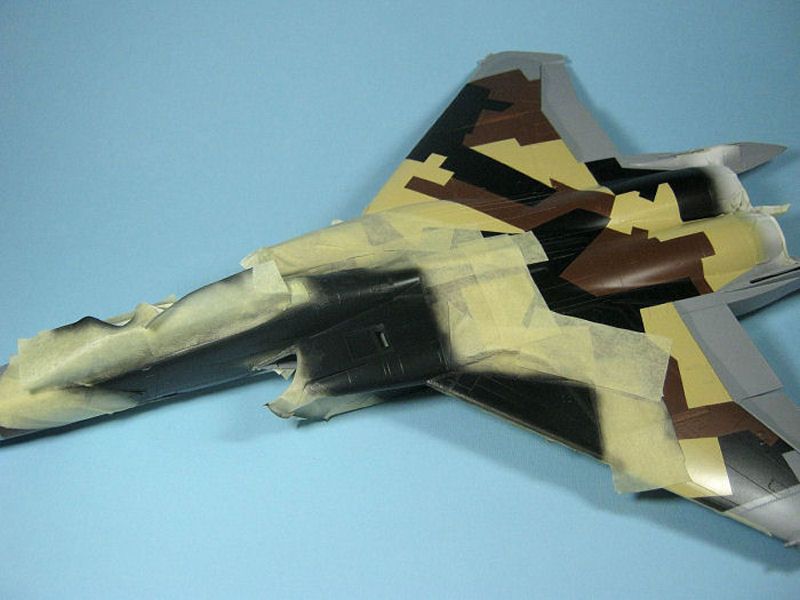
I'm building this right now in 1/72 scale, using Hasegawa's boxing. I'd be very interested in learning how you can achieve such an excellent paint job. What did you use for masking?
Mike, I first painted the underlying grey camouflage using the italian equivalent of Blu-tack...
...I then masked the panel lines with thin stripes of tape (it's a japanese pre-cut tape very similar to the tamiya one...i don't remember its name though...). The splinter camouflage was masked with thin stripes of low-adhesivity car masking tape...
I first painted the sand patches...
...then the brown...
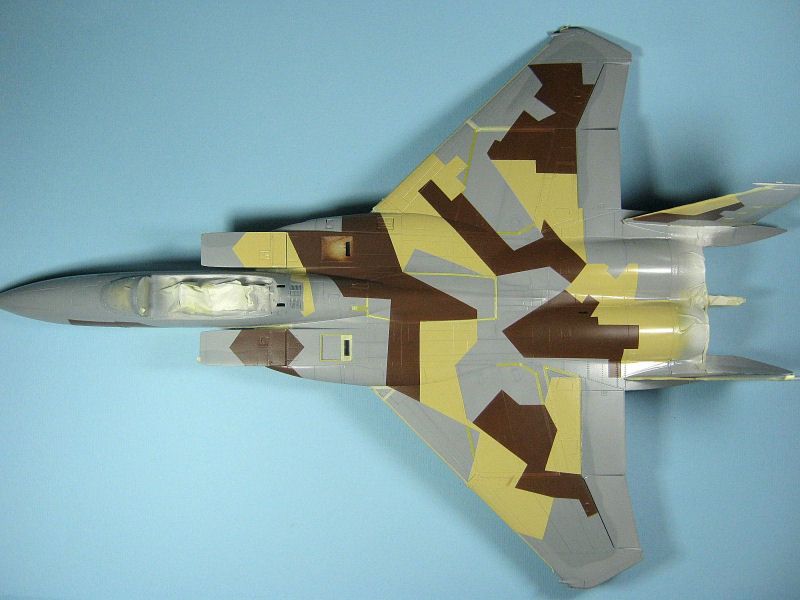
...and the black ones. I did it this way in order not to overlay any patch of color, since I didn't want to have any step caused by the thickness of the paint.
I used Gunze acrilics thinned with Tamiya Lacquer thinner...
Hope useful, cheers!
-
I would love to see your WIP pics of how you converted the E to a D.
cheers,
Mike
Sorry, but I didn't open a WIP thread; anyway, here are the modifications I made to the Revell kit; wheels weren't modified, even though the Strike Eagle wheels are a bit wider than the regular Eagle's wheels...
-
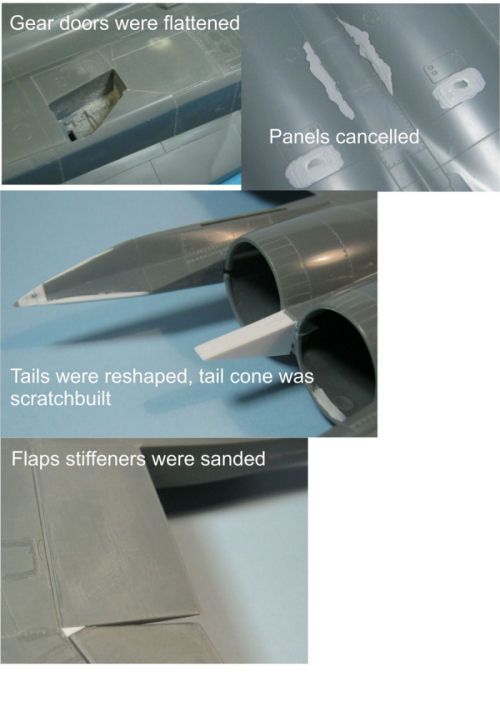
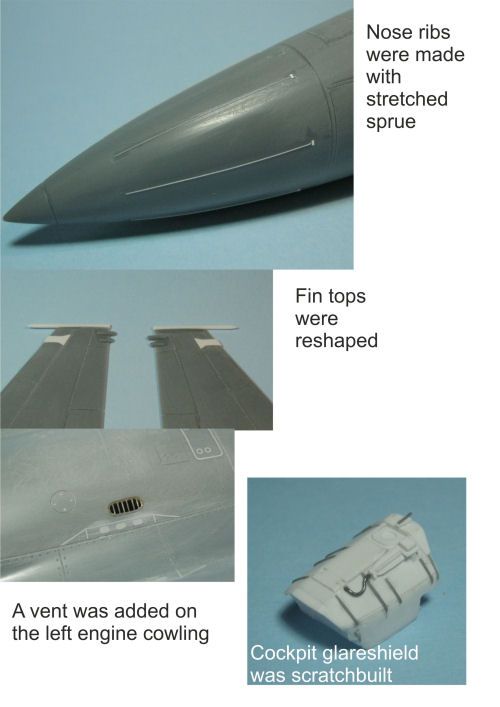
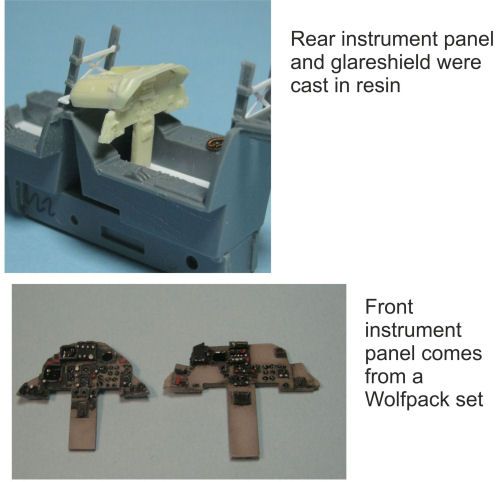
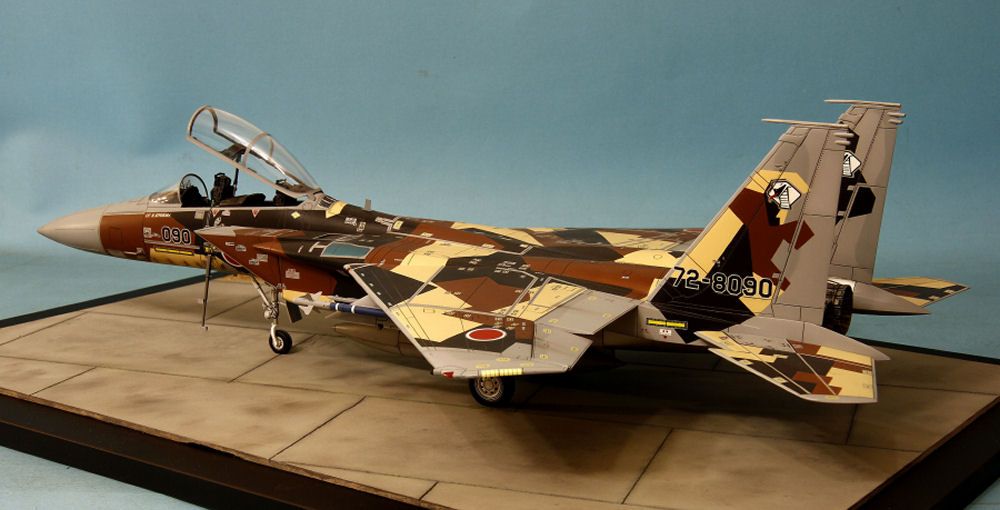
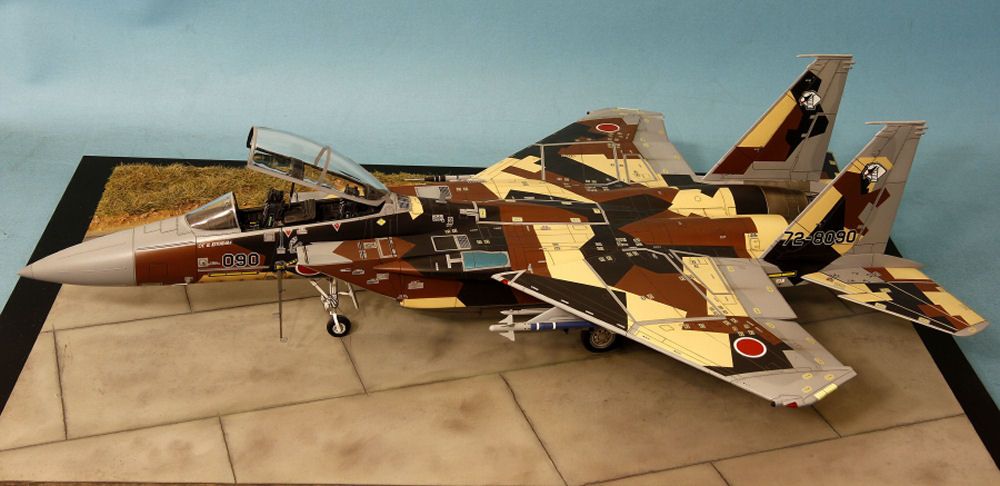
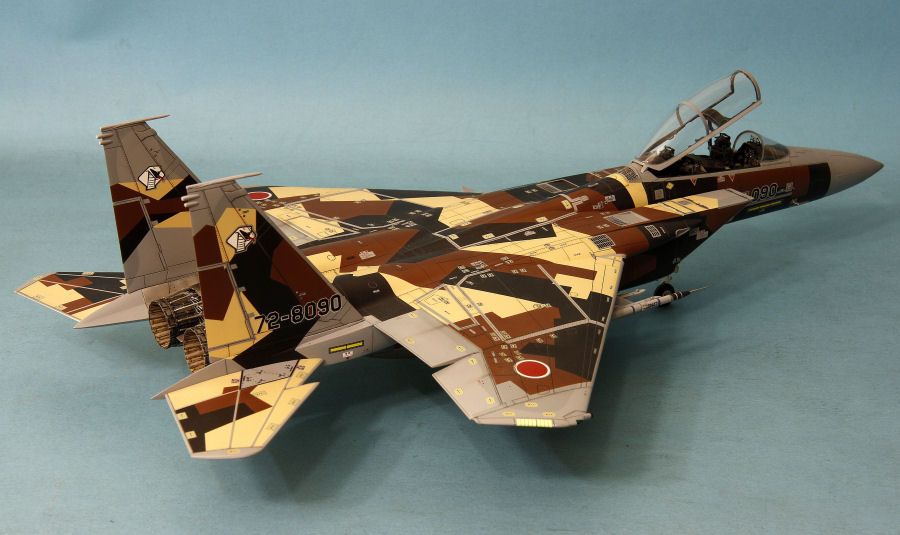
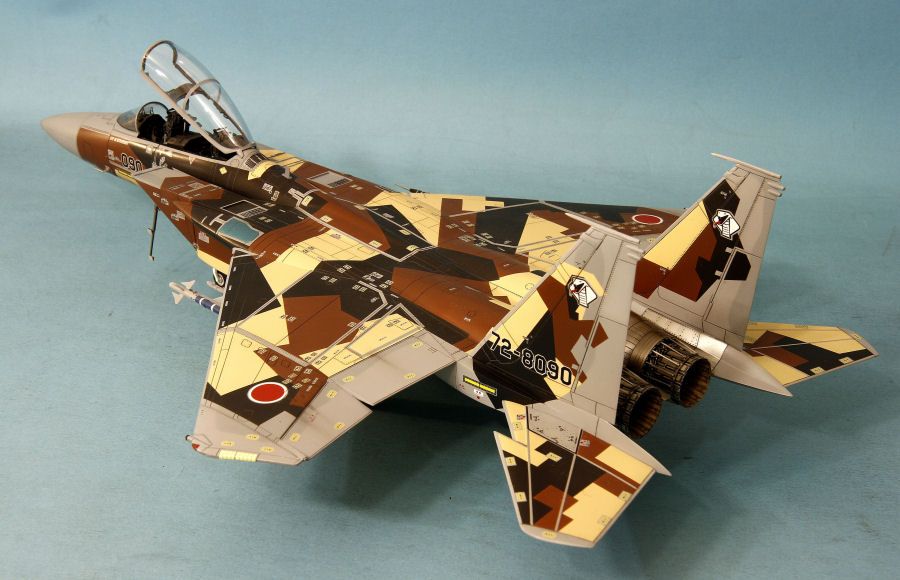
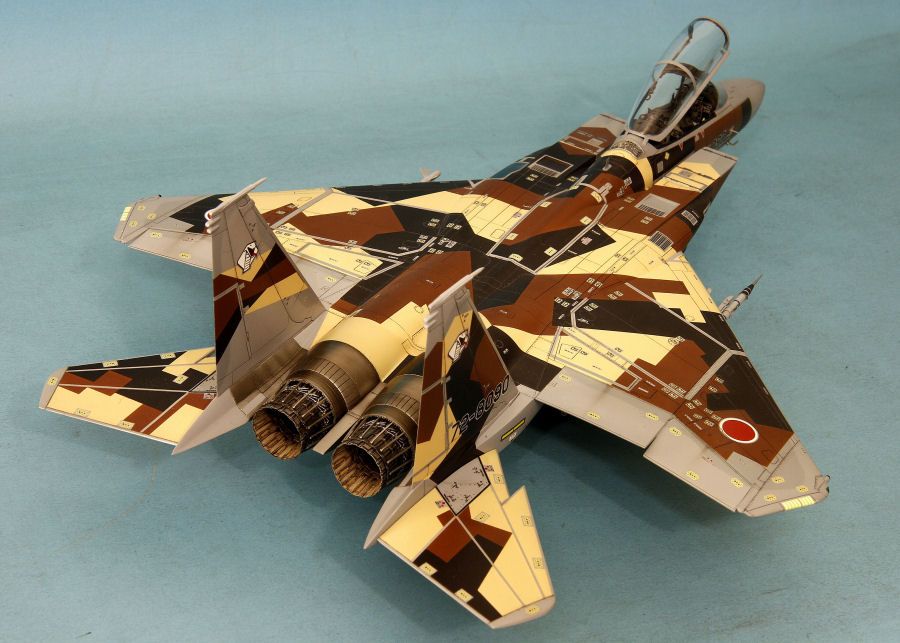
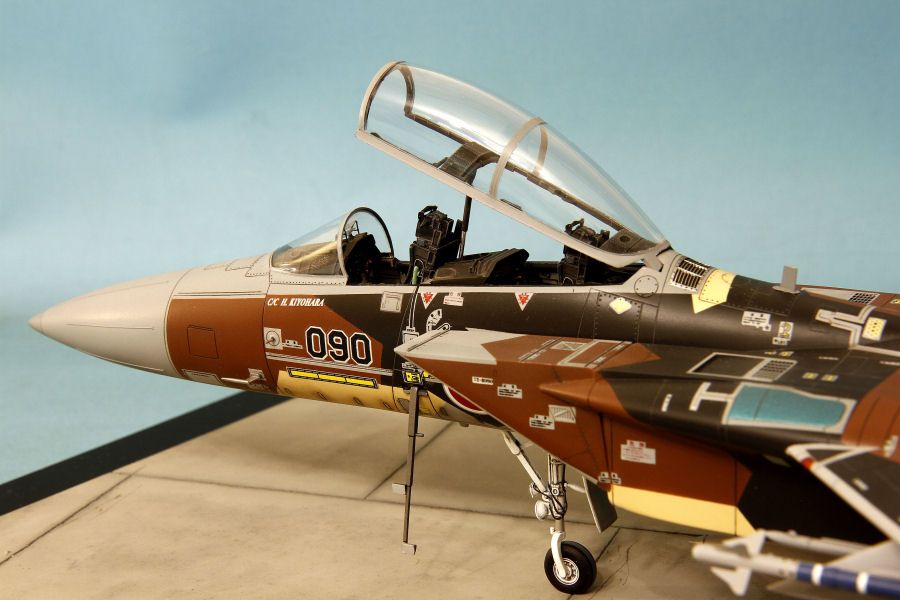
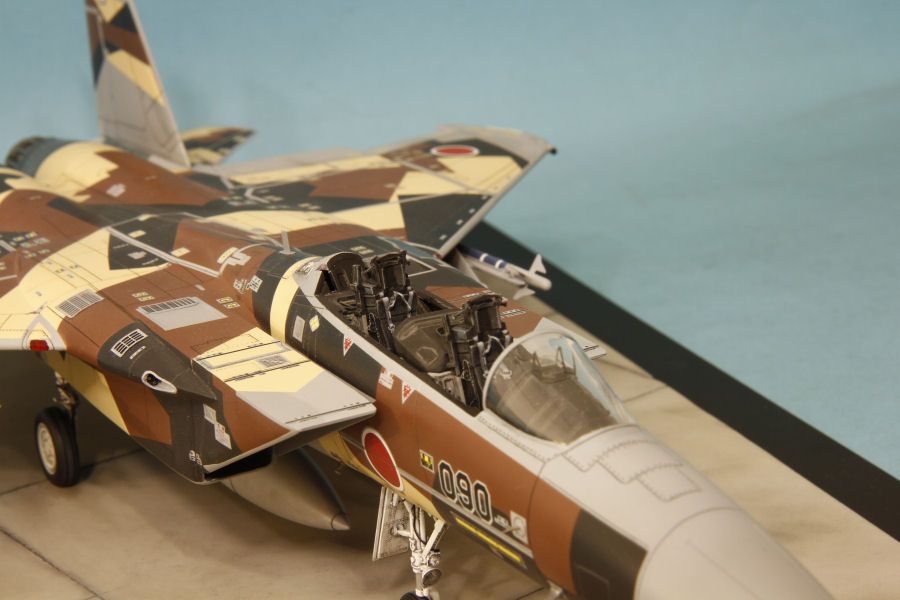
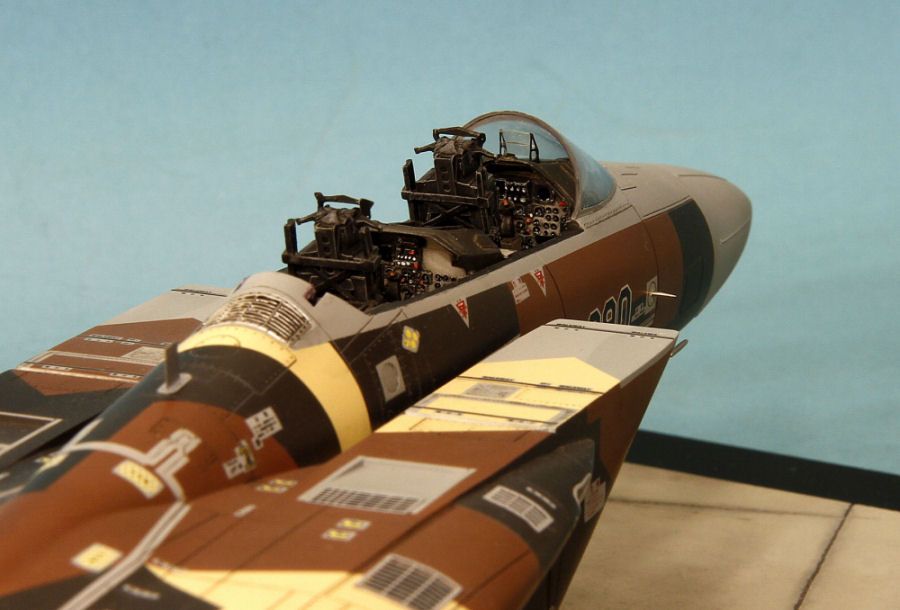
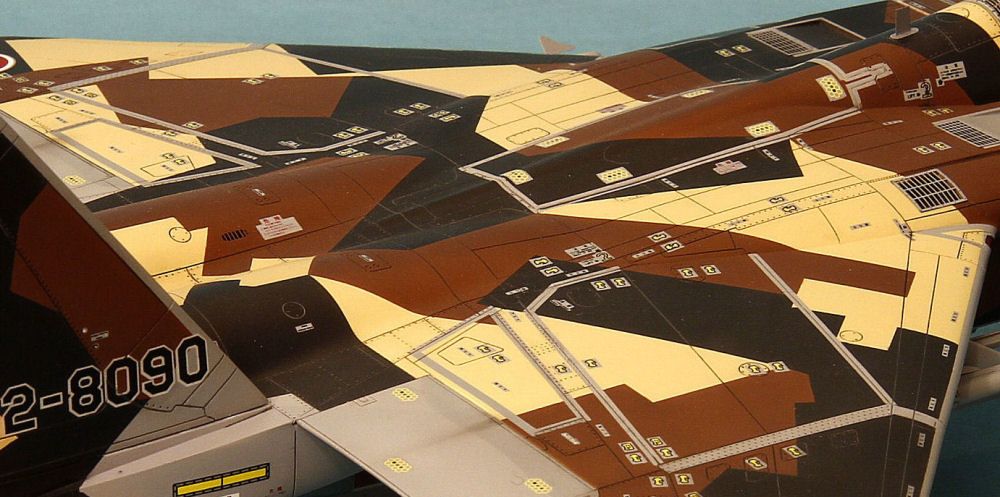
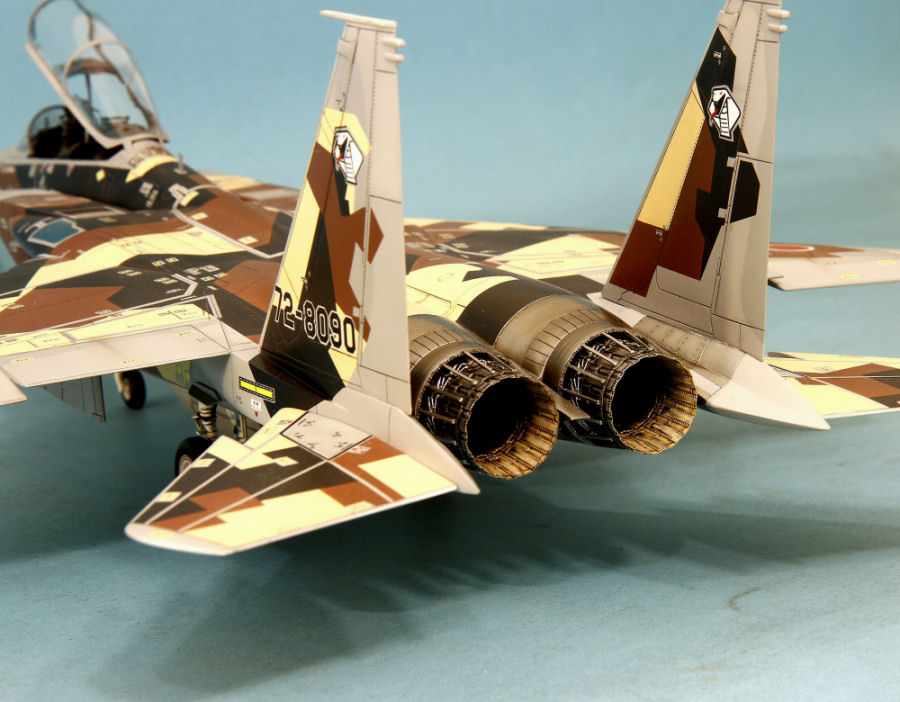
Hi everybody, this is my last project; it's a Japanese F-15DJ, obtained from a Revell 1/48 F-15E. I used Aires exhaust, Quickboost seats and DXM decals...
-
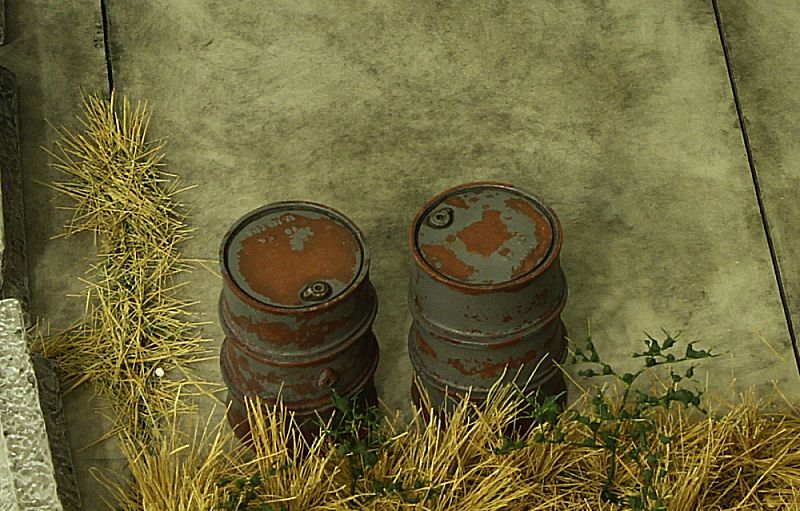
I was wondering if you used the "hairspray" technique on the drums and what method you used to weather the concrete?..........it all looks awesome!
Yes, the drums were weathered with the hairspray technique.
The concrete was weathered this way: I first painted the base (made with 2 mm sheet plasticard) with Tamiya XF19 diluted with rubbing alcohol, then the center of each panel was given a coat with a very light grey. I then picked some black oil color straight from the tube and spread it on the concrete, working on a limited space at a time (that's because the very flat grey paint will absorb the oil color very rapidly and it may turn out to be too messy). After a minute or two I started to remove the excess oil color with a wide brush moistened with turpentine, working with a "tapping" motion that allowed me to control the quantity of oil color removed and avoided to have some visible brush strokes on the concrete. The job ended with a black oil wash along the lines engraved on the surface...
Cheers!
-
Thanks to all of you guys!
I want to ask you how did you do the oil stains?
The oil stains were done with an highly diluted mixture made of about 70% Tamiya Smoke and 30% base colour (and a tiny, very tiny drop of clear red for the stains on the sand coloured part of the model). The base colours I used in the mixture were the original colours the camouflage was made with, namely the colors without desaturation. All the stains were masked with Patafix (which should be the italian equivalent of Blu Tac) and airbrushed in very light layers, in order to better control the final colour and coverage of the stains. The panel lines covered by the oil stains were enhanced a little bit with a light pass with Tamiya Smoke.
Cheers!
-
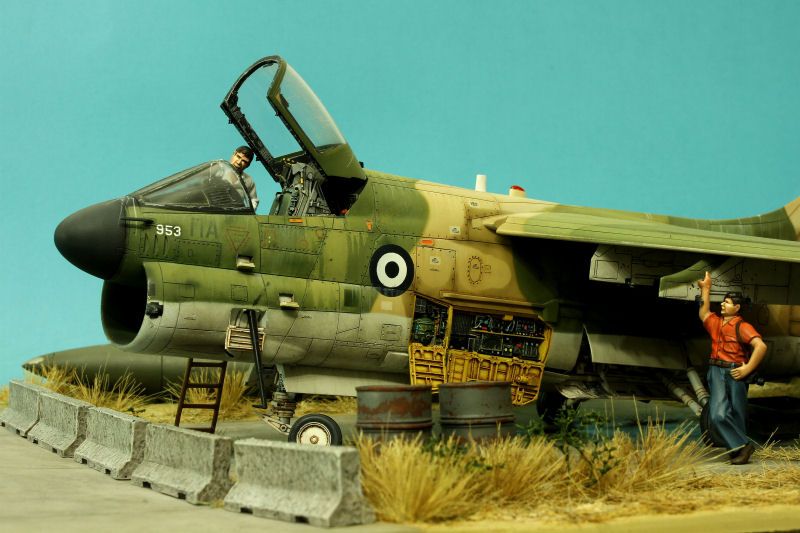
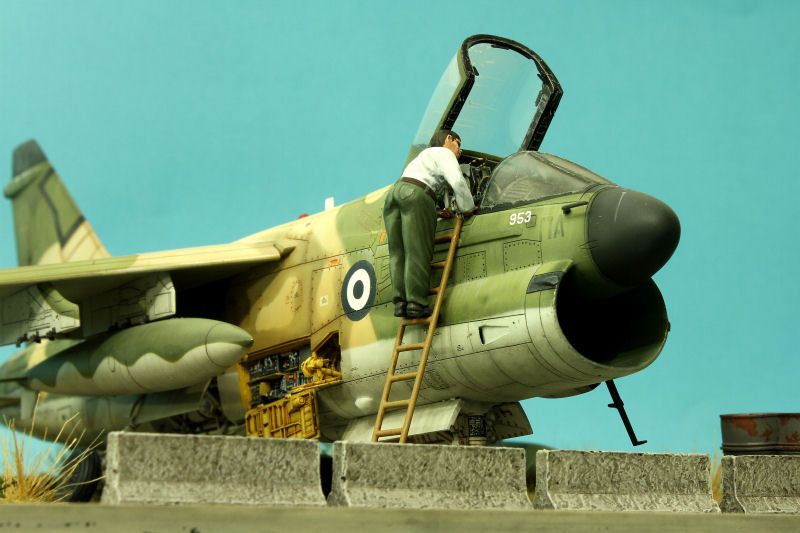
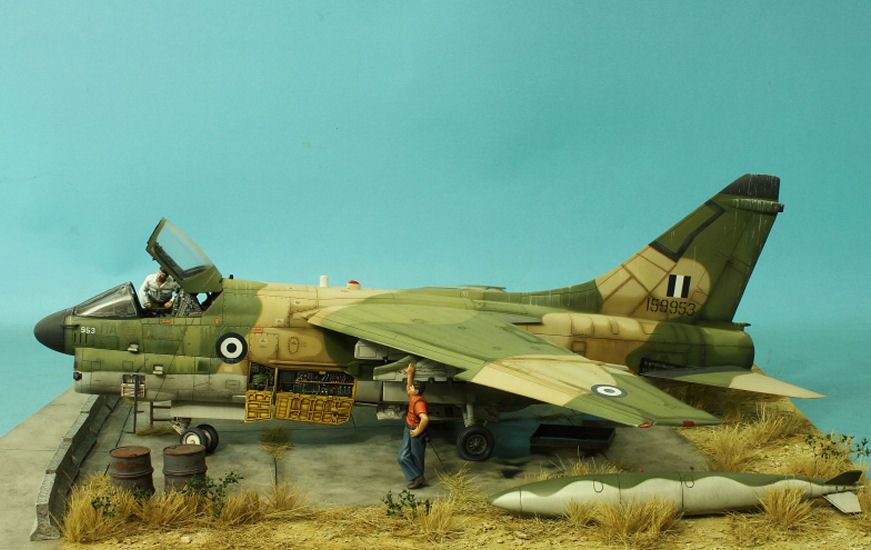
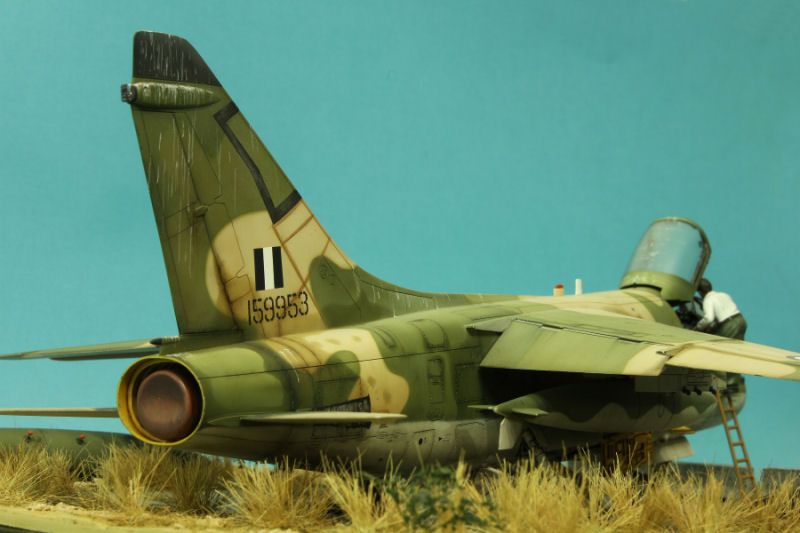
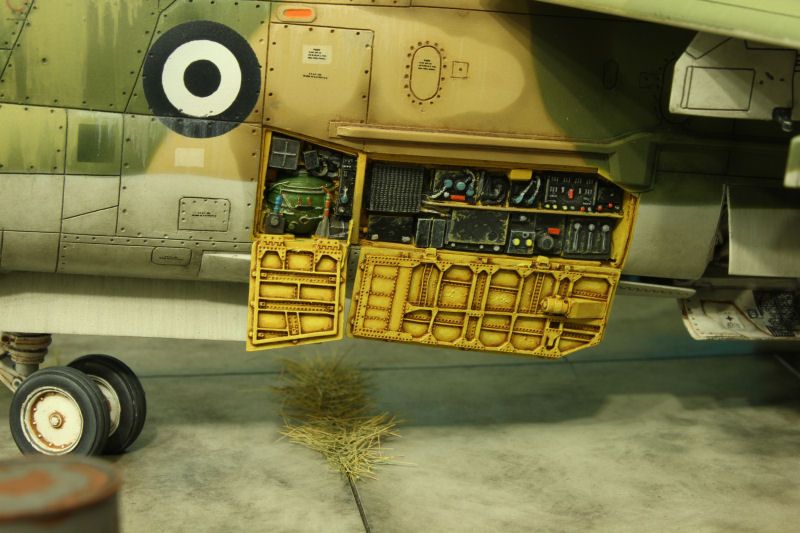
Hi everybody, I finished my A-7H...It's a 1/48 Hasegawa kit with Aires cockpit and avionic bays...
Here is a link to the cockpit pictures.
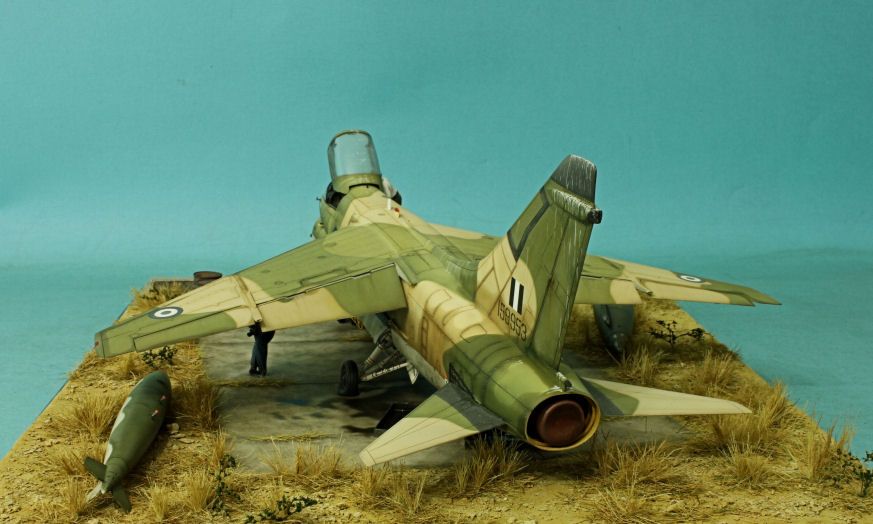
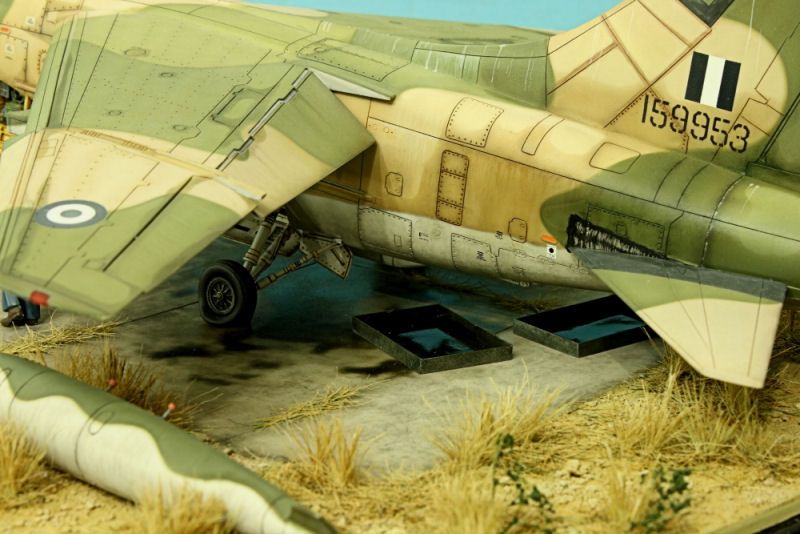
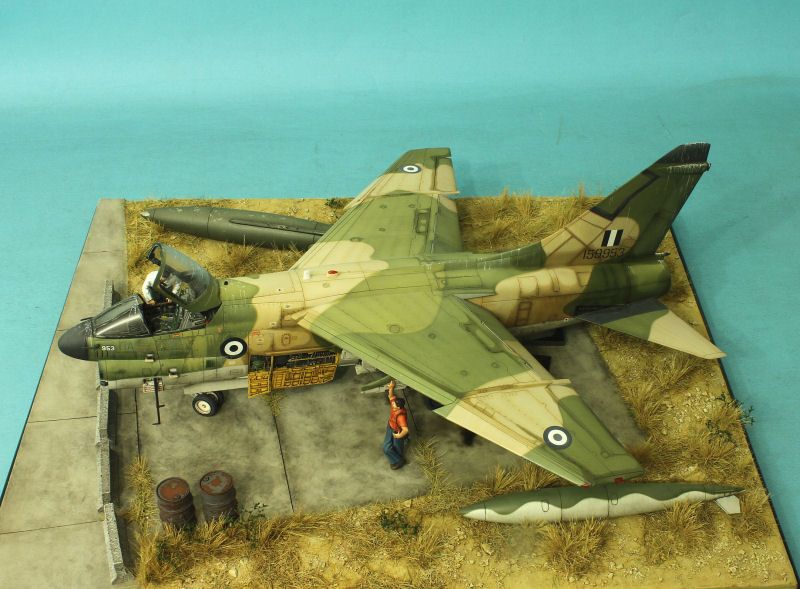
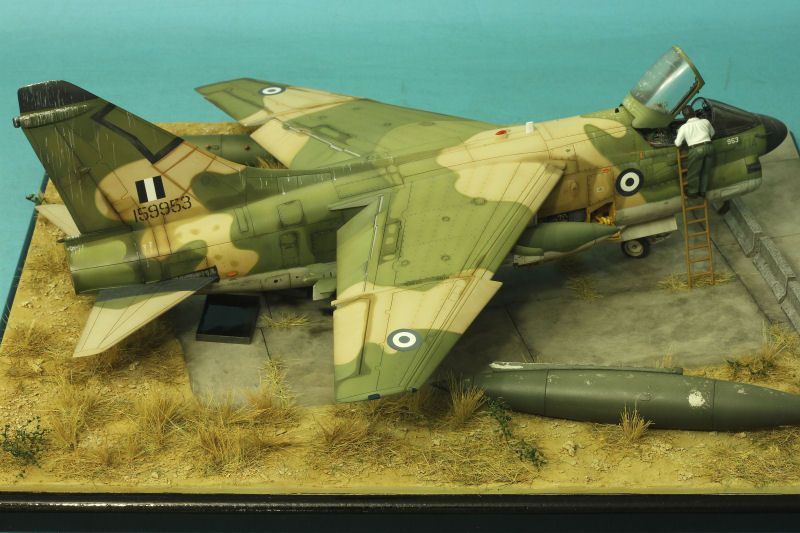
Bye!
Lorenzo.
-
Hi everybody, I started working on this Hasegawa A-7....It's a D model that will be converted into a greek H model....Cockpit and avionic bay are from Aires...
Bye!
-
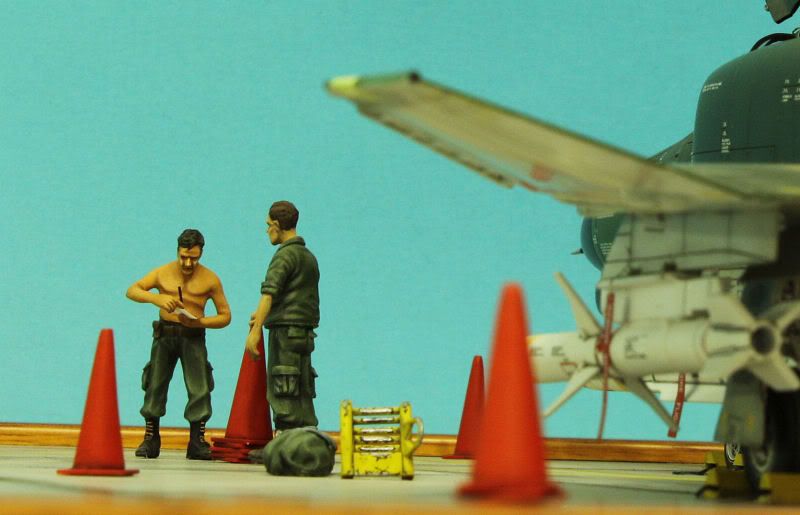
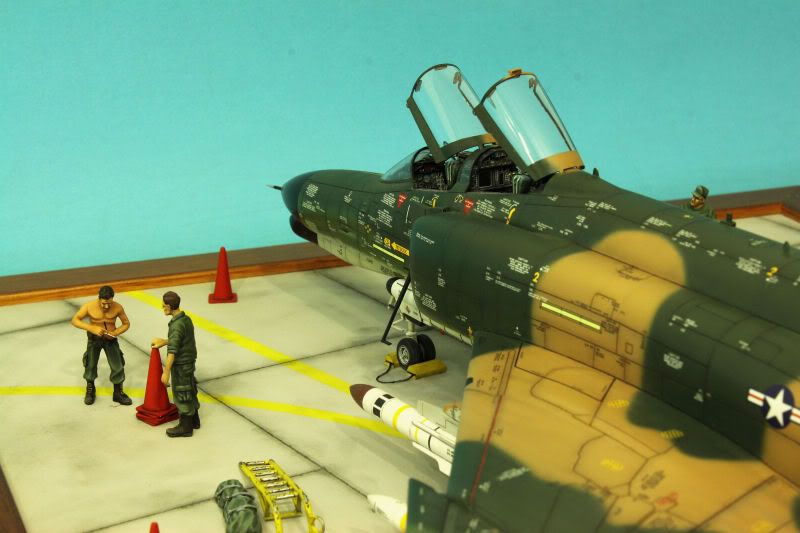
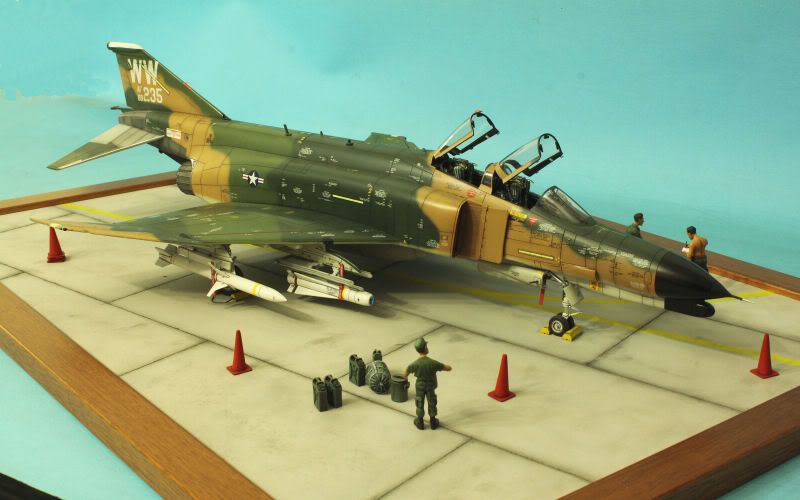
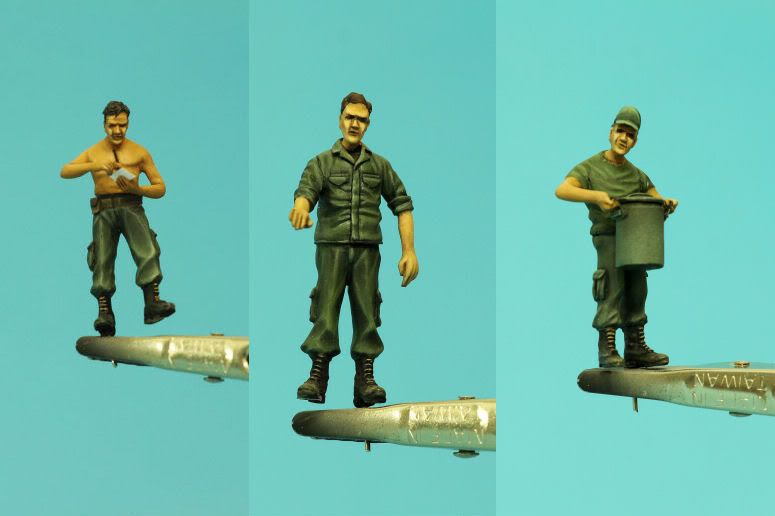
I'm trying to think of some aircraft maintenance thing the big metal pot could be used for, but I'm coming up with a blank on that.
TobiK got it right: the guy is just bringing some "minestrone" (vegetables soup, in italian) to the crew :P ...
Being serious, I just had to stick something into that guy's hands, otherwise I'd have to modify its posture by cutting, sanding, polishing etc...the big pot fit just right with the resin figure and that saved me a lot of time...
Thanks for the info about the uniforms!
-
Thanks everybody...I really appreciate it...
I added a few resin figures (Verlinden) around the plane, plus some other stuff from the Black Dog range...

Bye!
-
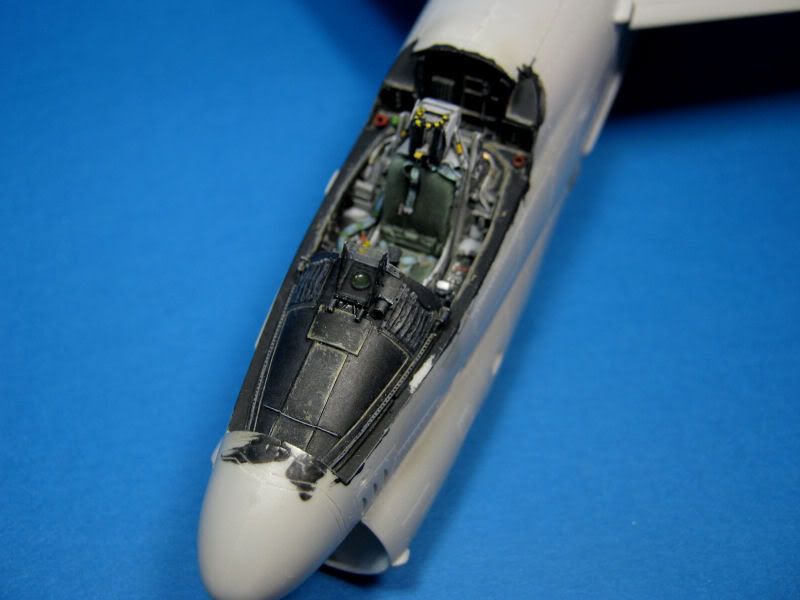
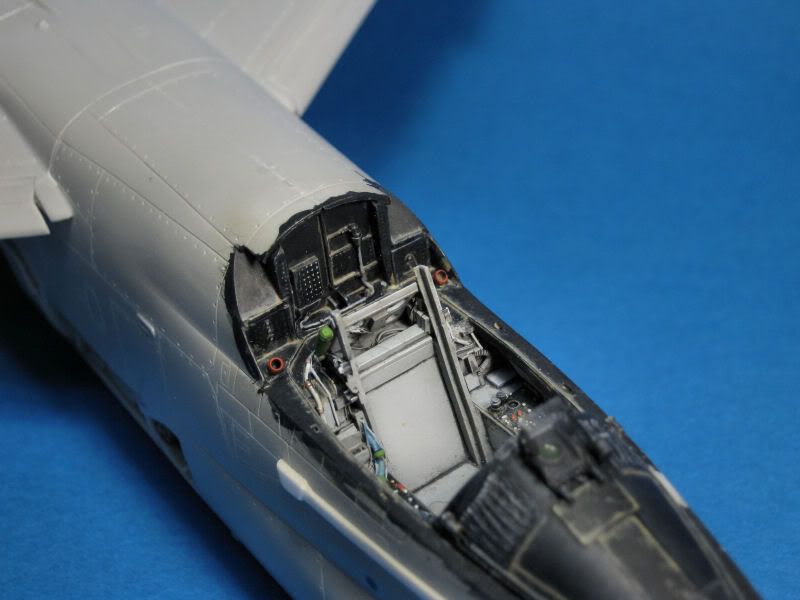
I am just starting a F-4G as well...have bought the Aires 'pit and Afterburner decals... But I have a question, do you have a WIP thread on this? It doesnt say much in the box how to fit the Aires pit...how much plastic has to be cut away on the original model and so forth... So I would like to see how you did it!!
I don't have a WIP thread here on ARC, but I have one on an italian forum:
In order to fit the Aires cockpit I had to thin down the sides of the fuselage to a point where they were almost translucent; the bottom of the cockpit tub and the top of the front gear well (Aires too) were also thinned with a Dremel, otherwise they wouldn't fit one above the other...
Let me know if you need some other info...
Cheers!
-
May I ask what paint you used (brand and number) for the light brown color? I am having difficulty with this color and yours looks very nice. Thanks.
Unfortunately I cannot give you a precise reference for the light brown color, as it was self made a few years ago when I built my first Vietnam-era subject; anyway, the base color was Gunze H310, to which I added some yellow, some red and light grey (sorry, but I really don't recall the exact amount of the colours I added...just a few drops in the Gunze jar though...).
-
Excellent build Girolamo! Can we have some more pics?
See you soon, bye!
-
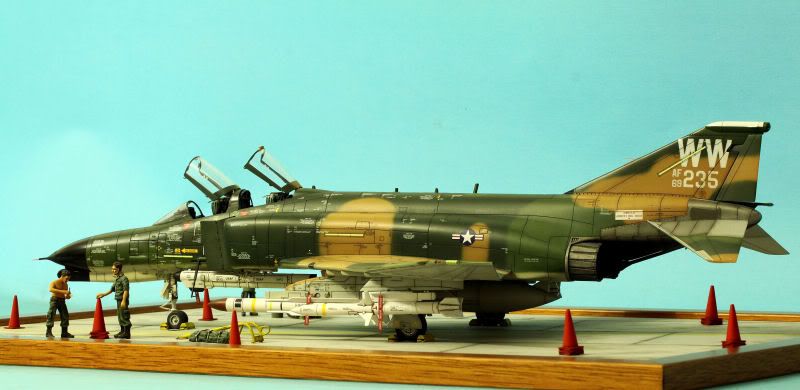
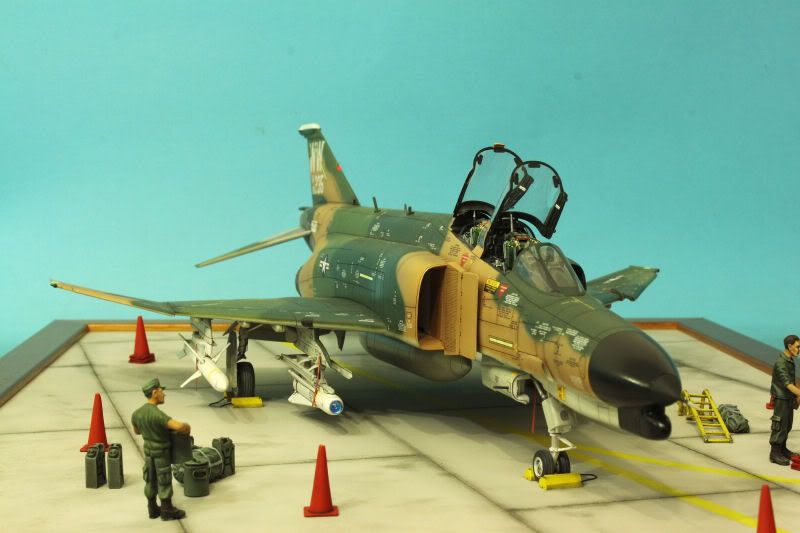
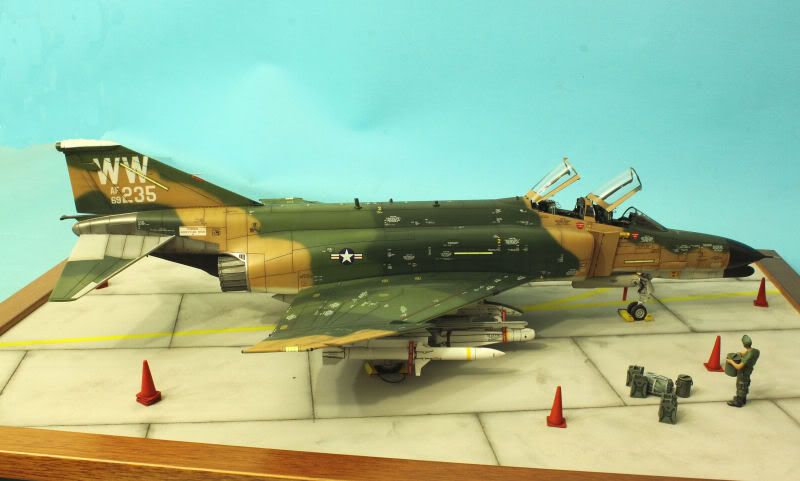
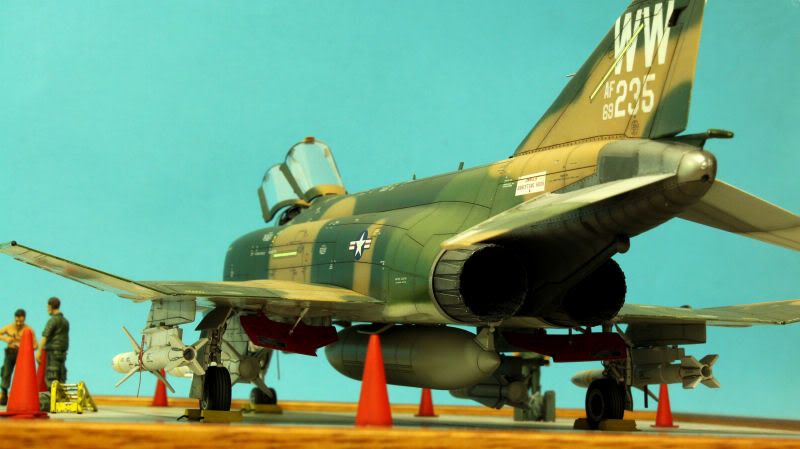
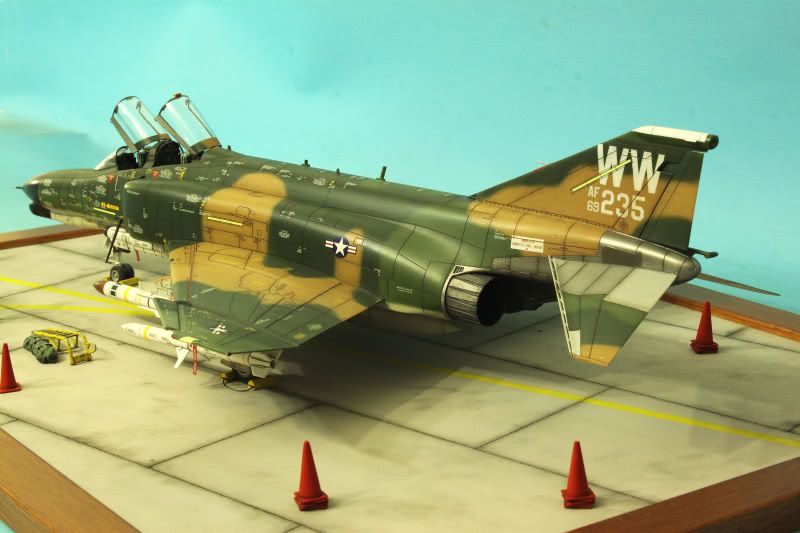
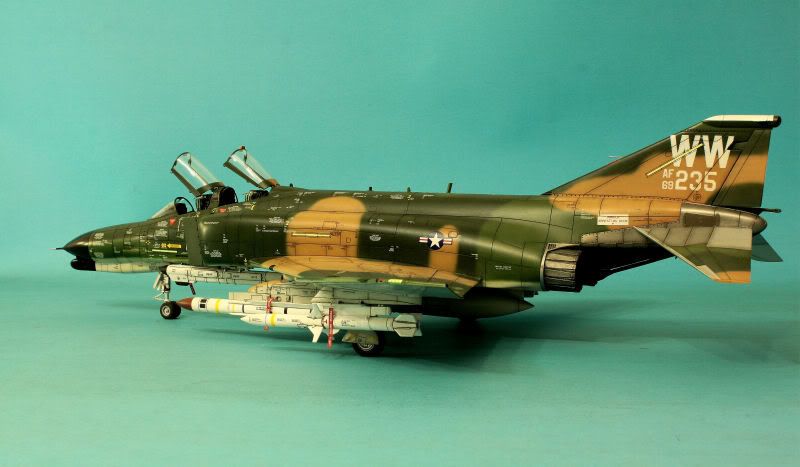
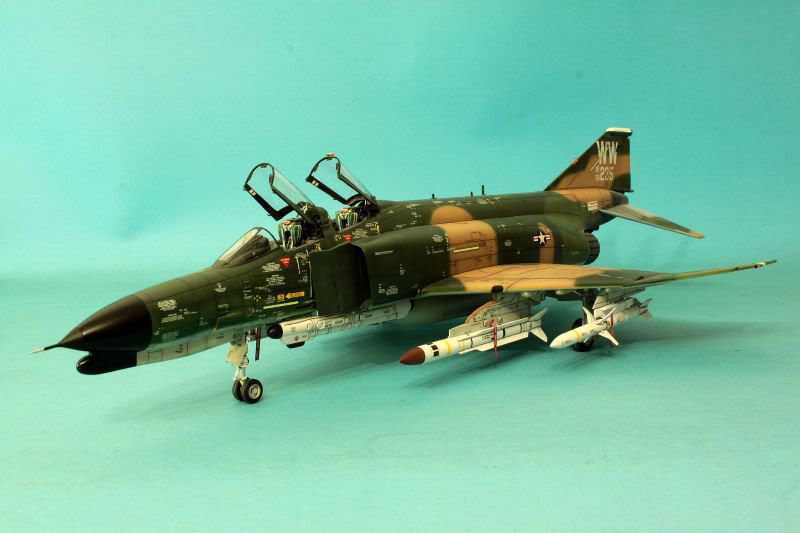
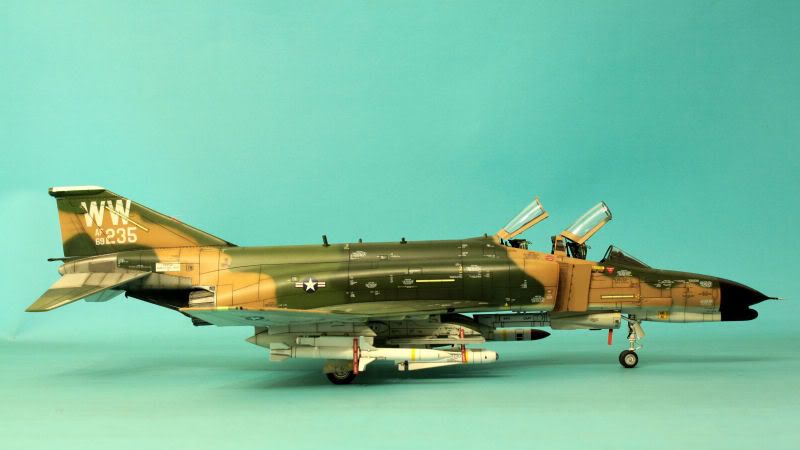
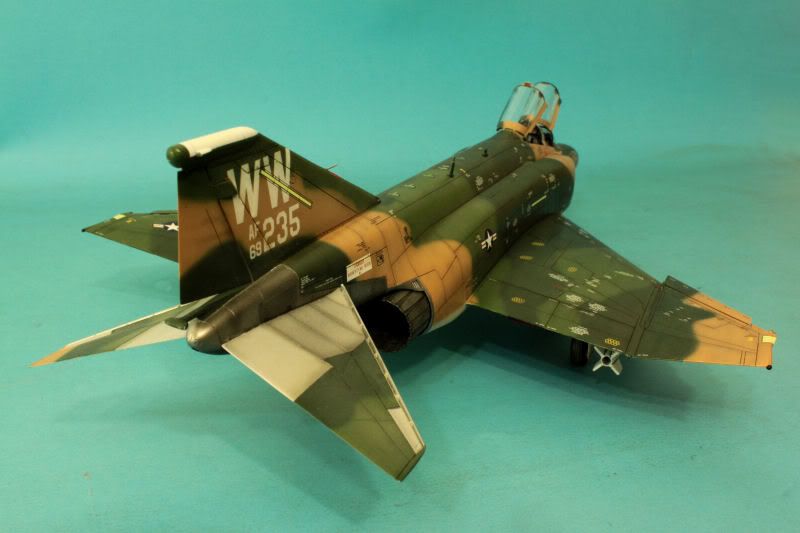
That is simply one of the most amazing Phantoms I've ever seen. How did you get those panel lines accented so well? Can you describe your technique? After seeing that loadout I want to build one myself. Thanks for showing.
I accentuated the the panel lines with a scriber, since the mould is pretty old and the lines were quite shallow. With painting completed, I diluted some oil color in turpentine and had it flow along the panel lines; I waited 2 or 3 minutes, then I cleaned up the oil colour that overflowed around the panel lines, using a n°1 brush moistened in turpentine, trying to push the oil color back inside the panel lines. I then gave the entire model the usual treatment with Future and Gunze Flat Clear. I used a dark green oil color on the green camouflage, a dark brown on the sand and a dark grey for the underside of the model.
Cheers!
-
Scott,
thanks for the nice pictures!
This is the picture I took as a reference:
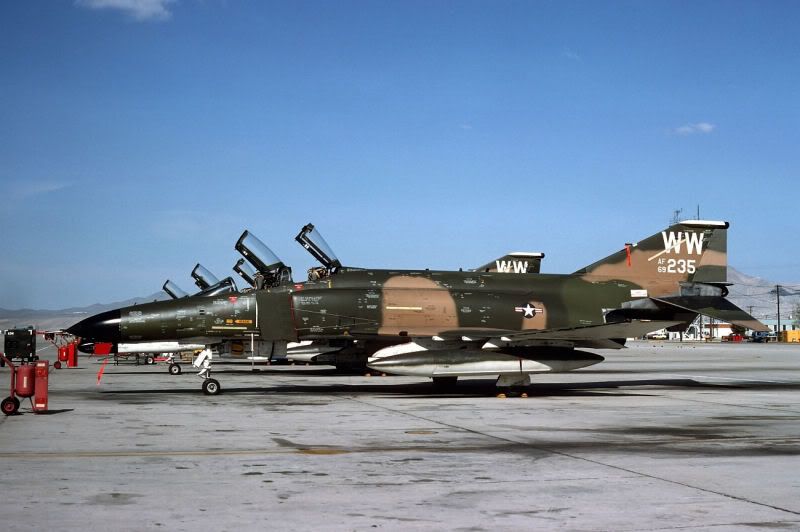
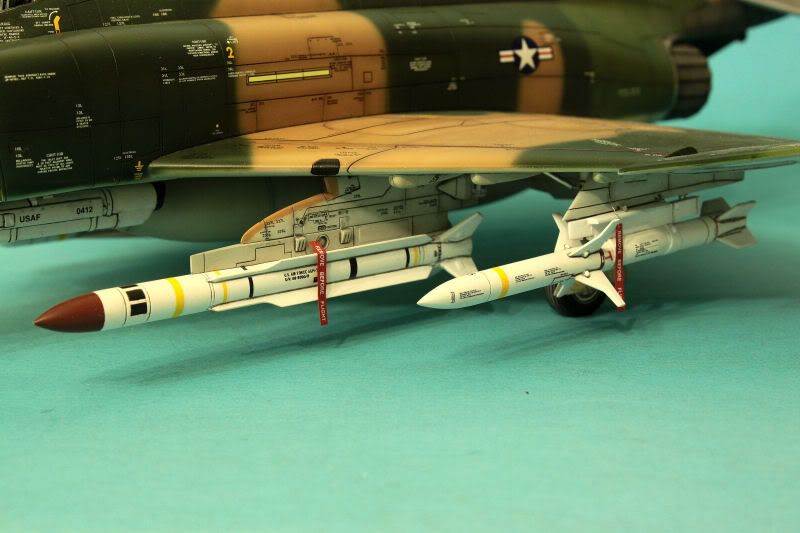
I'm aware of the Harm/Standard issue, but that is the the external loadout the commissioner asked me to do...He wanted a really mean looking machine...
Bye!
-
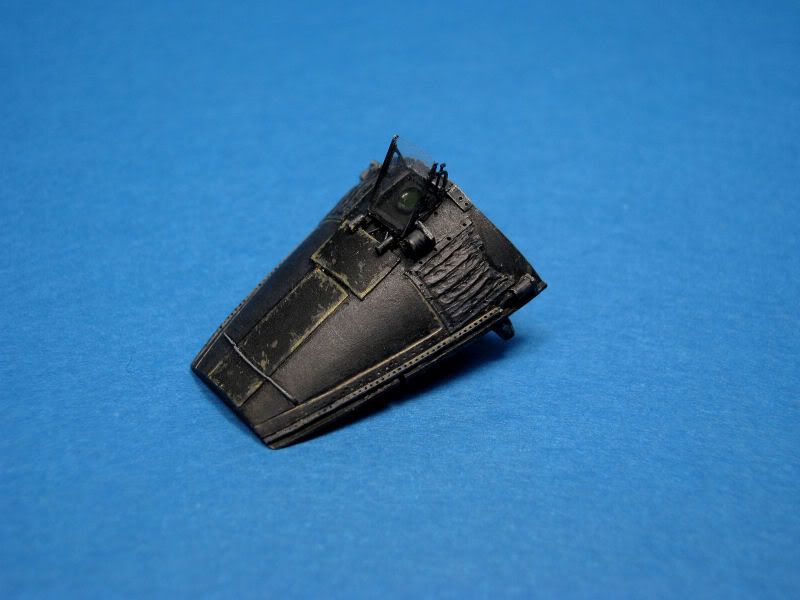
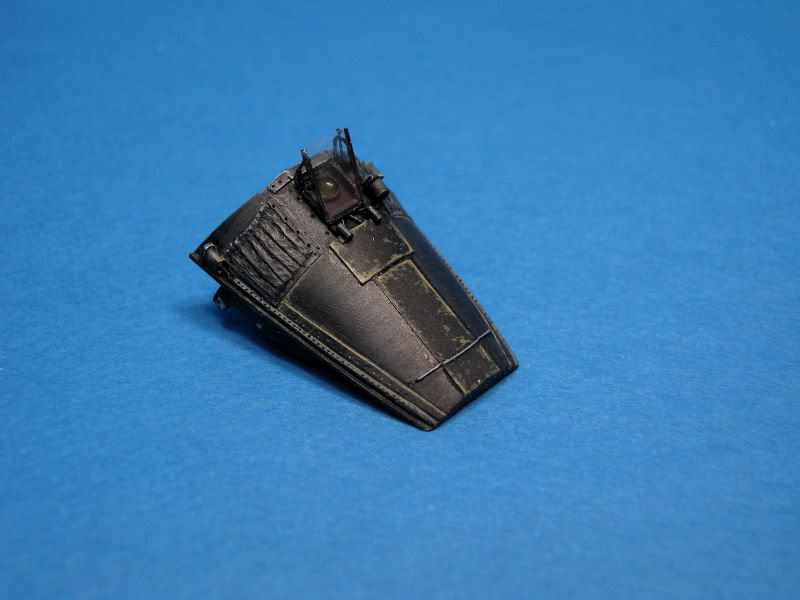
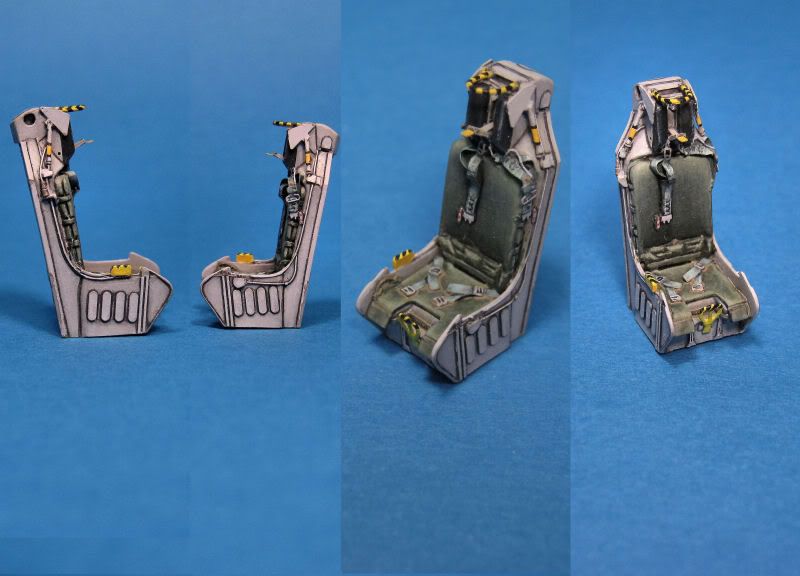
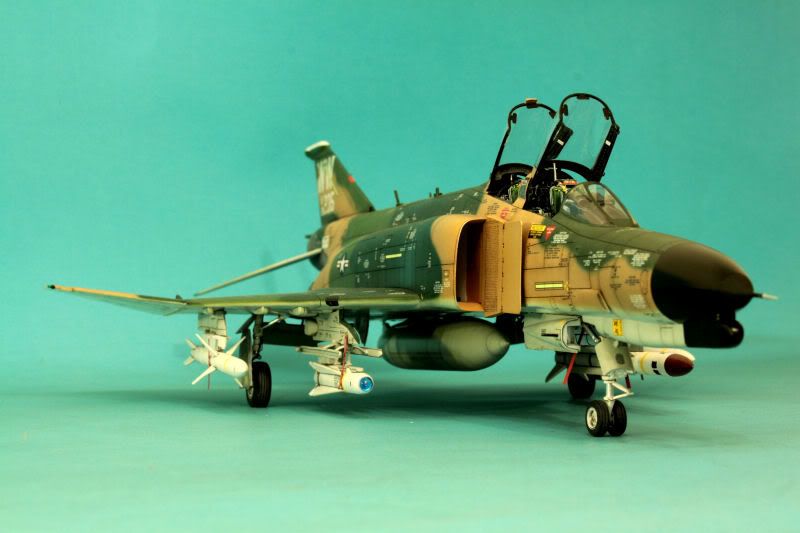
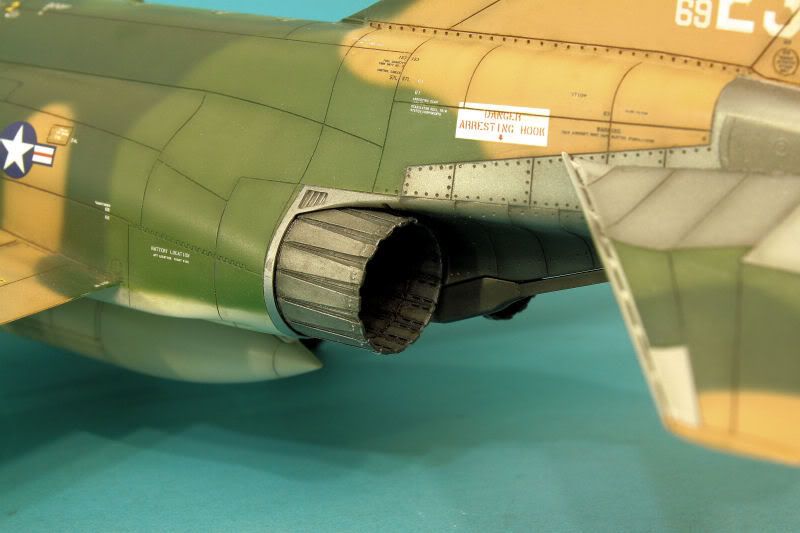
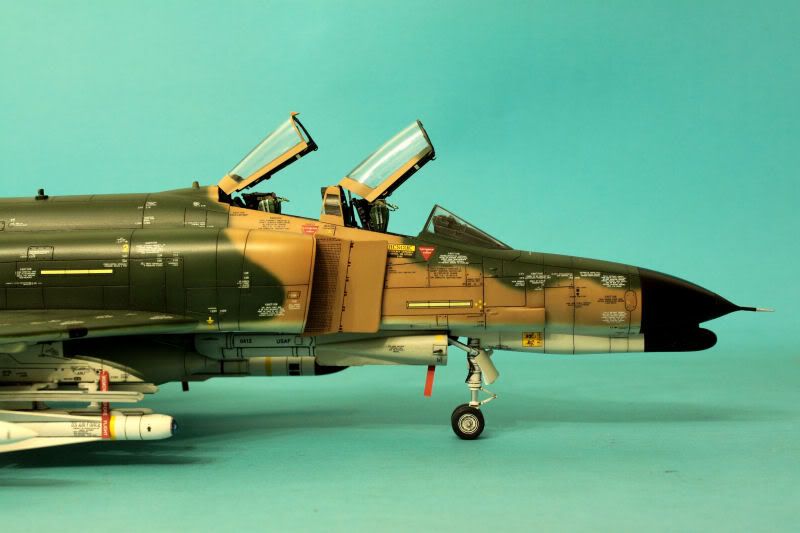
Hi, this is my last model, an Hasegawa F-4G with Aires cockpit and exhaust, Eduard Brassin seats and wheels, Afterburner decals (tail numbers were self made), Eduard RBF strips...
-
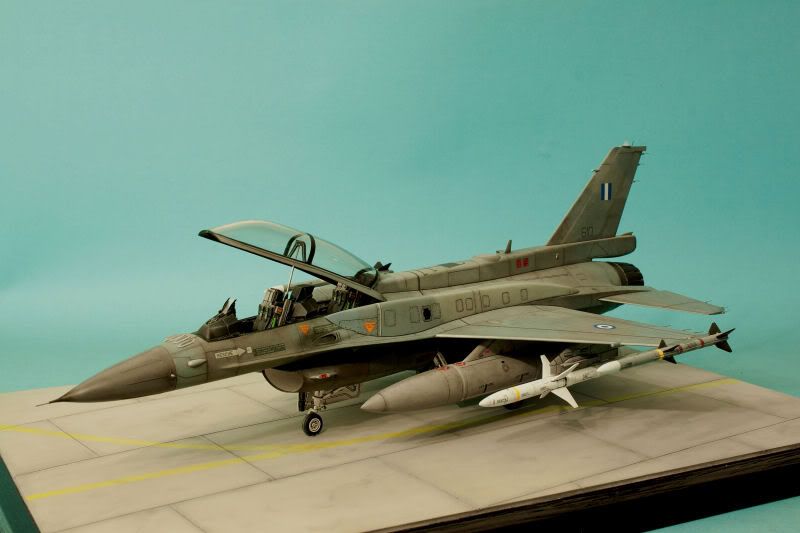
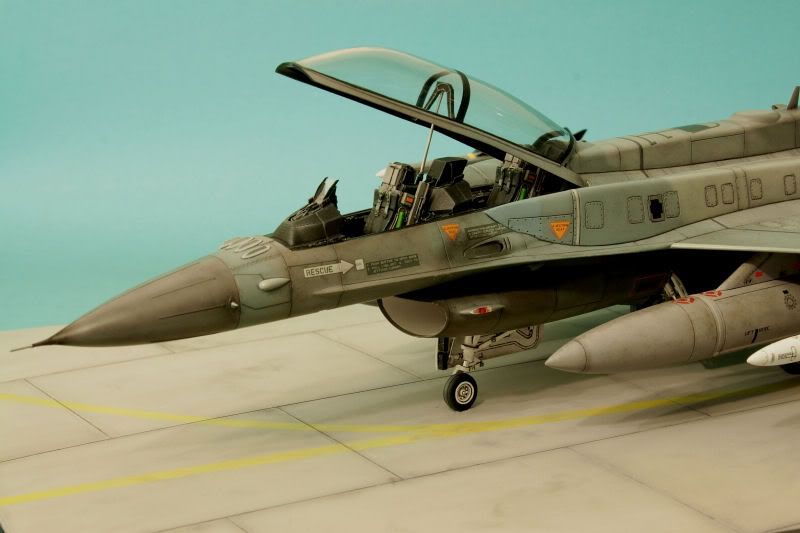
Thats interesting. How much did this project cost you? Hasegawa released a kit a few years ago that had the conformal tanks and Hellenic Air Force decals included. Did you use a straight Haseg F-16D then add everything to it or did you use the F-16D MLU Hellenic kit?
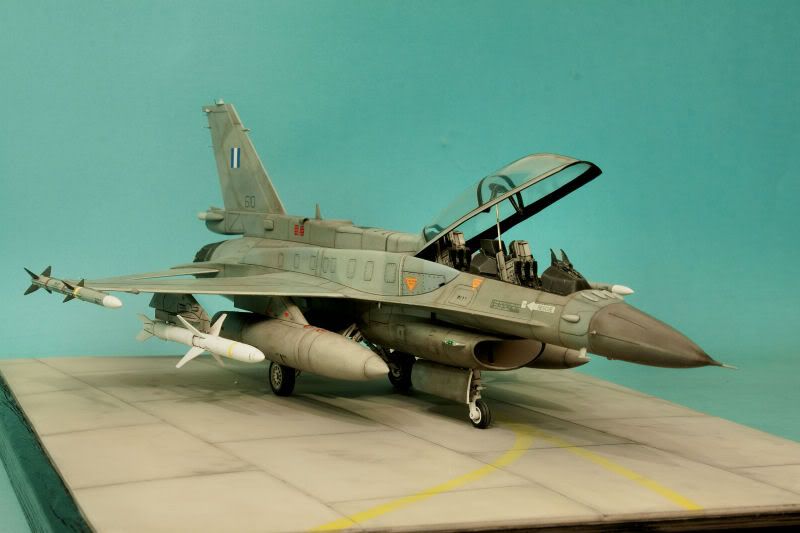
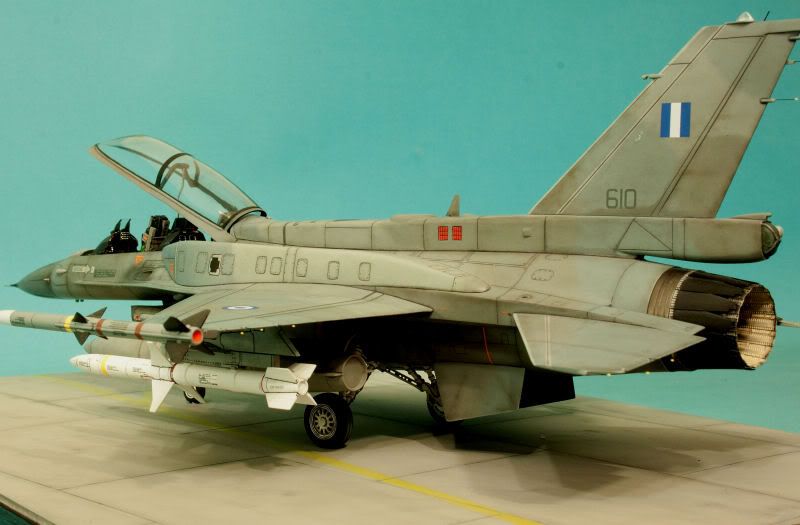
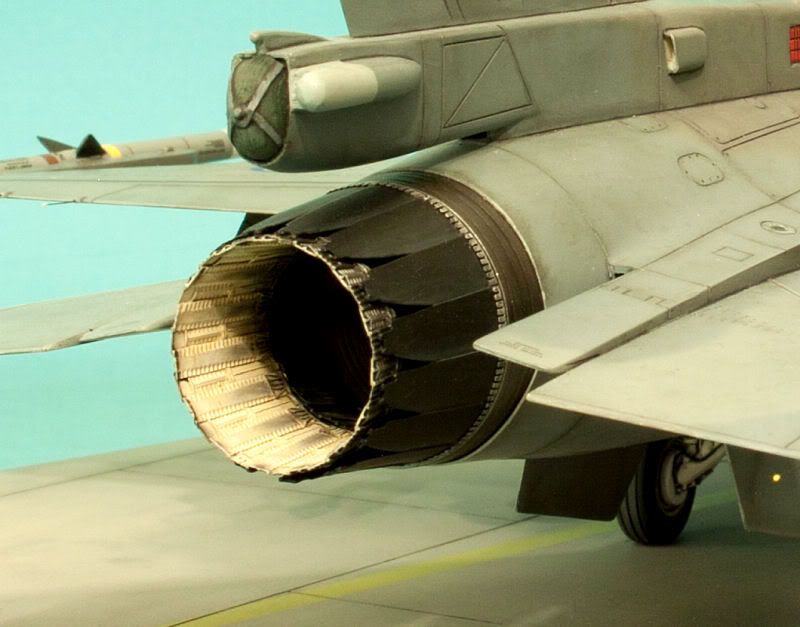
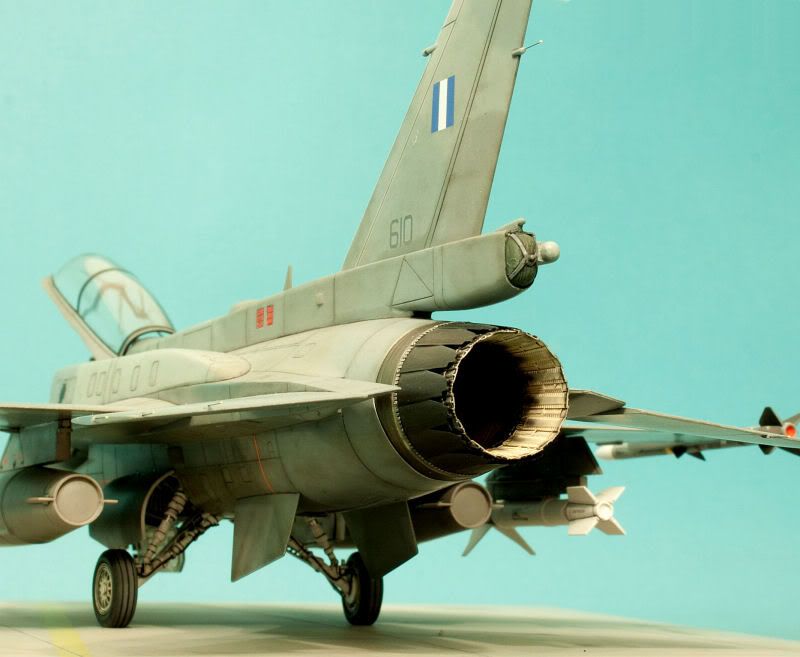
It actually didn't cost me a lot of money, since it was a gift (the kit and most of the aftermarket...). I used the F-16D (Block 52 Plus) Hellenic kit; the CFT's were changed with the CMK ones, since the Hasegawa resin parts were warped and poorly moulded (the dorsal spine was 3mm short and had to be completely rescribed...). The Tamiya parts (missiles, wheels, gear doors) were used in favour of their greater accuracy.
Bye!
-
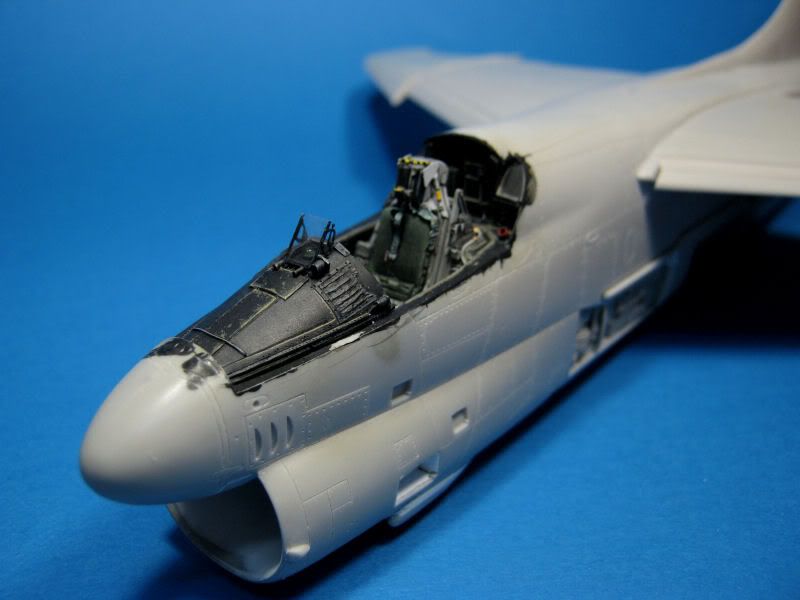
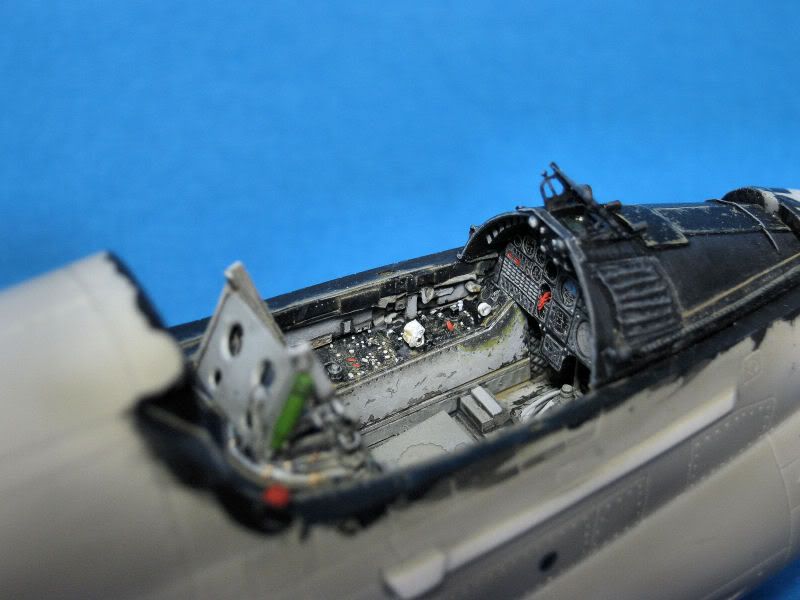
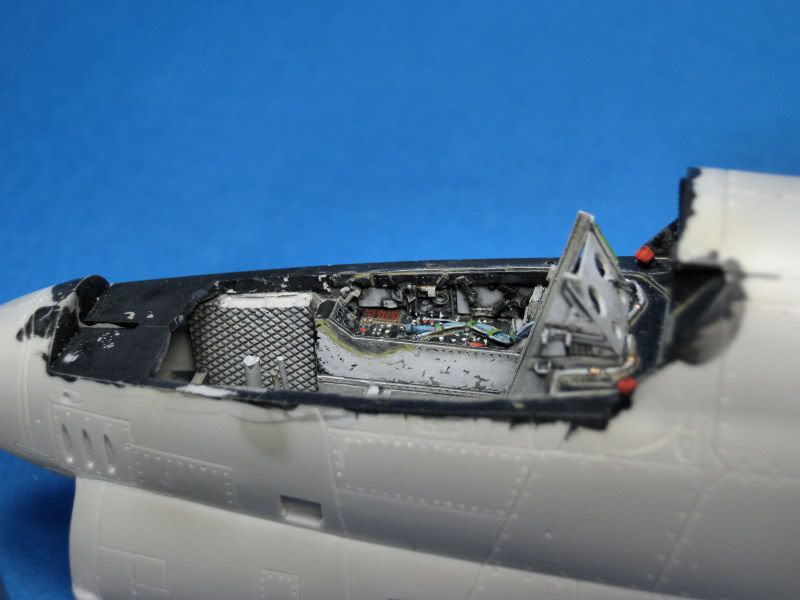
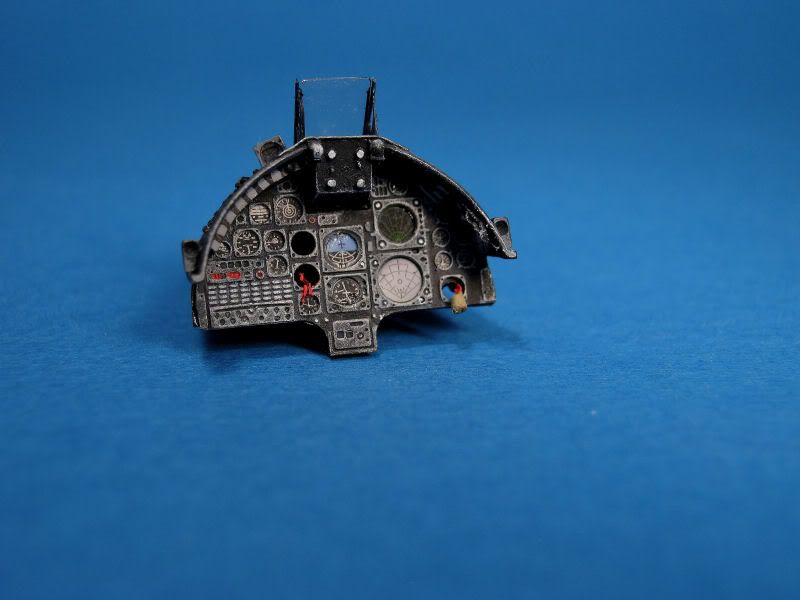
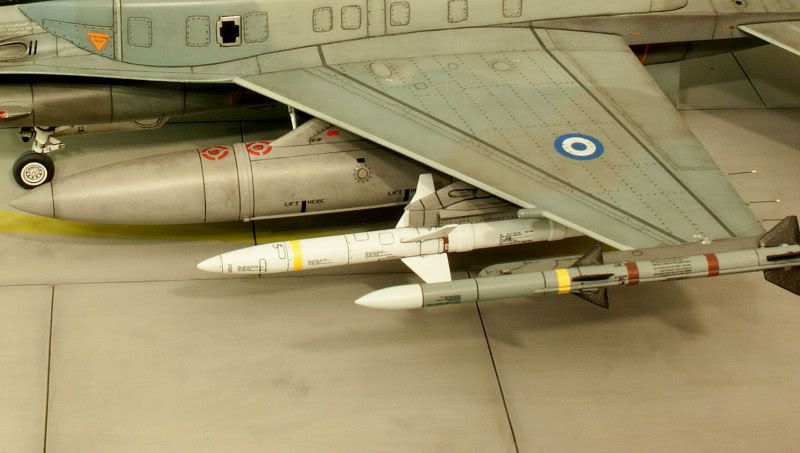
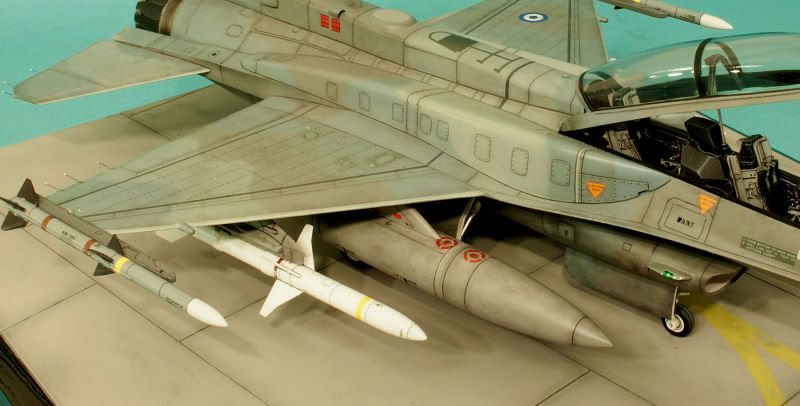
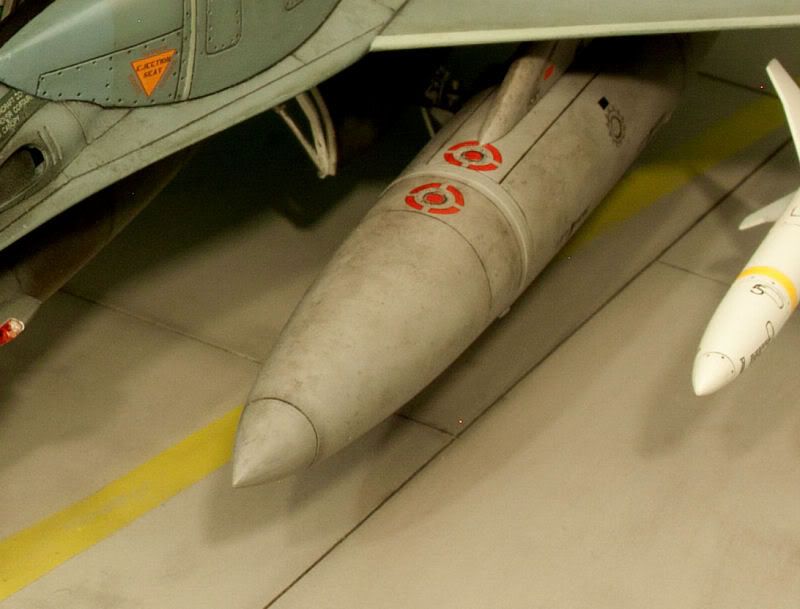
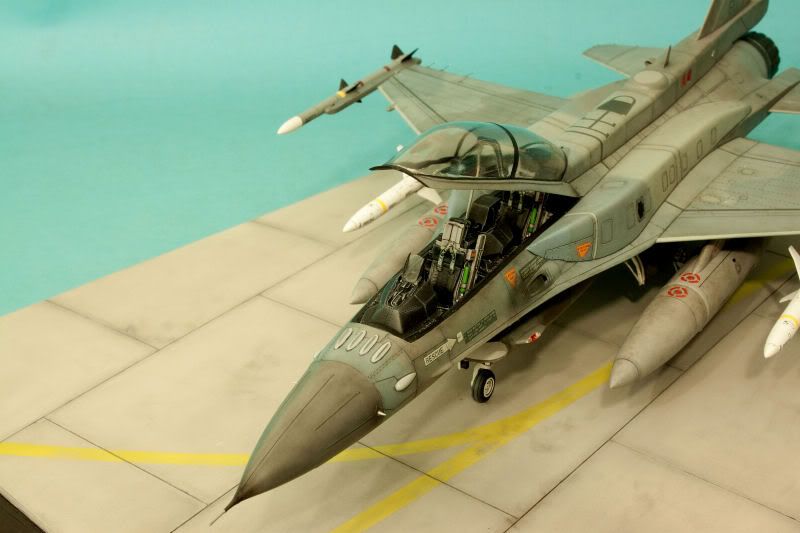
Hi everybody, this is my last model: it's an Hasegawa F-16 with CMK conformal tanks, Aires cockpit and exhaust, Tamiya HARM...
A-6E Monogram 1/48
in Critique Corner
Posted · Edited by Lorebor
Hi everybody, this is a Monogram A-6E with a Wolfpack cockpit, Brassin Mk-20s, Fightertown decals and many photoetched parts coming from various sets (Mainly Eduard and Verlinden)...
The fire truck is from the Verlinden range...
Cheers!