


Spook
-
Content Count
43 -
Joined
-
Last visited
Content Type
Profiles
Forums
Calendar
Everything posted by Spook
-
Top Gun 1986 F-14A (Tamiya 1/48 - in-flight twin build))
Spook replied to crackerjazz's topic in In-Progress Pics
Fantastic work! I love the exhausts! -
I do not really discern any details that could be represented realistically in scale on an existing injection molded kit part or a resin after market set, so a different color variation should do the trick both for the turkey feathers and for the small metal joints that appear in the photos. I guess it is like the P&W -220/229 F-16 engine which in scale is just painted differently than the early version of the engine. Anyway these engines seem to have been fitted to very few aircraft while it was not the norm, so it should see extremely limited applicability. Logic dictates th
-
Greetings! Some more aircraft with the different engines can be seen on the links below. If the dates on the posted photographs are correct the engines were being tested during the period 1996-2001 at least. F-14B BuNo 161860 VF-102 Diamondbacks - 12/10/1996 (Photo by Chris Hauser) F-14B BuNo 162922 VF-102 Diamondbacks - 25/04/1997 (Photo by David F. Brown) F-14B BuNo 163224 VF-103 Jolly Rogers - 11/1997 (Photo by David F. Brown) F-14B BuNo 162920 VF-102 Diamondbacks - 25/05/1998 (Photo by Peter Boschert) F-14D BuNo 163899 VF
-
Greetings to all! I recently stumbled across the following photograph of an F-14B Tomcat while looking for some reference for a friend's build https://www.airfighters.com/photo/186998/M/USA-Navy/Grumman-F-14B-Tomcat/163224/?fbclid=IwAR20LLhexd2eLLeqpR2ENlSjSRjZaXV0VGHjVTGV4ht0zll_mK0yH6xFRSU (Photo is by David F. Brown as can be seen on the link) The photo depicts an F-14B with BuNo 163224 in October 1997. On a first glance nothing seems out of the ordinary. However on closer inspection one can see that the F110 nozzles seem a bit different than one would expect. The
-
Kinetic 1/48 T-45C: Why didn't I throw this kit against the wall?
Spook replied to Collin's topic in The Display Case
Great job! Built this one a couple of years ago....Probably one of THE worst kits I've ever built. It is the only one on the scale though so you do not have much of a choice there. -
Truly inspiring build! She's looking great Steve! My hat's off to you sir! Andreas
-
Very nice build Darren!
-
Steve....This is awesome work! I can't wait to see it finished!
-
Great paint job and congrats on finishing it! I am building this one and the fit was horrendous at multiple areas. Just wanted to ask you what kind of red have you used for the nose and wing tips?
-
Stunning! Great job Martin!
-
F-14A Tomcat VF-154 Black Knights OIF 2003 [Fujimi 1:72]
Spook replied to Spook's topic in The Display Case
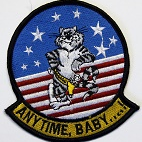
Hey guys! Truth be told I really enjoyed the build. Fujimi's kit was a pleasure, Fightertown decals gave the opportunity for a favorite squadron and above all it was a Tomcat! Anytime, Baby....! :smiley-transport006:/> Thank you all for your kind comments, really appreciate them! -
F-14A Tomcat VF-154 Black Knights OIF 2003 [Fujimi 1:72]
Spook replied to Spook's topic in The Display Case
Thanks for looking! -
F-14A Tomcat VF-154 Black Knights OIF 2003 [Fujimi 1:72]
Spook replied to Spook's topic in The Display Case
-
F-14A Tomcat VF-154 Black Knights OIF 2003 [Fujimi 1:72]
Spook replied to Spook's topic in The Display Case
-
F-14A Tomcat VF-154 Black Knights, CVW-5 USS Kitty Hawk, Operation Iraqi Freedom Spring 2003 Κit: Fujimi 1:72 F-14D Tomcat VF-31 Tomcatters No 280219 Cockpit: Aires 7293 Exhausts: Aires 7184 Decals: Fightertown Decals 72005 Pitot: Master AM-72-007 WIP ==> http://www.arcforums.com/forums/air/index.php?showtopic=272454
-
F-14A Tomcat VF-154 Black Knights OIF 2003 [Fujimi 1:72]
Spook replied to Spook's topic in In-Progress Pics
Mr Hobby's acrylic gloss was airbrushed and then the excellent decals (decal sheet FTD 72005) from Fightertown were placed on the model. The instruction/placement guide form Fightertown provides all the details regarding 4 aircraft , VF-154 ordnance loadouts during the various stages of OIF while decals are provided for pilot helmets and the landing gear. Awesome!!! F-14 NF101 had quite a number of missions/bomb drops however as I decide to represent an aircraft during OIF these decals were not placed as they were painted on the real aircraft after their return to Japan. A couple more gloss -
F-14A Tomcat VF-154 Black Knights OIF 2003 [Fujimi 1:72]
Spook replied to Spook's topic in In-Progress Pics
Following the excellent guide from Simone Fiorito (f12aaa), weathering was continued on the whole aircraft. For the various patches firstly H301 was airbrushed which then was covered (not completely) with H3087/H307. Once again more H301 and diluted/lightened base colors were airbrushed on random spots around the aircraft in order to get everything together and tone down the various patches created previously. AIM-9s were painted using H308 for the main body, Model Master Black+ Metalizer Titanium and Alclad Magnesium and Aluminium for the head. The LANTIRN was painted with H301 while the n -
F-14A Tomcat VF-154 Black Knights OIF 2003 [Fujimi 1:72]
Spook replied to Spook's topic in In-Progress Pics
Hey guys! Thank you all for your kind words! Continuing with the build, after a basic pre-shade, the model was painted with the colors of the Tactical Paint Scheme using Mr Hobby's acrylic series: Η337 == FS35237 Topside Η308 == FS36375 Underside Η307 == FS36320 Cockpit sides Tail fins, canopy area and the part of the airframe behind the canopy should be painted with Mr Hobby's H301 FS36081. In the photos below the following steps have been completed: -Model Master enamel paint was used as a primer -Pre-shade -Basic camouflage colors were airbrushed. -Diluted H301 was randomly airbru -
F-14A Tomcat VF-154 Black Knights OIF 2003 [Fujimi 1:72]
Spook replied to Spook's topic in In-Progress Pics
Steve, AllienFrogModeller thanks for your kind words guys! Thanks and good luck with your build Mark! One thing though.....I am not Kai Wolter :D/>/> and these are not my models on the links. :D/>/> I would hope....:D/>/> Michael thanks! Hope to see more of your work in ARC! Andreas -
F-14A Tomcat VF-154 Black Knights OIF 2003 [Fujimi 1:72]
Spook replied to Spook's topic in In-Progress Pics
Thank you Mark! Actually I think it is a bit off for 1:72 scale but I can live with it B)/>/>. I guess it would be even more appropriate on larger scales. I've seen it being used to represent the walkways of a 1:32 Tomcat (and for the GBUs on the same model i guess) (Model by Kai Wolter): http://www.combatedgeproductions.com/scalemodeling/f-14/inprogress/f-14_inprogress.htm http://www.combatedgeproductions.com/scalemodeling/f-14/inprogress/pics/29b.jpg http://i942.photobucket.com/albums/ad269/Combat-Edge/1%2032%20Tomcat/24b.jpg and Mr Hobby Dissolved Putty being used for the coat -
Really nice Tomcat! :) Considering that this is your first complete model, I am really eager to see the next ones.
-
F-14A Tomcat VF-154 Black Knights OIF 2003 [Fujimi 1:72]
Spook replied to Spook's topic in In-Progress Pics
The Fujimi front wheels will be replaced by the Hobby Boss ones (seen below), as they are (in my opinion) the most realistic looking in 1:72nd scale. LTS Thanks for looking! -
F-14A Tomcat VF-154 Black Knights OIF 2003 [Fujimi 1:72]
Spook replied to Spook's topic in In-Progress Pics
-
F-14A Tomcat VF-154 Black Knights OIF 2003 [Fujimi 1:72]
Spook replied to Spook's topic in In-Progress Pics
Hey Steve! Thanks! If you look closely on the real photo in the initial post you will be able to see the reinforcement plate. I am not aware if certain BuNos had these implemented but I've seen it on -As as well. Continuing with the model, it was riveted a bit: While i started adding details: RIO's instrument console Nose landing gear GPS antenna Hasegawa GBU-12 (Hasegawa Aircraft Weapons: VI US Smart Bombs 35011) -
Thank you! I appreciate your comments! Same here :(/> .....the Aires cockpit was a bit of a nightmare to fit in the model. A lot of sanding was required as well as I had issues getting the front instrument panel shroud into the correct position.