


Geek44
-
Content Count
19 -
Joined
-
Last visited
Content Type
Profiles
Forums
Calendar
Posts posted by Geek44
-
-
Here's what's on my bench at the moment. I started this, finished another then picked this up again, lost power in my study (which is a seperate building to the house) and finally really got back into this about six weeks ago. I hope to finish it before the end of the year (pull your finger out Geekman!!).

Went from what you see above to...


...this in about six weeks on and off.
The model wears a natural metal finish under the coats of Tamiya acrylic camouflage, invasion stripes and yellow recognition panels. I LOVE to weather and I often choose subjects with that in mind. Recent reference aquisitions show these birds often got pretty weather beaten so I'll be beating this up quite a bit. It's simply a case of scraping the paint off to reveal the 'aluminium' underneath which is a techniqye that's worked well for me in the past and one doesn't have to be too picky about the NMF since it will mostly be covered with paint. You'd expect a modeller of 37 years to know it will be much easier to mask and paint invasion stripes BEFORE he attaches the rocket rails but not here (
 ).
). 
Still some work to do. Decals later today. Thanks for looking.
Peace.
-
I built it...wouldn't do it again. I'd go for the old Monogram 1/48 kit which is also questionable but can be resurrected with work.
DML was grainy and boom fit was lousy. There was also a very large gap that needed filling with a plastic card piece in the dorsal barbette if that's the version you plan to model. On the plus side the cockpit interior was pretty good for the scale. Generally I found the parts kinda 'meaty' and lacking finesse. Good luck, it's a beautiful bird and really needs re-kitting (HELLOOO TAMIYA and HASEGAWA!!!!)
Peace.
-
Have we all found something else to whine about then? 'First World Problem'.
Peace.
-
Aah that's a beauty. I recently bought this kit. I love the understated chipped paint. A very tidy build.
Pecae.
-
Oh...there's the link. Thanks. I'll do it. Thanks for the positive comments too...very much appreciated.
Peace.
-
I'm the new guy. While I was looking around the site to see what people were doing I came across this beautiful example of modelling and it was the one that made me hit the 'Register' button. What a fantastic looking model. I have the 'Night Stuka' by Hasegawa in this scale so I know how big she is. Excellent stuff.
Peace.
-
Thanks for the good vibes guys. Always a pleasure and gives me that warm fuzzy to know my hobby is largely populated by decent, inclusive folk.
Peace.
-
Thanks. Hope things are pleasant out west. Perth is a beautiful place.
Peace.
-
I probably agree with everything except 'flawless'
 .
.Peace.
-
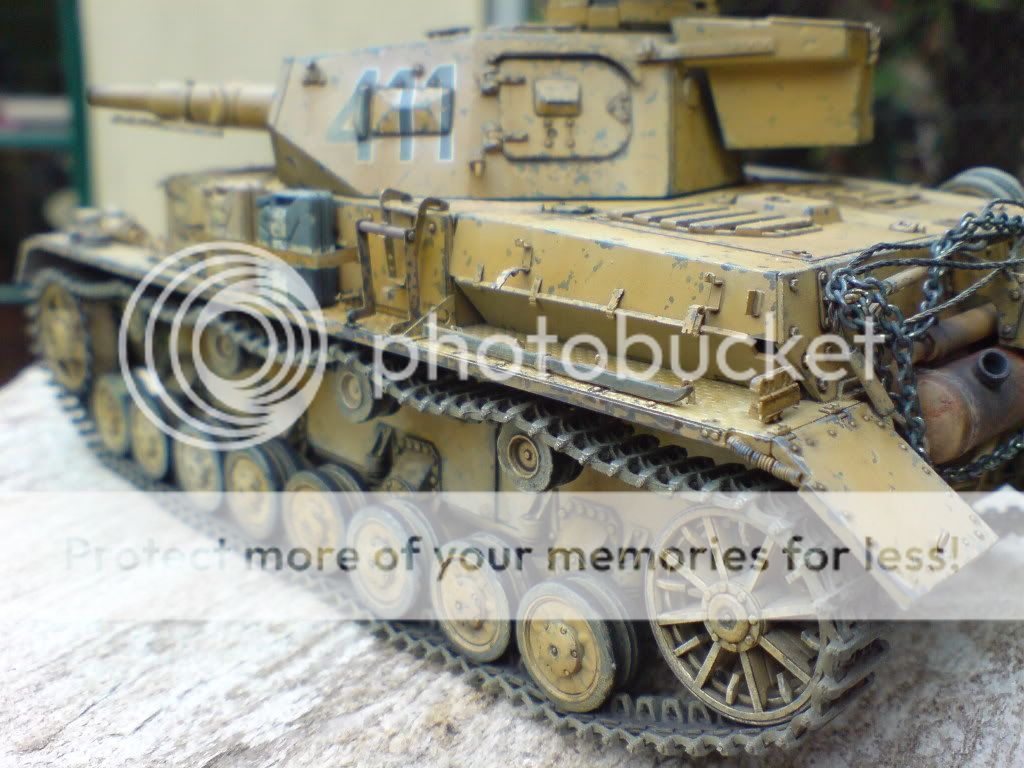
And here's the beast...


This is also by Dragon in 1/35. I believe it's the older kit. Zimmerit is my own Milliput method, this model includes a super-detail set by Voyager which is a great set that really enhances detail rather than pointlessly replaces stuff that doesn't really need to be replaced. Friulmodel tracks (as ever) and I ran into a small (but annoying to those of us with a touch of the OCD) problem. The Friulmodels for this kit include drive sprockets for both front and rear in white metal along with the links of track. These tracks have guide horns on every other link. I stuck with the plastic sprockets which I though were a little sharper detail wise...seems the kit wheels and the Friuls are of slightly different diameter. I ended up with two links together which have guide horns on one side. I hid these inside one of the wheels as much as I could but one link more and the whole track was too slack, one link less and it was too tight. One lives and learns I guess. Hope you like 'em. Any questions gladly answered.
Peace.
-
Next is the Sdkfz. 251 Ausf. C 'Stuka zu Fuss'.
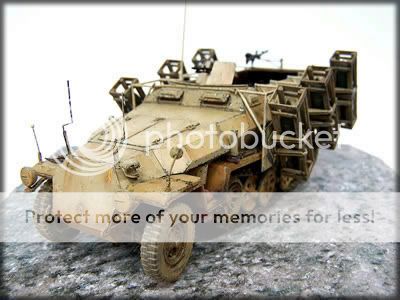


Another Dragon 1/35 'Three-In-One' kit. Out of the box again but with Friulmodel tracks and a bunch of scratchbuilt and cannibalised stowage inside. Painted as with Pz. IV above.
Peace.
-
Greetings all. New to ARC. Here are some pics of my armour models...
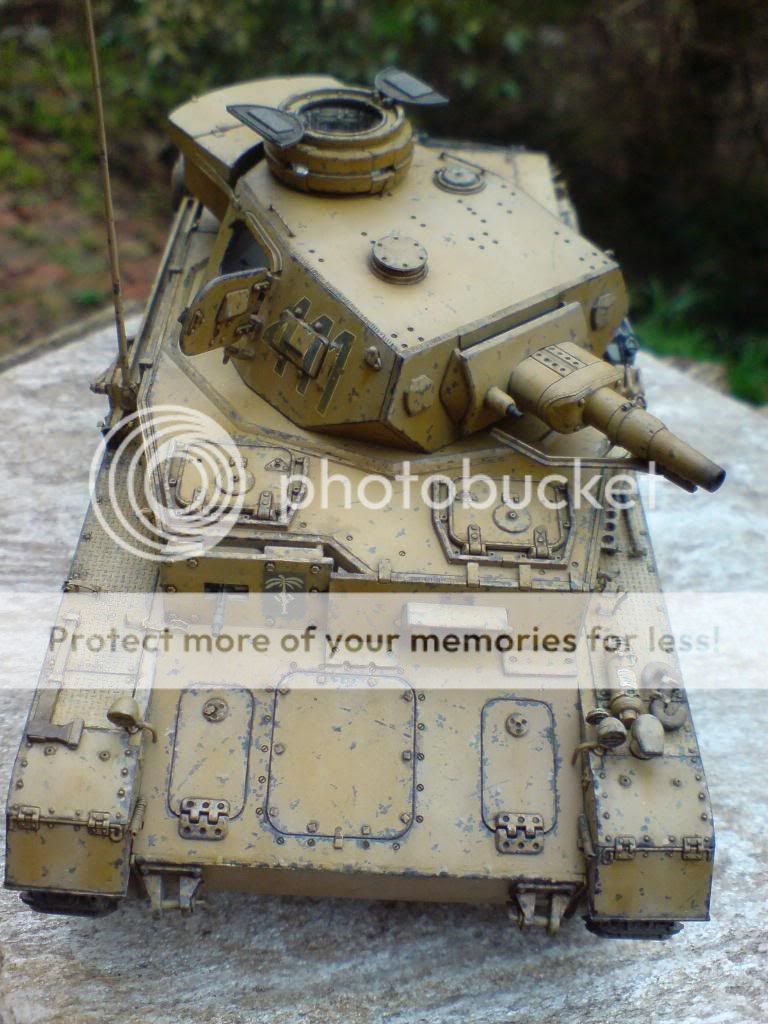
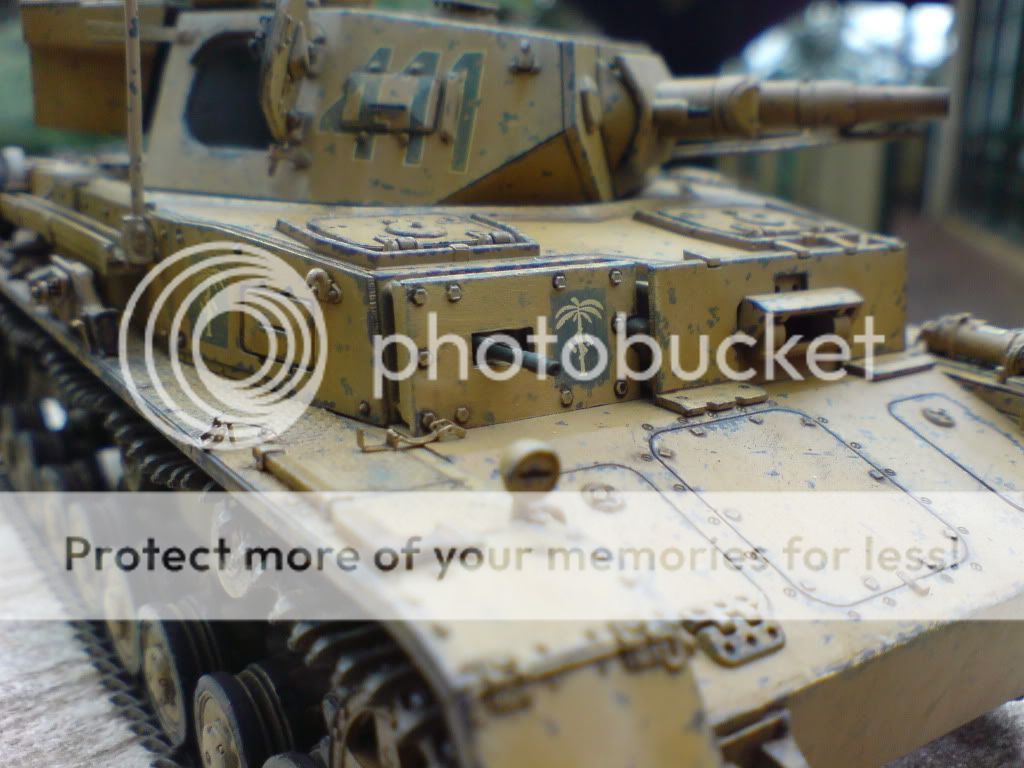

Panzer IV Ausf. E by Dragon in 1/35. A 'Three-In-One' kit built out of the box except for the Friulmodel tracks and a bracket for water cans made from a bit of Coke can. Oh and I may have made a copper aerial too I think. Really enjoyed this model. Painted with Tamiya acrylics, Humbrol enamels and artists oil. Pastel powders applied dry and wet.
Peace.
-
Mig 15bis in North Korean service...


This is the beautiful Tamiya kit in 1/48. The second time I've built this one and an attempt to refine the chipping technique seen on the I-16 above. This time I painted liquid mask where I wanted the chips to be before I applied my camouflage scheme. Still not happy with the technique, the liquid mask produces rounded, blobby chips that don't quite look right to my eye.
Painted with Humbrol enamels I won a group build at another site with this model. Depicts a so-called 'Honcho' which was an aircraft with North Korean markings but piloted by a Soviet. Straight from the box with my own scratch-built seat harnesses. I don't try to be too accurate with those but I think the eyes expect some kind of restraint to be seen in the cockpit.
I think I finally got my chipping technique right with a model (Hasegawa 1/48 P-39/400 Airacobra) that came to a sticky end a couple of years ago. Scraping the paint off with a scalpel blade gave the best chips so far, the model was totall squashed when a book fell on it on its shelf, I gave the remains to my then four year old son who smashed it to atoms in a second.
Peace.
-
Here's one of my favourite aircraft...


This is the academy kit in 1/48. It's my first and LAST Academy kit. I used this model as a test for the rather over done weathering and chipping you see. It actually has a natural metal finish under the paint. The Humbrol enamel was partly removed with the sticky side of some masking tape...went a bit far but I was experimenting. I learned some time after building this that these aircraft actually had fabric covered wings (doh!!). Next time, I'll build the Eduard kit.
Straight from the box with after market (AeroMaster) decals after the Academy ones literally fell off the night after I applied them. Note silvering under the 'Zha Stalina' slogan decals.
-
Greetings all. Made an introductory post in the General Forum area. Thought I'd seal the deal by posting some pics of my finished aircraft models.
All of these have been built in the last five or six years...I'm painfully slow and usually only finish two or three kits a year. Especially when I build armour but enough of that... here they are. Sorry about the green background, best I could do at short notice.


Focke-Wulf 190D-9 in 1/48 by Dragon. It's an oldie and I started this around 1995 and finished it about ten years later (it languished in its box for a long time). It has a Verlinden cockpit that is probably not very accurate since it's a 190A cockpit interior. It has the older style canopy. All markings except the fuel stencils are masked and painted on and has fine wire brake lines. I should probably add an aerial at some point and the 'No Step' dotted lines were drawn on with a very sharp coloured pencil. Painted with Humbrol enamels.
Peace.
-
Righto...consider all drinks bought or at least put on my tab.
Thanks for the warm welcome lads. Be back later with a few more pics and some shots of my current project which I'm busting to finish before the year ends. I'm a very slow modeller...some say a 'dilletante'. Cheers.
Peace.
-
Thanks for the welcome and compliments Soarin'.
Some say the armour weathering is a bit much, the thinking being that they didn't survive long enough to get so beaten up but that doesn't worry me.
I basically model simply to weather...painting and weathering is easily my favourite bit. I have a couple of other finished models at present but Photobucket seems to have 'lost' my pics.
Thanks again.
Peace.
-
Greetings to all from South Eastern Australia. Wasn't sure where else to post this...I can't see a 'New Members' area...may need new glasses.
I'm a 44 year old father of two and I've been modelling for about 37 years now. Mostly aircraft but lately a few vehicles and even some sci-fi just for a change. My usual has been Second World War but I've been known to get stuck into a Cold-War jet of two and now, with the advent of 'Wingnut Wings' from New Zealand I'm dabbling with the WW1 aviation too. I like to build 1/48 or 1/32 aircraft because there's space to add this and that and for armour I'm strictly 1/35.
I've been looking around the site here for just a short while and I've seen some staggeringly beautiful work by the membership. I look forward to learning from everybody and maybe even getting to know a few too. Thanks for a great site, I hope I can make a worthy contribution. Best wishes to all.


Some of mine.
Peace.
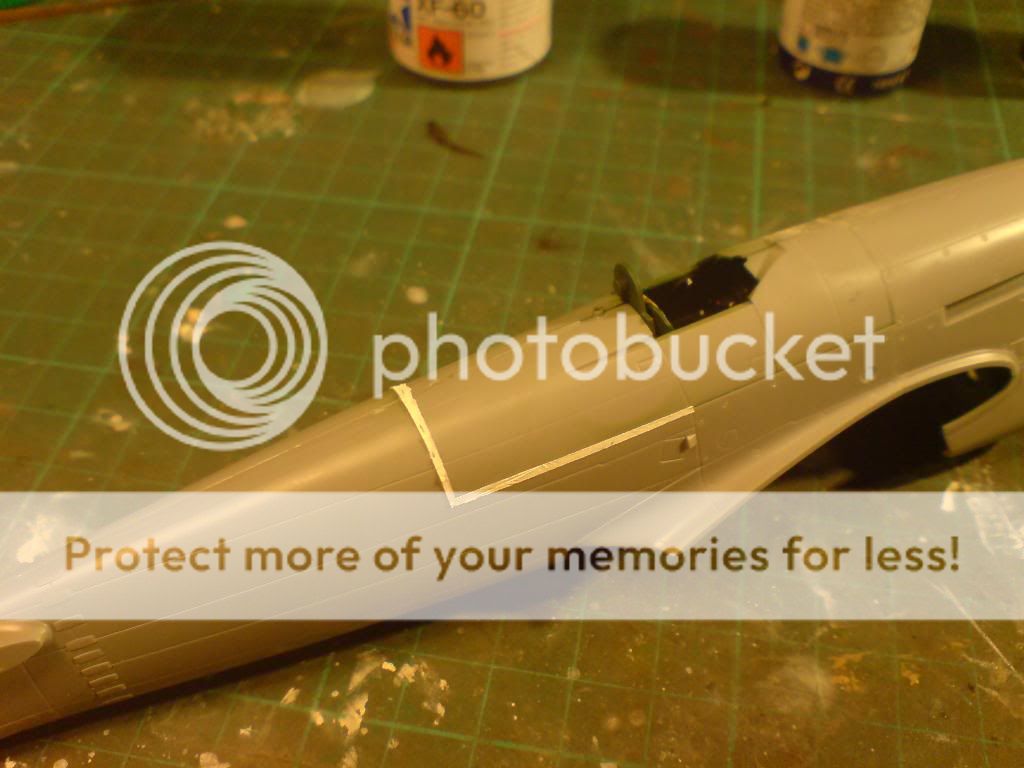
Hasegawa 1/48 Hawker Typhoon.
in In-Progress Pics
Posted
Oh...build is out-of-the-box except for some rudimentary seat harnesses I made from Tamiya tape and copper wire. Painted with Testors 'Model Master' Buffable Aluminium applied dry with a flat brush, the airbrushed with Tamiya acrylic colours applied freehand except for stripes which were masked with Tamiya tape and Humbrol Maskol. I usually use Humbrol paint when I do aircraft because I find their colours more sophisticated (snob I know) but I'm weathering this model just like I weather armour just to see what I get. Will be applying filters and oil paint after decals.
Peace.