

spaceman
-
Content Count
2,876 -
Joined
-
Last visited
Content Type
Profiles
Forums
Calendar
Everything posted by spaceman
-

space shuttle stack accurate flight deck question
spaceman replied to Homer's topic in Real Space Modeling
Great work Rostko, congrats! -
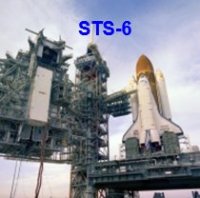
Space Shuttle Launch Pad 39A with Challenger STS-6 (1:144)
spaceman replied to spaceman's topic in Real Space Modeling
Hello friends, don't be surprised about my long break, but firstly I still need new seals for my airbrush gun before I can paint the ladders for the Payload Canister and secondly I'm very busy preparing for my trip to Florida (3 weeks), to which I'll fly on October 2nd from Stuttgart via Atlanta to Orlando. From there I'll drive with a rental car to Cocoa Beach, check in there for a week in the Best Western Hotel and hope that I can watch the Psyche Launch of a Falcon 9 Heavy from the Apollo Saturn V Center, which is scheduled for the 5th October 10.38 am. -
Educraft Diversions Apollo Era Crawler Transporter - 1/144 Scale
spaceman replied to Logan 5's topic in Real Space Modeling
Hi Al, OMG, then keep a level head and save yourself into your well-deserved retirement. -
Space Shuttle Launch Pad 39A with Challenger STS-6 (1:144)
spaceman replied to spaceman's topic in Real Space Modeling
Hello everybody, long enough I have ducked out of painting the ladders, because I just wasn't sure how to hold these fragile structures during painting without, in the worst case, scrapping them. Then I wasn't sure too whether I should paint them with the Spray cans from Tamiya or rather with the Airbrush. The use of spray cans has the disadvantage that the paint jet can hardly be dosed, at best via the distance to the object, which is not a reproducible solution. So I guess I'll try airbrushing. In order to be able t -
Educraft Diversions Apollo Era Crawler Transporter - 1/144 Scale
spaceman replied to Logan 5's topic in Real Space Modeling
Hi Al, it has become quiet on your construction site, what's going on there? -
Space Shuttle Launch Pad 39A with Challenger STS-6 (1:144)
spaceman replied to spaceman's topic in Real Space Modeling
Hello everybody, OMG, after the rod was glued to the Screw Jacket Worm gear and shortened to the required length, I almost had the other end glued with the central door drive without the two rings, but what I quickly made good for it. Then the other round rod was glued to the left Worm gear, shortened to the final length, provided with the two rings and fixed for gluing by Balsa clamping bars. Both pipes were then be glued to the drive. After drying, the linkage could be carefull -
Space Shuttle Launch Pad 39A with Challenger STS-6 (1:144)
spaceman replied to spaceman's topic in Real Space Modeling
Thanks Karl for your nice compliment. Stay tuned my friend and have fun. -
Space Shuttle Launch Pad 39A with Challenger STS-6 (1:144)
spaceman replied to spaceman's topic in Real Space Modeling
Hello everybody, and now the same fragile pipe linkage again for the other Canister side (Port side). How good when you've done it all before. So first the connecting pipes have to be cut to size again. And then it goes on: The same procedure as on the other side! -
Space Shuttle Launch Pad 39A with Challenger STS-6 (1:144)
spaceman replied to spaceman's topic in Real Space Modeling
Hello everybody, due to the occasion, here is a small detour back to NASA's Astrovans, which have also developed further in the course of the various programs, which I discussed in detail at the end of 2021. After that, this model was used during the Apollo Program, Source: wikimewdia.org as well as at the beginning of the Shuttle Program, Source: NASA and was later replaced by more modern vans, which also offered enough space for larger crews. http://www.raumfahrer.net/forum/yabbfiles/Attachments/up045518.gif -
Space Shuttle Launch Pad 39A with Challenger STS-6 (1:144)
spaceman replied to spaceman's topic in Real Space Modeling
Hello everybody my assistant thinks I should continue slowly. http://www.dpsggeldern.de/icn/lautlach.gif First, I glued the rod to the housing of the worm gear of the left Door Actuator assembly and let it dry briefly. Then it was time to try on these wriggly parts on the payload canister and to mark the protruding rod length on the housing. After that I almost wanted to glue the stick together, but fortunately I remembered the two rings, which have to be threaded on and glued on beforehand. -
Space Shuttle Launch Pad 39A with Challenger STS-6 (1:144)
spaceman replied to spaceman's topic in Real Space Modeling
Hello everybody, before installing these filigree and extremely fragile structures on the canister side walls, I had to think carefully about how best to proceed in order not to end up shipwrecked. Scratch building these challenging things were far too time-consuming for that, nothing was allowed to go wrong. One possibility would be to glue the central Pneumatic drive and the two Door actuators with their Screw jacks onto the provided places of the side wall, for which purpose an exact positioning of the three groups on a contour line would have to be realized, which -
Space Shuttle Launch Pad 39A with Challenger STS-6 (1:144)
spaceman replied to spaceman's topic in Real Space Modeling
Thanks my friend for looking in on me again and for your nice compliment. Stay tuned and let's have fun together. -
Space Shuttle Launch Pad 39A with Challenger STS-6 (1:144)
spaceman replied to spaceman's topic in Real Space Modeling
Hello everybody, but after the daydreaming now back to the somewhat smaller Payload Canister (1:160). For this I have to go back to this image again, on which the lower Door Actuators with the Screw Jacks and the central Door Actuator Pneumatic Drive can be seen. Source: NASA (STS-135) And these are these pretty filigree assemblies that I need now. But before I can glue them onto the side walls of the canister, a test should show whether and how well the distances of the respective connection points of the pipes (blue -
Space Shuttle Launch Pad 39A with Challenger STS-6 (1:144)
spaceman replied to spaceman's topic in Real Space Modeling
Hi folks, apropos STS-6 diorama dream, that goes well with it now. In addition to this project dream I will fulfill a long-awaited dream in 1:1 scale at the beginning of October and fly for three weeks to Florida, to make the Kennedy Space Center resp. the KSC Visitor Complex unsafe and will have a look at the surrounding area. There I will spend a week in Cocoa Beach and meet my friend and Launch Pad old hand James MacLaren (16streets.com), as well as my friend John O'Connor who created and constantly updates the websites with the awes -
Space Shuttle Launch Pad 39A with Challenger STS-6 (1:144)
spaceman replied to spaceman's topic in Real Space Modeling
Thanks Mike, ARC forum also has room for improvement, so hang in there. -
Space Shuttle Launch Pad 39A with Challenger STS-6 (1:144)
spaceman replied to spaceman's topic in Real Space Modeling
Hello everybody, to celebrate the day of this outstanding milestone here comes the current hit statistics of my noble fan Hugo from our German Raumcon forum, which he immediately posted, what has amazed me once again. In this I entered the current hit numbers of the other forums in which I still otherwise post. http://www.raumfahrer.net/forum/yabbfiles/Attachments/up035091.gif While the NSF (934.186) is hot on our heels, the other forums are already a long way behind: - Paper Modelers (467.074) - ARC Discussion Forums ( -
Space Shuttle Launch Pad 39A with Challenger STS-6 (1:144)
spaceman replied to spaceman's topic in Real Space Modeling
Hello friends, due to the occasion, I want to come back and slowly get off to a flying start again. Today we broke the sound barrier of 1 Million views in our German Raumcon forum. If that is not a reason to celebrate. Cheers! -
Space Shuttle Launch Pad 39A with Challenger STS-6 (1:144)
spaceman replied to spaceman's topic in Real Space Modeling
Hello everybody, unfortunately, the matter was quite a flop, since the Countdown unfortunately had to be aborted, which NASA calls Abort. The boss of the Family Adventure Land damaged the Shuttle stack's plastic jacket while unloading it with the forklift, resulting in a leak that needs to be sealed first. The "buddy" has already ordered the glue, but I'm curious to see whether the damage can still be repaired in the next few weeks. They also informed me that the "Giant water slide" can only be offered when it is dry. Apparently it also worked -
Space Shuttle Launch Pad 39A with Challenger STS-6 (1:144)
spaceman replied to spaceman's topic in Real Space Modeling
Hello everybody, life still goes on ... Hot summer greetings (31°C) from the Filder Space Center (FSC)! Of course I can't miss this attraction of the Giant water slide in the local center of Filderstadt-Bernhausen in my immediate vicinity! -
Space Shuttle Launch Pad 39A with Challenger STS-6 (1:144)
spaceman replied to spaceman's topic in Real Space Modeling
Hello friends, 40 years ago today, Sally K. Ride († July 23, 2012) launched into space as the first American woman aboard the Challenger (STS-7). left to right Sally Ride †, John Fabian, Robert Crippen, Norman Thagard, Frederick Hauck Source: wikipedia.org Source: wikipedia.org Her legacy will be cherished forever. -
A few pics from Torcan 2023 model show
spaceman replied to crackerjazz's topic in Real Space Modeling
Hey Joe, great pics show! Is the impression deceptive, or was Real Space Modeling underrepresented? -
Educraft Diversions Apollo Era Crawler Transporter - 1/144 Scale
spaceman replied to Logan 5's topic in Real Space Modeling
Hi Al, sorry, somehow I can not follow your scale conversion. And "the paint was the thing" sounds like you've already painted a grid (how and which one)? Then paint the 60 mesh grid first, when you got it, to talk about "correct "image" after painting" beforehand is pure speculation. -
Educraft Diversions Apollo Era Crawler Transporter - 1/144 Scale
spaceman replied to Logan 5's topic in Real Space Modeling
Hi Al, I'm surprised you bought 120 mesh grid now like you emailed me. Why did you buy it? With 0,125 mm hole size it seems to me to be much too fine in terms of size. Think about it, you also have to airbrush it, so I would have concerns whether you would cover the tiny openings (0,125 mm hole size) without knowing how well you can airbrush with your gun. I had sent you photos of 40 and 50 mesh to compare with your walkway width. Meanwhile I've also looked at 60 mesh (0,23368 mm hole size), https://www.twpinc.com/60-mesh-brass-0075-wire-d -
Space Shuttle Launch Pad 39A with Challenger STS-6 (1:144)
spaceman replied to spaceman's topic in Real Space Modeling
Hello everybody, and now to the Final Ladder Countdown. This will be the 3rd Ladder, scratched as usual. This image shows how quickly the rulers can slip as I was not careful when photographing the three finished ladders next to the fixed 4th Ladder. So it's better to put the finished ladders aside quickly and fix the ladder once again. This now completes all four ladders for the side walls of the canister, and were safely stowed away until their Airbrush -
Space Shuttle Launch Pad 39A with Challenger STS-6 (1:144)
spaceman replied to spaceman's topic in Real Space Modeling
No understatement needed, Kirk. PM me a link for having a look at it.