


Fellow Hobbyist
-
Content Count
388 -
Joined
-
Last visited
Content Type
Profiles
Forums
Calendar
Posts posted by Fellow Hobbyist
-
-

The decals I purchased to replaced the originally supplied sheets was a good investment. They did not disintergrate when immersed in water unlike the original decals which did. However these are still very brittle and most cracked as the backing paper curled up during the soaking process or when being applied onto the model. Fortunately only two have partially disintergated so far. The arrow decal on the cowling in the picture above was one example of this. The decal broke apart at the arrowhead and the trailing ends of the ribbon. All but a tiny piece was pushed into position and a coating of acrylic floor wax locked them in place. A touch of paint on the crack in the arrowhead and the ribbon would all but hide that fact.

Tonight I finished applying decals on the vertical tail and the #33 on the port side. The decal for the vertical tail made me really nervous. The decal applied to the starboard side was not particularly flexible. It would not sit into the grove between the tailplane and the rudder. I decided to carefully cut the decal along the grove...and wound up fracturing the decal instead of cleanly cutting through. I applied the acrylic wax in the hope it draw the jagged edges back into place inside the rudder/ tailplane grove. I though I had ruined it. But after drying it appears the wax did it's job. The application of the tail's portside roundel went much more smoothly and this time the inscission was clean. Once the decals dry from this seesion I'll apply the final two on the bottom of the wings and decaling will be done. All I have to to is wait for good weather to dull coat in prep for some weathering.
-
PM sent :)
-
Quick update. I've painted the La-7 but had to put hold pending the arrival of new decals. I got them on Saturday. Before proceeding I had to make a repair. The aerial mast just aft of the cockpit had broken off some time ago.

So I cannibalized an unused landing strut (it was about the same diameter). The remnants of the old part was removed and the repurposed part was formed, a mounting hole drilled out, and the new part installed.

I need a new camera. With this now done decal laying can commence.
-
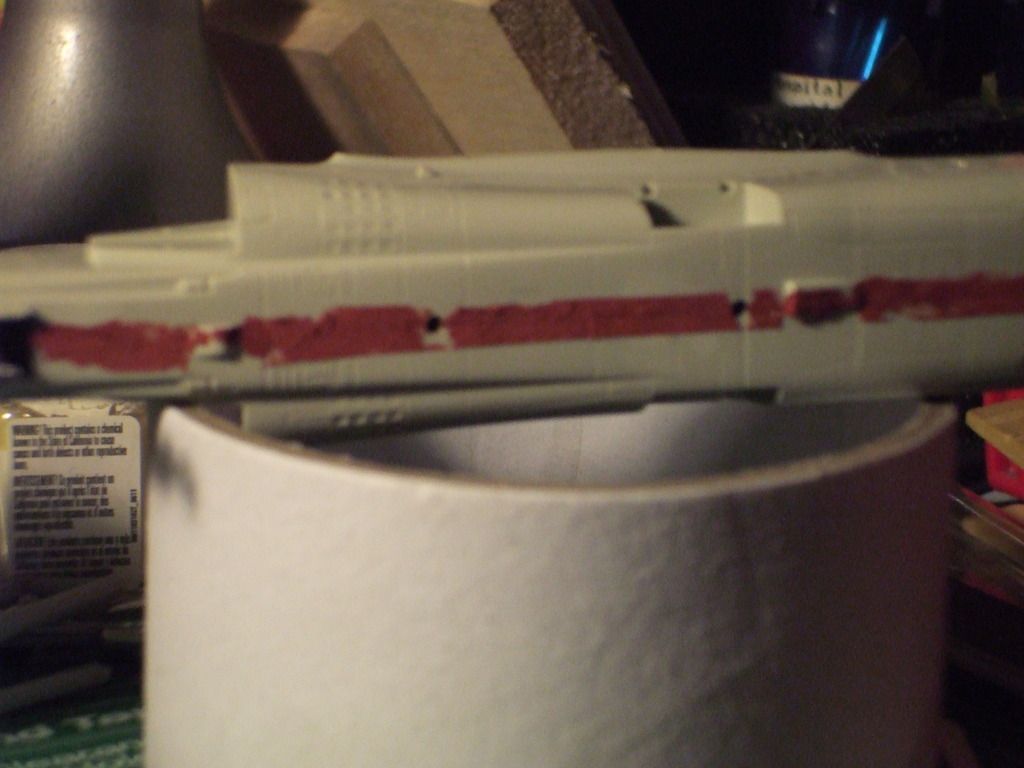
A particular place needing to address is the area where the bottom fuselage (which represents the landing gear bays and bomb bay area) joins to the upper fuselage. There was a thin; but noticeable, step along the join on either side of the fuselage.

To correct this I cut thin strips of card stock and bonded along that step with Tamiya cement

In this picture the grafts also extend out the the rear gear well. The strip was scrapped and sanded to blend the strip.

Presently I'm perfecting the repairs to remove the gaps between strips and pock marks in the preliminary filler (Thought I had a photo but I don't right now). I was scared this repair would not work but I'm pleased it has. Filling on the fuselage is nearly complete now. Some panel lines will need etching but thankfully not many.
-
I plan on trying to depict a B-52H used in testing. The test birds with the dayglow orange sections are appealing and unique.
-
Though late to the party I'm going to build a B-52H. Presently I have a 1/200 Scale kit by Dragon so that is what I will be using for this GB.
As I want to do a 1960's era B-52H the pods for the nose and vertical tail have been omitted.
Fuselage assembly was straight forward. Paint cockpit pieces and glue the fuselage halves, "crew", and canopy together.

Likewise the wings went together with little problems. One of them (I can't remember which) needed as thin strip of plastic added to the bottom plate to ensure the surfaces of the plate and wing would be level along the join.

As an 1960's era B-52H is what I am looking to build I also needed to remove the blisters on the very end of the tail; forward of cannon.

As you see the blisters are carefully carved and sanded away on one of the two sides. The process was repeated for the other half.

-
1/200 Scale B-52H Stratofortress.
-
Initial priming has started. As it is getting colder to spray primer onto the model outside I hand brushed thinned Testors enamel flat gray onto the model from the comfort of my apartment. So far I've done two priming sessions.

The first session revealed the joins where the wings and fillets meet needed more sanding and some some spots on the starboard fillet need more filler. More sanding was to be done on the duct on the underside and the bottom of the port wing tip.

The second primining showed the work on the fillets was worth it. The filler was more evenly feathered into the surrounding plastic and the holes eliminated. Still more work is needed on the underside duct. The wing tip was fixed.

It might be hard to spot but you can see the lines where I etched the main gear doors. I am happy with how the etching turned out.
One thing I've noticed is the thinned paint dries far too quickly than I like. And unfortunately dust and lint is an ever constant problem. It does not help my room has full floor carpeting. Regarding the fast drying nature of the thinned paint; any suggestions on how to get more working time out of the thinned mixture?
-
That was an interesting read 11bee. Thanks for posting.
-
So in summary the filling has more or less been completed since the end of July. I spent August and part of September ecthing some of the lost panel details atop the cowling. Also I spent copious time filling, sanding, and scraping the plate that made up the main landing gear doors so as to make the part flush with rest of the underside of the plane. That part was cartoonishly too thick.

Around the beginning of September I finally got the part smooth. But due to work and some focus on other project the La-7 was set aside till now.
Over the last few days I've set about re-etching the lost panel detail particularly around the landing gear doors. With the exception of the round wheel covers; I just eyeballed the door panel lines and etched with a scriber and DYMO tape. Surprisingly the latex wood filler did not get damaged by the removal of the DYMO tape from atop the areas filler was applied. Likewise the filler tolerated scribing; the only minor divets where the scribe did sometime get stuck, but overall it etched satisfactorialy. For the door panels I traced a pattern onto the model with pencil and laid a piece of scotch tape over the pencil marks. I then traced over that with marker and carefully removed the tape. The tape was transferred to thin piece of scrap plastic. I then carefully cut out a template and finalized the contour with half-round file. Labeling forward and aft orientation helped to make sure the template was placed onto the model in the right direction.


With the template taped into place I etched the round door panels. This was a little more difficult than the straight lines. The scriber got stuck frequently! But it worked out in the end. The rounded panels got done and I finished off all the straight lines this evening. The plate now has "separate" door panels as they should. Next will come restoring the lost panel lines from around the periphery of the gear doors and etching lines on the tail gear doors.
-
Yet another of the castmembers of the series goes beyond the Rim :(
-
I've recently attached the landing gear door panels, oil cooler intake, and the tail wheel piece to the underside of the fuselage. As the gear doors are closed the instructions called for cutting off the tail wheel. The nub received an initial sanding but final shaping will be pending. Also note I opened a notch at the bottom of the fuselage, forward of the oil cooler, for mounting the finished model atop a stand.


My focus over the last couple of days has been blending the fuselage fillet and upper wing surface. To speed up the project I am using latex wood filler. It dries relatively quickly and can be blended with a damp q-tip. The later technique was done during the initial application of filler. Subsequent applications were sanded smooth. First dry sanding to roughly knock down the layers of filler followed by gentle wet sanding to thorough blend the filler smooth (too vigorous of a wet sanding will remove most of the filler...which is not what I want).


Having finished the fillet/ wing join blending this morning I added some filler on the gaps along the oil cooler intake/ fuselage join and reshaped the contour of a contiguous fixture, the gaps just aft the oil cooler and where on the gaps where the bottom wing panel joins with the top wing pieces (not photographed yet).
-
Seeing the progress you've been making Niart reminds me why I love this hobby. The Drone is looking fantastic and is inspirational. It's what people like me strive to acheive. Here's to a successfully completed Drone

-
What an incredible event to endure, you have my total sypmathy and all my best wishes. So glad you and your family are ok!
It's great that you're able to get back into the hobby so quickly, it sounds like you're part of a great club.
I appreciate your sentiments K5054NZ. The fire marked the end of life as it was. And for as painful as that day was; I've kept in my mind that this new chapter in life can offer the opportnity for joy and renewal for us all.
As for my club. They are the most wonderful group of people I could have ever met. I can't think of any other way to describe my friends.
-
Five weeks ago a fire destroyed my home and my belongings. Most of my neighbors, my family and I escaped. But sadly four neighbors did not. It was a tough four weeks but we finally found a new home and moved a little over a week ago. Things are returning to some level of normality. Further my friends from my scale modeling club gave me some new kits. Now I feel ready to start the first project since that dreadful day.
Considering the limited tools and resources I have I chose a simple 1/72 Lavochkin La-7 by Novo (formerly Frog).


Started with painting the pilot, seat, and cockpit interior.

Among the other thing generously provided by my friends was a bottle of Tamiya extra thin cement. Using this made fusing fuselage and wing sub-assemblies a breeze. How come I never discovered this product sooner?

With a few more pieces to attach I can move to seam filling by tomorrow. It feels nice to be building again.
-
Unfortunately the model has been destroyed due to circumstances beyond my control. Thus my this project is at an end. I was pleased with practicing detailing techniques. I had got to the phase where I was re-scribing the panel lines of the wings, fuselage, and especially the vertical tail. I used a series of custom templates to accomplish that task and was looking forward to priming.
If at all possible I hope to obtain a new model kit an hopefully complete participation in the HAF GB.
-
There was a aircraft magazine a few years back that detailed the mistakes that LM paid for vs what the government paid for and LM ate some losses. Pratt is paying for the engine fix for example. A lot of it has to do with the contract types and penalties.
You also have to discern what is an "honest mistake" when cutting edge tech and new things are tried, vs an actual preventable mistake. F-35 is ambitious, there are going to be issues. People said this thing was impossible. It's possible but its not easy either.
The government doesn't seem to be going after lockheed over The F-35 the way they are getting boeing on the tankers.
Speaking of boeing, denmark has outlined why the super hornet lost to the F-35. I'll post about it later. Denmark used USN numbers for lifespan which upset boeing because they are saying the USN under valued them
It may be the attempt to avoid a repeat of what has been experienced in the F-35 program's past that prompted the penalty to be levied against Boeing.
-
Planes got broken but flight crews are okay and no one else hurt. The best outcome any one could hope for.
-
Tea or coffee; largely depends on what time of day I happen to be working at the bench.
-
It is relaxing when I am building. I get a sense of satisfaction when I find a solution to a build problem and the elation when you look at a subject when it is finished and you hear the voice in your head say "I built that! :D".
-
Thank you Zark. The reason I ask is the Esci 1/72 kit I am building has these features in slightly different locations; the starboard side blister is set higher on the vertical tail than the port side blister. I wasn't certain if that was a error or the way they were supposed to be. Thanks to you I now know it is an error that needs correcting.
-
Quick question Zark
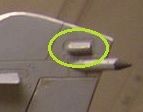
The encircled blister on your model; is it in the same location on the opposite side of the vertical tail?
-
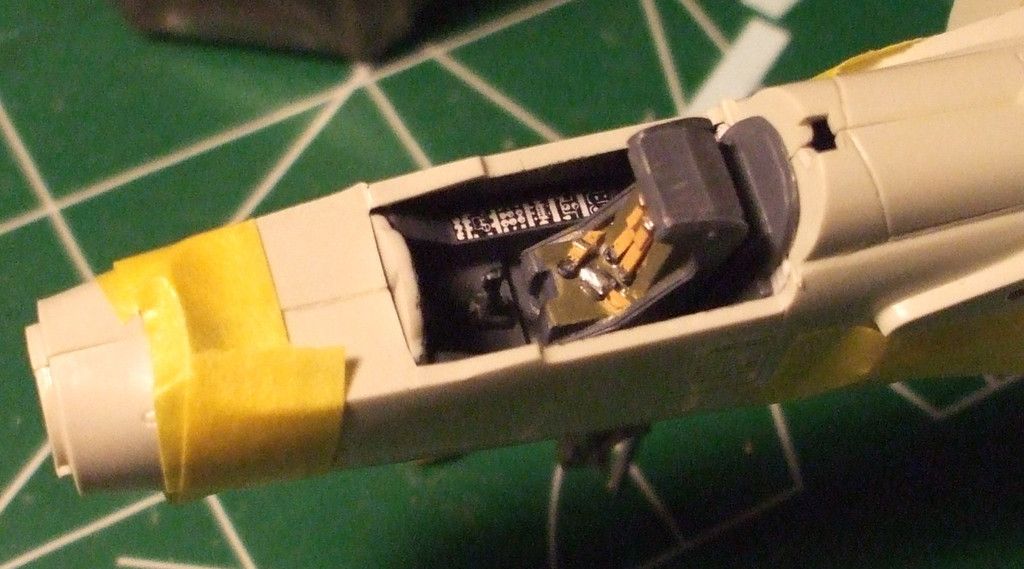
Excellent cockpit detailing Skinny Mike
-
The fuselage halves have been closed up after some ballast was installed.

Overall the additional detailing to the ejection seat looks excellent if I say so myself.
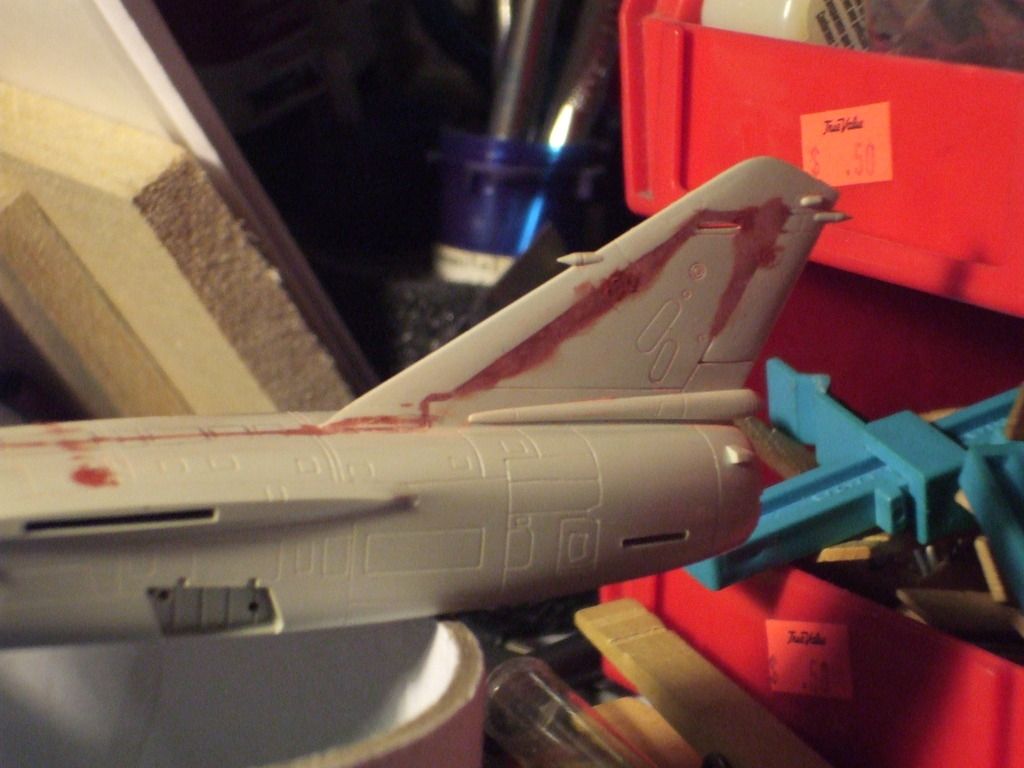
Putty work has started on the wings and fuselage. The vertical tail were not even. The inner panel sunk below the outer panels in several places.

Thus a lot of filler was used to level the inner and outer panels.
The ventral side of the model. It too needs copious amount of filler to level out the seams there.


1/72 PC-6 Air Glacier
in Props
Posted
Nice high wing you have built there Le Boz.