


as205
-
Content Count
284 -
Joined
-
Last visited
About as205
-
Rank
Tenax Sniffer (Open a window!)

-
Very cool. My two great loves in one. Modeling and computers. Good work.
-
I finally got around to getting the 1960's NASA manned spacecraft mount finished. Here are a few pics. That's it for 2023. Hopefully I can get in a few more builds in 2024. Randy
-
Thanks Pete and Ricardo. One day I hope do one on par with yours. Randy
-
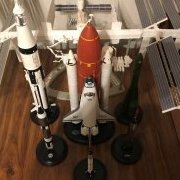
1/200 "Man in Space" rockets and Space Shuttle display
as205 replied to LA2019's topic in Real Space Modeling
Very cool display. I have those in my stash as well. Someday.... Randy -
Work on the Ascent stage continued with more foil work. Before I added the foil, I painted some black on the lower cabin and the RCS quads. Foil was then added around the hatch area, the area below and under the “gills” and the lower sections of the front RCS quads. Next I painted the black areas around and below the windows. The notch in the black near the hatch was painted light gray. Then I painted the sides of the “nose” and part of the “gills”. I cut some clear 0.010 styrene to fit the window openings. This was glued in with Plasti-Zap
-
Thanks Pete, I used a fresh #11 blade and took a few deep breaths and went after it. Outside edge first, then pealed the excess off. Then took another few breaths and went after the inside. I just finished adding the foil to the sides of the porch. It came out pretty good. No photos yet, but they are to come. Randy
-
Having pretty much wrapped up the Descent Stage, I started work on the Ascent Stage. I started painting with the mid and aft section of the LM. I painted it Model Master Acryl Aluminum. I then painted the panels that were black with Vallejo Model Color Black. When that had dried I went back and scraped the paint off where the panels met. Next, I covered the black areas with some Vallejo Matt Varnish to protect the paint. LM-4 was the last LM to have the overall Aluminum finish. All later flights had one type or another of anodizing. Then I started applying foil where it was needed.
-
SpacecraftGuy, Thanks. Yes I have that one, plus a couple of others. But the main problem with them is that at the time of the photo not all of the coverings were on the LM so it is difficult gauge what is correct when it was actually launched. Paul Fjeld and Mike Mackowski have some drawings that I'm accepting as close enough. BTW, I did make some progress today with the Ascent Stage. It got its aluminum base coat. Randy
-
Pete, Thanks, I have those as well. Lacking any definitive photos, I picked a path and executed. I took a while going over those and you really can't go wrong either way since we don't have the photos (at least I can't find any) to give guidance. Randy
-
Thanks Pete. Like yourself I've found very few photos of Snoopy. I'm mostly going from Mike Mackowski's SIM 7.1 LM book. The copper color on the top side of the Descent Stage is Bare-Metal Foil Bright Aluminum with three coats of Tamiya transparent orange and one coat of Tamiya transparent red. It came fairly close to the color in some of the photos of the LM topside. Randy
-
Most of my outside distractions are disappearing, so the delays can now pretty much be blamed on procrastination. However, progress has been made. I've been working on the Descent Stage of Snoopy. The landing radar is installed. It almost disappears in the shine of the foiled underside. I've applied the foil details on the top and sides of the Descent stage. I used four colors of foil. Bare-metal foil Bright Aluminum, Gold, Yellow Gold, and Dark Orange. The Aluminum and Gold are the bare colors of the foil. The Yellow Gold is the Bright Aluminum painted with a cou
-
A little more work got done on the Dragon model in the last few days. I started with the steerable S-band antenna. Looking at my reference photos I noticed that the main post for the antenna projected more from the side of LM and not the top. The Dragon parts are made for a top mount. So I filled the hole in the top of the LM with putty and allowed it to dry. The New-Ware replacement parts for the steerable S-band can be seen in the below photo, which also shows the filled mounting hole. The replacement parts are much more accurate. The Dragon part for the antenna
-
After a long layoff I’ve finally gotten back to the Apollo 10 build. I’ve had a bunch of other things on my plate lately and, to be honest, I just haven’t gotten my modeling mojo back. But, I felt like if I don’t get back and try to restart the project it will never get finished. So, I got back to work on the landing gear for the LM. I finished folding the gear sections and did a bit of trimming and applying putty. Then they got a coat of primer. They aren’t exactly scale, but they do look better than the pre-folded part provided in the kit. I finished the
-
Thanks for that. It's been slow going lately, lots of outside stuff distracting me.
-
Oops, I misread the post and thought he was looking for CSM decals. Pete, you are correct Space Model Systems does not produce any 1/32 scale LM decals. The LM has so few markings it wouldn't be too hard to make some. The hardest ones would be the markings on the hatch.