

Falconxlvi
-
Content Count
1,783 -
Joined
-
Last visited
Content Type
Profiles
Forums
Calendar
Everything posted by Falconxlvi
-
Hi Rodney, sorry I missed your comment earlier. How is your J coming along? It’s a great kit isn’t it? I hope to get back to the Phantom in April 😊 Yeah, the ZM kits are superior for sure! And you won’t be disappointed in the Tamiya F-14 either- I built the A and it went together like a dream! Steve
-
F-15E strike eagle loadouts being used over syria
Falconxlvi replied to Modelkeenfan's topic in Jet Modeling
I don’t know, but with the Phase Hanger resin set in hand, my vote would be for them - they are incredible best bang for the buck is the Hasegawa set. -
F-15 correct horizontal stabilizer for 1/48 GWH
Falconxlvi replied to arnobiz's topic in Jet Modeling
The big HUD was primarily for the FLIR at night - NVG’s have negated the need for that. Also, JHMCS has made a giant HUD less relevant 👍🏻 -
Thanks Mr. Happy, I'm definitely learning a lot about P-47s as well. I appreciate your kind words and hope to have this finished up before too long! Steve
-
F-15 correct horizontal stabilizer for 1/48 GWH
Falconxlvi replied to arnobiz's topic in Jet Modeling
Awesome! You bet 👍🏻 -
F-15 correct horizontal stabilizer for 1/48 GWH
Falconxlvi replied to arnobiz's topic in Jet Modeling
You had me at EX TAKE MY MONEY 😂👍🏻 Steve PS- will you have an EX instrument panel? I don’t have a photo of the RCP unfortunately -
F-15E strike eagle loadouts being used over syria
Falconxlvi replied to Modelkeenfan's topic in Jet Modeling
I don’t see it. 😂🤷♂️ EDIT: Never mind, found it. Thanks 👍🏻 -
F-15E strike eagle loadouts being used over syria
Falconxlvi replied to Modelkeenfan's topic in Jet Modeling
Basically the rundown on GWH is this: Best 1/48 F-15E OOB for a post OIF jet. Obviously the surface detail and engineering is state of the art, but they left the door open to be superseded at some point (I’m looking at you Tamiya and hoping George Canare reads this 😂). If you want to build an earlier F-15E, use the Revell kit. A few notes on the GWH kit: Errors: Canopy profile is off. Not really much you can do, but the omega shape isn’t quite there. Doesn’t include the new-style UFCs, which every jet post 2014ish has. Quinta’s Revell cockpit -
Most impressive! The painted tail markings look great as do the exhaust petals with the CF decals. I’m looking forward to seeing this completed! Steve
-
Blow dryer will also work.
-
Nice! Definitely want to see more of these 👍🏻👍🏻
-
Thanks Cruiz- I’m looking forward to painting something! I have three models ready for paint on the bench and it’s time to get to it! I’m also looking forward to your next update on the Corsair. Cheers! Steve
-
Fantastic!
-
Good on you for fixing the tails. It was noticeable and looks perfect now! I love everything about the build - your weathering work is outstanding! Steve
-
Part VIII Priming! With construction now complete, the entire model received a coat of Mr Surfacer 1500 black primer thinned with Mr Color Leveling Thinner. Gun bay details Underside Since I am using HGW wet transfer rivets on the entire model, and spraying natural metal on the underside, I gave the P-47 a thin gloss coat of Tamiya X-1, and buffed it to a high shine using Tamiya polishing compounds and cloths. Before...(note, I fixed the rough spot behind the gun bay on the right wing) After...
-
Part VII Flaps! One of the few shortcomings of the Tamiya kit is that it does not have the structural detail on the side of each flap that is visible when the flaps are extended. Brengun makes a nice resin set that adds the missing details. The casting quality is just ok- beware of some air bubbles in the resin and the attachment point detail is a bit iffy (there is a lot of excess resin that needs to be cleaned up in the attachment slots for the kit actuators to fit properly), but the important visible detail on the sides is perfect. The f
-
Part VI You might recall I reached out for some reference help in the Prop forum for a photo of the P-47 flat belly tank - specifically, how the fuel and vent lines attached to the fuselage. Here’s what came out of that discussion... First the tank in question... The line attachment schematic... Translating that to the Tamiya kit... And adding the requisite holes on the kit tank, as well as adding a scale fuel filler cap punched from plasticard... I will plumb the tank with lead wire before attaching it during fi
-
Part V Fun with chipping fluid! So- I’ve never used Ammo Chipping Fluid before and thought I would give it a try on the prop. P-47 props do not appear to be heavily chipped in most reference photos...I tried to strike a balance between reality and artistic preference 😄 Step 1. Assemble the prop and paint the tips yellow (ok, that was a mistake, read below 😂) Step 2. Paint the prop an aluminum or silver color (once again, Mr Color 8 Silver for me) and varnish the metallic color. Step 3. Airbrush a light coat of chipping fl
-
Part IV I turned my attention to the landing gear. One of the weaknesses of the Tamiya kit is the many ejector pin marks inside the landing gear doors. Putty time. I added the brake lines with some copper wire, again, leaning heavily on Doog’s Models P-47M build as a resource. And all together (doh! Didn’t quite get rid of the ejector pin marks but the wheels should hide them 😬) For the wheels, I turned to Eduard and utilized their excellent P-47 Brassin Wheels set. Check out the detail co
-
Part III Gun Bays! What the unique thing about a P-47? How about eight - EIGHT - 50 caliber machine guns. I decided to add right Gun bay since the left would cause me to cut the Star and Bar decal. I also wanted to try something a bit different- namely, adding resin 50 cal ammo belts into the bays instead of the flat PE belts Eduard provides in their gun bay set. The first step is to cut the gun bay panel. I used my JLC Razor Saw and cleaned up the edges with Tamiya metal files... The Eduard set builds up nicely and the fit is perfect. I cut
-
Part II With the cockpit out of the way, I added the Quickboost intercooler and oil cooler(?) exhaust interiors to prevent the “see-through” effect you would have there on the model otherwise. I used also MRP Zinc Yellow for the interior part of the gear bay on the wing root, wing spar, and tail wheel interior, as well as the cowling interior and lower firewall. Next, attention turned to the engine. I cannot leave well enough alone, and decided to use the Aires R-2800 Late instead of the suitable, but basic, kit engine.
-
Hello ARC! I need to catch y’all up with some of my builds (Jug and Spitfire XVI). If you are part of the ARC or Eduard Facebook groups, you may have already seen some of these pictures, but I know not everyone is on Facebook. BUT IF YOU ARE...you know that ARC is doing a P-47 Group Build ending on March 31st, and this is my entry which I started in December... The start... I added a few things that aren’t pictured, including Brengun flaps and the HGW wet transfer rivet set (which hasn’t arrived from the Czech Republic yet) Taking
-
They didn’t replace them, but SW delivery modes have been added. Different symbology in the HUD when a JDAM is under the pickle button than a Mk.__., etc. You can still select CCIP.
-
F-15E strike eagle loadouts being used over syria
Falconxlvi replied to Modelkeenfan's topic in Jet Modeling
🤷♂️ Maybe 🤔 -
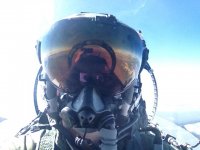
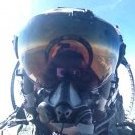
Hahaha - there’s still a lot to do ... like not hit the rocks 😂 and SLAY in air to air 😎