


airsupremacist
-
Content Count
73 -
Joined
-
Last visited
Content Type
Profiles
Forums
Calendar
Posts posted by airsupremacist
-
-
while we are at this, what colour should be used for the su-35? especially if it's gonna be in mr hobby colors? and how accurate?
-
Hello Everyone,
I have a WIP Hasegawa Longbow right now that I hope I can convert to a Guardian.
I've done some early research but so far hasn't found anything that can help me do this successfully.
I'm wondering if anyone can gimme a hand, especially in terms of referring me to resin or other converter kits.
Thanks!
-
And thanks everyone for the comments and compliments!
-
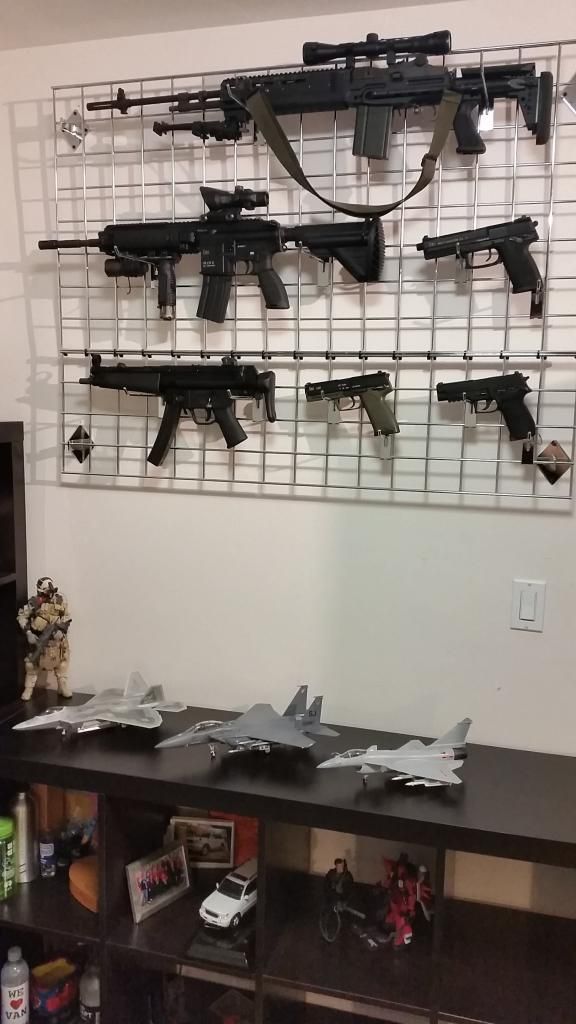
Great job!
Absolutely love the gun rack!
What is the top one? Looks similar to the M110 with a different butt stock.
Thanks! It's a M14EBR..airsoft lol
-
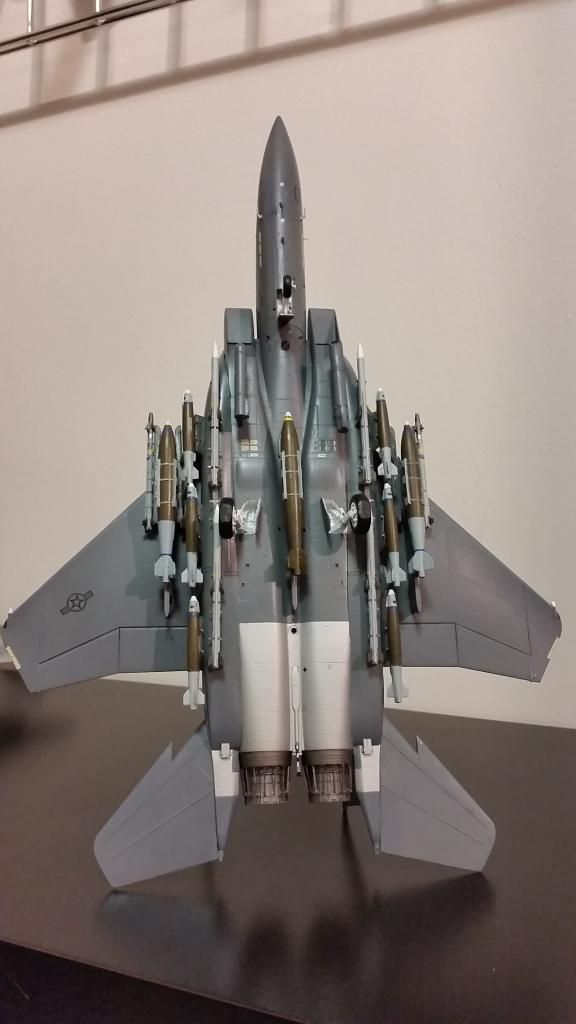
By the way everyone here's my final completed project. I hope I didn't disappoint. Here it is:
-
Thanks Scott! I will give that a try! I do have one area where I needed to do some fixing, and I hope the sanding will help. The fluid collected and formed this weird leathery texture along that area.
-
Echelon Left
-
-
-
-
Not sure what that was, but I painted it according to what I saw during my research.
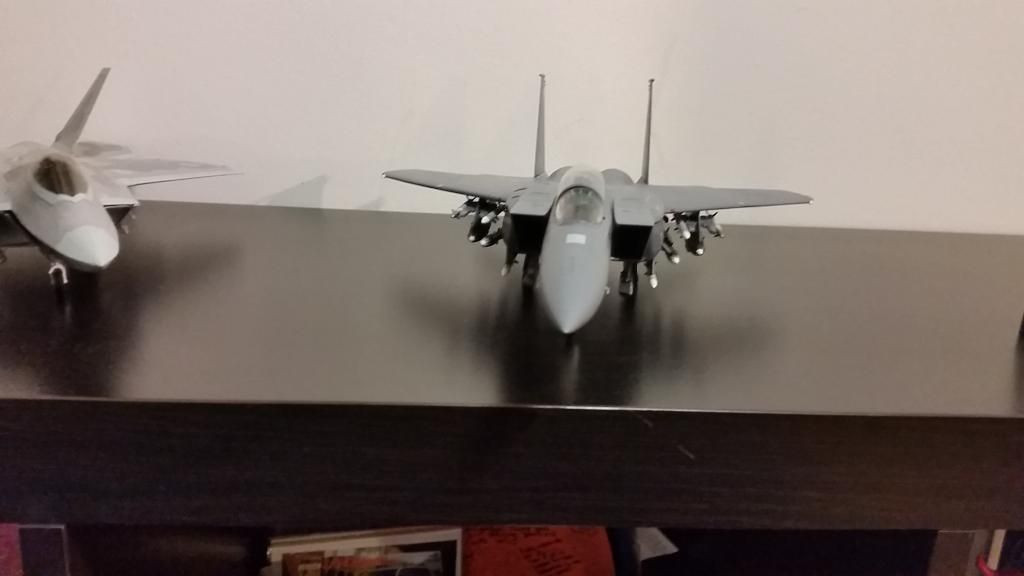
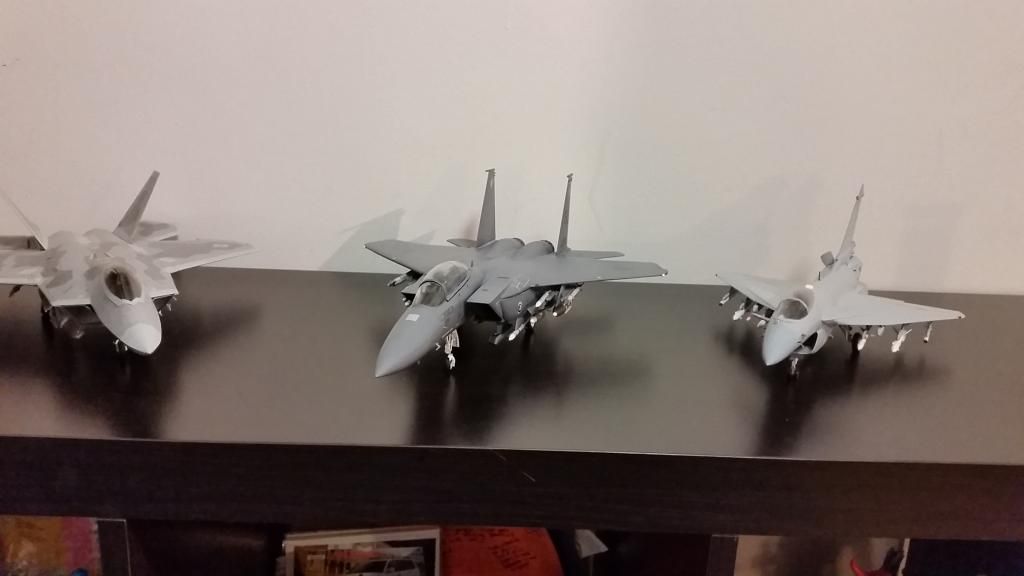
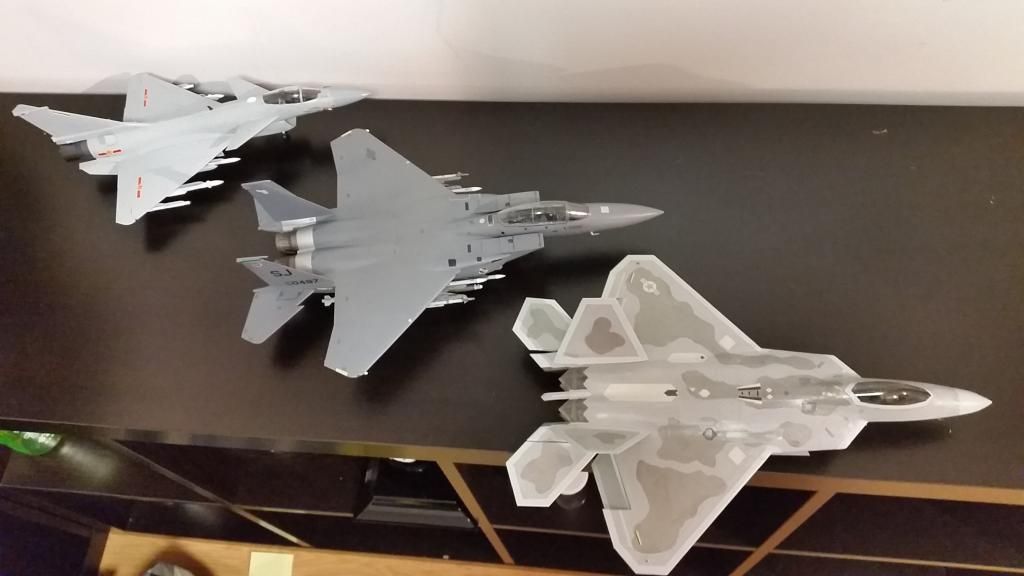
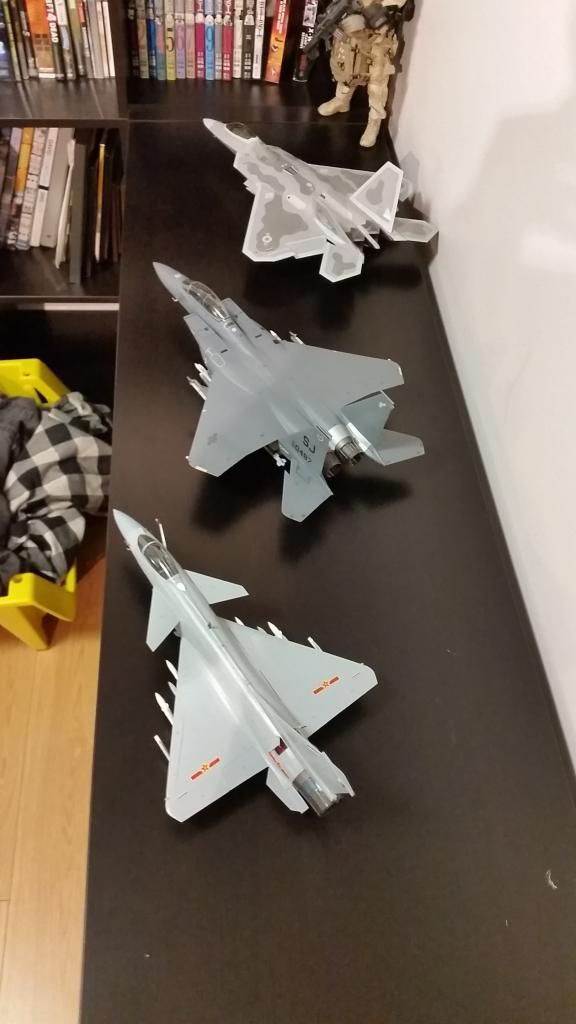
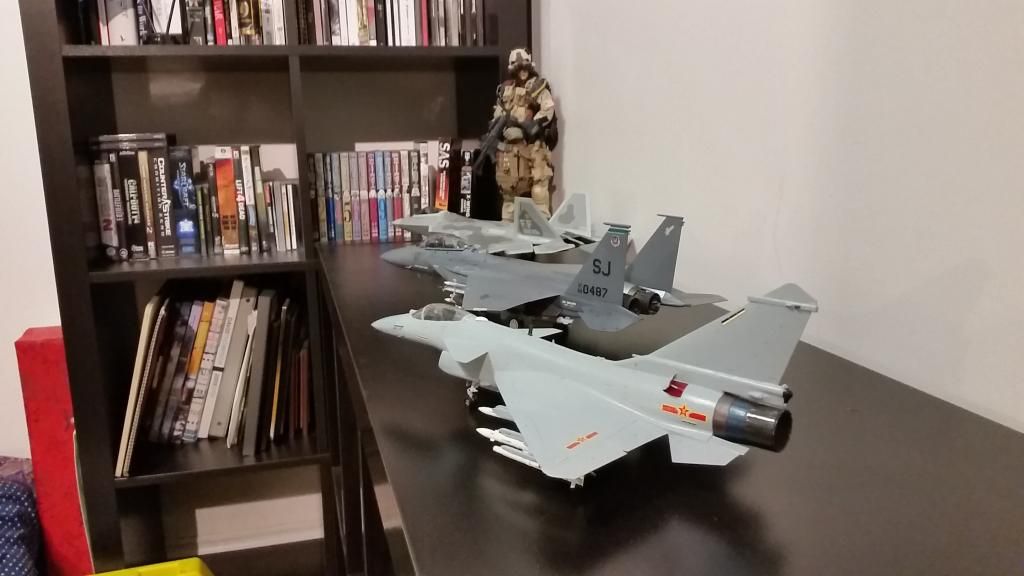
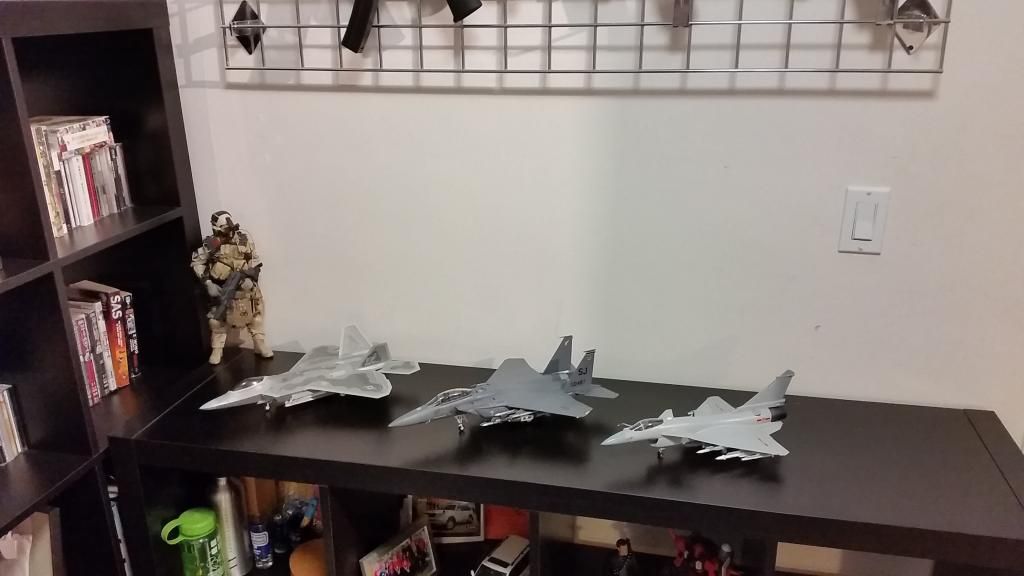
With his buddies..the 5th gen F-22 and the 4.5 gen J-10B
-
The JFS that I included
The Sniper pod.
The LANTIRN pod. I tried my best to paint the "window" to match as closely to the real thing as possible.

GPS dot next to the airbrake.
The Sniper pod again.
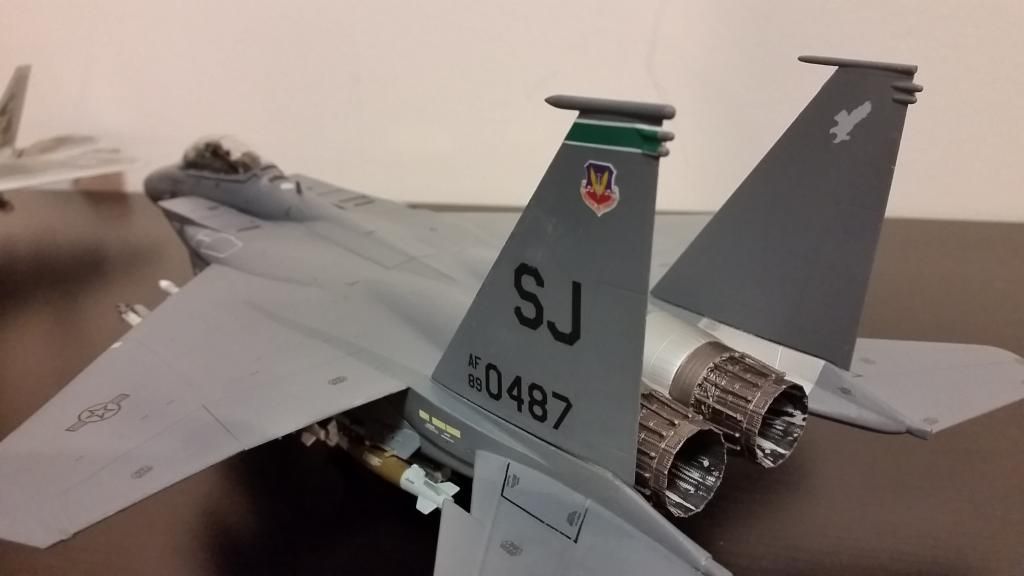
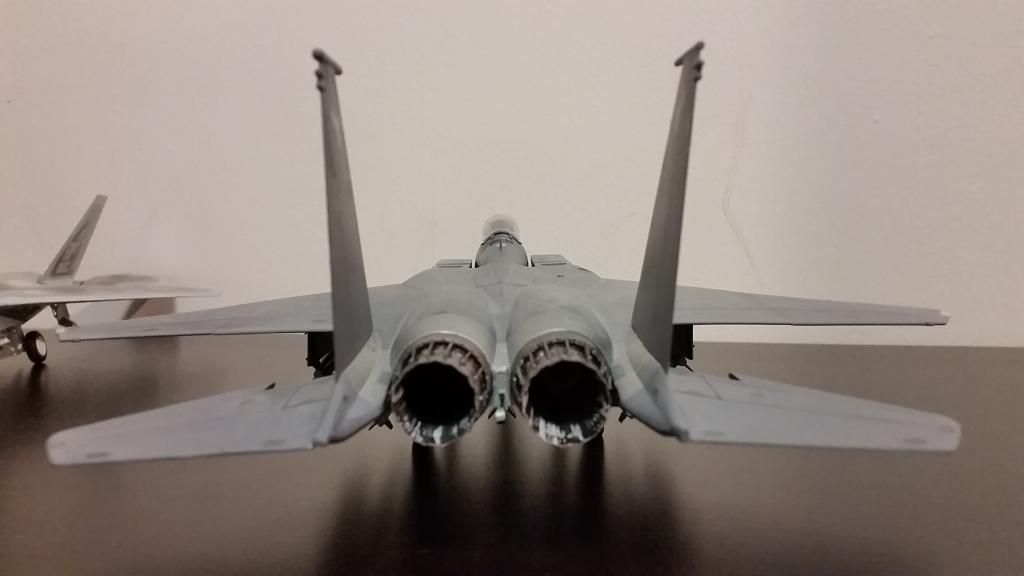
The interior of the nozzle. Also no silvering for the decals!
-
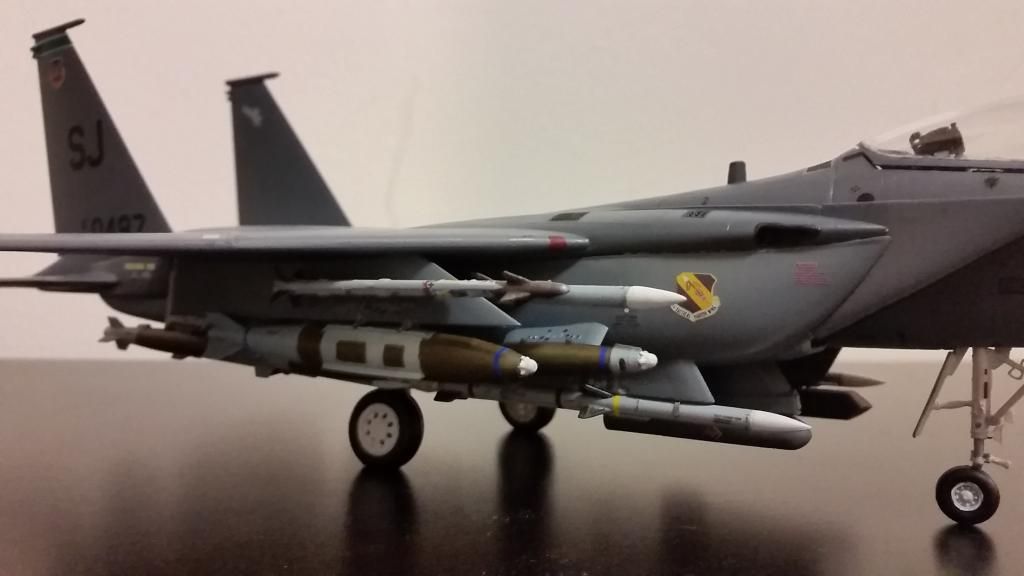
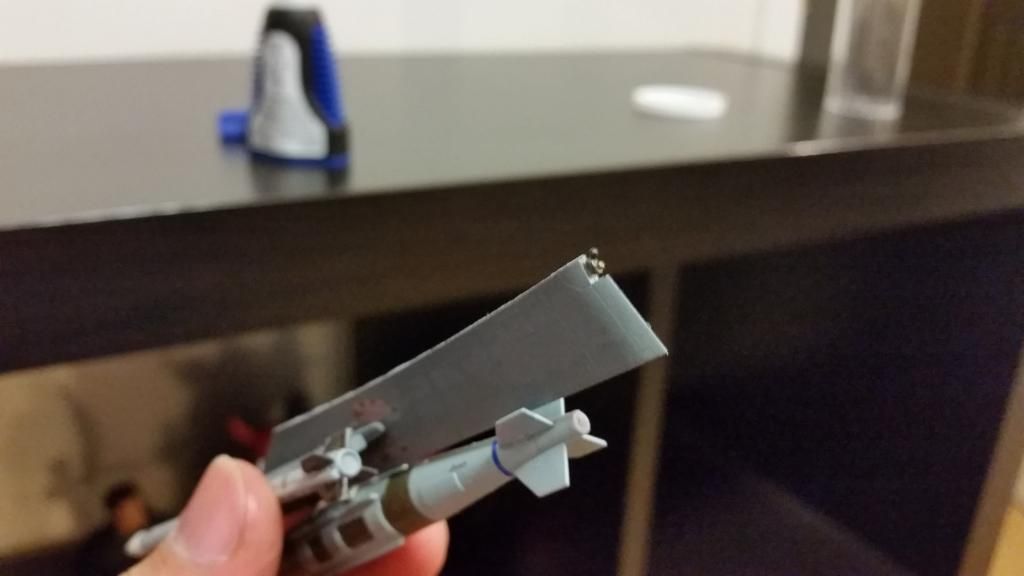
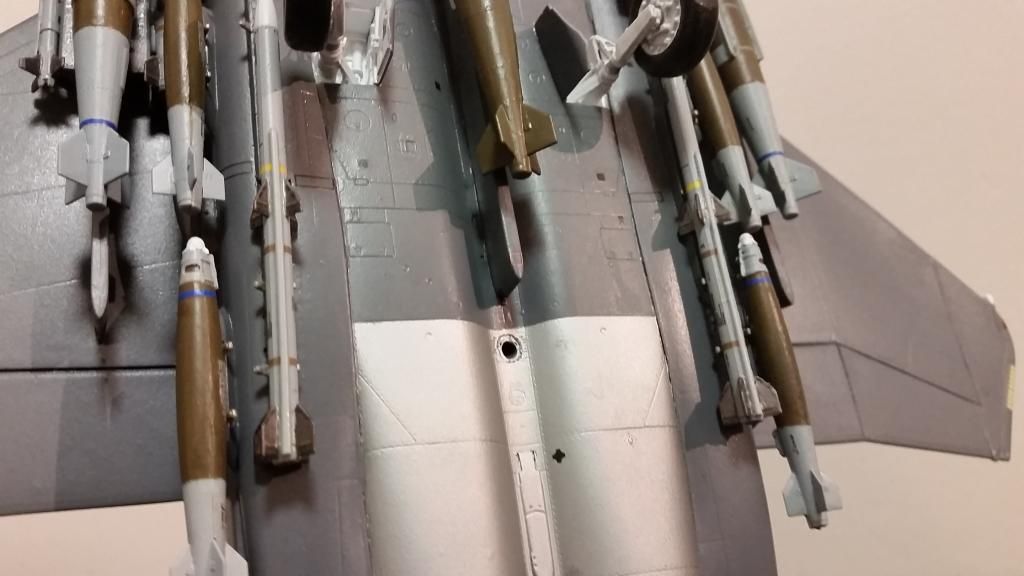
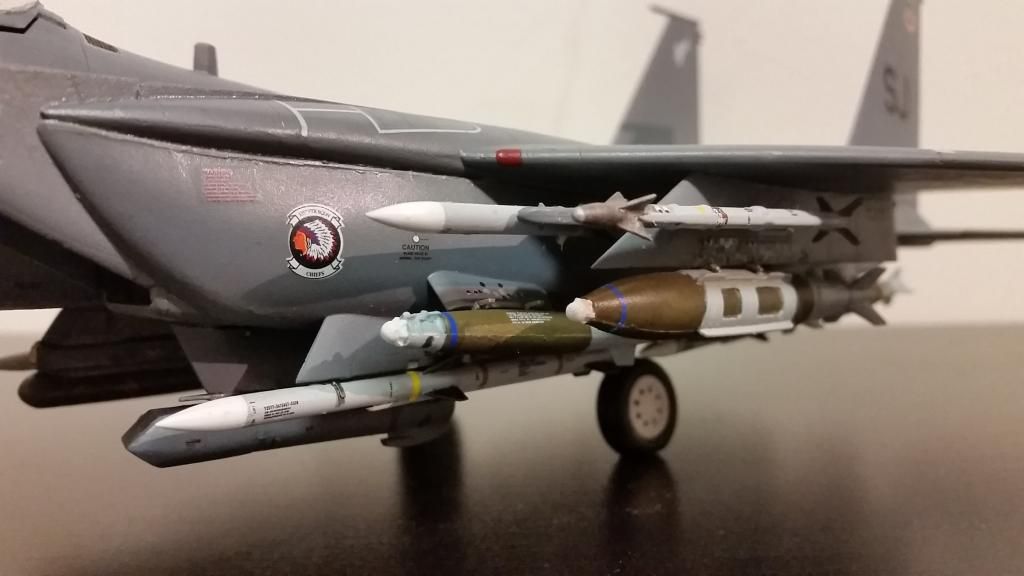
The weapons, including the AIM-9X
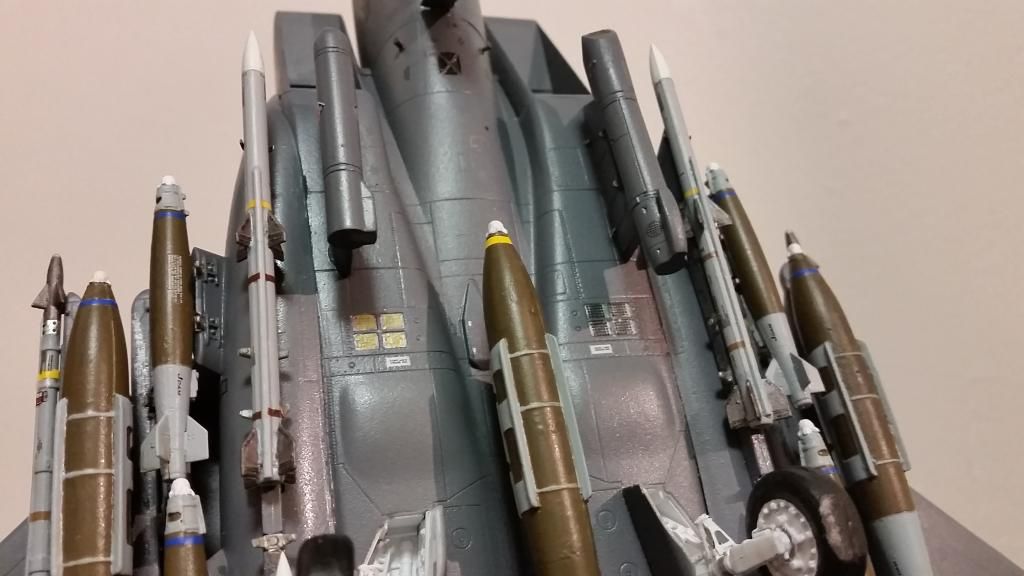
The chaff/flare dispensers, with the chaff behind the Sniper Pod and the flares behind the LANTIRN pod.
-
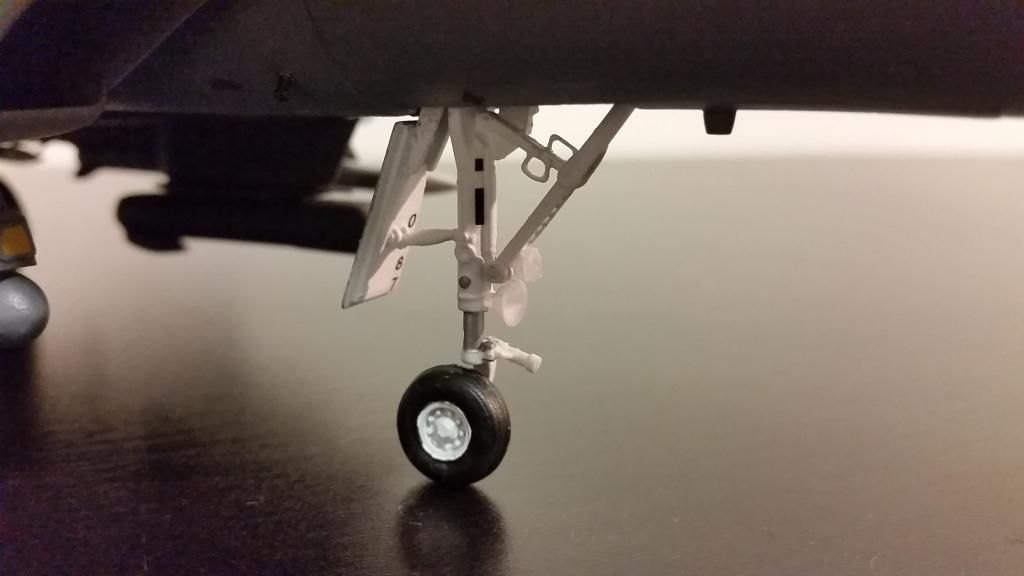
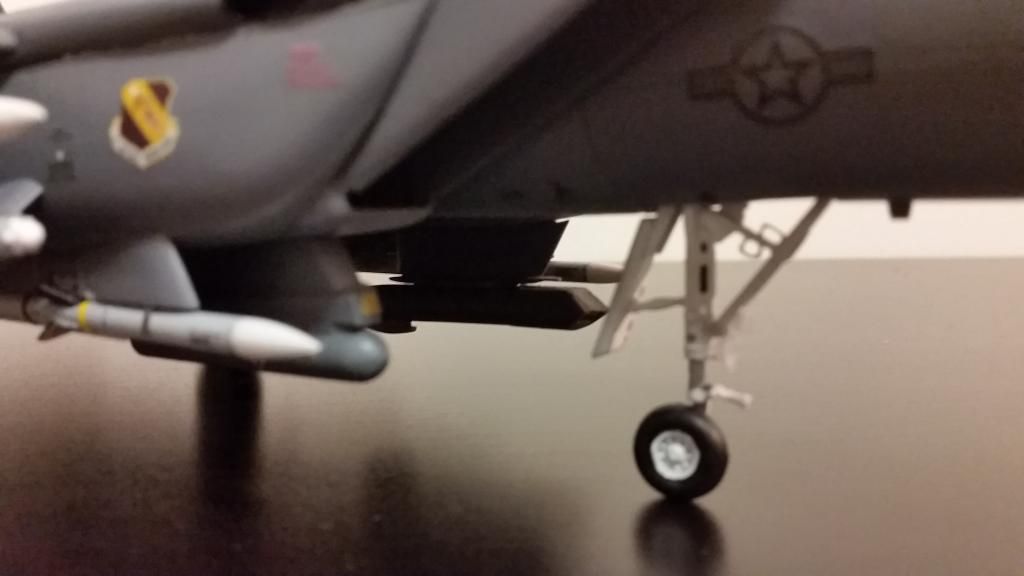
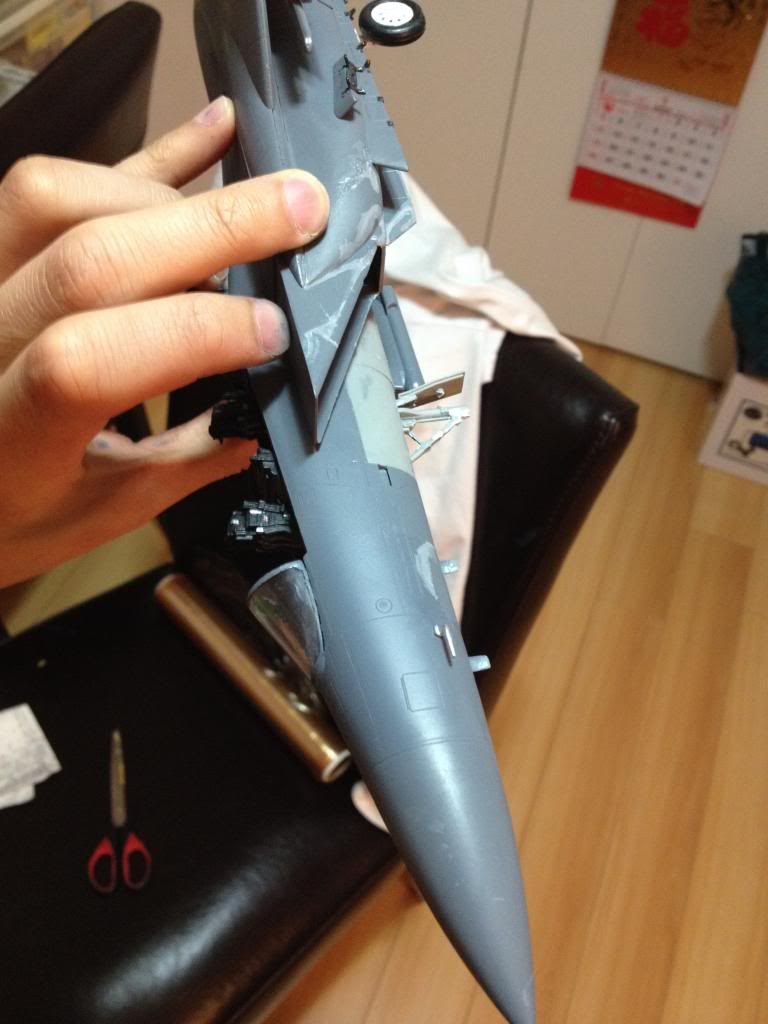
You can actually see the shimmy dampener I added here.
-
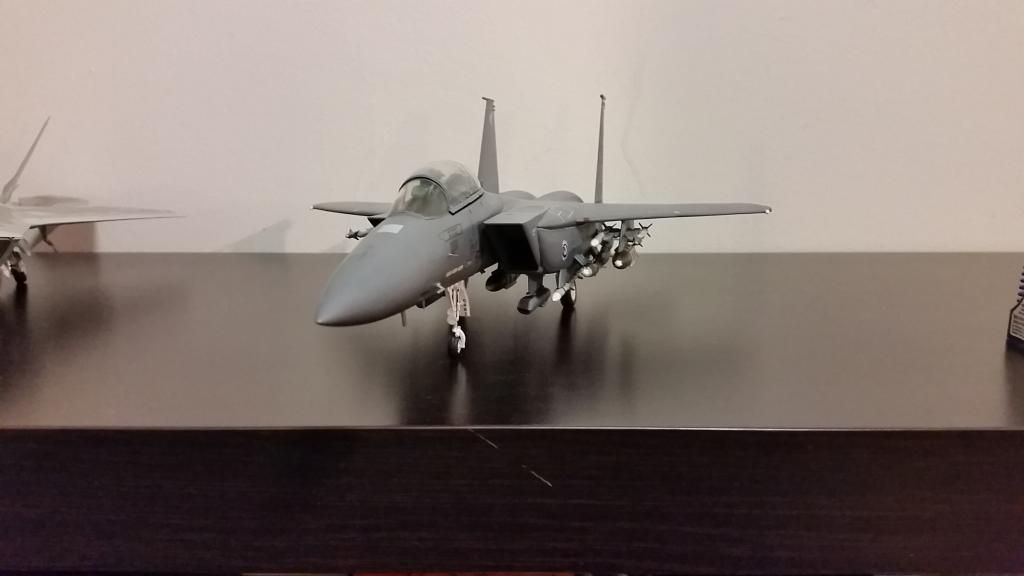
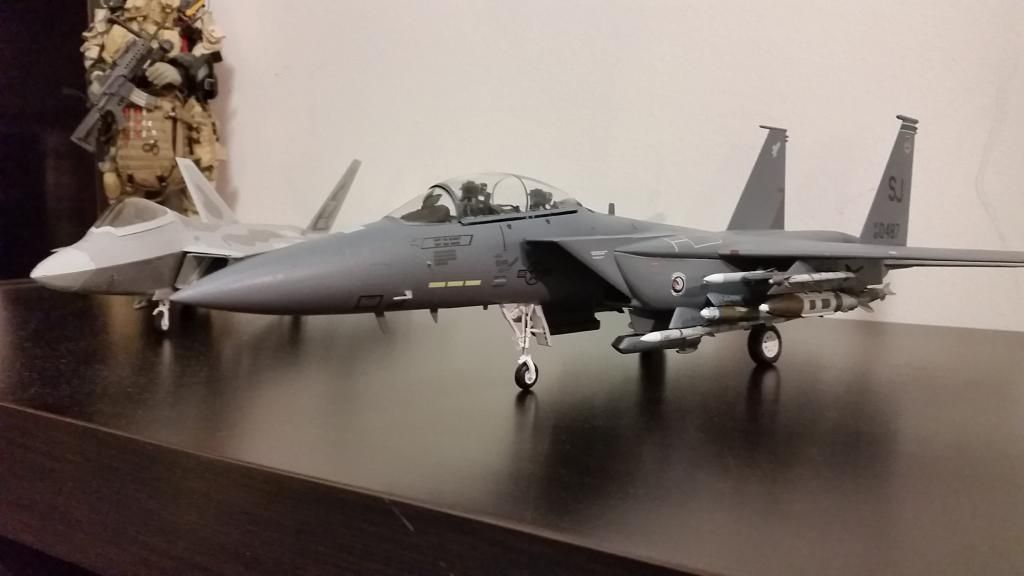
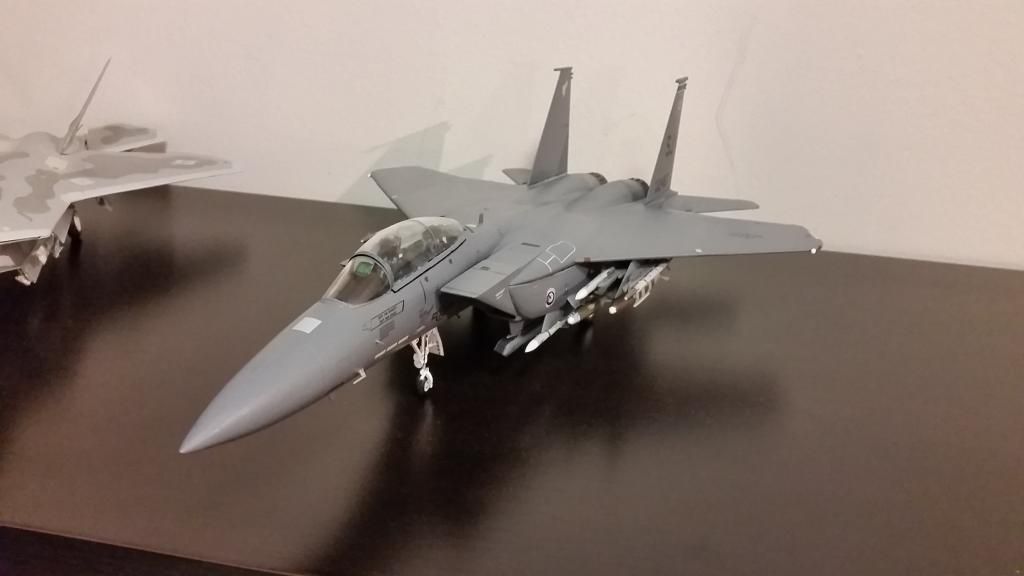
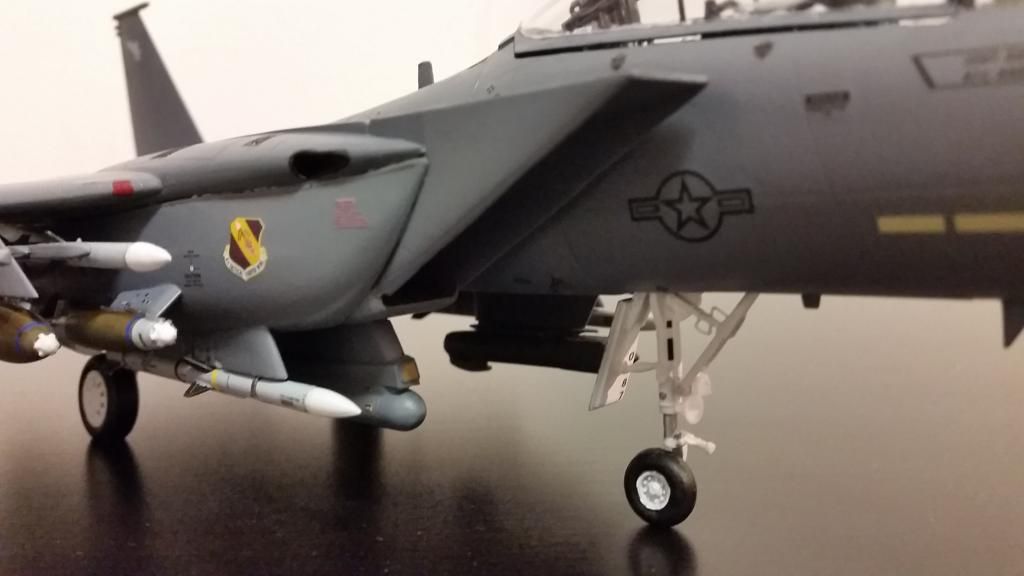
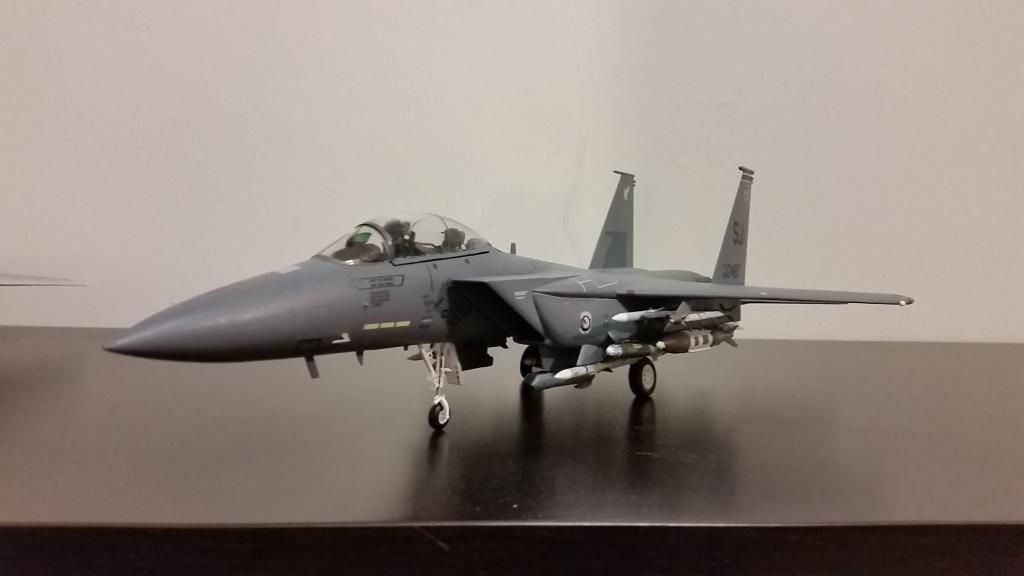
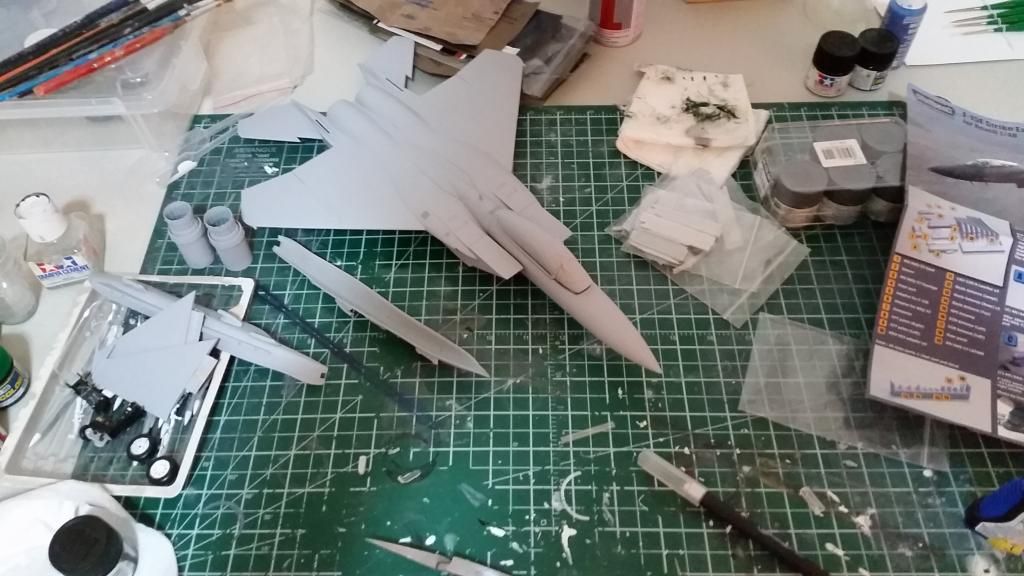
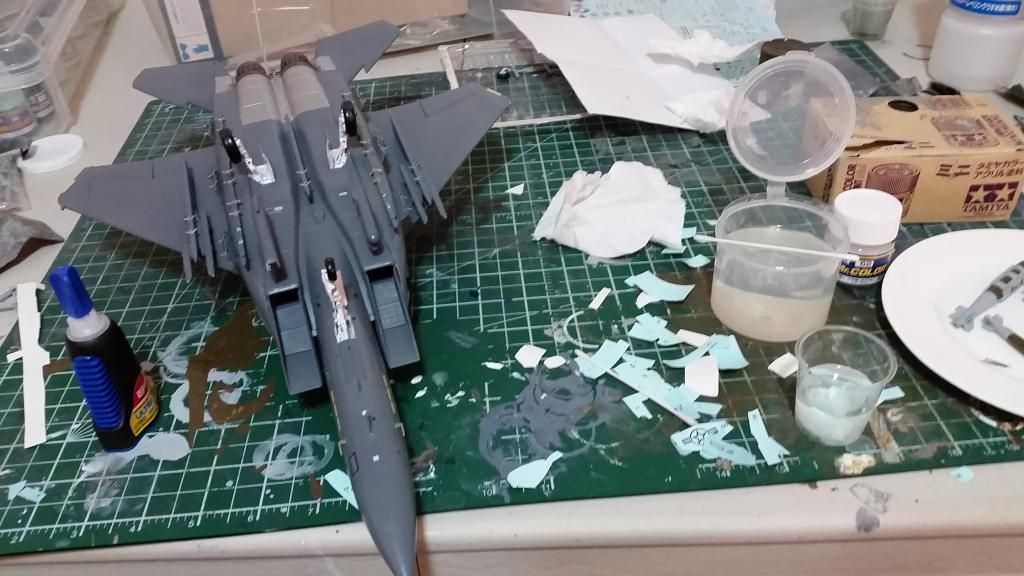
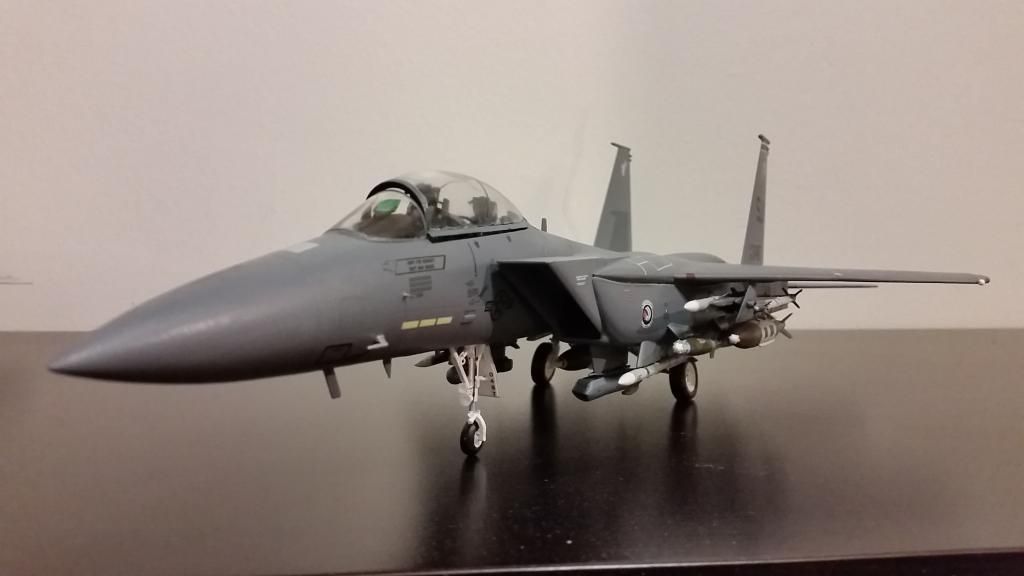
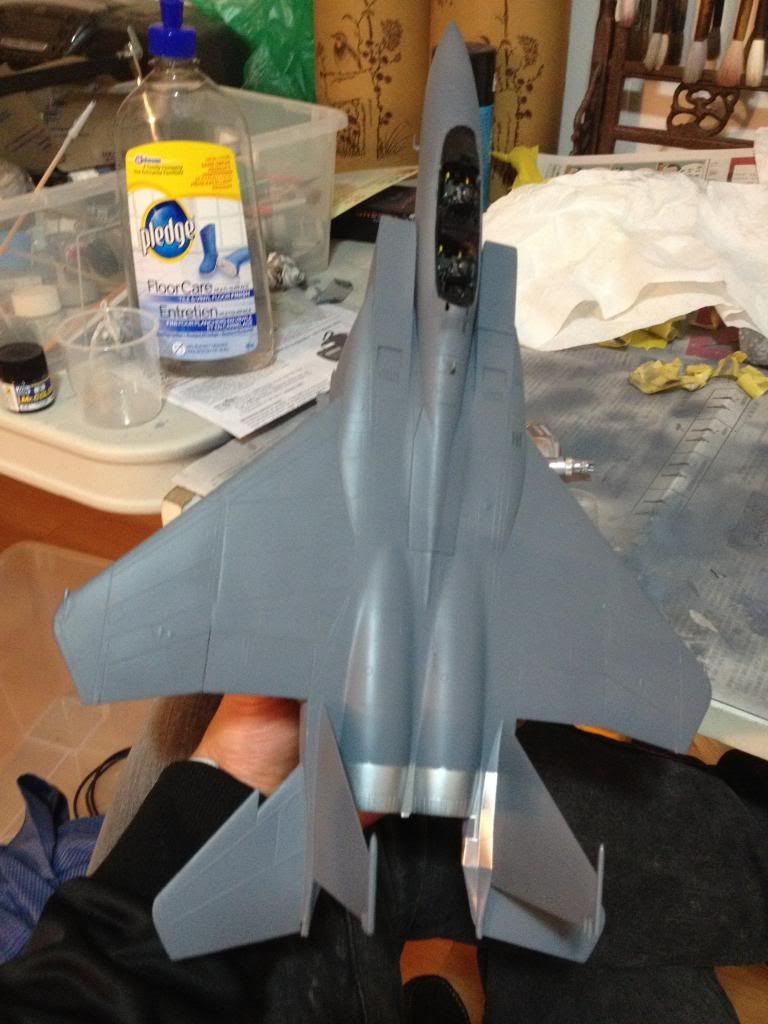
After months of effort, bad luck, spent paint, and terrible messes, I'm proud to present the Revell 1/48 F-15E Strike Eagle.
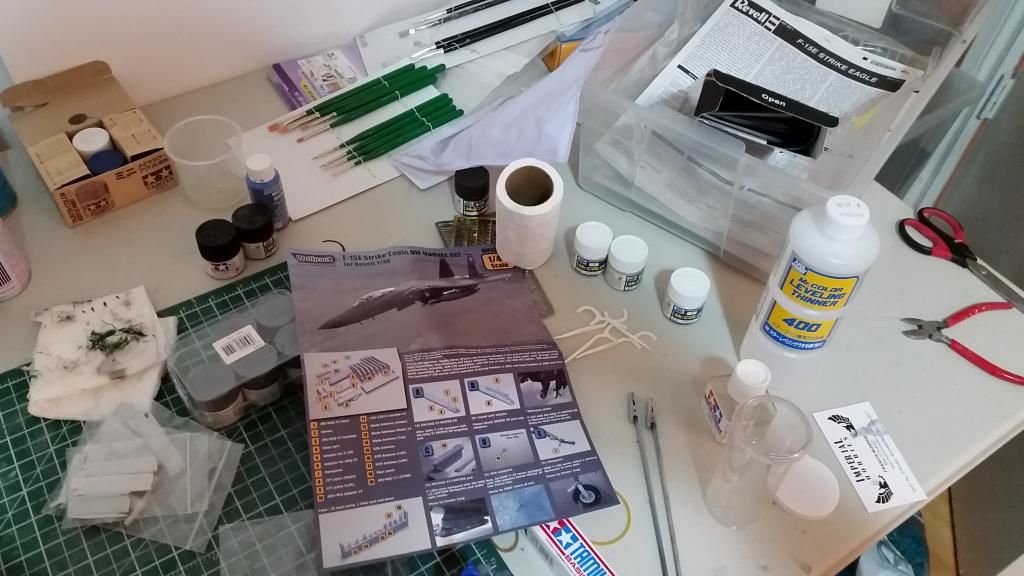
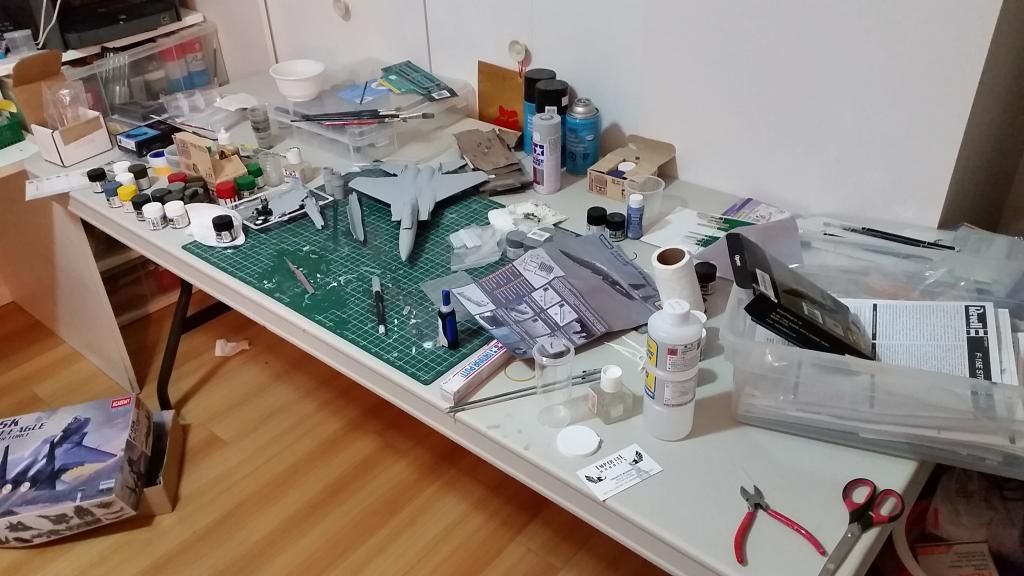
Background: Of all the fighter jets out there, my favorite is the F-15 Eagle. However since the F-15E came out and is much more advanced in every way, I decided to make this my signature work. For that reason, I had done a lot of preparation for this project, including doing research by looking at photos, buying aftermarket parts, and getting the appropriate color paints because the instructions are sometimes wrong. Other things I prepared for this project included: airbrush, Future floor polish, and super super glue.
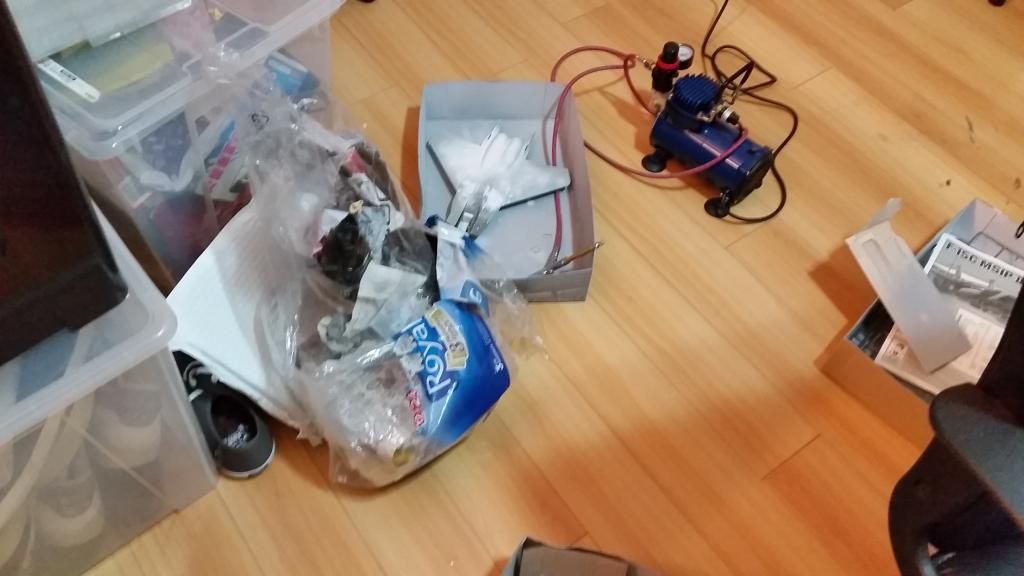
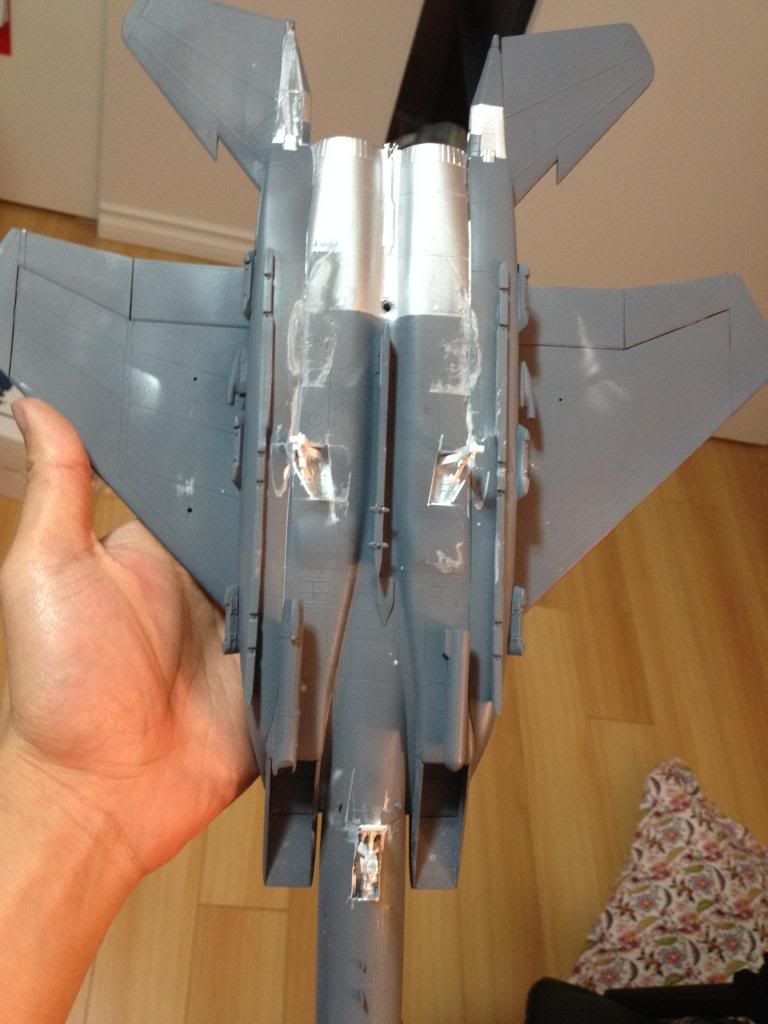
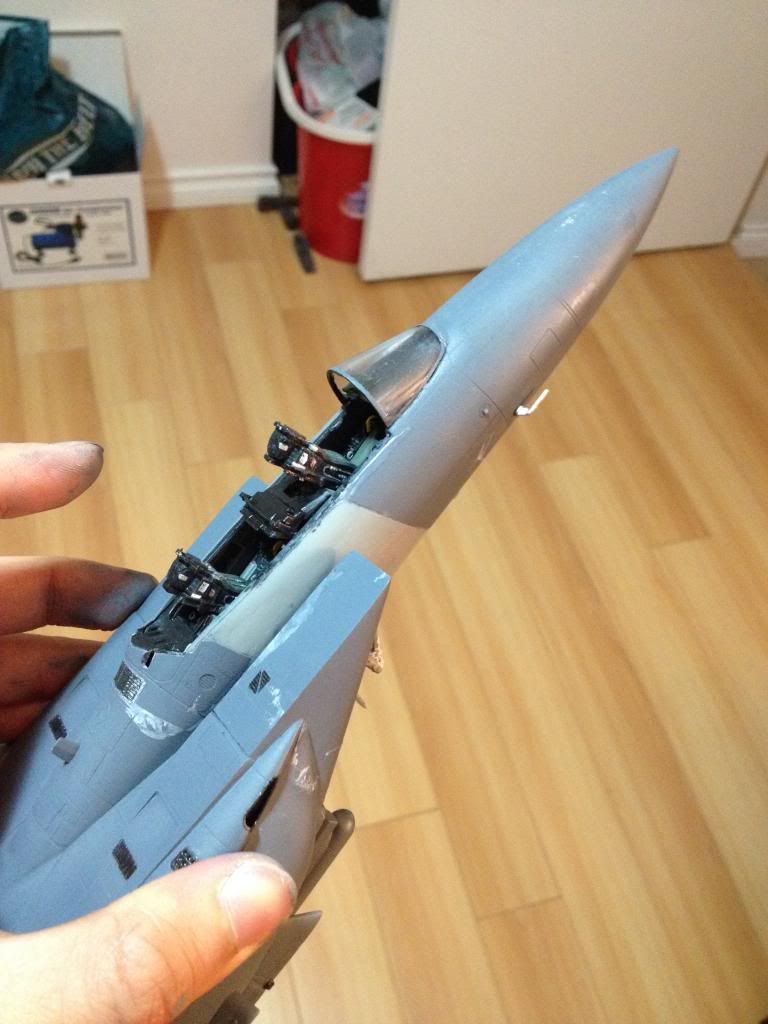
fuckups: Despite all the preparation, I still fracked up on this project several times and gotten so tired I put it aside for a while and returned numerous times before finally getting it completed. Sometimes there would be other schedule clashes, and sometimes just simply lack of skills or other various mistakes including blotching up the paint jobs, such as the first few photos with those mess-ups. In fact, I even messed up the final flat coat before I finish, but sometimes that's how you learn. This includes jars of wasted and spilled paint, thinners, masking tapes, etc.
I also did a bit of research from forums and websites and learned how to modify the plane so it comes out as accurate and detailed as possible. For that matter, I had made the following changes or added the following components to this project:
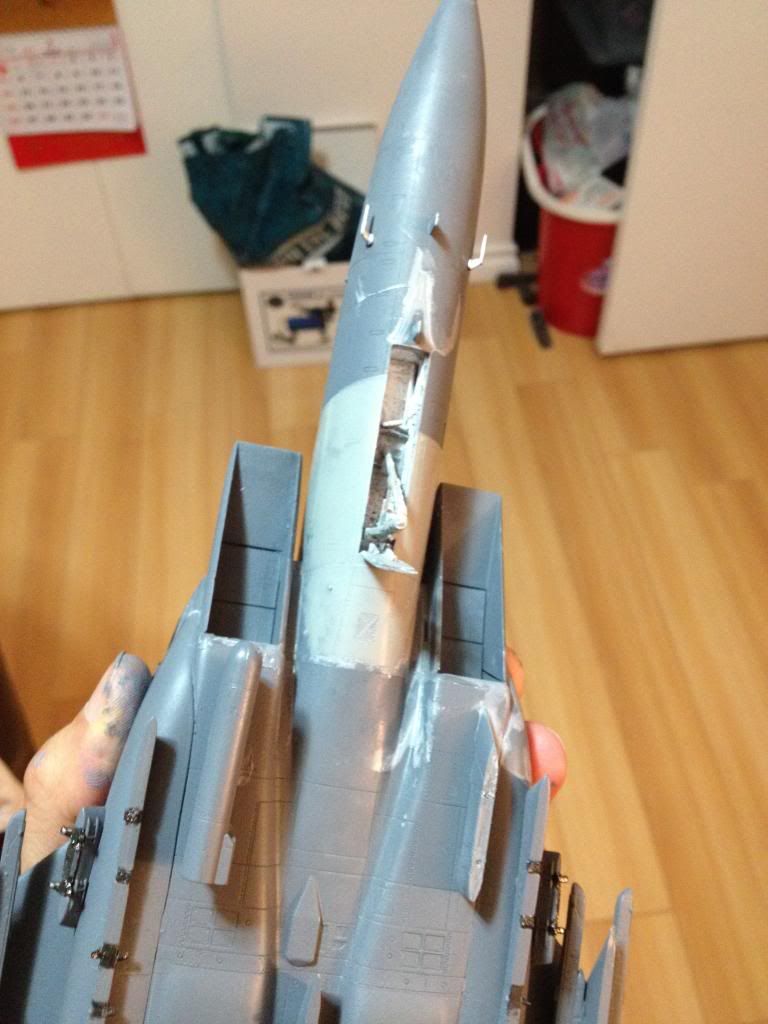
- added shimmy dampener to the nose landing gear
- added 2 structural additions to the nose landing gear
- added a wire to the nose landing gear
- filled the nose cone panel line
- filled all the panel lines on the CFT(conformal fuel tank)
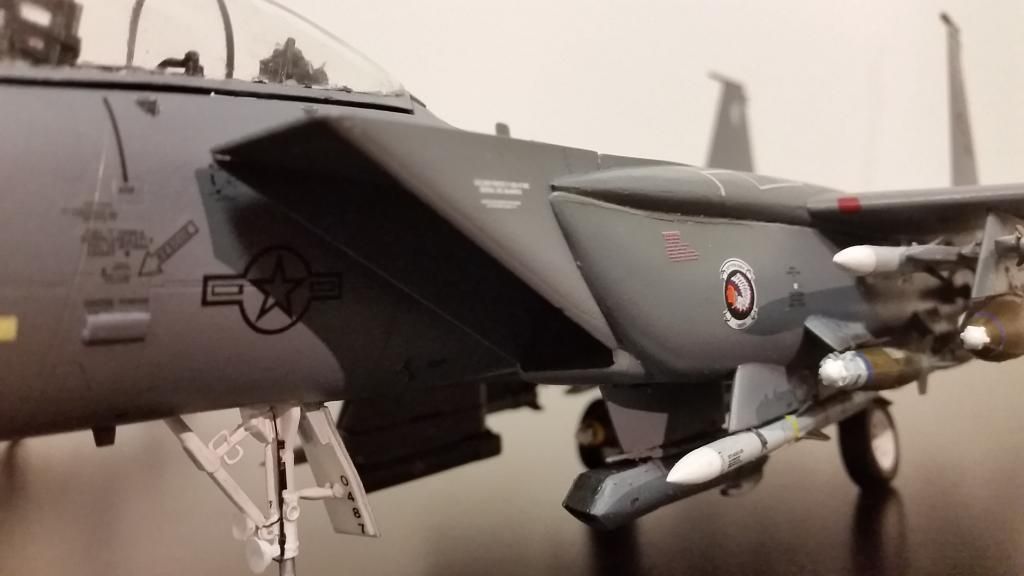
- installed AN/AAQ-33 Sniper Targeting Pod in replacement of the standard AN/AAQ-14 LANTIRN targeting pod
- added the window and painted it for the AN/AAQ-13 LANTIRN navigation pod
- added countermeasures (chaff and flares) to the buckets. The flares are yellow and are installed behind the navigation pod and the chaff installed behind the targeting pod.
- installed the JFS (Jet Fuel Starter). This is the hole behind the Centerline pylon.
- installed the piece for the tailhook
- installed the GPS dot next to the airbrake
- installed the antenna for under the nose and the ECM to the rear port(right-side) sensor
- replaced the old rail launchers with LAU-128 for wing pylons.
- painted the rear of the pylons
- repositioned the front BRU-47 bomb racks on LAU-107 to secondary position for air-to-air configuration
- decals for the BRU-47 bomb racks, pylons, LAU-128 launchers
- installed AIM-9X for most up-to-date air-to-air capabilities
- installed DSU-33 proximity sensors to the GBU-31 and GBU-38 JDAM.
- photo-etched for cockpit instrument panels and canopy rear mirrors
- polished and shine the canopy
- realistic colors for the lights, lock-on lights on canopy frame, BRU-47 clamps, and CFT edges
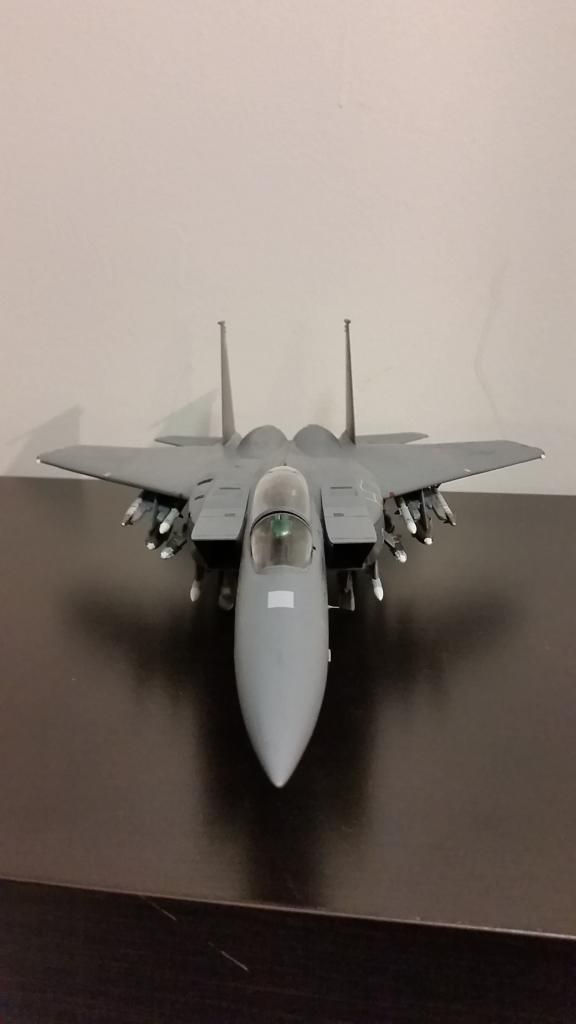
- installed the auxiliary intake scoops on the CFT for the upgraded F100-PW-229 engines
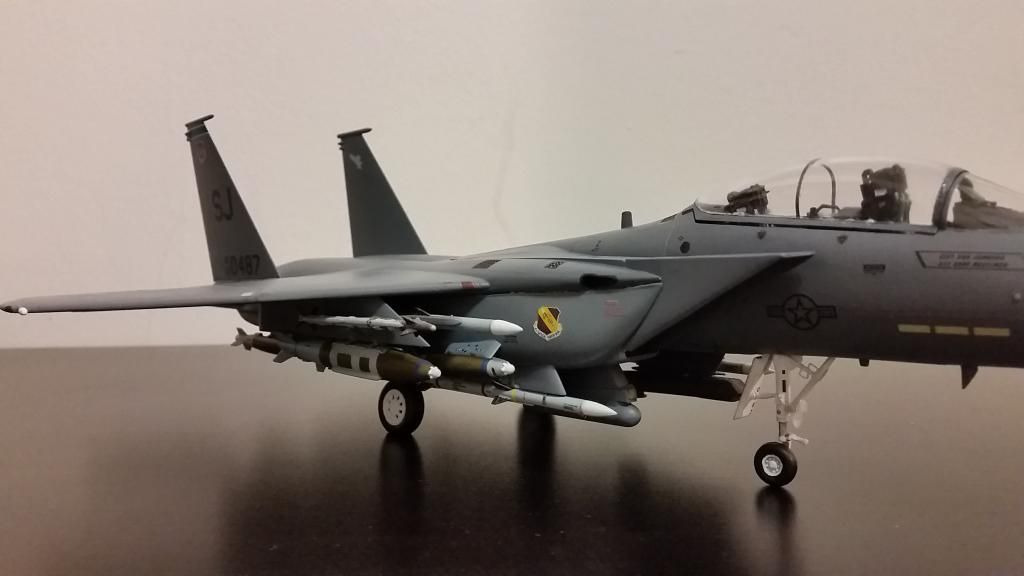
- Seymour John (SJ) decals as currently only the SJ birds would have all of the upgrades listed above
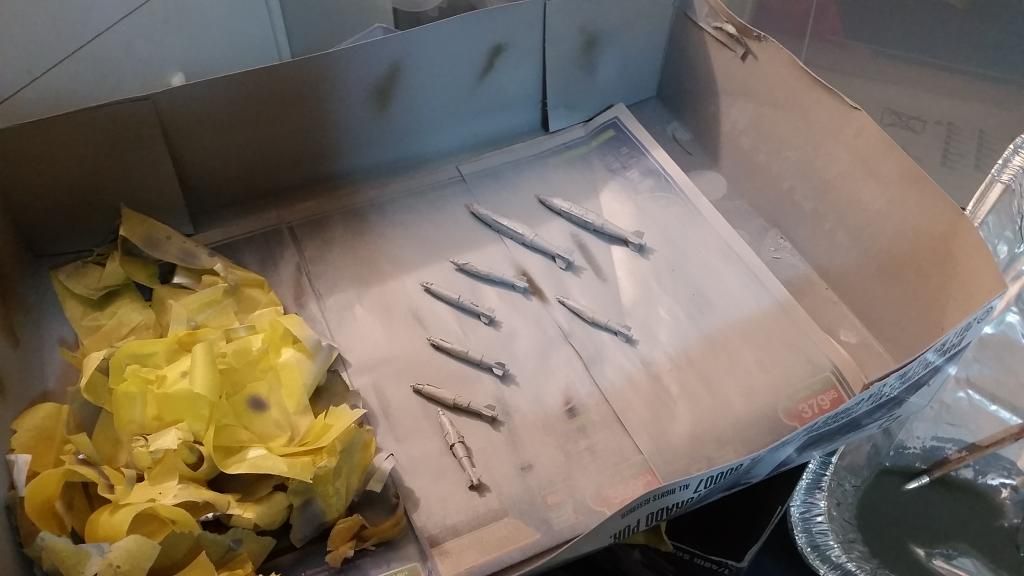
While the normal payload configurations for the F-15E have never seen a mixture of 8 AAMs (air-to-air missiles) + other ground attack munitions, I modified this plane because I like this plane to retain its air-to-air lethality. After all I collect primarily the contemporary most lethal air-to-air fighters, and having only 4 AAMs (2 Sidewinders 2 AMRAAMs) like the "realistic" payload is simply not threatening enough. For the rest of the ground attack munitions, I installed 3x GBU-31 and 6x GBU-38 JDAMs to give it the most advanced lethality as well.
How it all started:

-
Hi guys I'm at my final finishing coat stage for my F-15E. I tried the Future + Tamiya Flat Coat airbrushing lately and it caused frosting. It took me some efforts to restore the plane but I restored it again, and also had a coat of Future on top of the plane which makes it really shiny. This coat of Future also happened to seal down the decals that were not affected when I restored the plane. A few decals were damaged so I reapplied those after I applied that Future, which meant most of the decals are sealed by Future while a few were applied after the Future and thus unprotected. Anyways of course now I am finishing it off, so I asked my local model store guy and he said I can use a can of Tamiya TS-80 Flat Clear for finishing coat, which also can flatten out the currently-glossy plane. While I mostly trust him, this is again my first time doing this, so I don't
want any surprises and redo my plane again.
Anyways so I want to confirm if this is going to be safe and OK with you guys. Any advice, suggestions, PRECAUTIONS, etc?
Another thing is if I use something else like Mr Hobby Top Coat or something, will that work?
I hope I hear from you guys soon because I'm flying on Tuesday and I'm just waiting for what you guys have to say before I spray then start doing other more important things. The last thing I'd want is my plane to F up again.
Thanks!
-
All I can say is holy shoot (I literally said that 20 times or so) when trying the reapplying the Future technique as Storm had suggested. That stuff works like magic. I was thinking to myself, "Well my model's already fracked up, so nothing to lose right?" as I attempted it. And surely enough, ALL the frosting disappeared. The plane is still wet as we speak, but daymn I literally watched my baby restored to original colors as it occurred.
Man, if there is a God of Modelling and Craft somewhere up there, I bet you his blood flows Future or something. That stuff is crazy.
-
By lacquer thinner, what will that be if you can specify? Maybe as in particular brands, for example?
I guess I will give it a shot with the Future coat as well.
-
Thanks. Does that mean my Mr Color coats will also come off as well?
-
Anyways so I was applying my finishing coat after the the decals then I messed up... bad. It started with perhaps spraying too much onto the plane and causing some drips and uneven surfaces. I saw this small white spot so I decided to rub it off. I ended up rubbing off the pre-decal coat too that was underneath, which created a model plane's version of a batman 2-face. I decided to wash everything off and redo it all instead, but what ends up happening is now my plane is covered with white frosting which I suspected to be either dried Tamiya Flat base or also the Future.
Is there anything I can do to salvage my plane, or how I can get rid of it all? I am trying sanding but I can't seem to get to the seams. I wonder if there's anything I can use that can remove that flat base white frosting without hurting anything else like the paint underneath...because once the paint melts too, then I'm obviously back to starting line.
-
seems like from what i'm understanding is that even though those fumes are bad for you, the person will still need to breathe in a huge amount before damage begins eh?
-
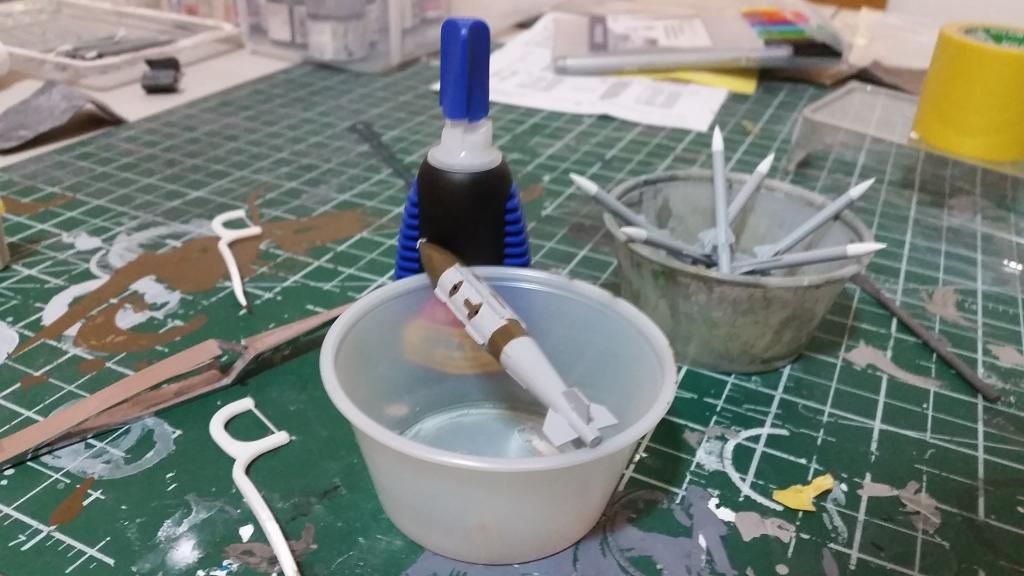
In fact, I was just checking my GBU-31 which I just applied Tamiya Primer on, and the color and even the texture came out the exact same as the coloured AMRAAM. I wasn't sure if I should apply another coat of 308 until I saw some chipping, which confirmed my decision to spray one extra coat just in case.
Just wondering, so I suppose the pre-decal coat is ok if I use only Future without any mixtures and ratio, right?
-
Totally! I'm gonna share my plane with you guys once I have completed the project. Since my plane is waiting for the first pure Future coat, I think I'll go apply that after I post here.
-
Thanks so much strikeeagle801!
And for checksix,
Mine is going to be SJ, I'll say fresh off the line (so it can have all the fancy things I added to it) and on first mission with balanced AA and AG payload.(yea I know that's not really realistic, but then I'm a big fan of air supremacy, so I like aan air superiority theme and load up my plane to the max of its AA capabilities). Some may ask me, why not build a F-15C MSIP II, but my answer is because the F-15E is actually way more advanced than the C counterparts and able to retain the AA combat effectiveness. Plus I generally liked missiles more

I thought about replacing the GBU-31s I'm loading on it (2 on wing pylon, one centerline) with HARM for Wild Weasel, but then again I've heard some people say that's too unrealistic.
The decals/styling will remain realistic, while the plane is equipped with all the latest goodies, so the only unrealistic/non-historical component will be the payload config.
If I want to do the flat, how would I go about on the composition? And just to confirm, using pure future for the first coat before the decals is fine right? And will it get clogged up in the airbrush? I'm using a Paasche Double Talon.


Academy 1/48th F-16C decal issues
in Jet Modeling
Posted · Edited by airsupremacist
Bro if you think this is bad...
I'm currently decaling my 1/48 CH-46 Sea Knight, and I can only say, the experience is so horrible it's like it wants me to surrender.
First, some bits of the decal map are inaccurate: panel lines that either don't exist, or missing panel lines corresponding to the kit.
Next, after I attempt to remove wet decals from the sheets, 10% will crack and shatter and break. This applied even to the big piece, which is the worst because they are the most visual. Some even broken into multiple segments.
And as if that's bad enough, a doorway decal I applied this afternoon came off for some reason, and as I attempted to put it back in its place, I accidentally touched a dried large decal and it instantly stuck to my finger. A piece broke off instantly. I was fortunate enough to completely remove it off my finger by dipping it into water then put it back where it is. As for the doorway decal, using Future to wet it to apply it was a horrible mistake because when the decal didn't land on the perfect spot, it almost became glued to where it was currently. Trying to move it afterwards led it to fracture into multiple pieces, and again the doorway decal is a big piece too, so if it's too fragmented, I would be better off not using it at all. Fortunately I was still able to put all the fractured pieces to the doorway, but it totally drained me with so many issues.