BillS
-
Content Count
476 -
Joined
-
Last visited
Content Type
Profiles
Forums
Calendar
Everything posted by BillS
-
There were two methods of painting non skid on USAF F-4s. Aluminum oxide grit was one. Many USAF F-4s had the walkways applied but were consequently painted over leaving an uneven appearance. With time the walkway non skid wore unevenly. Here is an F-4E from the 704TFS late in life wearing a special scheme for Gunsmoke competition. You should be able to discern the faint outline of a walkway atop the intake.
-
Here’s my quick and dirty advice 1. As a general rule, enamel paint sprays and brushes the best. 2. If your not ready to spring for an (Iwata) airbrush, hand paint affordable Tamiya or new release Airfix 1/72 stuff. 3. Keep it simple: start out with a no.11 Xacto knife, tweezers, some Tamiya yellow “kabuki” tape, Tamiya liquid cement, super glue and an assortment of brushes both flat and pointed. 4. decal setting solution 5. a small assortment of wet or dry sand paper. 6. an optivisor. All the advice above is really good. Drink it in and go forward.
-
This is an easy one. The headrest conversion began around 1977. This incorporated a drogue chute that gave the Northrop seat a zero altitude, 75 knot capability. The main wheels would be solid and the nose wheel could be solid or spoked. I was assigned to the 64FTW at Reese AFB from May ‘78 til June ‘81. When I arrived in ‘78 there were a tiny number of old style seats. The slotted mains came along long after I left.
-
If you go easy with a scribing tool, I’ve found Miliput to hold up and look decent. I really dont use any other filler putty anymore except small amounts of CA and Mr Surfacer for small blemishes.
-
I was at Holloman in the early 80s sharing the ramp with the ‘102 and ‘100 drone outfit. The green in these photos is the way I remember those huns. These are GREAT reference photos of an original, unrestored jet. I believe there was a lot more of that green, approximating 34092, than we might think. That color was all over the inside of a KC-97L I photographed at one time as well.
-
Just a wag on a possible Lakenheath configuration aside from practice munitions would be 2 tanks and a B -61 most likely on station 3. Dollars to donuts they could haul nucs.
-
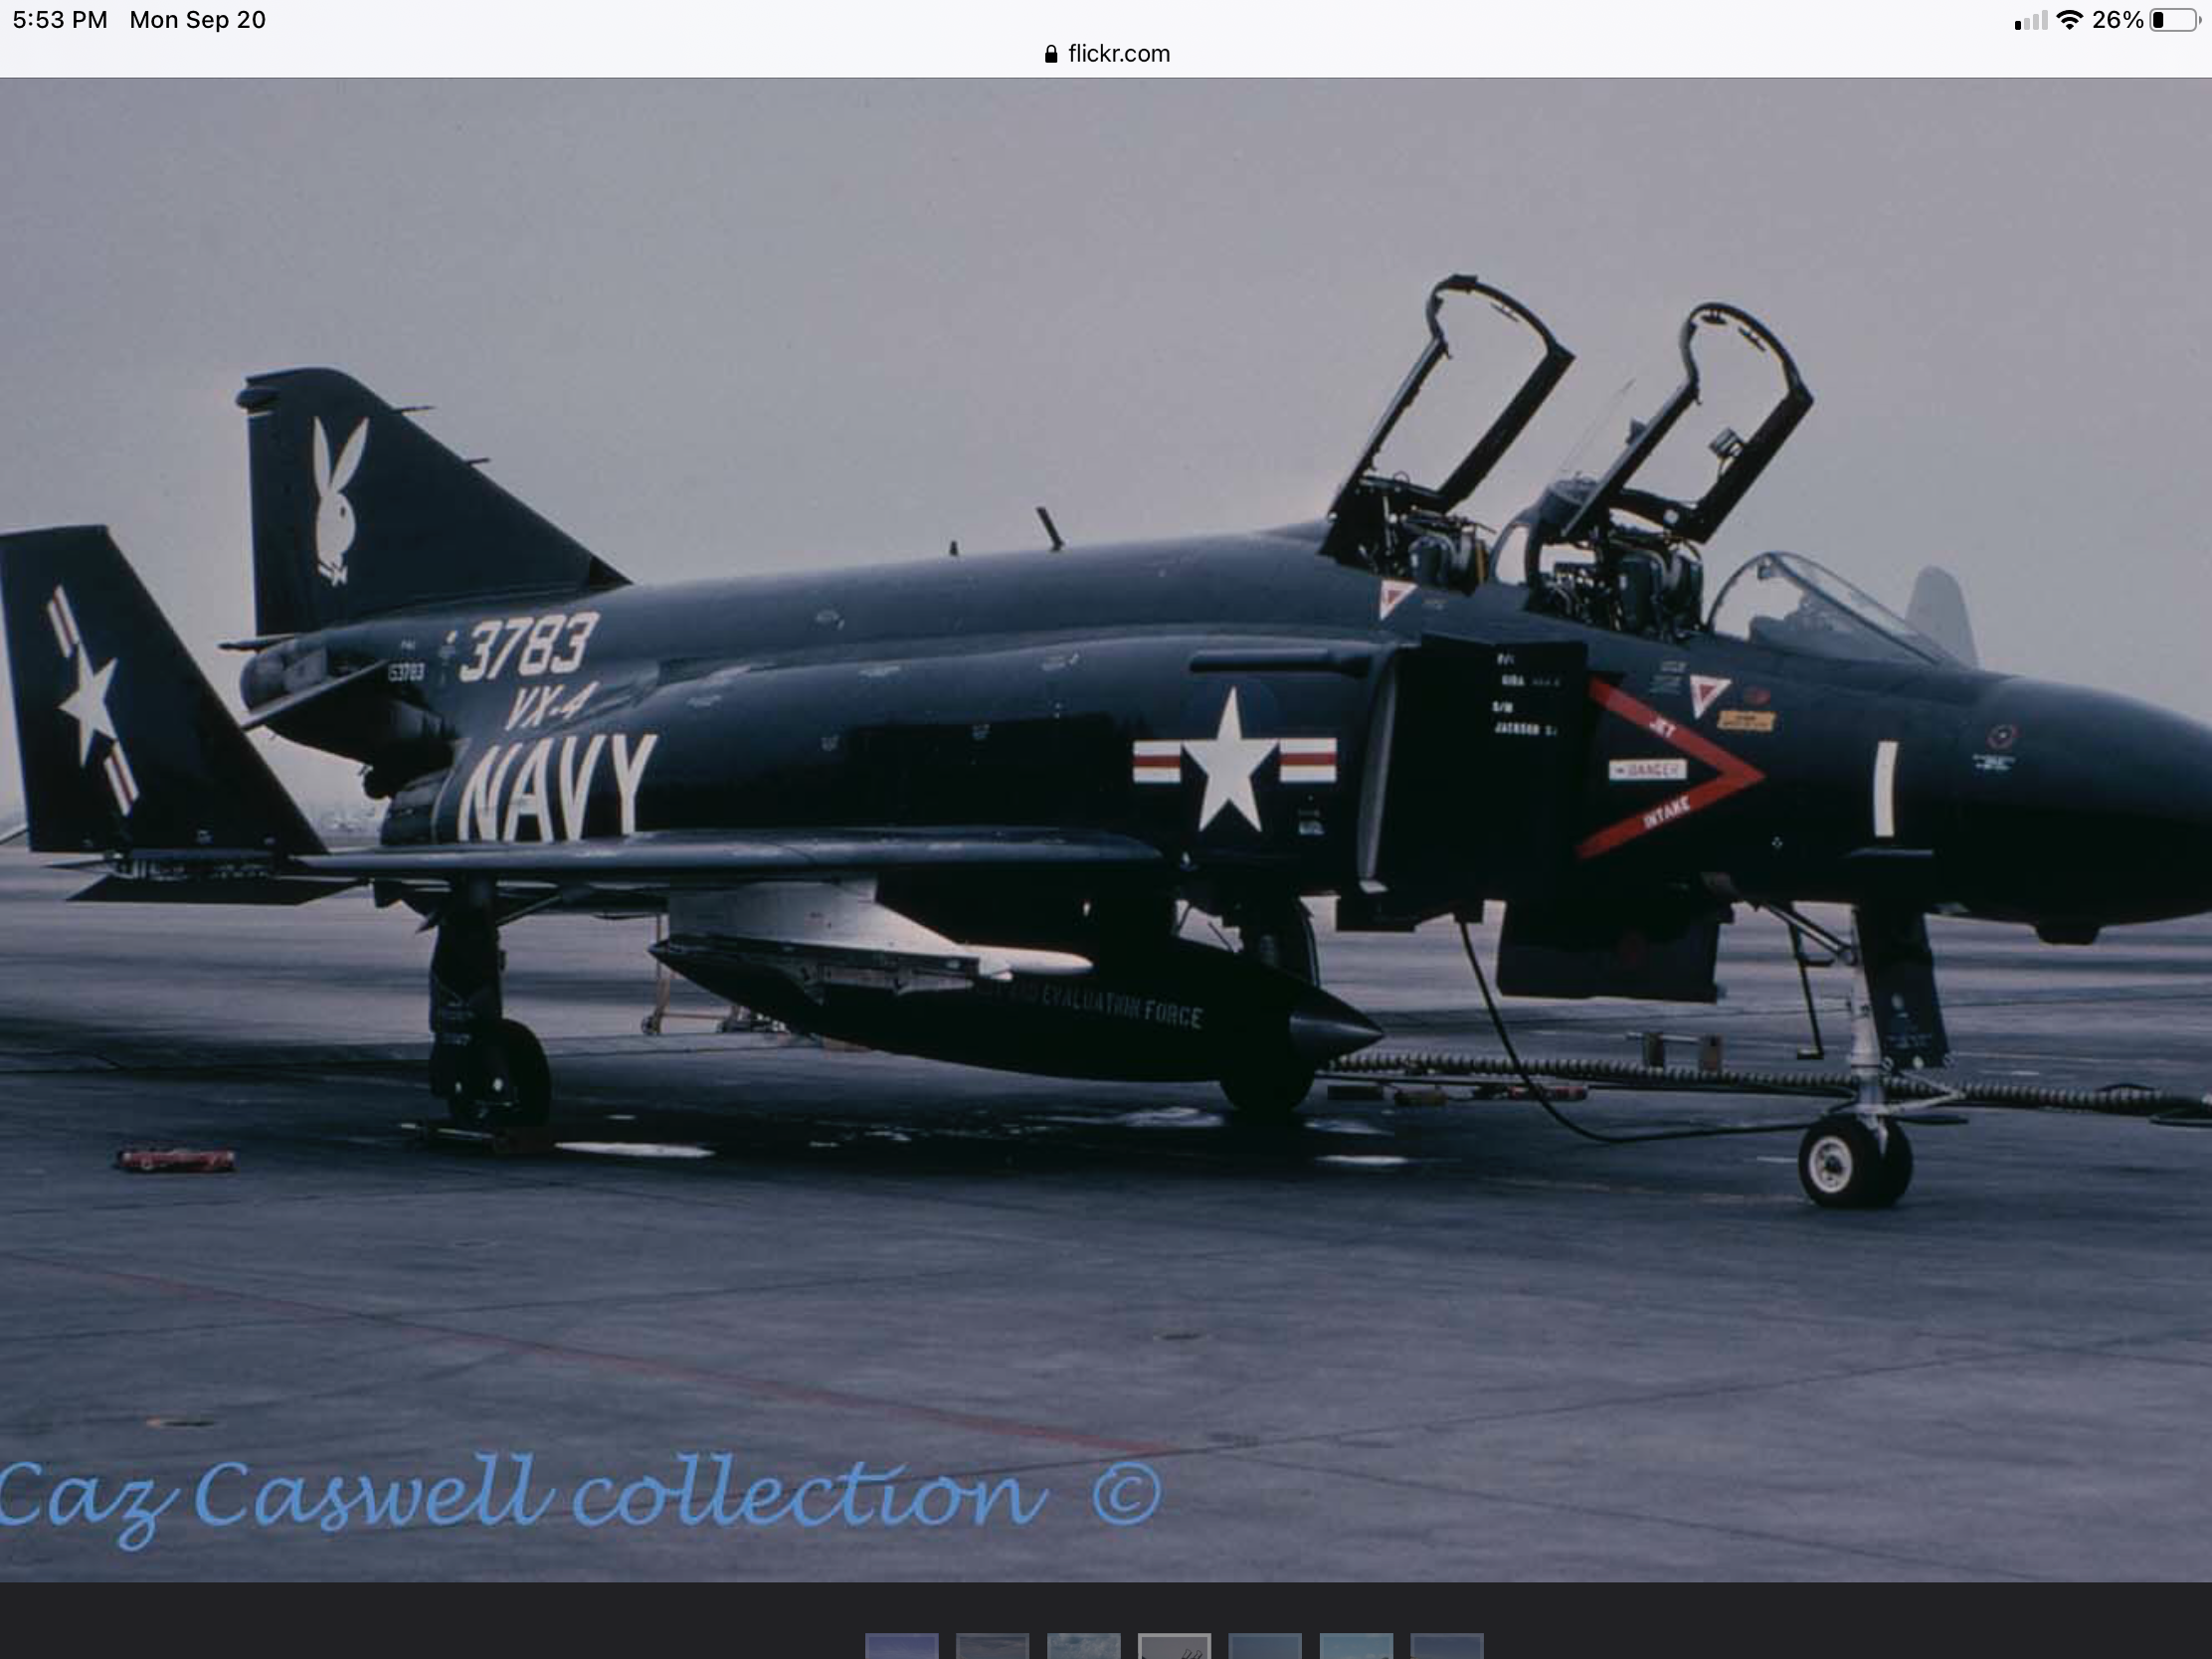
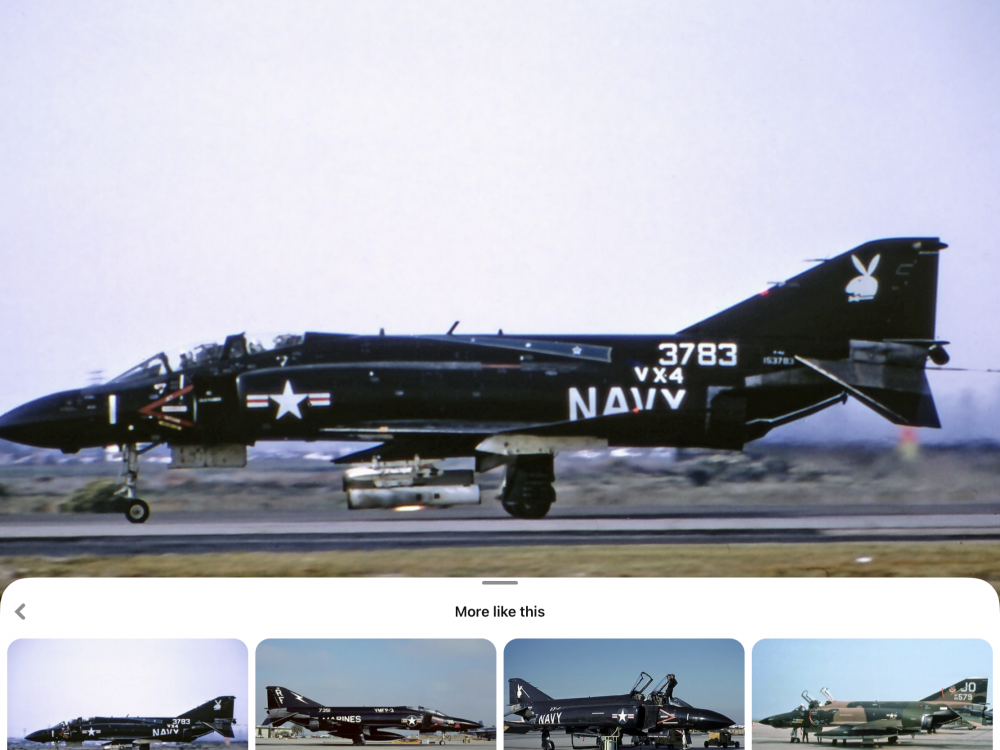
Here’s but a sample of what’s out there. The intake mounted antennas came along in the middish 70s. I saw this jet at Magu twice. Very impressive doing Zuni live fire!


-
This might depend on when. There wascalso more than one Vandy One. I’m going to scour my sources.
-
Anyone know of fin cap replacement for 1/48 Tamiya F-4B?
BillS replied to F4DPhantomII's topic in Jet Modeling
If you have a ZM F-4c or d, the old style fin cap offered in that kit fits the Tam b perfectly. -
On the flip side, my heart leapt with joy over the ZM kit. Like a lot of other discriminating modelers, I wouldn't have batted an eye the shape issue had it not been pointed out. The Tamiya B is the best rendition of the F-4 but only just. ZM actually has features Tamiya doesn't. If there is a problem with ZM it’s availability.
-
Anyone have any gouge on the disposition of Kitty Hawk’s product line?
-
Although not beyond the reach of most serious modelers, the ECM fairing on the fin will have to be cobbled up. Betcha someone does a resin rendition. Otherwise most color scheme options will be the full color ones.
-
Zouki ****’s “clean”fin cap fits perfectly. You could scrounge the DECM intake antennas from Academy and cobble together an N. Pay attention to blade antenna and NFO’s cockpit but rhis is a doable conversion either way.
-
1:48 RA-5C Research: Using burner cans from F-4J?
BillS replied to Specter1075's topic in Jet Modeling
I ‘ve still got a Cutting Edge A-5A conversion set. This requires hacking the Trump kit in to chunks and grafting a ton of resin. I’m working up the nerve! I did the recce years ago and it is a mess. For sure that aft upper fuselage is like a sink hole and needs beefing up. An aftermarket cockpit of any brand along with some aforementioned exhausts will help. At least there is a generally good shape to start with. -
I agree with the “happy with SB” crowd. My stuff takes 2, maybe three days to arrive on a consistent basis. Victory Models is another efficient online store. I continue to have great service from Hannants as well. Come to think of it, I’ve ordered from some Cinese dealers on Ebay and was astounded with how fast that stuff has made it and in great shape. The Model Gods must like me.
-
The USAF and USN/MC shared the same harness and lap belts rated to 40g’s. The images of the seat cushion on this thread are for Navy seats evidenced by the emergency oxy gauge under the crew member’s left thigh. BTW, Tam’s F-4B has the USAF style emergency o2 which was mounted behind the crew’s left kidney flank.
-
It wasn't always present on USAF seat cushions. I saw more of that later in the F-4’s life. You’re safe with just a plain, medium OD colored cushions. Same for the lumbar pad. One of these days I’m going to go on ARC and Hyperscale with notes on the various USAF and USN/MC Mk 7 variations for those ultra-deTail freaks. Several seat landmarks changed over the years that would be visible even in 72nd scale.
-
Calling all the F-16C SMEs...Model Maker VENOM Demo Decals 1/48
BillS replied to AlienFrogModeller's topic in Jet Modeling
Tamiya -
The picture Ben posted is a USAF either -15 or -17; can’t tell because the exhaust nozzle isn’t really visible. In looking over the sprue shots Tamiya has modeled the Air Force style lumbar pad and emergency o2 bottle which is molded as a small appendage on the left where the aircrew’s left lower back is. The Navy seat had the emergency o2 in the survival kit, so the lumbar pad was symmetrically shaped. ZM actually correctly molded the o2 gauge on the seat cushion applicable to USN/USMC. I hate to say it but those afterburners look pretty undersized in length. Not trying to be pet
-
DAVE, Thanks for posting the great pic of the Marine dudes in the shelter. That and Ben’s postings illustrate what I what I mean. As far as Tam’s rendition, there a pic of the internal build up of Tam’s innards and to me it looked like they have the long fairing ala USAF. Run over to the thread on Hyperscale titled “Afterburner Length” and you'll see that image on the first page. It really is just a point of interest and should not detract from this very exciting new kit.
-
Sorry for speaking”Phantomese”! On the very front of the engine there’s a protuberance sticking out of the middle. On USAF jets there are two “arms”, one at 5 o’clockish the other at 7. On USN/USMC this protuberance was much shorter and minus the arm thingys. To be able to operate in the field with minimal ground support equipment, the Air Force wanted to be able to start the engines with an explosive cartridge. This cartridge was about the size of a coffee can. The breech for this thing was on the engine mounted gearbox where other accessories like the hydraulic pump etc. This system was acce
-
I guess you guys already saw this. I lean gray because of the sunlit footage and the clear images in Ginter’s book.
-
As I continue to dream of getting my paws on this kit, i noticed on the images of sprue and built components, the CSD (Constant Speed Drive) is the USAF type. Air Force -15 and 17 J-79’s had a cartridege start feature mounted on the gearbox mounting pad where the Navy’s CSD/Generator was located. So, the cart start system necessitated moving the CSD/Generator to the compressor front frame. The Air Force unit was longer and had the two struts that carried oil to that system. The -8 and -10 motors had a shorter, more conical fairing. I also think the nice engine detail representing what’s visibl
-
I was never stationed at Spang but had a close friend who flew weasles there. To be authentic, training sorties would most likely be a single captive carry AGM-88 and or AGM-65. Mavs might not be your fav but they were probably one of the most common weapons carried. A captive carry AIM-9 would be appropriate as would the ALQ-131. Tank configuration would most typically be 2x370s. Three tanks were as rare as hen’s teeth due to the drag which used up the fuel in the third tank.
-
Thinned Tamiya Clear Blue (really thin) lightly airbrushed on the inside is an option to try. Don’t like it, wipe it off.