


Aurora Mark
-
Content Count
483 -
Joined
-
Last visited
Content Type
Profiles
Forums
Calendar
Posts posted by Aurora Mark
-
-
Thanks for posting these up, they're definitely going to help in other areas for sure!
-
Done and done. Thanks Dutch!
-
Hello everyone,
Search high-and-low and yet to find anything other than the single low res image on this sites Walkarounds ... does anyone have any images of the radar setup under the nose cone of the ole CF-100 Canuck (preferably the Mk. IV and V)?
Other desirable information would be pictures or diagrams of what lies directly under the large port and starboard panels just aft of the radome. Any and all help with that would be greatly appreciated.
Cheers,
Mark. -
Been a while on this one. Hoping there is some hope. I'm looking for even a partial section of the decal sheet - more specifically just the nose art and matching RCAF + 3 fuselage codes for a camo scheme. Which squadron you ask? Whichever you're willing to part with.
-
C2J,
FIrst off, thank you kindly for taking the time to give this excellent response. The way it's looking is that this cowl was either on, or off. Okay, as such I'll be building this kit with the cowl securely on. Thanks kindly!
Mark.
-
Hello everyone,
I've posted questions about the Vega in a number of places online and have spent a ridiculous amount of time trying to find the answer. I'm hoping someone here can help.
With regards to the engine cowl on the Lockheed Vega 5B (specifically Amelia Earharts Vega), does anyone have any pictures, diagrams or design sketches of what the cowl was attached to at the top/bottom when opened up?
I'm not so much worried about the R-1340 underneath, or anything to do with the engine, engine mount, etc., but very specifically how the cowl itself was attached. The plan is to have the engine cowl opened up.Thank you kindly,
Mark. -
There are parts I need but I can happily send you those I'm not going to use (like the instrument panel and other components).
PM me if interested. -
Yes sir! PM Sent.
-
Gents, all, and I mean ALL my physical reference material (that book, numerous other books) are all at home in Nova Scotia and I haven't had a chance to get them shipped out to me in Ottawa, which is why I'm without this information.
On the plus side, talking with the museum in hopes of getting much more up close and personal with the nose than the general public.
Thanks a million,
Cheers,
Mark. -
Hello all.
As things are still happening with my family in Ottawa and I'm here on a temp move there won't be many updates for the Viper for a while unfortunately. I decided that I'd rather move kits with me that weren't started (like the long awaited Avro Arrow project), and I didn't want to risk damaging the parts of this build in a move half way across the country.
Meanwhile, I'm going through the fun times of moving all these pictures from Photobucket to another server as I'm sick and tired of PB dropping off.Anyway, merry Christmas and happy holidays to you all.
Cheers,
Mark. -
Evening everyone.
I'm wondering if anyone has the correct nose-cone profile drawing of the Mk.II Arrow - or effectively RL-206, that would make for a good comparison/guide for the 1/48 HC kit.I'm working overtime here while in the capital to build up as much info on the Mk.II to build an accurate representation of RL-206, but understandably they don't want to let me at it with a measuring tape, lol. What's the worst that'll happen, right?
Thanks in advance for any and all help,
Mark. -
Yeah, to be back in 1934, right?
So, 1/48 is the largest scale aside from paper models and wooden models... mind you in the RC world, the only sizes that lend themselves to being accurately shaped are far too big for the shelf. 1/32 and 1/24 would have been great. -
Hello all. Trying my hand at building up Amelia Earhart's Vega. I'm looking for reference images (plans, diagrams, pictures) of the engine area without the cowling.
The Winnie Mae cutaway helps a bit but the setup as far as I can tell was different on the AE Vega.
Any and all help would be greatly appreciated.
Cheers.
Mark.
-
Hello all.
I've got my grubby little hands on the 1/48 AMT Lockheed Vega. Curiosity has me right now in its grips in looking for a larger scale version of the Vega, but surprisingly the internet has turned up a lot of nothing. Does anyone out there reading this know of a Vac Form kit of the Vega in either 1/32 or 1/24?
Thanks kindly!
Mark. -
Sean,
Long time no talk! I hope things are going well for you. Thanks for the tip. I've emailed them with fingers crossed (as the last two times I sent them a message they were out). Wish me luck!
Mark. -
Loooooooong shot but I can always hope, right?
Folks, I'm looking for either the Canuvk or Arrow Graphics decals for a 1/48 Avro Arrow.
More specifically I'm looking for the placards and stencils for the aircraft. Any and all help would be greatly appreciated.
Cheers,
Mark.
-
On 9/26/2019 at 3:42 AM, Emvar said:
Yeah.... don't pay the 75.... It comes up at lower prices be patient. Have 2 in 1/72nd scale because I'll be doing both schemes. I'll keep my eyes open for you at Model shows. Took me some time but I found some Avro arrow resin for another ARCer. Took 3 years though.
Cheers.
Emil
And thanks again!!
-
22 hours ago, Brett M said:
Curiousity, was the shop running low on Model Master enamels? They're getting harder to find locally here and I'd heard they're going out of production.
Brett they had a large selection and quantity still. The shop is Hobby House Ltd. in Ottawa. PM me if you want contact info or particular paints.
Vern, thank you kindly for that! That will definitely come in handy when I'm back home looking for paints.
Mark.
-
Thanks Brett. It's also here in part to help me remember what I was thinking about through all these late nights.
I did manage to sneak away and take some time for myself this afternoon which involved me walking down to a local hobby shop here in Ottawa. With my paint chips in hand I wanted to find the right combination of paints in order to have them when I eventually make it back home and get back to the Viper build. The problem I have is that back home the only "hobby shop" is a single aisle of models and basic supplies with a limited supply of paints. Ordering paints through the mail for something that doesn't have a specific FS code or accurate colour call out is always a gamble and has bit me in the past.
Although I haven't had a chance to do an exact mix-ratio comparison against the paint chips yet, these bottles of paint will get me to where I want to be. I'll just say this is a bit of a preview and that the paints were compared against the colour ships provided on the rack and a glance at the paint through the bottle. They're close, but not quite there yet and I just wanted to make that clear instead of misleading anyone into thinking these are the exact right colours.
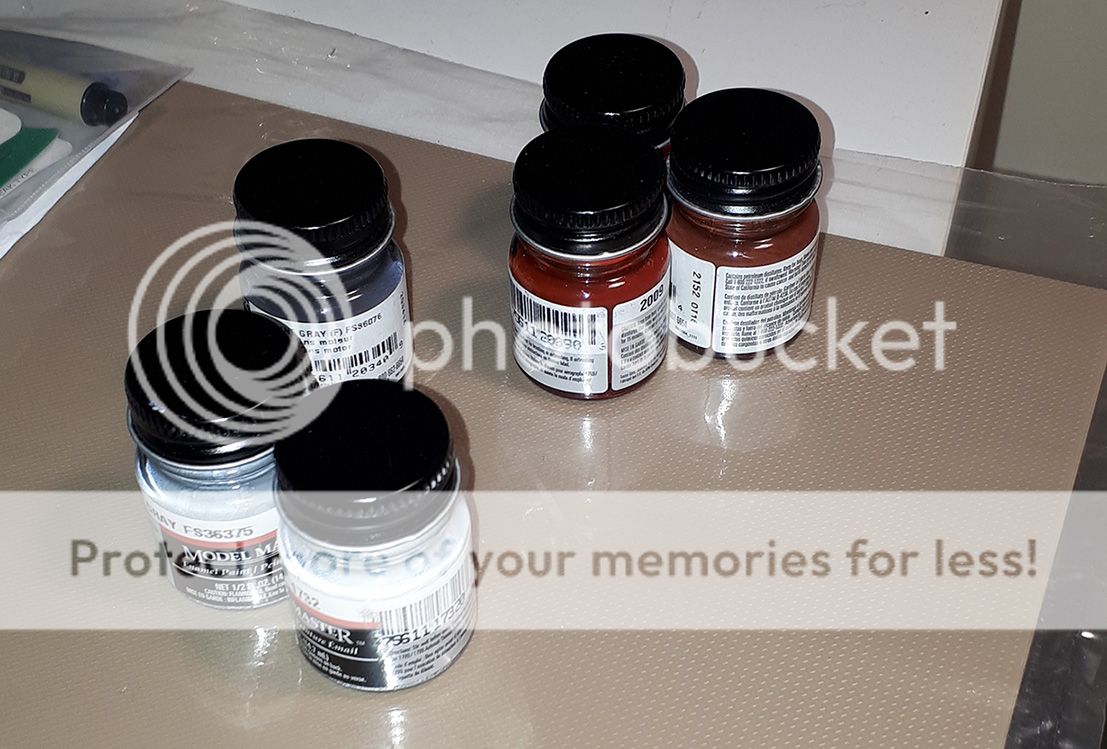
I don't have an overall preference to paint manufacturers or only enamel or acrylic. For me it's more a need to make sure the paints are compatible and suite my needs. In the case of the Viper, as there are scuffs, scratches and a bit of superficial battle damage but no actual paint chips in the traditional sense of showing primer or bare metal underneath, I'm opting to go for enamel paints. These for me are much easier to work with when it comes to weathering using various methods and provide a solid base layer over a slightly textured plastic that this kit provides. MM paints were selected because the red stripes will be painted on and there were no viable options for both a grey and burgundy in any other brand.
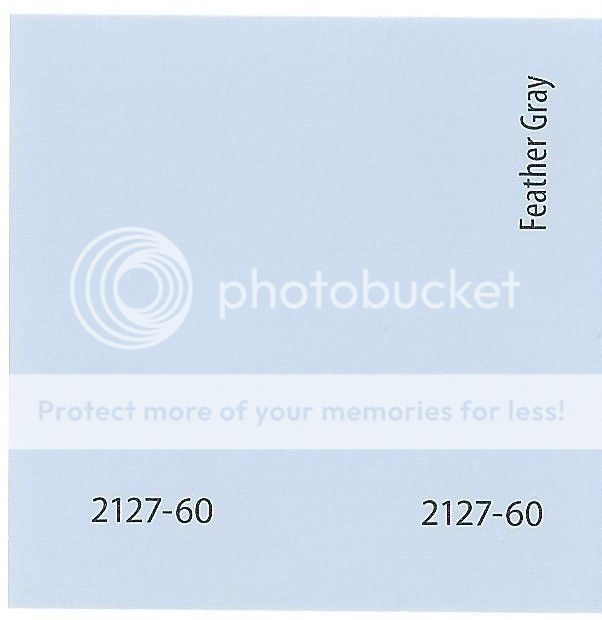
Feather Grey - as best as I could compare it will be a near 50/50 mix of Light Ghost Grey (1728, FS 36375) and Light Grey (1732, FS 36495)
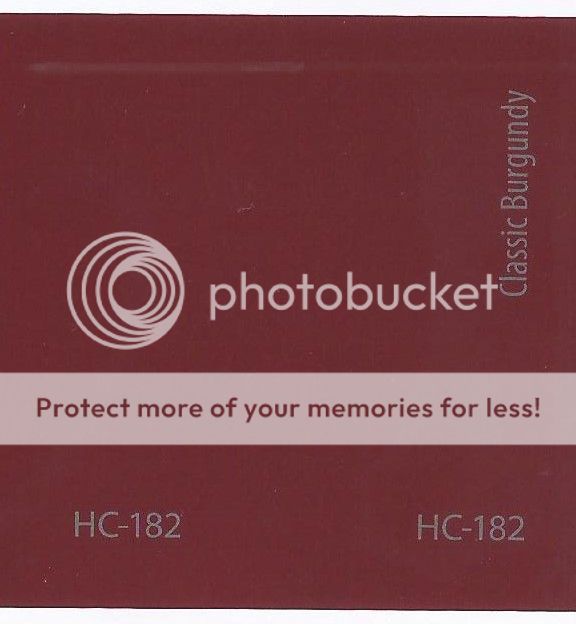
Burgundy - this is going to take some mixing around but the combination of British Crimson (2009, no FS code yet), Root Braun (2152, RAL8012) and Insignia Red (1705, FS 31136) ought to do the trick.
The Phillipsburg Blue used on the instrument panel was a very surprising match to the Intermediate Blue (1720, FS 35164) and I wasn't going to change anything at this point as the panel was already completed.
Witching Hour for the rest of the interior tub was actually really pretty spot on with Engine Grey (2034, FS 36076) and will require maybe a slight amount of intermediate blue. Maybe.
So there are the main colours. As there really isn't any great information I've been able to find concerning the gear wells (some CGI has the door panels as silver, others are just white, but the actual Starbuck prop has them quite dark on the inside face), the darker grey used in the cockpit tub will also be used inside the landing gear wells. I don't think it's too far of a stretch to think that as they used the same colours in numerous areas of the show, that the same grey would be used for the insides of the gear doors and the gear wells. Again, just an assumption.... unless I can get my grubby little hands on the actual prop which is somewhere in France, there's no way I'll be able to know for sure.
Hopefully this is all over soon and things will return back to 'normal' enough so that I can continue working on this kit.
Thanks for looking. Cheers for now,
Mark. -
So a bit of fun to put colours to rest... sort of. I was always bothered by the notion that the Viper was 'white' as it wasn't. It was some... some sort of grey colour. There were some references on a great website that still has not come back (galactiguise.com) so I took matters into my own hands. Turns out the original Viper is sitting at a movie-prop museum in France. They also give a good description of the actual prop itself and the colours used. The grey and burgundy colours used on the viper were the same as the grey and burgundy used on the hangar decks and throughout the ship during production. Right on! Having already found the two interior cockpit colours, it was time to get actual paint chips.
While taking shifts at the hospital I had a chance to stop by a local paint shop and pick out the paint-chips mentioned, and so here they are (all Benjamin Moore paints):
The fuselage colour:
The burgundy of the red stripes (which I was wrong about in the initial posts... they are almost as deep a red as the JT Graphics decals...)
For the cockpit itself, the lighter grey used on the instrument panel (which I must say, for looking at colour samples online, the intermediate grey used was nearly spot on!):

And the darker grey:

I can't wait to bring up the subject of scale effect when it comes time to paint the exterior... among other topics... mainly because of how much experience my wife has in the arts and with painting, that it'll be an interesting topic of conversation. I mean, scale effect isn't anything new... maybe to the hobby in the last 15-20 years, but artists have been using scale effect in paint colours since the 19th century to give a perception of depth and distance, right? For me, its more to take the edge/crispness off a paint colour to give it the look of being more... what's the word... scale appropriate? But for now I'm going to stay focused on the cockpit itself.
Although there are two colours here that really contrast each other, I'm having a hard time finding images that show a sharp distinction in colour of the actual cockpit (see some of the previously posted reference pictures). What I mean is, I think there's more at play here than just the two very different grey colours. In reading up on the paint done, there was a clear coat applied, but there was also a fine silver powder applied to both paints in the cockpit. That's something interesting for sure. Well, to me at least. Thinking of the silver powder in the 1:1 cockpit as an almost light grey pastel chalk being brushed on in 1/32 scale, I can visualize the colours blending a bit better. A lot closer at least with what is pictured and shown in BSG itself rather than two paint chips sitting on a desk in front of me that leaves me wondering "is this actually right?"
I think my approach is going to be first to match the dark grey as closely as possible. Once the tub is painted in the colour I'll give it a similar treatment as the panel got to try and at least blend or match up the weathered effect the pastel chalks and dull coats gave the instrument panel. Simple enough process that's going to hopefully have the cockpit as I want it to finally end up.
We will see. It's all in a planning state as I'm about 3 provinces away from the work bench and I'm honestly writing right now to keep my mind occupied throughout the night. I'm thinking that the next chance I get, I'm going to head down to the local hobby shop with these paint chips and try to find some enamels that closely match these samples.
Although the Viper Mk.II will never be as popular as a Mustang or Corsair, I'll do my best to offer up some good information on the paint colours selected to give future readers a more helpful idea of the Viper and its colours as the call-outs in the instructions and a lot of other websites just call for white with red stripes.
Anyway, that's me for now. More yammering to come soon, so consider yourselves warned.
Cheers,
Mark. -
Hello all,
As per the title I'm looking for the bare bones of a 1/24 Merlin. Preferably the earlier types offered in the Airfix 1/24 Spitfire and Hurricane. No prop, firewall or engine mounts, simply a complete engine as it would come out of the crate.
If you can help in any way that would be absolutely fantastic.
Cheers,
Mark.
-
Thank you Ikon. It's going to be a bit of time still before I'm back home. Such is the nature of these things. Regardless, I'll post an update as soon as I can.
Cheers,
Mark.
-
Thank you Sir.
There is a lot more still to come. However updates will be a bit sparse for the foreseeable future due to unforeseen circumstances in the family. Once we're out of the woods the building of the Viper will continue.
Thanks everyone.
Mark.
-
18 hours ago, Ikon said:
There's more modeling in that seat than there is in the whole stock kit! Well done.
Thank you. This cockpit is definitely having me step out of my comfort zone but it is a lot of fun to say the least.
16 hours ago, Brett M said:Nice work again. Definitely shaping up to be a brilliant build.....without having even touched the exterior yet!
Brett, right now I don't want to even think about the rest of the work that needs to be done, hahaha.
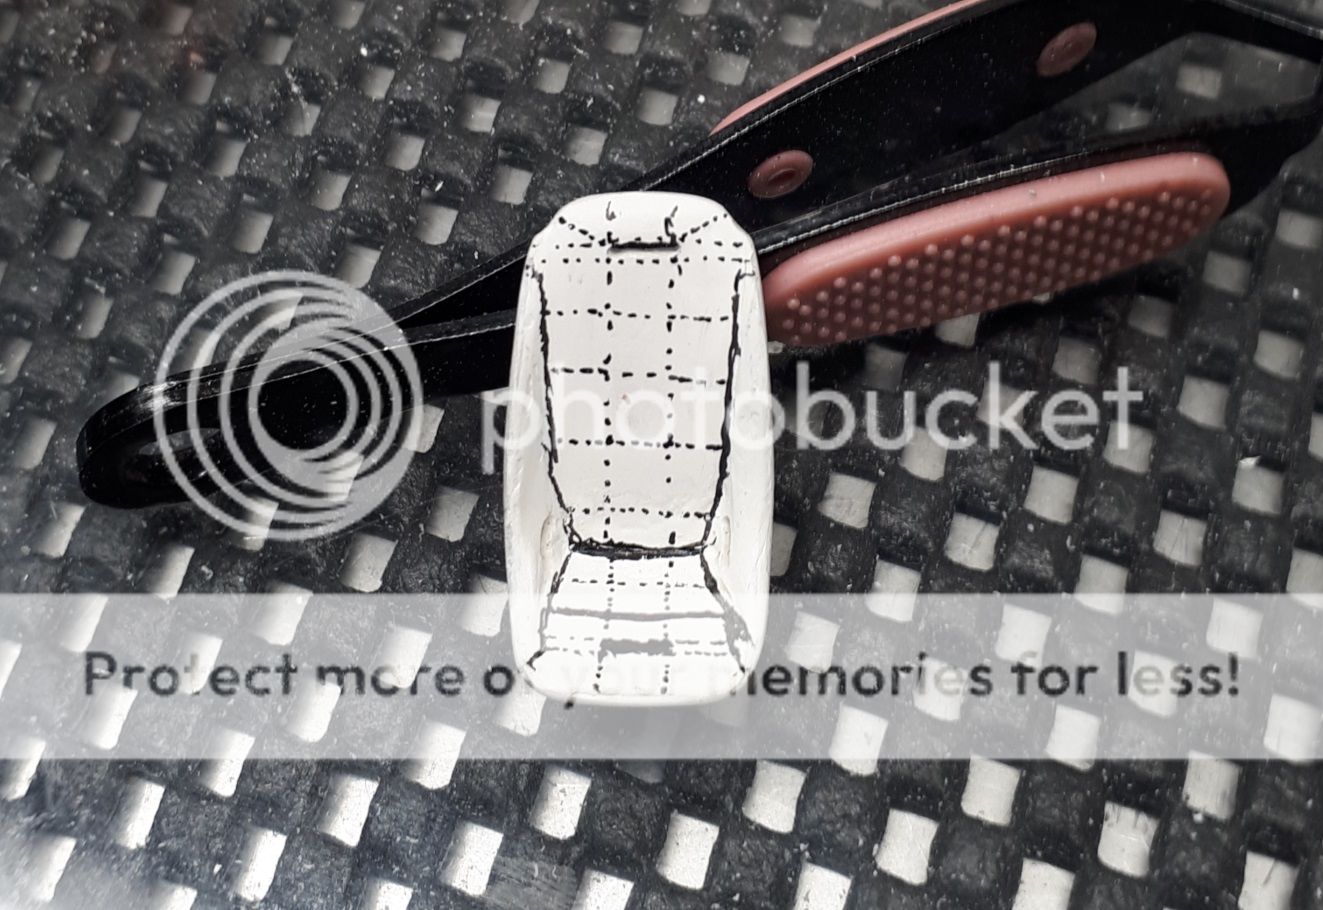
So, back to the seat. Last step was just the bucket seat itself with some Tamiya filler. The next step was to smooth out the padding and then draw out the plan for the padding itself. Using a marker I traced out the layout for the padding as best as I could using the few shots of the seat that were available:
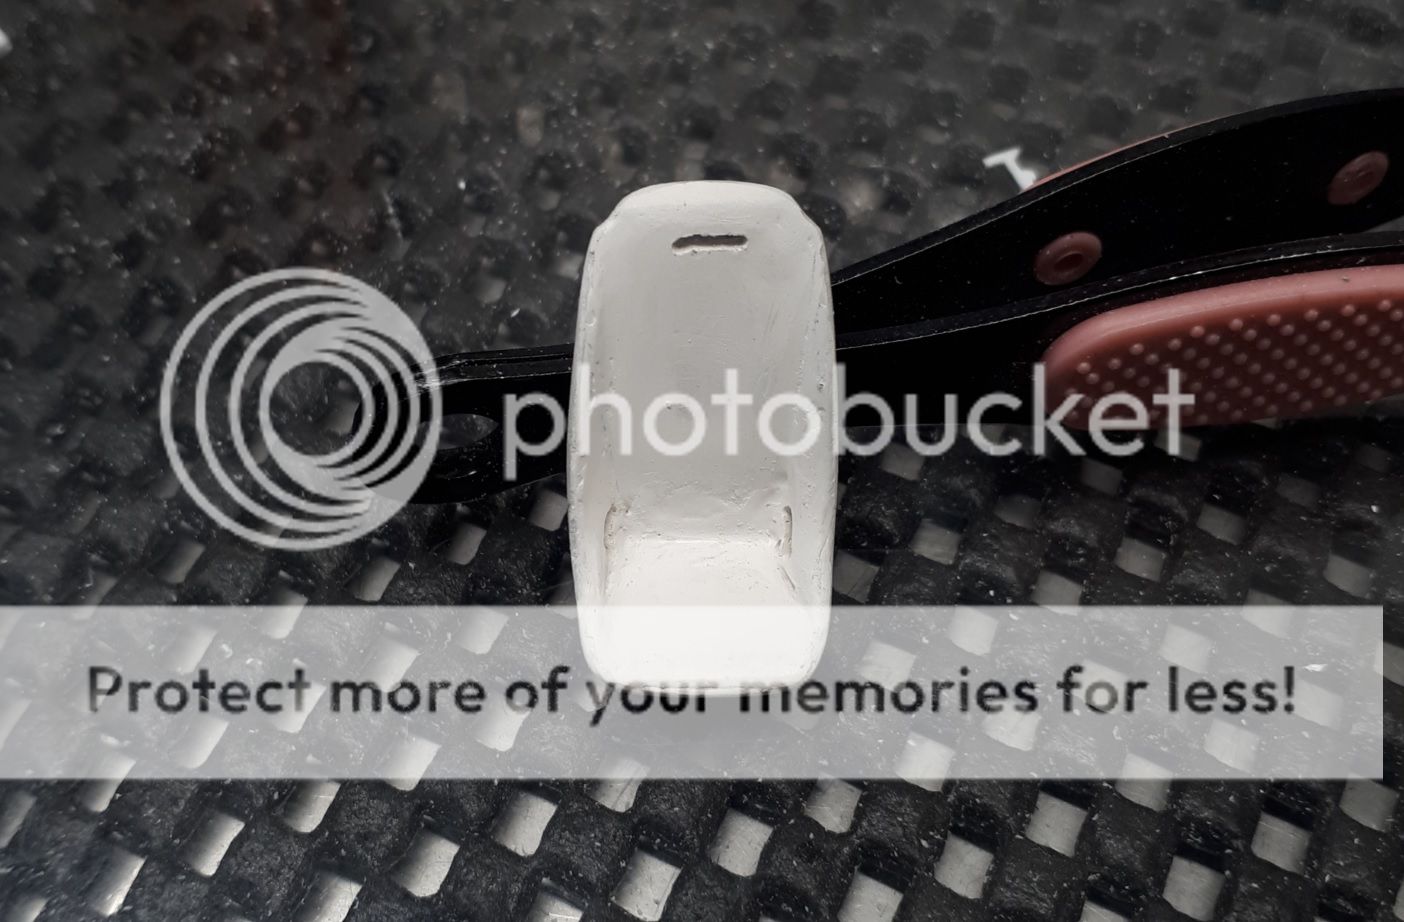
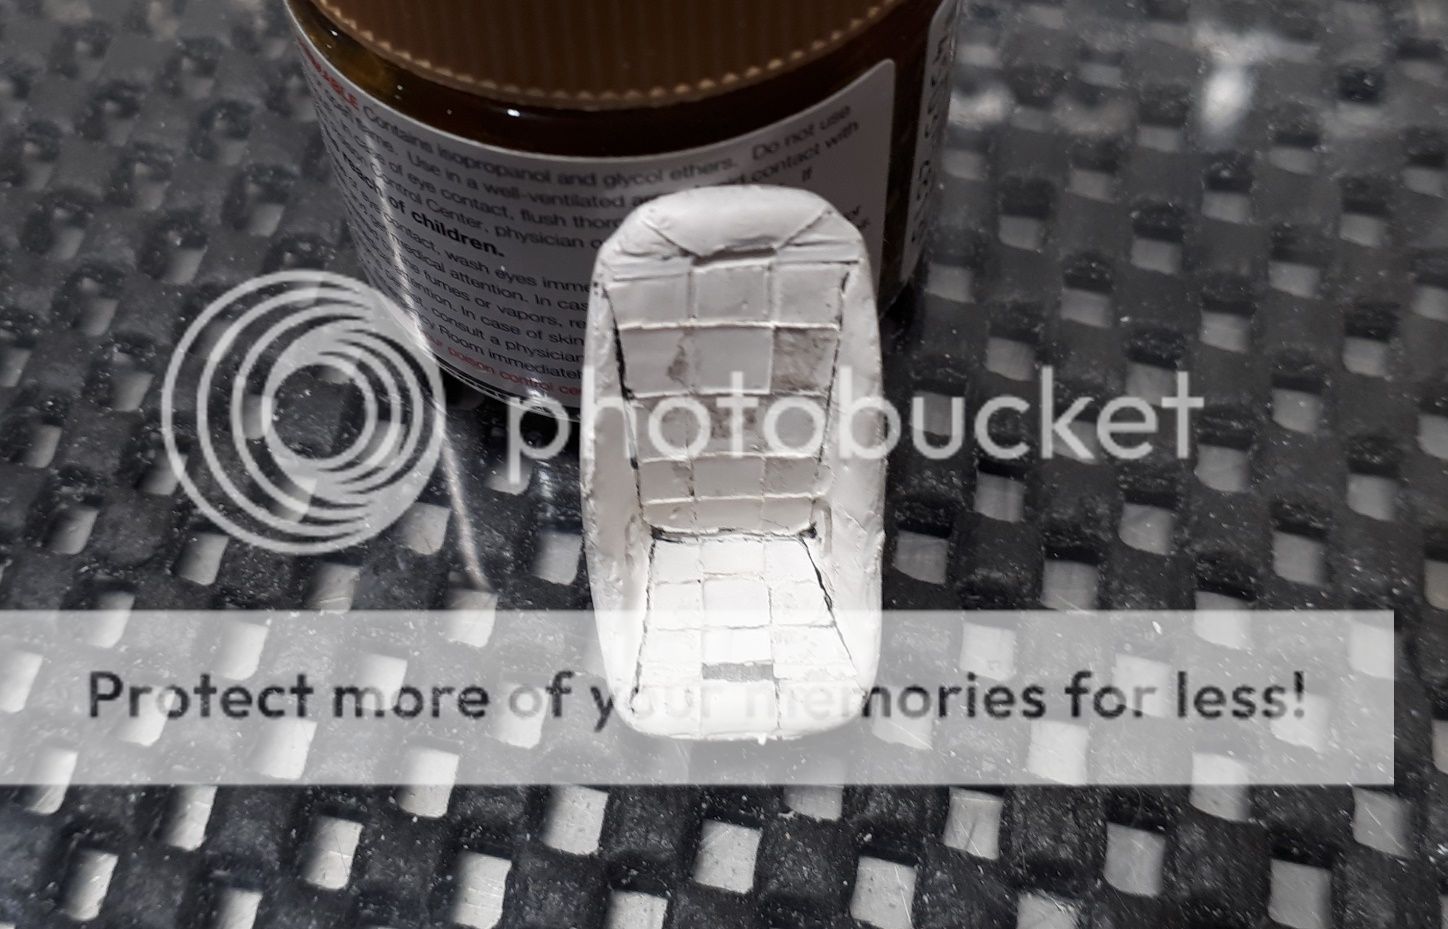
In order to get the seat to have the seat cover look right, but not look flat and boring I went through the ridiculous step of taping up each individual square and putting down varying thicknesses of Tamiya putty:
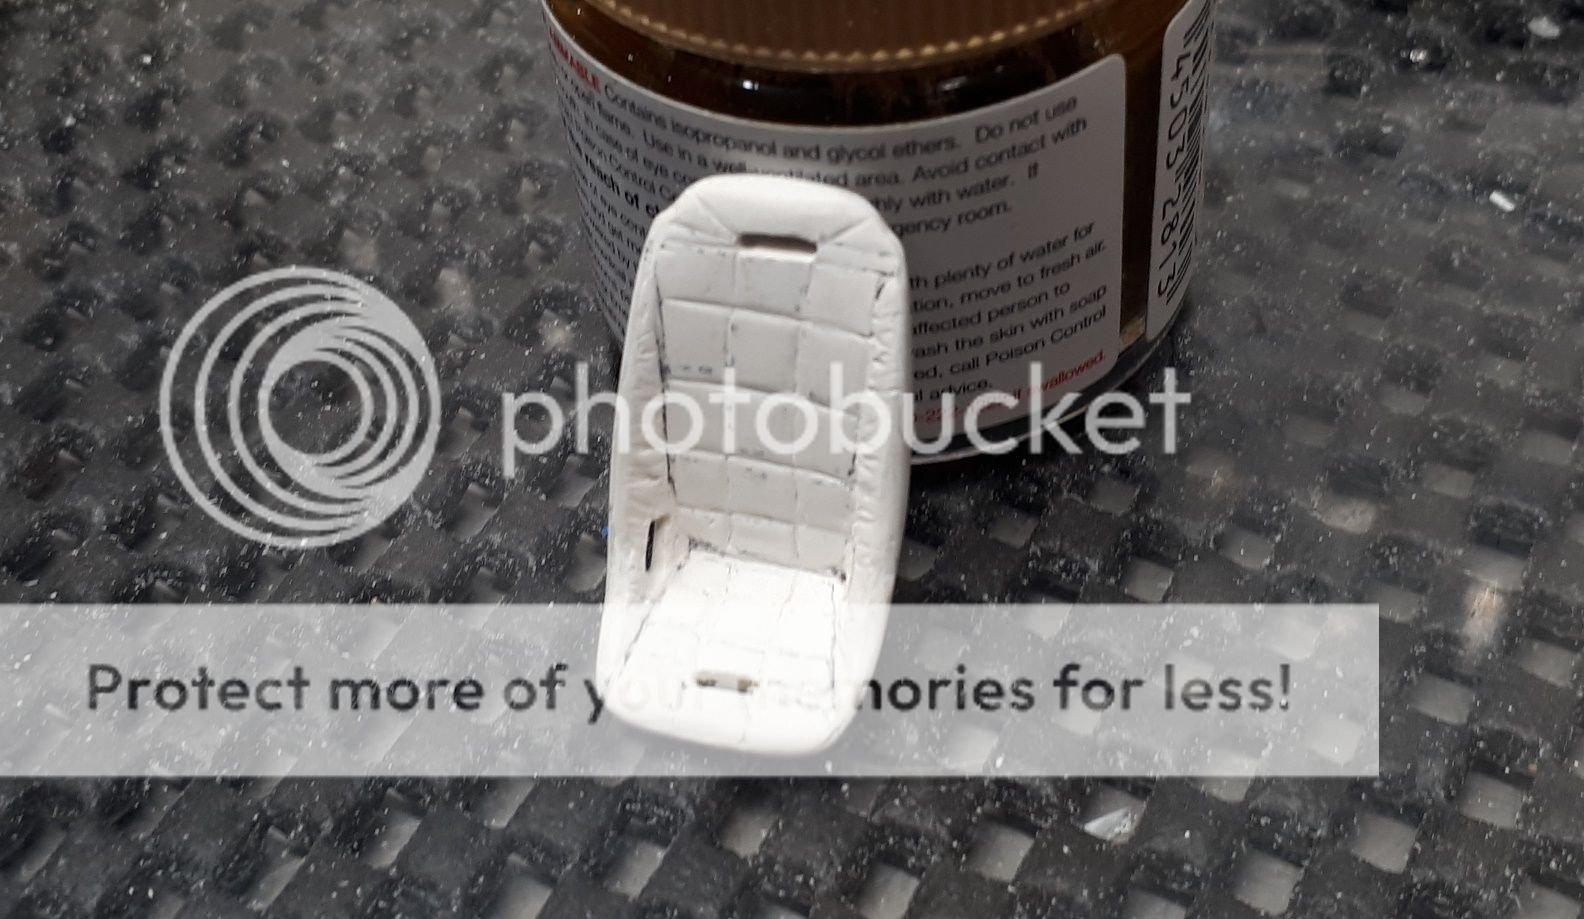
From there the sanding started. Using a thin file the grooves between each pad were applied. Using 400 grit sand paper over a soft piece of balsa wood the pads were then sanded down to shape with focus between each pad to make them slightly rounded. A small pick was used to add the wrinkles to the side pieces and emphasize some of the deeper grooves:
Now that this was finished I used a thicker coat of flat black than normal to fill in and smooth out the seat even further. I apologize for the lack of focus of this image:
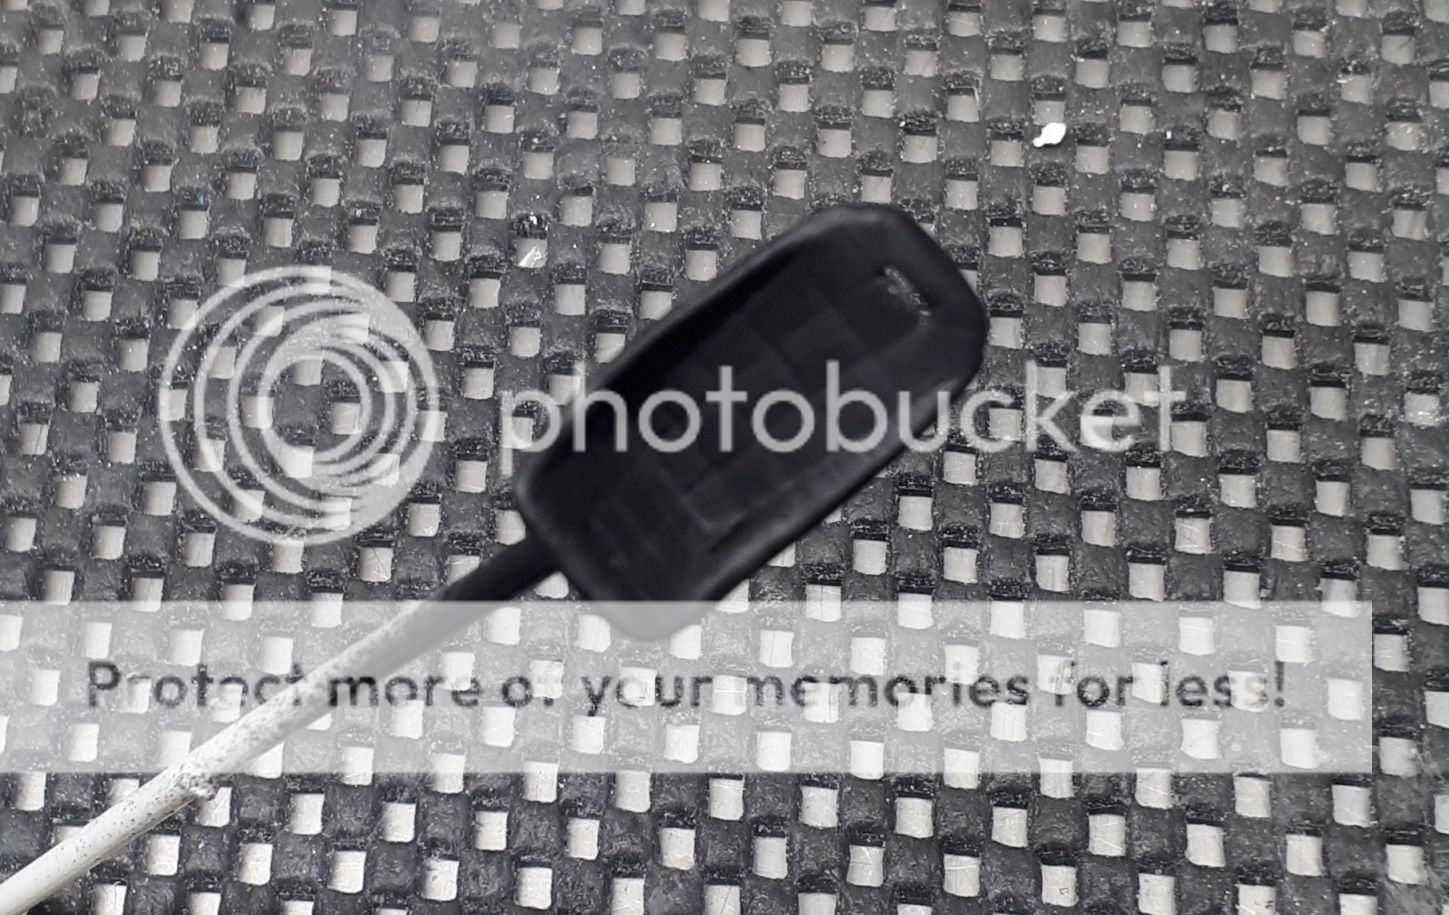
Once this was cured I used pastel chalks of varying degrees of black/grey to give the seat some depth. The pastel chalks were then polished up with a Q-tip to give the semi-gloss finish of the seat cover. Lastly, a few nicks were added with the tip of an x-acto blade and tan colour applied to simulate small tears in the seat itself:
With the seat finished all that is left is to build up the inside of the fuselage halves and smooth out the gaps between the cockpit tub and the fuselage itself. The light is at the end of the tunnel!
Thanks for looking,Mark.
LF Images/Info - CF-100 Canuck - Radome & Others
in Research Corner
Posted
...might be a bit late in asking, but if anyone happens to have a good image or two of the area under the fuselage on the aircraft with the gun pod removed, that would go a long way as well. I have one with the pod being raised up on the dolly but it only shows a shallow and partial angle inside the open fuselage area.
To spill the beans on what the plan is, once I'm back home and will be able to finish the Viper Mk II, the plan is to do a dual build of two CF-100s (a Mk 4b and 5). One of the two will be fully buttoned up while the other will be opened right up (radome, nose opened up, air brakes open, etc...). It'll be a long haul of a build that is currently still in the planning and research stages.
Thank you for any and all help with any information.
Cheers,
Mark.