


Eric B.
-
Content Count
686 -
Joined
-
Last visited
Content Type
Profiles
Forums
Calendar
Posts posted by Eric B.
-
-
On 5/26/2021 at 5:21 PM, Mr Matt Foley said:
Much is internal and from the exterior has an additional pylon station on each wing as well as the new EPAWS antenna on the tail booms. Check out the F-15SA and it will have much of those exterior antenna. I think we will have to wait for kit makers to give is the details and/or the resin making crowd to get on the computer and 3d print details. We still do not have an accurate F-15E cockpit, so I doubt it will come anytime soon.
Hello,
Big thanks Matt. This explains why I not could see that much. (I probably was after those canted vertical fins and stuff like that 😃)
Thank you.
Eric B.
-
Hello all,
Besides Kursad decals, what is needed to build an F-15EX from existing kits. Is it reasonnably possible to build one?
Namely, can anybody list/sum up the cosmetic differences between an F-15E and an F-15EX?
Cheers
Eric B.
-
I have followed Brian too, and also used his knowledge and decals too... 😉
-
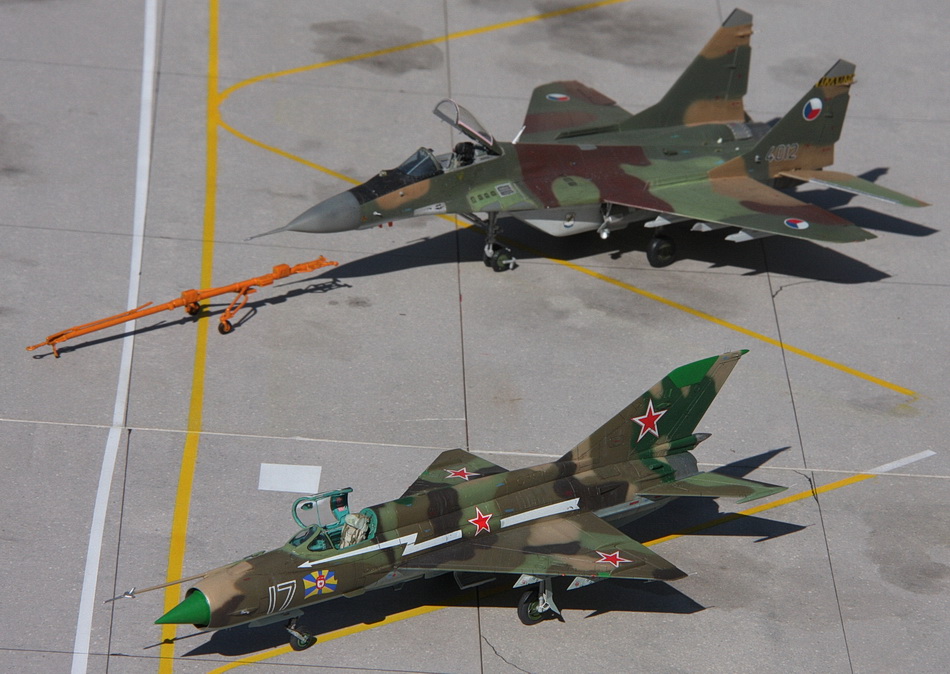
Hello,
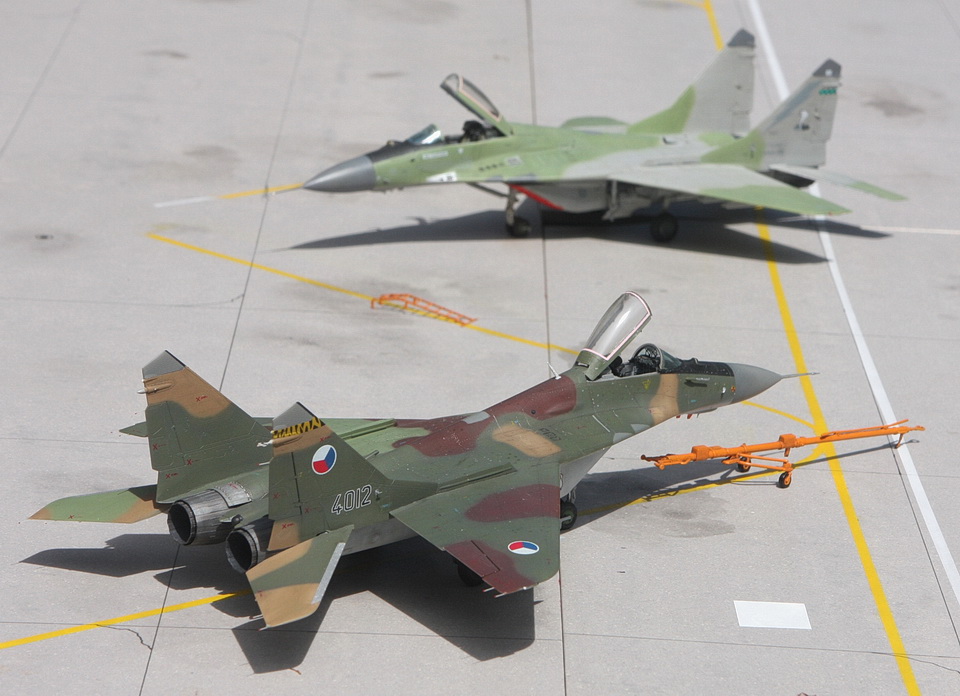
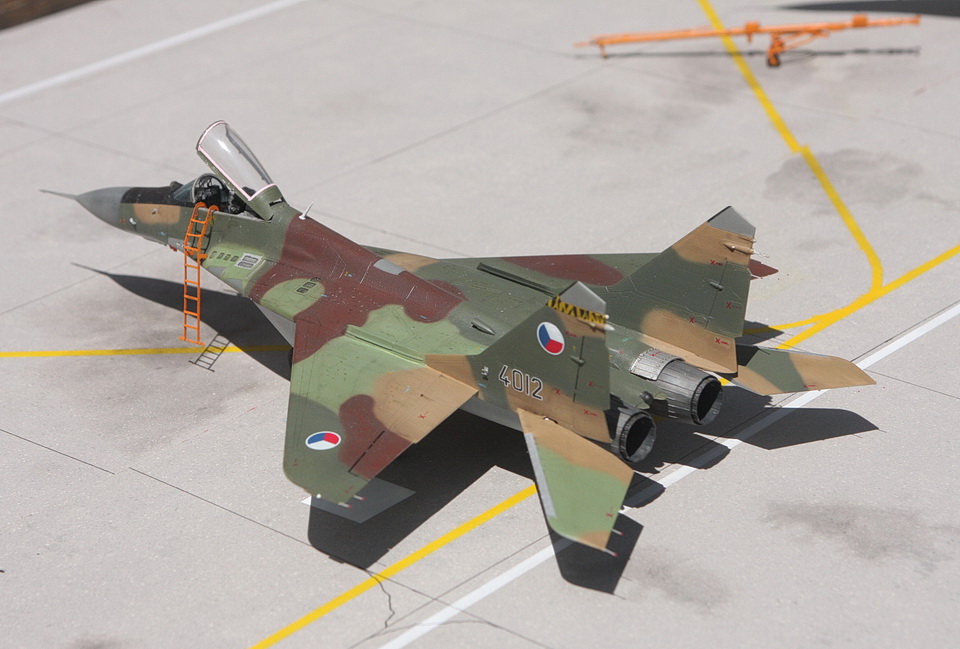
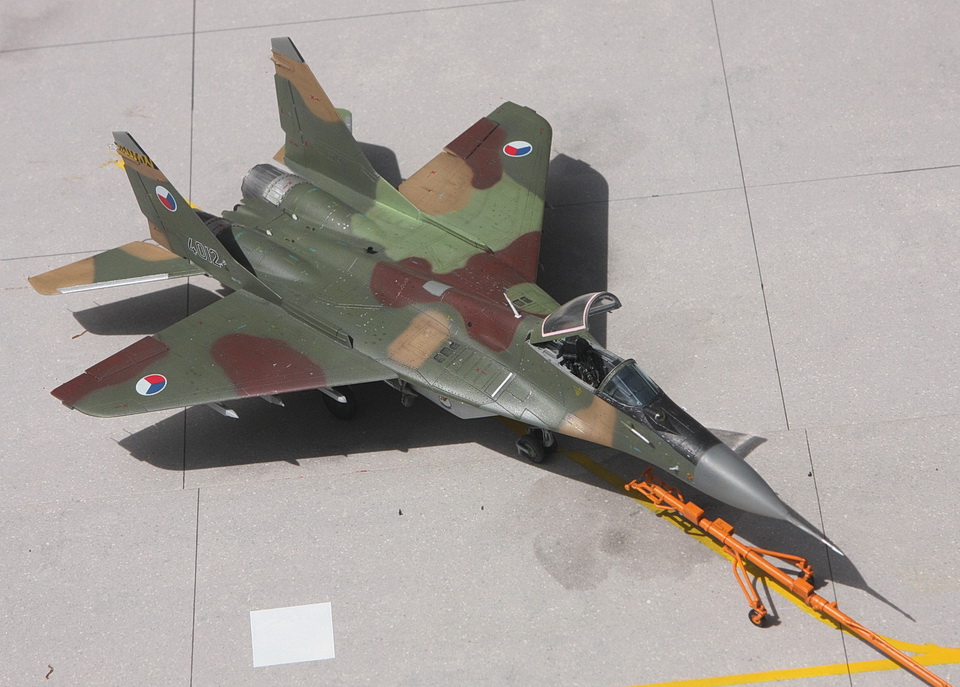
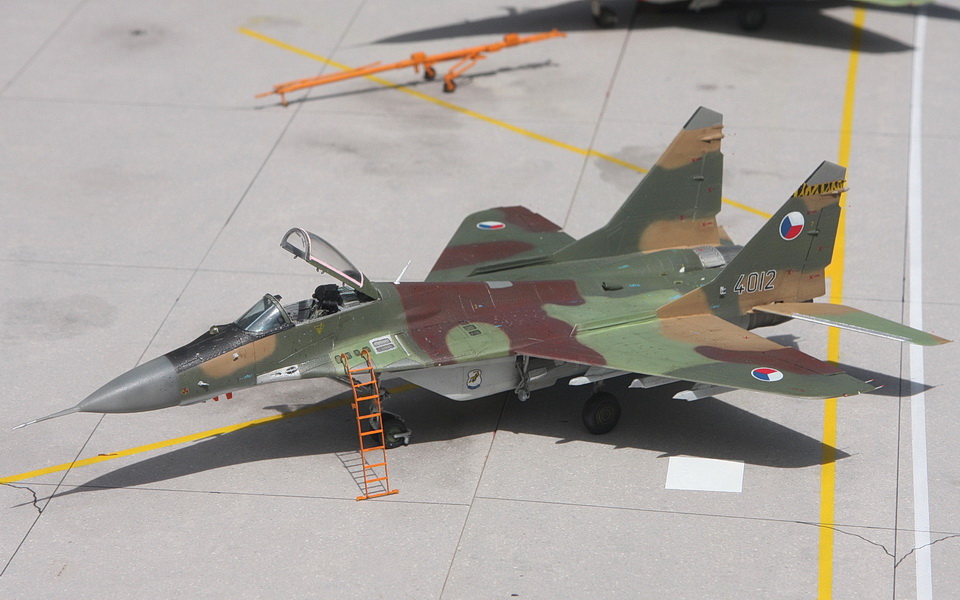
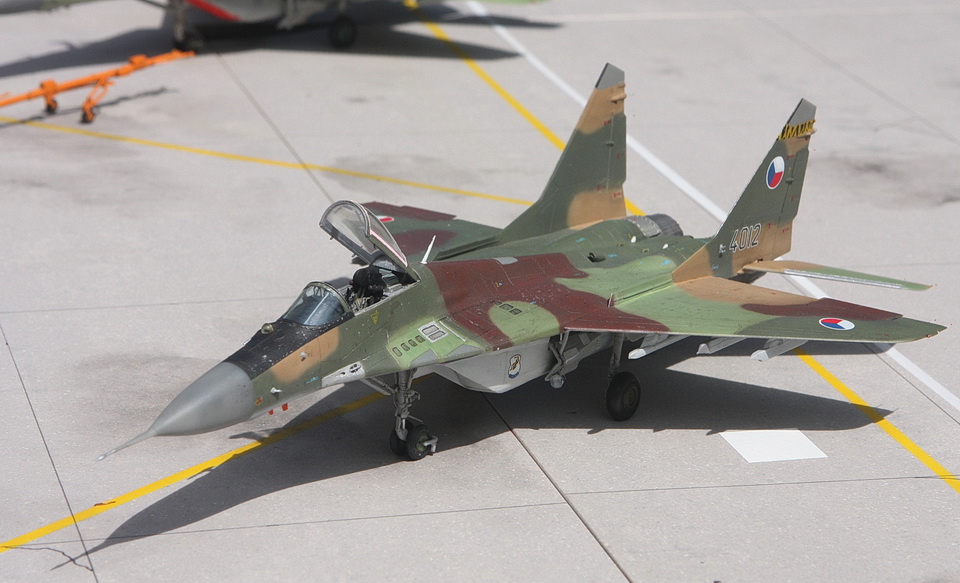
These are my little Mig-29 9-12s in 1/72nd scale.
Story started a few years ago when I built my first Mig-29 in 1/72nd scale. At the time best choice was between the Italeri and Airfix models.
I thought the Italeri kit was a better starting point and proceeded with my project.
I actually was not very satisfied with that first try for 2 main reasons :
I missed to correct the angled position of the main landing gears (Italeri gives them vertical…)
I left the upper auxilliary intake doors open – they normally are closed when aircraft are parked and idle.
I decided to correct these flaws and later started a second Fulcrum, also from an Italeri kit. I also corrected some other aspects of the aircraft addind resin accessories in the process (nose cone, cockpit and seat, wheels and exhaust nozzles). Aircraft was built as a Malaysian Mig-29N. Resin IFR probe and fairing were difficult to cement in position so I decided to build my Mig-29N without the IFR equipment (I found information proving that Mig-29N have occasionnaly flown without them).
Then better Fulcrums were released both by Trumpeter then Zvezda. I had decided for either an East German, Czeck or Polish 5 colour camo which left me with the Trumpeter Mig-29 9-12 (Until now Zvezda reselased only the 9-13 and 9-19 version from their new moulds).
Here are both models
Italeri Mig-29N
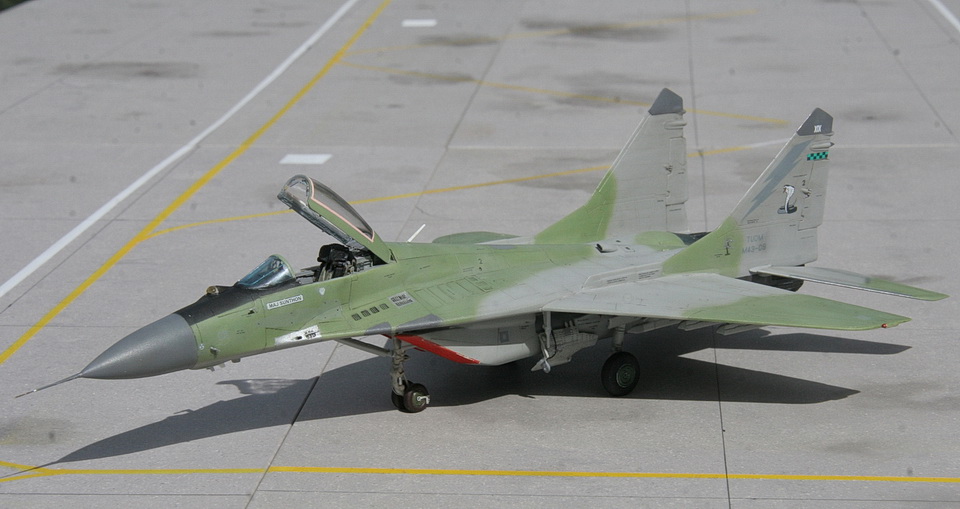
Trumpeter Mig-29A
Cheers
Eric B.
-
Hello Andrew,
I am myself more of a "jet" modeller >> US NAVY >> my favorite aircraft still is the F-14... that is where I have so often used the precise information and knowledge that you have shared here.
Hence my little words about Spitfires.
I do appreciate the kind words of the specialist in aviation that you are.
Cheers
Eric B.
-
Hello Andrew,
Thank you dearly, I was not expecting you as a first answer on a Spitfire topic 😃
Seriously, you're right : if one is to build one Spitfire in this scale, it has to be an Eduard kit. It was I very long time I had not used aftermarket on a kit (well bar decals here).
Cheers
Eric B.
-
Big thanks Mario. Thank you for your kind words...
Cheers
Eric B.
-
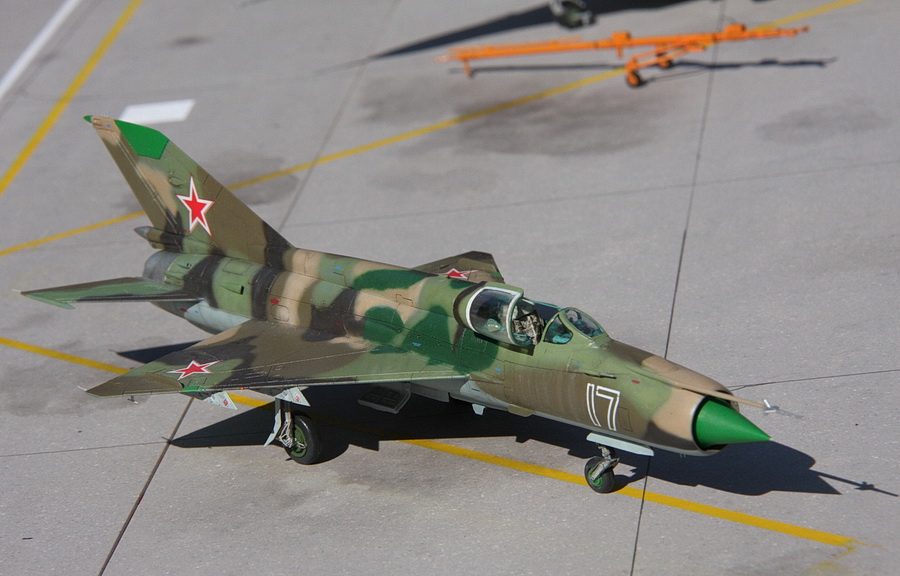
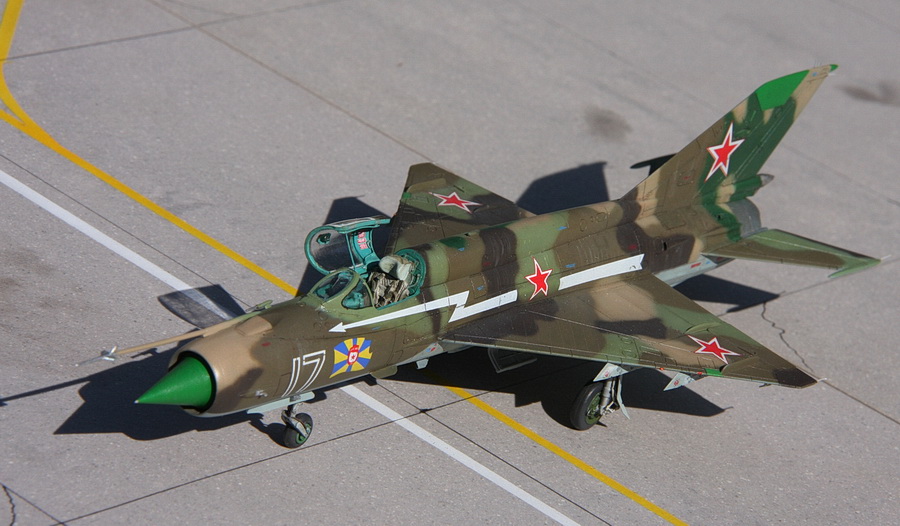
Hello,
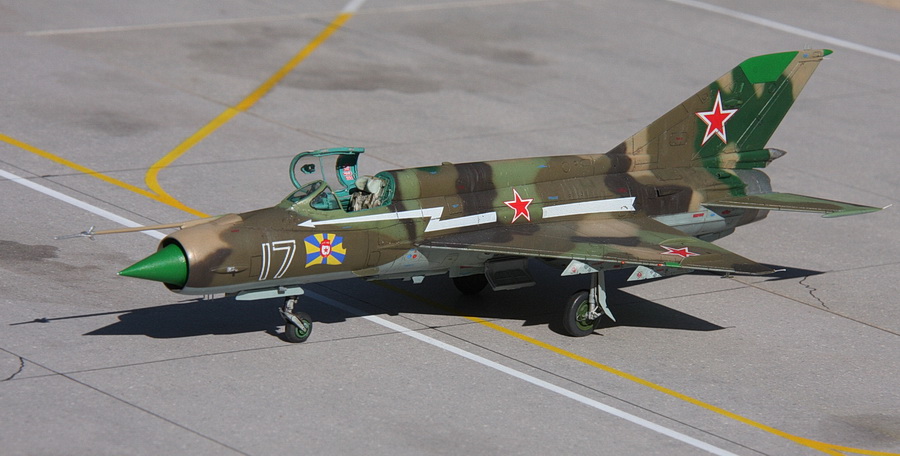
I had a hard time deciding which livery I wanted for my Eduard 72nd scale Mig-21 MF.
Then I decided for a russian aircraft with one of those complicated camos with several coulors. I found an interesting aircraft in white 17.
It is a 5 + 1 colour camoed aircraft (+1 being the emerald green patches which might be repair works or touch ups…)
This actually is a Mig-21 SM (SM being basically being the domestic version and MF beig the export version).
White 17 belongs to the 1st Squadron ou the Fighter-Bomber 18th Regiment – 303rd Composite Air Division based at Galyonki Air Base as seen in 1985 (well that is what the decals instructions claim.)
I actually found several profiles and several decals for this Aircraft (Lindenhill decals, RV Aircraft, Tally Ho decals and others, and no two camo pattern description was the same. Unfortunately although this aircraft seems to inspire many, I could not find any photo.
I decided to stay with the Tally Ho interpretation because it was close to the RV Aircraft scheme (at least two patterns were close – Linden Hill and other profiles were very different) and also because it came with a 4 view description.
White 17 is a late Mig-21 SM and it is very close in details to a Mig-21 MF.
Studio
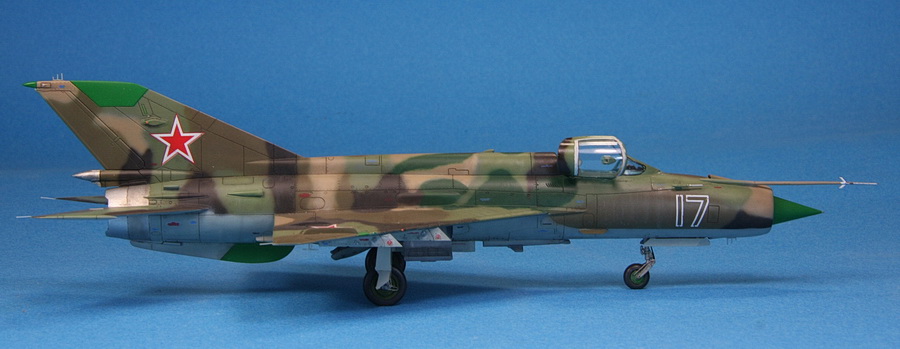

Daylight
Eric B.
-
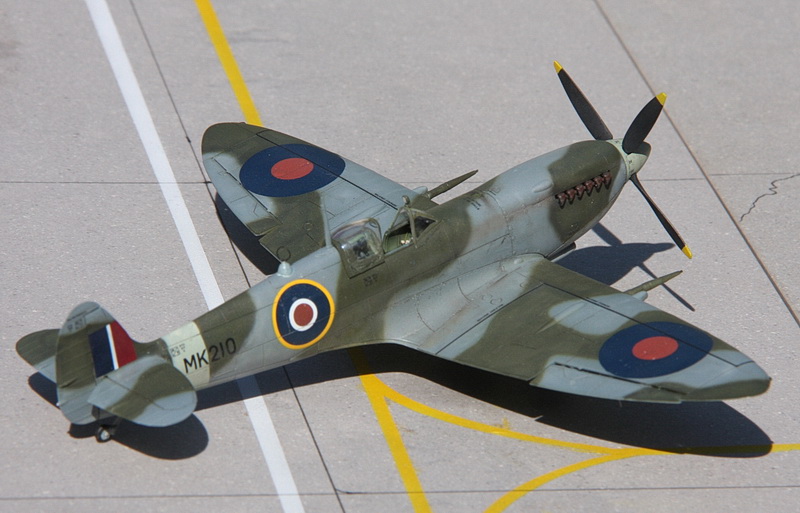
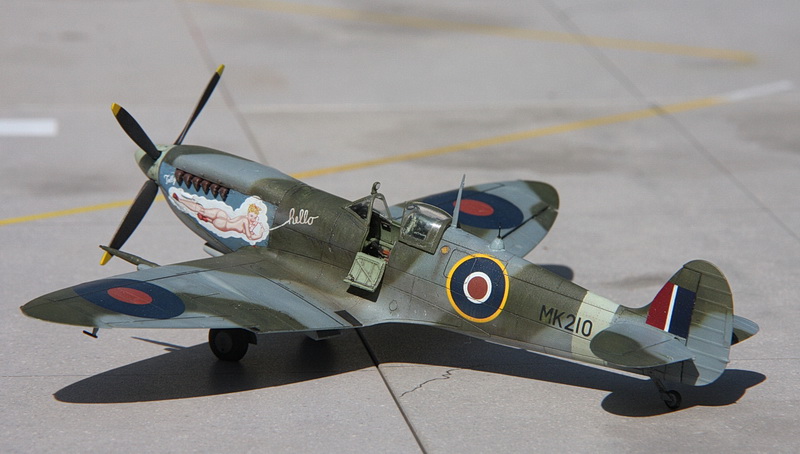
Hello
A fancy AeroMaster decal sheet attracted me to this nose art adorned Spitfire a few years back. I did not know about this aircraft at the time but a Spitfire with a huge painted lady was a bit surprising.
Later on, a newer and even more precisely designed Kitsworls decal sheet increase the interest.
I started documented the aircraft, only to find the aircraft was part of long range Spitfire tests mostly conducted at Wright Field (USA) and basically combining an additionnal fuselage tank and underwing P-51 tanks.
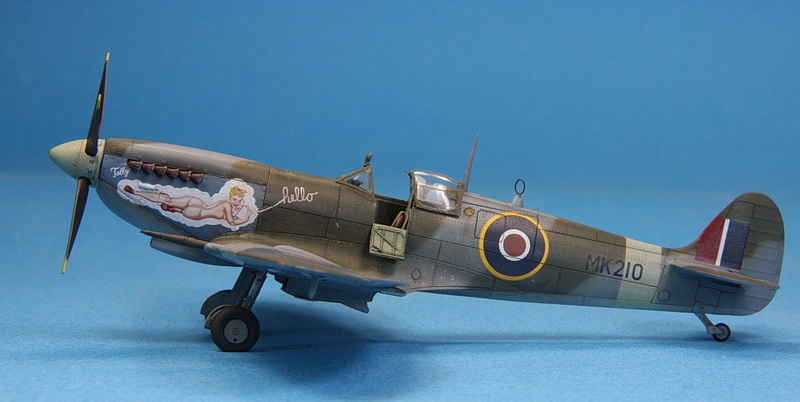
Release of the splendid Eduard Spitfire Mk.IX models gave me the occasion to revive my project.
Pilot was Lt Colonel Gustav Lundquist. Aircraft was equipped with a DF Loop for its flight back to England. That is during the return flight that the aircraft had to belly land in Greenland. Nose art was painting on the field during repair works.Building was straightforward and this was my first out of the bow build in a long time. Model is perfect, easy to build, sharp, accurate and detailed
Paints mostly are Gunze and Tamiya.
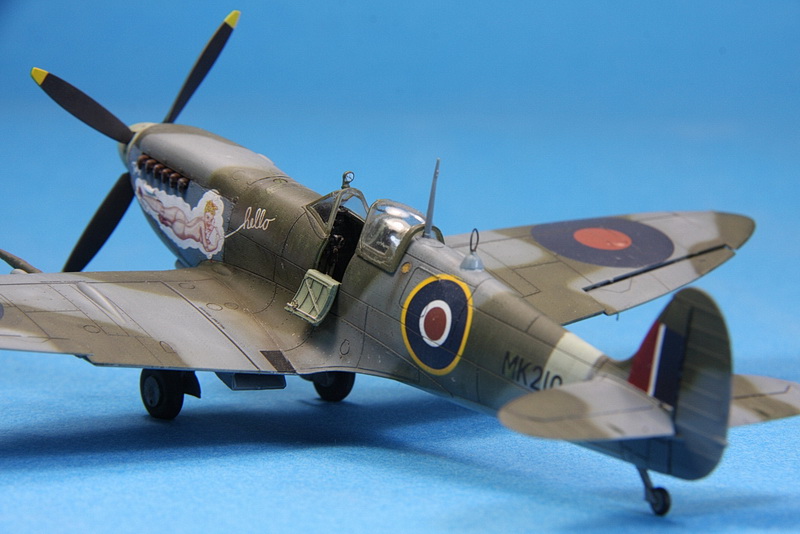
I was missing a few details to build the aircraft as I originally planned (ie with P-51 tanks). I then decided to complete this build without tanks but I hope I will eventually be able to grab additionnal information on specific pylons with plywood brace.
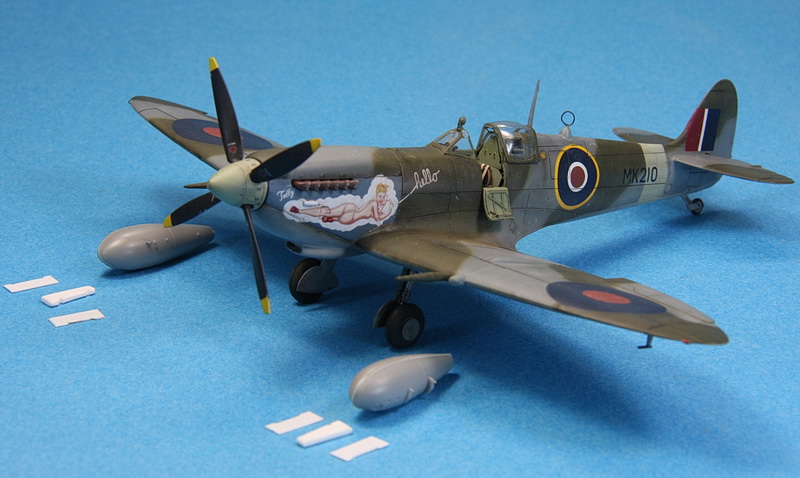
I could not find photos of the aircraft with DF loop. I therefore stole a DF loop from a Hasegawa P-51 kit, kept fairing but rebuilt the loop from metal wire. My guess is based on the ground tests being held in the USA, long range navigation equipment may have been adapted from existing stock.
And a few daylight photographs!!
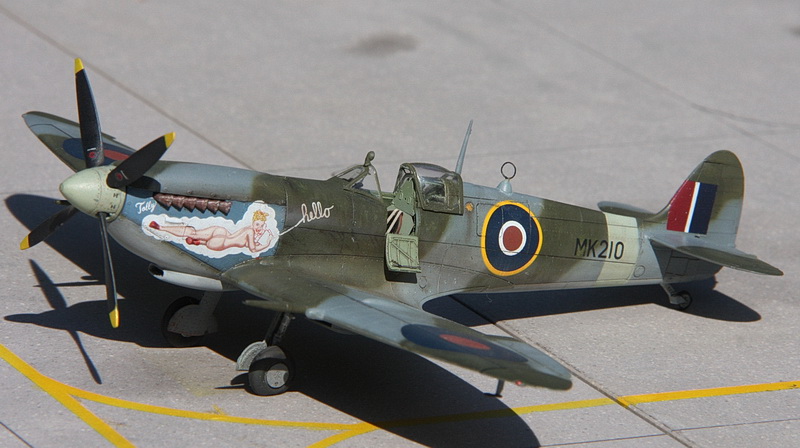
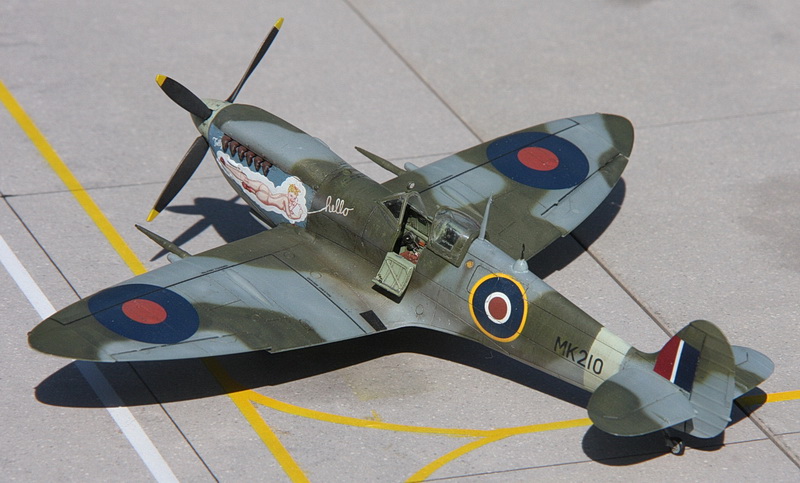
Eric B.
-
Hello,
Well, I am a 1/72nd scale guy and I'd say :
* F-84F Thunderstreak
* FJ-4 Fury
* A-26B Invader (come on Hasegawa - B-25/B-26 style)
* P-47N
* F4U-4/5
A few weeks ago F-5E/F would have topped the list, but it seems they are coming...
Cheers
Eric B.
-
On 8/26/2020 at 11:17 PM, Mstor said:
On Amazon, scheduled release is September 26, 2020.
https://www.amazon.com/Claws-Tomcat-Combat-1987-2000-Middle/dp/1913118754
Thank you,
It means the book release has been postponed. Last time I checked on Amazon this info was not available yet.
Thank you dearly...
Eric B.
-
Hello all,
On the same note, I was wondering quite the same thing about another Tomcat book that was to be released around April 2020.
I saw some publishing information but I never was able to find a hot link anywhere.
Book is : "In the claws of the Tomcat - US Navy Tomcat in combat 1987 - 2000" by Tom Cooper.
Anybody knows if it has been published or will be published in the future?
Eric B.
-
Gene,
He is a friend of mine. I just passed the information to him.
Cheers...
Eric B.
-
2 hours ago, GeneK said:
Eric,
However, since the airplane has speed brakes and ailerons that start to droop after hydraulic power is removed (engines shut down), these should have been provided for modelers who want to show the airplane on the ground other than immediately after shut down!
Gene K
Hi Gene,
That is actually what I meant, surfaces drooping with power off.
You are right they are the outer surfaces (ailerons) that droop at the wing trailing edge, not the inner surfaces (flaps).
Monogram, Fujimi on their British Phantoms, Academy did it on their models, I would have expected FM to do the same.
That's a correction I bring on all my Phantom models (mostly based on Hasegawa 1/72nd scale kits) but I would have appreciated to save time and efforts on a new mould 1/72nd scale Phantom.
This said I have pre-ordered!!
Regards
Eric B.
-
Hi
Very nice new 1/72nd scale Phantom moulds are being released. Especially if they come in different versions.
Nice parts, cockpit etc... But I am still surprised they went that far with some details - ie air intake ducts and belly auxilliairy air intakes - but do not provide flaps and airbrakes.
Probably afetrmarket accessories here?
Eric B.
-
Hi,
Great news this new Wolfpack F-5E/F - Long overdue.
Before this, I always figured I might try a Trumpeter/Italeri mix. Use fuselage and wings from the Trumpeter kit and salvage all the other parts from an Italeri F-5E. After all Trumpeter copied (very poorly) the Italeri little kit.
Maybe with a careful cleaning/filing Trumpeter fuselage could do the job (note : I do not like scribing - and yes I did it once long long ago on an Italeri F-5E).
This said, we will need beautiful F-5E/F decals in the future...
Eric B.
-
Hello
I really love your model. Nice build, nice paint, nice weathering.
Well done.
Congratulations...
Eric B.
-
Wow,
People don't talk to much about the Zvezda Fishbeds but you did a real great job with yours.
It is really inspiring. Congratulations.
Eric B.
-
Hello,
Beautiful build of a rarely seen kit. Really beautiful and pleasing.
Sorry, I am not sure if I understood your point correctly but N registration should be a US airplane, here it is...
https://www.airport-data.com/aircraft/N11524.html
Japanese aircraft ate J japanese. Sorry if I misread...
Best regards..
Eric B.
-
Hello,
That's a very nice build indeed... Really inspiring job.
Eric B.
-
Bora Bora, Pacific huh ?
You have big choice ;^D)
Boy : Rex, Tony, Oscar, Franck, Zeke, Pete, Nick, Jack…
Girl : Betty, Dinah, Emily, Frances, Grace, Helen, Jill, Judy..
And many more…
Congratulations to you both… All the best...
Eric B.
-
Hello,
First of all let me start by telling I am a huge Hasegawa fan and I don't consider myself as a rivet counter of missing millimeter chaser.
What I find wrong with the Hasegawa Harrier IIs?
I think they are a bit basic (more of this later), they seem to have been designed with the original AV-8B (day) in mind. ll other versions need correction and more if you want to build a RAF version. They are not well researched then.
I believe there is a sublte shape issue around the nose (kind of reversed banana shape) which makes the nose tip a bit high. Way to correct this is open landing gear doors and maybe shorten nose landing gear 1 to 3 millimeters (0.1 or 0.2 inch) to lower nose. The Harrier II has a distinct nose up stance but not as much as the Hasegawa model.
About the "being basic" issue? Cockpit is very basic. Depends on how much detail you want to put in it but I elected to drop a resin cockpit into my kit. What I really dislike is that all underside bays and wells (front and rear landing gear wells plus airbrake bay) were molded closed.
For landing gears it seems they can be left closed on the ground and at rest on real aircraft. I still consider this a poor offer by Hasegawa on a modern aircraft model. Anyhow airbrake must be open on Harriers as they are linked with the landing gear. You therefore have to cut airbrake shape in fuselage, build a well, find and airbrake replacement (resin + resin + resin in my case - else spare box!)
Hope this helps.
Eric B.
-
Hi Hajo,
Just out of my head and because I am thinking about the same convertion as I think Hasegawa's Harrier II series has not been their best effort.
Question 1 : what AV-8B Subversion do you plan to build? AV-8B, NA, Plus?
For the rest : whatever subversion you plan to build, you'll have to change nose shape, cockpit details and ejection seat, remove 2 weapon pylons under wings (British Harrier IIs have 8 whereas US Harrier IIs have 6 underwing pylons), change gun pods if you plan to build a gun armed AV-8B, remove British ECM suite (small bulges on wing tips and at trailing edge or rear lower keel), remove what I believe is British chaff and flare dispenser form behind (?) airbrake).
In turn depending on US sub version you might need to add US chaff and flare systeme (either in fairings in shoulder position just front of fin and corresponding longer air intake at the base of fin leading edge or behing airbrake ..)
All and all not such a simple conversion : you might need some parts from a Hasegawa Harrier II to complete your project - That at least is what I plan to do - salvage and Hasegawa AV-8B to convert an Airfix GR9 to AV-8B PLus.
My reply might not be complete but you have the idea.
Regards
Eric B.
-
Hi Oscar Hotel,
I think there is a possibility : why don't you try Superscale decal sheet 72859 that provides decals for VMAQ-1, VMAQ-2 ans VMAQ-3 Prowlers in 1/72nd scale.
https://www.scalemates.com/kits/superscale-international-72-859-grumman-ea-6b-prowlers-usmc--1083734
I have not found VMAQ-4 decals...
Try this link for VMAQ-3 Prowlers
http://www.seaforces.org/usmcair/VMAQ/VMAQ-3.htm
The Hasegawa is a very decent kit (engraved lines, good shapes), but it is now an old kit that was not updated as real Prowlers were. It is very basin in certain areas (Cockpit stands out and wheel wells).
You'll have to search documentation as real Prowlers were fitted with new antennaes, some bulges or fairings were added and some removed, cockpit were updated, aircraft received new weapons.
External corrections are well doable in 1/72nd scale. Cockpits can be detailed with the help of either "Golden Dragon" or "Aires" resin cockpits.
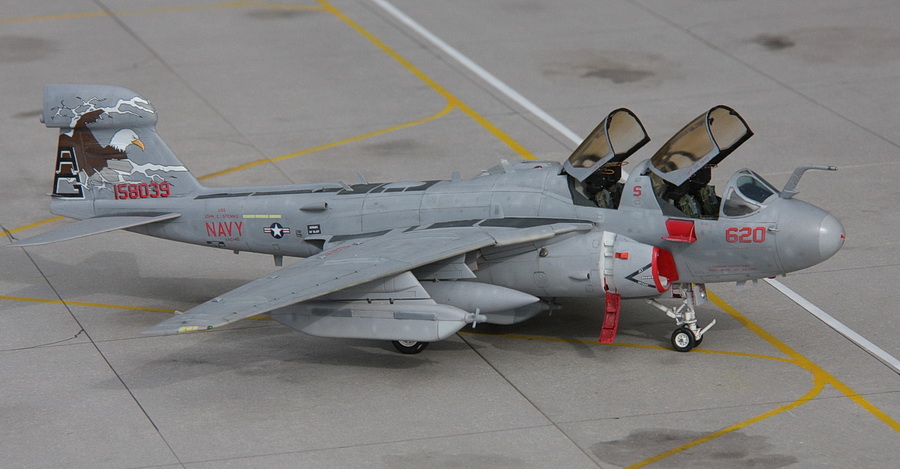
(Over : Hasegawa EA-6B updated to midlife specification)
Eric B.


JASDF F-2A fighter New FineMOLD
in Jet Modeling
Posted
Beware,
It seems it's fake like for a past April fool's day...
https://www.f-16.net/forum/viewtopic.php?f=2&t=8009&start=240
Se lower part of the page
Eric B.