

Waldmann
-
Content Count
16 -
Joined
-
Last visited
Content Type
Profiles
Forums
Calendar
Posts posted by Waldmann
-
-
Time for t6he V-18 to get legs.


-
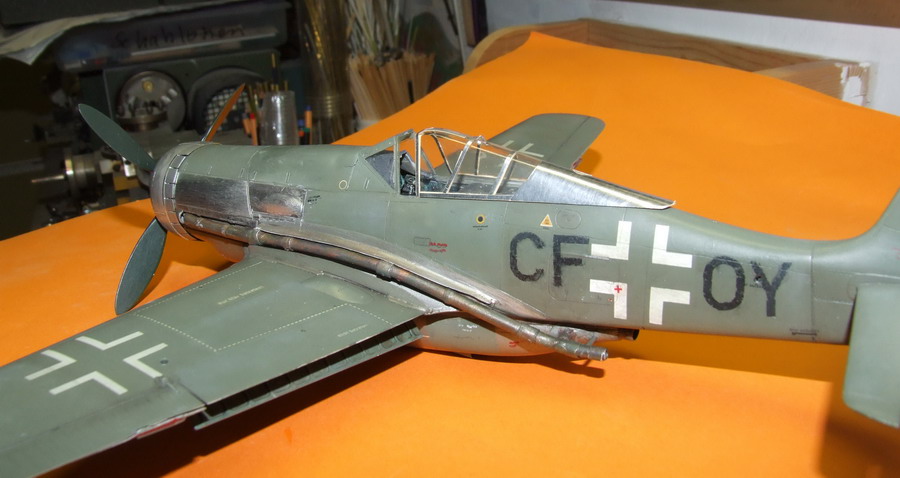
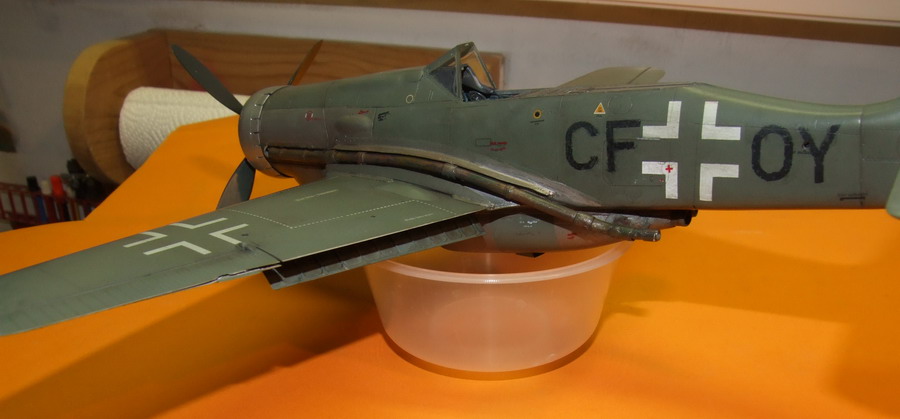
The canopy is finished with self-adhesive metalfoil as are the two panels on the cowl.
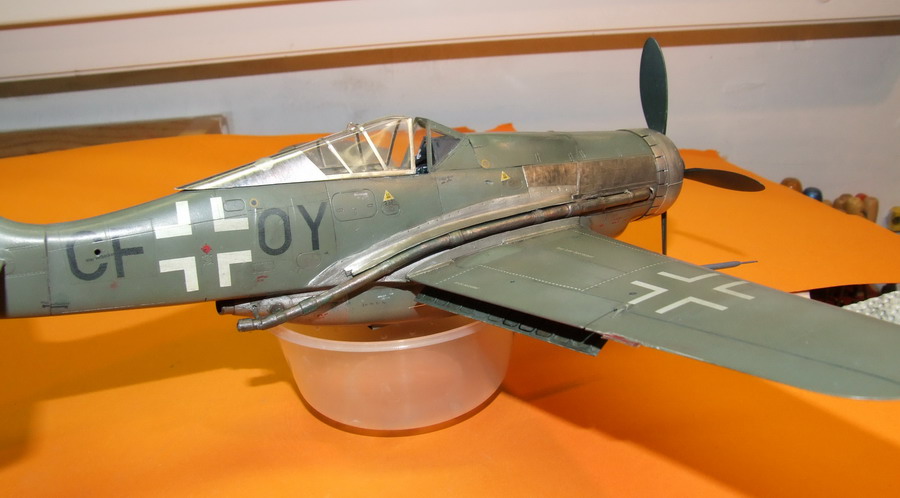

Had some difficulties in applying the metalfoil over the hunp on the left side. It looks worst in the pic than in reallity - I hope so.

What's left to do is applying the undercarriage and the antenas.
-
I will paint the V-18 in RLM-02 and natural aluminium. The call- and seriial nubers were made with the help of an ikjjet printer.

Only very slight weathering was aplied.


-
I painted the V-18 RLM-02. A darker shade than usual.

The large bare metal part beneath the cockpit is questionable. I changed this later.


The V18 was a long living prototype which went from the U1 to the U2 version. Don't know the difference between the two. Finally after an accident it got full camouflage, a Jumo engine and ended up being one of the TA-152 H prototypes. So you can color it at will. There exists a pic of the ac still carrying the original Call-letters. (Close-Up 24 monogram)


-
That's the final shape of the spinner. The props were made from old FW 190 Hasegawa stuff.
I cemented plastic card on the backside of each prop to broafen it and sanded them to shape. The prop bosses are made of aluminium tubing.
Tthe provisional colour shows more sanding is needed on the props!


-
I found a P51-B spinner (old Revell kit) and reworked it to look like the FW-spinner. The cowl flaps are made of alu-sheet from the a fast food Wok. At last came the heat guards on the wing roots.

a coat of primer will show any need for further sanding and rescribing.


-
Had a real fight with the exhausts. Wife, daughter and dog took cover and worst of all my Beer suplies ran out. In earnest I had missed to look for solutions in advance. At last I got them done with an appropirate piece of plastic tube formed t by inserting a copper flex. . I hope this was the last great problem in building the V-18. By the side the real V-18 U2 had an accident late in 1944 and was reconstructed as one of the TA 152 H prototypes with large wooden tail and a Jumo 213 E enginel.


-
A coat of primer from time to time helps discovering flaws.


-
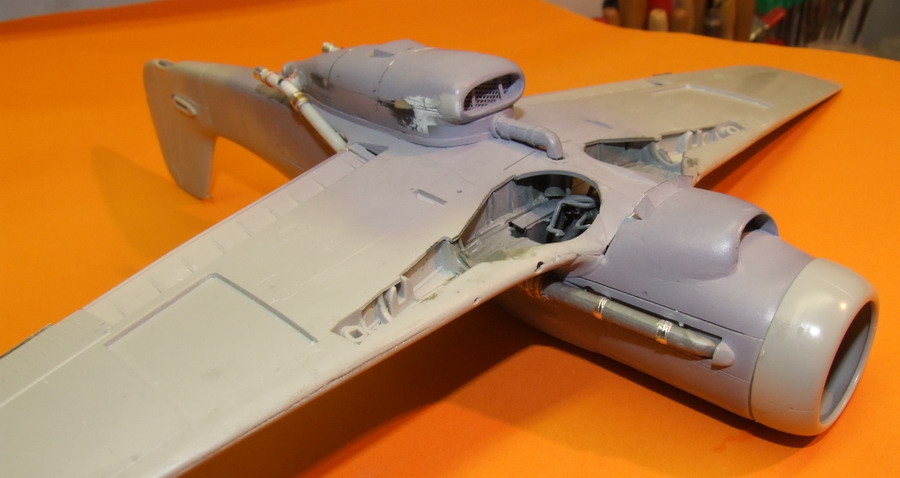
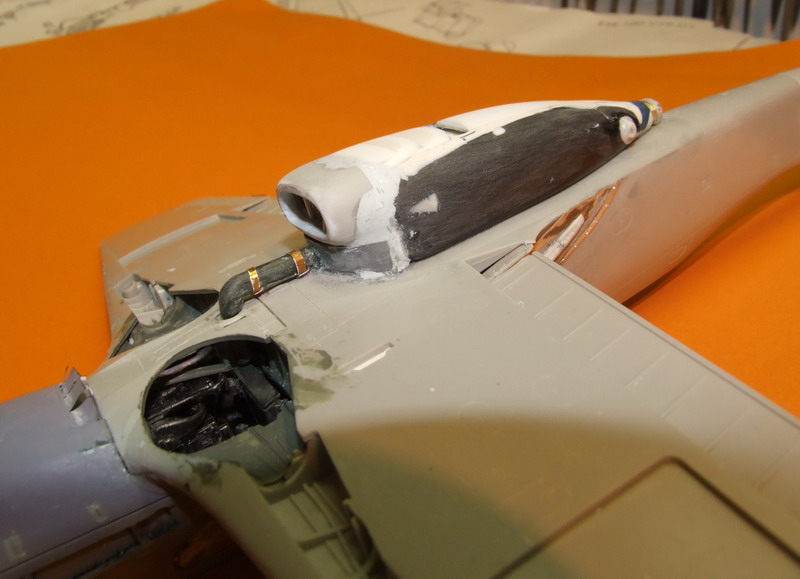
I adopted the "Black Widow" cockpit of the 1:72nd scale Airfix for my Torbocharger housing. Not much is left of it after loads of putty and heavy sanding:

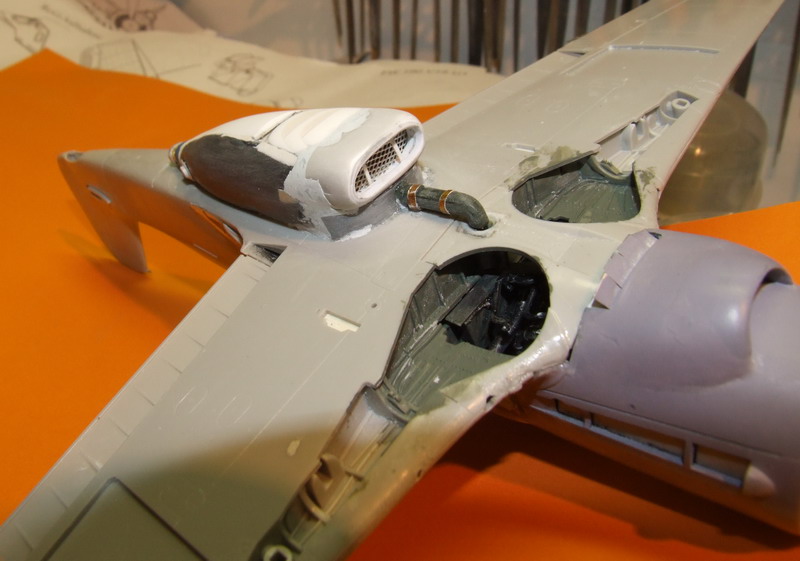
The need for some more putty and fine sanding is obvious.

-
Once upon a time in the Falaise gapp:

A kit from the time when there was no Internet and no forum. So I can offer you omly some pics of the finished vehicle taken during Modell-Fairs.


-
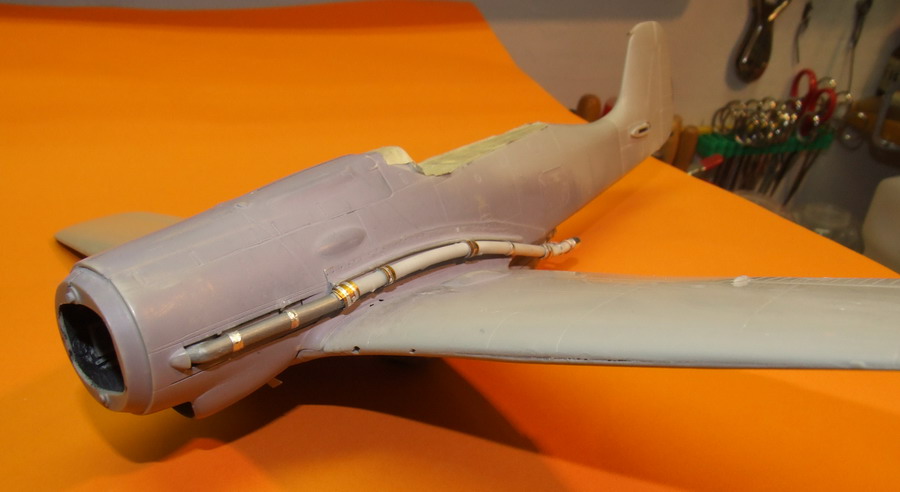
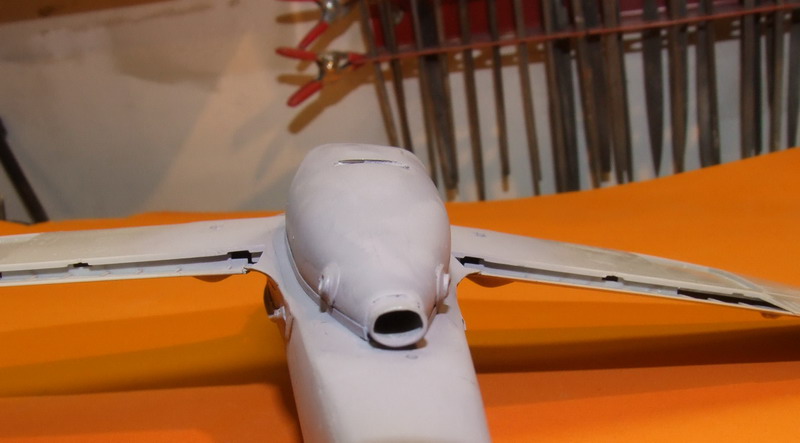
A coat of primer is applied to show flaws.
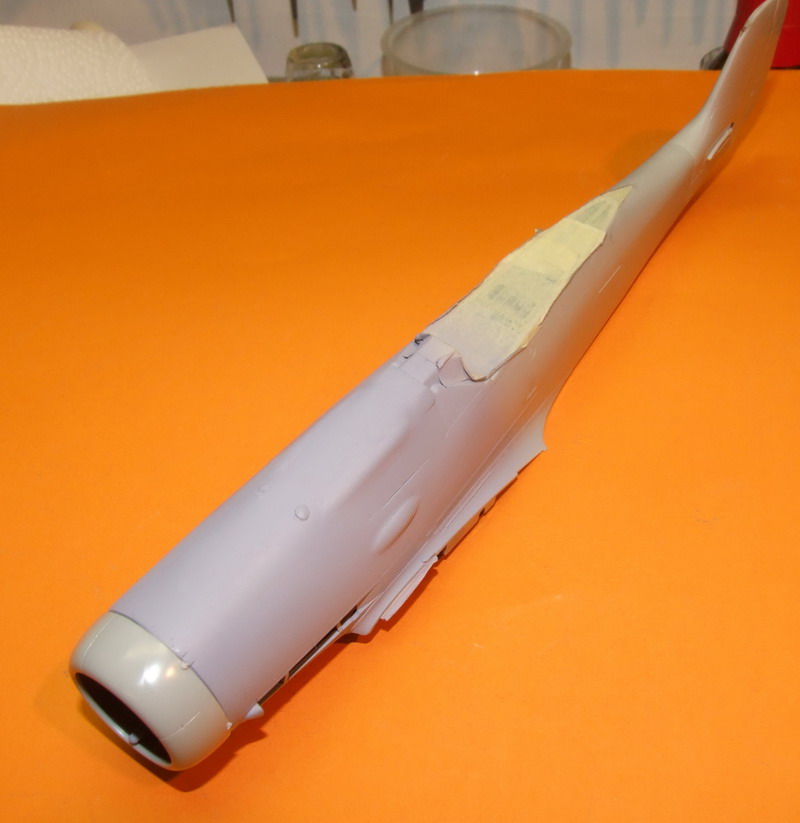


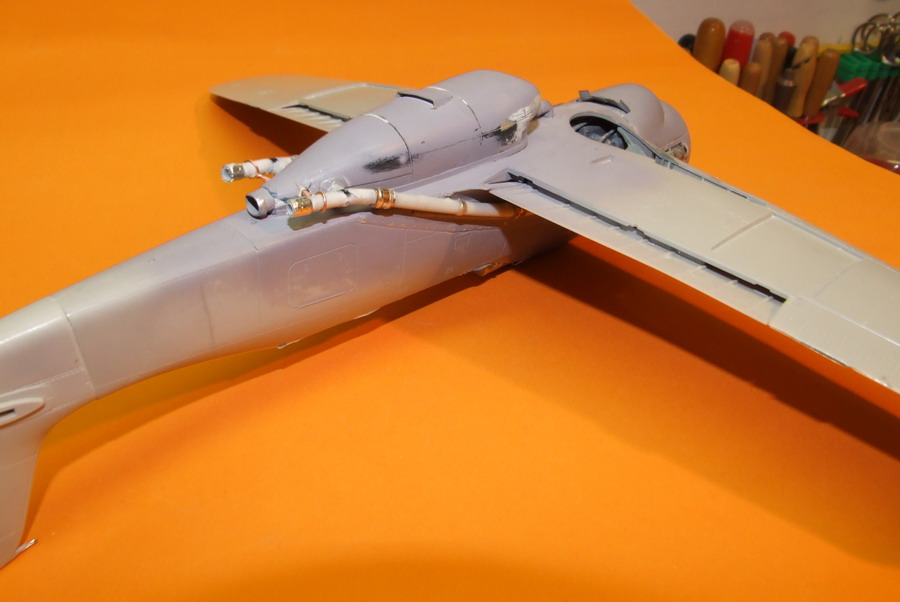
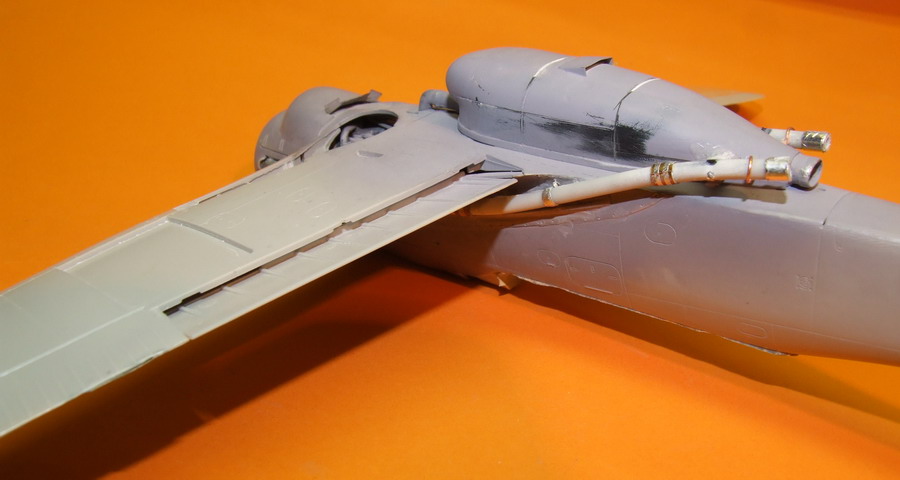
The lower wing is fitted. The heat shields for the exaust tubes are fitted to the sides of the fuselage.

The front of the Supercharger-cooler is cemented in place. It is made from the Dora plug in for the enlogated tail).
Now I try to build a supercharger housing from an old Airfix "Black Widow" cockpit some sheet plastic and plumper piping.

-

I ran out of quarterscale P47 cowls so I had to look for ozher spareparts to build the oilcooler. There was an old Ju 88 from
Lindber, no one wants to build even when forced by a gun! But the 88 tail part delivered the desired basic structure for the cooler.
The oilcooler is finished. Only some fine sanding will be needed. The coolingflaps of the cooler are from a beer can. We have a nice hobby!
The next step will be the wings because the supercharger and its piping can only be fitted when the wings are in place.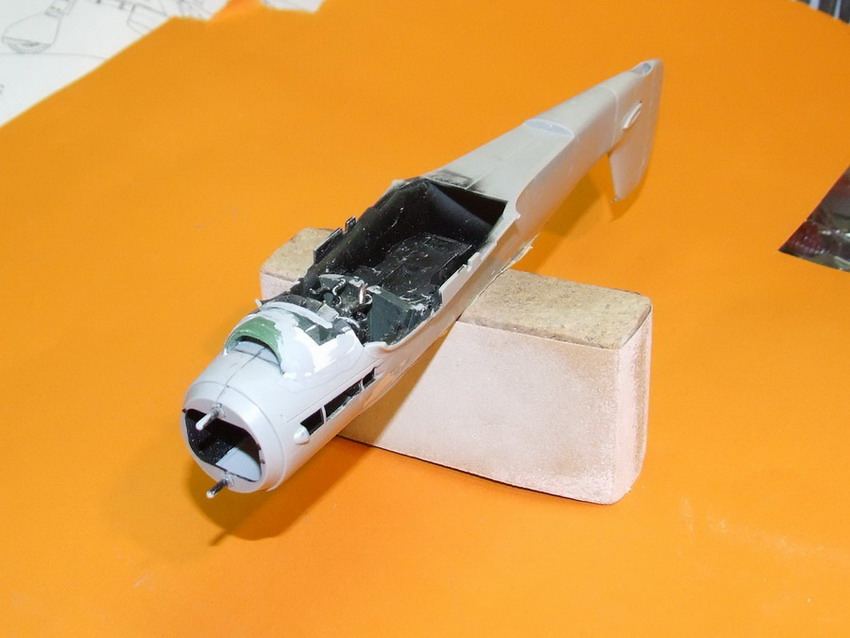
-
Hi,
I like Focke Wulf prototypes.I try to build The FW 190 V-18 with the characteristic exhaustdriven turbosupercharger.
To make things a little easier this time I used Newtool Dora kit from Revell.
The original V18 U1/2 at last ended up (after an accident) as one of the prototypes for the TA 152H.In a Model art publication I found these pics


First I cut off the enlogating part (Tonne)of the Dora tail. (I used the large tail of the Revell Dora) and cemented it back o the fuselge. The turbocharger adapter for the Jumo-engine at the right side had to go. The V-18 got a Daimler engine which had the loader on the left side.
The Dora cowl cover over the machine guns was replaced by the old A6/8 Hsaegawa part. With a little modification it fitted satisfactorily. Much easier than converting the Dora part. Two bumps on the new cowling and a new one on the right side for the inlet manifold of the DB 603. were fitted.


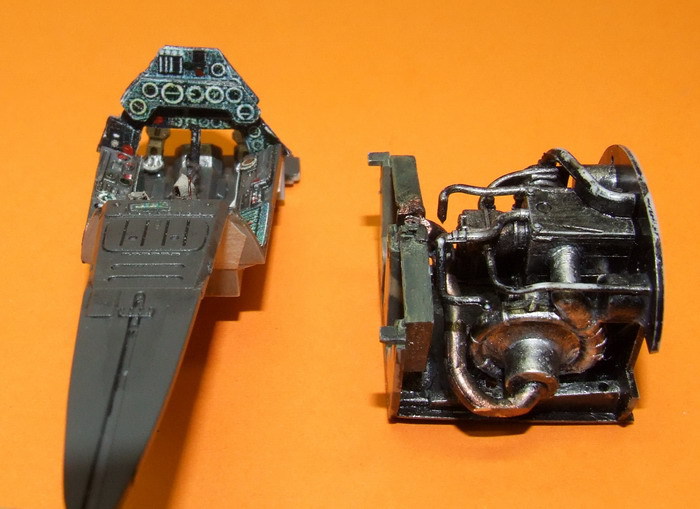
The completed cockpit and a Jumo 213 engine changed to DB 603 standards were the next parts made ready.
-
error
FOCKE WULF 190 V-18
in In-Progress Pics
Posted · Edited by Waldmann
The end of the story: