
terrysumner
-
Content Count
18,173 -
Joined
-
Last visited
Content Type
Profiles
Forums
Calendar
Everything posted by terrysumner
-
What's a SWINBO? I know what a SWMBO is but SWINBO is a new one to me... Terry
-
Sorry guys...no new progress right now. For the last three weeks, my son and I have been working on this guy's 1987 BMW 325is car in my garage. We stripped it down and gave it a new paint job. Since I got laid off, money was getting tight. So it's a good thing this little job came along. We got it done on Friday, got paid for it so we now are scrambling to get Christmas shopping done. Thank GOD for pennies from heaven so to speak. It was a helluva lotta work and my hands are sore and cracked, but ya gotta do what ya gotta do right? After Christmas is over I'll have time to get back into the
-
Big Ed photoetch set for the Revell 1/72 gato class submarine model! Terry
-
I have used gap filling superglue as a filler that can be scribed as long as you do it within an hour of hitting it with Zip Kicker. But are there any other putties/seam fillers that can be scribed without chipping? Terry Sumner
-
Thanks Steve. I found that it can be done with the EDIT button on a Full Edit. You have to go back to the very first post in the thread that you made to do it. I guess the reason I couldn't figure it out was because I wasn't going back to the very first post! Thanks again Bud! Terry
-
Just wondering if there is a way to change the second line of the topic. Terry
-
Getting some of the sub-assembly work done... Hosted on Fotki There are some nasty raised ejector pin boo-boos in the engine inlet and outlet areas that will be plainly visible upon assembly. These will have to be removed prior to glueup. Hosted on Fotki When I said before that the front of the fuselage had a big warp in it, I wasn't kidding! Here the left fuselage half is lying flat on my table and you can see how much the nose lifts up in the air!! Hosted on Fotki Hosted on Fotki That's all for now... Terry
-
Wow..I gotta say...I'm surprised at the number of replies this WIP has generated. Apparently there is more than a passing interest in a build of this airplane. Now I feel some pressure to git r' done and do it well. Terry
-
Well, since I have zero photos to use as reference for any of the interior, I plan on building with the door shut. Terry
-
Thanks Justin, I've been searching the net and I've come up with a number of photos taken both at Offutt and SAC Museum. In fact I got a couple of photos of the one in the kit decals that will help quite a bit. Should be an interesting paint job to accomplish. I don't plan on doing anything extra to the cockpit as you can't see very much of it through those 1/7-dinky windows. . Terry
-
I think you'll all be a bit surprised at my method. Terry
-
I'll give it my best shots! :) Terry
-
Thanx Spooky, Yeah I thought about the hot water and the hair dryer methods. I will probably try one or both of those techniques if the thing stays warped. But I don't think I'm brave enough to try the open flame method. I once built a 1/32 scale Hasy F-6F Hellcat. I scratchbuilt the entire cockpit and it came out beautiful. After applying some of the paint I set it in my small paint booth (that I USED to have) to dry. Well I had a 100 watt light bulb in the top for light. I guess I had the top of the airplane too close to the bulb because a short time later the airplane's fuselage had a sev
-
I know...it's the dreaded white gloss! LOL We'll get it though...my car modeling skills will get me there I hope.. Thanks much, Terry
-
Was asking some questions about decals for this bird on Jet forum and a fellow ARC'er asked if I would start a WIP on this one..so here is. Here's the basic mockup sitting on top of the box. The fuselage is really warped badly on the nose. I thought if I taped it all together for a while in the position it has to stay in...maybe it would conform more easily when it comes time to glue it together. Hosted on Fotki Here's the mockup next to the 1/48th scale F-86D Sabre. Man this 1/72 model is BIG!! Hosted on Fotki That's all for now... As always you can see my models on my Fotki site here..
-
Here's the kit..... Hosted on Fotki These are the profiles from the decal set, Eagle Strike 48-068. Going to do the bottom airplane, Miss Minooky. Hosted on Fotki Here's the decals themselves.. Hosted on Fotki Getting basics together.. Hosted on Fotki Cockpit in, fuselage glued together, nose on, weight in nose.. Hosted on Fotki The pit.. Hosted on Fotki This one is coming together nicely.... more to come I hope.. Terry Sumner
-
There are already 3 of these in the ARC Gallery...all 3 well done. But I will start a WIP Terry
-
That's cool! I'm sure I won't be ready to actually apply the decals until then. Maybe you could let me know when they come out and I'll be the first to order one or two from you? Thanks much! Terry Sumner tsumner@ct.metrocast.net
-
Yeah, that's what I'm finding. I may just cobble up some from various sources. Thank you much! Terry
-
Title says it...are there any EC-135C decals out there in 1/72 aftermarket? Terry
-
Man this sucks. A brand new Michael's just opened up near me and they aren't carrying any models at all! Terry
-

Question for anyone who has built the Revell F-86D
terrysumner replied to terrysumner's topic in Jet Modeling
Thanks guys, I ended up gluing the wings together. I will then glue the entire assembly in place. The dry fitting looked real good so it should be okay! Terry -
Did you glue the bottom wing to the fuselage first and THEN glue on the top wing halves? Or did you glue the top wing halves to the bottom section and then glue the whole assembly to the fuselage? I'm just wondering if you did the latter, how well were you able to get the alignment perfect and were there any issues with gaps at the upper wing roots where they attach to the fuselage? Right now I'm at that point on my kit and I'm thinking I may glue the bottom half first and then glue on the top halves in case there needs to be any lateral adjustments made. Terry Sumner
-
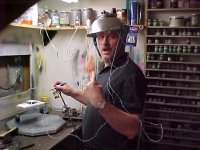
Okay, I know at the beginning of this thread the caveat was, "No cleaning of the bench prior to taking the photos." Well I didn't exactly clean it...I just got done building a whole NEW workstation. I built it in a 8' X 10' room in my basement over by the fuse panel. It's in a U- shape and everything is within arm's reach. The computer is ther along with TV, cable, DVD player, CR (yeah..still got one of those) and a small refirgerator. So I didn't clean it..I just haven't USED it yet to build anything...LOL But I will. Here's a few photos.. Hosted on Fotki The spray Booth Room. It's 5' X
-
1/12th scale 67 Corvette and 1/12 scale 57 Chevy! Terry