


dai phan
-
Content Count
1,669 -
Joined
-
Last visited
Content Type
Profiles
Forums
Calendar
Posts posted by dai phan
-
-
24 minutes ago, Sabrejet said:
Not odd: open slats; open speed brakes; separate control surfaces. Where to end? The aftermarket will do something I'm sure. I'm not a fan of open gun bays since they aren't ubiquitous. Open canopy, speed brakes or dropped flaps more so.
In my opinion, open gun bay is so prominent that I find it odd to forgo this main feature. Dai
-
Sabrejet, I find closed gun bays to be quite odd. Can you chime in? Dai
-
Hi all,
Honestly the F-86H like the P-51H is something not something highly desirable by the crowd. Correct if I am wrong or right. Dai
-
Hi all,
Great new release! But why on earth the weapon bays are NOT open? Dai
-
Hi all,
It was brought to my attention of the summer 2024 exiting release (at least for me) ! I hope this will not be a let down like the highly anticipated Ammo Mig-17 in 1/48 scale. Dai
-
12 hours ago, mike_45 said:
I'll be dam !!! Dai
-
Hopefully the final photos will be posted along with my Pros and Cons assements here soon. Dai
-
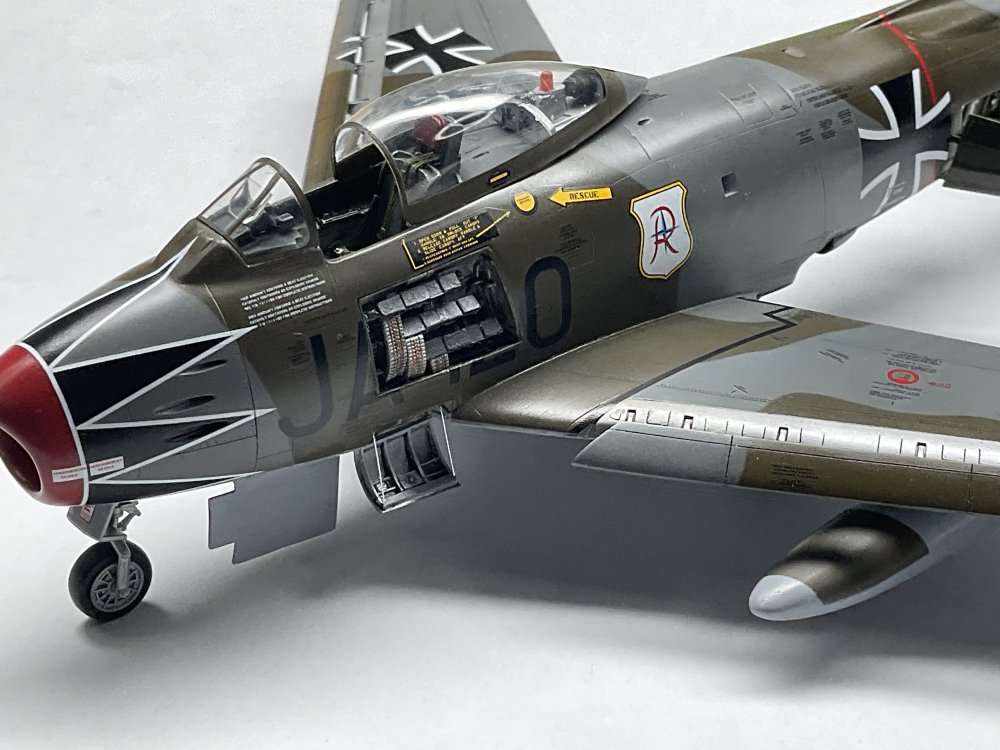
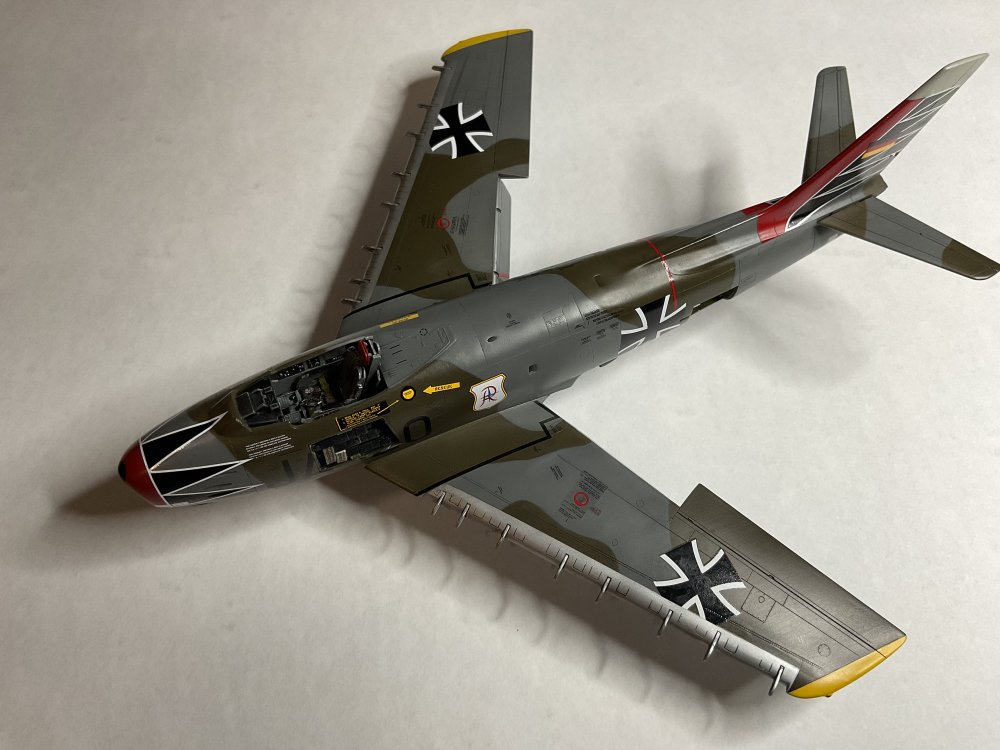
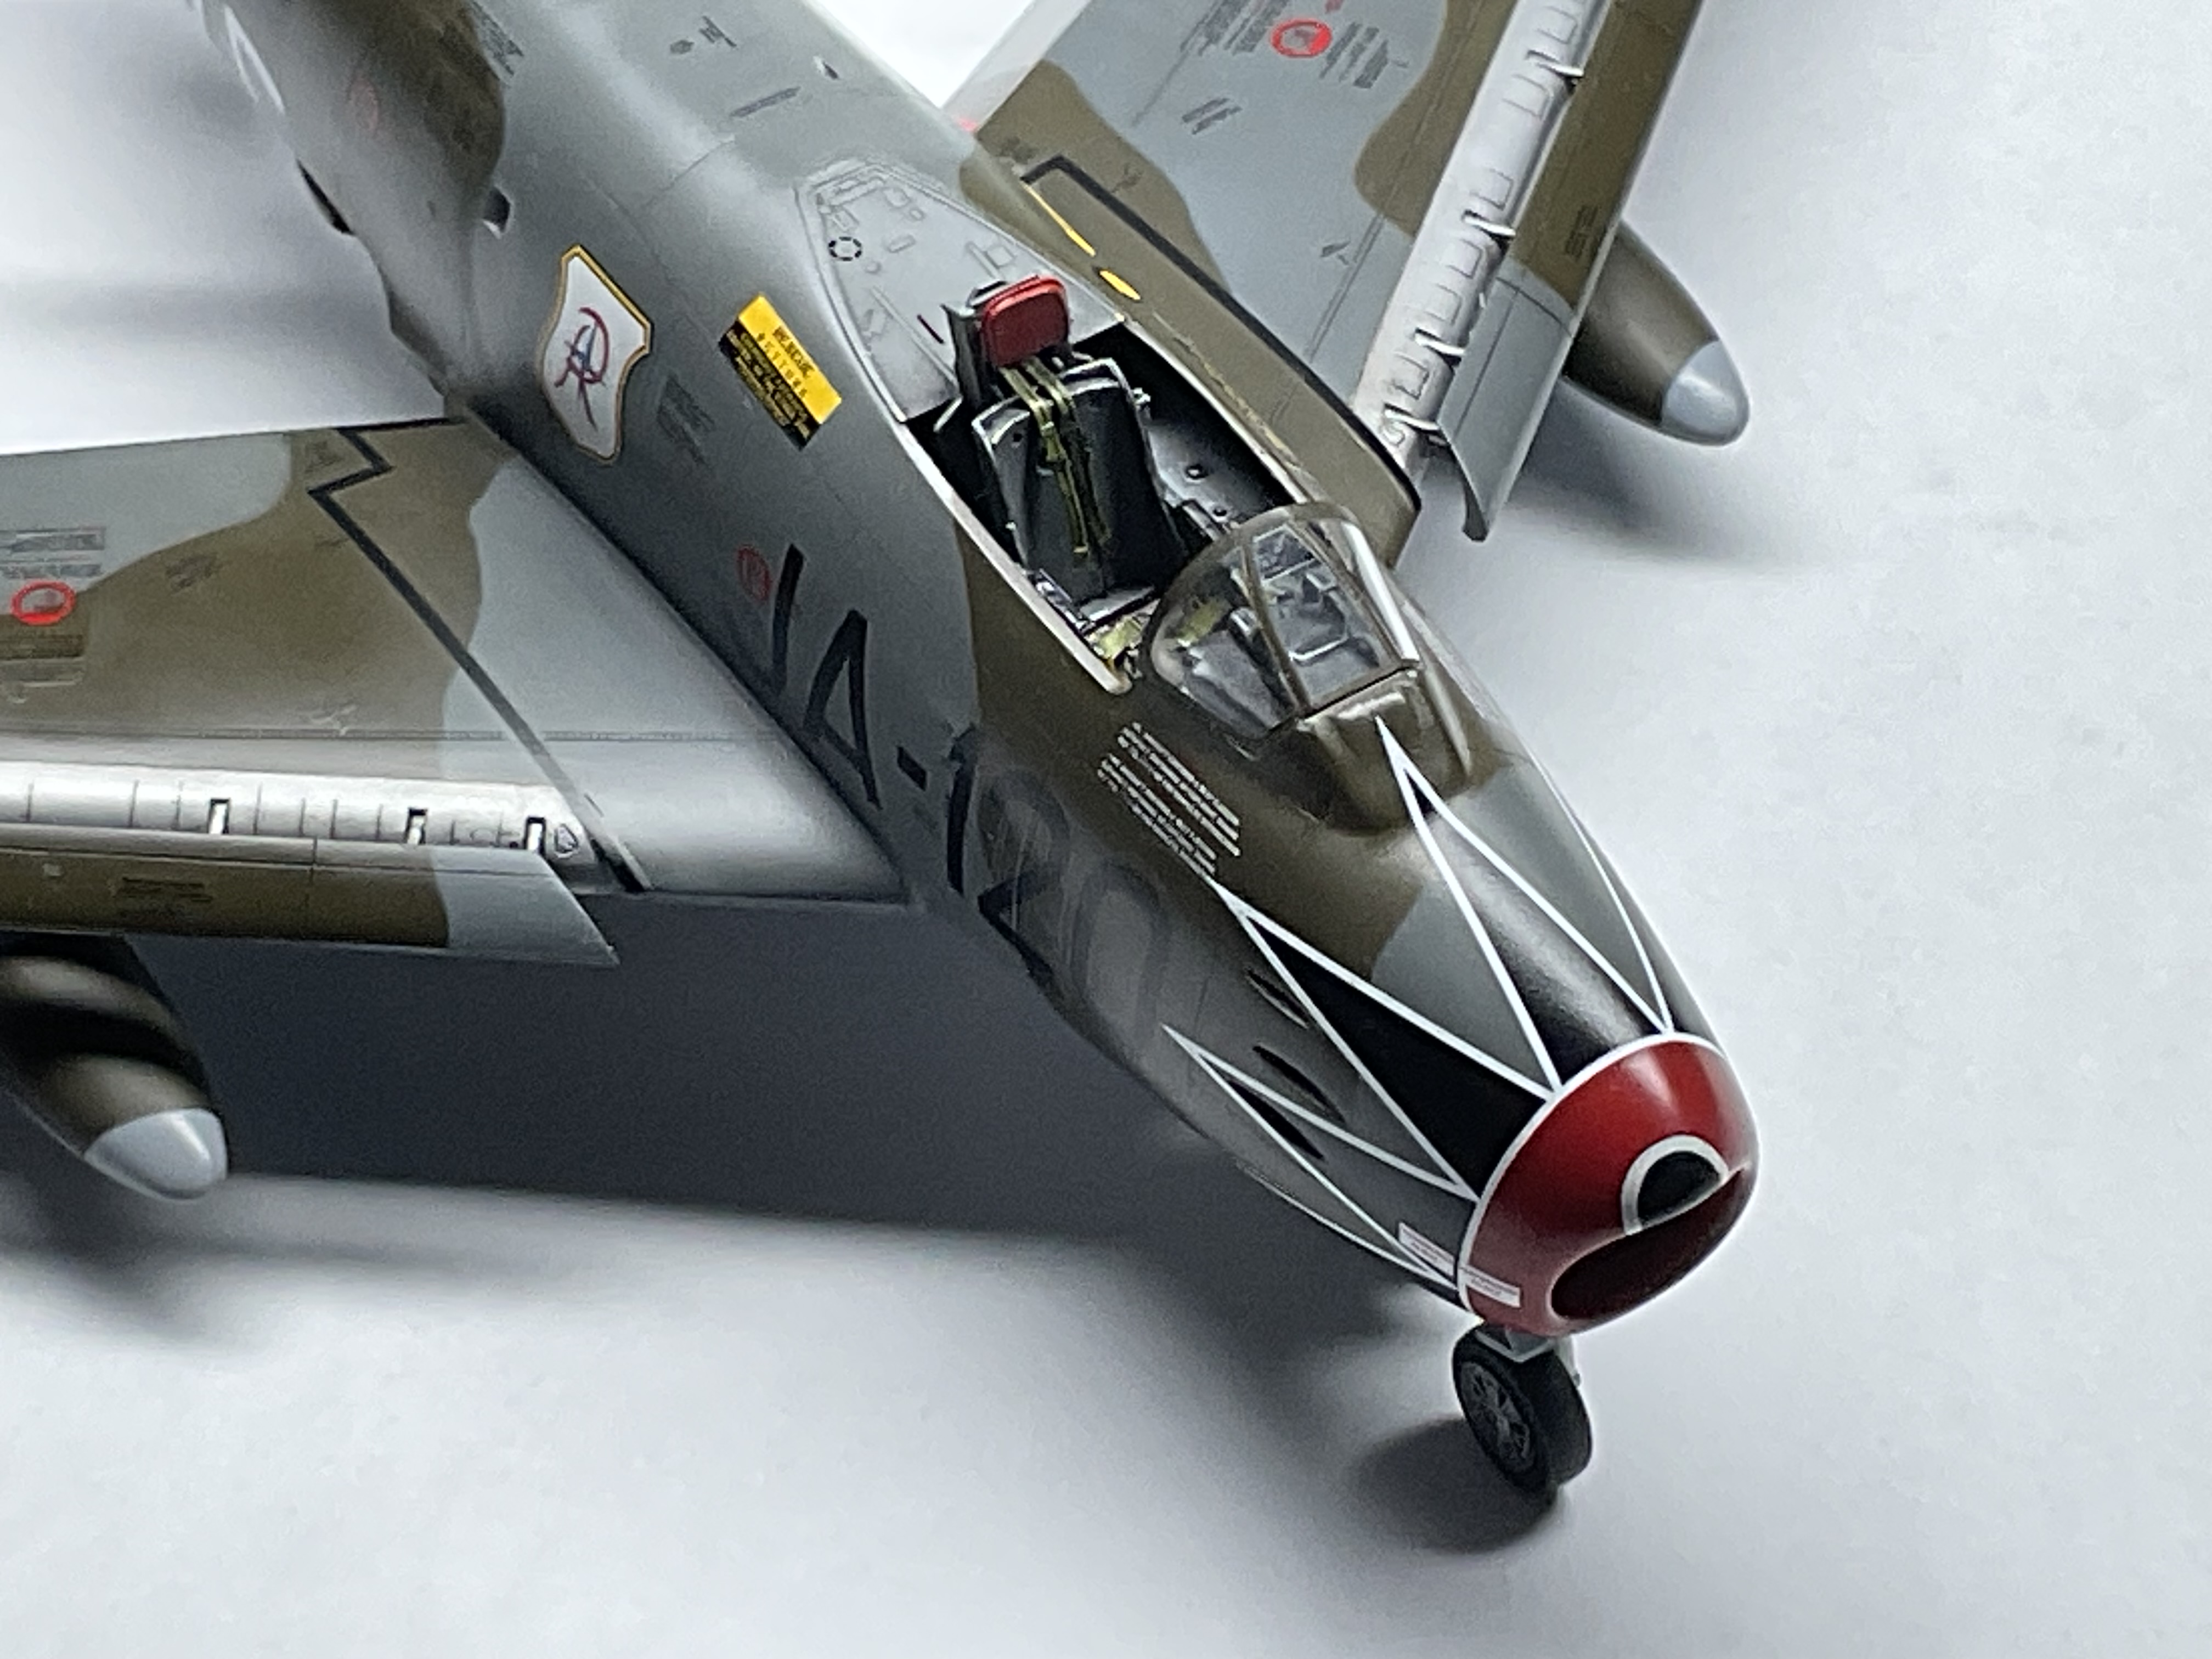
Hard to paint white border of the black nose came from Hasegawa Luftwaffe MK 6 kit. I used New Ware mask to paint the black nose. One regretable thing is the thickness of the Eagle Strike decals. Really a let down considering how thin their other offerings were. I think this must be an old release. Dai

-
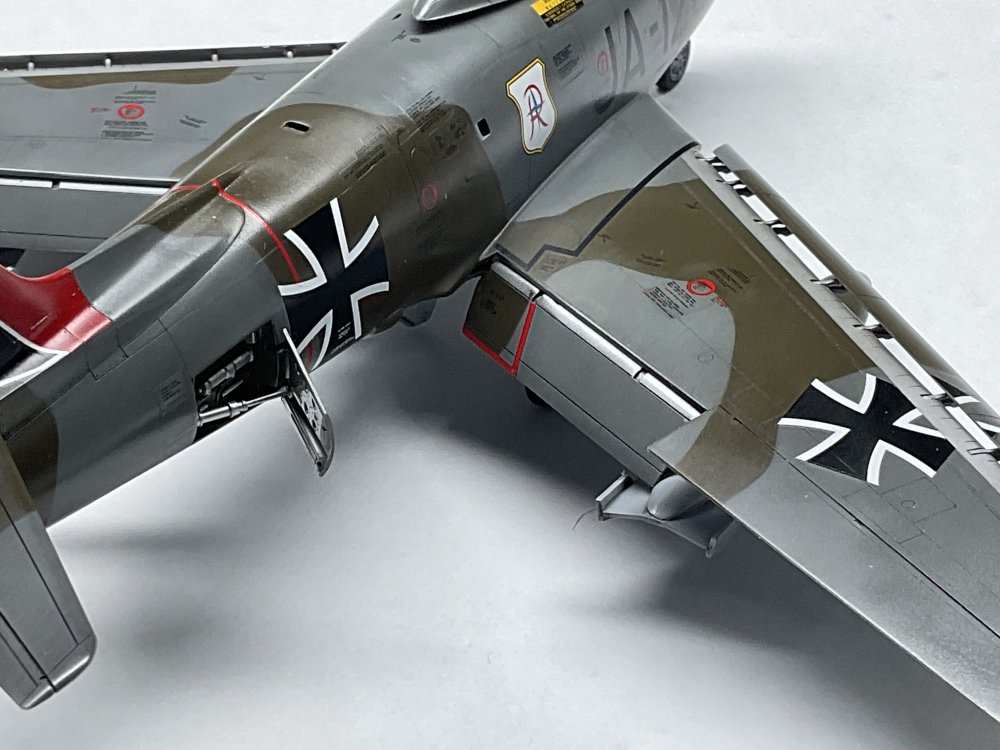
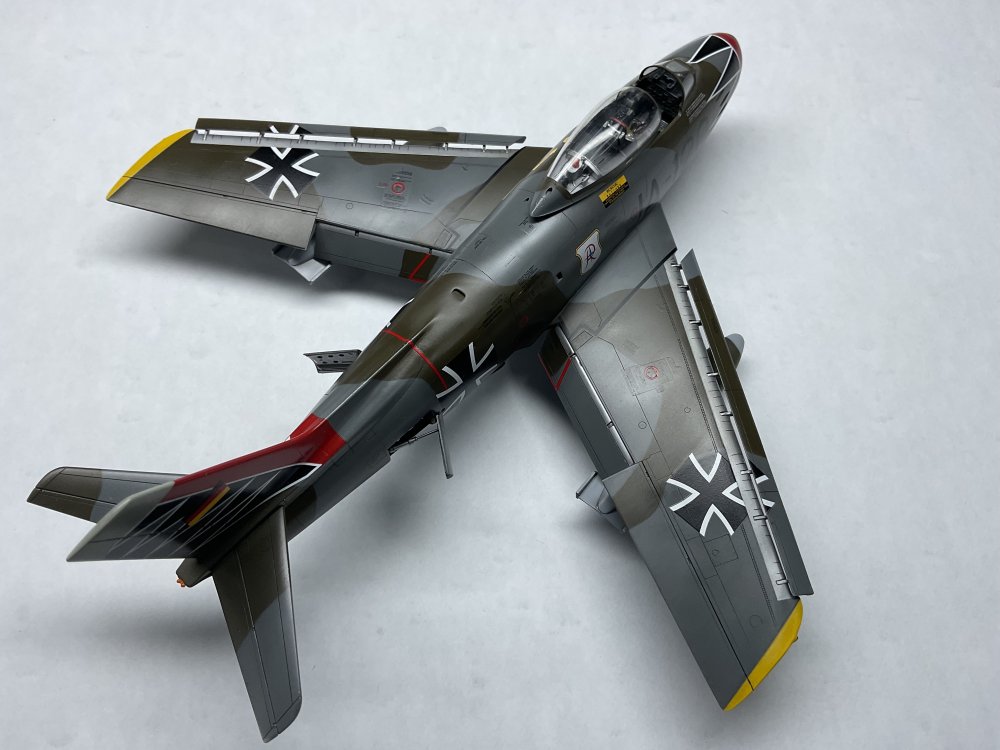
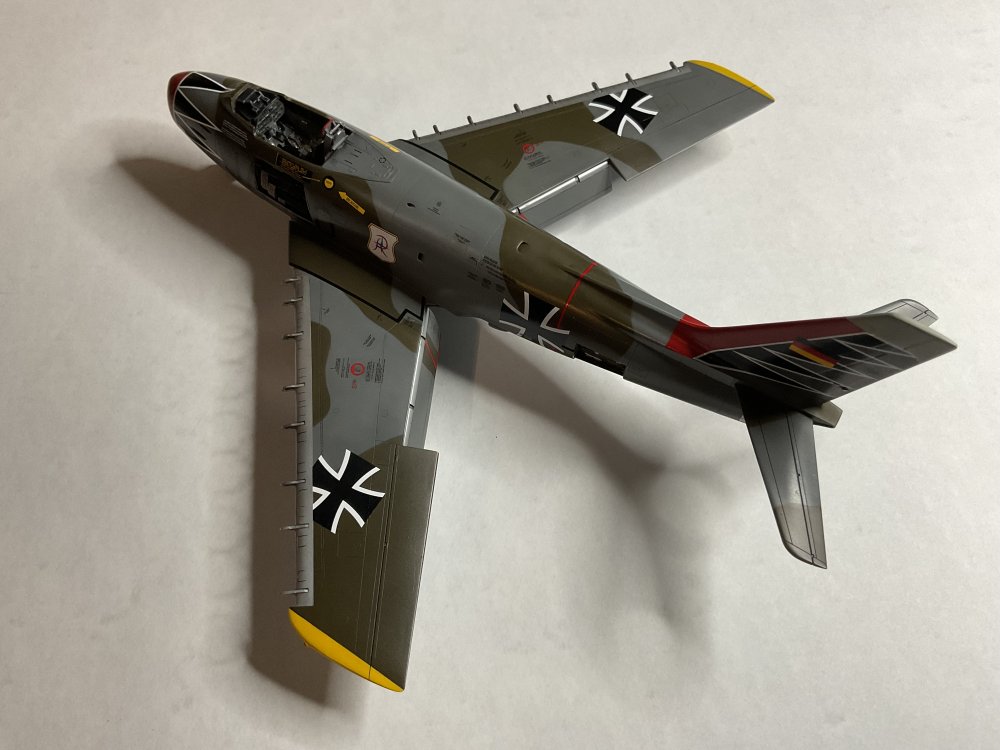
The speed brakes were angled down by shaving the top tabs. The fuel tanks were moved inwardly per advise of Tony. The thing that I wish I have the skill for is to scribe fuel filler cap onto the right side. The wing tips were from the kit's discarded sections. Resin wing tips supplied by Hasegawa were undersized in thickness and virtually useless. Dai
-
The flaps are beautifully done like 3D quality. Dai
-
Greetings,
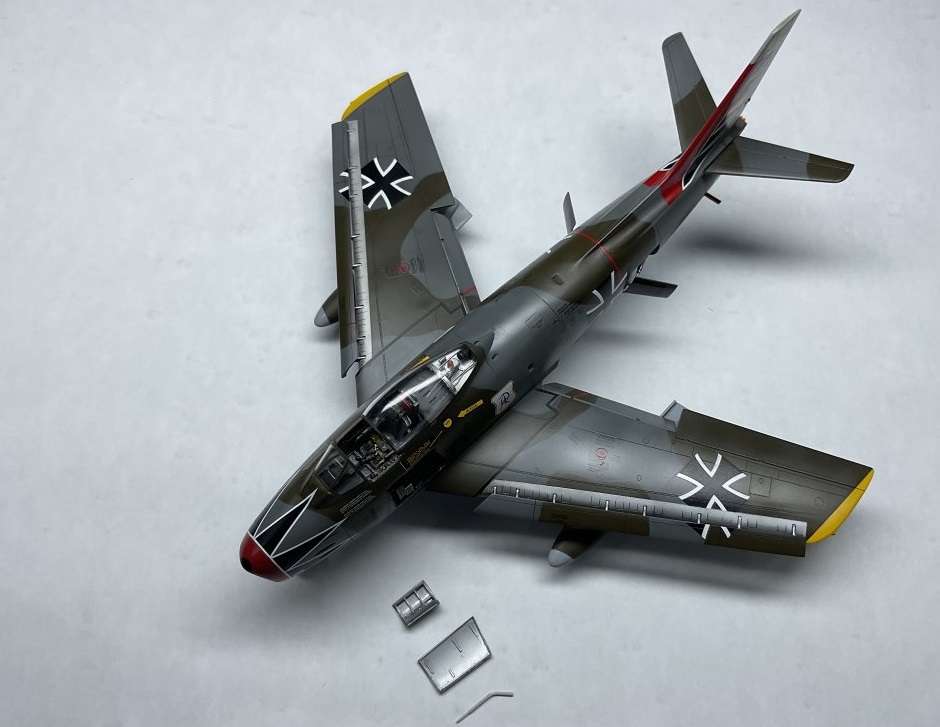
Some close up photos to indicate what were added to the kit and its conversion done to the F-40 to make a MK 6 to my best ability... The left side sports the vintage Verlinden gun bay and ammunition bay. The ammunition belts come from Legend set as the Verlinden's is too wide and less detailed. Oddly the ammunition bay does not have the ammo casings. The vertical strings are easily made from painted stretched sprues. The deck behind the seat (with the orange light) is also from Verlinden that is more detailed than the kit's. The base is the PE from Eduard cockpit set. A must as this area is bare on the kit. The seat is from Aires. The slats are from KSL and beautifully casted. They are casted but very detailed like 3D printed. You can also see the fuselage vents. These are not simply rectangular square holes but have the angled ramps. You can see on my earlier thread how it was done under my limited skill. This is a very distintive feature of the MK 6 and cannot be omitted. Dai

-
Hi all,
To be fair I have seen companies putting out the same stuff ad nauseum although there are already plenty on the market. Eduard just put out the P-51B Mustang like we already do not have enough already. But then there are companies that put out models that me wonder what's up with their thinking like 1/48 LA-15 or 1/48 Yak -15 ! Dai
-
37 minutes ago, lgl007 said:
Wonderful build! Stunning 🙂 Thanks for sharing the whole process... really enjoyed it!
-Greg
Thank you so very much. This so far has been the most time consuming project as there are many resin add ons (Verlinden gun bay/ammunition bay, KASL slats and flaps, Aires seat and AMS sugar scoops) and modifications of the airframe and wings. Learned quite a bit on export Sabres. Dai
-
Howdy all,
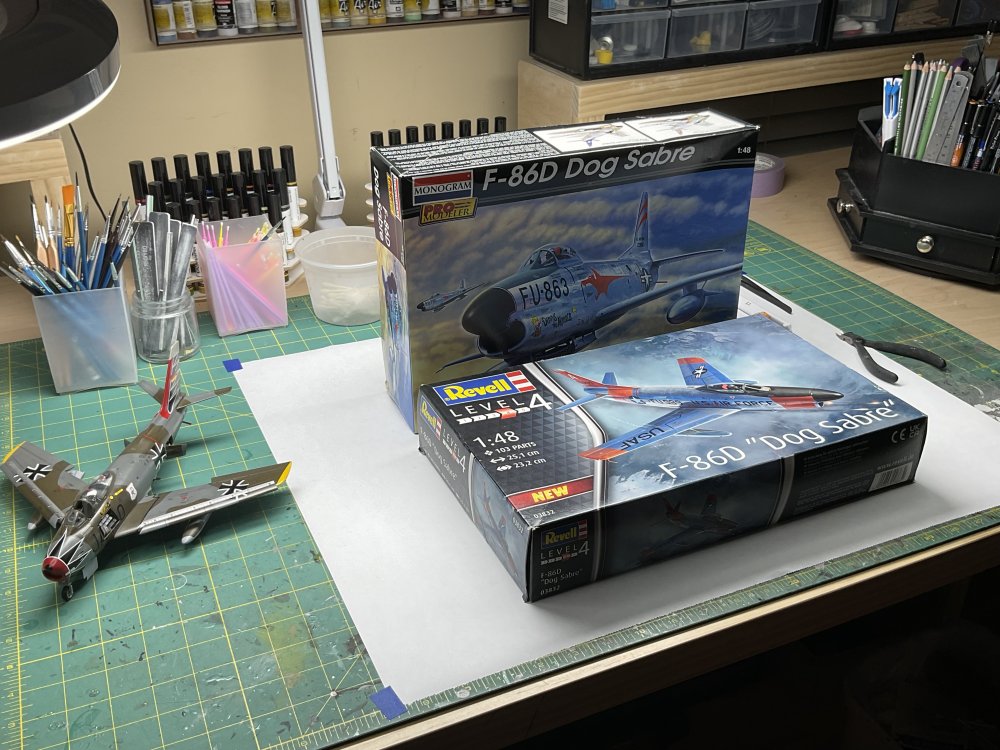
With the F-86 project coming to a close, I will start on this project this weekend. The Revell and Promodeler kits differ in the early or later brake chute types. I will have to look into the decal sheet to determine the correct variant. Dai
-
Hello modelers,
This project is coming to a close. I still have to install the pitot tube and the ammo door. Hasegawa calls for the clear mirror part to be installed on the canopy but it is not included on any of the kits? The white metal pitot tube supplied by Hasegawa Mk 6 version is so poorly detailed and cannot be used. I use the standard F-30 tube. The tanks are glued via white glue in case I need to reposition them. Verlinden provides the ammo bay but no ammo casings. Will look into other resin kits to see if I can use them instead. The decals by Eagle Strike is much thicker than what I used to see from them. As such when doing a wash be extremely careful that you do not trap the wash at the clear carrier film. I hope someday we will see dry transfer technology that will virtually wipes out carrier film with good predictable result. Will do my usual Pros and Cons once the final photos are posted. Thank you all for the help on this long project. Foreign export Sabres are not simply the standard Sabres in different markings. They are different birds in surface details. Dai
-
Hi all,
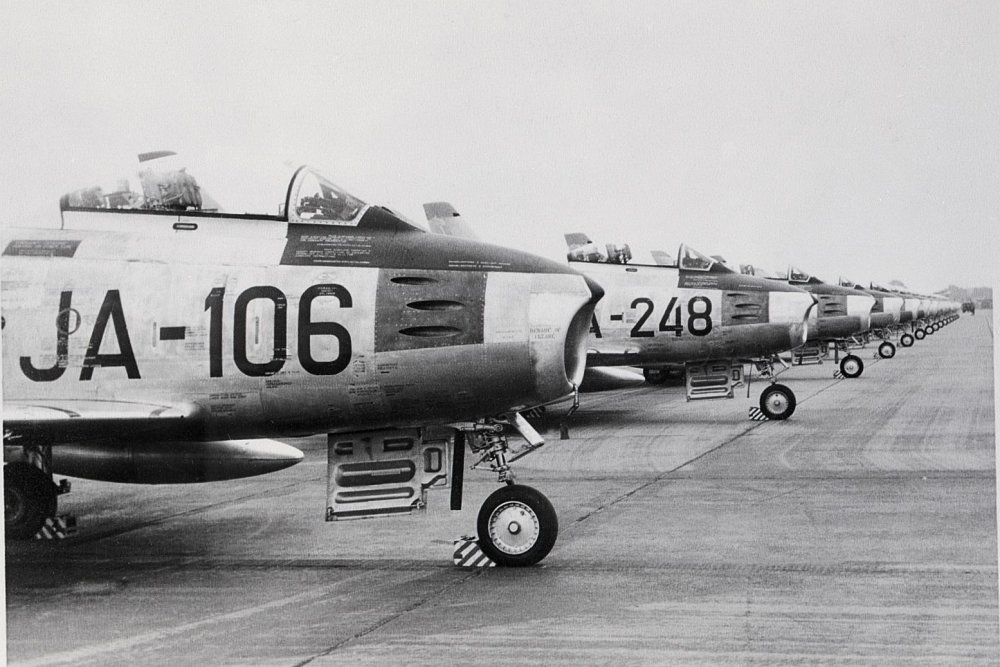
From time to time I keep reading " Hey, if you make this model or a version of this model, be prepared to print money !". But yet model companies are mum on these suggestions. One example is F-86A which is highly desirable by modelers in any scale. But still no one is jumping at this "print money"thing suggestion. Are model companies seeing something that we modelers do not see? That is why they are not jumping at this printing money thing ??? Dai
-
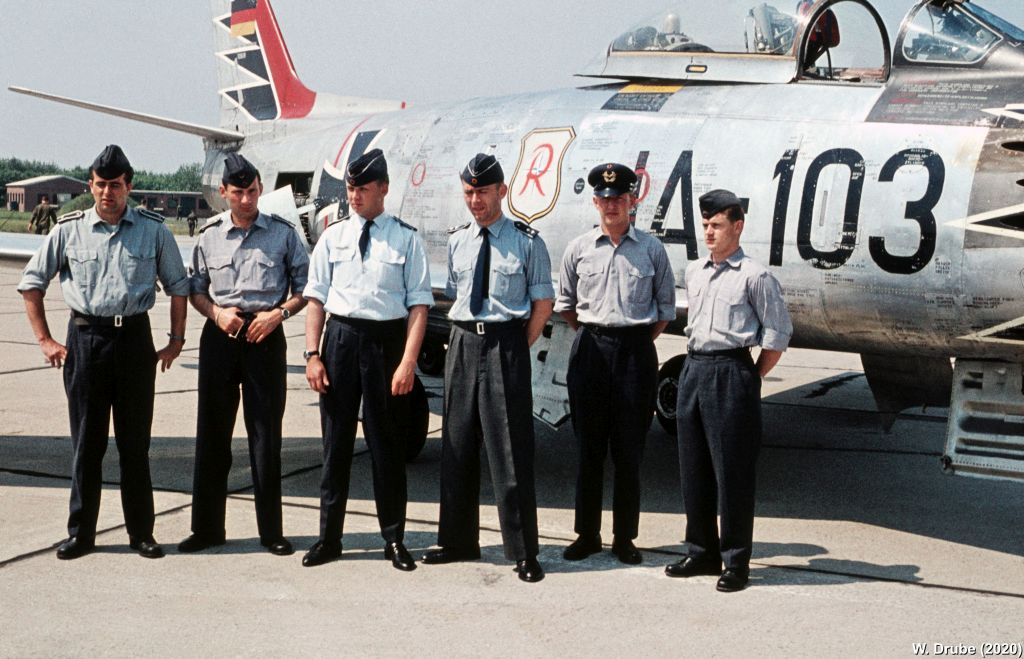
Hi all,
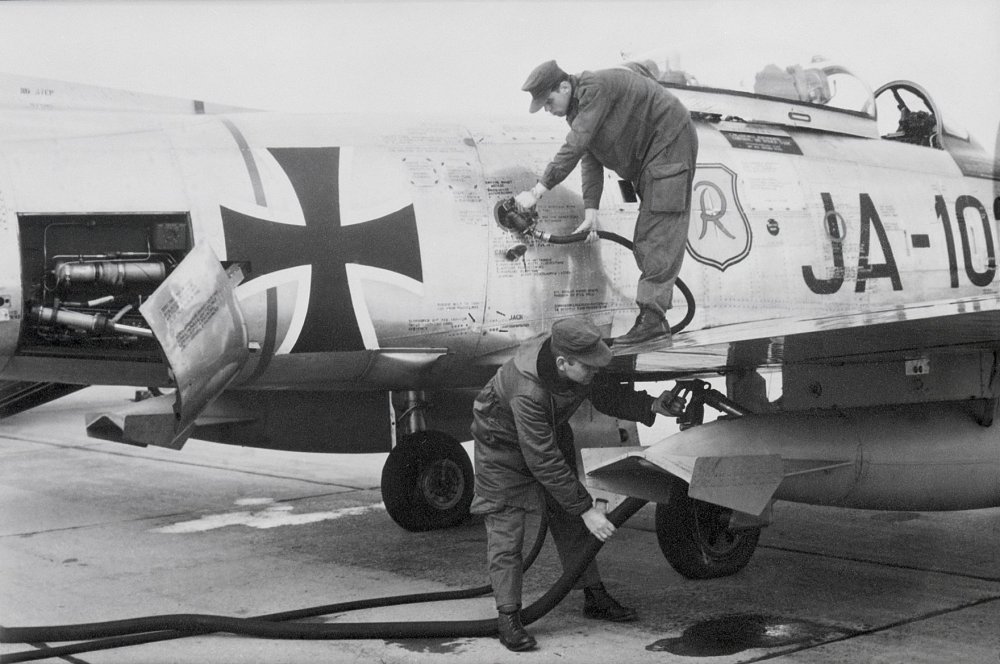
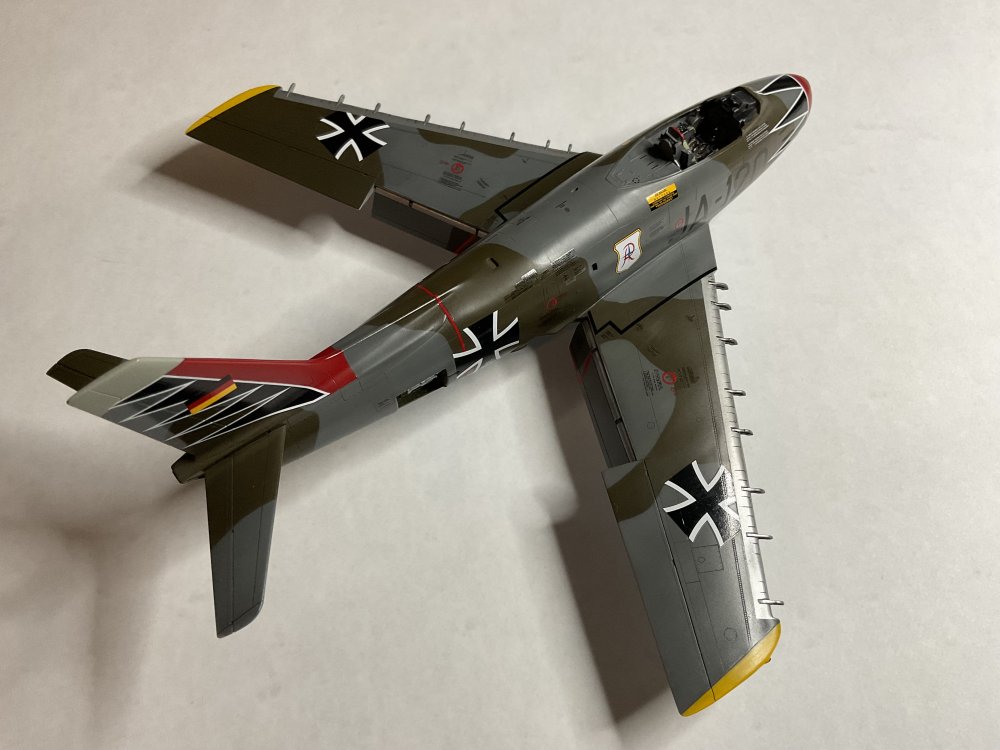
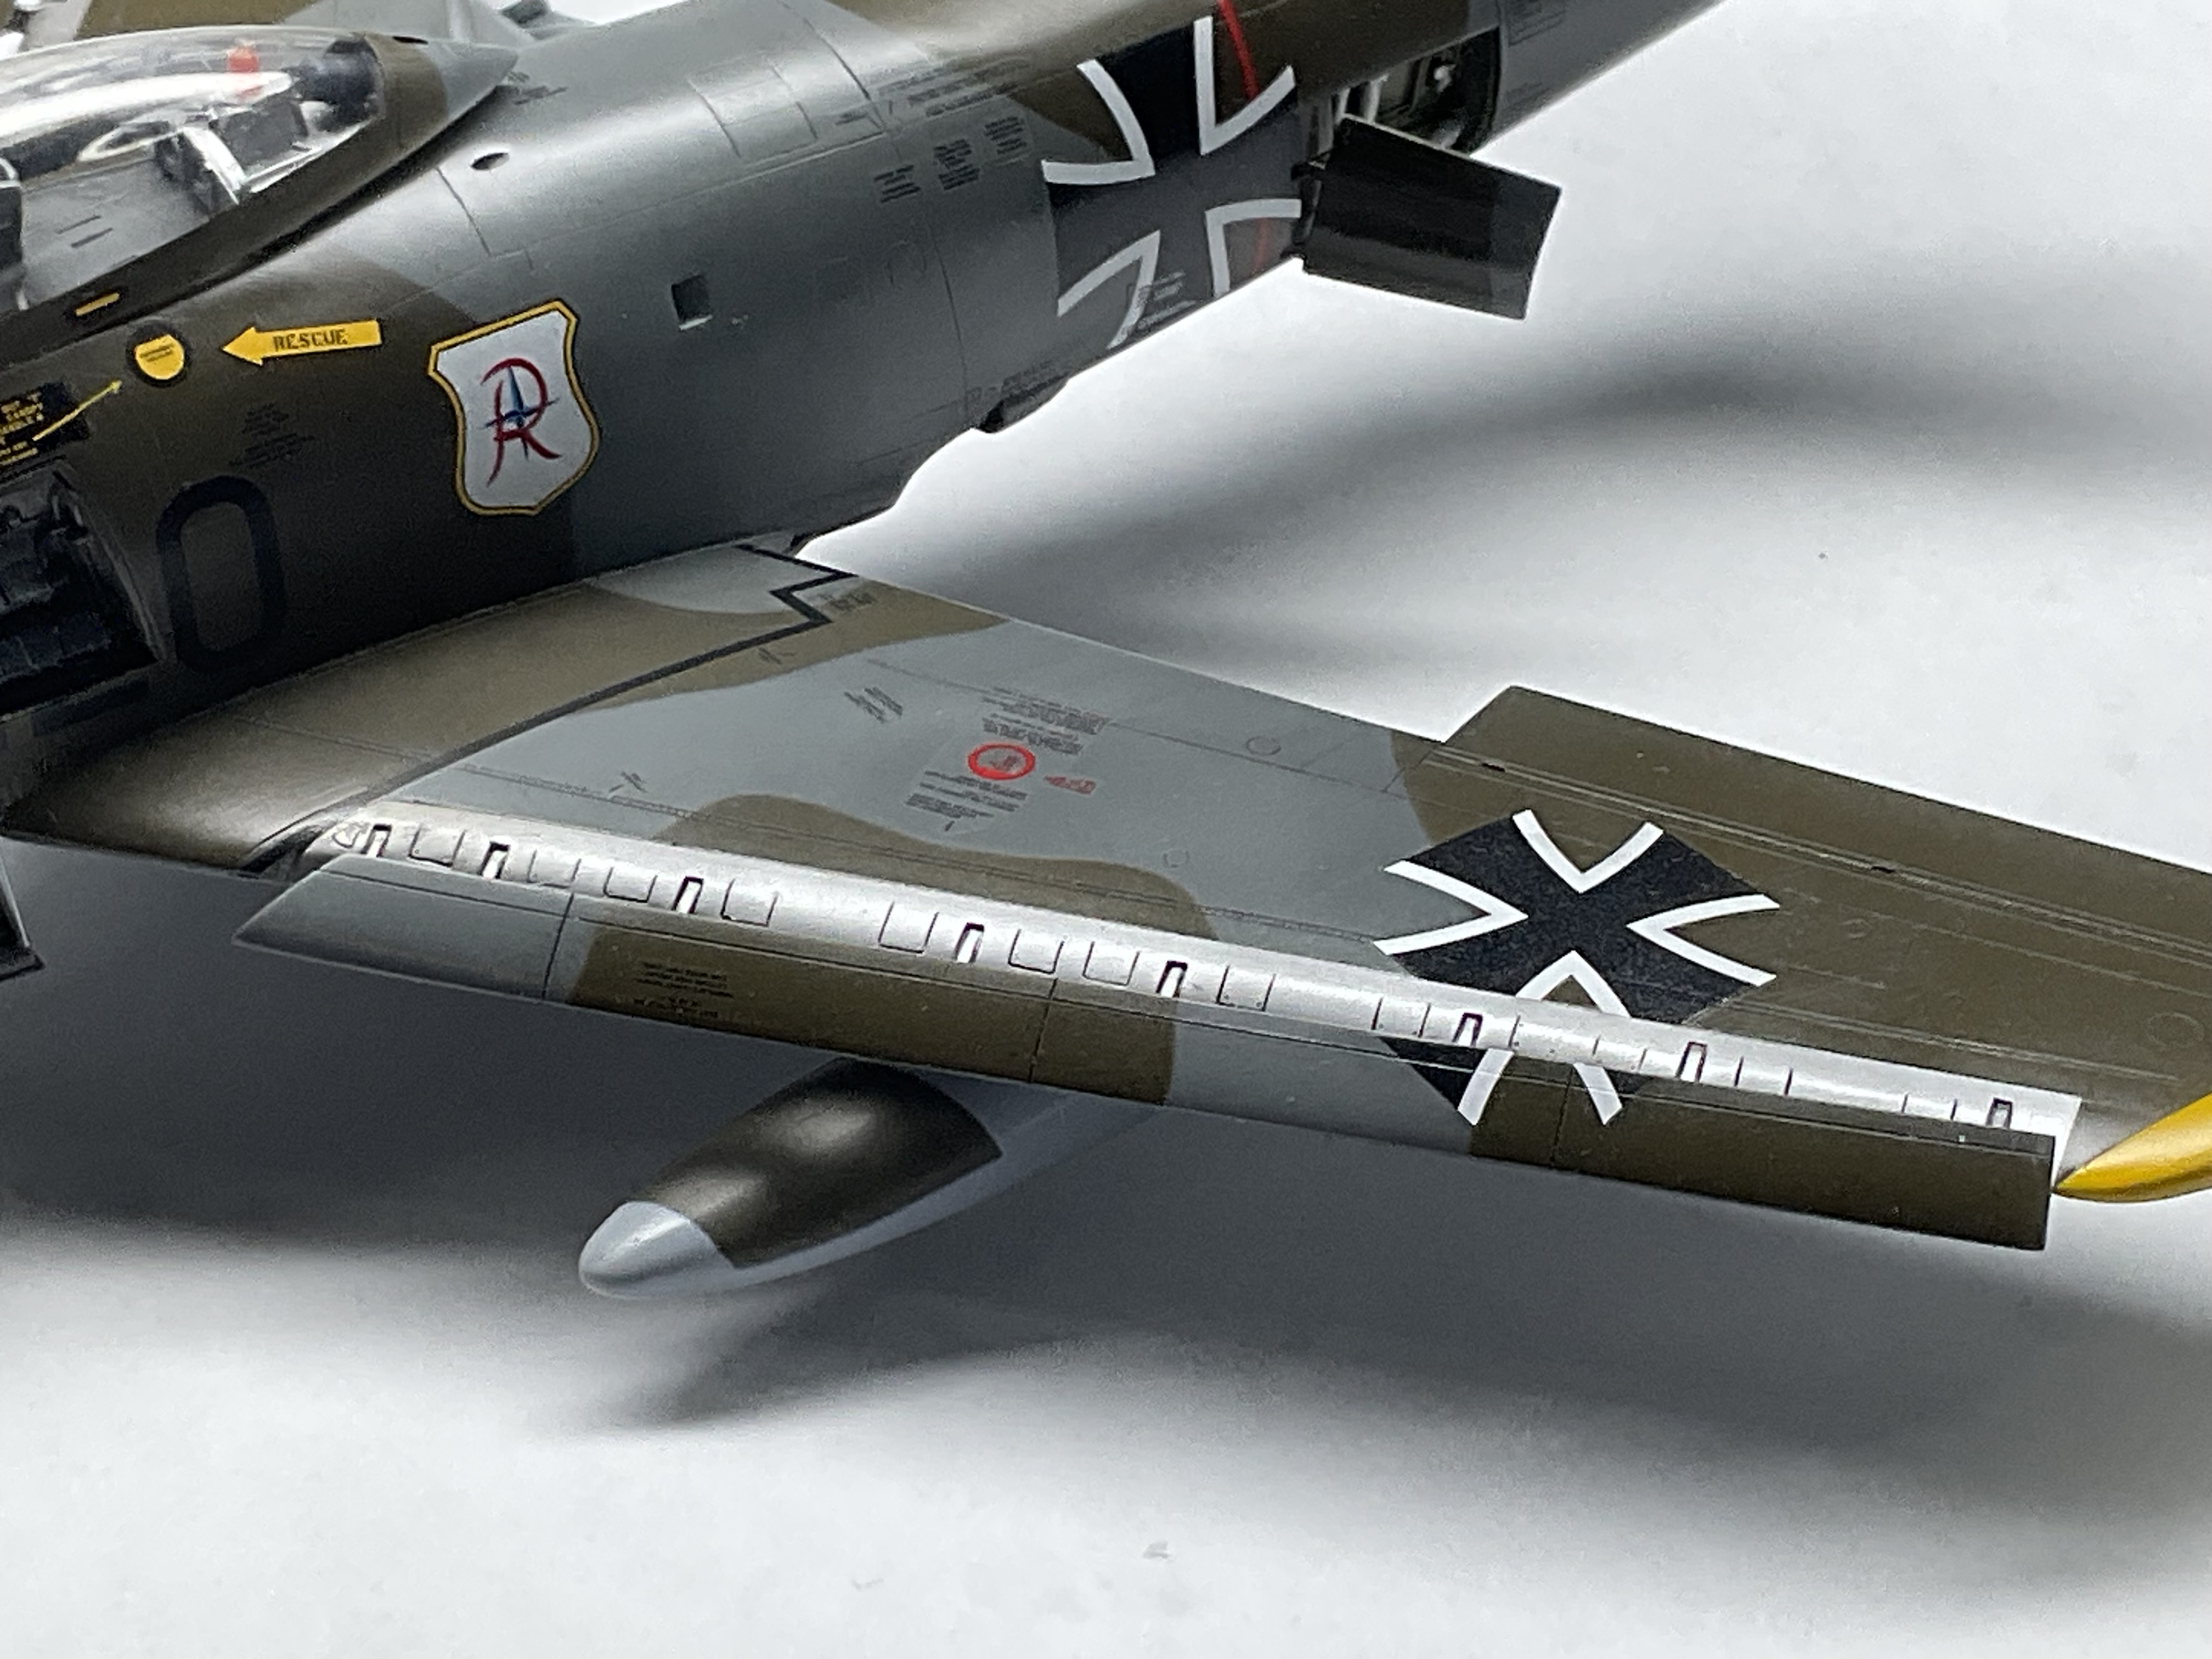
Another consideration is the correct placement of the red fuselage band. Decal companies tend to get the decal placement incorrect so this is a good example on where it should be placed. Dai
-
Hi all,
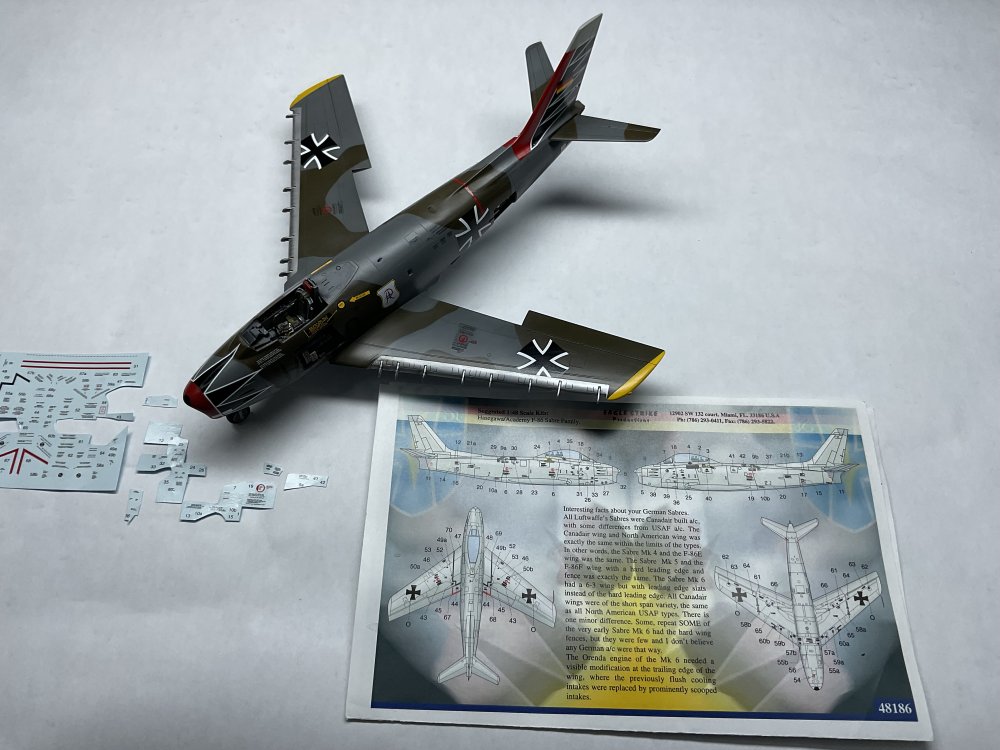
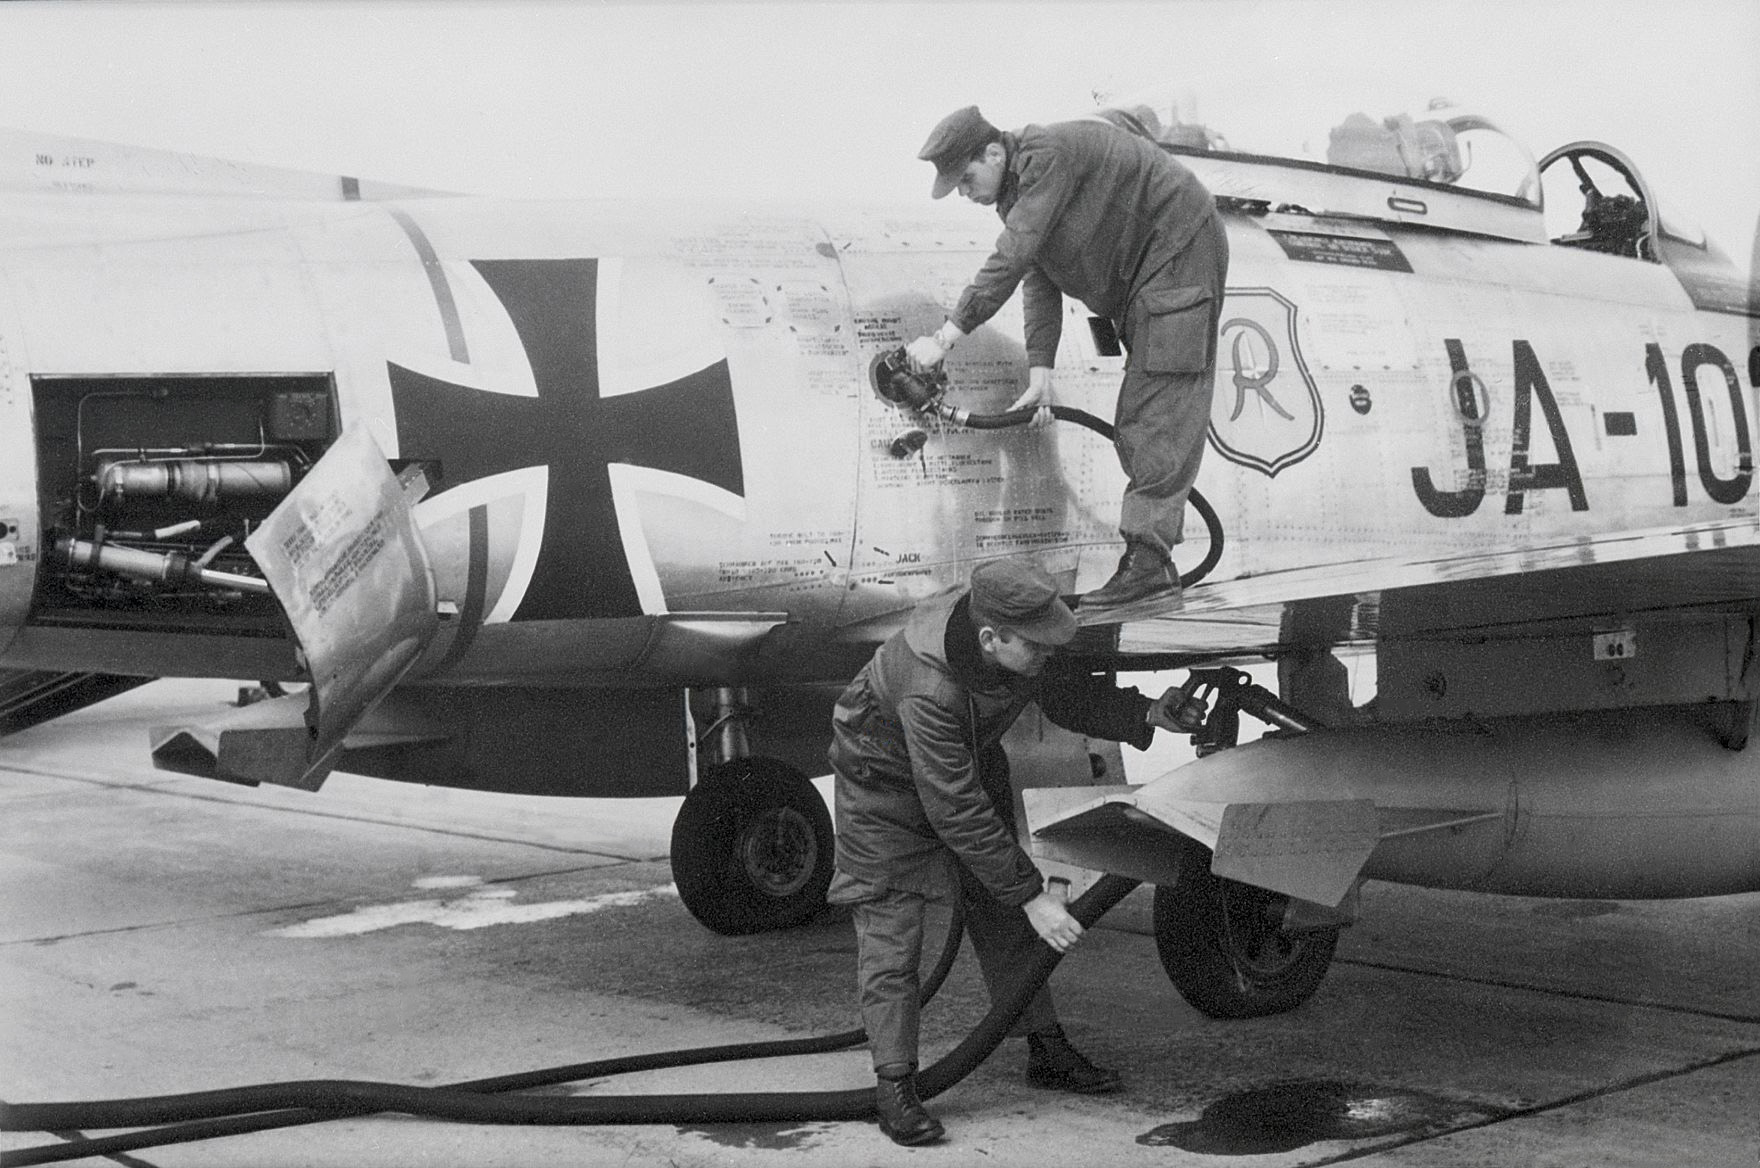
All the stencils supplied by Eagle Strike and others are not quite correct as they are printed in black rather than white and black. The letterings when applied over black background should have white letterings so the crews can read them. Something to consider if you are in absolute accuracy. Dai

-
Hi all,
The clear coat was applied. To my dismay, more cracks start to appear on the fuselage. The plastic is getting old and starts to deteriorate. Buy Academy kit ! Dai
-
Dai Phan
100 Windermere Village Way
Blythewood Sc 29016
-
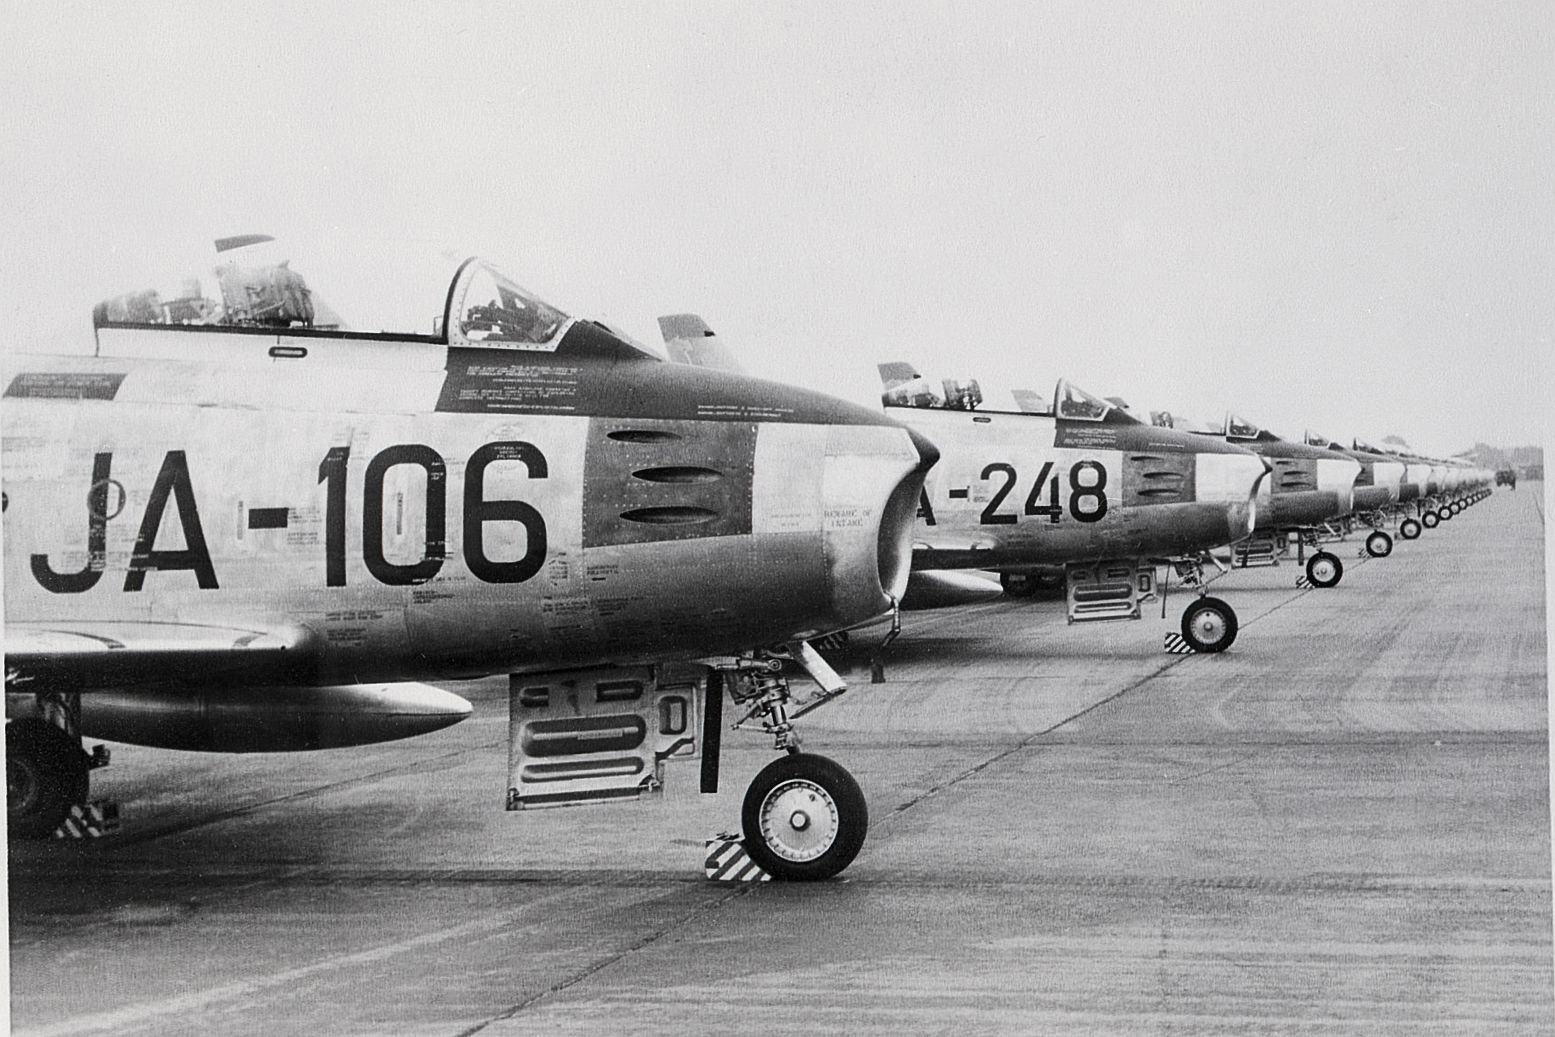
Hi all,
The Luftwaffe Sabre JG 71 is among the most colorful birds of the foreign exports. Getting accurate camo pattern for your project is quite challenging as there are wide variations of the interpretations pending on the painters. Your mercy is at what photos you can find. The Eagle Strike decals give you a nice compliment of stencils. However note the Hasegawa F-40 is NOT the MK 6 so the panel lines are not correct throwing you a curved ball when appliying stencils decals. Dai
-
Hello everyone,
The decal application is completed and tomorrow will be clear coated. If you plan to add slats to make a foreign Sabre, I strongly advise you to use the Academy instead of the Hasegawa kit. The gun bays are there already so you do not have to fight with the resin bays to make them fit with the kit's cockpit tub. The biggest thing is the quality of the plastic. Old Hasegawa Sabre kits tend to have hairline cracks just from handling. I had to fill, sand and repaint from 7 cracks throughout the fuselage that appeared AFTER the whole plane was painted. The plastic tends to become very brittle as it ages. The KASL slats/flaps are designed with the Hasegawa kit but since the Academy kit is nearly identical, I see no issues here. Dai
-
Hi,
I would like to buy:
Scobie 1/48 F-86 narrow chord slatted wing conversion for Hasegawa or Academy $20. Please send PP invoice to drdaiphan@yahoo.com. Thanks Dai Phan
-
Greetings,
Lots of stencils to apply. Dai


HASEGAWA F-86 MK 6 1/48 WITH KASL SLATS/FLAPS, VERLINDEN GUN BAYS, B&B RESIN DESIGN (AMS) SUGAR SCOOPS AND AIRES SEAT.
in In-Progress Pics
Posted · Edited by dai phan
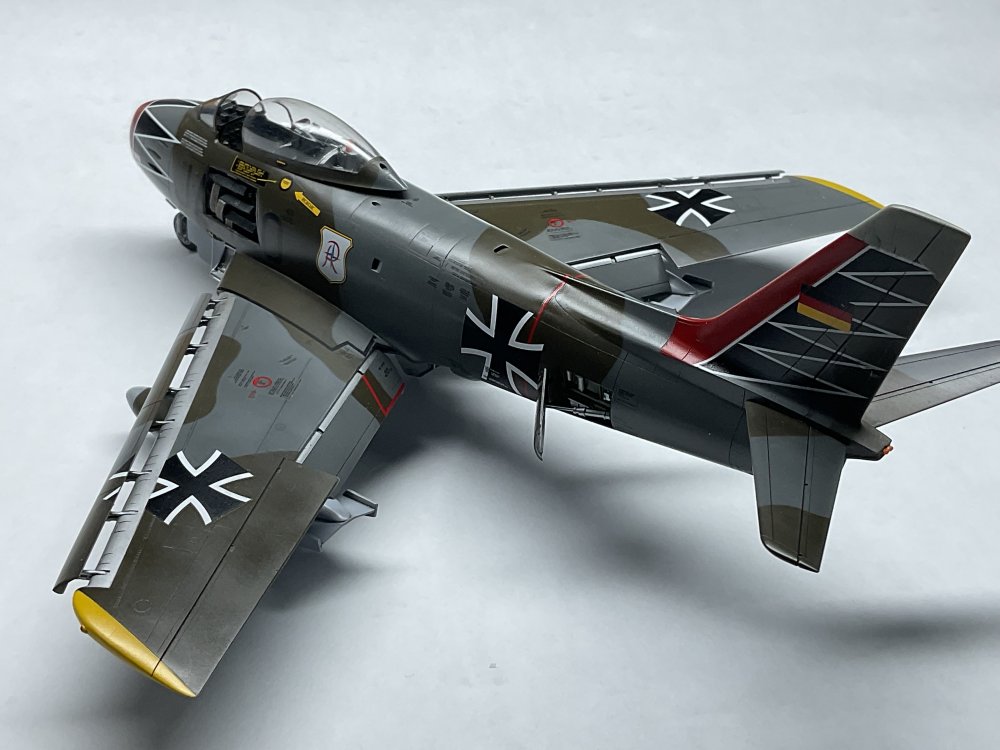
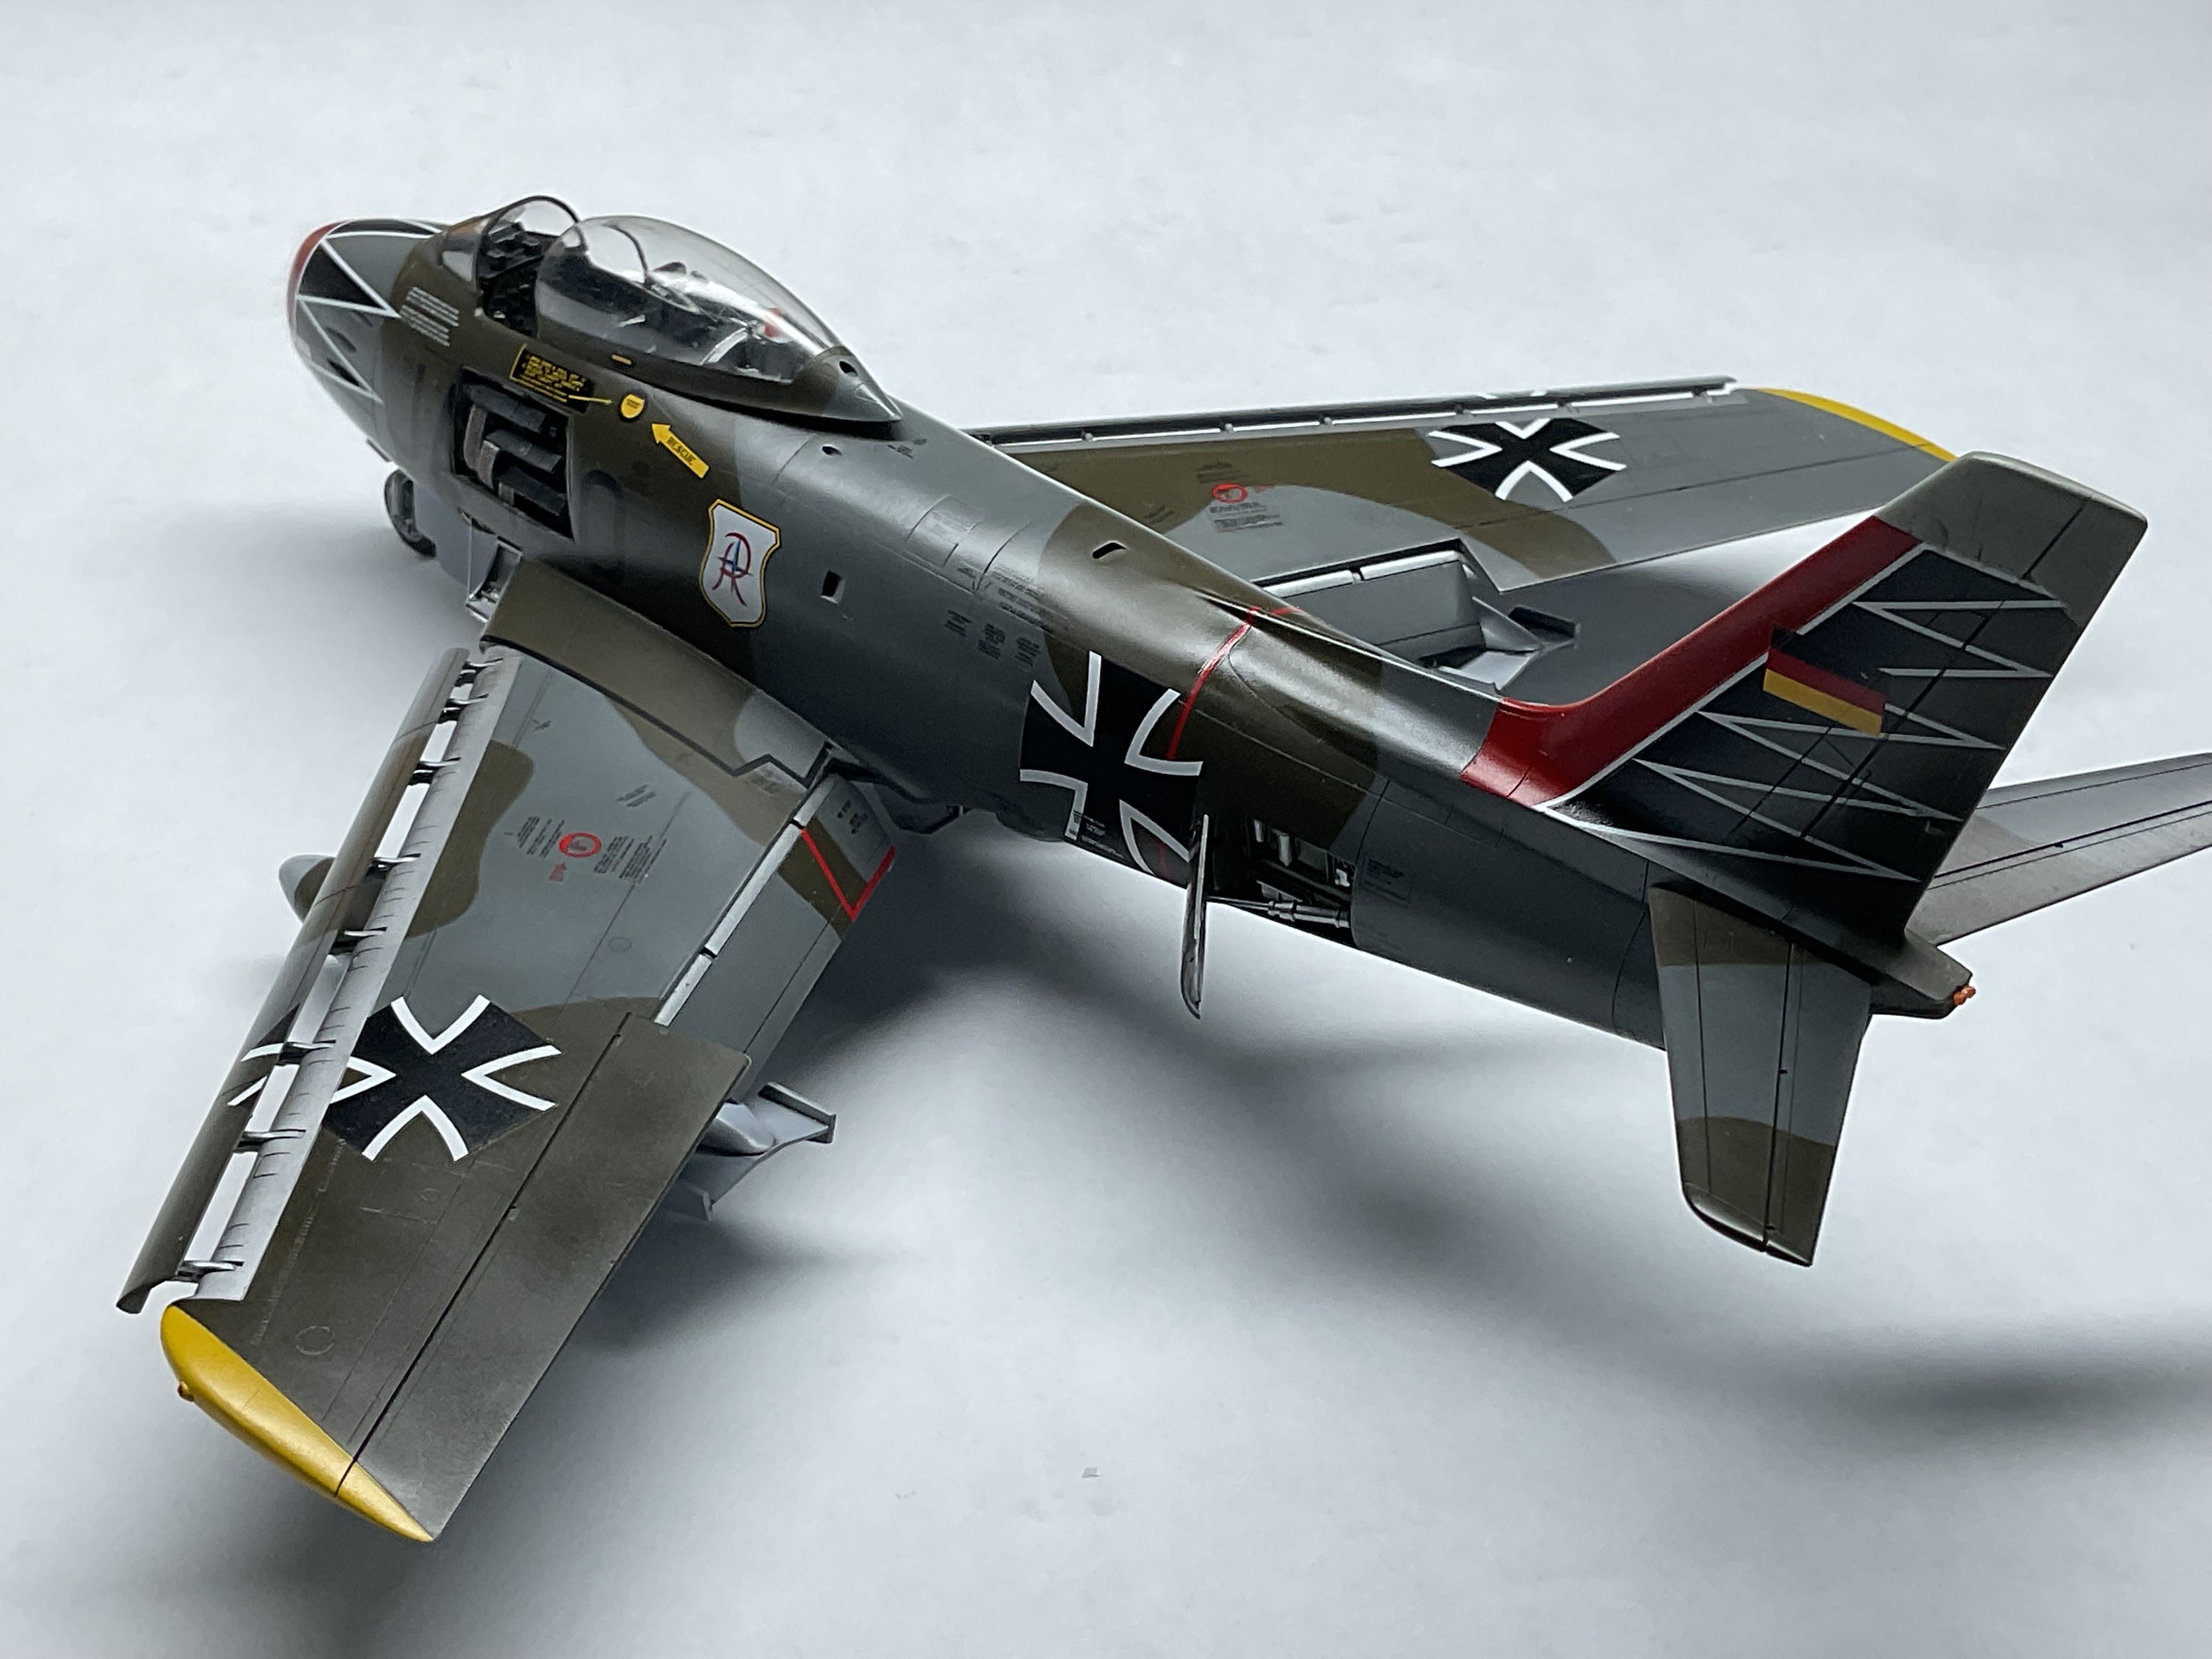
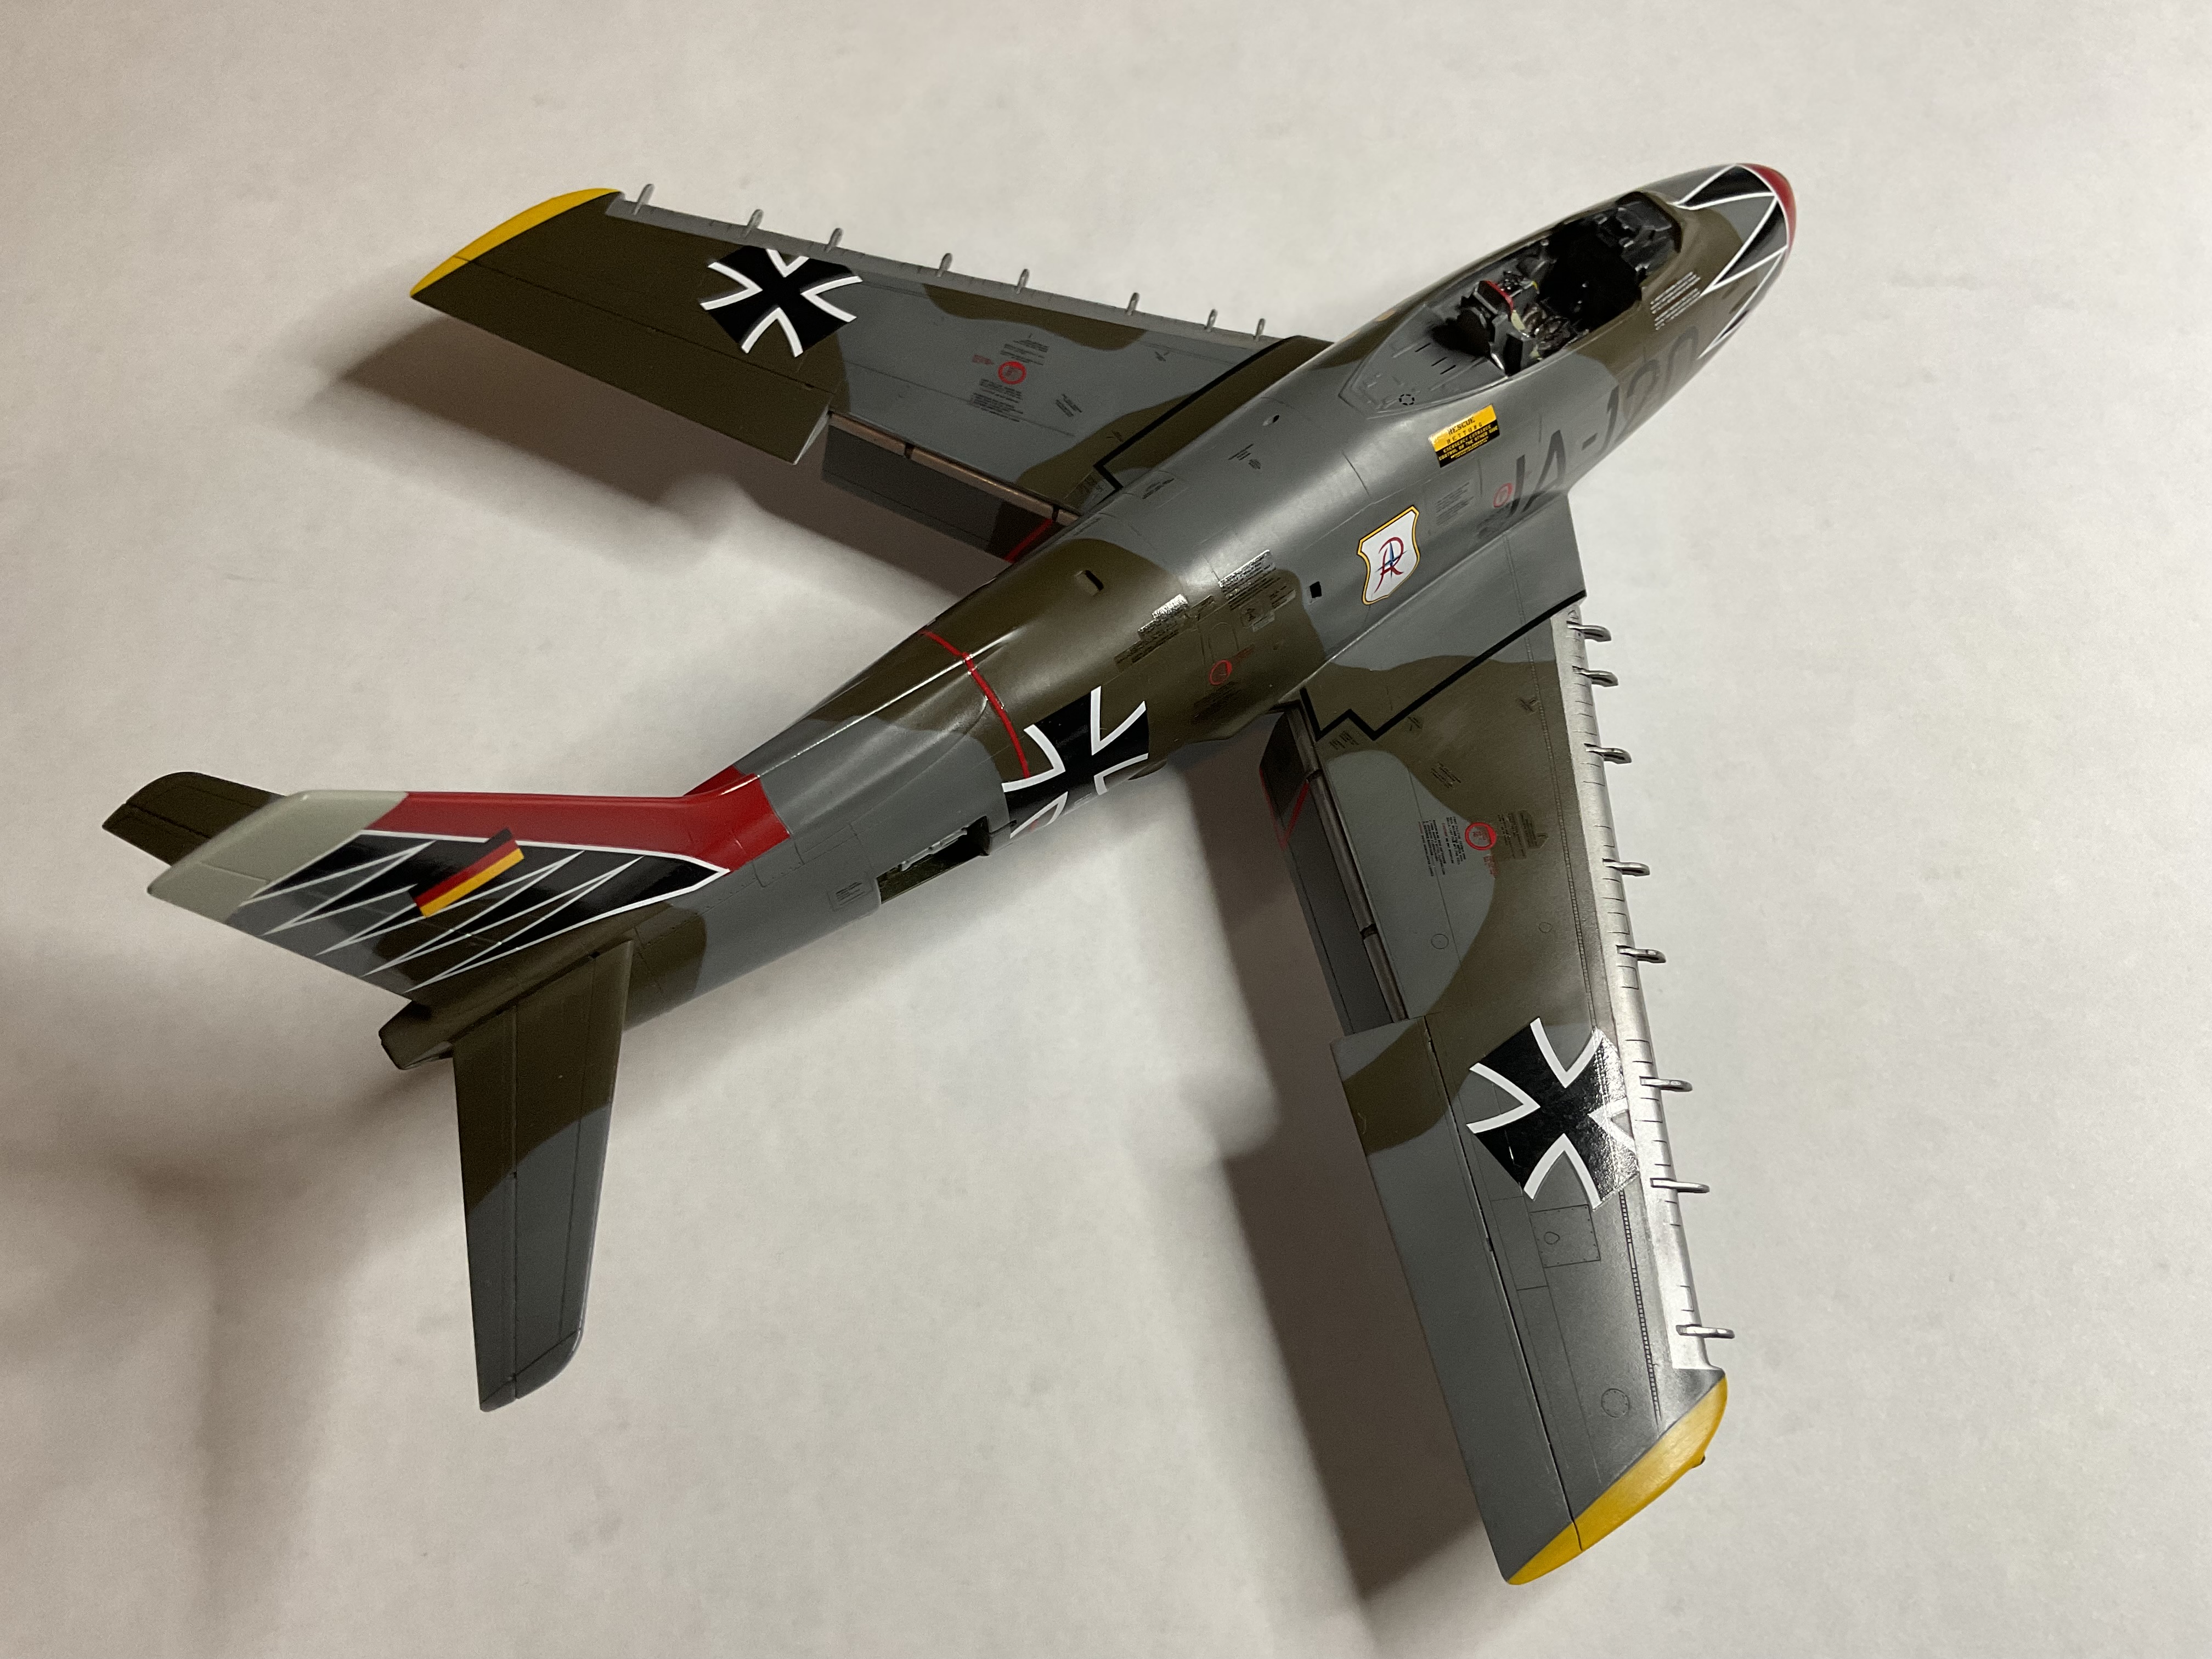
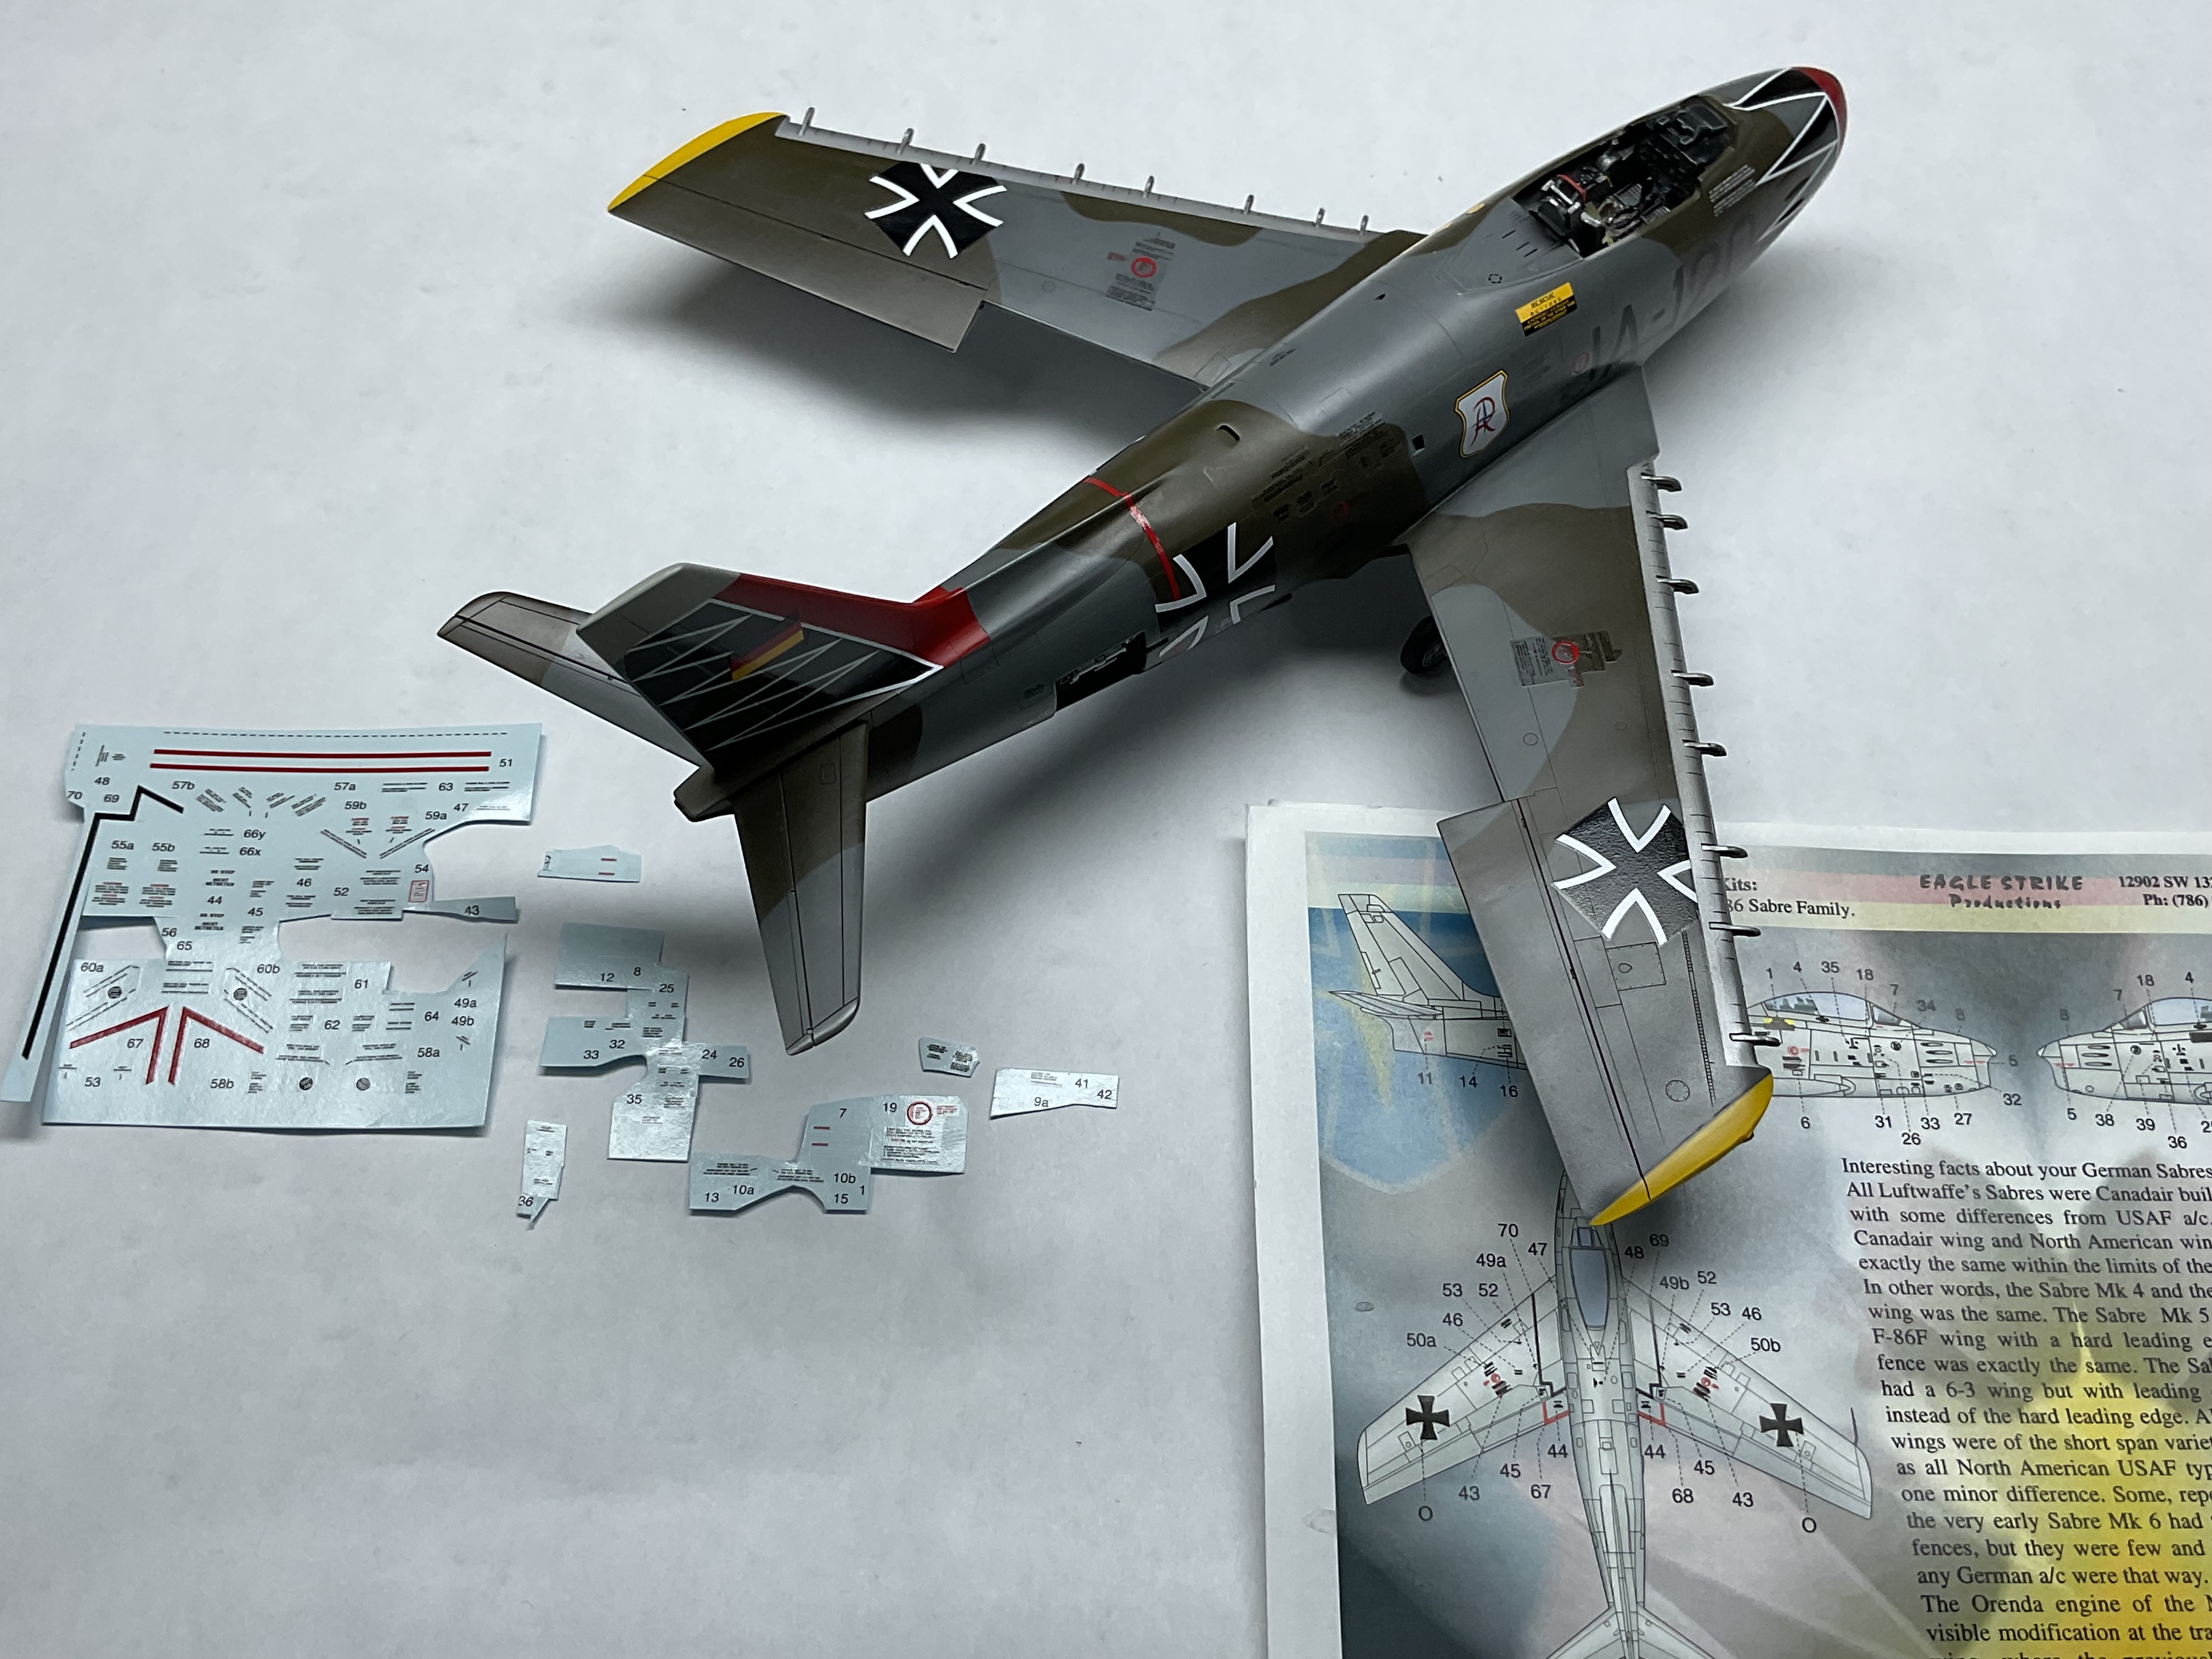
Greetings friends,
The model is completed. With the help of all of you, I have learned great deal about exported Sabres. It is not simply putting on foreign markings but involved modifications to the airframes. Modifications to the airframe involves shortening the span, adding slats, removing the panel on top of the fuselage ahead of the vertical tail, filling in various fuselage vents, adding sugar scoops and the most important feature of all is adding the rectangular fuselage vents on both sides. Due to my limited skill I did not scribe in correct panel lines or adding the fuel filler cap to the right side as Tony suggested. I did however moved the fuel tanks closer inward per Tony's recommendation.
The resin add ons include the vintage Verlinden gun bays and ammunition bays. Oddly the ammunition bay does not have the bullet casings. I also used Verlinden resin deck behind the canopy to improve over the kit's part. The AMS and Flightdecks sugar scoops are oversized in width and short in length. But since I am deficient in scratch building skill, I ended up using the AMS scoops (now B&B Resin Design). The KASL slats and flaps are beautifully detailed rival of 3D printed parts. The kit's seat is very substandard so I used the Aires seat with Eduard's seat belts.
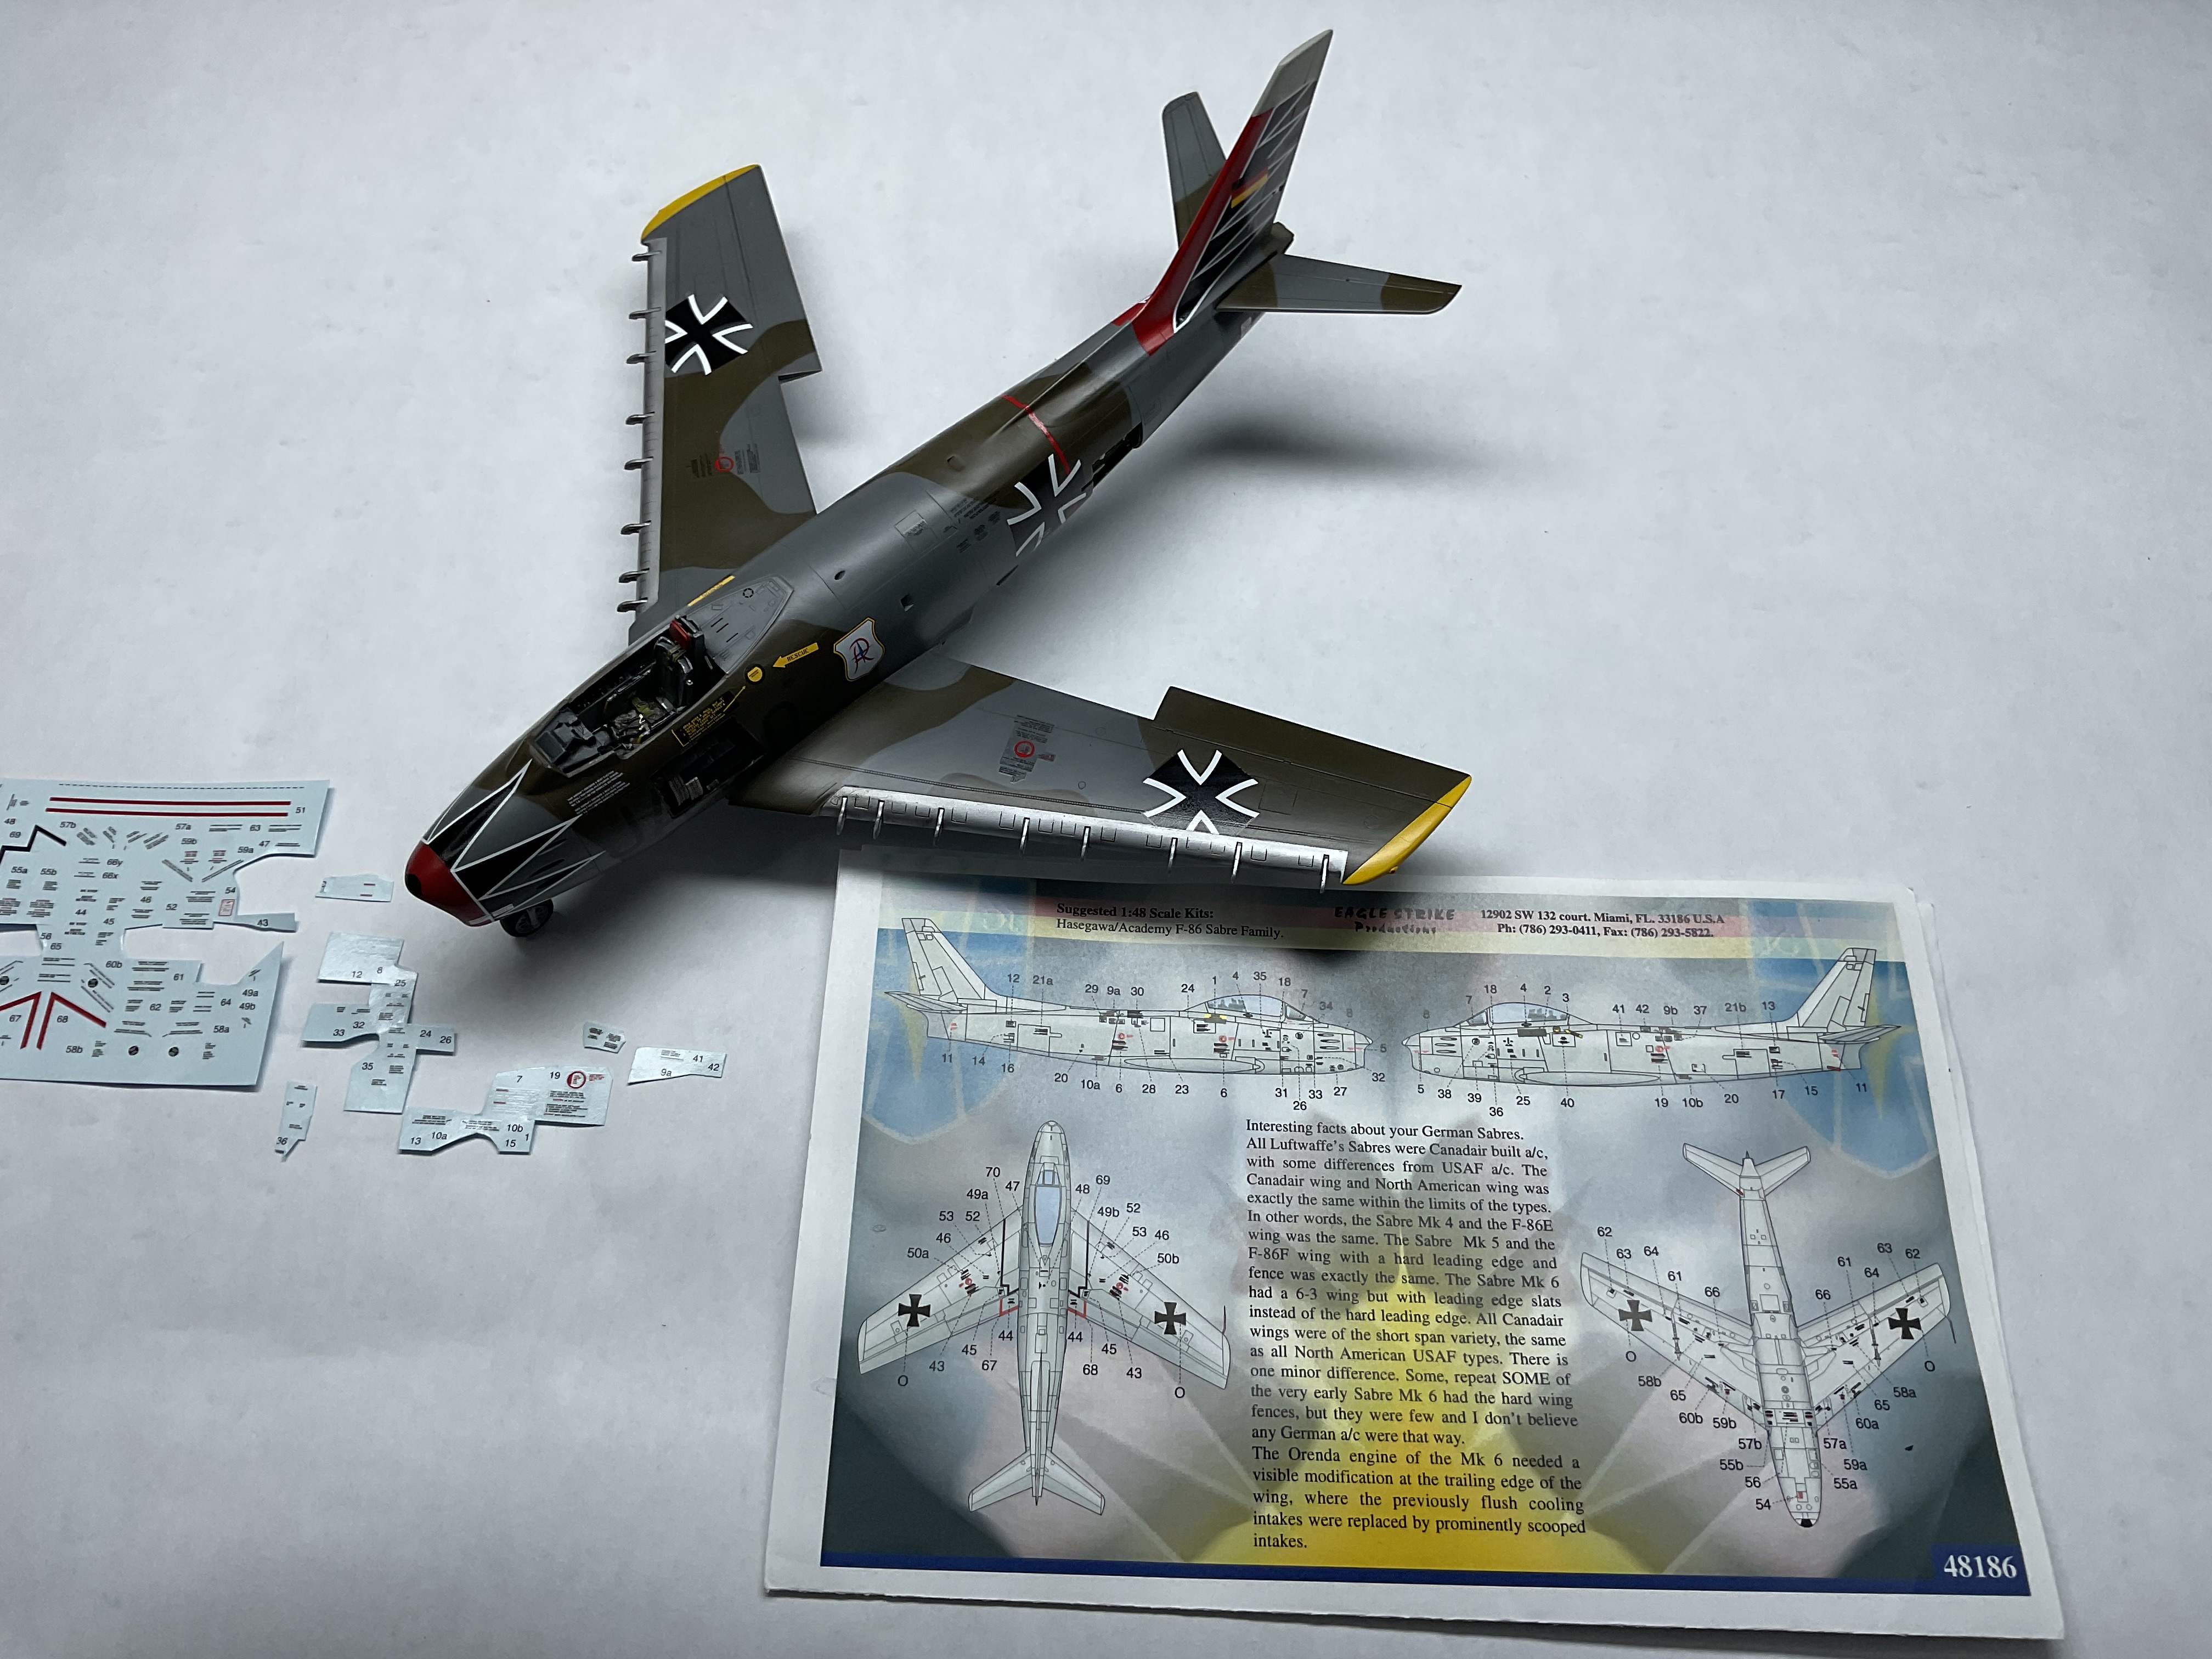
I use the Eagle Strike decals sheet but unfortunately they are much thicker than I am used to from them. The Flightdecks sheet is more accurate of the vertical tail tulip pattern but oversized in the white stripes so I use the former instead.
PROS:
1. One of the best F-86 in 1/48 scale along with Academy offering. The Monogram has raised panel lines and ESCI has horrible nose curvature. Forget about the Linberg one.
2. Generally good fit.
3. Open air brakes.
4. Nice compliment of fuel tank types and Sidewinder missiles.
5. FOD covers for the air intake and tail pipe.
CONS:
1. Thick decals.
2. The plastic started to have hairline cracks after the model was painted and decaled. Perhaps it is an isolated incident.
3. Long nose gear strut that needs to be shortened.
4. Incorrect illustration on where the holes should be drilled shall one wants to install the drop tanks.
5. Poor fit of the wing to fuselage in the bottom.
6. Ill fitting resin wing tips. I use the kit's instead.
7. Poor quality white metal pitot tube supplied in the MK 6 version. I use the one from the F-30 kit.
If you plan to do a MK 6 version, buy Academy kit instead. The kit already have the gun bays opened and the plastic could be better in quality.