


Pappy121
-
Content Count
648 -
Joined
-
Last visited
Content Type
Profiles
Forums
Calendar
Posts posted by Pappy121
-
-
G'day Thadeus,
Thanks very much. The canopy fits very well although as you say it is a bit thick in the sides which results in some distortion. I doubt this would be an issue with the canopy open.
G'day people,
I have managed to get the lid on
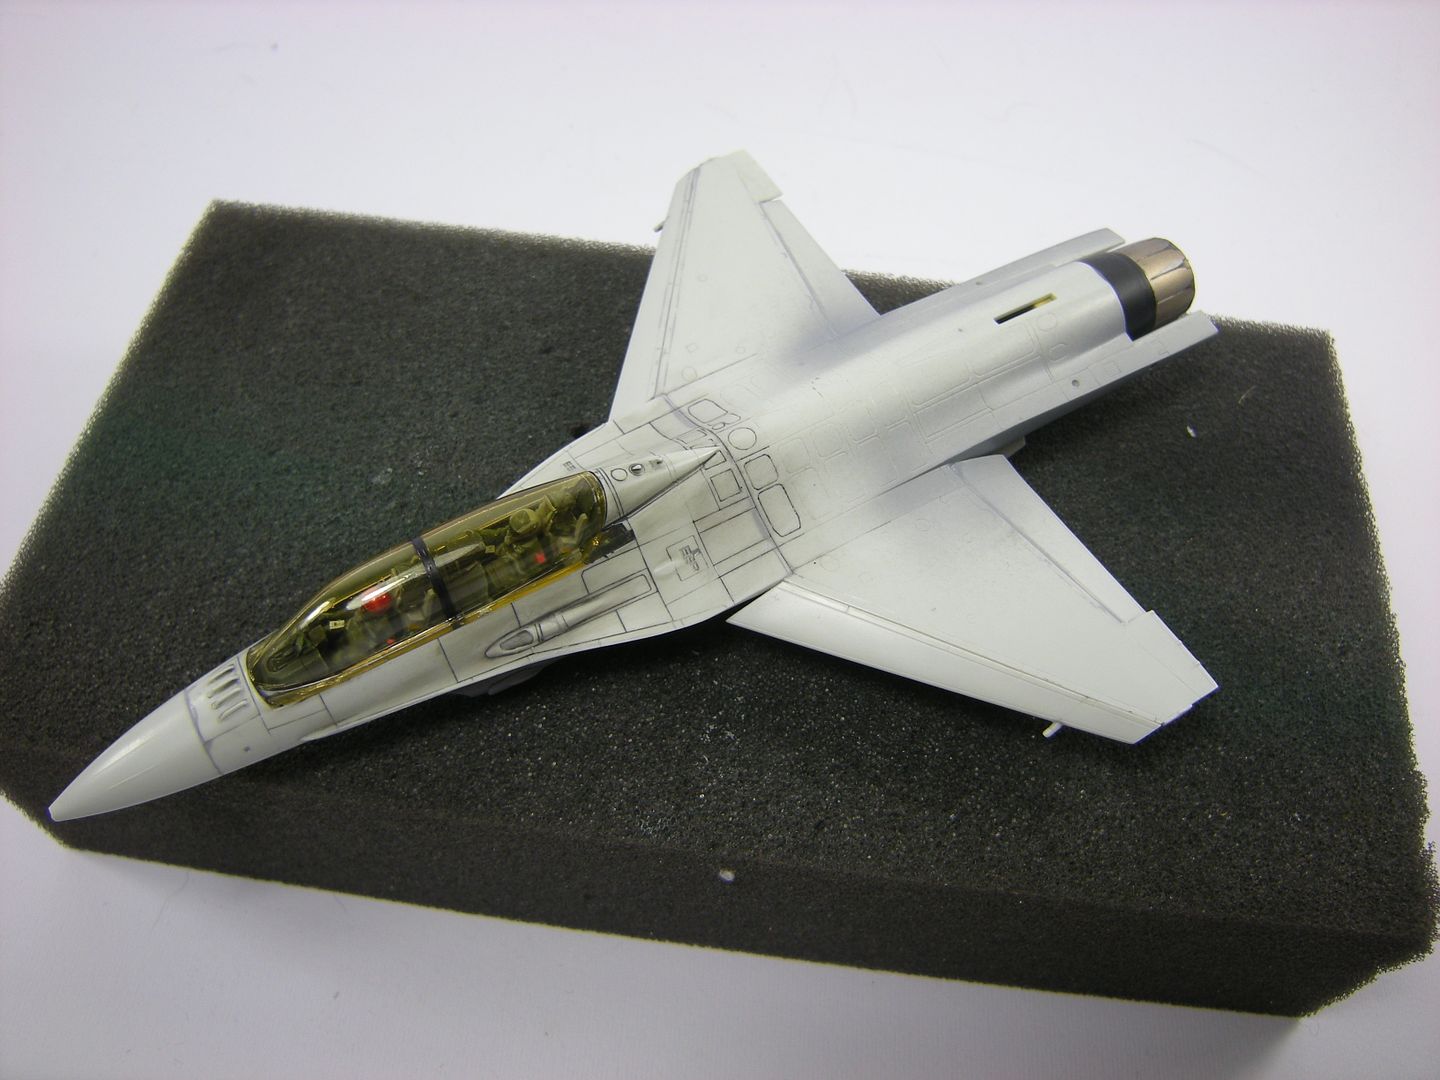
As already mentioned, the canopy fit is excellent however although not immediately apparent from the pictures there is some distortion when looking directly through the side sections. The canopy was dipped in Future following tinting so this is not an opacity issue with the tinting but due to the thickness of the plastic.
One minor issue I discovered was that the instructions would have you install the canopy bridge part with the actuator receptacle facing forwards which is incorrect, it should actually face aft. This is easily achievable with an open canopy but with the lid down the actuator needs to have the extended section cut off. If the bridge is glued in the correct orientation, the remaining actuator part angles rearwards too much and looks wrong. I glued the bridge facing forwards instead. Given the distortion issues mentioned previously it is not really visible
The engine exhaust and intake assemblies have also been installed
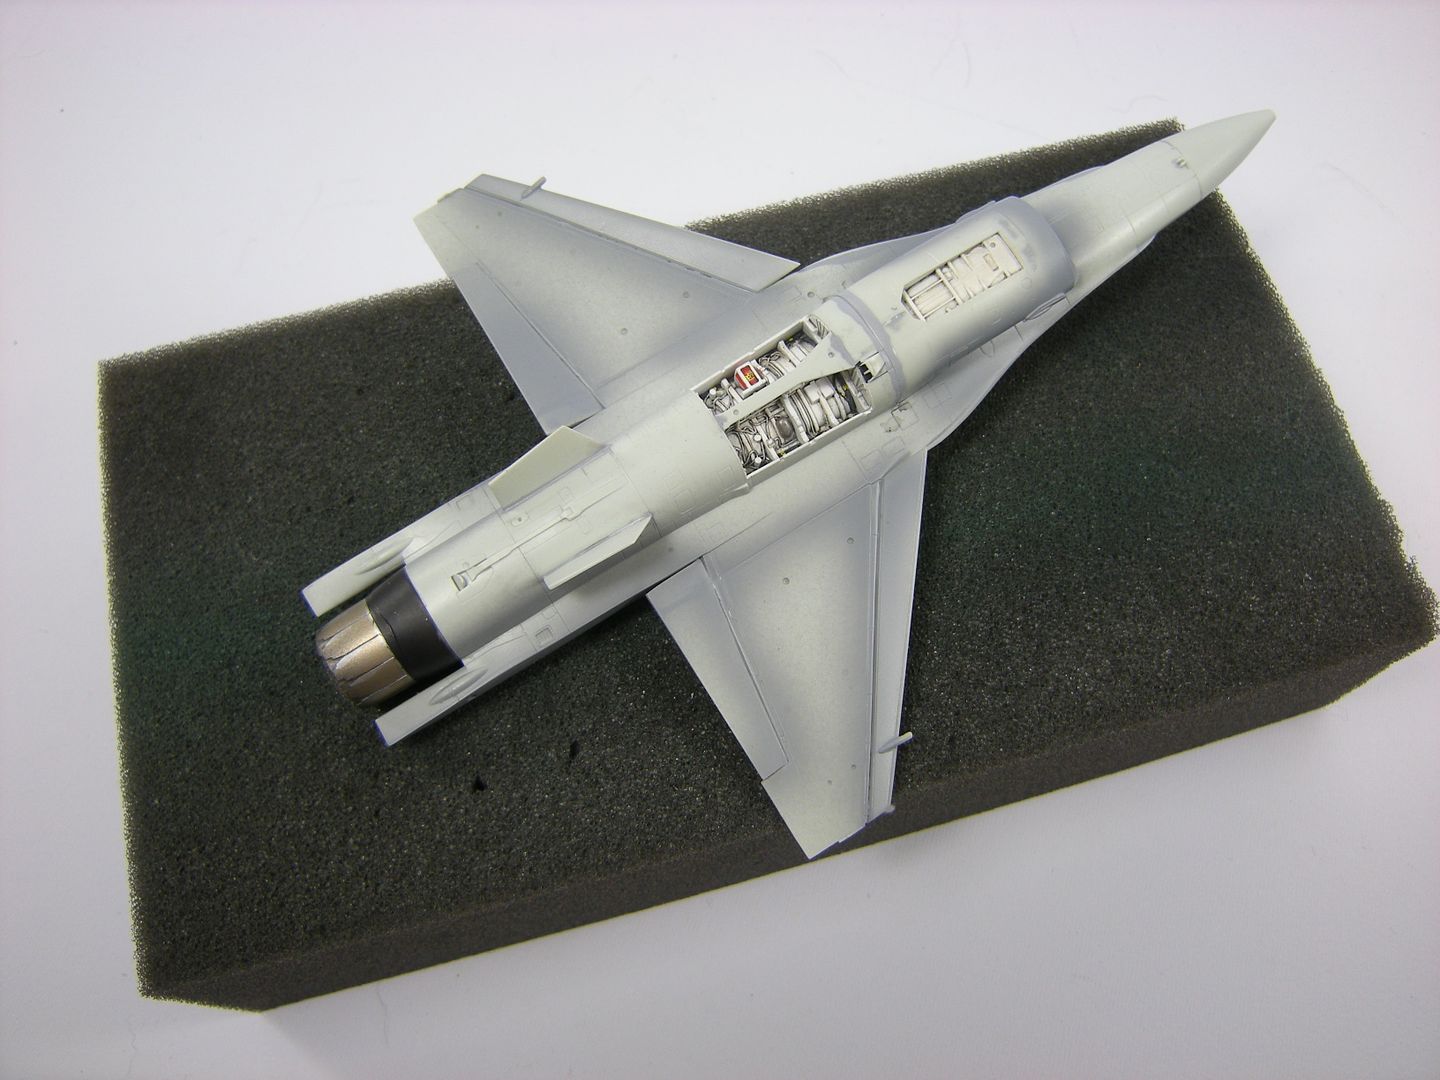
I cut off the kit orientation tab and aligned the exhaust by eye, it fit very well after ensuring both it and the fuselage were square

There was a considerable amount of masking required to get the various colours characteristic of the -229 exhaust. There will be more required to preserve it during the painting process!
The intake is proving more problematic as although it fits, it does not fit well
There is quite a large gap where the intake assembly meets the fuselage. This has been the worst fit I have experienced so far,
regards,
Pappy
-
G'day people,
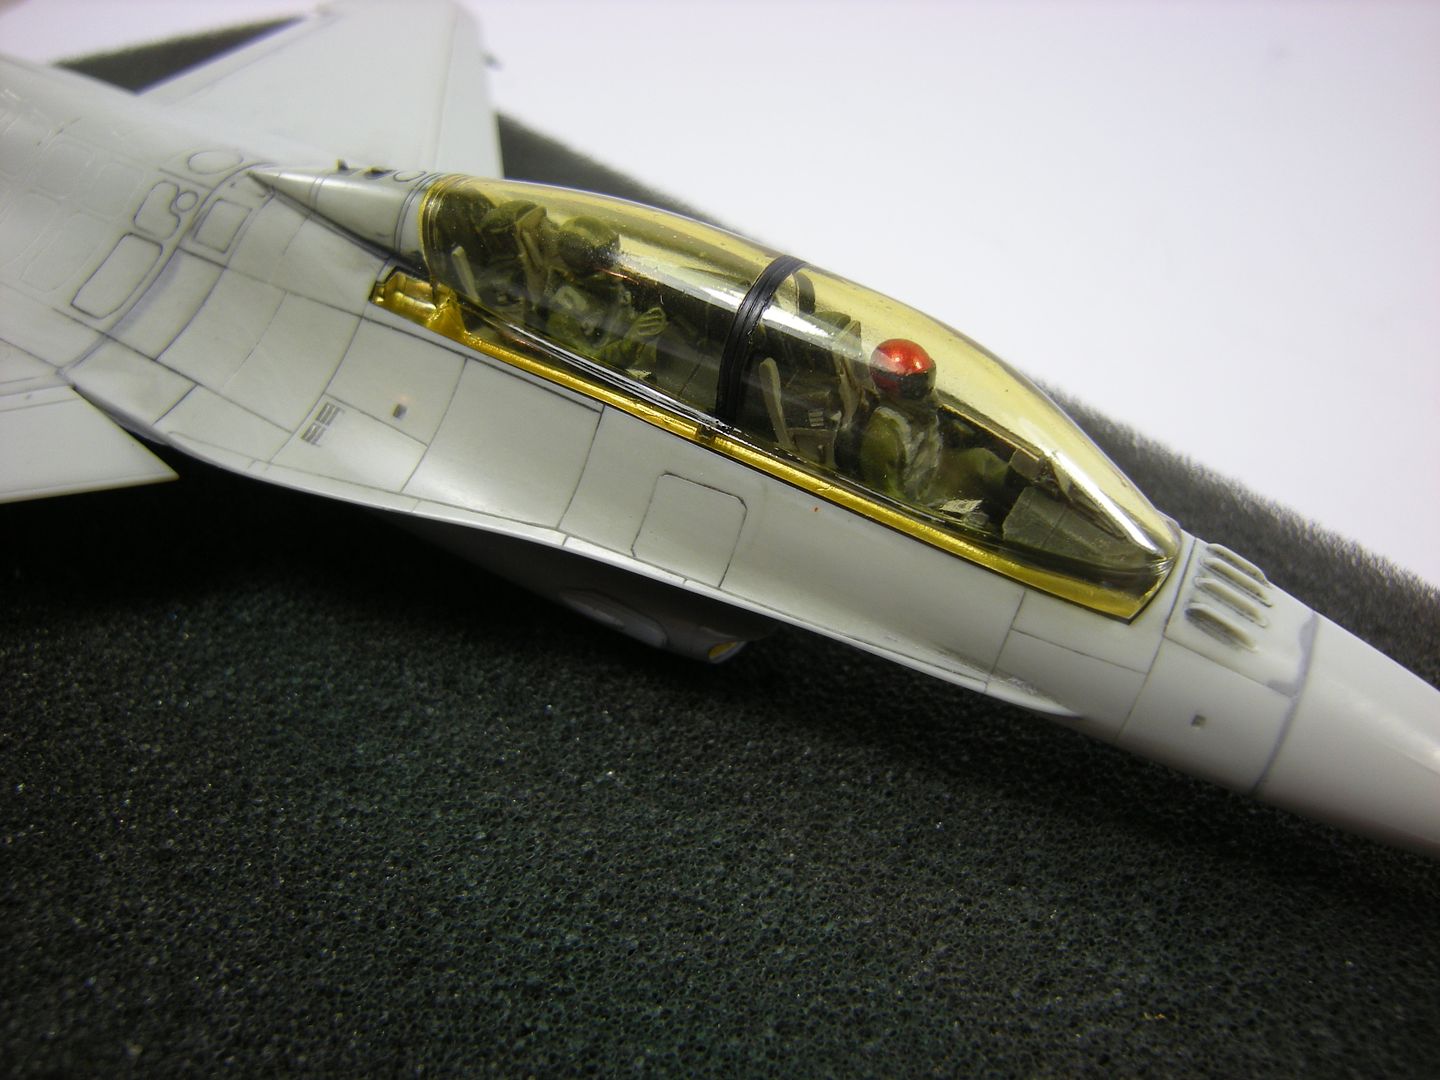
Getting closer to closing up. The kit supplied crew figures have been painted up. These are nicely sculpted for the most part with the torso including mask and hose details with a separate right arm. The left arm kind of disappears and is poorly defined and the head is also a bit too big proportionately with poorly defined details. I ended up sanding the head down a little and re-shaping. The details were the painted in by hand
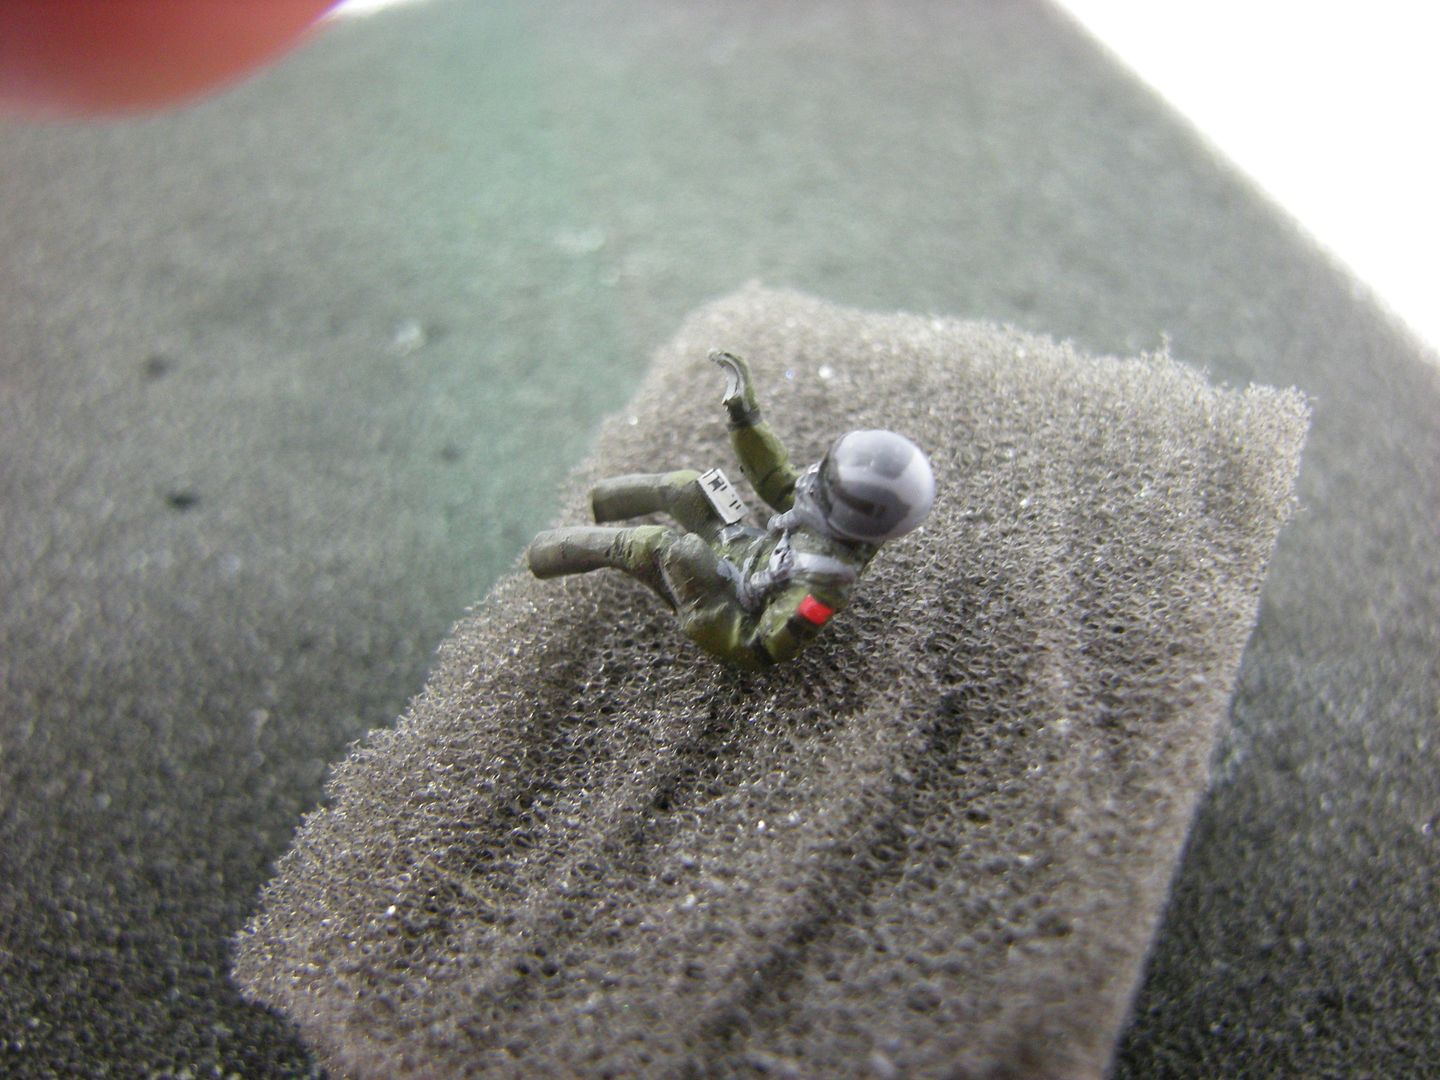
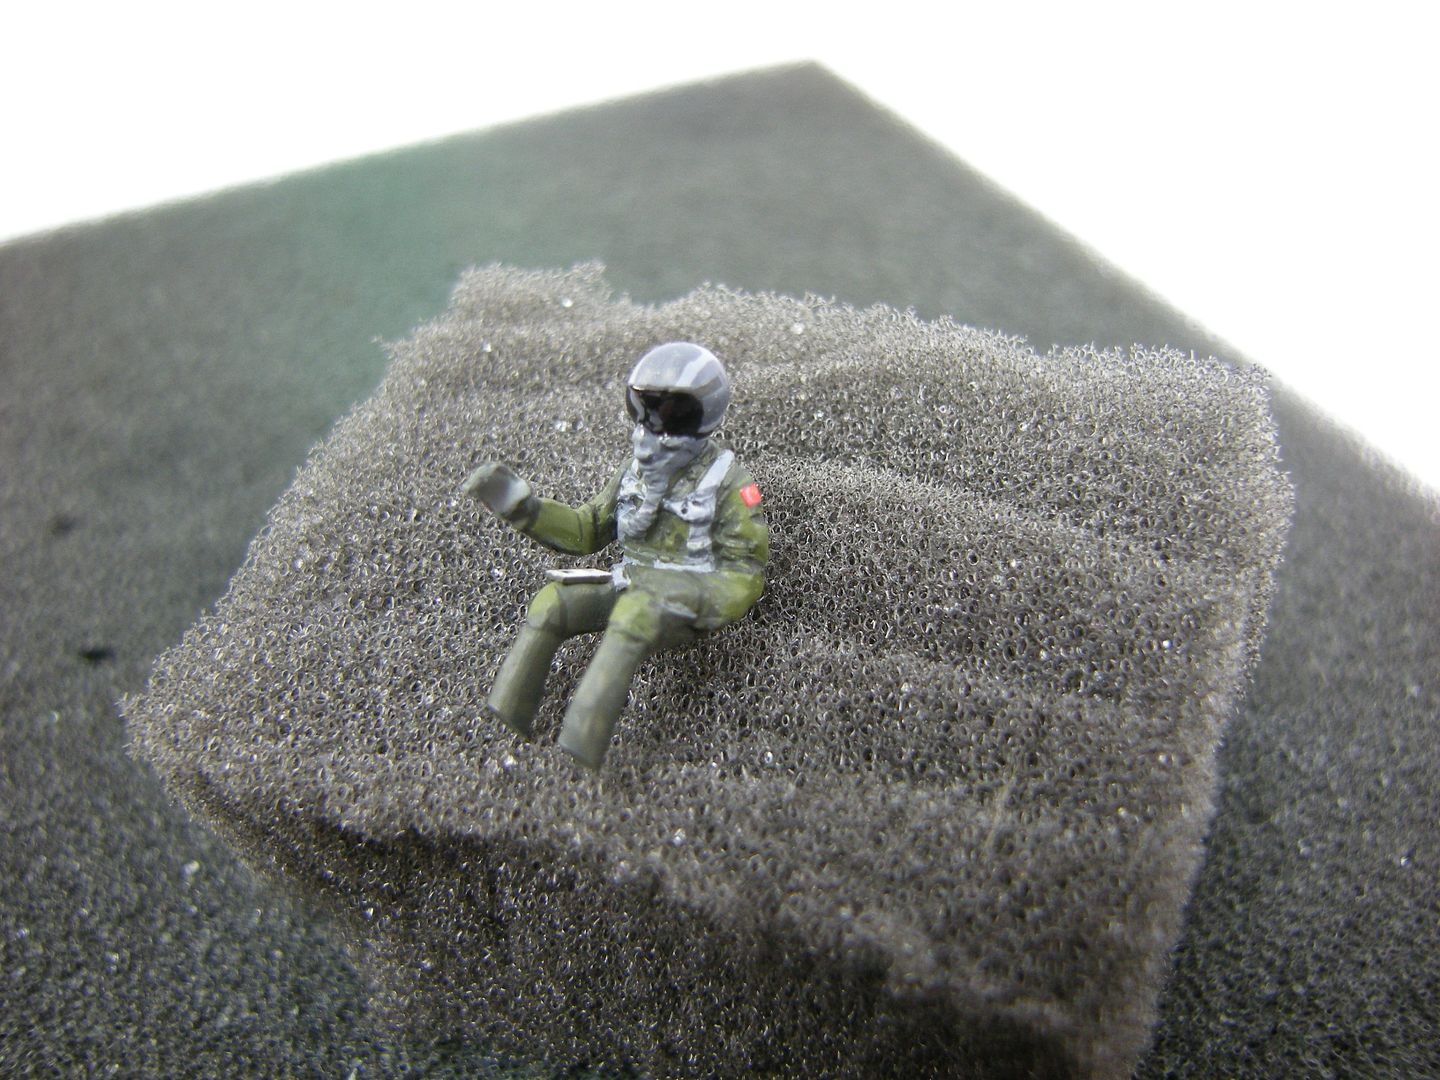
I used some spare decal placards to simulate the knee board checklist details
I found the HUD combiner glass a tight fit and it required some gentle sanding to thin is slightly in order to fit correctly
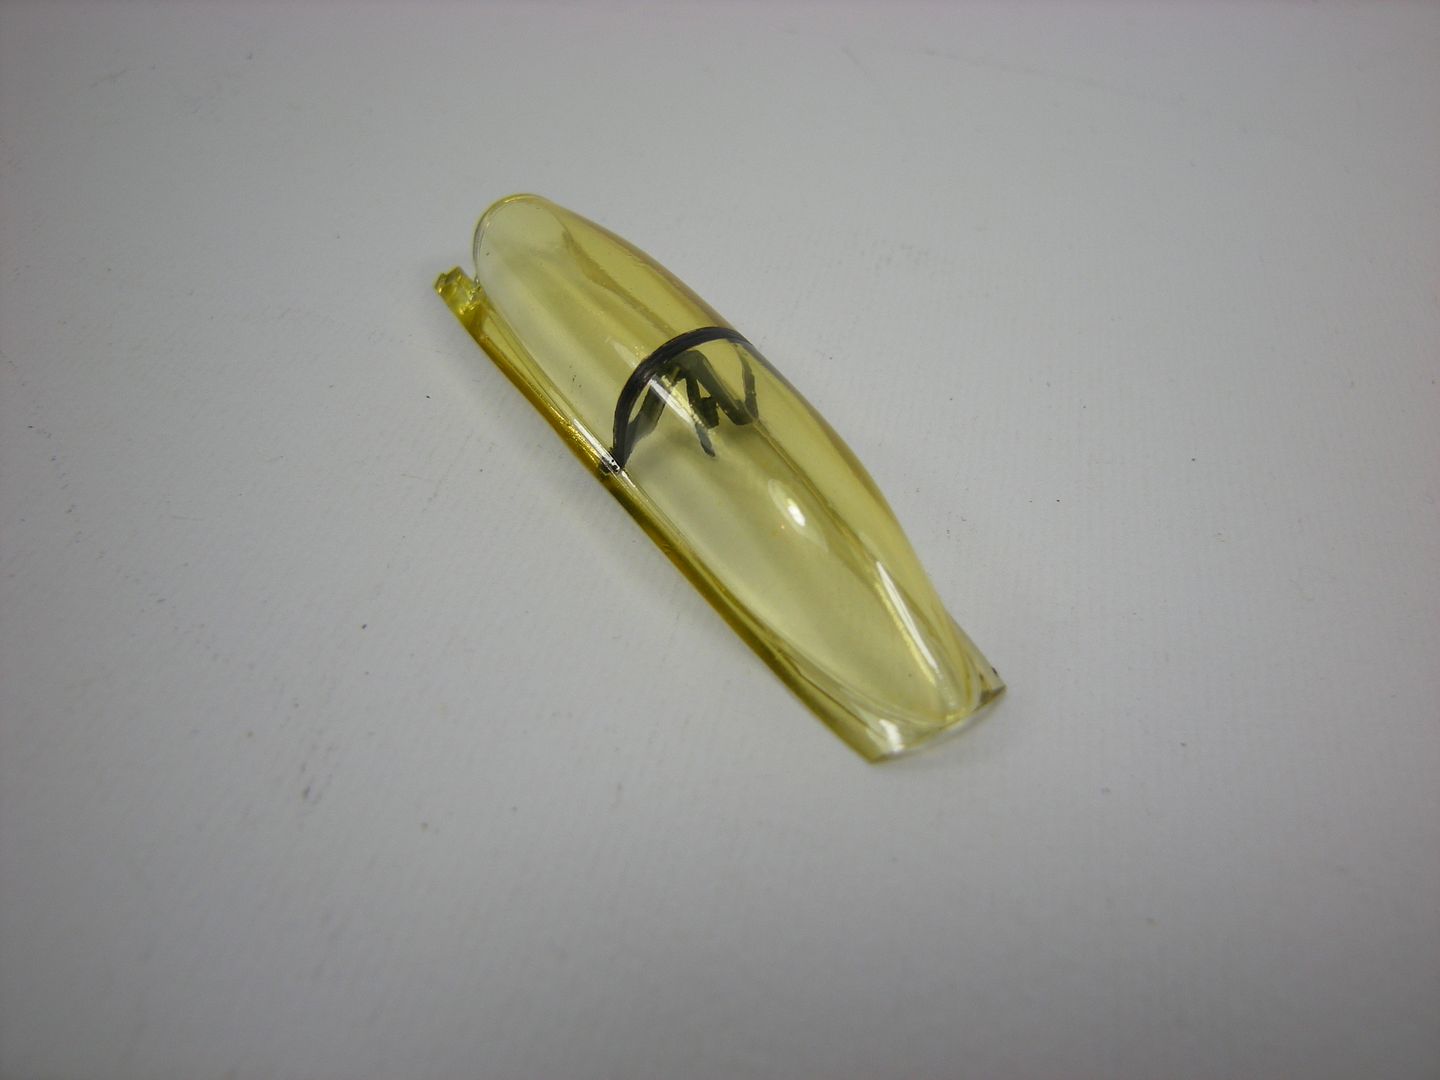
The canopy is supplied clear so I tinted this with a concoction comprised of various clear tints. I have seen various combinations of clear and tinted forward and aft canopy sections on two seat F-16s so it is always best to check refs. My display jet has both sections tinted
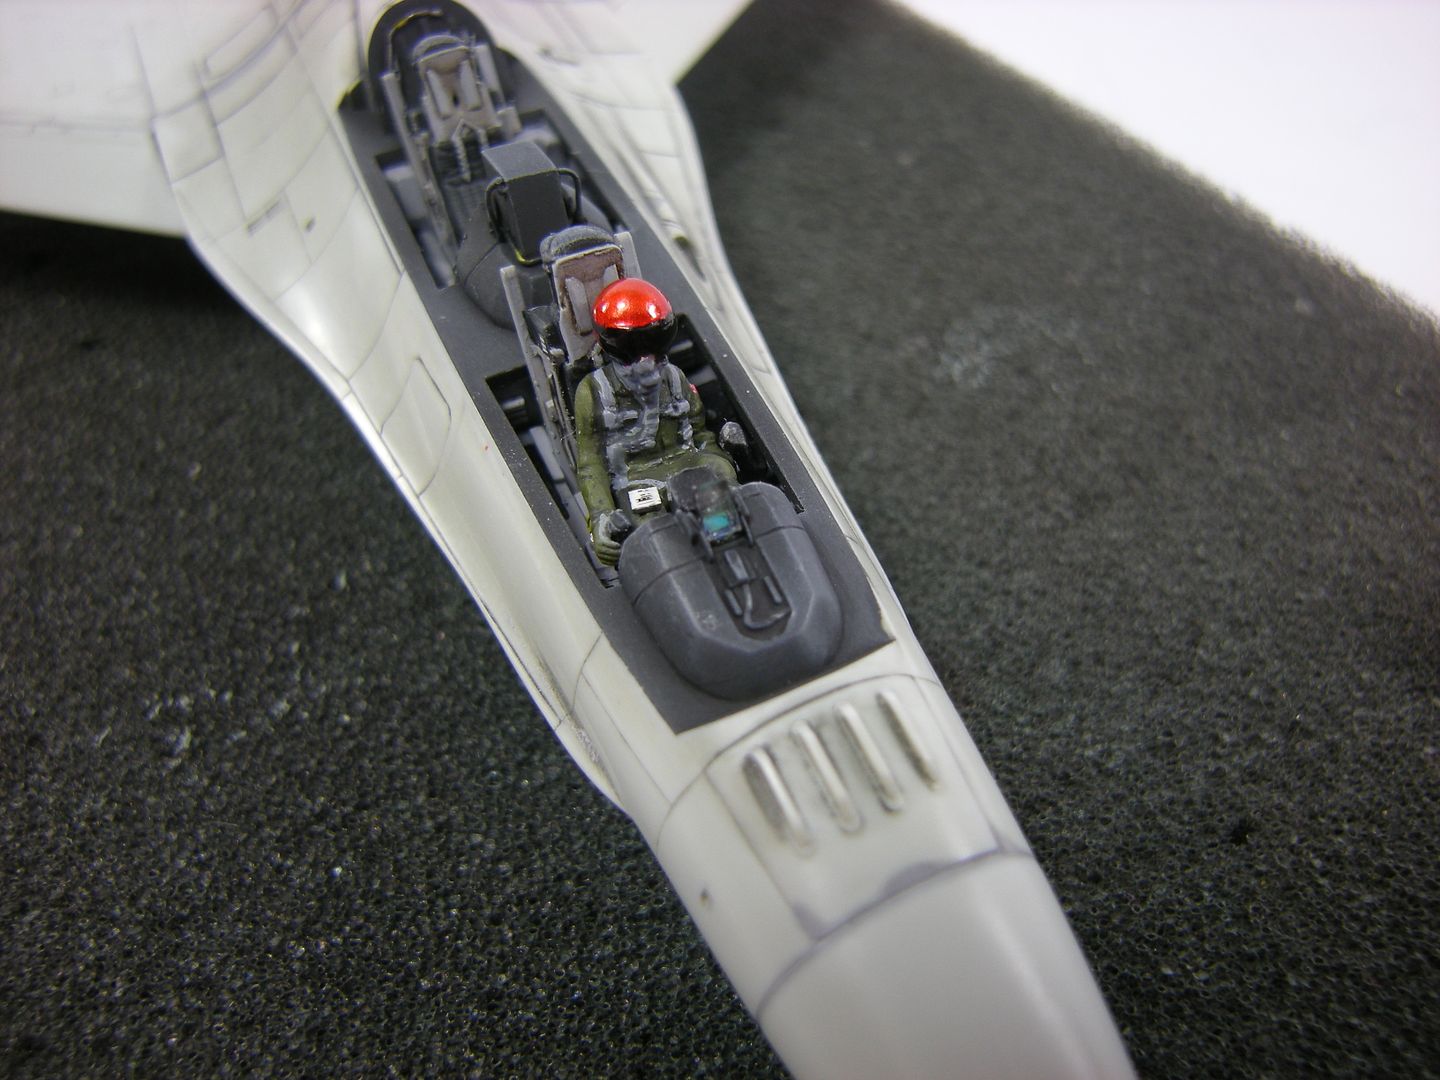
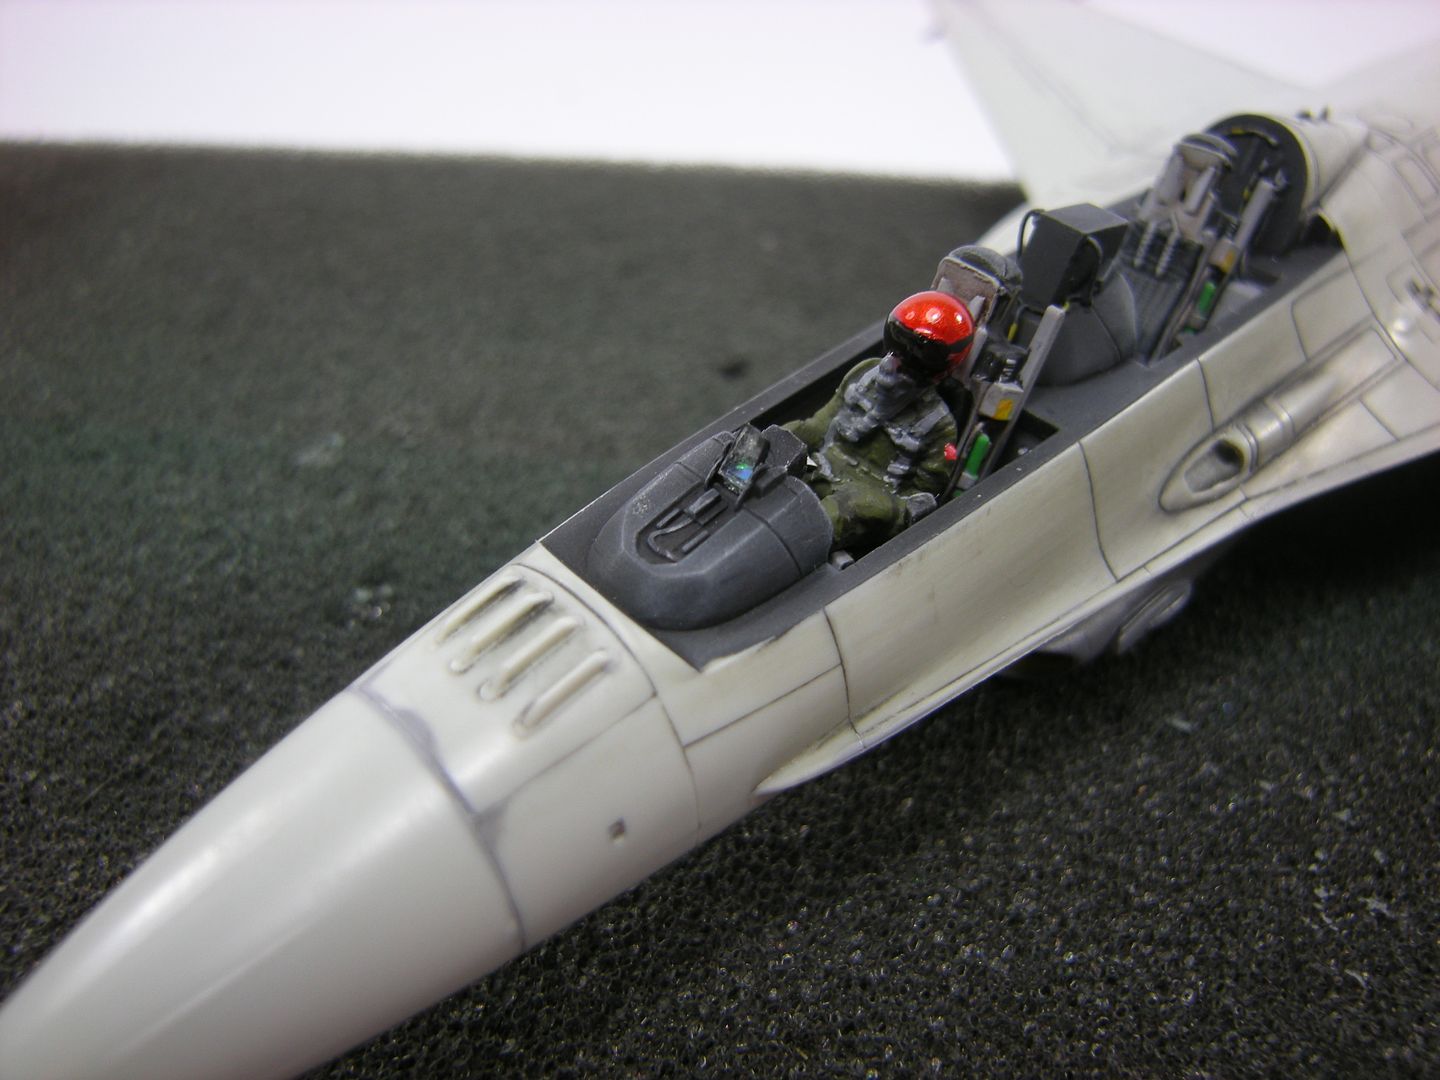
A dry fit to confirm all the bits will play nice together
Although very clear in the upper sections, I found the sides to have some distortion such that everything below the shoulder is practically invisible. The tops of the seats and crew helmets are very visible so it would pay to concentrate on these areas if you intend to have the lid down,
cheers,
Pappy
-
G'day people,
I was able to find some pictures of my subject display jet with an interesting asymmetrical load of inert AIM-9M, AIM-9X and ACMI along with a pair of jugs that received some artwork to match the jet.
I had a pleasant day today preparing the stores. The kit supplies a pair of very nice AIM-9L/Ms but I will only be using one. I was able to scrounge the AIM-9X from another kit and the AMI pod is a modified AIM-9 from the spares box. The kit decal sheet includes stores stencils and these all behaved exceedingly well. I used the spare AIM-9M stencils on the AIM-9X, not strictly correct but I won't tell if you don't
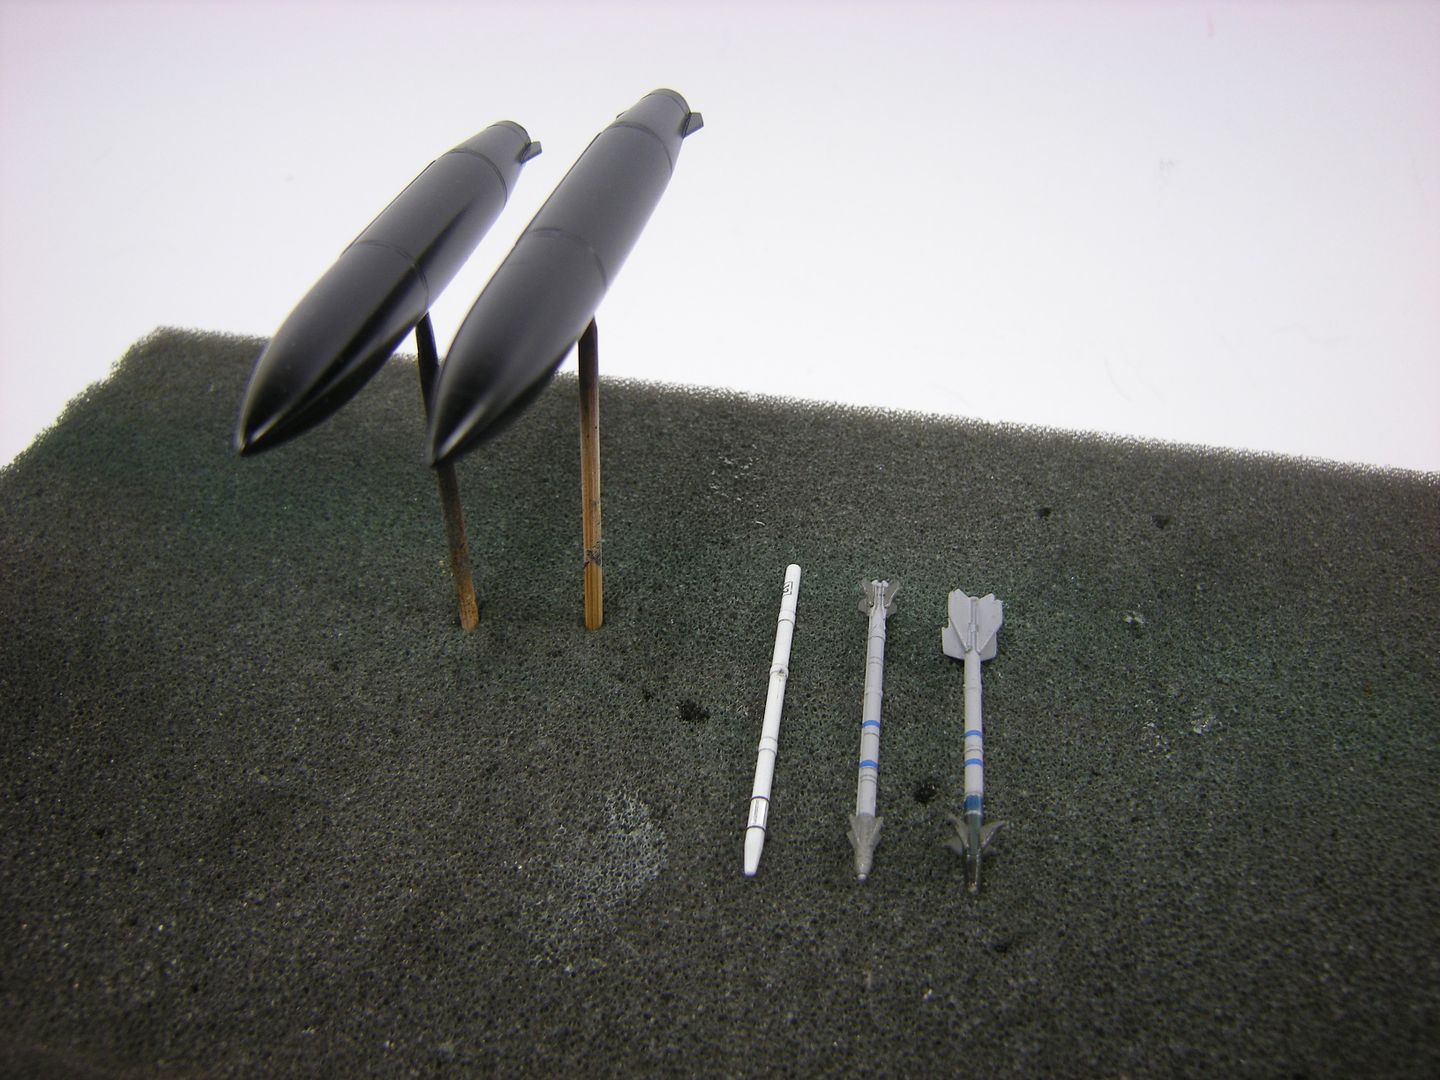
The eagle eyed may have noticed that the AIM-9L/M CATM has had its rollerons removed. I have seen this on some jets and this was the case with my subject but it is not that common so it is another point of interest. Most of the CATMs I have seen usually have complete rear fins without rollerons.
cheers,
Pappy
-
On 3/29/2022 at 6:15 AM, kurnass77 said:
Nice work! I like the scratche HUD repeater in the rear office!
Gianni
G'day Gianni,
Thanks very much. I just coul not let it go and since it will be visible thru that big canopy it seemed like the right thing to do
On 3/31/2022 at 11:57 PM, Kurt H. said:Great work, I really like the extra detail you added to the MLG bay, and cockpit.
Welcome to the GB
G'day Kurt, thanks for the welcome
G'day people,
I spent today on the back end. Revell provide both the GE and PW engines with some very nicely rendered details for the turbine faces. Apart from the mahoosive amount of flash on the engine parts
.JPG)
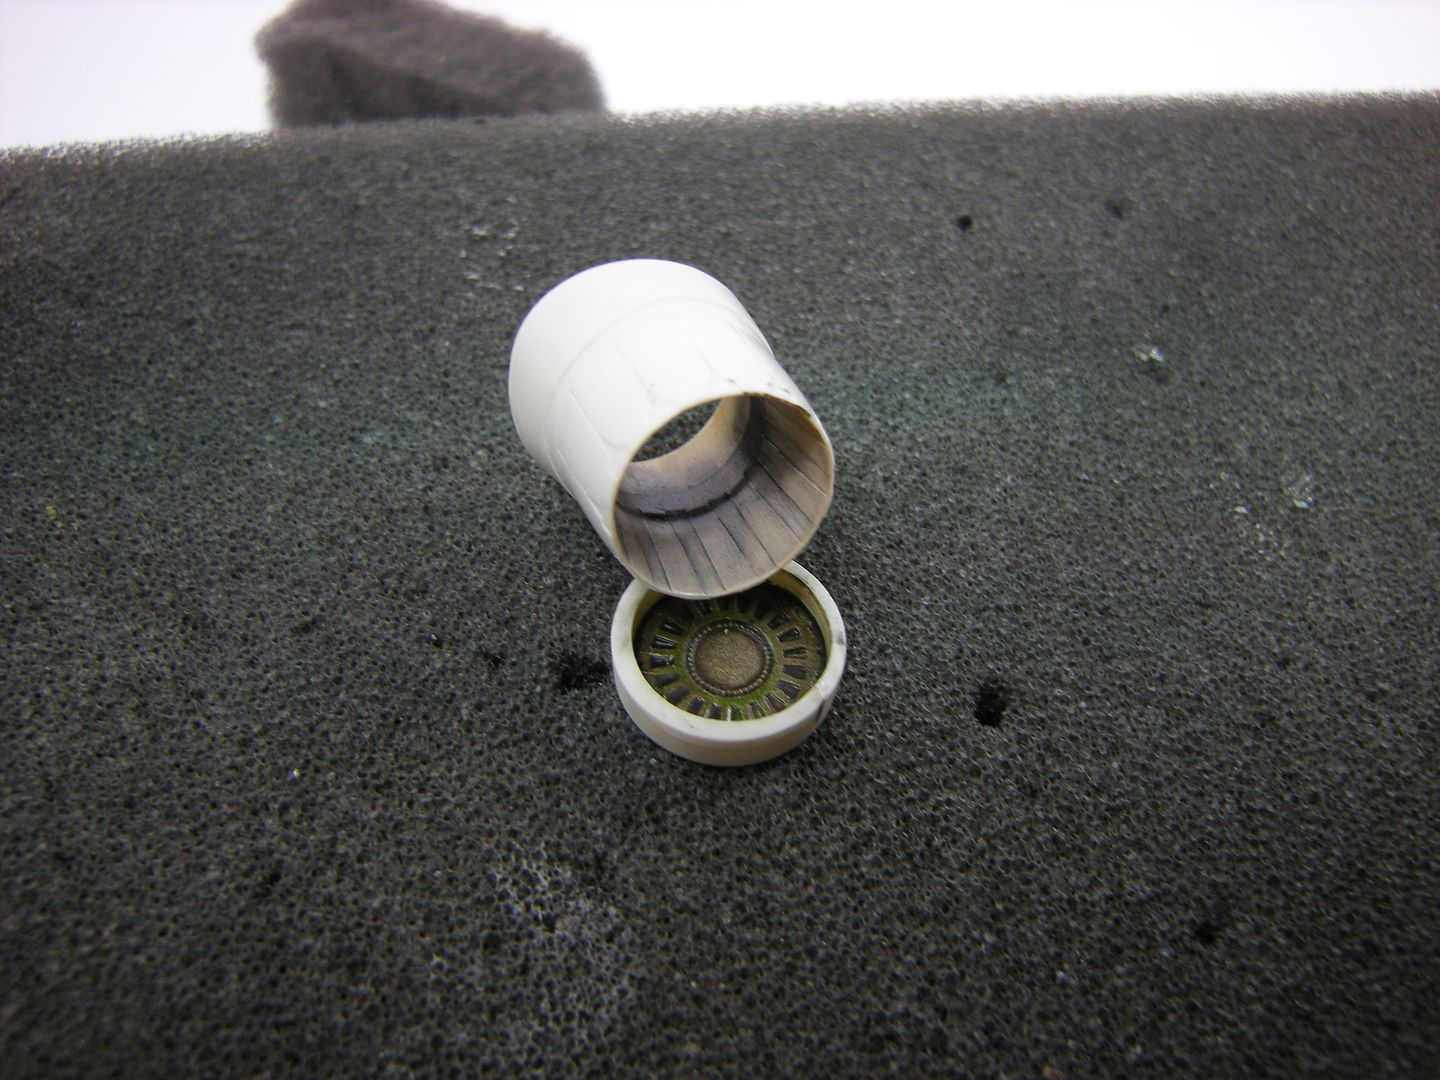
After cleaning that up, the next problem I had to deal with was painting the turbine face as it is quite deep within the exhaust section. My solution was to cut the end off
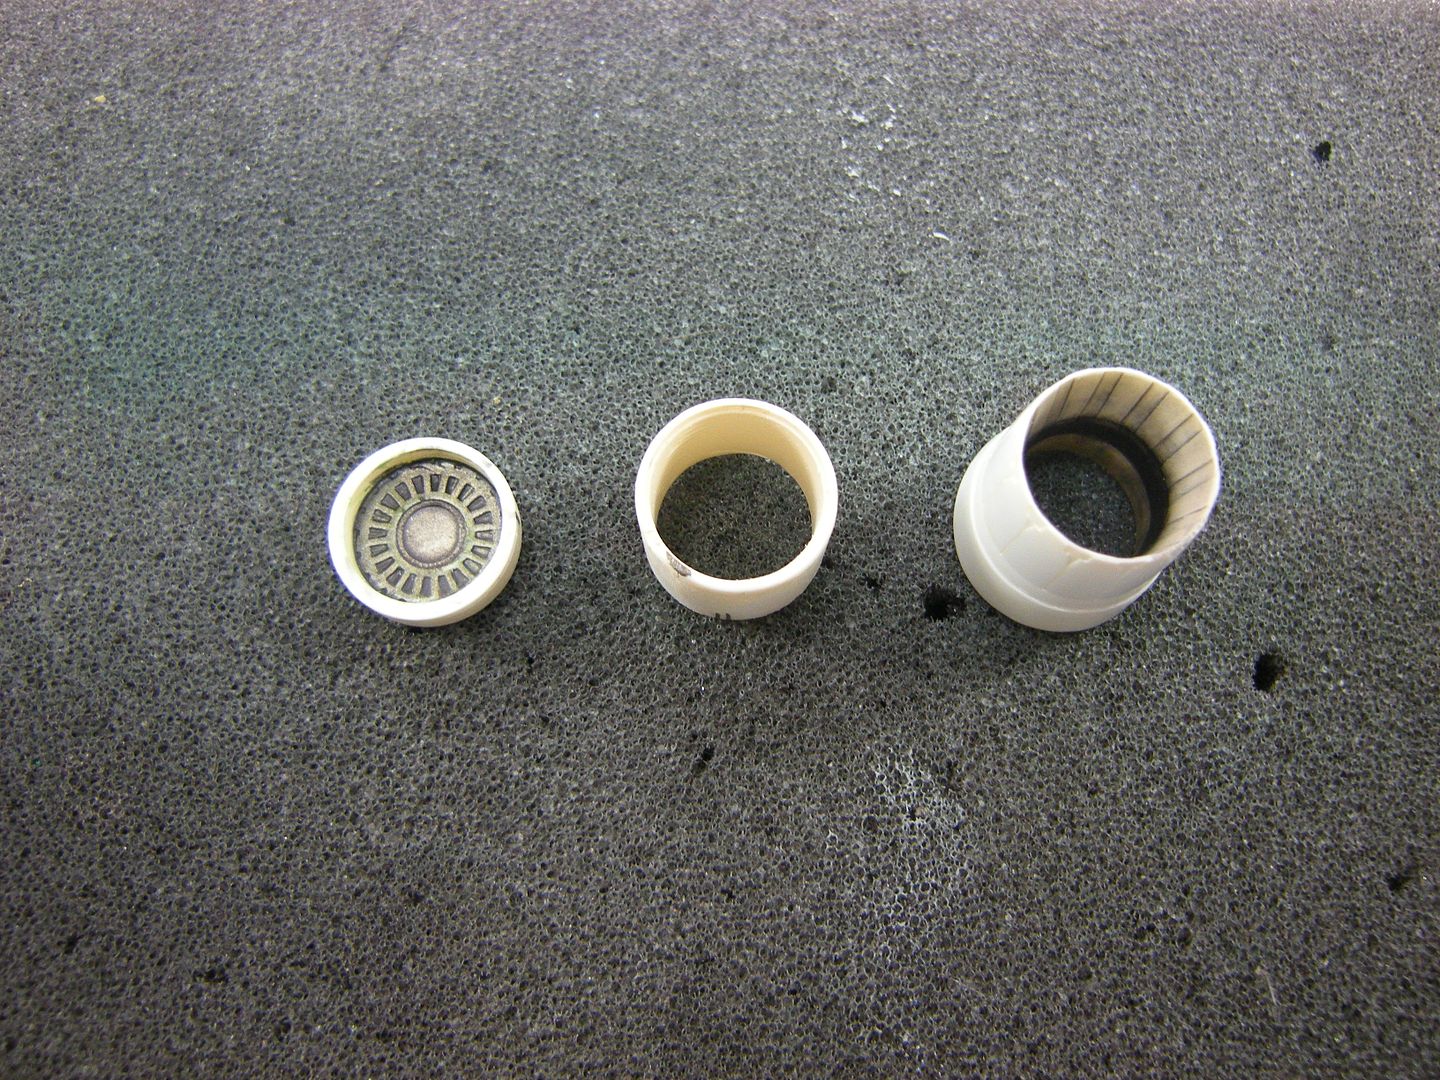
This is one area where the Hasegawa kits are a little easier as the turbine face is supplied as a separate item (but the depth of the exhaust is also comically too short) which would have been the ideal way to engineer this part
Anyhoo, moving on, the exhaustn has had some basic colour applied in preparation for the weathering stages to follow
cheers,
Pappy
-
G'day people,
The fuselage is together!
It went together okay but I found that the rear side portions did not marry up too well. Revell (and just about every other manufacturer) break down the fuselage into a horizontally split affair, but Revell have moulded the wings integrally with the upper rear fuselage so this is one less seam to deal with and also takes care of the wing anhedral issue nicely.
Revell have chamferred the upper edges of the lower half and this part had a tendency to pinch inwards resulting in a small gap. If I were to build one of these again I would add a spreader or two within the fuselage to help push the sides out. The gap looks worse near the wing root as I have cut away the flaps.If these had been left as moulded there would not have been a gap here so that part is clearly self-induced.
The join along the fuselage chine was very good. I brushed on some liquid putty and rubbed this back so just like the upper fuselage join, it looks worse than it actually is
Likewise the IFF panel in front of the cockpit
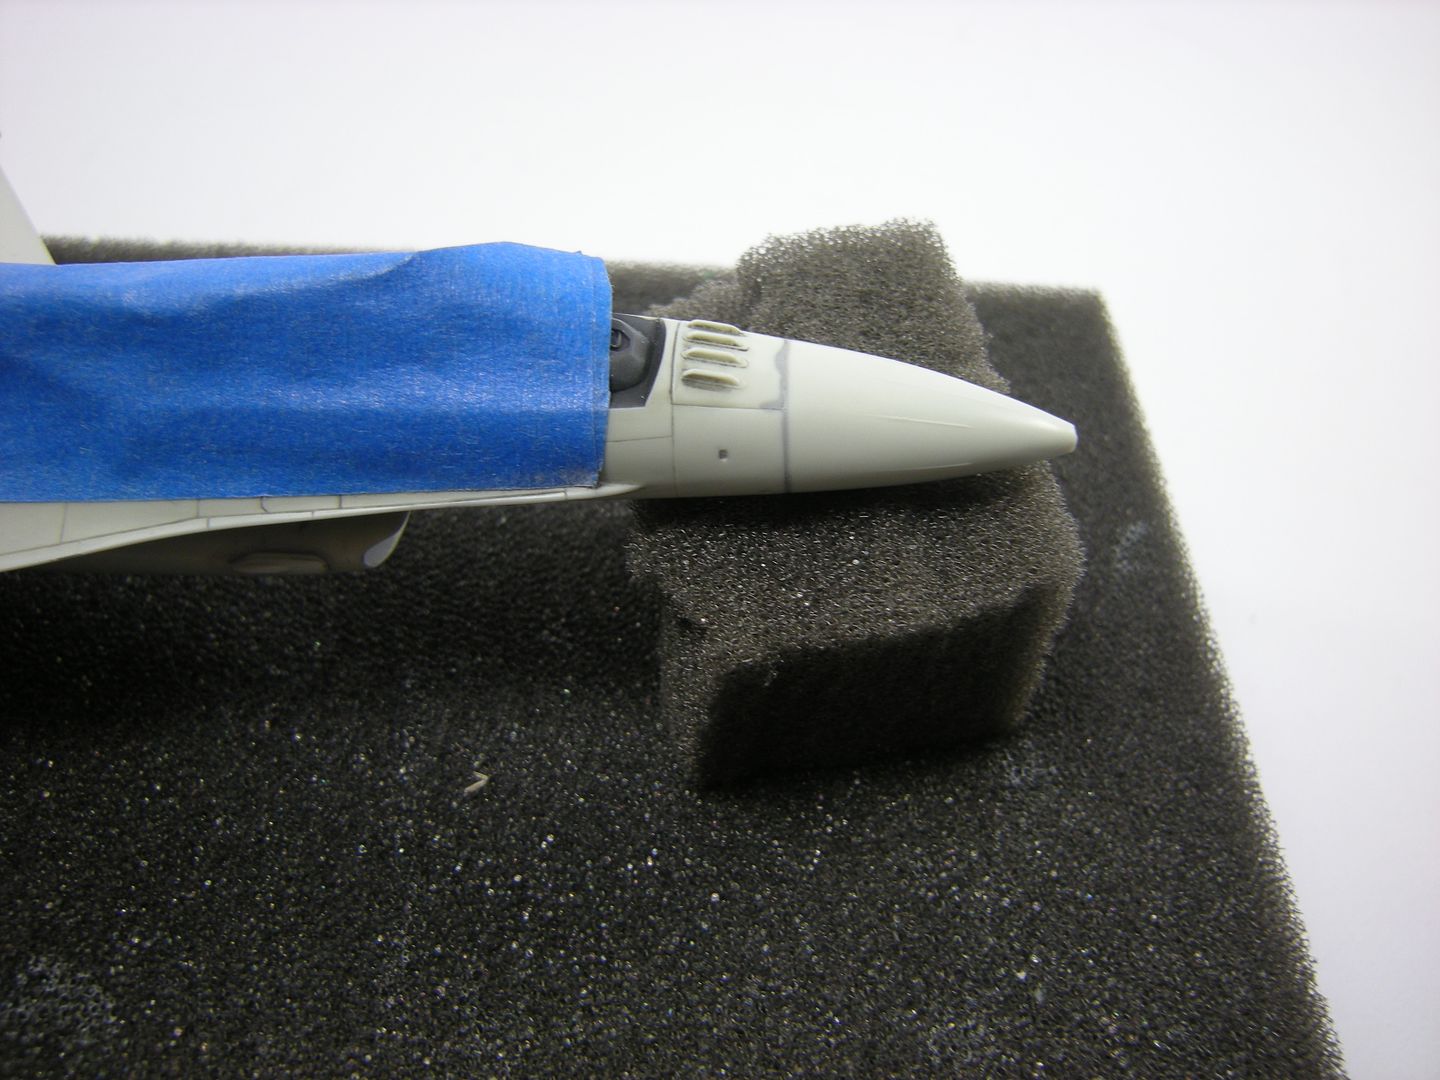
A brush of liquid putty was applied and rubbed back. The fit of the radome was a little uneven but it did not take much to blend into the fuselage profile. I used a razor saw to re-establish the seam. The fuselage join passes directly through the forward avionics bay panels but this just needed some gentle sanding to eliminate
cheers,
Pappy
-
With the original downwards ejecting seat - terryfying!
Pappy
-
1 hour ago, Thadeus said:
Very nice work! I much prefer the Revell kit to Hasegawa, especially with the landing gear bays construction. Can't wait for some more progress!
G'day Thadeus, thanks very much.
I am a fan of the Has 1/72 F-16s (having built several of them) but I must agree this seems the better kit, but then again it should be as it is a significantly more recent tooling so it should be.
The Has kits still build into fine models but the panel lines seem finer and more accurate on the Revell kits and the u/c is a massive improvement.
The thing is, the Revell kit is considerably more expensive and closer in price to the Tamiya 1/72 F-16s (which I have not built), which in Oz is close to $60 vice the Has kit which can be around half that (or much less 2nd hand at swap meets) so that is something that needs to be factored in as although better I do not think the kit is twice as good. The money saved can go towards AM at which point the advantage of the newer kit is less relevant. I have a Revell single seater I may also build if this one winds up quickly,
cheers,
Pappy
-
8 hours ago, ALF18 said:
The reason I ask is that I may try to do these for my big F-16 model. They are guys we flew against on a detachment to Gulfport, Mississippi in early December 1995.
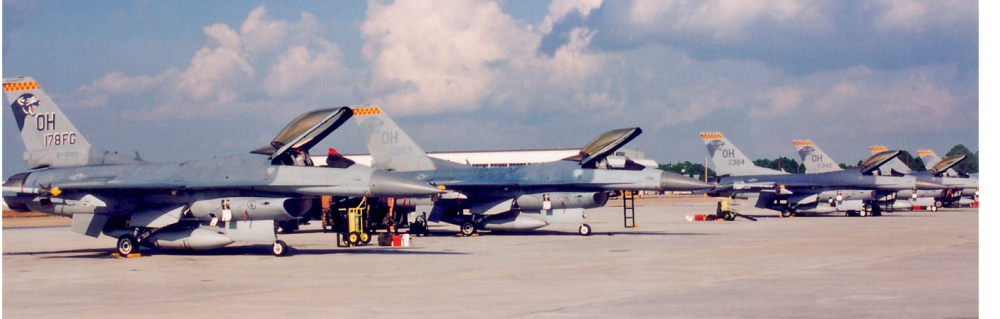
It looks to me like dark rings just before the nozzles, so GE engines? I am NOT an F-16 expert, but with guys like Habu and Pappy around I know I'll get good info.
ALF
Yup GE engines.
In this instance the tail feathers are visible. and they have a different shape to the PW engine which are narrower and closer (but not always) to steel colour while the GE engine has a more golden hue and the exhaust petals are wider, plus as you correctly state, the doughnut is black,
cheers,
Pappy
-
12 hours ago, kurnass77 said:
Very interesting, especiall 'cause I've 5 RoG kit, of which two the same box you satrted building here; very useful tip of fit/construction.
keep up with the good work mate!
Gianni
G'day Gianni, glad this has piqued your interest, 1/72 builds generally get less attention.
G'day people,
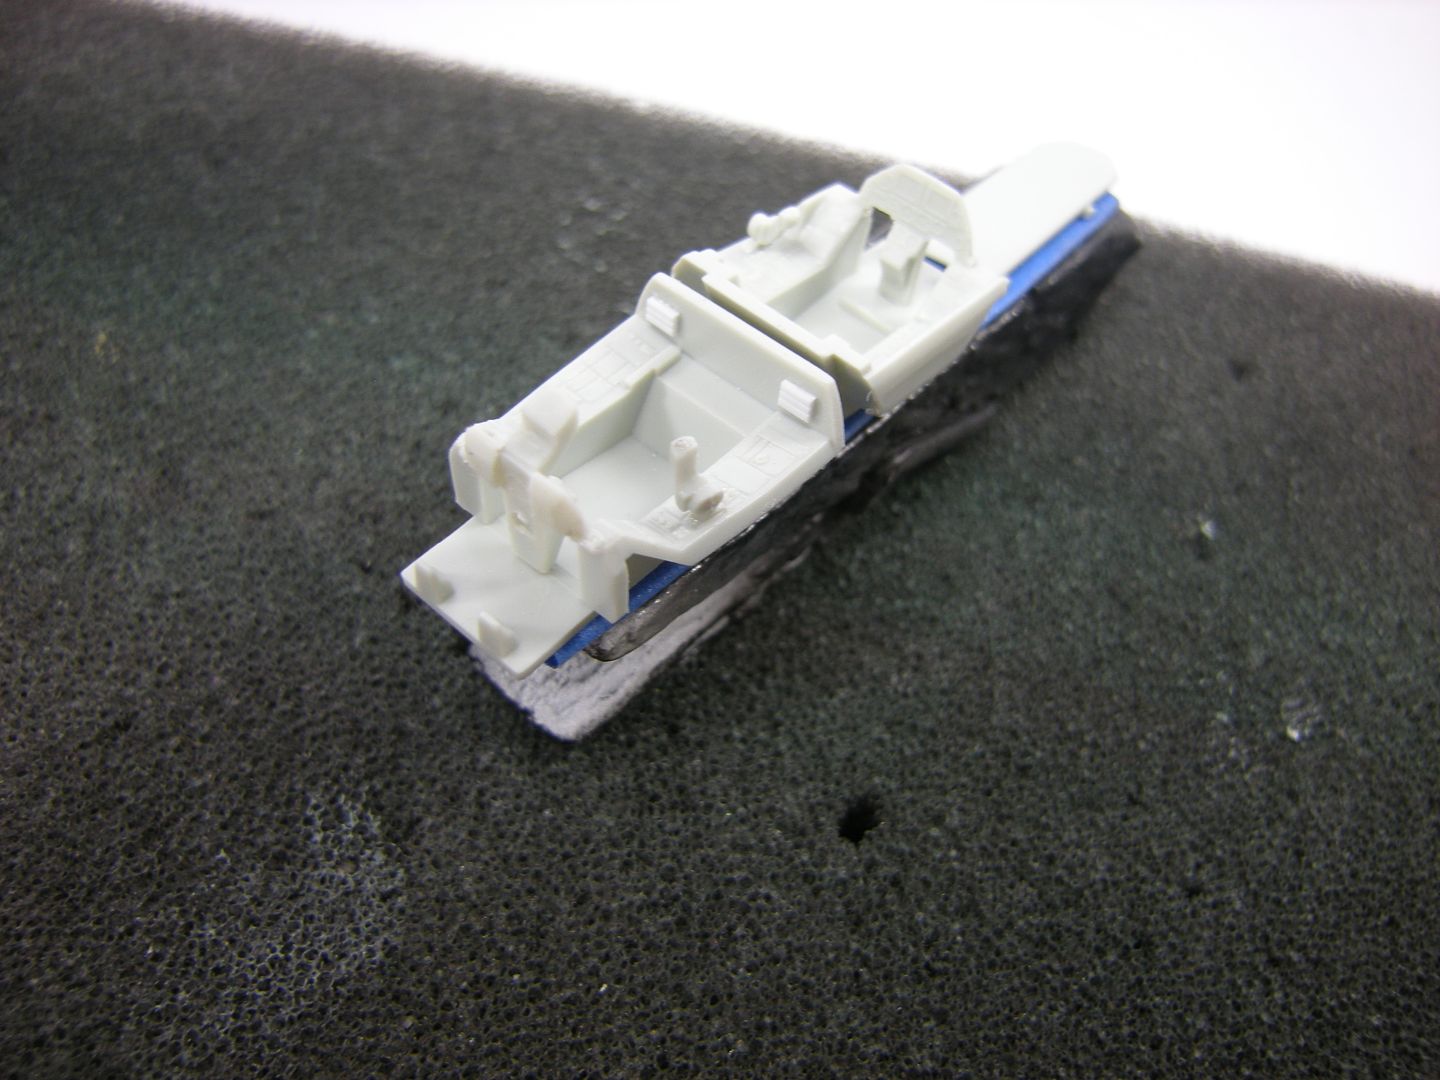
The cockpit tubs have been painted. I opted not to use all the instrument panel decals as the supplied detail is very nice and looks good when carefully painted. I did use some decals for the centre pedestal as these are completely devoid of detail
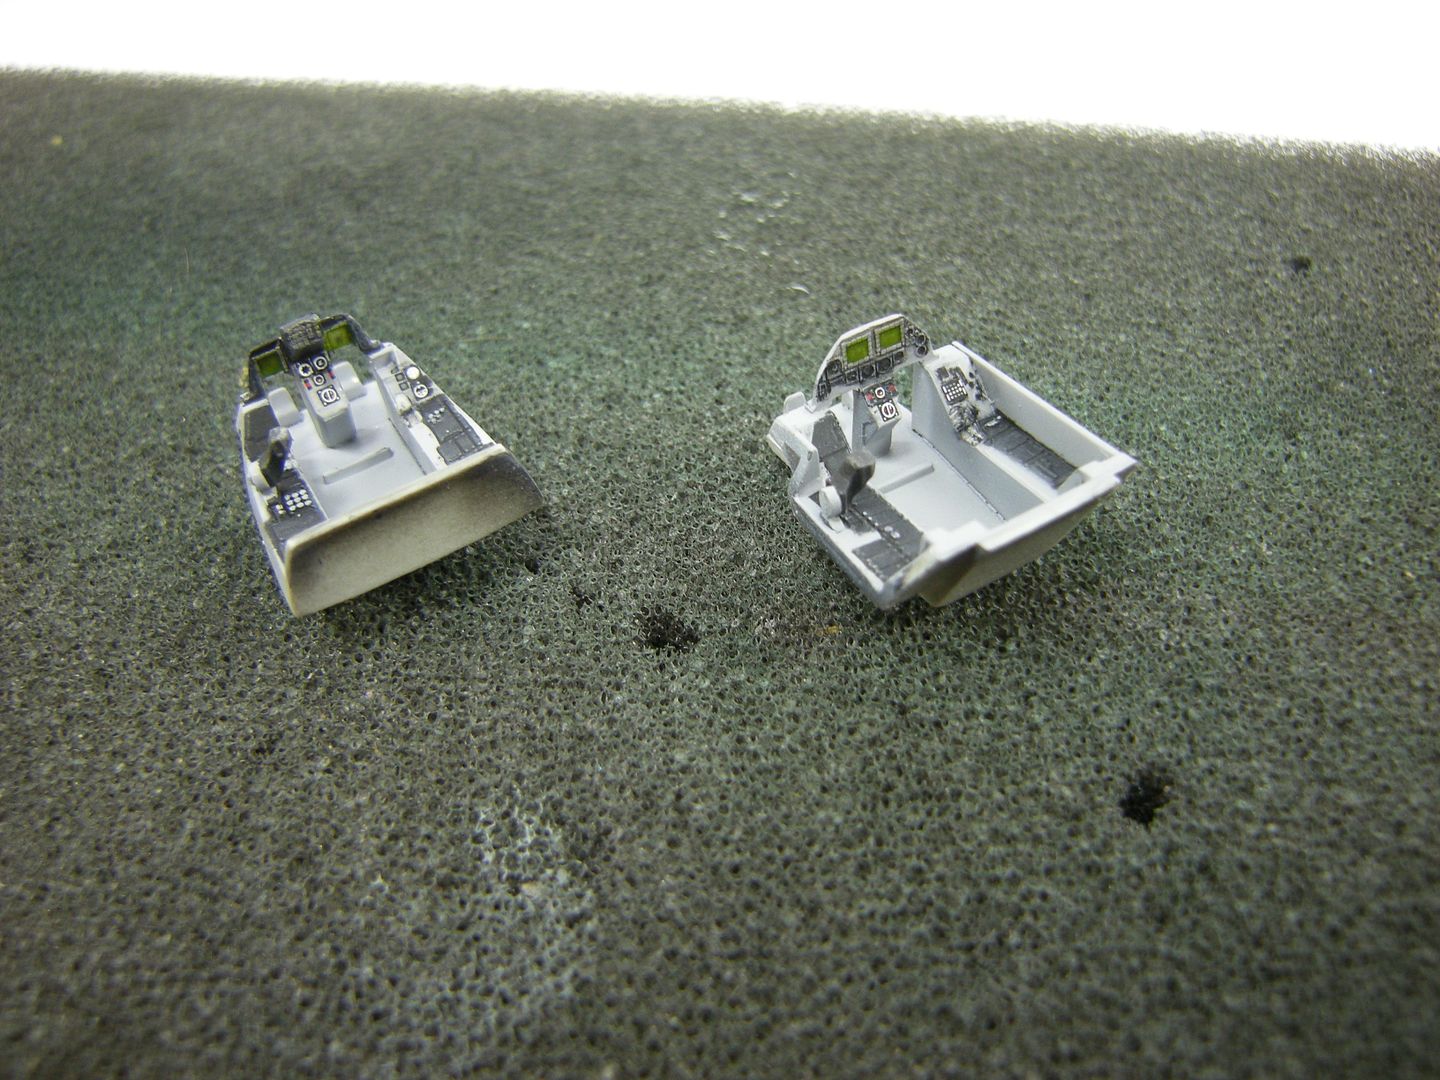
They look a little garish by comparison but with the aircrew in place and canopy down I don't think the effect will be that stark.
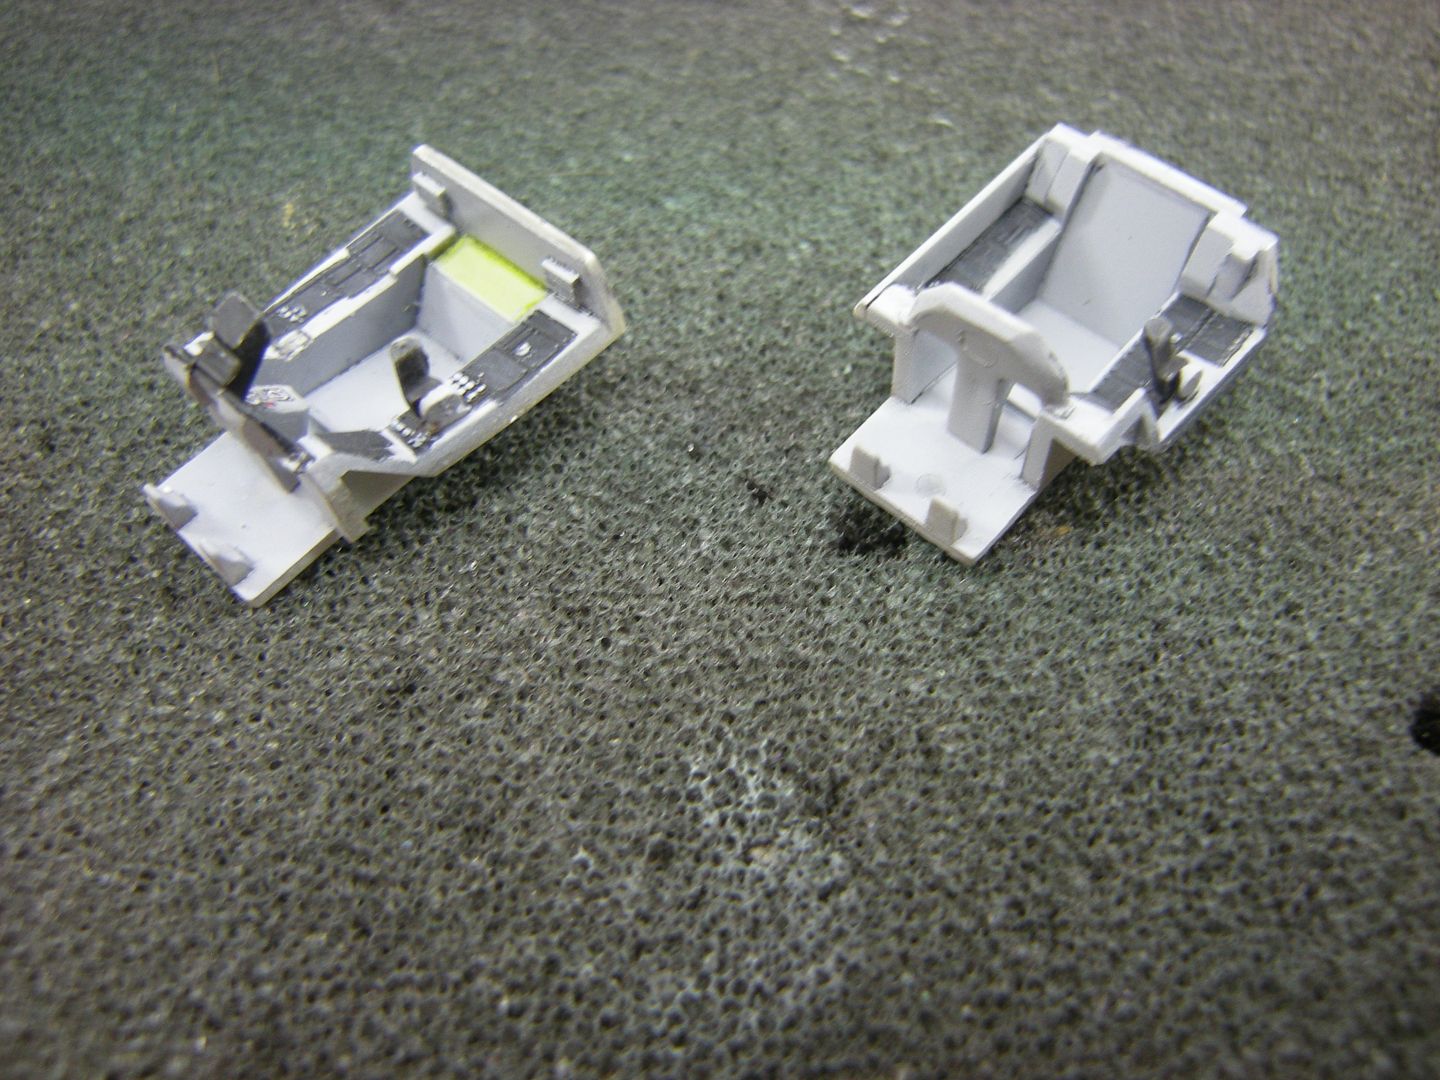
The seats have now been painted up as well

These are some of the nicest 1/72 ACES seats I have seen, especially for kit supplied seats. It would have been nice if all the seat belts were moulded on but with the aircrew in place this will not matter
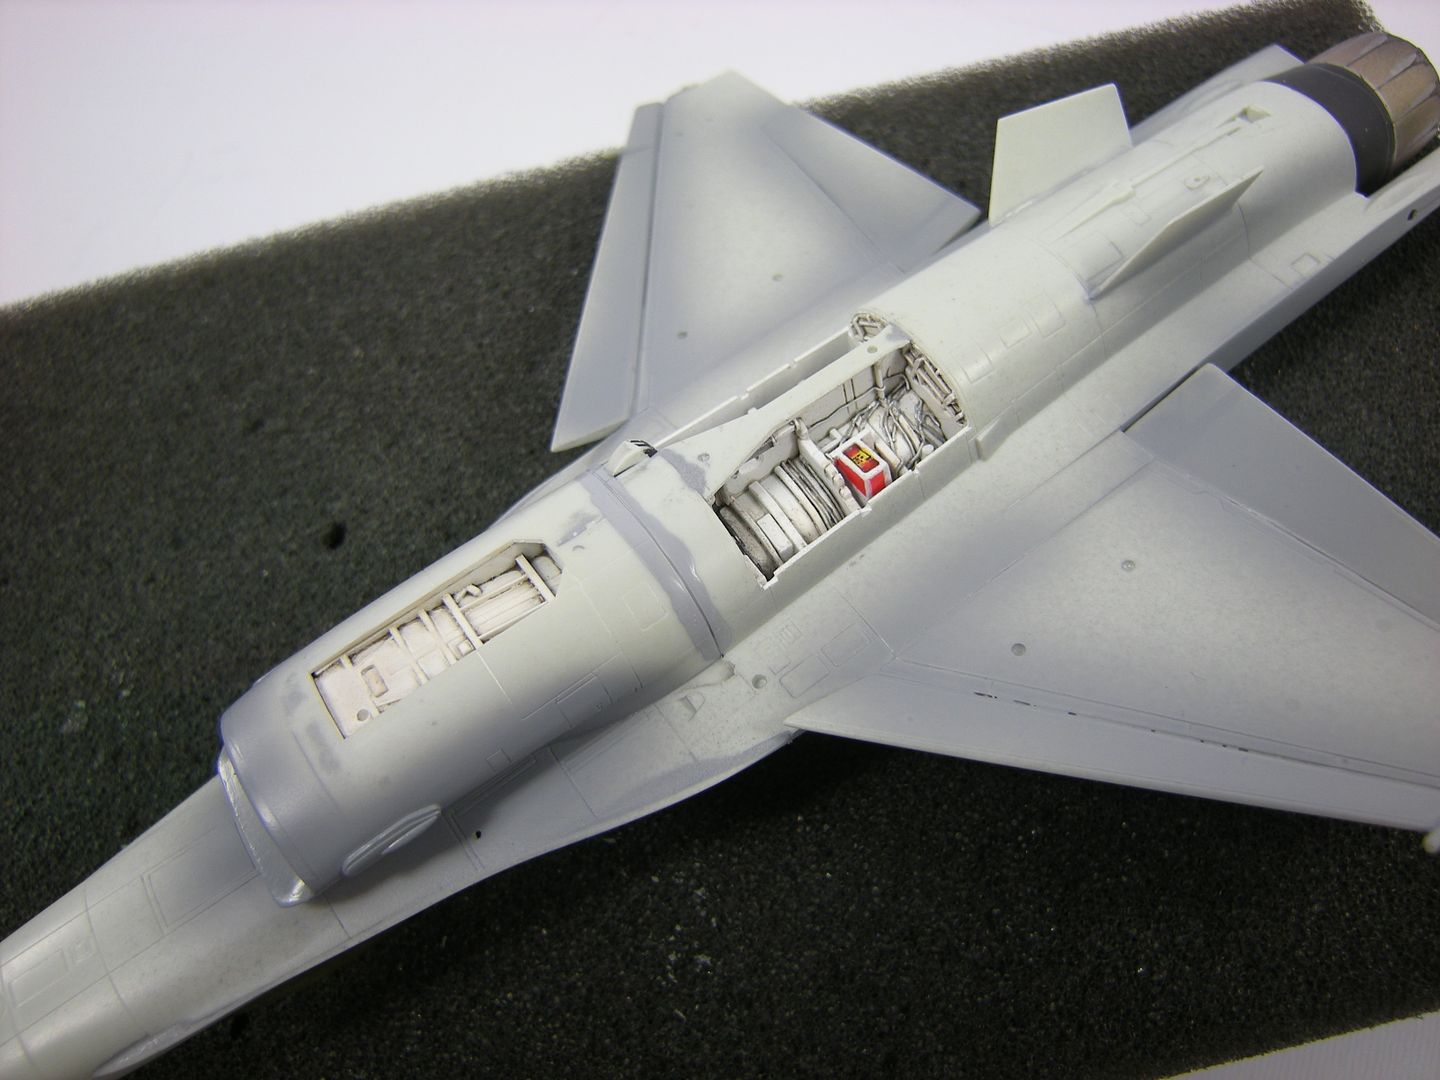
The MLG has been added to the lower fuselage but the intake assembly is only dry fitted at this stage


I don't think I will be able to paint the intake separately and just drop it in . the fit is good but still has a visible gap
Finally, the cockpit sill has been painted up. One thing that struck me was that the rear instrument coaming lacks the ASHM that my subject BLK 50 jet has and left unmodified the part is more representative of an F-16B. I used some scrap resin and copper wire to knock up a crude representation and some addition cabling was added before the whole lot received a coat of black
cheers,
Pappy
-
G'day ALF,
Yup, what they said.
The time difference involved in being on the other side of the planet does not always allow for a prompt answer
I didn't know about the early BLK 30/GE birds, thanks H2, I Iearnt something new!
cheers
Pappy
-
1 hour ago, JackMan said:
Nice progress! Good surgery on the leading & trailing edges too

Thanks very much. It was much easier to do before the wingtip launchers are added
cheers,
Pappy
-
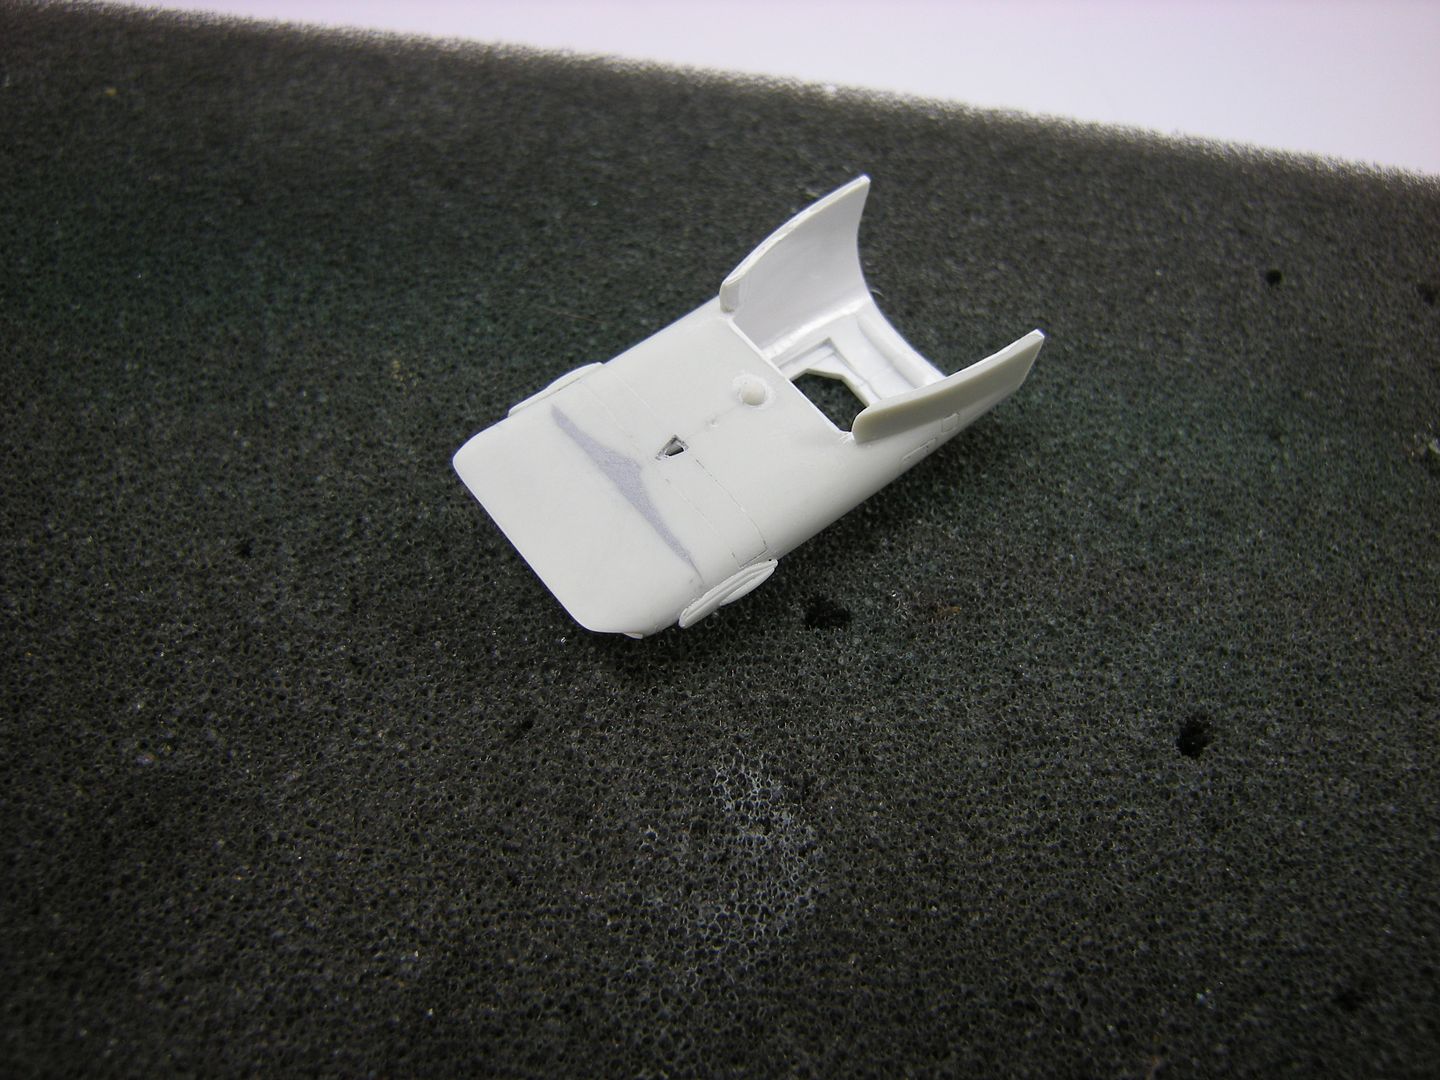
G'day people,
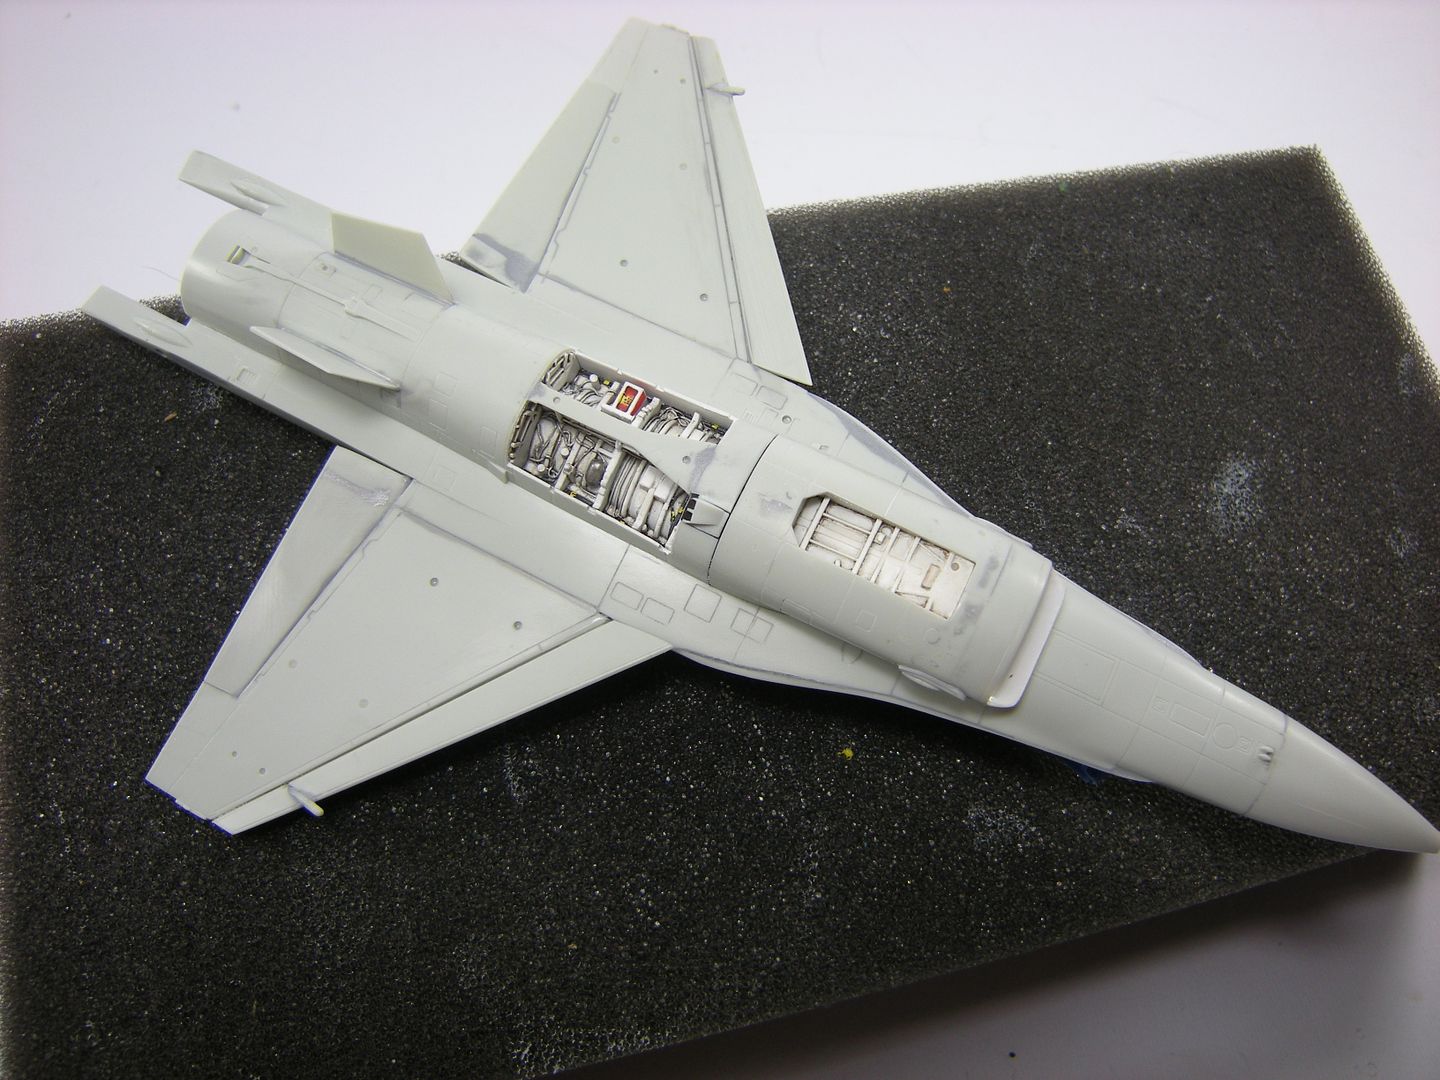
Revell break down heir kit fuselage a little differently to their Has equivalent. They have opted to use a common rear upper and lower fuselage section with different forward sections to allow for the single and dual seat versions. The advantage here is that the wings are moulded integrally to the rear section but the modeller is left with a potentially nasty seam to clean up. I would have preferred Hasegawa's approach which involves a completely new upper fuselage for one hole/two hole vipers as this eliminates a potentially nasty seam.
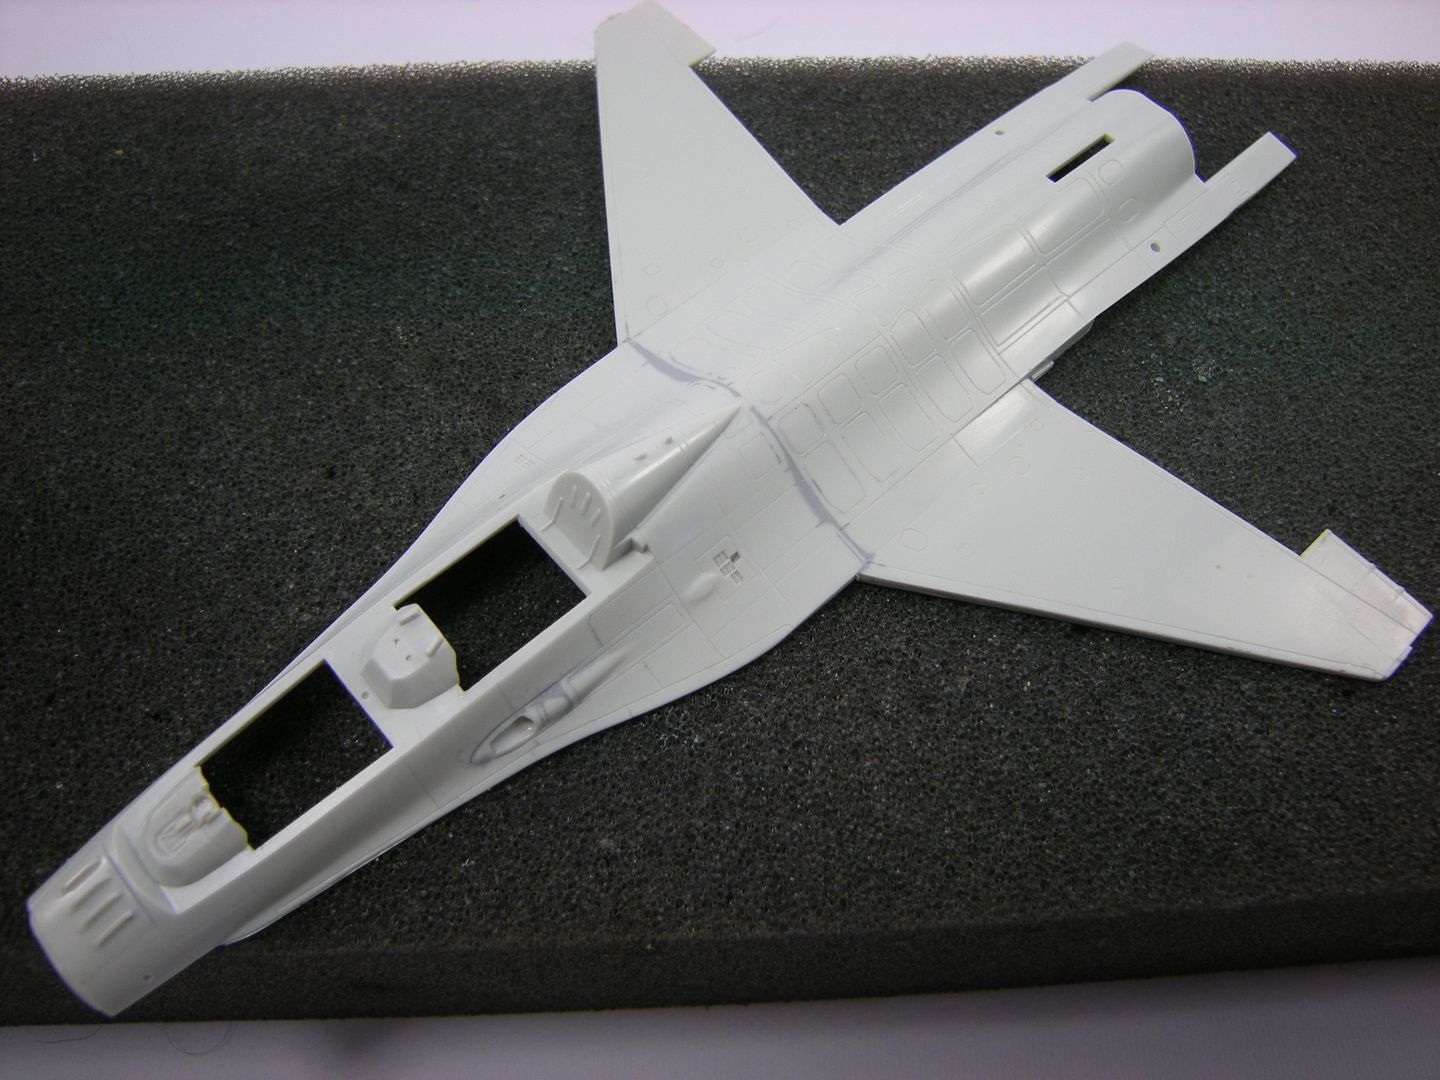
I glued the fuselage parts carefully in stages as I found the forward part wanted to move around if left by itself during test fitting. It is a complex surface so I joined the left edge to the top centre and let it cure overnight. This let me get the two surfaces as flush as possible. The next day I used a couple of spots of CA to hold until the other side was in the correct position, then wen I was happy, a bead of CA was run in from the underside and zapped with some accelerator. A smear of liquid putty was applied over the top and allowed to dry then lightly rubbed back. The seam was pretty good and did not need any detail to be re-scribed - result!
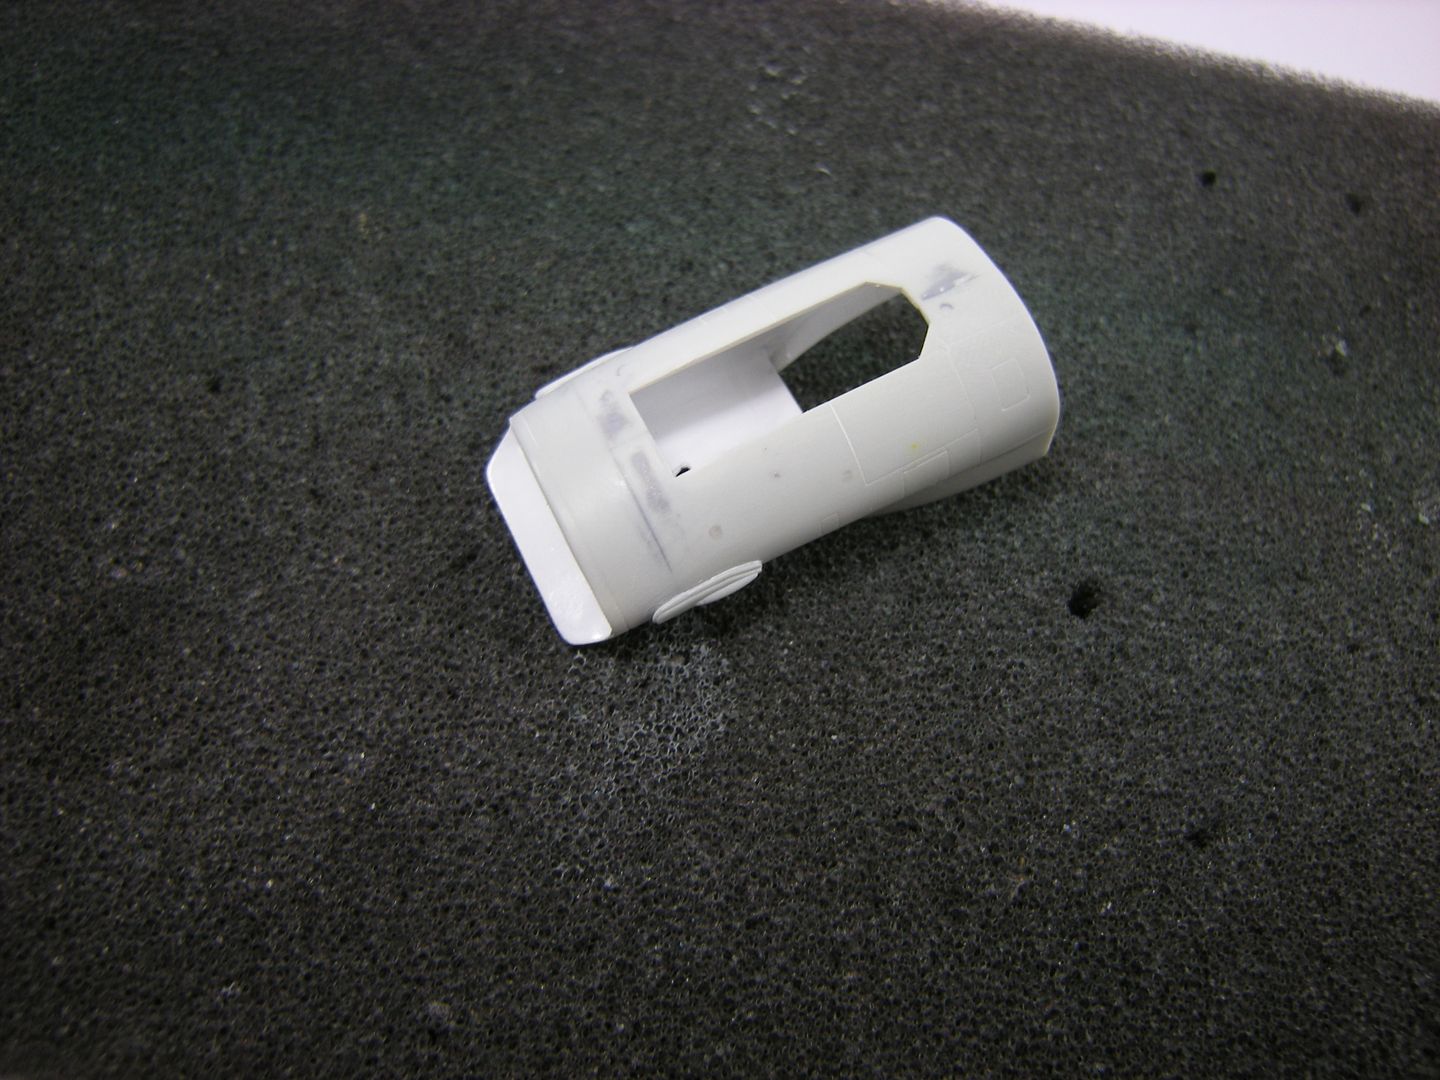
The cannon port is supplied as a separate part as this item changed shape during the course o the jet's development and the F-16D features the later style. The kit part did not fit without some judicious sanding first and still required filling and sanding to blend in.
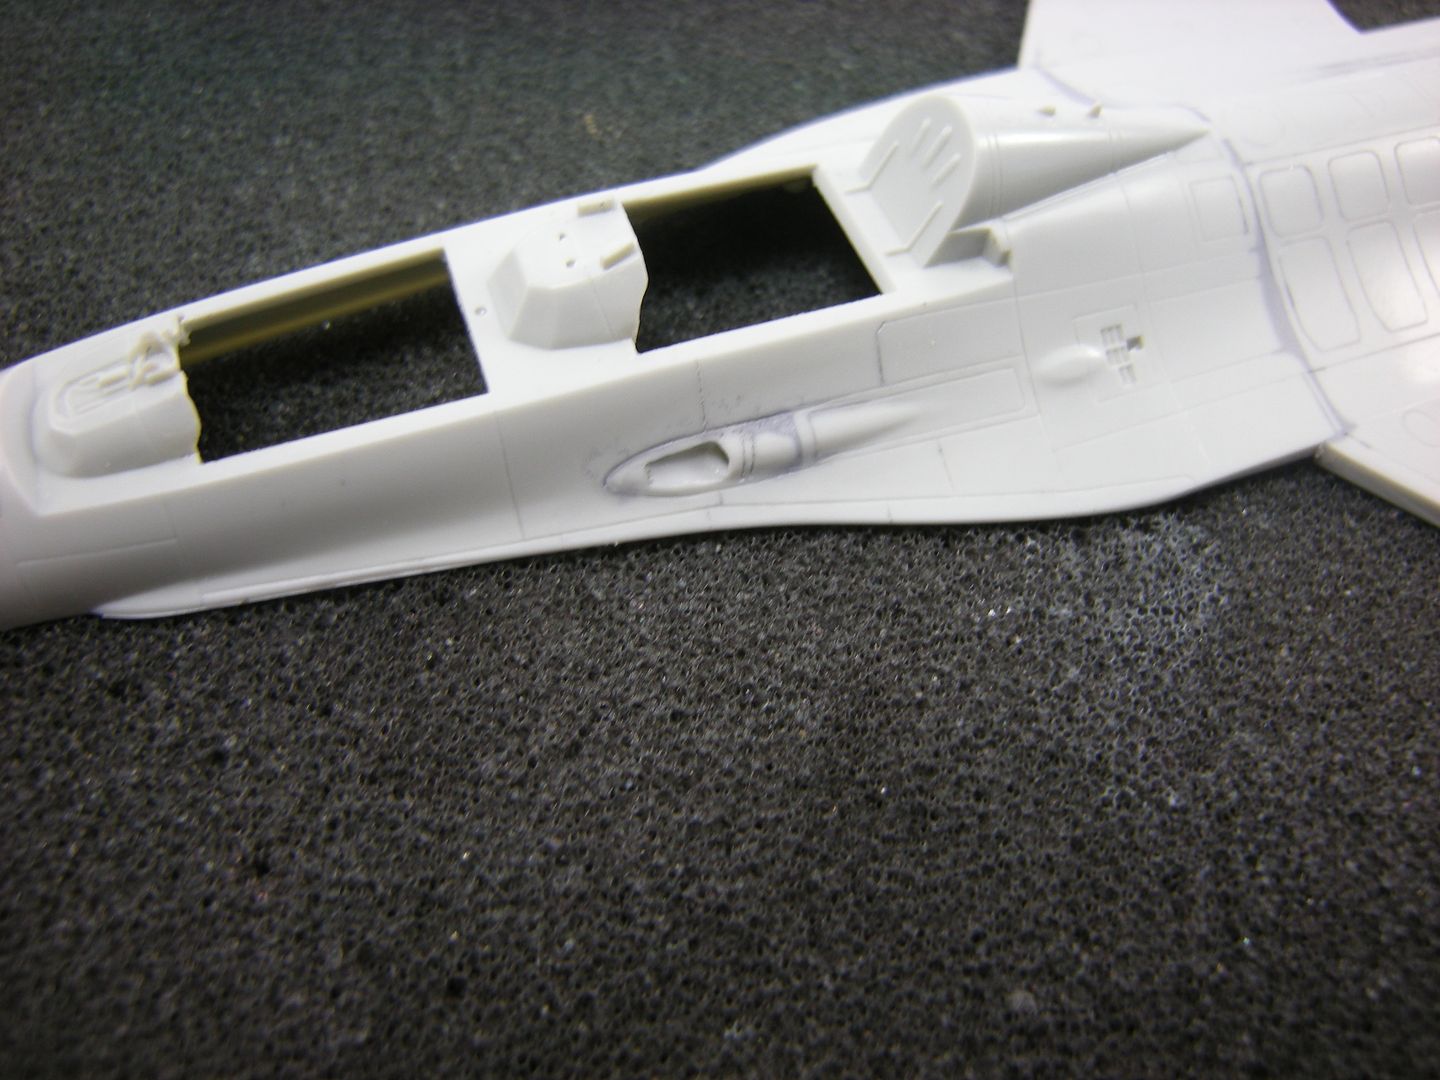
Still on the body, I wanted a more dynamic appearance for my kit so used this opportunity to saw off the leading and trailing edge flaps which will be put aside until a later stage
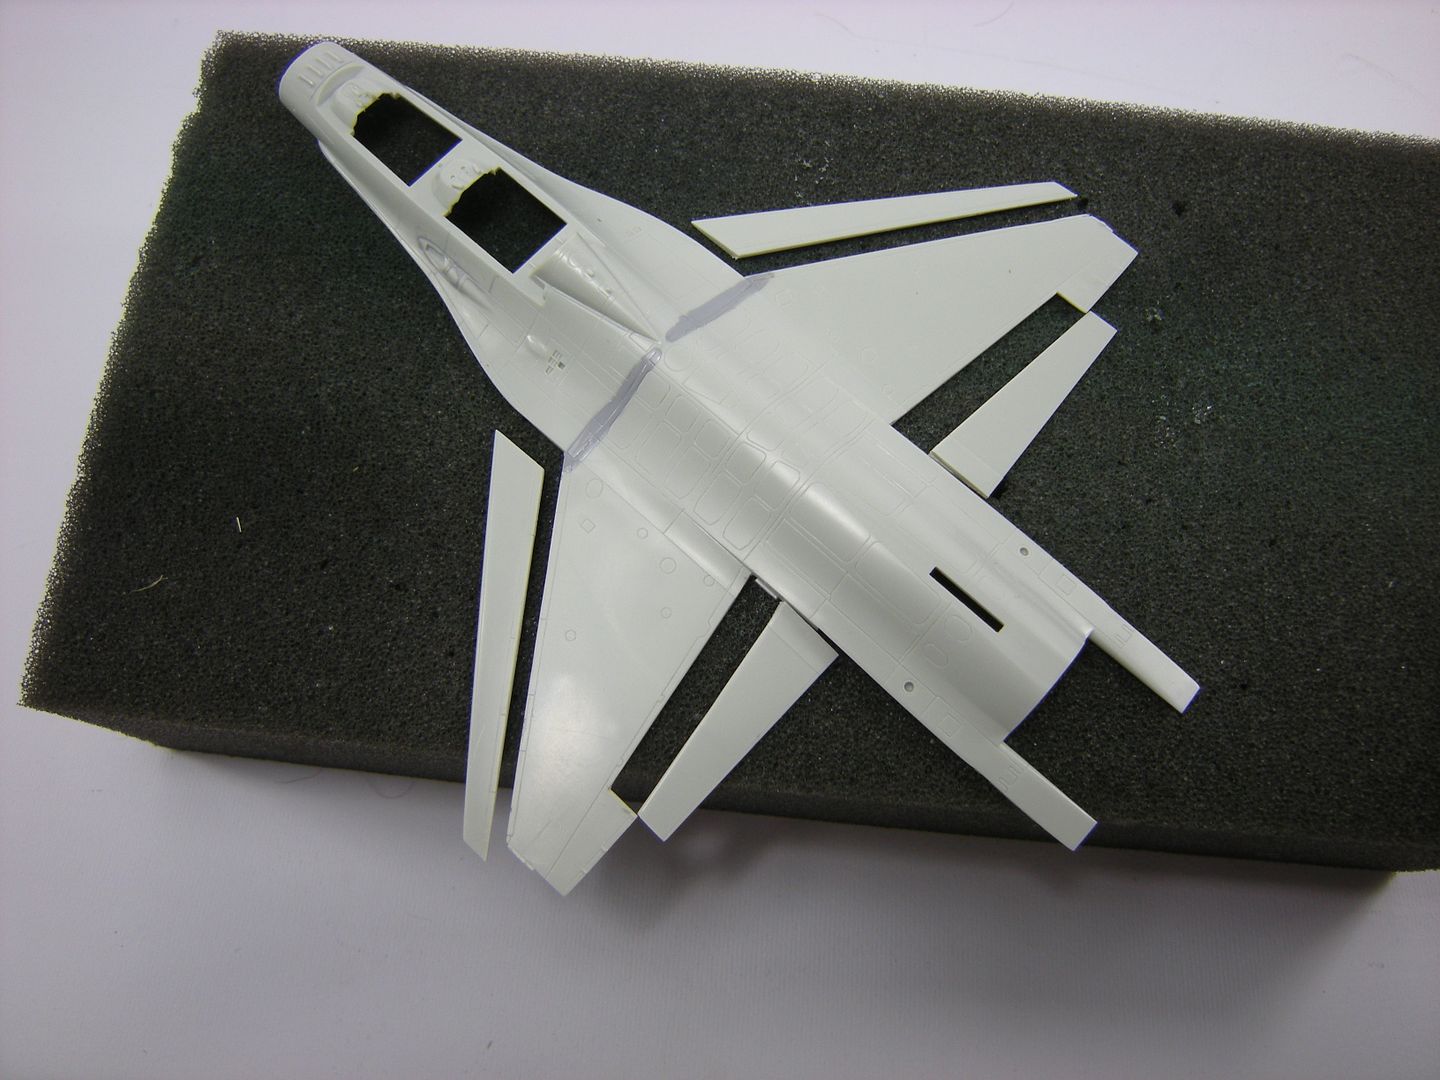
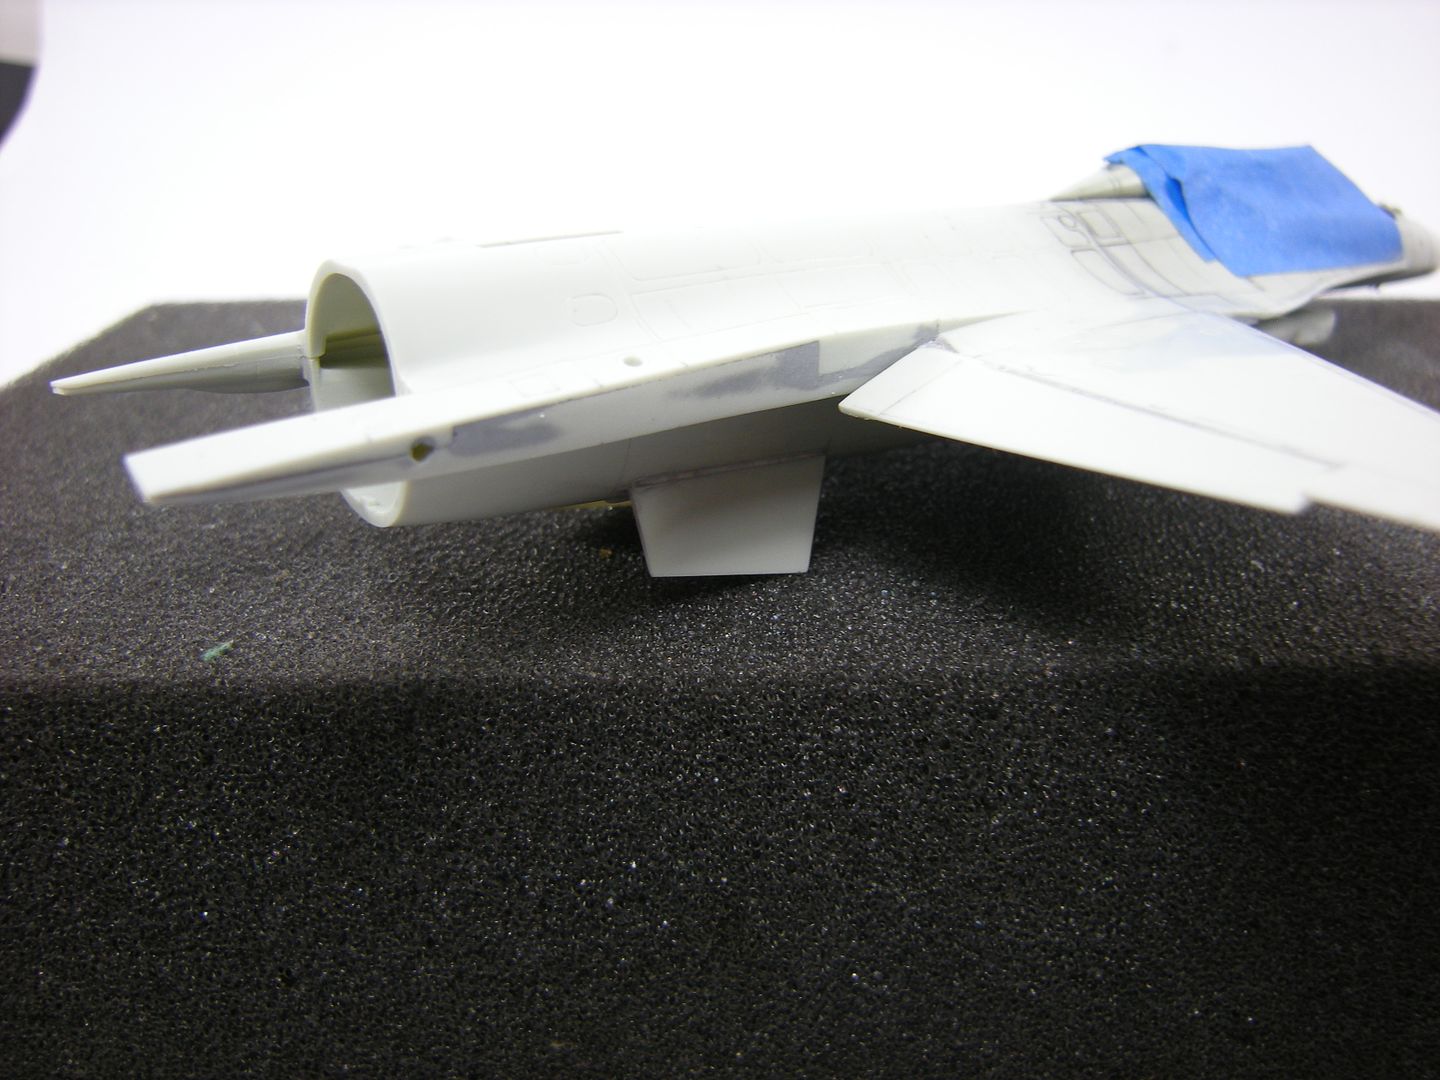
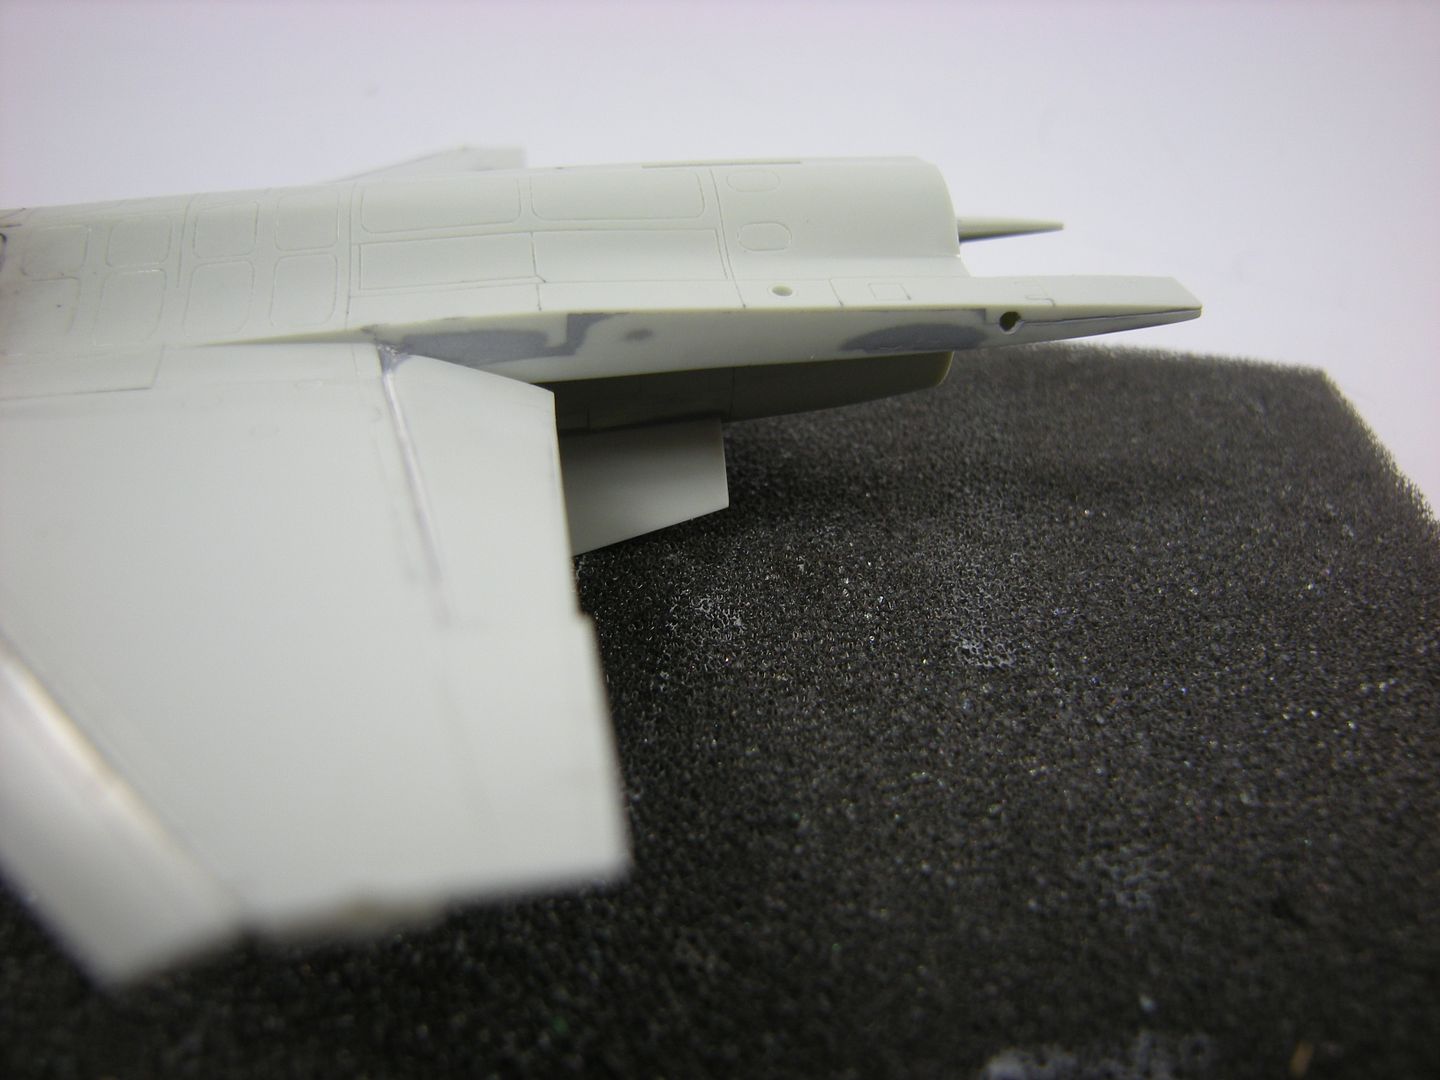
The intake has been assembled and required some filling and sanding of the upper (internal) and lower seams. As my kit will be posed in-flight I couldn't just cheat and add an intake cover so I had to do the work. The destructions would have you add the lower intake ramp/ Nose Wheel Well (NWW) during assembly but this can easily be added after the main parts are together which greatly eases the filling and sanding stage.
Finally, the MLG has been painted and detailed.Much more could be added but I find that detailing these areas involves a law of diminishing returns and this would be enough for this build
cheers,
Pappy
-
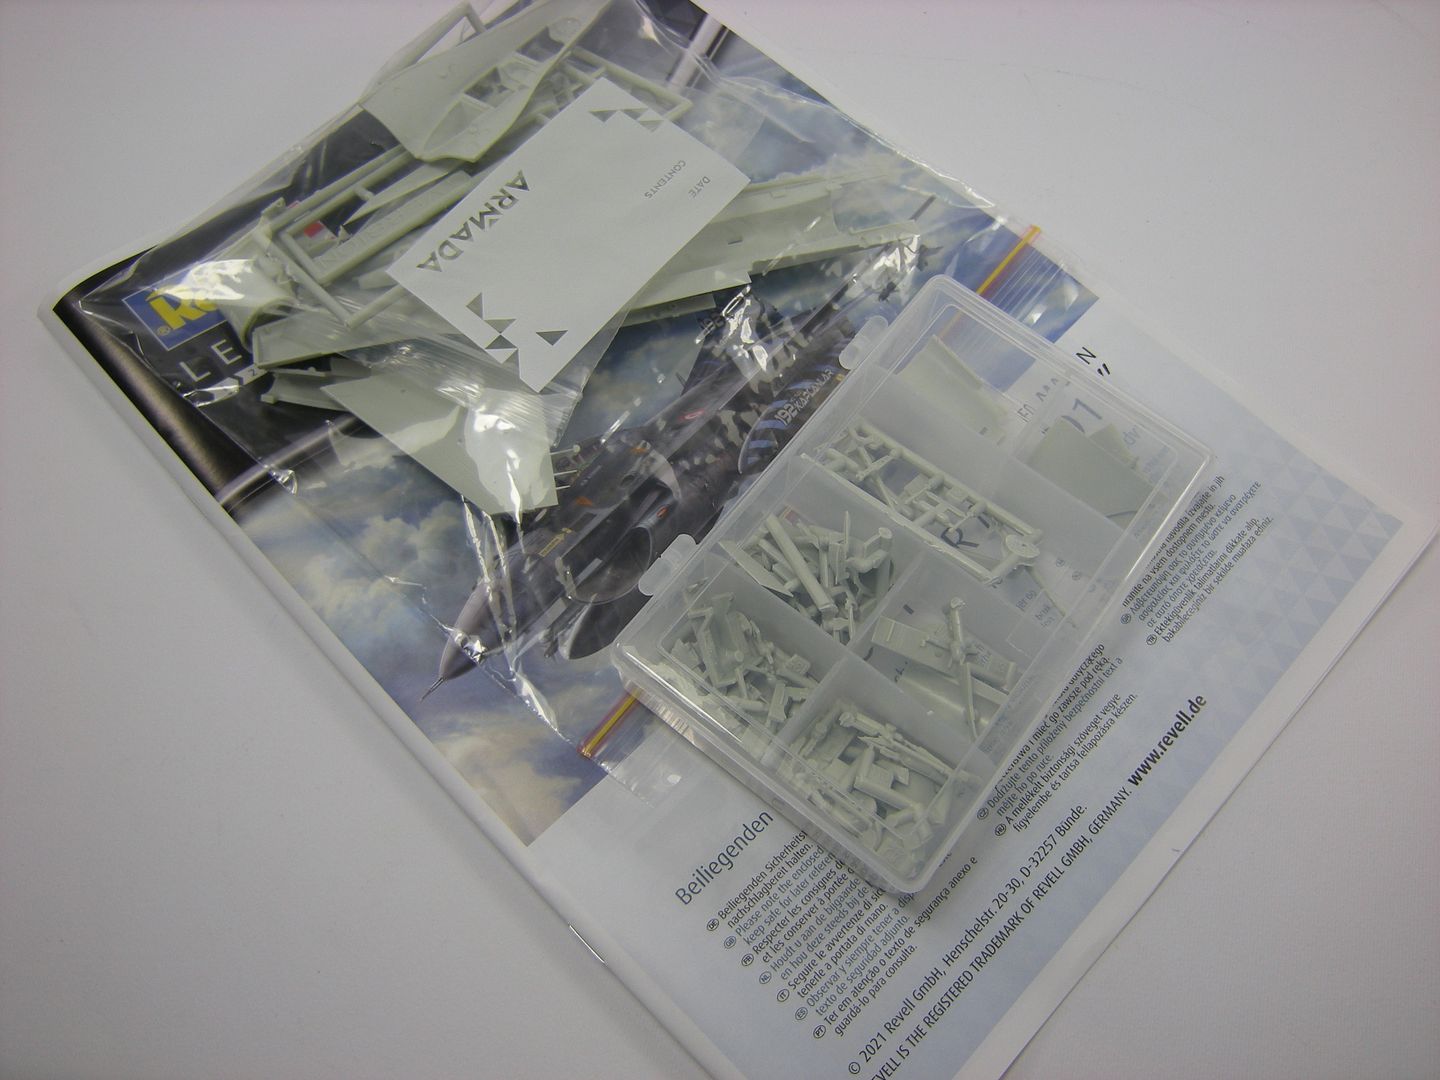
G'day people,
I have made a very basic start today by doing what I like to call condensing. the kit comes with many parts that will not be utilised as this kit is based on Revell"s earlier PW engined F-16B kit while the kit subject in this boxing is a BLK 50 (GE engined) F-16D and includes an additional sprue for that purpose. In order to avoid confusion and eliminate the potential to add an incorrect part, these 'Not for use" items were removed from the sprue and added to zip-lock backs in their parts group i,e tail, inlet, weapons etc) and squirreled away into the spares bank.
I then removed the remaining parts and stored them in a pill box. After an hour I was left with this
That done I then started work on the various assembly groups. I tend to jump around the instructions as I find I can paint and assemble one group while another is drying.
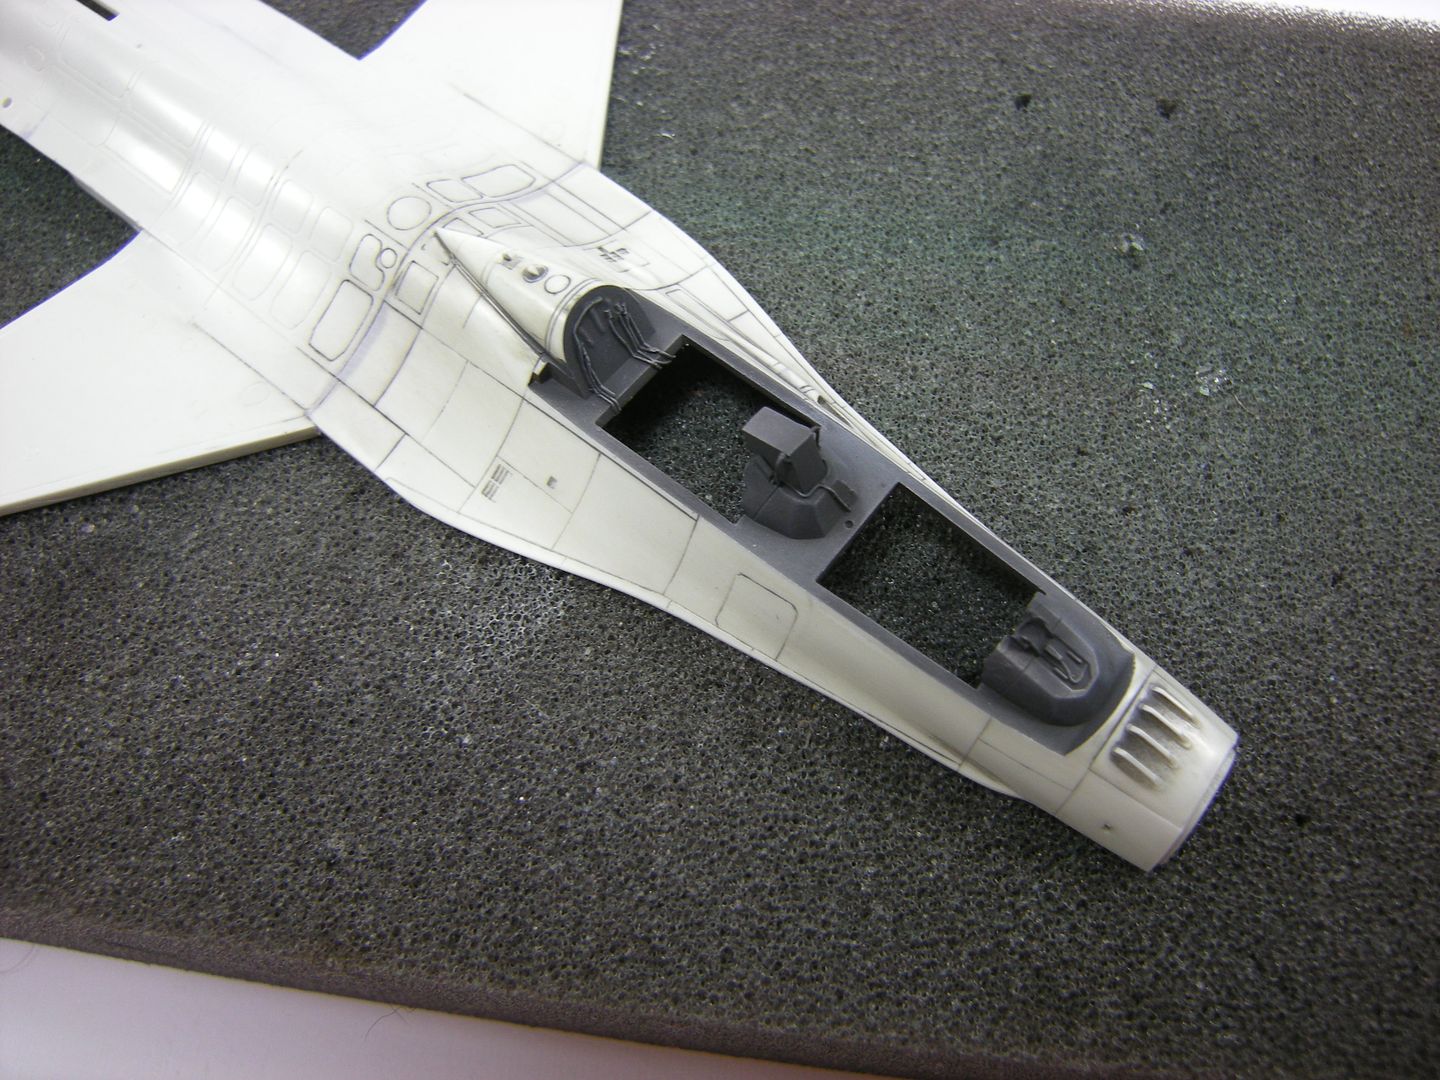
First up, the cockpit tubs were cleaned up.
This kit will have aircrew installed, canopy down in-flight so I was not going to go crazy. I simply added a representation of the two air vents on the rear bulkhead of the front cockpit using some plastic sheet. The throttles were added (a nice if somewhat over scale touch) but I will leave the joysticks off until Iafter the seats have been added
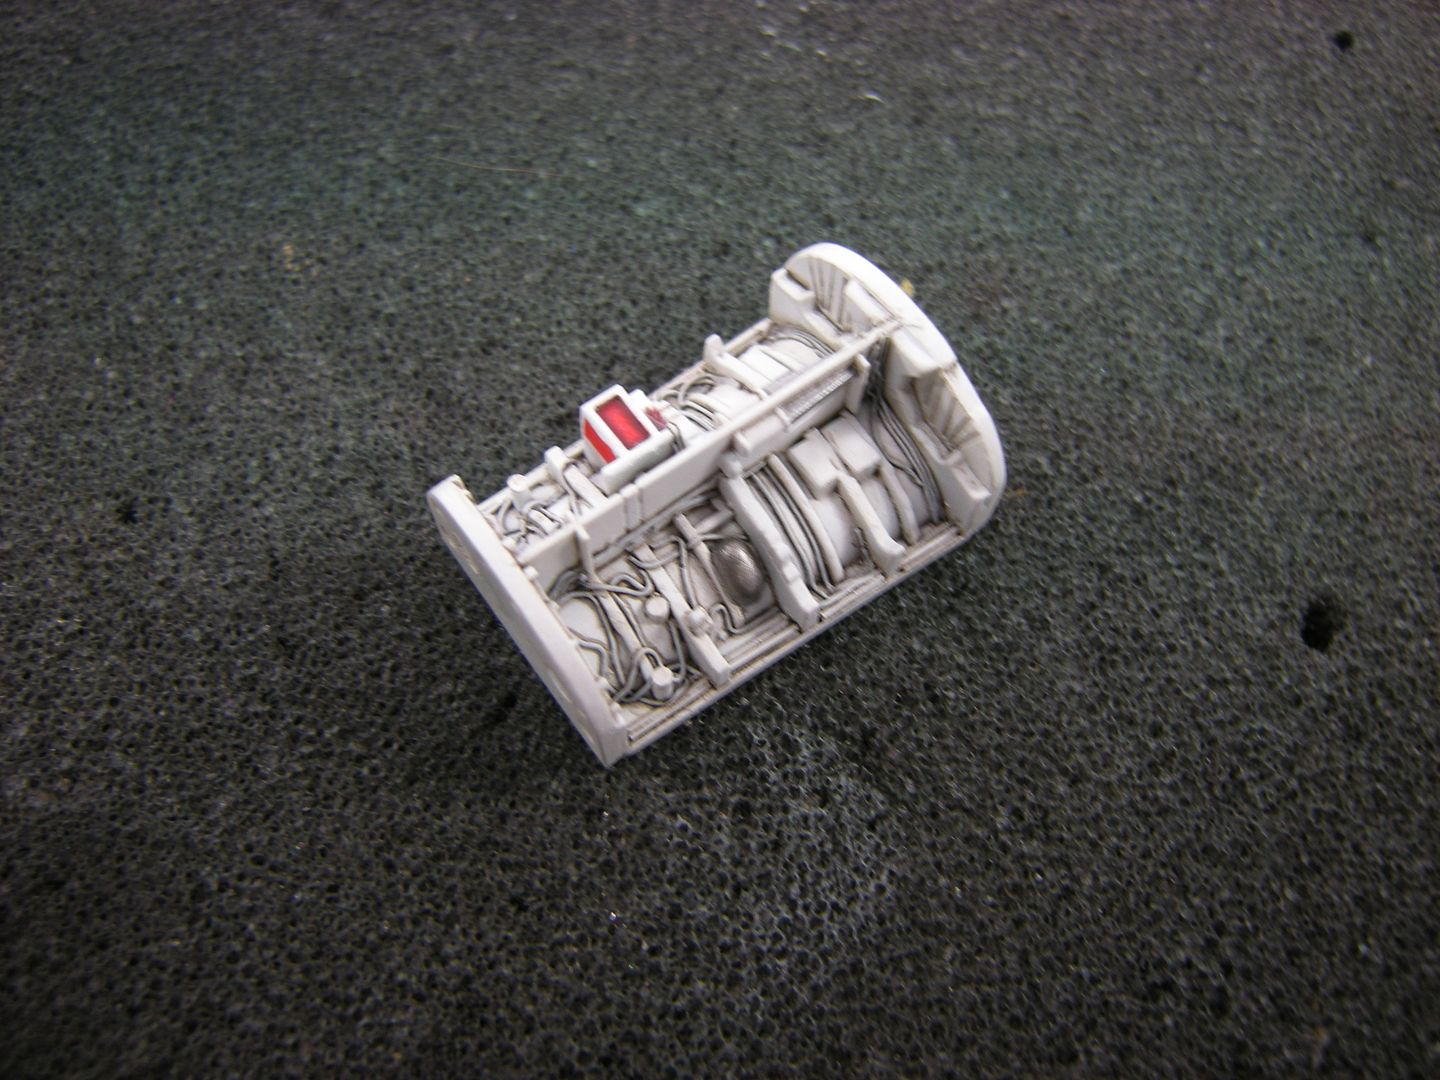
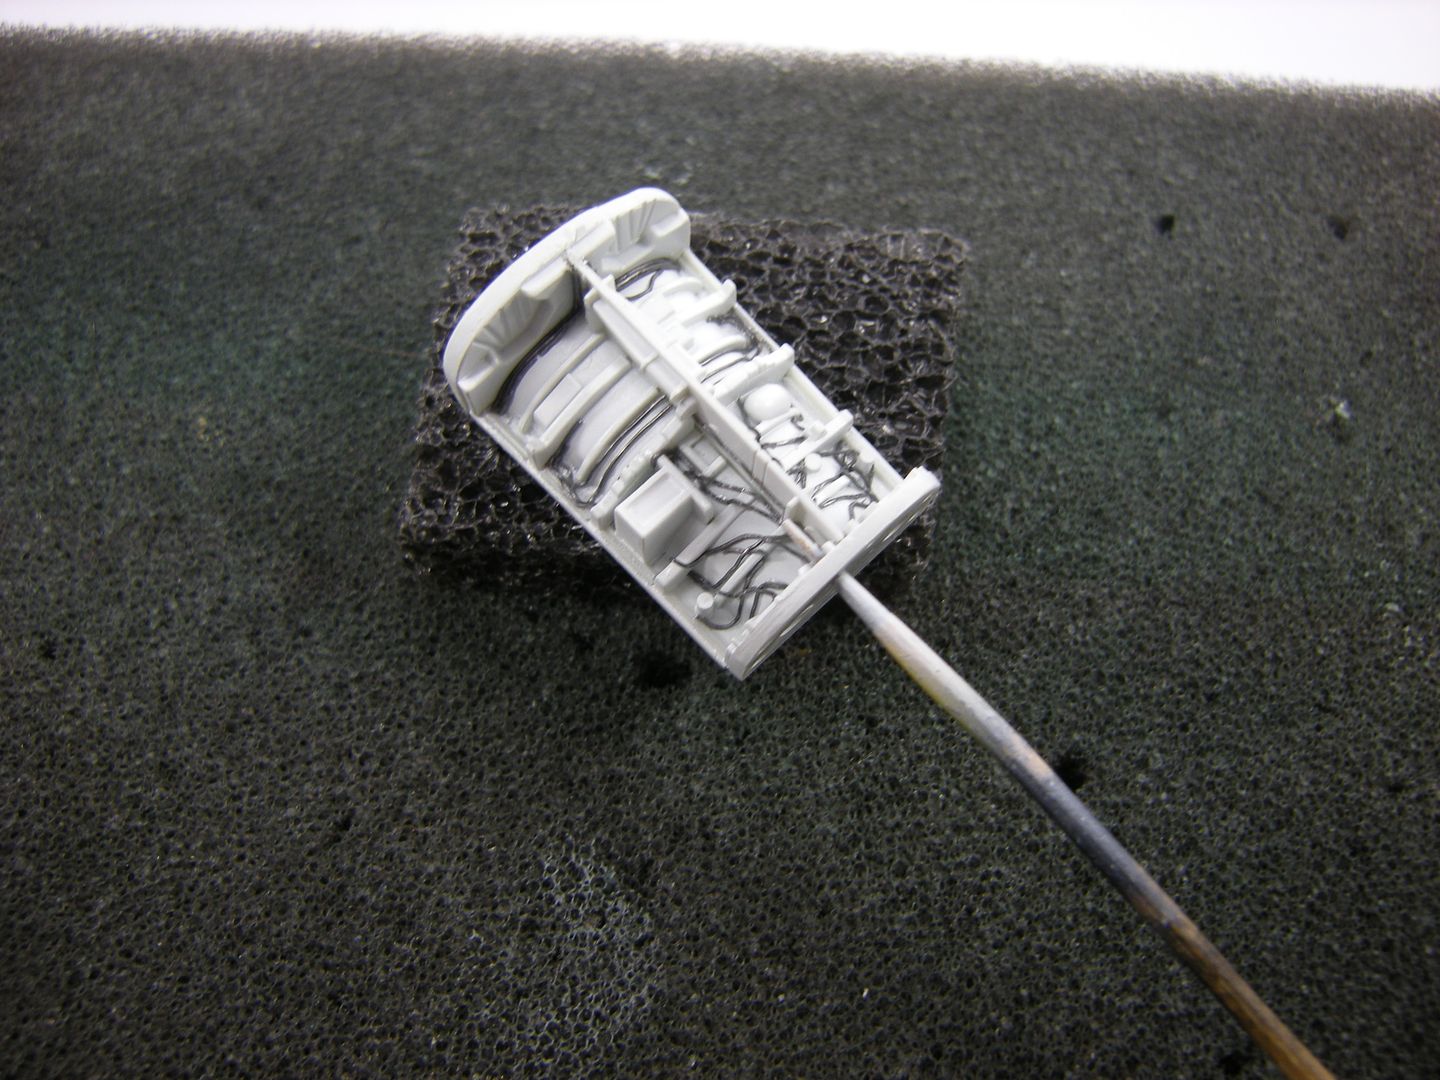
The Main Landing Gear (MLG) bay was also assembled. This is far superior to the old Hasegawa offering. A quick spray of white to see how it comes together. I was going to just leave it alone and add a wash but my AMS took over and I decided to add some wire to busy it up
Since I was in the detailing mood, the seats were assembled and received some additional detail
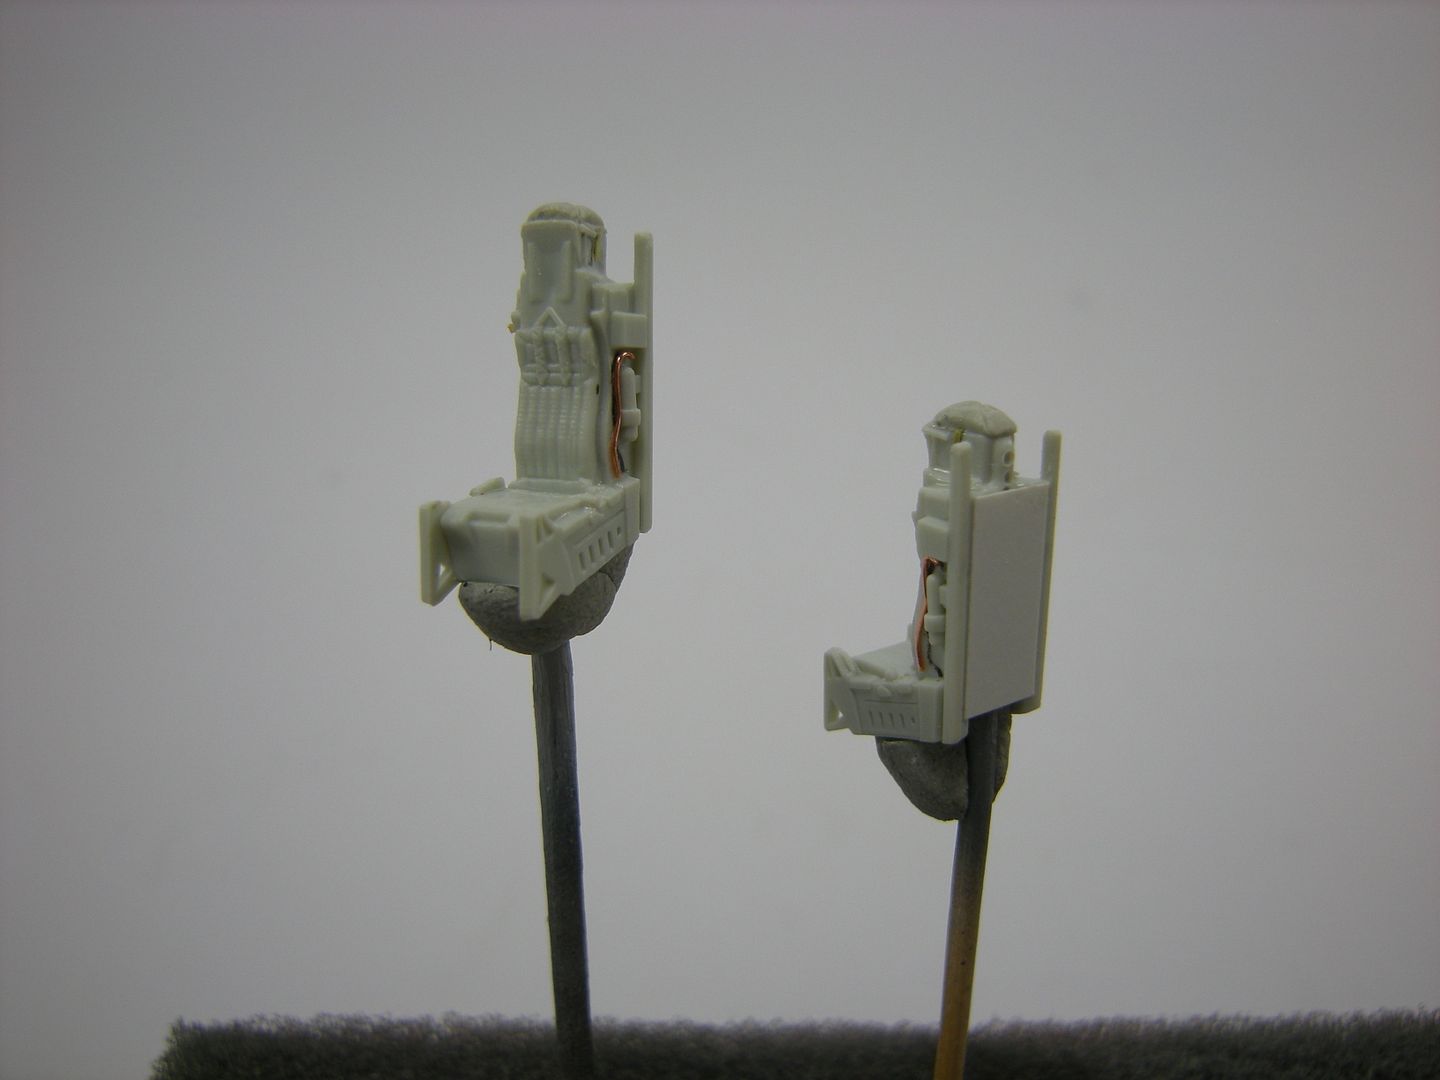
The back of the seat assembly was sheeted over as it was just an open section that did not look correct. Other details added include the tubing running from the emergency oxy down the seat side (and a similar line on the other side) but the area that really needs some help is the top of the headbox.
Early ACES II seats had fixed pitot probes that stuck out each side. The seats were later modified to ave retracted probes folded against the headbox sides. I cut off the kit probes and scratched up some replacement probes from stretched sprue. The final addition was to add some two-part epoxy putty to the top of the headbox sculpted to represent the canvas flaps of the parachute pack,
cheers,
Pappy
-
44 minutes ago, f5guy said:
I see what you're talking about, but after looking in Jake's F-16 book, which was my main reference, there's a bunch of Vipers in there with the "doughnut" in silver too, so who knows.... It is what it is at this point. Fred.
G'day Fred, I don't suggest correcting it now, you have made a stunning job and I am sure that Roto will be very happy with it and probably won't even notice.
On page one, in the second picture that shows the intake (with a cover installed) the ram inlets above the intake itself are angled forwards.
This is a recognition feature for the GE engined /MCID ("Big Mouth") inlet combination which use the CF weave doughnut as HABU correctly pointed out, if anyone knows he should! The PW engine/NSI inlet uses the metallic doughnut combination.
F-16s are a little like Me/Bf-109s in that they have lots of little tweaks and updates and it can be daunting to get these correct as there lots of variation due to different users and block level upgrades, even with a reference book. I am not posting this to pick holes in your kit, as I said, it looks fantastic, just to help others who may be in a similar situation
cheers,
Pappy
-
G'day people,
I would like to join in and this will be my kit
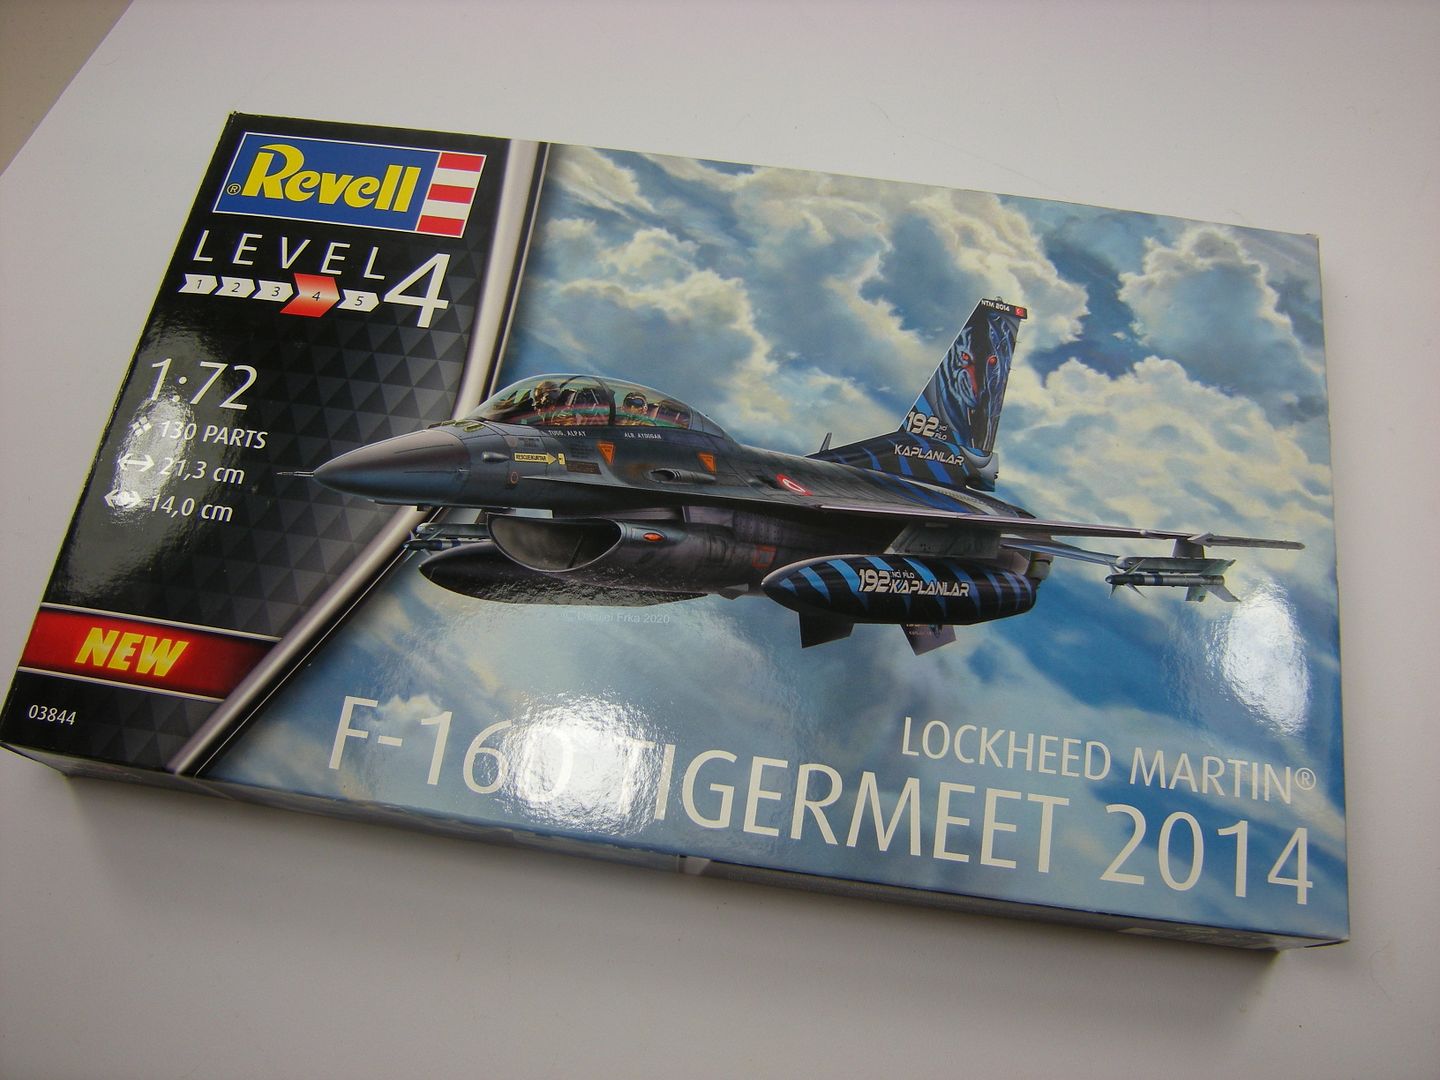
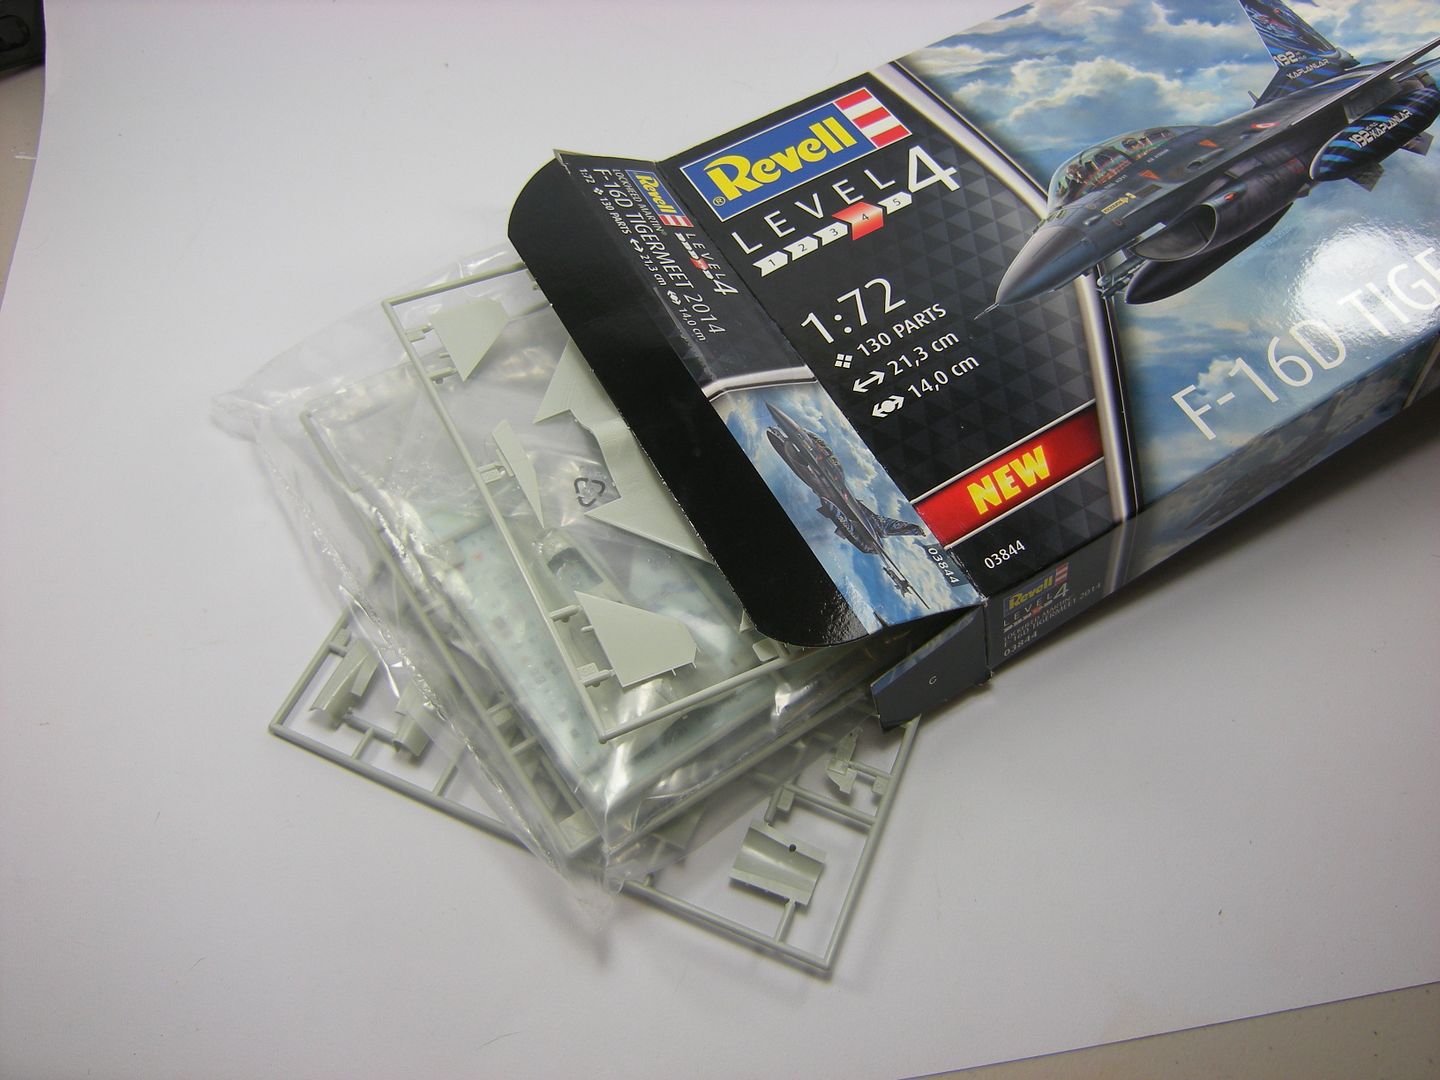

I have not built a Revell F-16 before so it will be interesting to see how it compares the the Hasegawa offerings. It looks very nice with more detail in general but for a relatively new kit there is a considerable amount of flash. As an example here are some engine exhaust parts
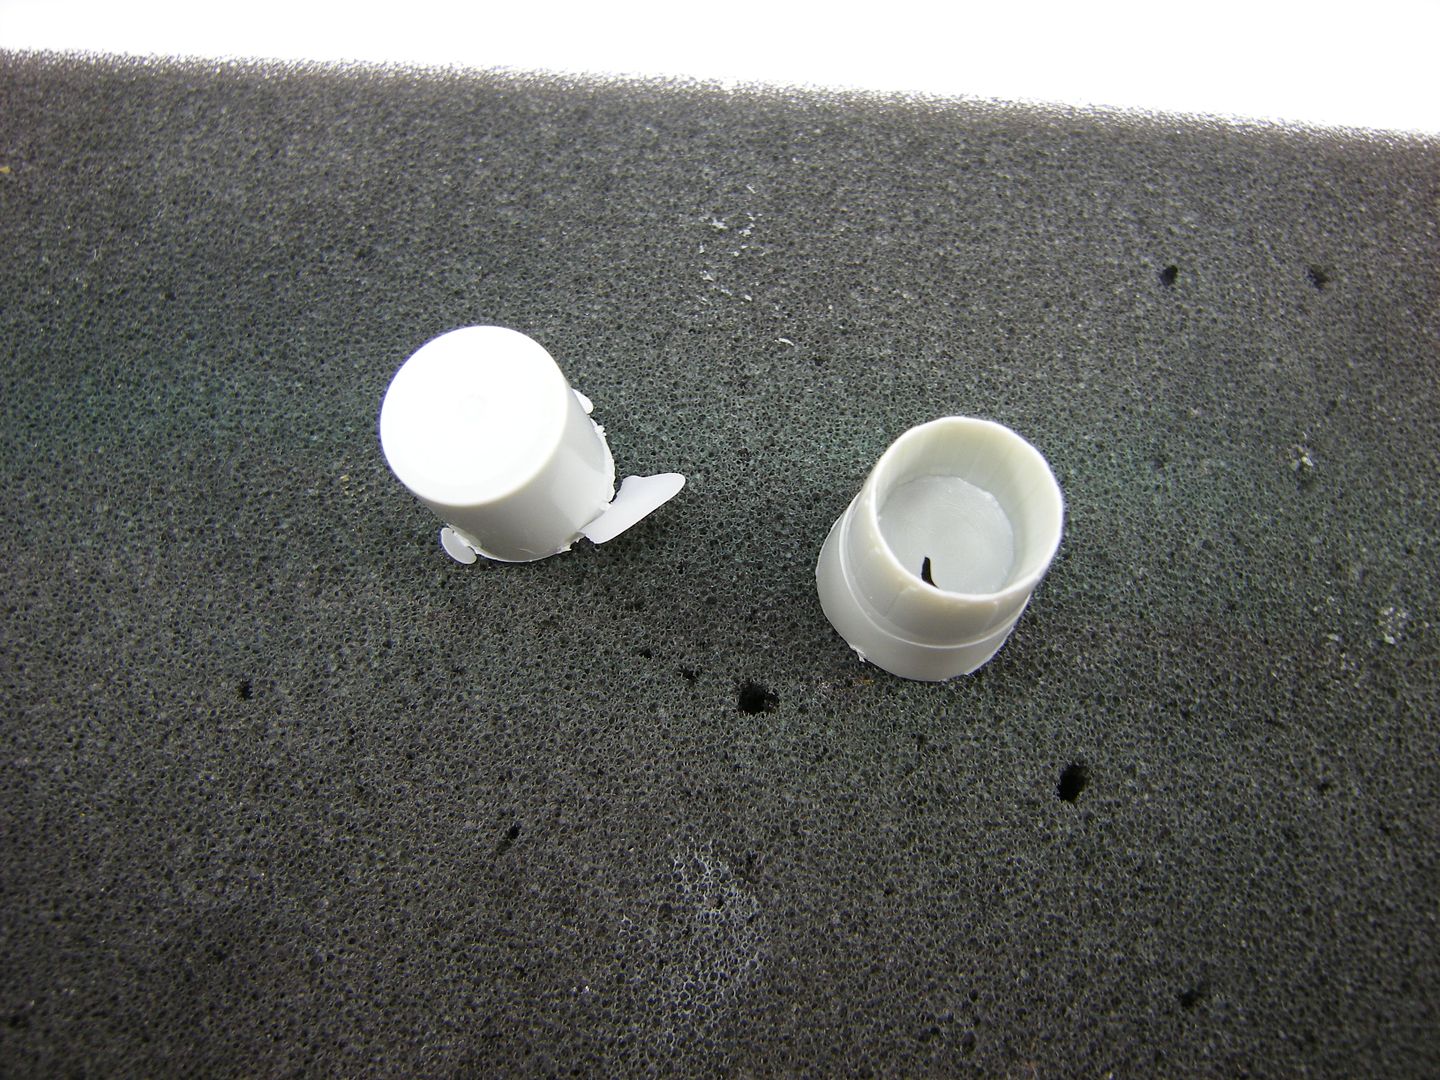
The exhaust opening is almost completely closed over!
cheers,
Pappy
-
6 hours ago, Geoff M said:
Thanks for the compliment. About the burnere can, As Bob Ross would say that was a happy accident. The kit itself was molded in white plastic. I put a wash of tamiya panel line black on it to highlight the recesses and when I went to wipe it off it took the paint off down to the white plastic. So I went with that.
Geoff M
Accident or not it is a great representation of worn ceramic coating. Congrats again on a great looking T-bird
Pappy
-
G'day Geoff,
Thank you very much. That is sad news, I hope the owner's situation improves,
cheers,
Pappy
-
G'day Fred,
That has turned out very nicely. I aways thought that the exposed part of the engine immediately behind the fuselage 'doughnut' was a black colour on GE birds, yours is a sivery grey colour?
cheers,
Pappy
-
G'day all,
It has been a little while since I havebeen on here. It looks like there is a current F-16 Group Build (GB) underway.
I have some questions:
1. Why is this not in the dedicated GB sub-forum?
2. What are the GBrules and dates?
3. Can I join in?
cheers,
Pappy
-
G'day Geoff,
Lovely work. I was skeptical that the decal seat belts would look convincing but they look very nice under the closed canopy. I alsoreally like the worn effects of the engine exhaust petals, may I ask hpow that effect was achieved? It looks very convincing,
cheers,
Pappy
-
Awesome work CDT - you nailed it!
Many thanks,
Pappy
-
G'day people,
I posed the same question over at Britmodeller and it looks like it is an ACMI pod, potentially a RAIDS pod (or deriviative) which is close in dimension and shape to an AIM-132,
thank you for all the replies,
Pappy
-
-
43 minutes ago, Hoops said:
I would guess some sort of indigenous range instrumentation pod, definitely not CATM from my view.
Hoops
G'day Hoops,
It may be an indigenous pod, but if it was some AMI type pod I would expect some antennas to be sticking out?
I have tried 'zoomig' the image out to read the writing but it just makes the writing unreadable.
Hopefully someone will be able to identify the pod, I am stumped
cheers
Pappy


(2022 F-16 Group Build)Turkish F-16D
in In-Progress Pics
Posted
Thanks,
Pappy