


Devinelounge
-
Content Count
31 -
Joined
-
Last visited
Content Type
Profiles
Forums
Calendar
Posts posted by Devinelounge
-
-
Thanks! It was alot of small masking tape triangles to make that work!
-
Thanks, Steve. The clear film on the HUD fell off never to be see again. I’m hoping it’s something I can replace down the road though.
-
Wrapping this thread up with final product from few months ago before I start my next project! I ended up rebuilding most of it OOB after I had dropped the first attempt!


-
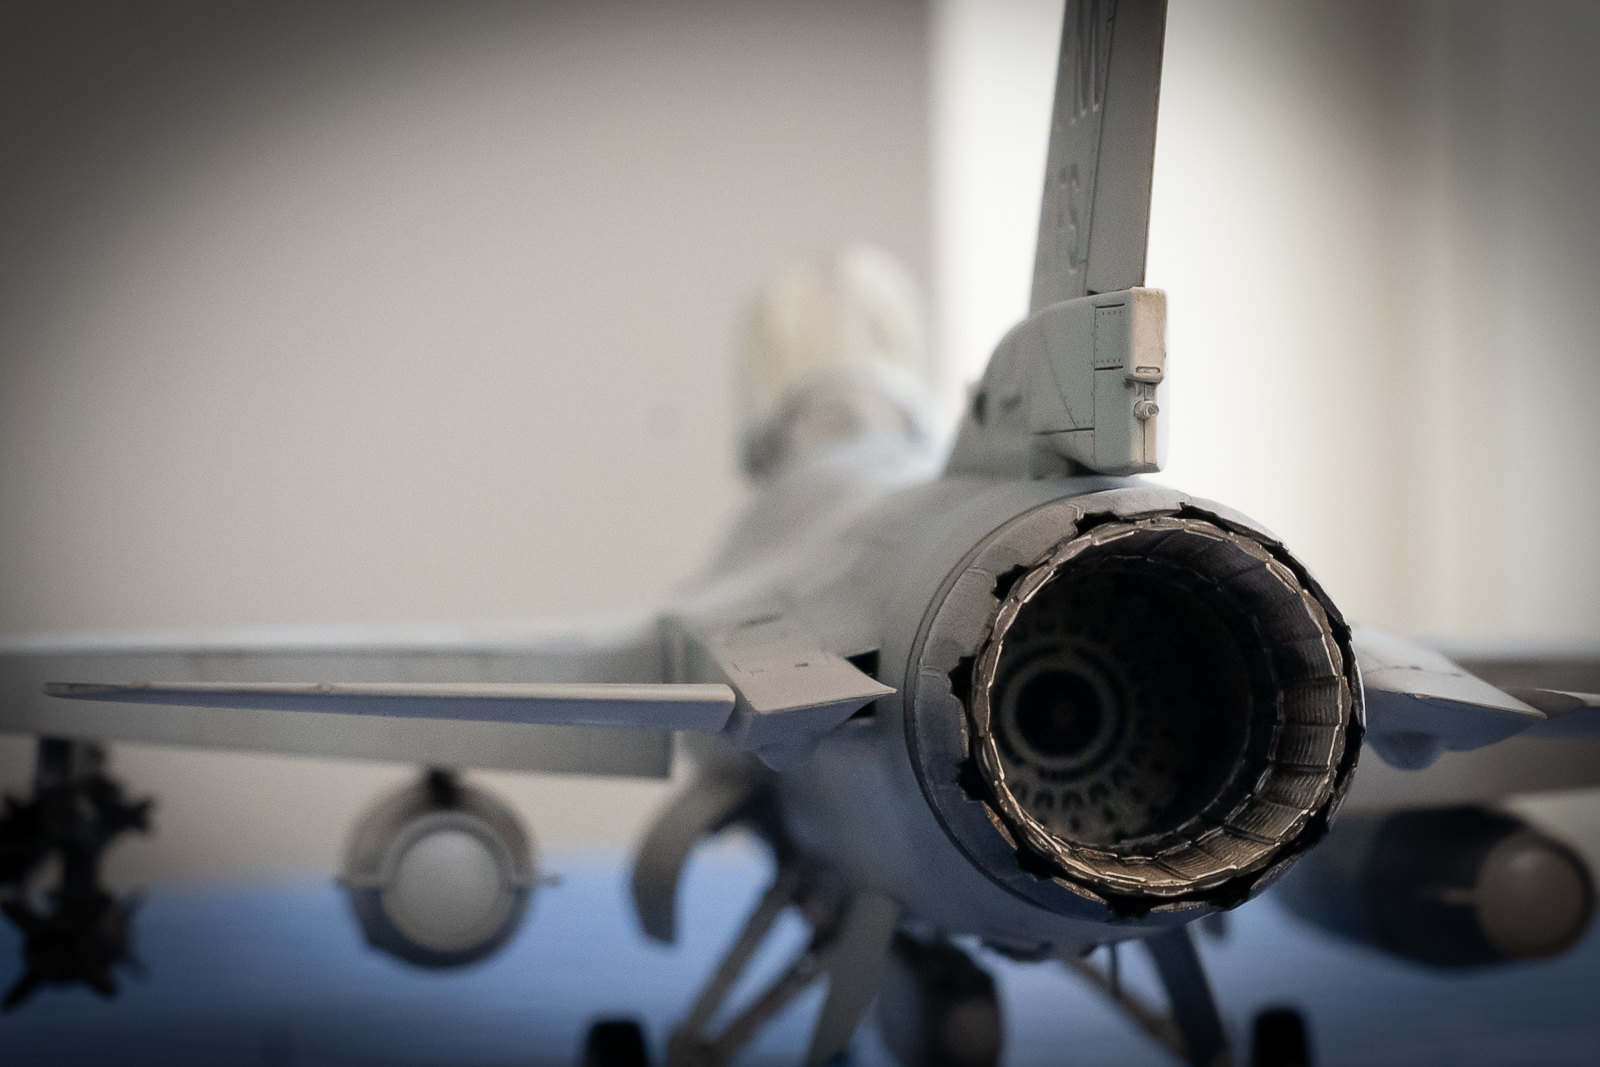
Thanks, Thadeus! The reason for lack of recent updates is there was a mishap where the model fell, and both the cockpit and landing gear became dislodged within the assembled fuselage, as well as the airbrakes and radome breaking off. After debating whether or not to quit the hobby forever for a day or two, I managed to salvage it. The cockpit and landing gear fit isn't quite perfect, but decided to give it my best and take some lessons learned along the way. Finally moving onto painting the body soon!
-
Quick update on engine painting before moving onto some other odds and ends before hopefully painting the rest of the aircraft soon.


-
Finished painting the landing gear bits, and it was definitely a challenge attempting to paint all the various cables and hoses that are molded onto the Aires set. Brush painting isn't really my strong suit, and if I had it my way I would airbrush everything. But I do really like the copper wire they provided, definitely doing more of that in my next build. All in all, pleased with my first resin wheel bay attempt. On to the engine.


-
Some test fitting my of aires wheel bay and seamless intake. I also removed air brakes to make way for Eduard's set with my new favorite UMM saw saw tool. This worked an awful lot better than the wobbly Xacto saw I tried to use on my last one 🙂

-
Thanks, Steve! Yeah, it'll definitely be on its gear so I'll see if I can modify the angle of those. Appeciate your insight there.
-
well that makes it easy. Thanks!!
-
Hi there, does any know which pylon I would need to fit my 1/48 Tamiya viper for the ALQ-131? I'm using the Eduard ALQ-131, and Tamiya gave me the centerline pylon for a fuel tank, but not sure that's what I need? Are there any aftermarket options out there if not?
-
Also almost done with the Aires cockpit. Unfortunately, I lost a few PE/resin details for the top of the seat, side wall, and one of the panels so I'm going to replace those bits before giving a final flat coat. I think I also shaved a bit too much off of the sides
of the forward housing bit the HUD sits on because it doesn't fit flush with the kit piece once installed, and will probably need a bit of filler and sanding to fill the small gap there. Getting this to fit was way more difficult than I thought, but I think it's only my second time using a resin cockpit set, so I'll take it as a learning experience.


Next up is fitting the Aires wheel bay into the kit and also integrating the seamless intake. Will check in with another update once the cockpit is finalized and the wheel bay is underway over the next couple of weeks. stay tuned.
-
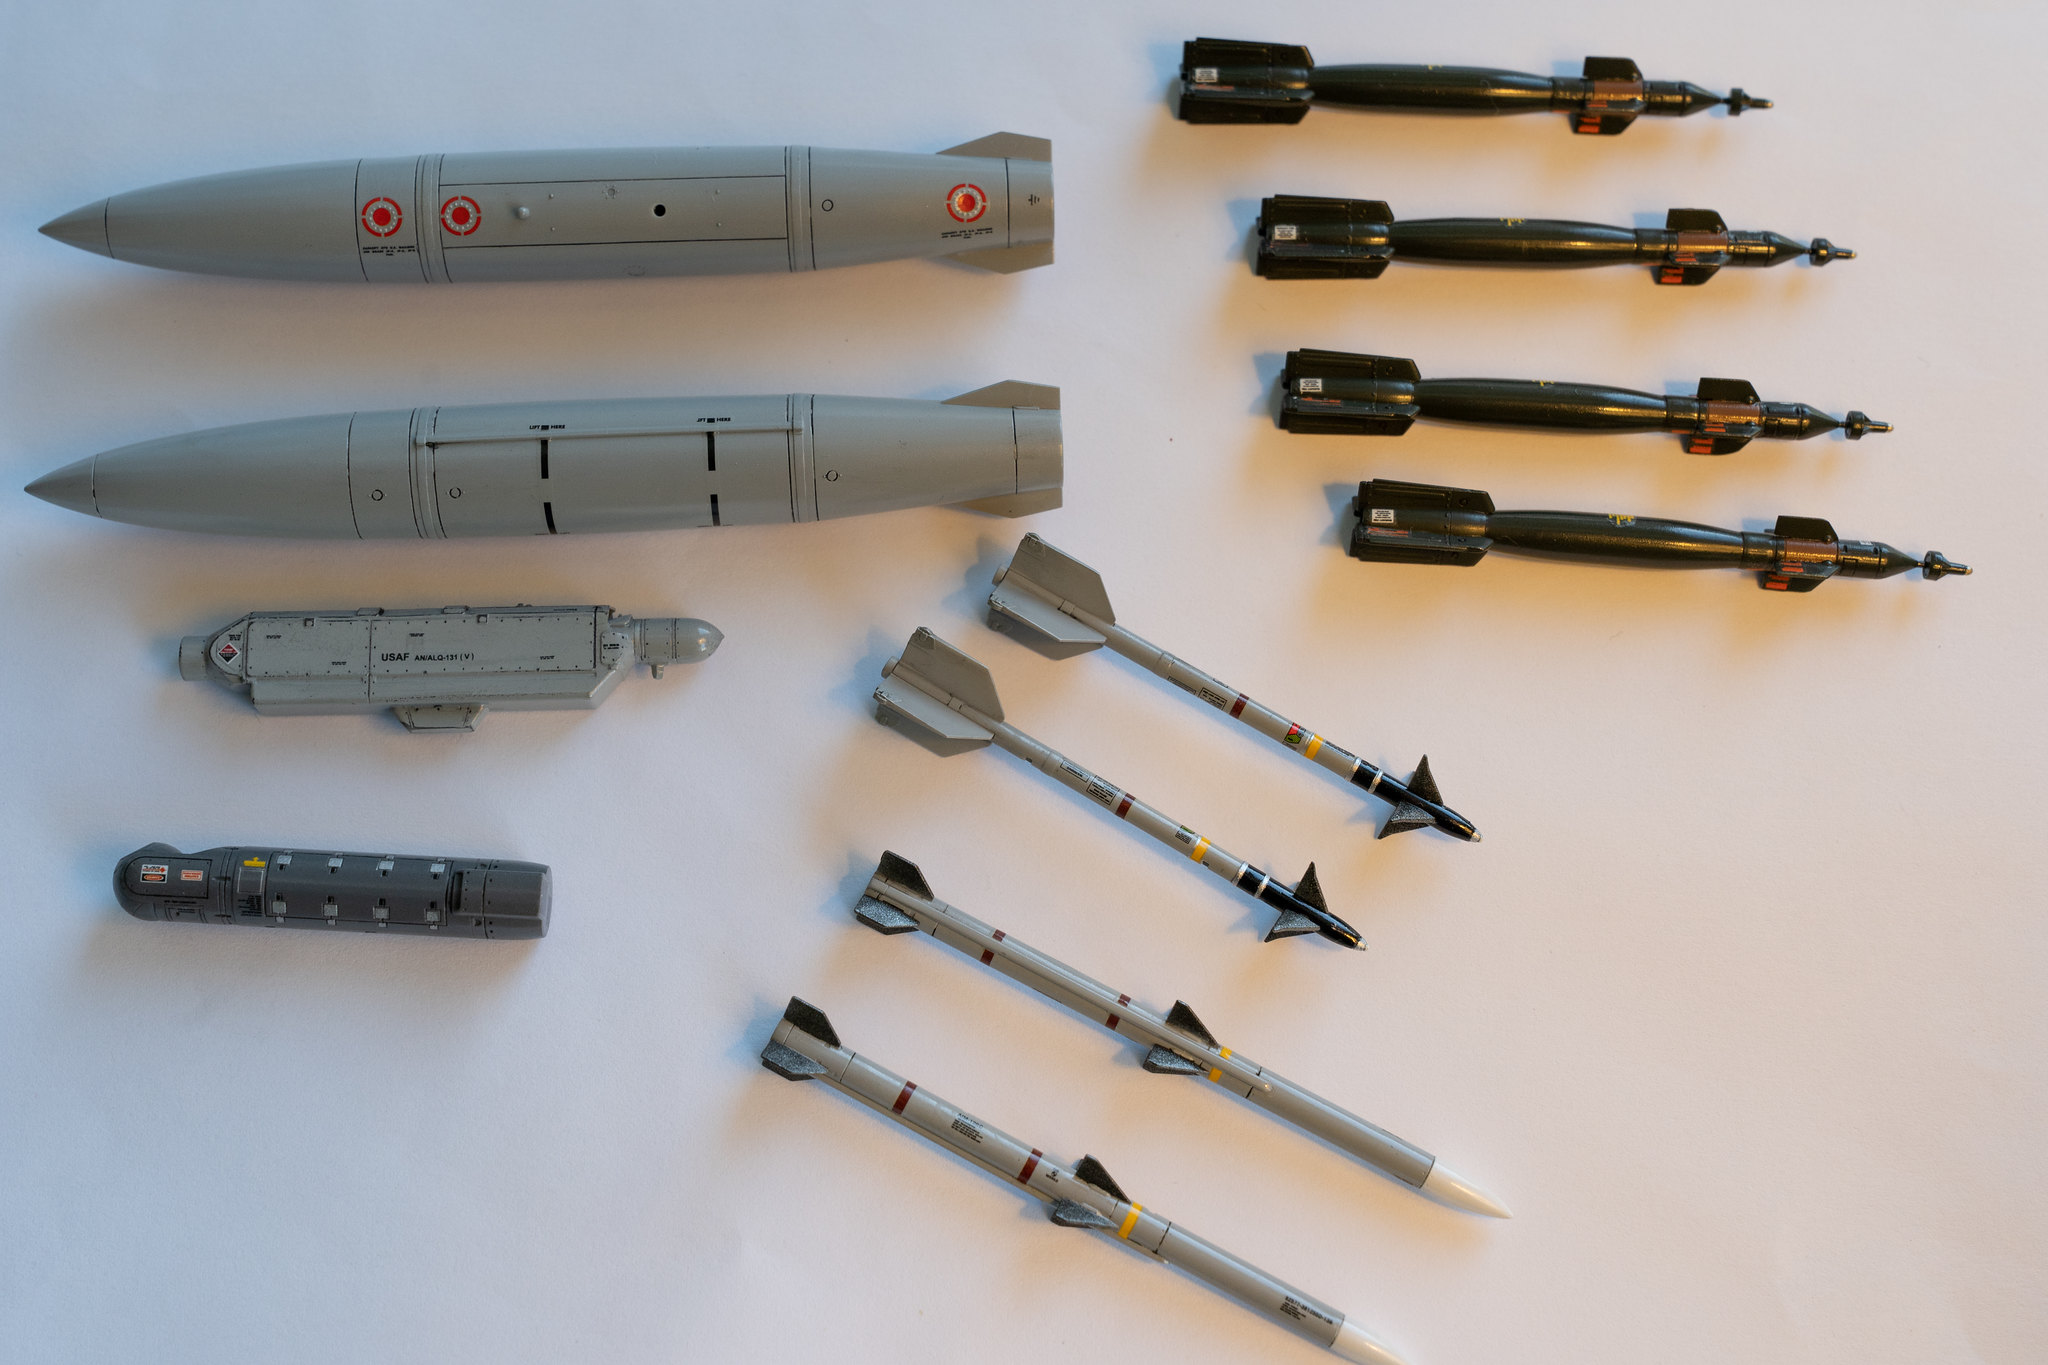
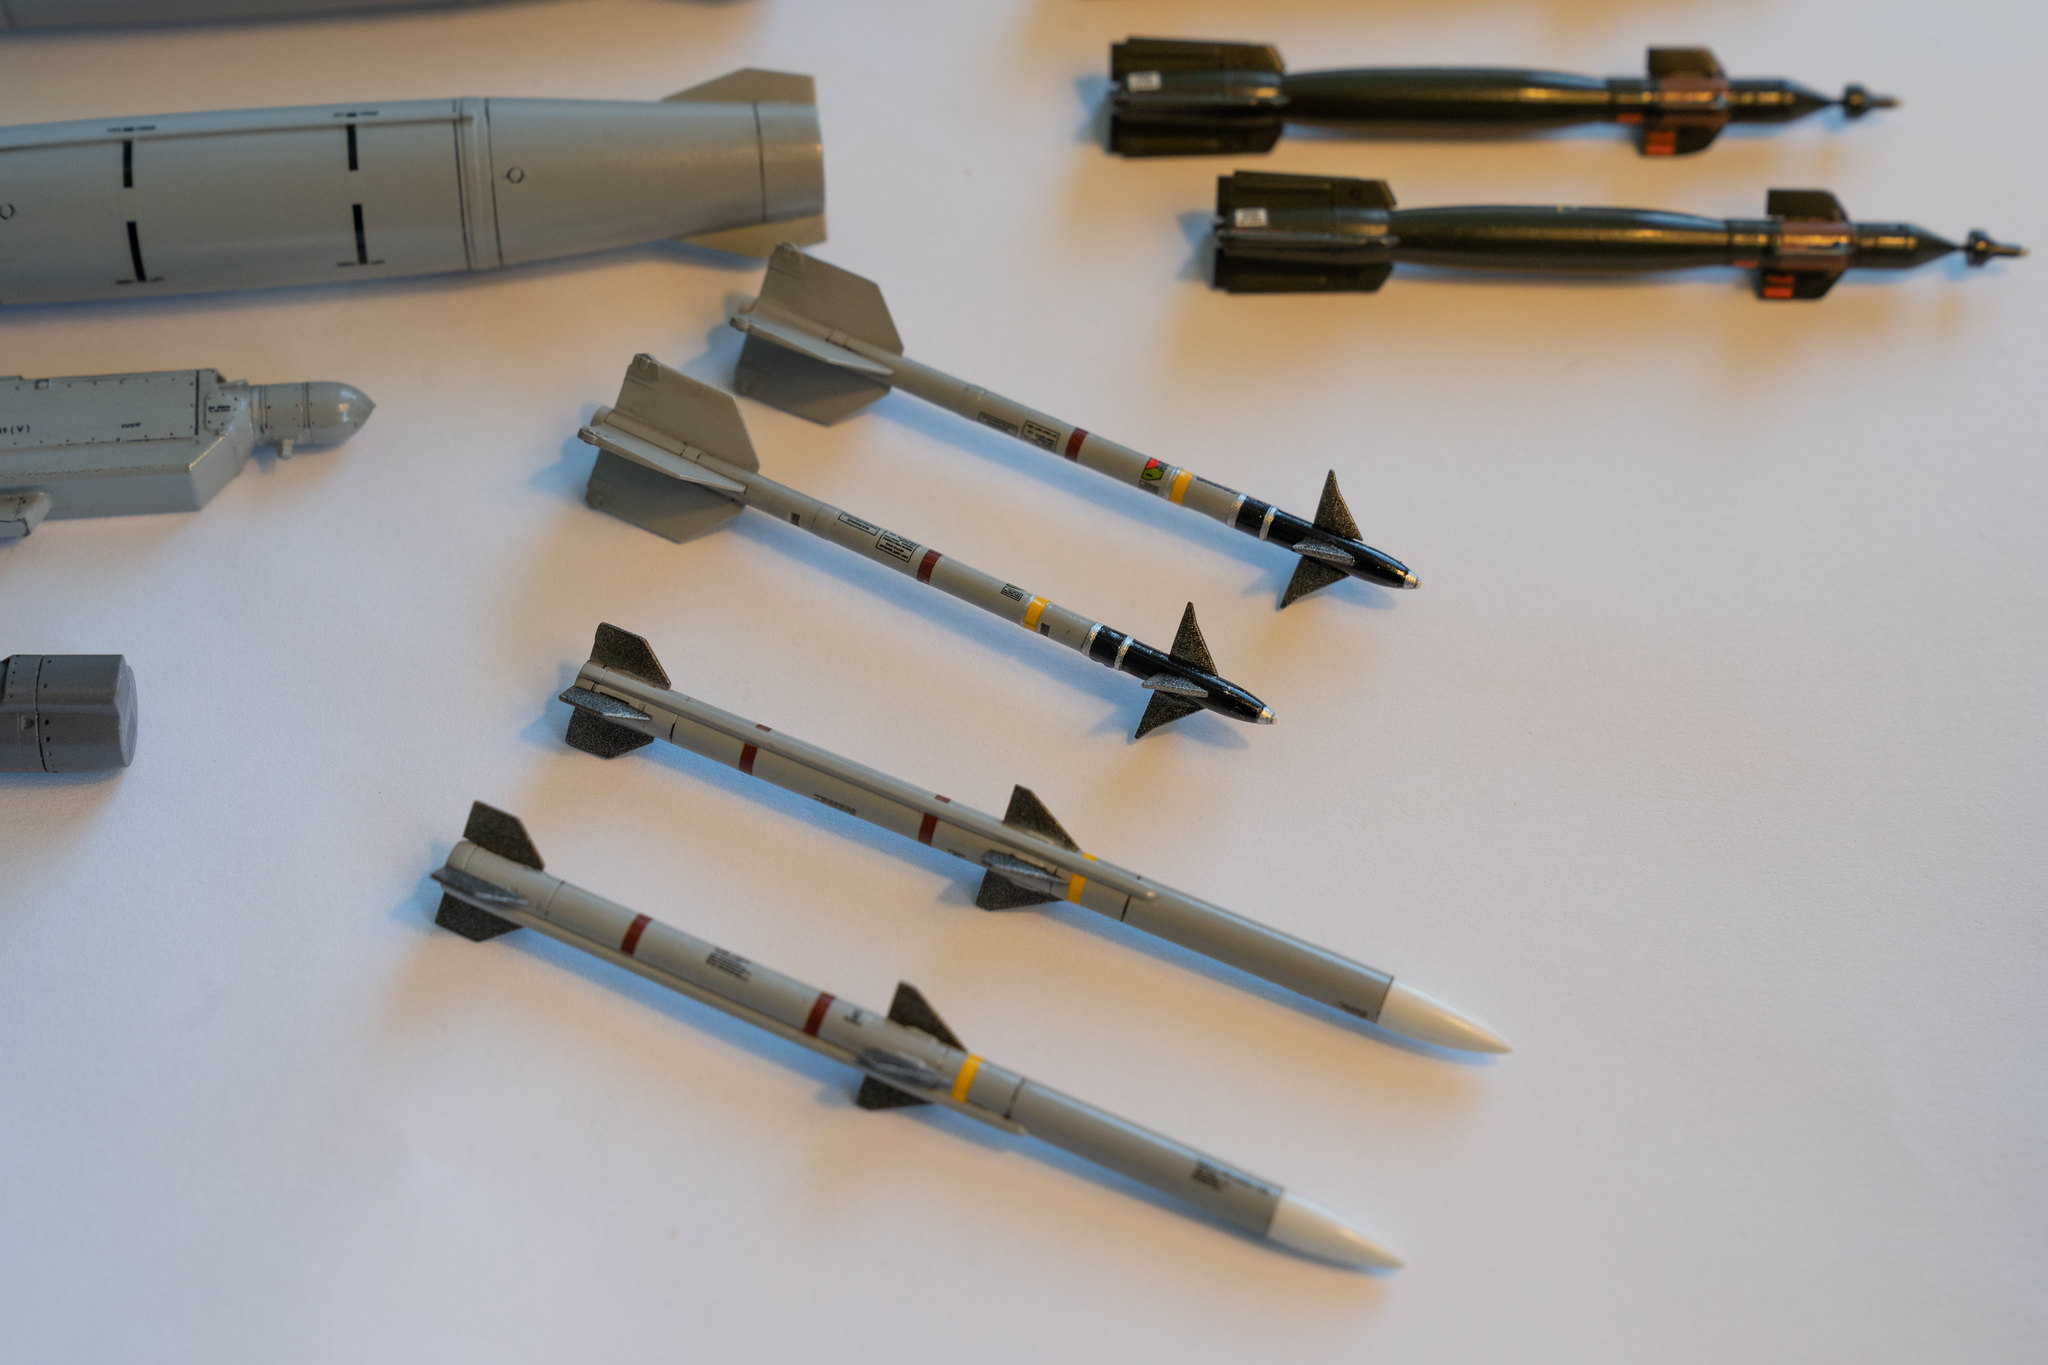
Hi there, quick update here. I was on a bit of hiatus while moving, but have finished painting and decaling the weapons followed by a quick wash. I definitely knocked off the tips of a couple of GBU 12s more times that I'd like to admit, and also had to strip and repaint one of the fuel tanks after a spill during the wash..glad that's done. Hoping to do some additional weathering later on before attaching these during final assembly.


-
Thanks, all! I went with the UMM saw. Will let you know how I make out!
-
I need to trim the airbrakes off my 1/48 Tamiya Viper to make room for my aftermarket airbrakes in open position. Does anyone have a suggestion on the best saw or tool otherwise to be able to precisely cut in a straight line through these plastic bits? Thanks!
-
Crap, XMM showing sold out, I think I missed my window here. I'm still interested if you have any spares, Brian. Thanks!
-
Hi again, Arnaud 🙂 Good question. I picked this up before I decided to go full-fledged aftermarket. But good to know the CJ boxings are cheaper for future builds. Keep in touch with how your in-flight F-16 build goes too.
-
My second model in ten years, first was 87-0290, also a 1/48th Tamiya Viper that I finished a couple of months ago. I got a decent result, but am definitely a bit rusty, and it was a challenging build. This time around I wanted to get more practice in with resin, so I added the detail sets pictured below. I started with the loadout pictured below while waiting for the cockpit set to arrive. I’ll move onto the cockpit after painting and finishing these bits off over the next few days.
Happy for any tips or advice from others who built this kit as I go along!


-
Hey Brian, yes! Do you have any for the Hasegawa F-4E? Hoping to use them for the JSDF F-4EJ I'll be working. Happy to pay for part/shipping via Paypal etc.
-Chris
-
anywhere to get these still?
-
Thanks! I ended up using a sewing needle for this part and worked out pretty well 🙂
-
Hi, does anyone know how I might go about scratch building a couple of AOA probe covers for my 1/48 Tamiya F-16. I think I'm giving up hope of seeing the steel beach set ever coming back in stock. Thanks!
-
Do guys know what is a good tool is to rescribe the small rivet holes on the forward fusealge that surround the joint that meets the nose cone? I'm having to do a bit more sanding than I would have liked to get a smooth transition to the nose cone on this Tamiya kit, and am starting to lose some of these rivets.
-
parts J29 and J14 lost to the carpet. willing to pay for parts and shipping via Paypal, cash app etc. . Thanks! - Chris
-
Thanks, good eye. What about this forward vent. I'm not seeing this in the Tamiya instructions...?

1/48 Tamiya Viper 86-0323
in In-Progress Pics
Posted
Thanks, Gianni! A reference photo of the sharkmouth intake was the deciding factor for this build!