


F-16rhs
-
Content Count
284 -
Joined
-
Last visited
Content Type
Profiles
Forums
Calendar
Posts posted by F-16rhs
-
-
... and some more!
-
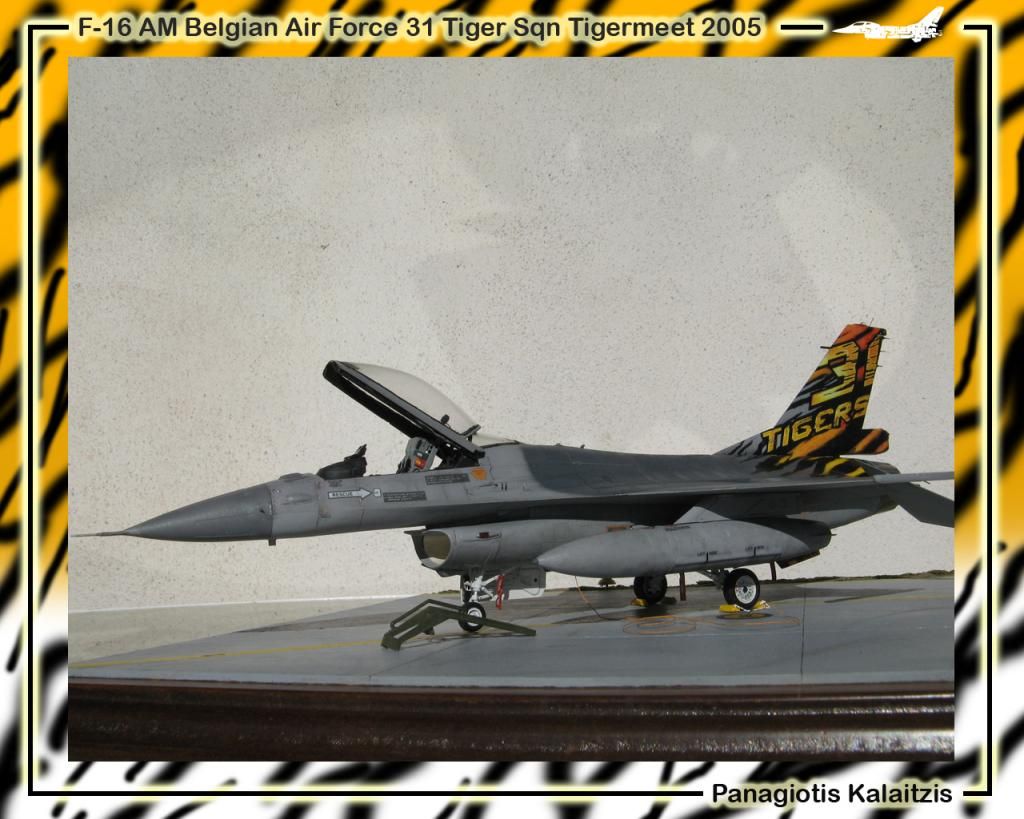
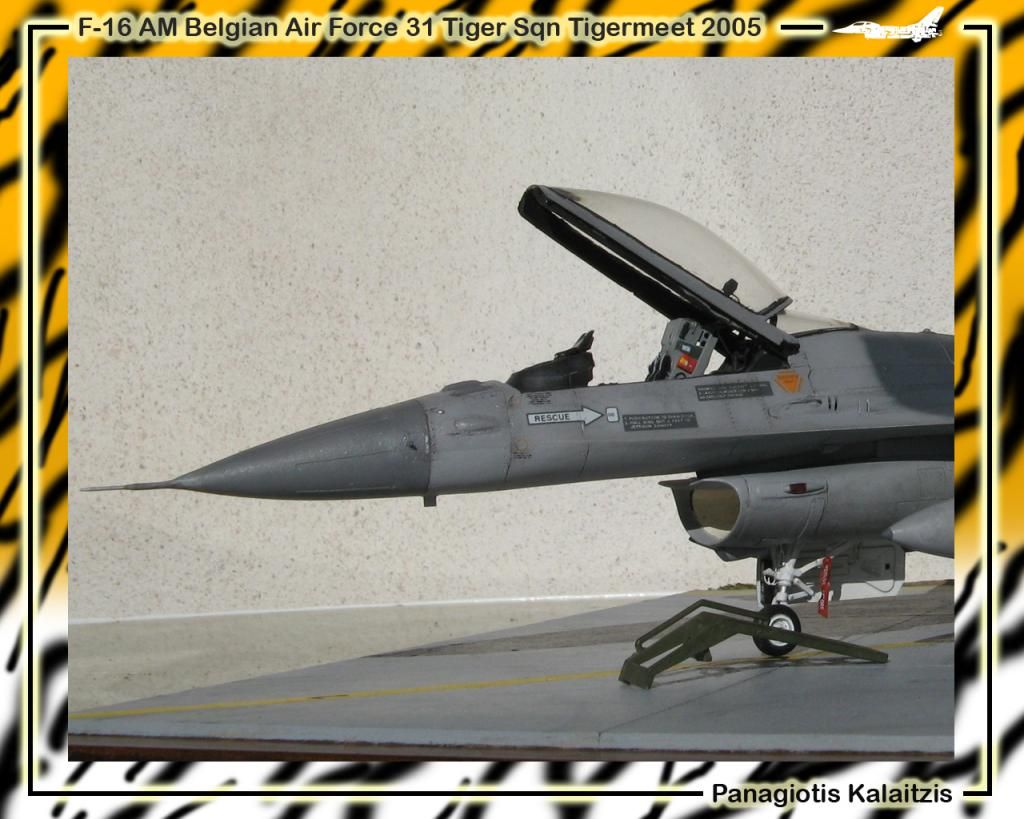
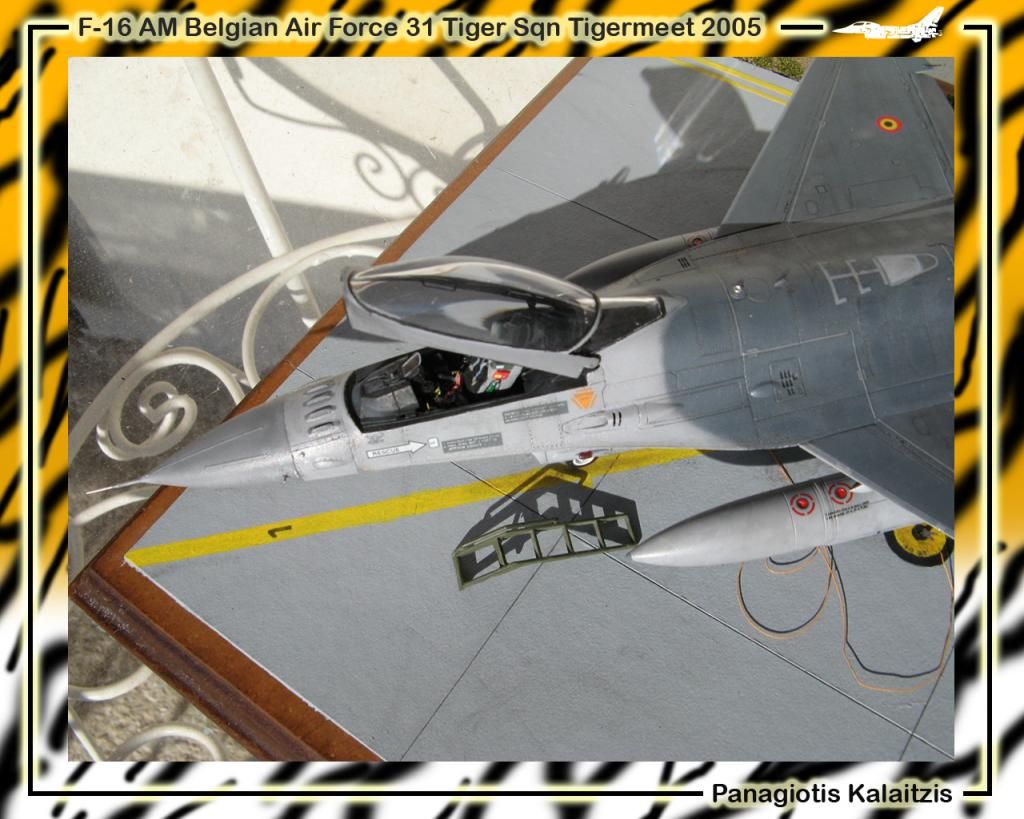
After a loooong time (about 2 years) i finally manage to finish this model...
Too little space on my new house, and too little time for modelling. :(
My in-progress posts are here:
http://s362974870.onlinehome.us/forums/air/index.php?showtopic=212733&st=0&p=2019368entry2019368
Sorry for the incompleted in-progress...
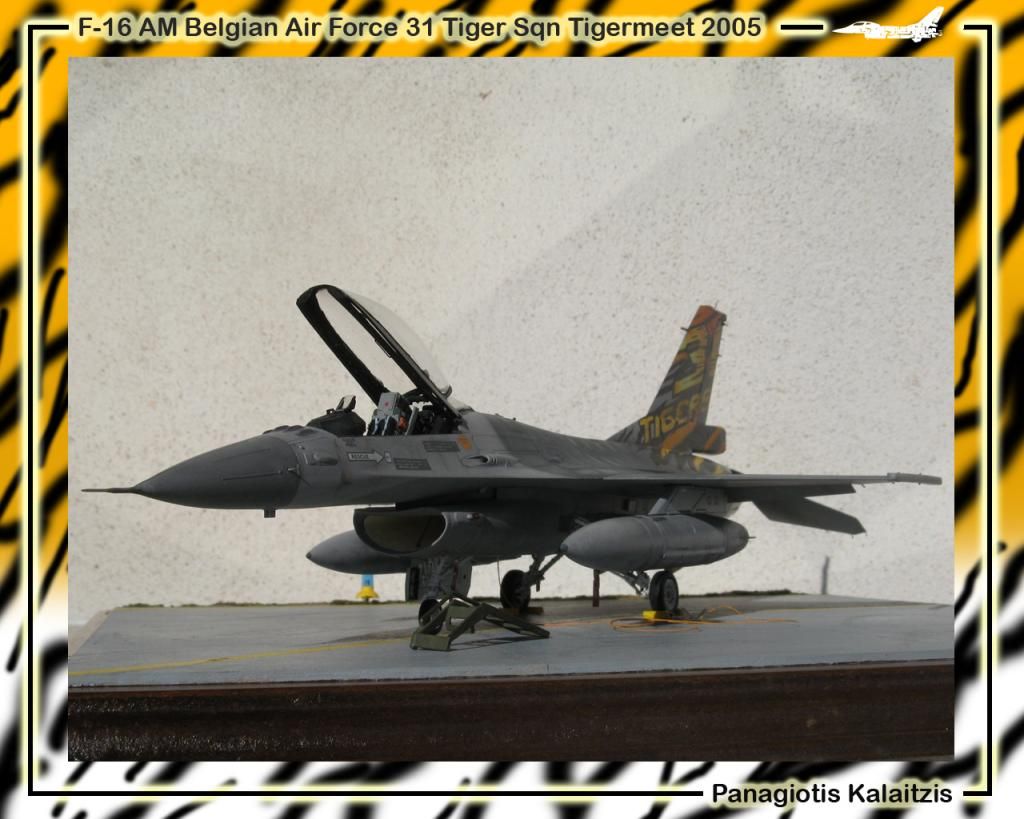
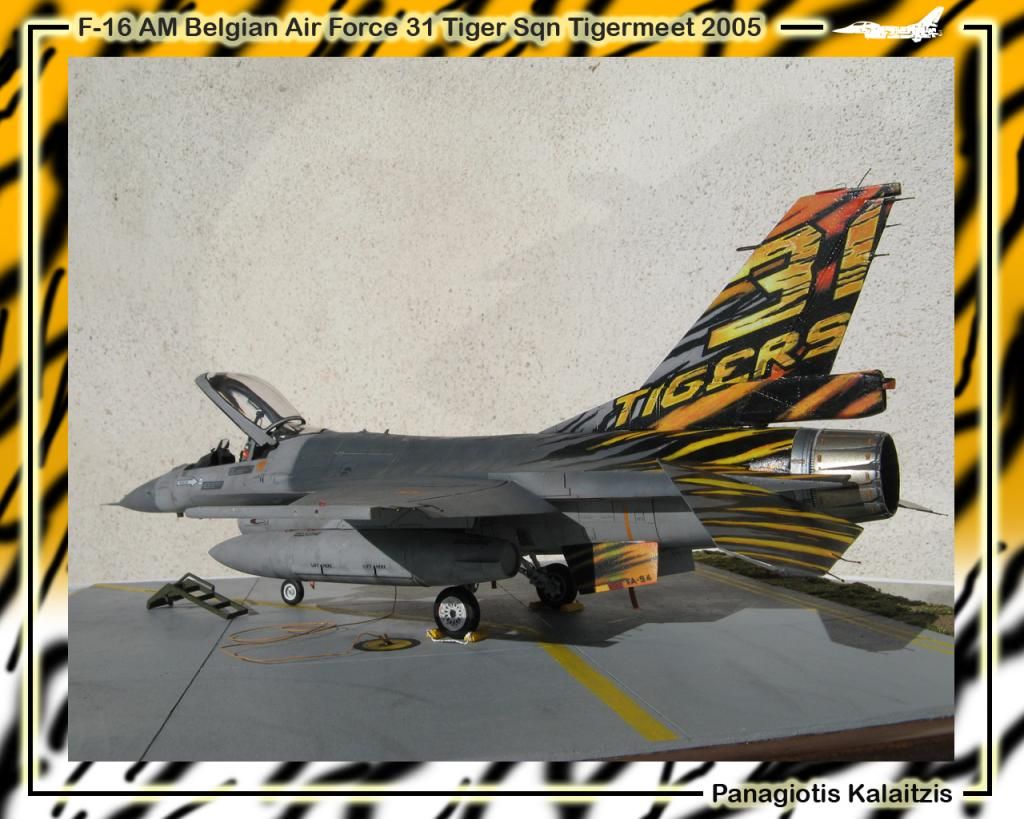
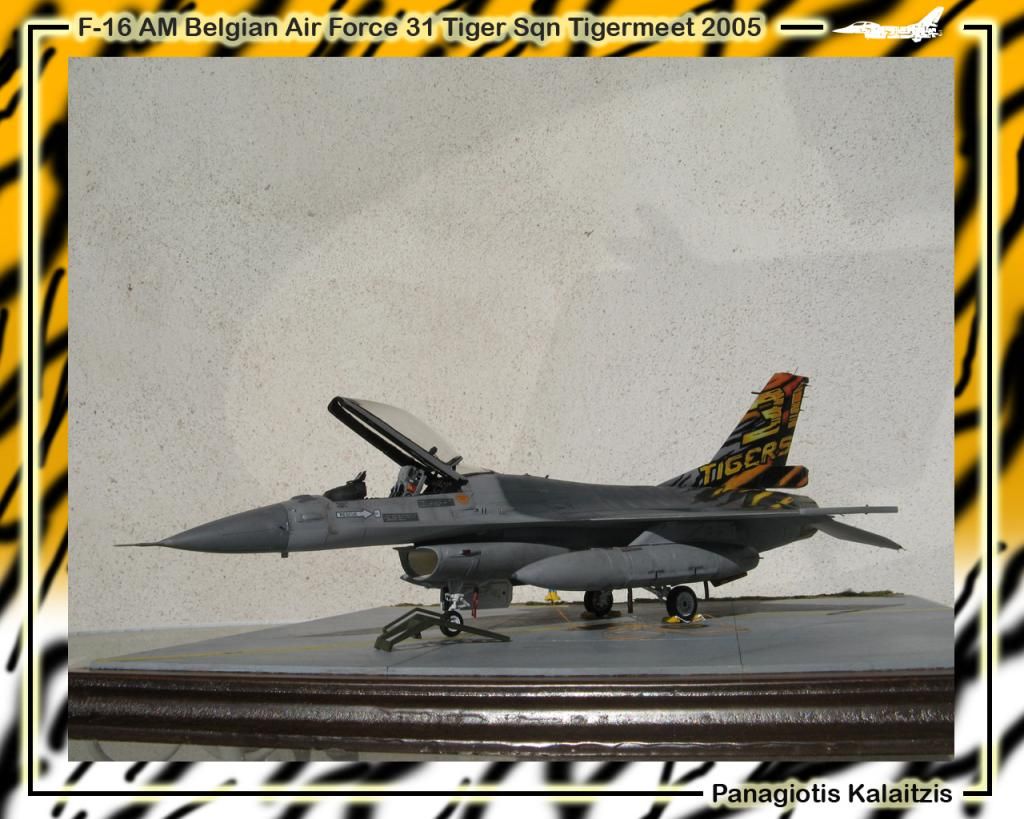
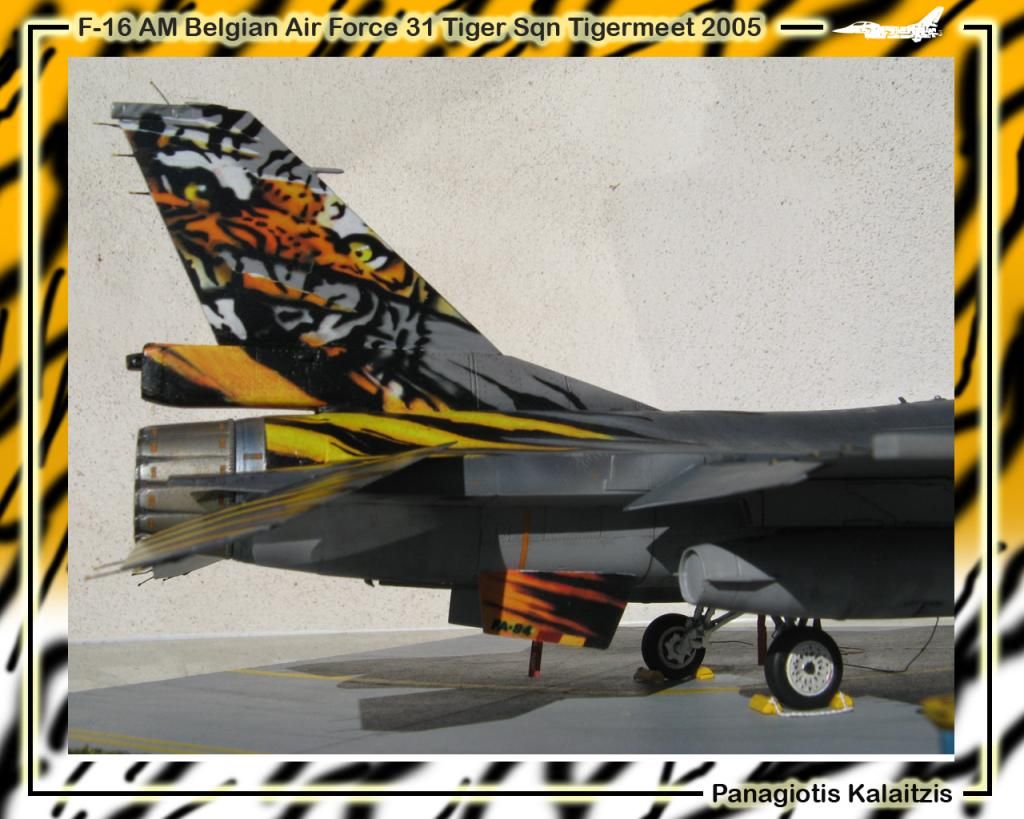
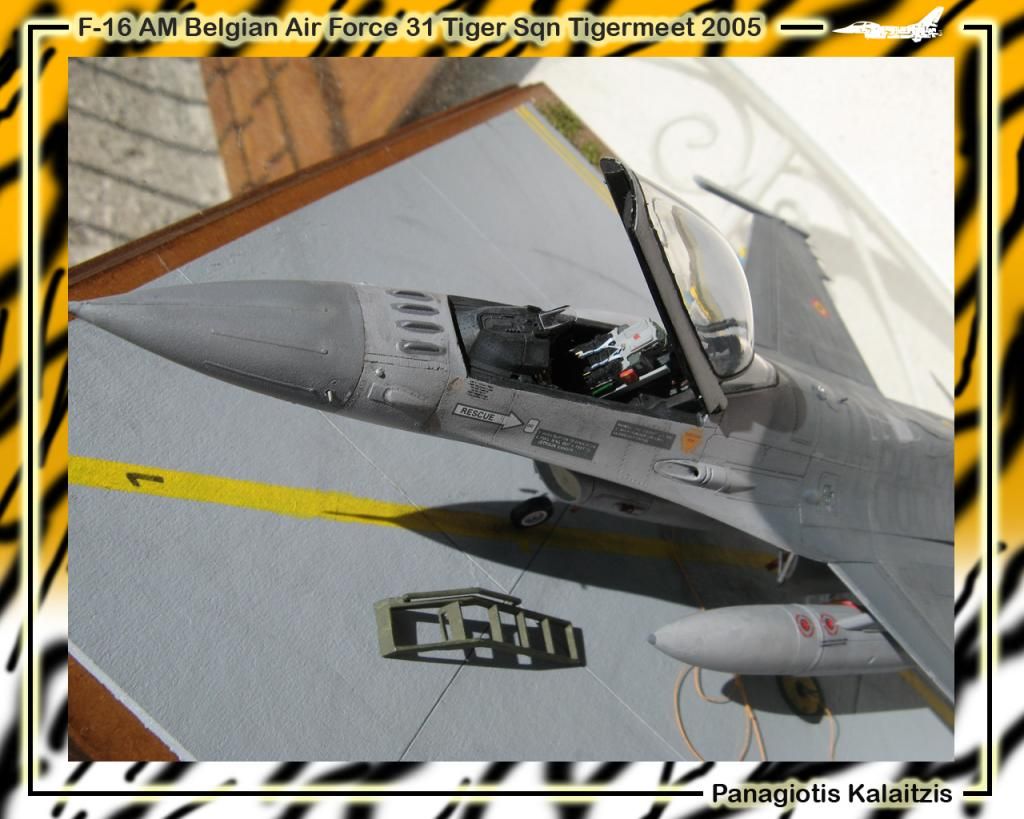
The F-16AM finished on his base.
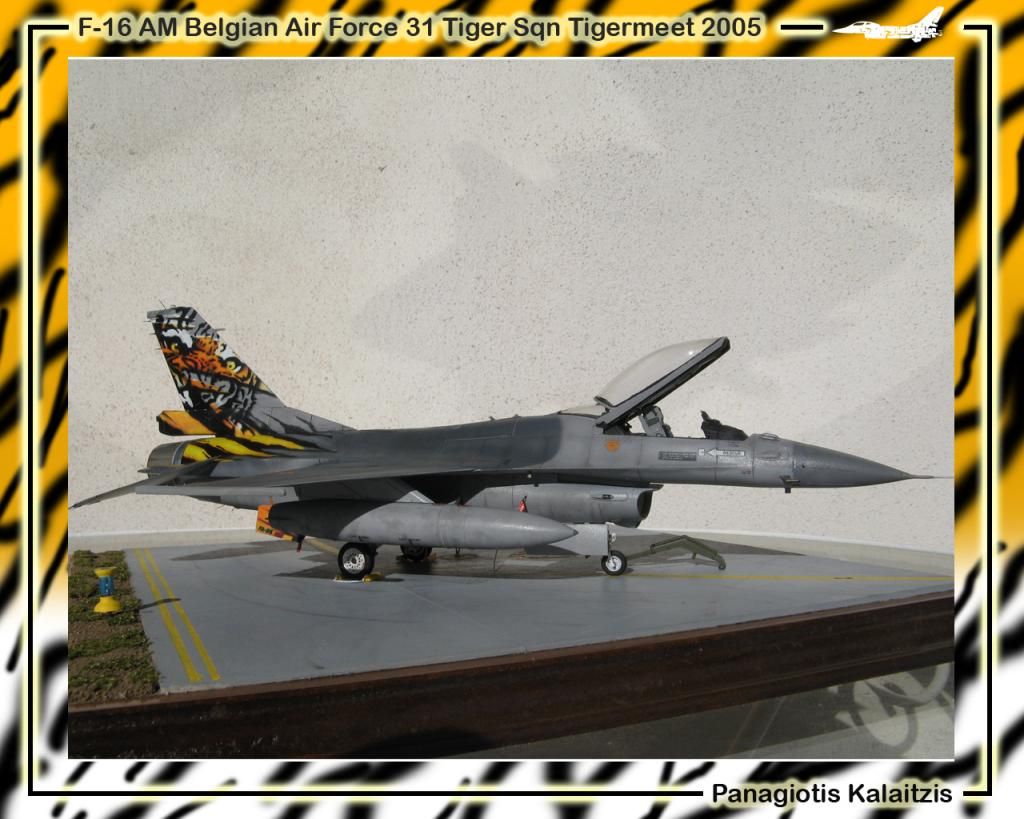
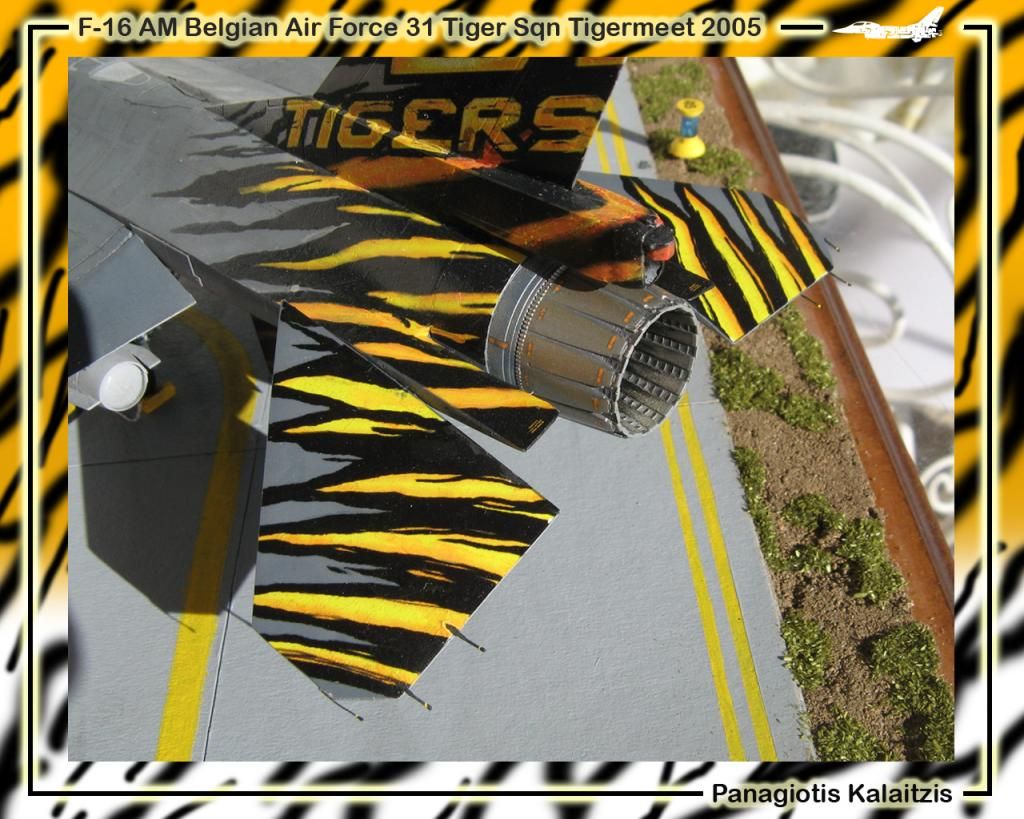
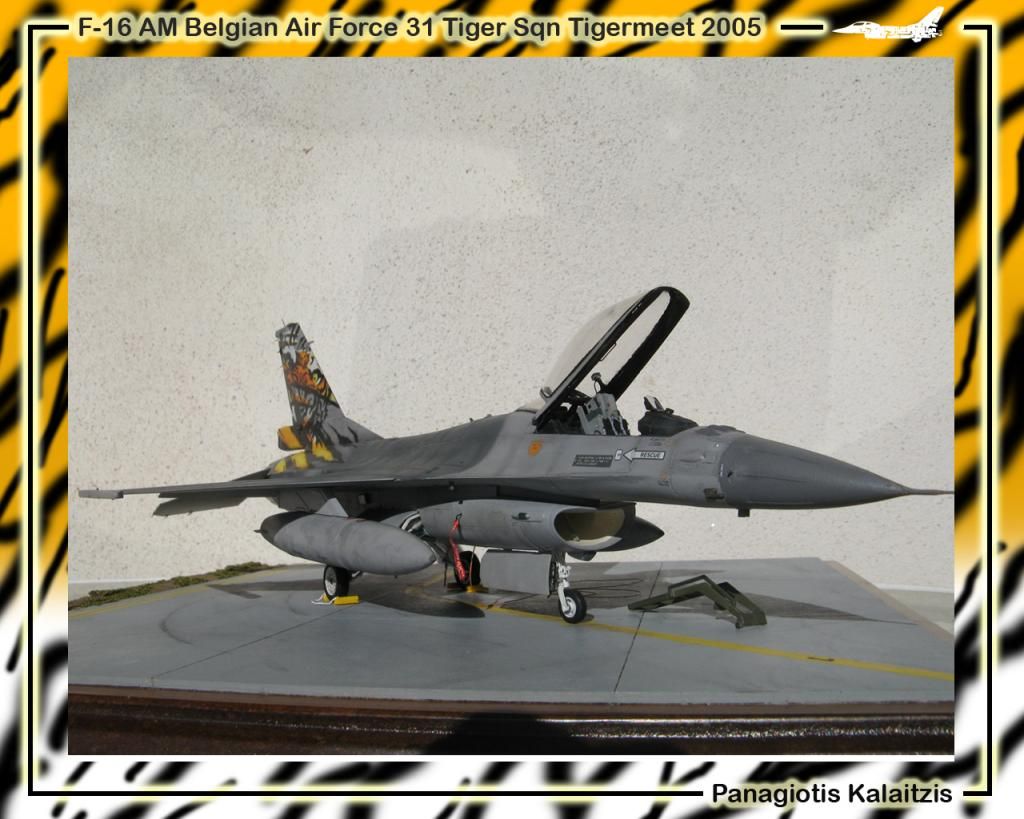
I'm also thinking to load 2 AMRAAMs on the Tips cause they are too.. empty...!
Thanks for your time gentlemen... :)
Panos
-
Well Done Takis!
-
Very nice build Pompeo!!!
-
Maybe you have a hint which kit contains good J/P winders? Maybe some F-4E boxings?I think you can found some 1/48 AIM-9P in monogram/revell F-5E/F or in AFV Club F-5E/F kit. SO what are you waiting for? please do a sprue cutting ceremony for this Greek bird!

I totally agree. I thing they are the best Papa Winders, -in 1/48 scale!
Italeri F-16C has good Papa's also. Try them!
-
Awesome tip!!!
Keep it up m8!
-
Veeery Nice!!!
-
Dear friend tobiK.
The HAF RF-4E's are repainted by H.A.I. after their 3rd stage maintenance. Common fact is that every aircraft inserted for maintenance, painted after that, with it's current cammo again.
For instance, if a "Lizard" (Norm 83A) cammo inserted for maintenance, after it will be painted again with the Norm 83A one. Stencils are painted again (in english!) with light gray colour,
Here is a photo of the ex-luftwaffe t/n "7495" "fresh"-painted by Hellenic Aerospace Industry.
http://www.airliners.net/photo/Greece---Ai...fc1f948ed0dfae6
I m worried about the fuselage colored background printed on...I m quite sure that the decal color will not match my sprayed colorYeap, i worried also for the same reason to apply the decals on my HAF F-4E Anniversary.
Thanks for the hint about future! And of course Mr. Mark softer. What about a sealing before putting them into water? Mr. metal primer? Or nothing required?No need to thank me man! Giannis says that his decals are not vanurable to any kind of decal "softer" or "primer", but last time i used them, with simple water and future, i had some little problems. So...be careful!
Giannis did a great artwork job, but as "home made decals", have their issues...
Unlike the GAF RF's the HAF birds are equipped with sidewinders (looks like a "J" type AIM-9) on grey rails -oh just a question to the greek-geeks! What colors are the rails?? Some grey!? -and the TACAN pod!! That' s indeed a kind of special load for a RF!About loadout:
-The AIM-9's are not "-J" ones but AIM-9P 4 ones ("Papa-4") and they are kind different on their colours.
-There are variety of launcher's colours. Most of them are gray as you see them in the photo, and it is around the "medium gray" (Humbrol 140 is very good i thing, i'll come up with more info's later)
-Also the pod is the ASTAC (French ELINT pod) that HAF RF-4E are using as a recconsaince/ELINT platform.
Cheers
Panos
-
Very nice starfighter jerrymic!!! Loved it!!
-
Interesting project!
H.A.F. RF-4E Phantoms have the S.E.A. and Norm 83 cammo with some "touch ups" on the black green with matt black. This makes the whole painting seem extreme weathered, great opportunity for lots of dirt and weathering on your model's cammo!
Are these "Three Star Decals"? If yes, they are very difficult to handle , cause they are homemade as you already know. Lots of future use, is the key of success...
Wish you a good start!
-
In the end, no one will believe that this, was an Italeri's model kit.
Excellent scratchbuild!
-
Thanks a lot for your comment Jake! I 've seen them on a haf block 52 and i thought MLU have them also after their upgrade!
Thanks a lot for the heads up!
-
Loved the painting!!! Great job!

-
Wow! Great job there with the masking tape!!!
-
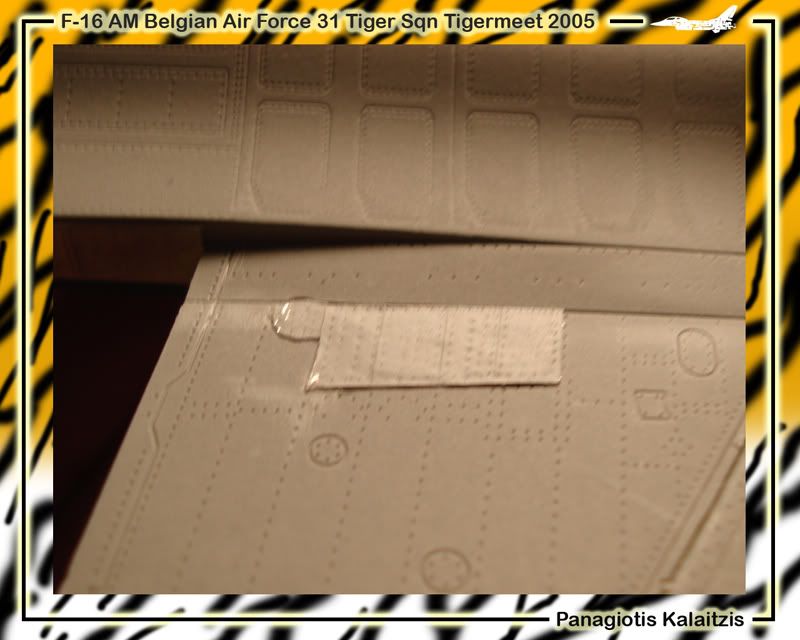
So, new Progress...!
Τhe Strengnething plates on their places on the fuselage.
They are copys from the original Tamiya's Detail Up Parts set to aluminium foil from nescafe pack.

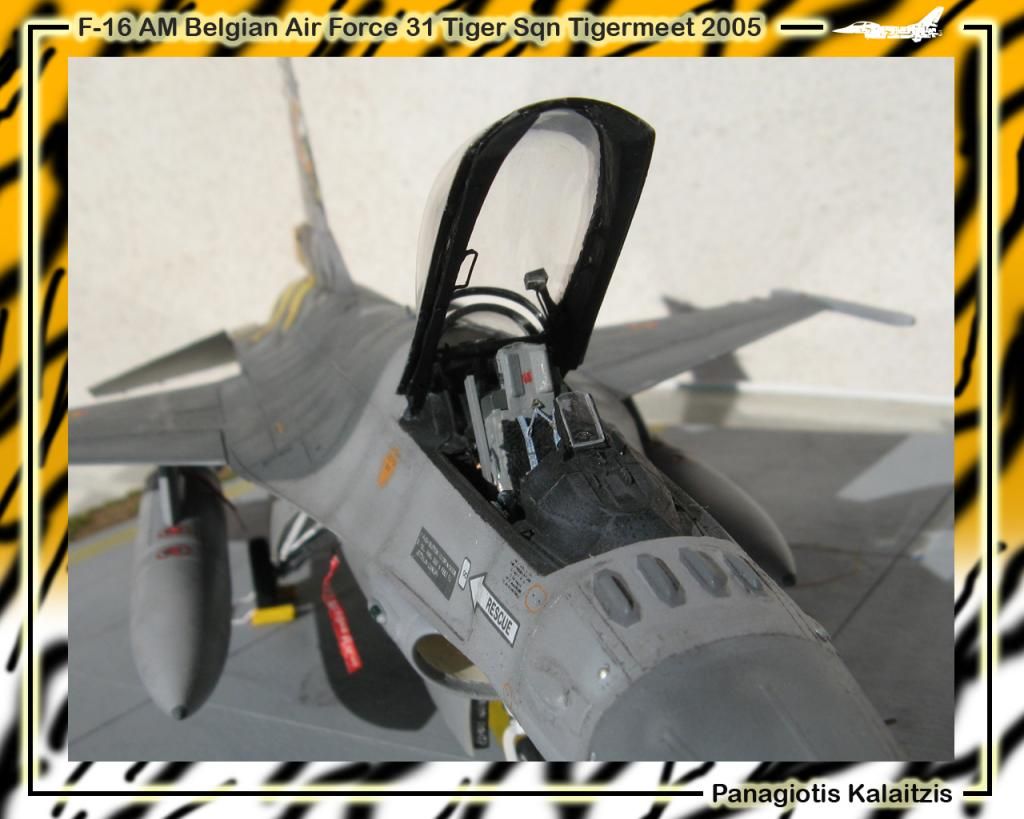
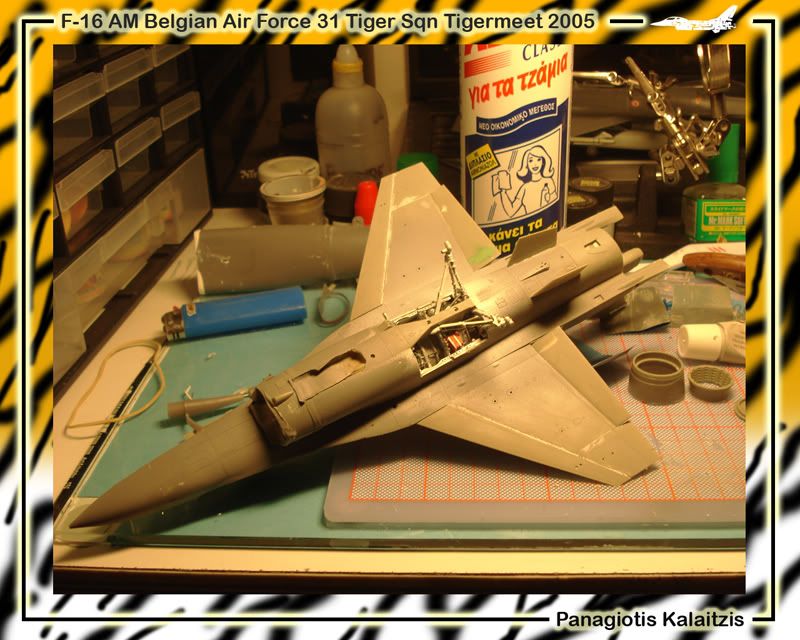
Cockpit:
Added some wirings and the electrical motor of the canopy.

Nose:
The nose fixed after lots of dryfits, puttying and again puttying!! The most difficult part of the construction.


Primer:
After i primered the lower surfaces with the Mr Hobby Mr Surfacer 1000 (Code B505)

I unfortunately had some oversprays on the cockpit, but fortunately on the upper parts such as hud etc, and can be easily fixed!
Thanks for watching!
-
Excellent diorama!! Congratulations! :D
-
Οne of my favourite themes.... Agressor/Adversaries F-5...
Absolutely awesome job my friend!
-
Yes Aris -> Ares is the Ancient God of War in Hellenic Mythology...
-
The world of fireworks...
ARIS Thessaloniki Football Team.

p.s. slow down your volume... :lol:
And the best singing:
-
WOW....!!!!!!!!!!
Great job on the Mig!!!!
-
It's looking Great!!!!!!!!!!!!!!
Well done!!
-
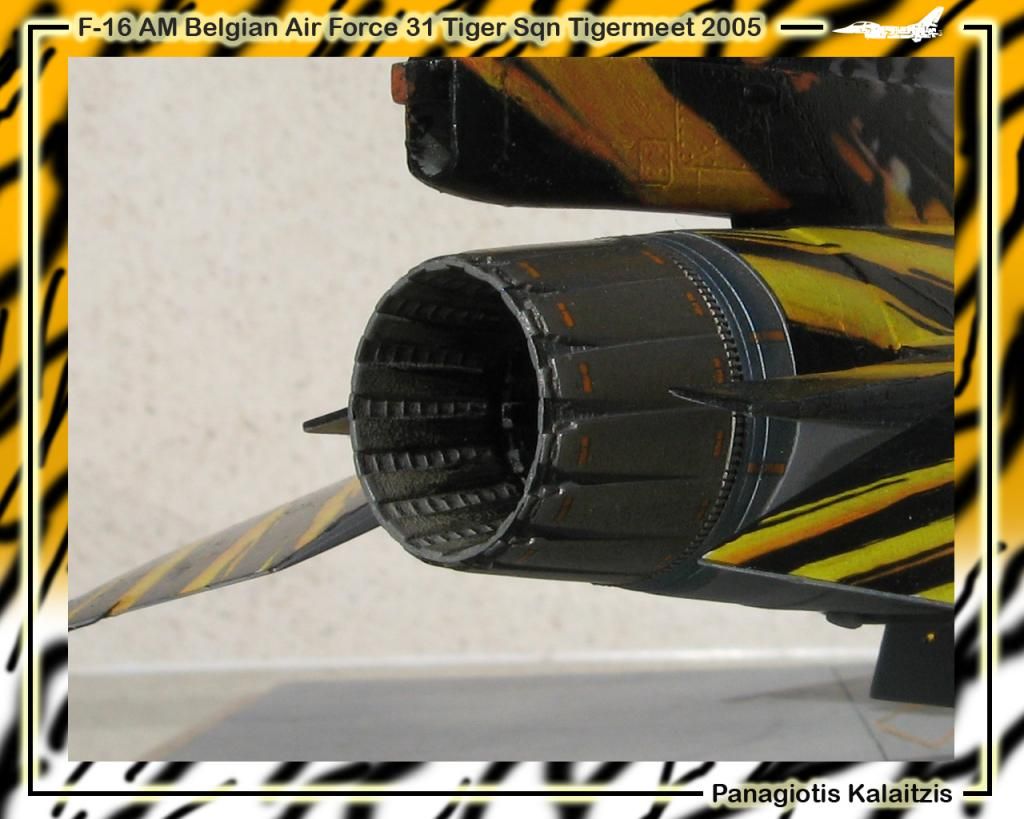
Update here with the exchast of the F100-PW220 Engine.
Here are all the parts painted except from the flame holder of the Afterburner
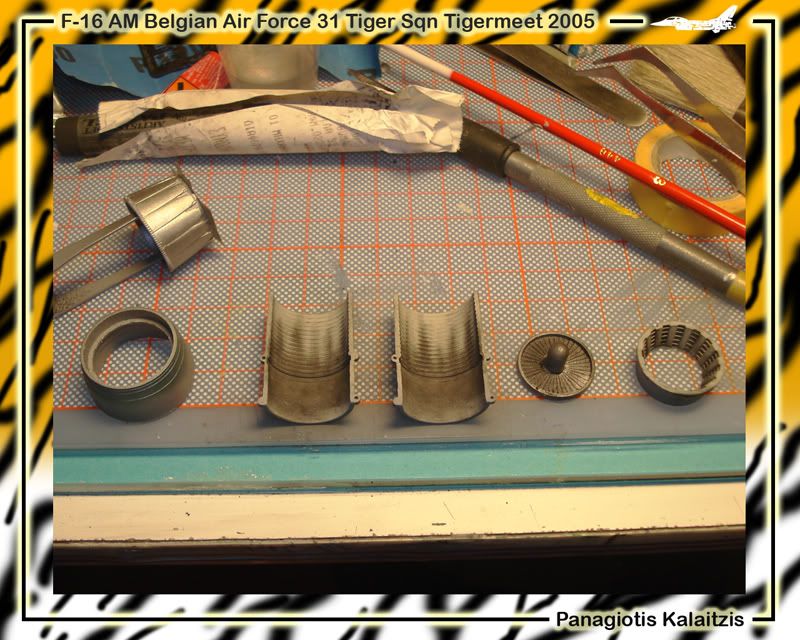
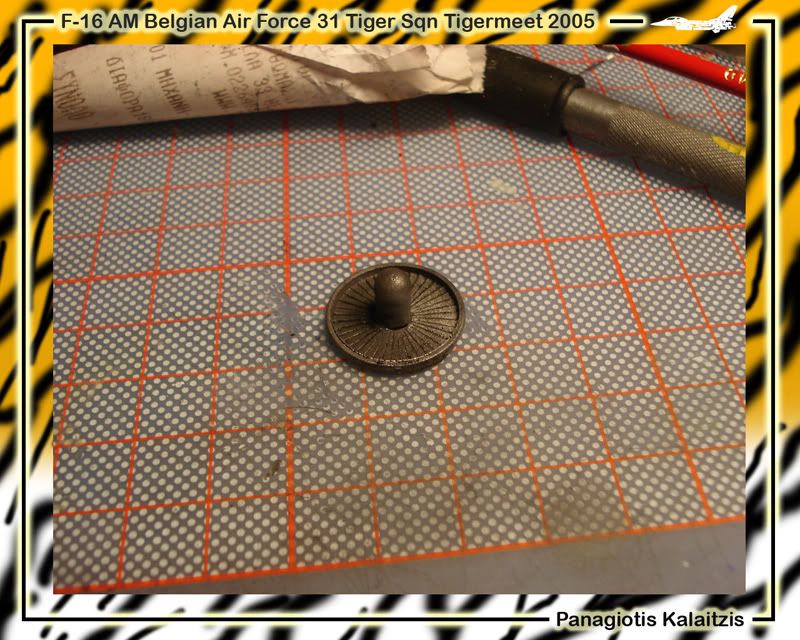
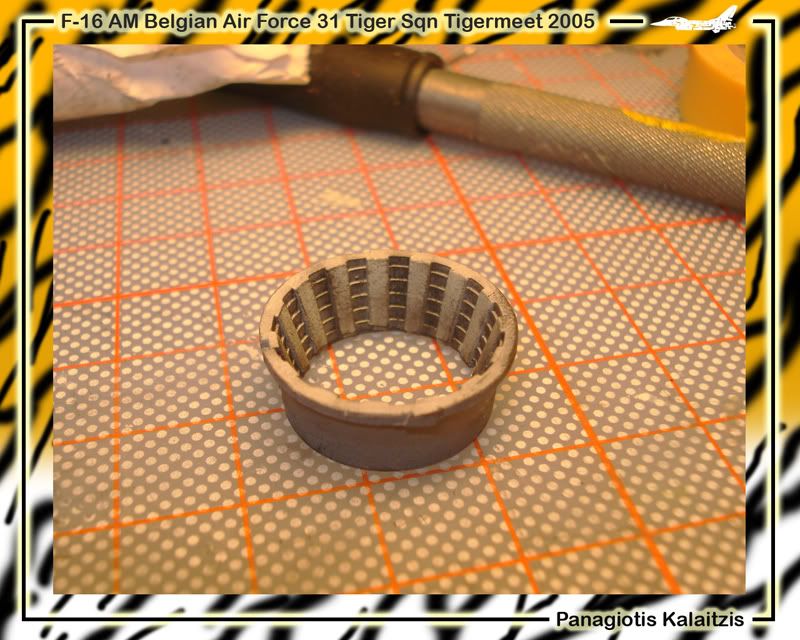
The engine's Turbine. Painted silver with citadel and with black pastel to replicate the high temperature that blades are operating.
The exchast pipe is painted with the Humbrol Matt 28 (Camouflage Gray) which is a colour that matches a lot to the real one exchast.
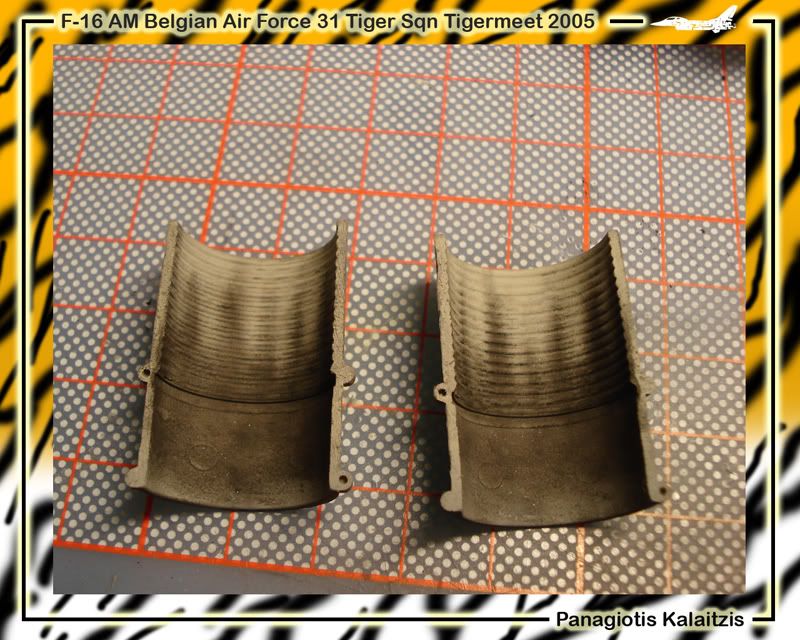
After that with black pastel i made the burner's heated areas.
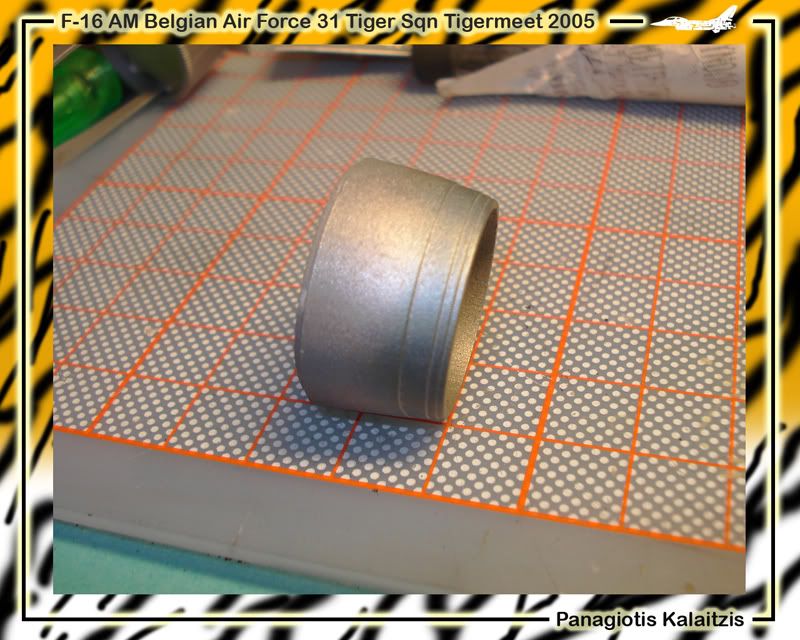
The last part of the engine before the exhast nozzle (Ring) is painted with citadel's silver and after that i put the Tamiya's weathering dusts to seem like burnt blue, as in the real engine.
Last but not least the convergent part of the PW200 Engine, also painted with the matt 28 inside and with black pastel i made it's heated material
Soon i'll continue with the Nozzle of the Engine...
Cheers
Panos
-
Not a very interesting progress but the model started to seem like a plane...
The Upper Surface
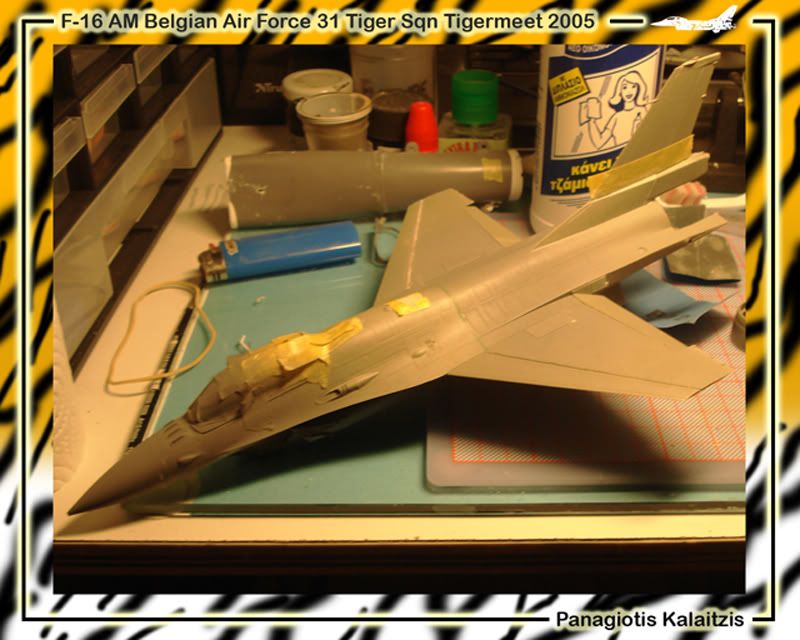
and the lower one...
I used a lot of putty to fill the gaps that the Kinetic F-16 had.
Note the fixed nose on the model. (The kit's one is "hanged" down...")
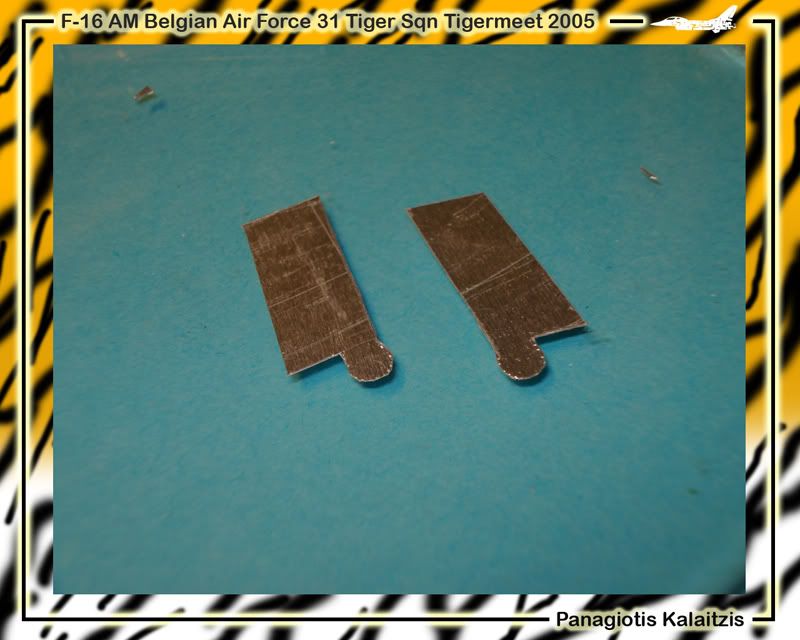
From Coffee's aluminium cap i scratched the Wing's Strengnething Plates.(Falcon UP structural Upgrade)
And i apply them after scribing and bolting...
...so in the L/H Wing
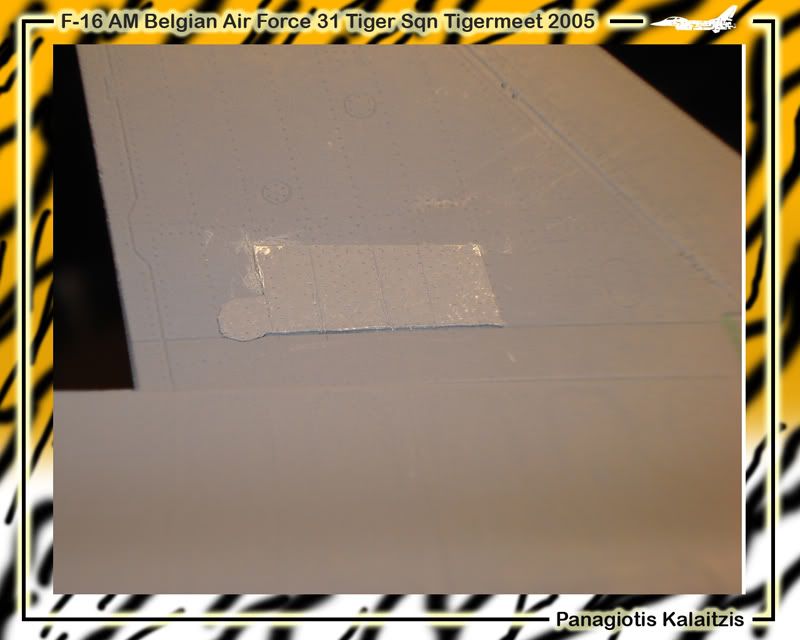
as far as in the R/H Wing.
Here are the Strengnething plates position in a Block 25, but there are the same as in a Block 15 MLU. (Source: Afterburner Decals)
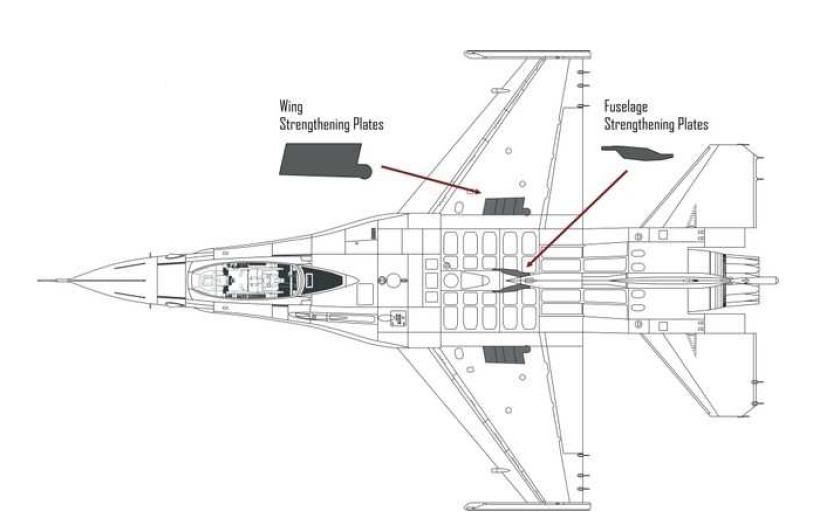
Next step is the exchast's painting...
Thanks for watching,
Panos
-
Ι love this colourful tail also....!!!
Very nice job!
Waiting for the end...!
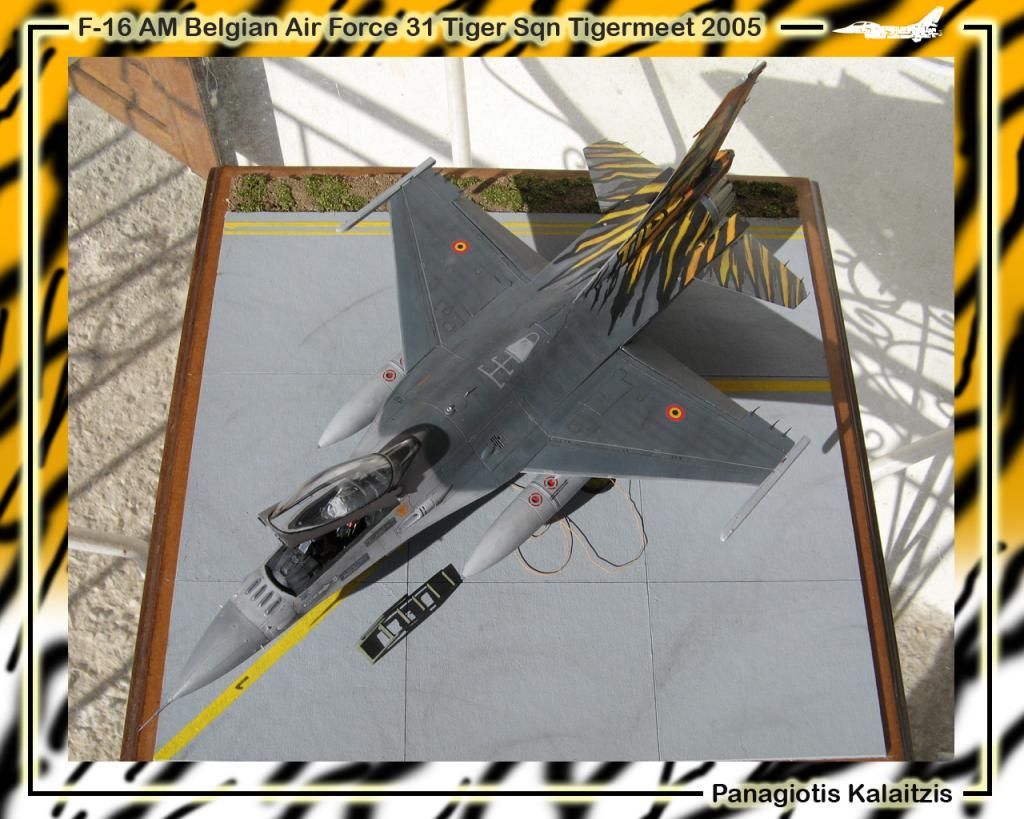
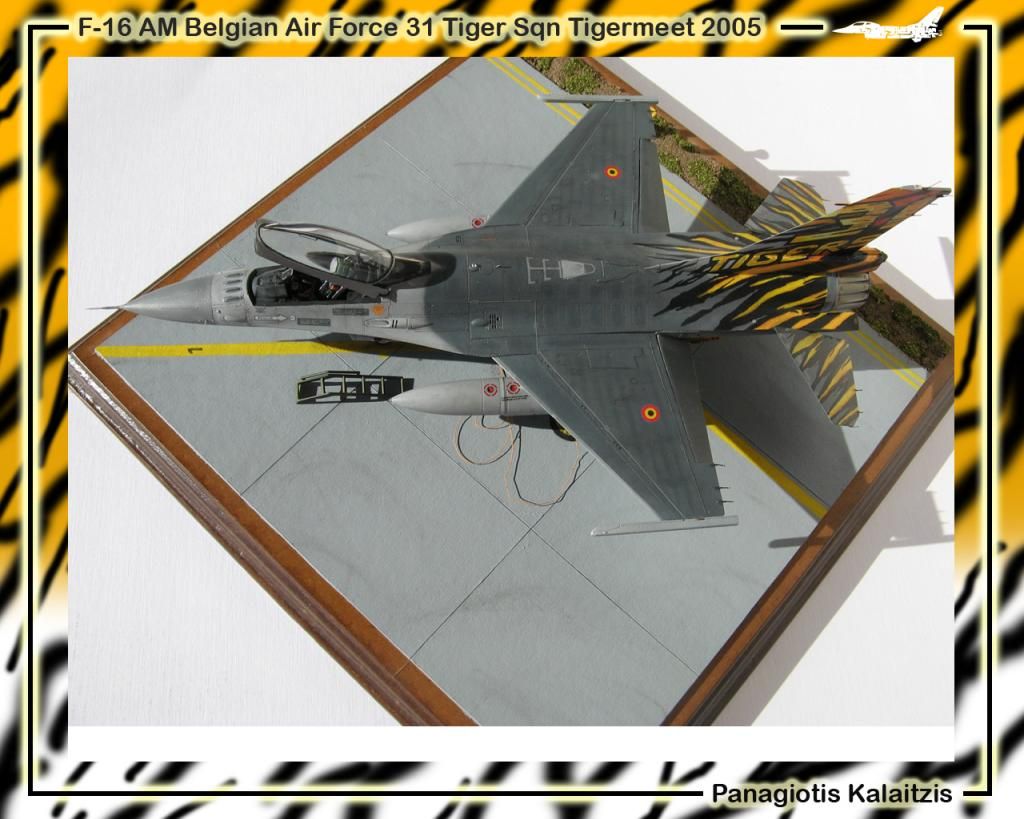
F-16AM 31Sq NTM 2005, B.A.F. 1/48
in The Display Case
Posted · Edited by F-16rhs
Thanks a lot for your kind comments guys...! The nose drop fix is included on my in progress topic, check it on my first post.
31Tiger thanks for your comments. I didn't knew that BAF F-16s don't have ram plates there.. I also thing you are right for the hmcs sensor... Tape2 software installed after 2005...?
Thanks again!!!