


Plankwing
-
Content Count
111 -
Joined
-
Last visited
Content Type
Profiles
Forums
Calendar
Posts posted by Plankwing
-
-
I would ... maybe make the tail a bit bigger/taller
Okay, okay, you shamed me into enlarging the tail. After I pondered the matter for a bit, I figured I could add sheet stock to the leading edge and tip of the tail to enlarge it by 6" in scale front and top.
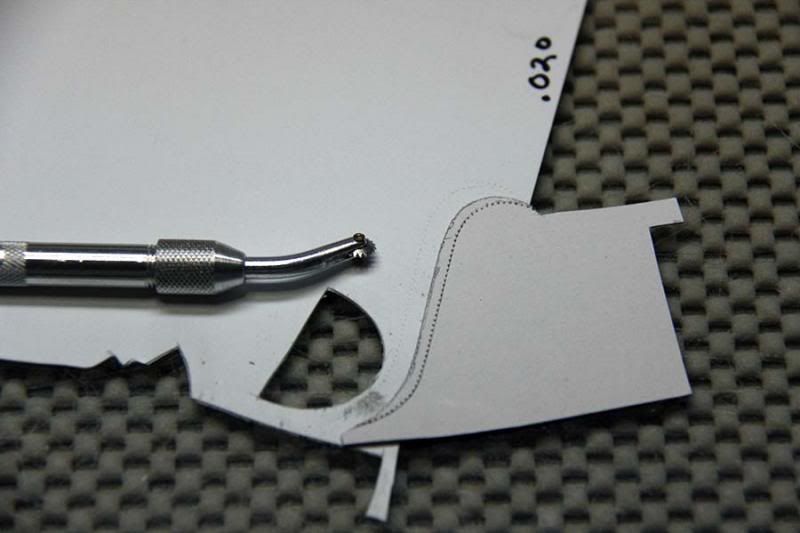
Used pounce wheel with paper pattern to create cutting line on .020 sheet stock.
Cemented the sheet stock "up and over" to the leading edge and tip of the kit tail.
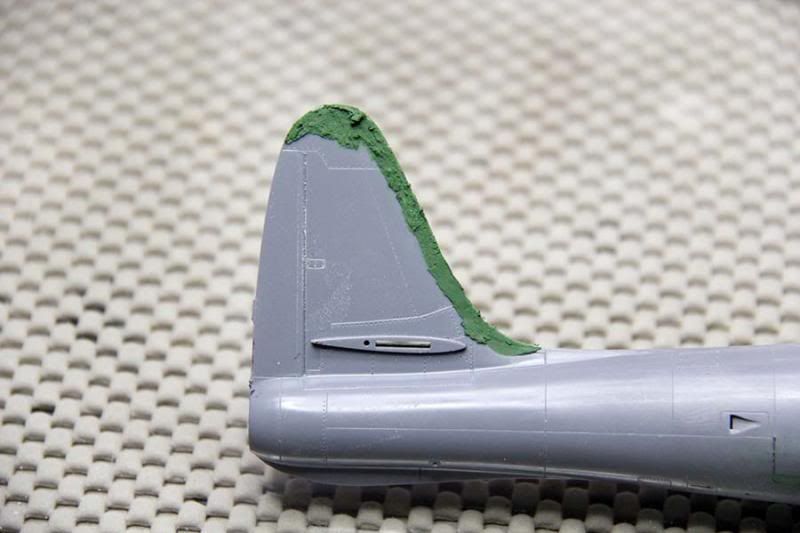
Squadron Green putty to commence shaping, have since filed/sanded to shape and primered.
Be sure to check that the inserted link doesn't end with ".jpg~original". If it does, just delete the "~ original".I discovered the problem, I was copying the wrong "link" window from PhoBuck, needed to copy the IMG window instead. Frustration exited stage left!

-
Fuselage was lengthened equally fore and aft so CG should be fine. It was already a hassle getting the fuselage contours to look right so too much work to make "slight" changes to enlarge tail for this "what-if" bash. I may be "the masochist modeler" but I do have my limits ... :salute:/>
I am EXTREEEMMMMLY frustrated with trying to include photos in my posts. No matter what I do, including following the "instructions" in HELP, photos will not "post" (notwithstanding that I posted some photos back in March when I started this thread). Most often, after inserting the URL in the "insert image" dialog then "Save Changes" I get an "You are not allowed to use that image extension on this board" error. Other times, it just inserts an "external" link to the image on PhotoBucket.
-
Link to "in progress" of this model.
http://s119.photobucket.com/user/Plankwing/library/F-84%20Kitbashing?sort=6&page=1
-
Link to photos of completed model.
http://s119.photobucket.com/user/Plankwing/library/F-84%20Kitbashing?sort=6&page=1
-
Ah, yes, better late than never ... :-)
Link to photos of Revell+Tamiya+many aftermarket detail parts as F-84G-16-RE 51-10306.
http://s119.photobucket.com/user/Plankwing/library/F-84G-16-RE%2051-10306%20Model?sort=3&page=1
-
I have scratch-built a canopy mold for vacuforming using RenShape.
Paper pattern on prototyping foam. This foam was too fragile so part broke. I switched to a different density of RenShape to make the canopy plug.
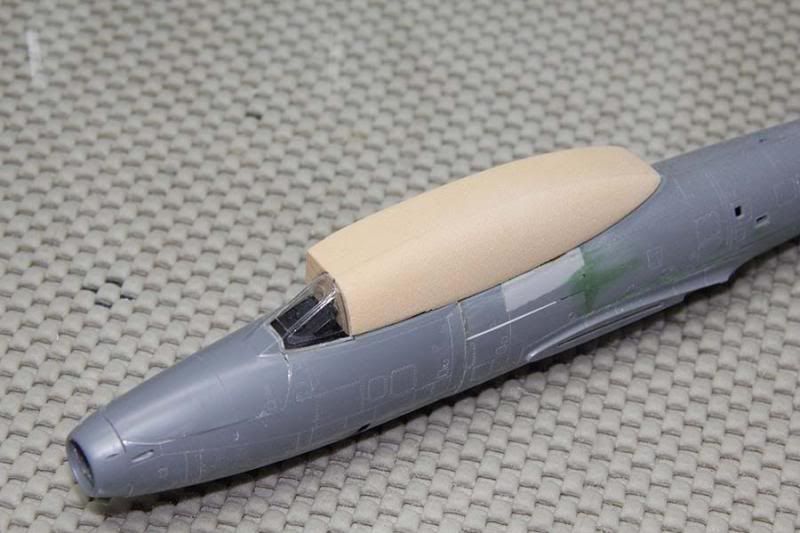
Half of the plug shaped.
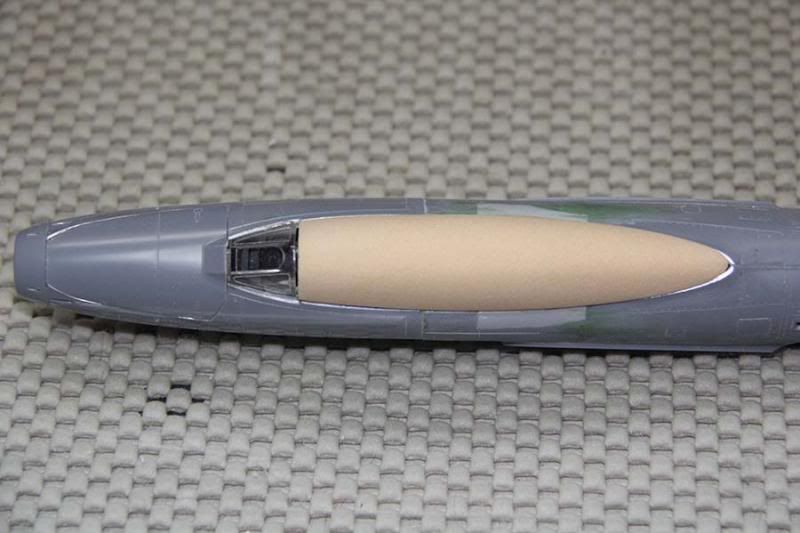
Rough shape done, view from top.
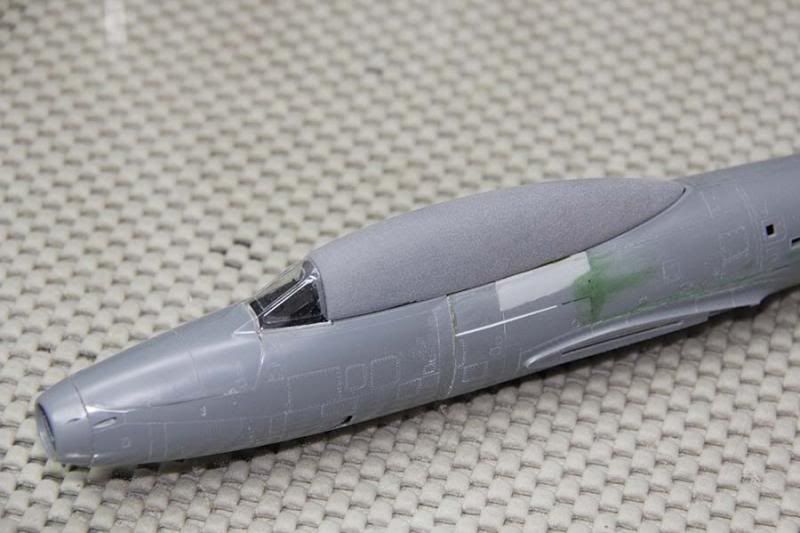
Primered and sanded several times, finish sanded with 1500 to 12000.
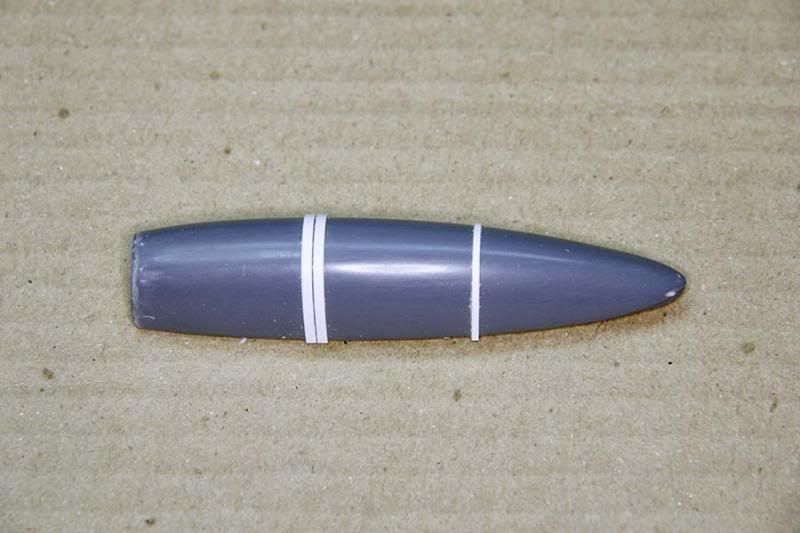
Using .010 strip stock to add canopy bracing. The short of it is, I could find no way to get the strip stock to stick to the smooth paint surface, so since have removed the strips and will add the bracing with decals. Done that before, can do it again.
-
I posted a build update at this thread:
http://www.arcforums.com/forums/air/index.php?showtopic=268825&st=20
-
I posted a "build" update at this thread:
http://www.arcforums.com/forums/air/index.php?showtopic=268825&st=20
-
I posted a "first look" review of the Hobby Boss F-84F 81726 48th scale at this thread:
I failed to include in my review that the KIT DECALS are for F-84F-30-GK 51-9432 and F-84F-45-RE 52-6675.
-
I can add some first-hand information about this HB F-84F kit as I just got two of them in the mail today. First thing I did was got to Hairold's place (he of AMS Resin) so we could do a thorough look-see and compare it to the other three F-84F 48th scale kits. I left one of the kits with him so he can evaluate his current parts to see which will fit "as is" and which may need revising "to fit." Here is the "first look" in brief.
General overview:
There are six gray sprues, one clear sprue, one PE fret, and two decal sheets.
The HB is pretty much copied from the Fonderie F-84 fuselage and Heller parts. The plastic is somewhat soft, will require care to align wings and tail without warps. The finish is smooth, not "grainy" or "matte" like the Kinetic/Italeri. That is the start of it.
The good news:
The Fonderie "replacement" FUSELAGE for the Heller fuselage is the most correct in profile so, likewise, the HB profile is correct. [10]
The Monogram fuselage in plan is too "skinny" aft of the wing roots, ditto Kinetic/Italeri; the Heller/Fonderie is too fat at ejector terminus. HB is correct shape. [10]
PANEL LINES, finely engraved; other than the comment below (obvious error) they look "right" compared to photos of 51-9433. [8]
HB GUN BAY not opened but, calipers in hand, I measured that the Tamiya cover is close enough so, when posed open, the minor measurement differences "won't matter"; thus opening the gun bay is just a busy-work option with either the Tamiya gun bay parts or one of the aftermarket detail sets. [6]
The SPEED BRAKE size and location correct, opened with separate bay (decent detail) and brake (decent inner detail, PE for exterior detail). [9]
The INTAKE SPLITER is a separate part, and is not molded together with the nose gear well; detail is decent and, as one part, no seam line. [9]
The DROGUE CHUTE HOUSING is a separate part, thus no seam line; we suspect this is to allow another release with the ventral fairing as on early blocks (and see comment below). [9]
The WINGS are generally correct; welcome details are the separate flaps and "wells" for the PE spoilers (the spoilers are NOT "for cooling the mechanism" as asserted in a certain "F-84F Walkaround" book ... :o ) other than the comment below (obvious error) they are otherwise externally well done. [8 for "external" rating]
The TAILPIPE (ejector, in Republic terminalogy) is two pieces plus internal fore and aft turbine faces; detail is decent but missing the four vents. [8]
The OUTER DROP TANKS are nicely detailed and, without measuring, appear to be correct the correct dimensions in scale. [10]
The PYLONS are correctly shaped and nicely detailed. [10]
The CANOPY is furnished with parts for posing both closed and open, five parts in all; very well done. [10]
The FIDDLY BIT details are generally good for the scale, nothing specific to downgrade. [8]
I did a parts cleanup and DRY FIT only of the fuselage; six alignment pins aid alignment, and the parts fit perfectly. [10]
I observed only two or three very small instances of flash and no offsets in any parts; all sprues are very well molded. [10]
The Bad News:
The COCKPIT details, including pan, side panels, instrument panel, and seat, are minimal; they are barely better than those with Heller/Fonderie. [3]
The NOSE GEAR details, including well, gear, and wheels, are equivalent to Heller/Fonderie; the well is not even close to correct, the gear and wheel are in once piece. [2]
The MAIN GEAR details, including well, gear, and wheels, are equivalent to Heller/Fonderie; the wells are molded with the ventral wing halves, thus are to shallow and detail is minimal, barely a representation, and should have been molded with the dorsal wing halves as, for example, done by Monogram [3]; the gear has minimal detail that is short of correct and the wheels are severely lacking in detail. [1]
The GEAR DOORS are a mixed bag, some with decent details, some with incorrect or no detail. [5]
The INNER DROP TANKS, unlike the outer drop tanks, are minimally detailed; they represent the smaller of the inner drop tanks used (the AMS Resin inner tanks represent the larger tanks). [5]
The HORIZONTAL TAIL parts represent the early blocks which had traditional fixed stabilizers with elevators; all late blocks had flying tails (as per Monogram, et al). [5]
OBVIOUS ERRORS are: {A} fuselage has the incorrect RF-84F panel line (copied from Caruana's incorrect drawing in SAMI); {B} starboard wing has the refueling door represented but that door was only on the port wing. [0]
Conclusion:
In general, the EXTERIOR is the strong point of this kit; it is the most accurate in shape, and the best detailed, of the available kits. [9.5]
In contrast, many of the "INTERIOR" details miss the mark. [3]
FROM THE BOX the HB can be built as a model that, for exterior appearance, is closest to the 1:1 Thunderstreak (late blocks, of course).
To ENHANCE the build, the HB begs for aftermarket details to "correct" what isn't right; AMS Resin detail parts are available from Sprue Brothers.
PRICE is within the range of most listings for Kinetic/Italeri (retail and eBay) and Heller/Fonderie (eBay); neither excessive nor economical.
RECOMMENDED!
-
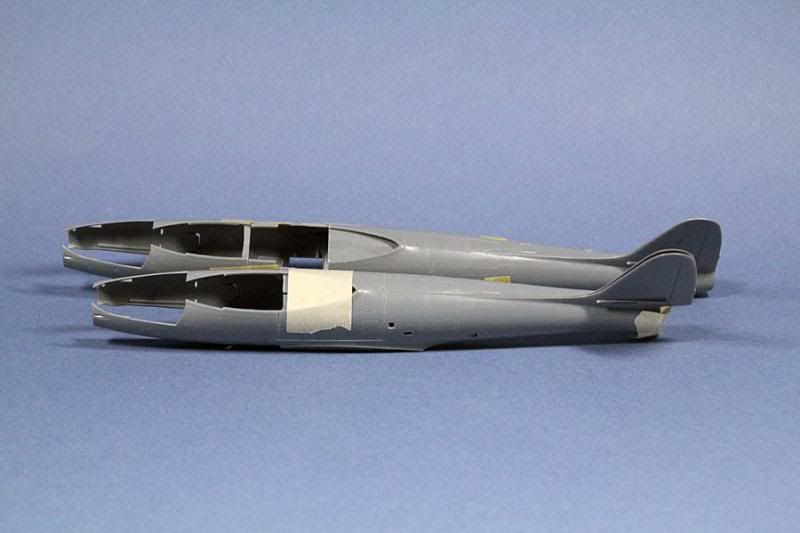
I proly posted some photos of this on another thread, but have decided to be "specific" to this build on this thread. Basis of the build is a Tamiya 48th F-84G backdated to F-84C. I have used the same fuselage that was the subject of my "How to" backdate to F-84D which is at www.craigphoto.smugmug.com. I will post more photos and more details later, but for now, this photo is of the fuselage buttoned up just this evening and with a "mock-up" of my PhoSho decals as a test fit before printing them on ink-jet decal media. All the Squadron Green is to fill in panels which were not present on the F-84C.

-
Got the F-84C pilot seat done. Very thin parts in the seat means very thin casting. So flexible I was constantly having to be careful to not break it and to keep from twisting or otherwise distorting it.
Two views in one photo - ain't PhoSho wonderful!
-
I created sub-categories, moved the photos to a sub-category, checked the links and they worked. Why did they "die" later? Only the hoseknows.
-
Mr. AMS his own self was bugging me only this last Thursday to do a backdate to "early" F-84 as in "D" (XP-C have totally different wings, wheels, and main-gear doors). I've already done that deed (make the XP-C wing masters) which Mr. AMS has in his possession to make some castings for me for my "on the workbench" F-84C build using ... tada ... the Tamiya kit shown in the photos with the intake correction. I have also made fuselage masters from a RMPM (Revell, et al) and Tamiya bash for any XP-D backdate; those masters will also get the intake correction treatment (last part of the "bash" to be accomplished).
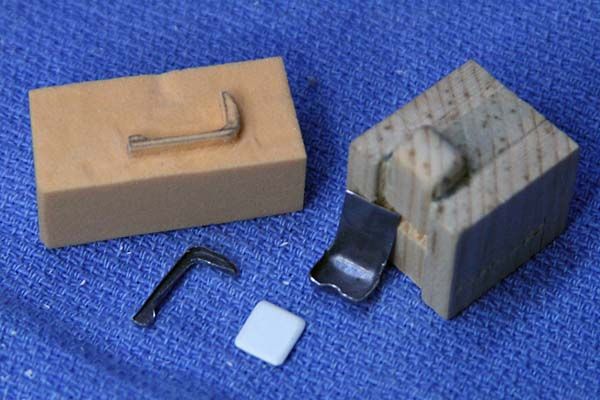
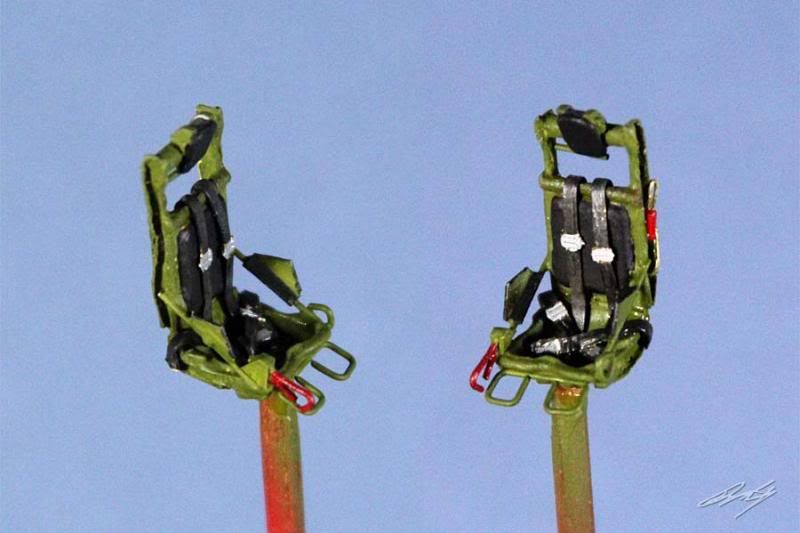
I just, this evening, finished the "scratch built" early F-84 pilot seat. I made the basic "master" using RenShape and wood "dies" to shape lead foil along with sheet stock for the seat back. I added wire and styrene sheet stock to complete the master part.
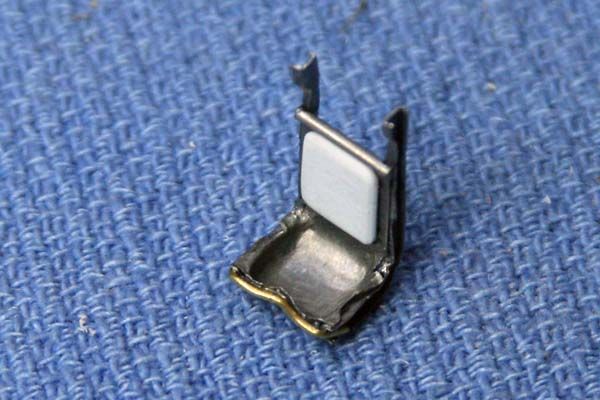
Harold then made an RTV mold; due to the fragility of the master, it was destroyed beyond recovery upon removal from the mold. The part was complex and fragile enough that he was only able to get three parts out before the mold went FUBAR.
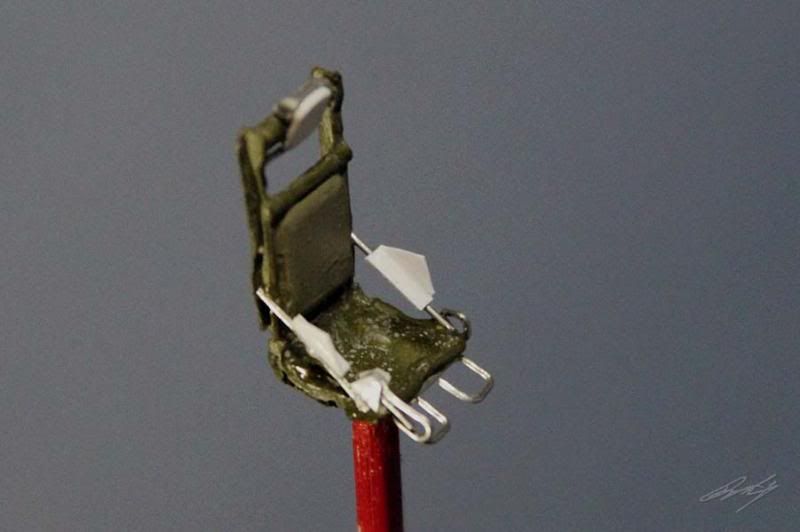
I used one of the castings for adding wire and sheet stock bits to do the final build.
The photos are of "ready to paint" condition.

The decals I used PhotoShop to make for my F-84C build.

I used PhotoShop to make the graphic of the F-84C/F-84D instrument panel for my F-84C build. This is the second version of the Thunderjet series instrument panel arrangements; the first two did not have the "side mount" panels as seen on the E/G series. Also, it is well to note that, even within the three main arrangements, there were many variations of instrument placements. So, this is "as seen" in the Republic F-84C Manual and may not represent what is seen in photos of specific aircraft.
-
Gracias, and exactly my view of "why" to do this!
-
I am updating my PhotoBucket, their servers seems to have gone FUBAR ... so will have to post photos later.
-
Uh ... Olive DRAB not Olive Green. Do I qualify for the next space-cadet seat? :bandhead2:/>
FWIW, the non-national markings on the FS-428-A were done on PhoSho and an Alps printer.
-
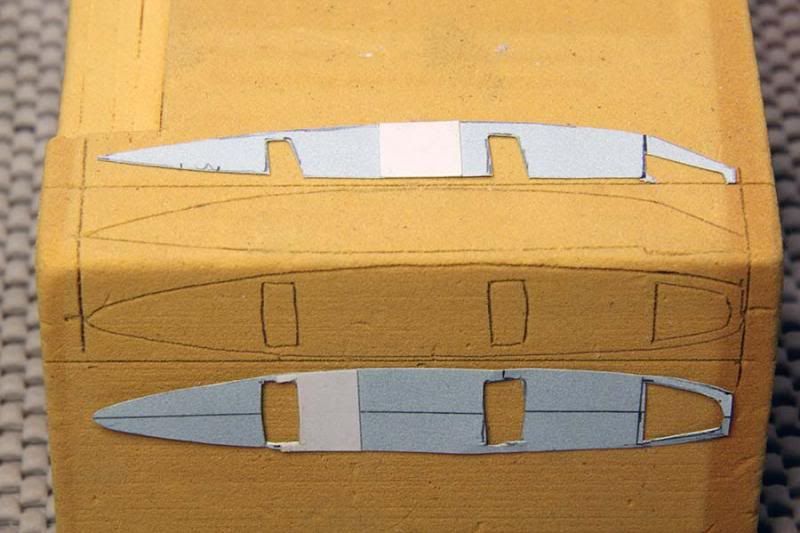
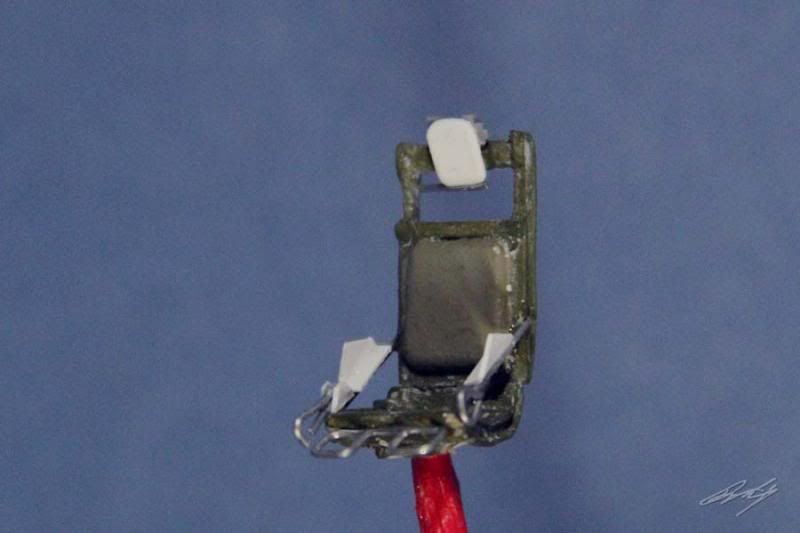
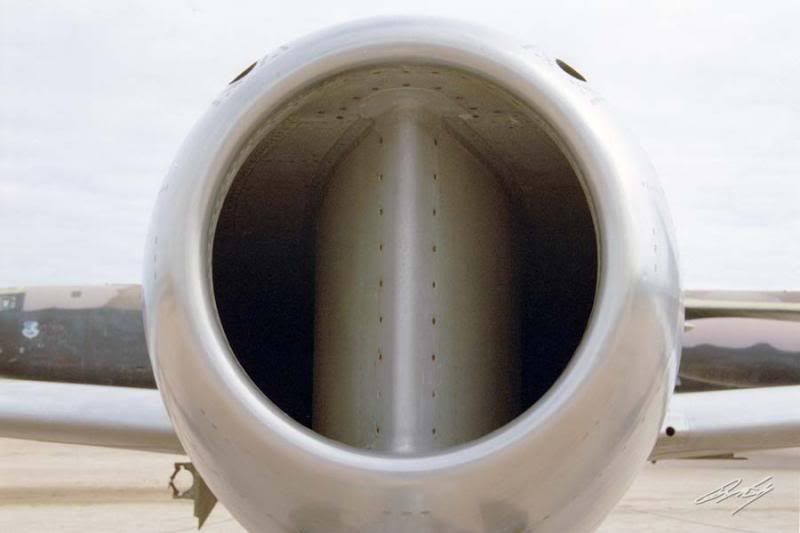
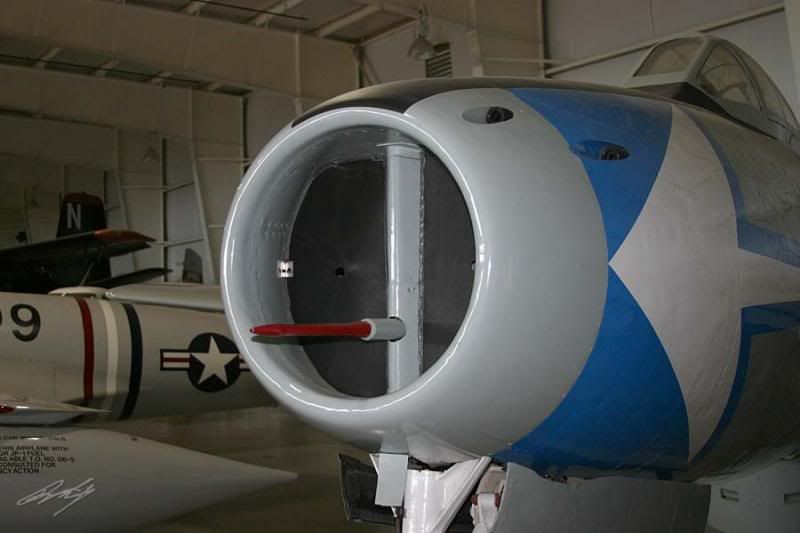
The Tamiya and RevMonProMod 48th scale Thunderjet kits were engineered without correctly modeling the smooth intake runners. Photos are of an F-84C, F-84G, a photo of the kit parts showing "before and after" and a pattern "in scale" for scratch-building the parts to correct the intake runners to "smooth" as on the 1:1 Thunderjet. Last photo is of my F-84G build with "smoothed" intake runners.
F-84C at March Field Museum, Riverside, California.
F-84G at Hill AFB Museum, Roy, Utah.
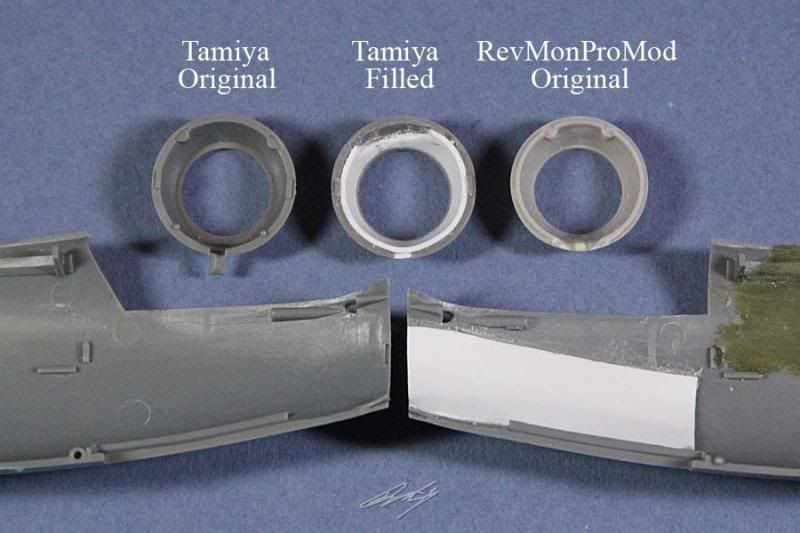
The "before and after" kit parts.

The pattern for the sheet styrene "correction" parts. The patterns are slightly oversize so will need trimmed "to fit" and some filler may be required.

F-84G 48th scale kitbash using RevMonProMod with Tamiya, Aires, Verlinden, AMS Resin, and other parts. I have "smooothed" the intake on this model per the process shown above.
-
Nicely done. Not sure why you think it is not well done ... ?! But, being my own worst critic, I can identify ... :D
As for the spine decals that came with the kit, they are not close to correct color. I've attached a photo of my build done FTB, kit provided to me gratis by Revell for review when the kit was first released. To compare, I've attached a photo of a Tamiya build I did with correct anti-glare Olive Green. Thunderjets had either Matte Black or Olive Green anti-glare.

Revell F-84E 48th FTB

Tamiya F-84E 48th (kitbashed to F-84D ... which is incorrect for this S/N ... oooops!). :o
-
This has been rattling around in my skull for over ten years. A couple nights ago, I couldn't sleep. Three hours later, this bash magically appeared. Then I woke up to discover I had been sleep-modeling.

TF-84G-31-RE 51-16974 71st Flying Training Wing.
Two 48th-scale Tamiya F-84Gs kitbashed, FTB kit for comparison. Now I have to finish it.
I elected to "rename" my what-if bash from YTF to TF as it will be done in a Flying Training Wing scheme.
-
Nine months later ... it would be nice to have some communication about the progress ... or lack thereof.
-
I sent a request to Erik to return my canopy, via "Return Receipt Requested," which he signed for two weeks ago. Still no response. As no Have Blue kit is forthcoming and I now have no canopy for me to continue on my scratch build, I regretfully have to conclude "caveat emptor."
-
Which kit? Which decal sheet? There are many. Why hi-res? I have scans of about 60 decal sheets for Thunderjet series ...
-
Mr Thunderjet Hisself here, bought one of these, promptly handed it over to Harold aka AMS Resin for him to do his thing. I generally only build 48th scale but will proly condescend to build this one ... just for the HOI. That is, when AMS Hisself hands over completed resin. Yup, proly.
As for my F-84 model photos, you can find them here.
http://birdphoto.smugmug.com/Hobbies/F-84-Models/F-84-Models/18323561_td8XDW#1410866158_w7DpVMf


The Thunderjet Republic Never Made
in Jet Modeling
Posted
RenShape sampler is what I bought.
http://freemansupply.com/MachinableMediaSam.htm
It seems like whenever I get to the task of getting the site back online, something comes up that gets in the way of accomplishing the task. I have the domain and a host, except the host's "features" limit me to a max of 1024 files per folder and all my over 5000 pages are in one folder. I don't have the time to go through and recode the html to "fit" the folder max as I estimate it would take me six to eight weeks to recode everything. And that doesn't include some 2000 more possible pages to add to the site. I have another possible host, but he and I always manage to have a schedule conflict so that isn't done yet.