

HeavyArty
-
Content Count
3,589 -
Joined
-
Last visited
Content Type
Profiles
Forums
Calendar
Posts posted by HeavyArty
-
-
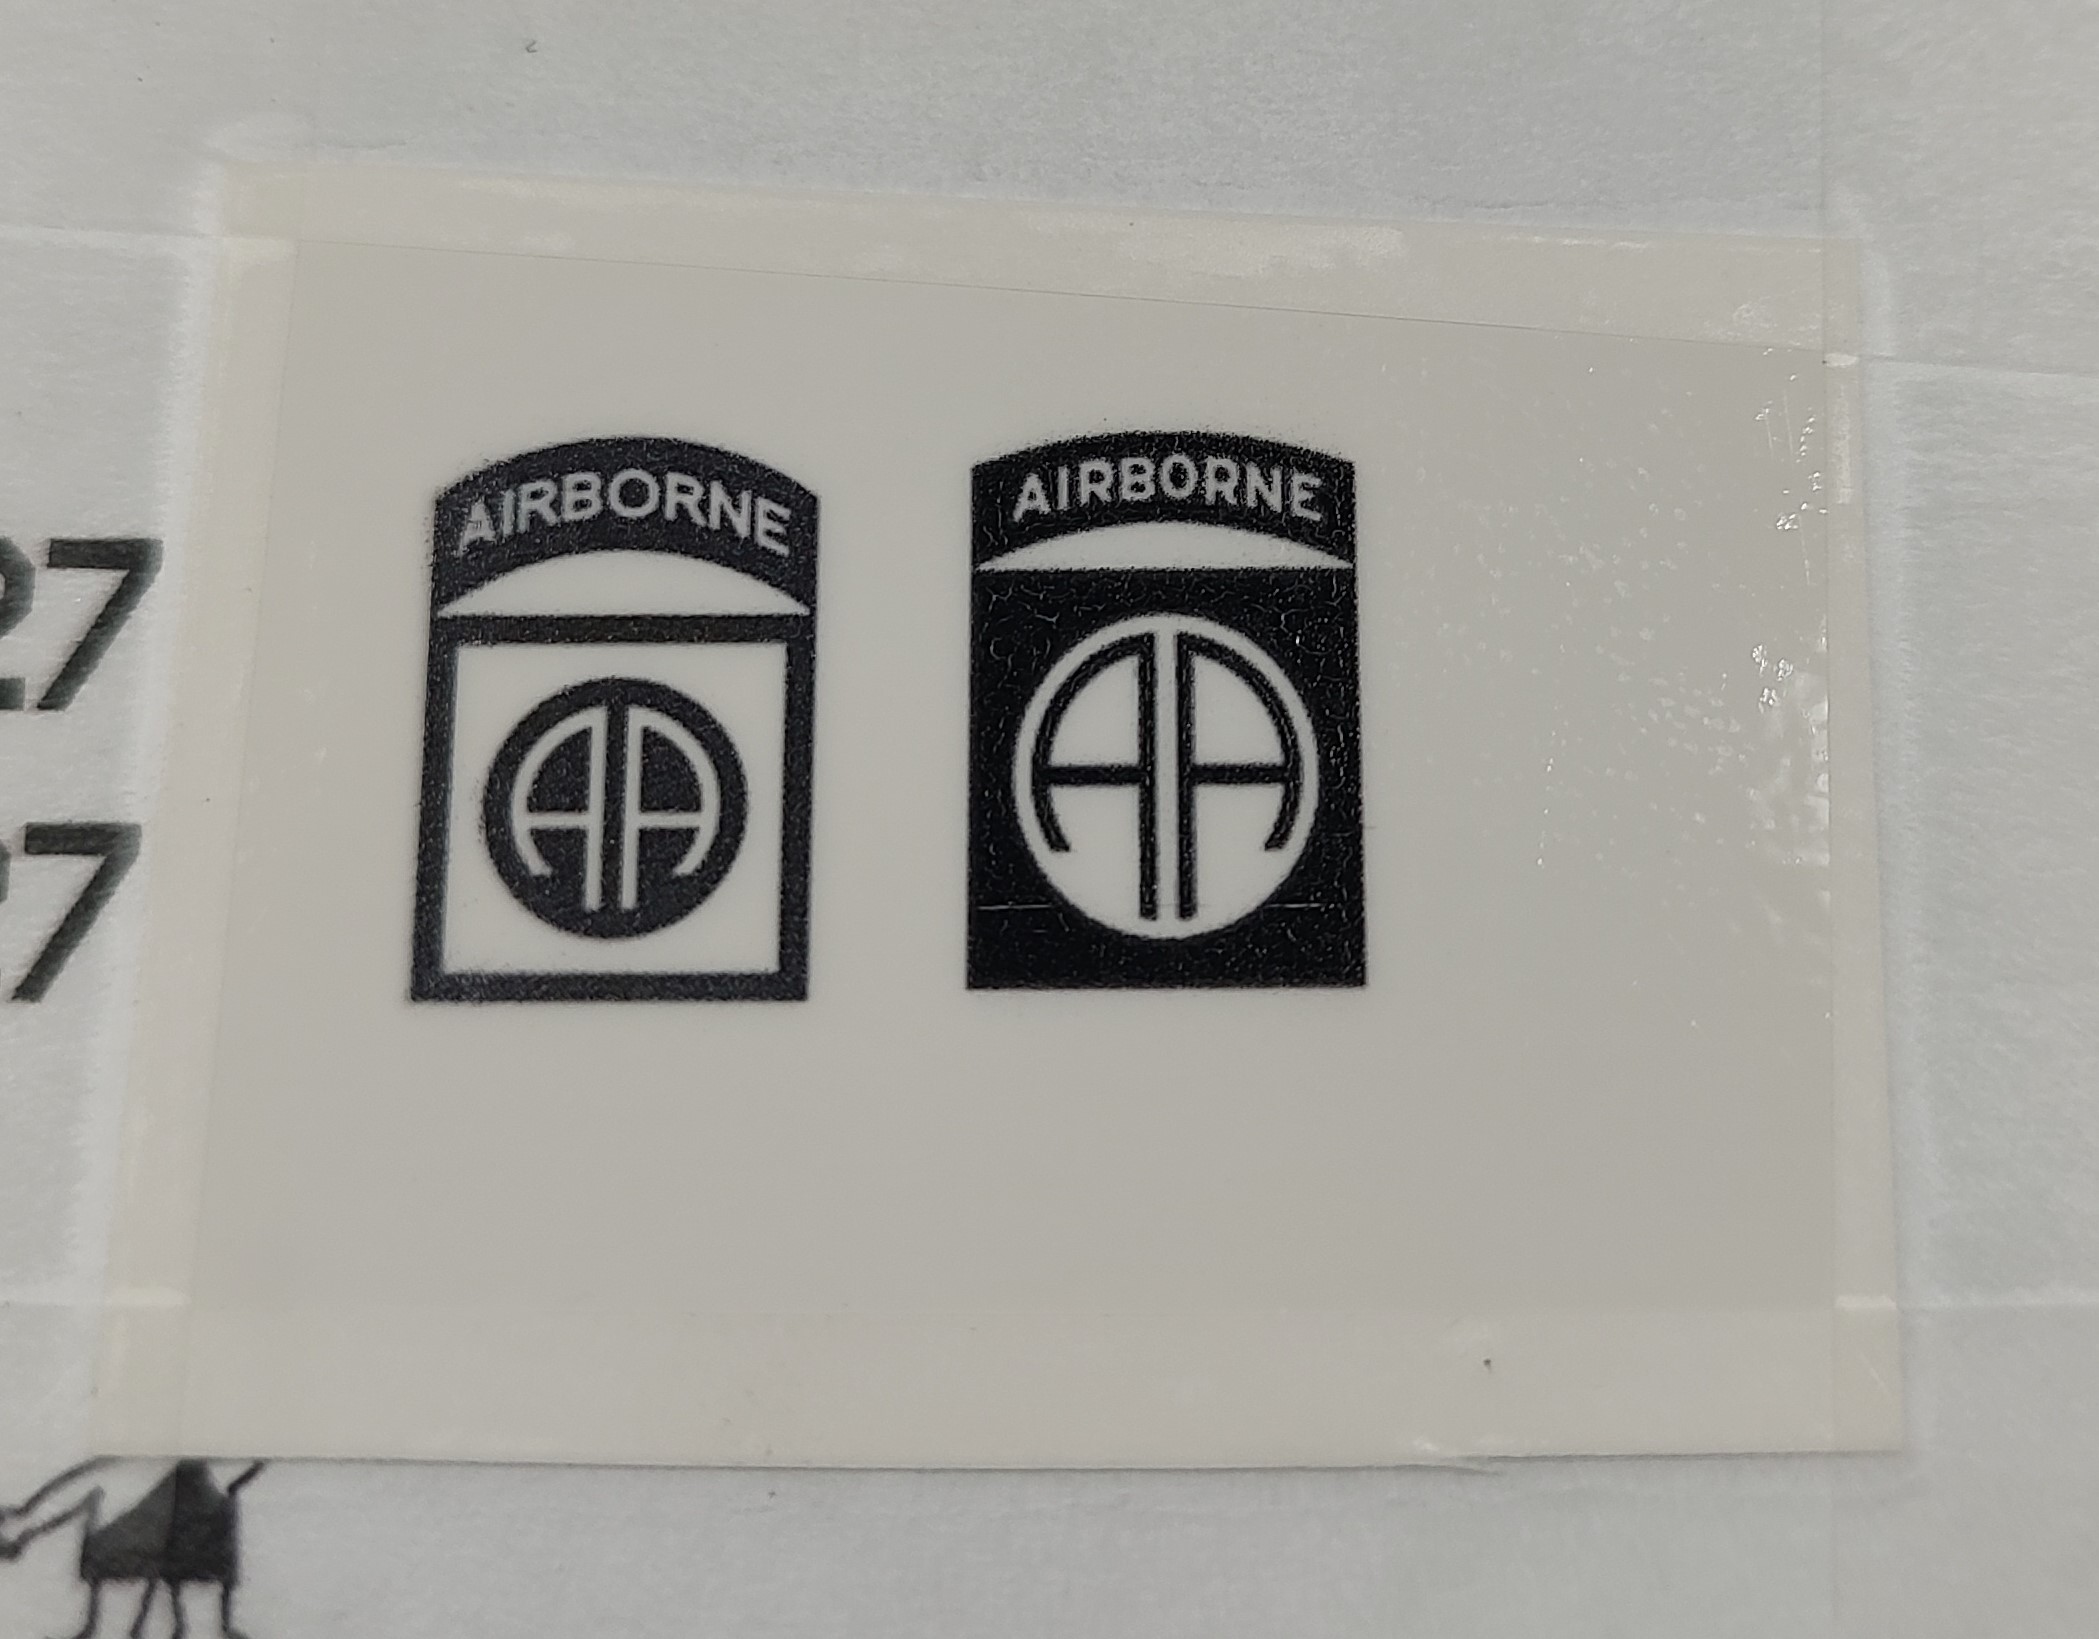
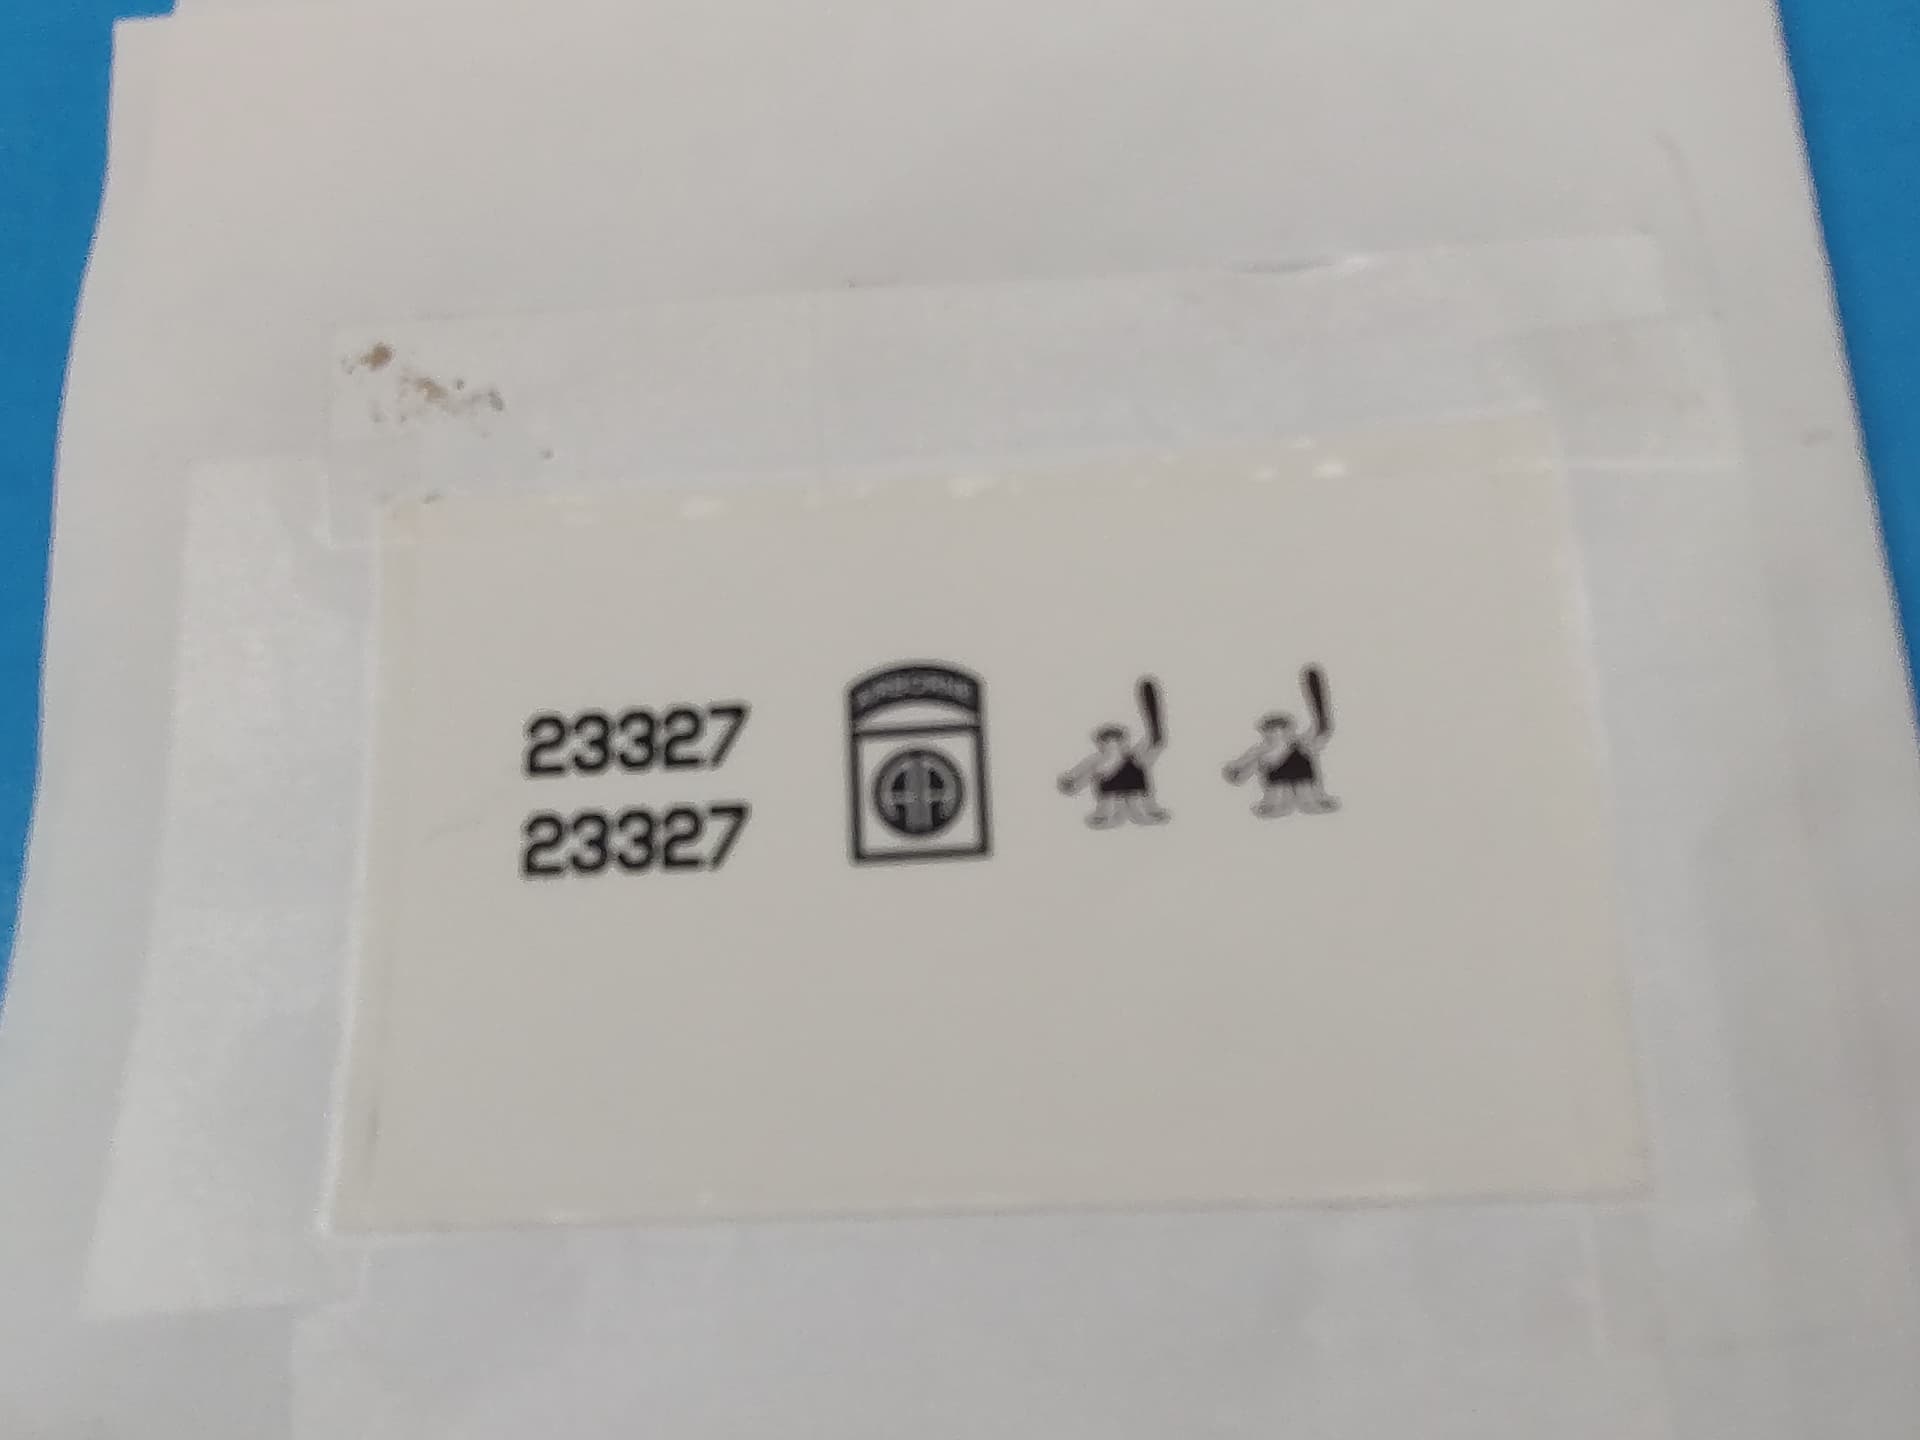
After posting above, I realized I was using the wrong 82d patch. I went online and found the right one and printed up a decal for it.
Correct one on the right.
Actual nose art.
-
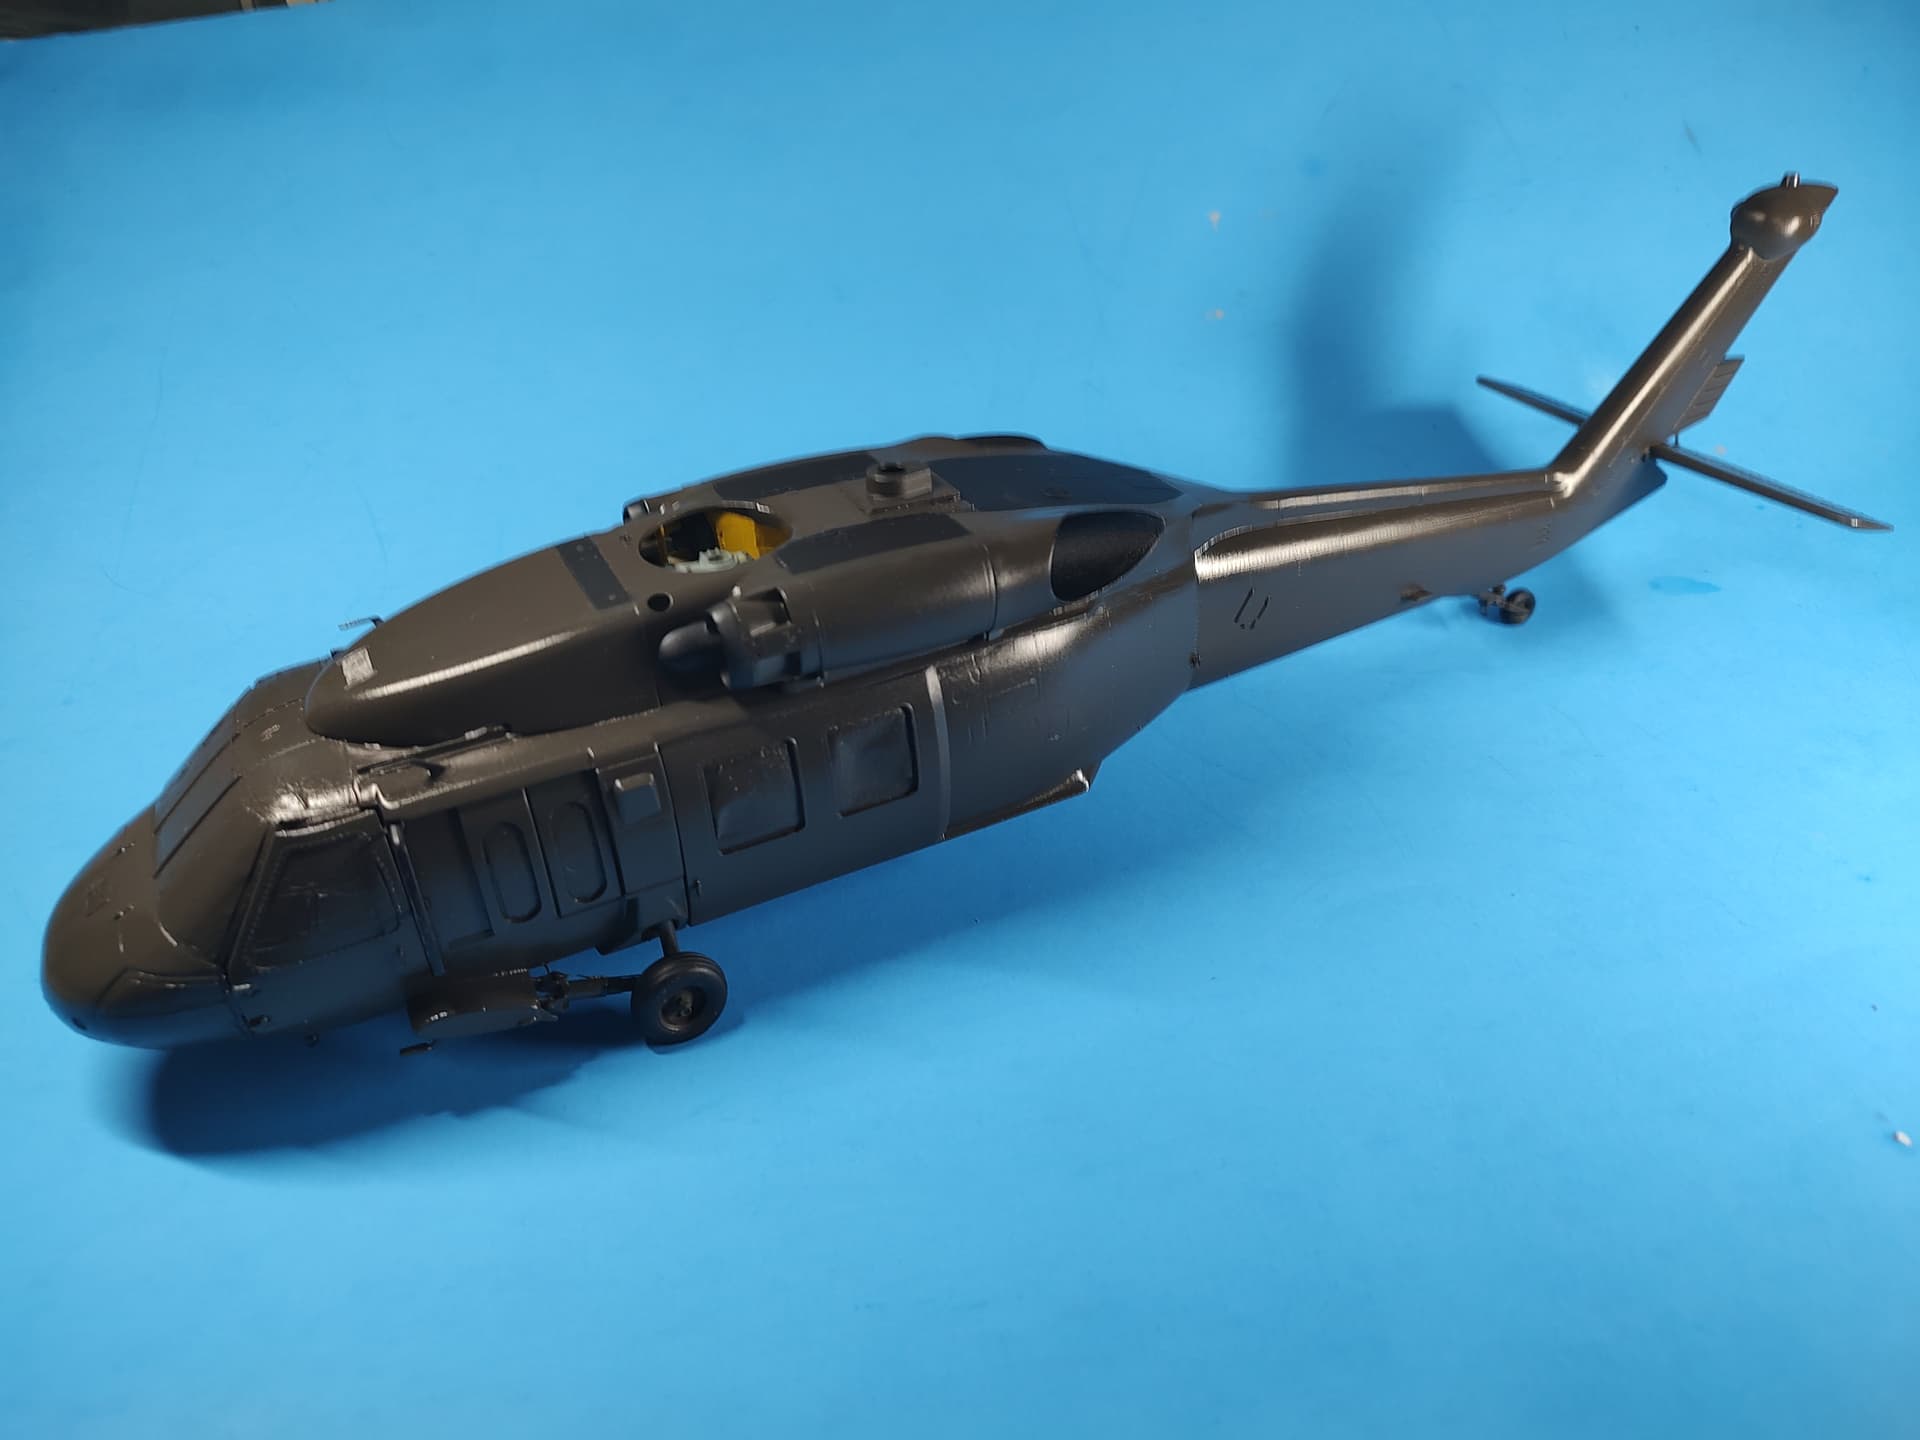
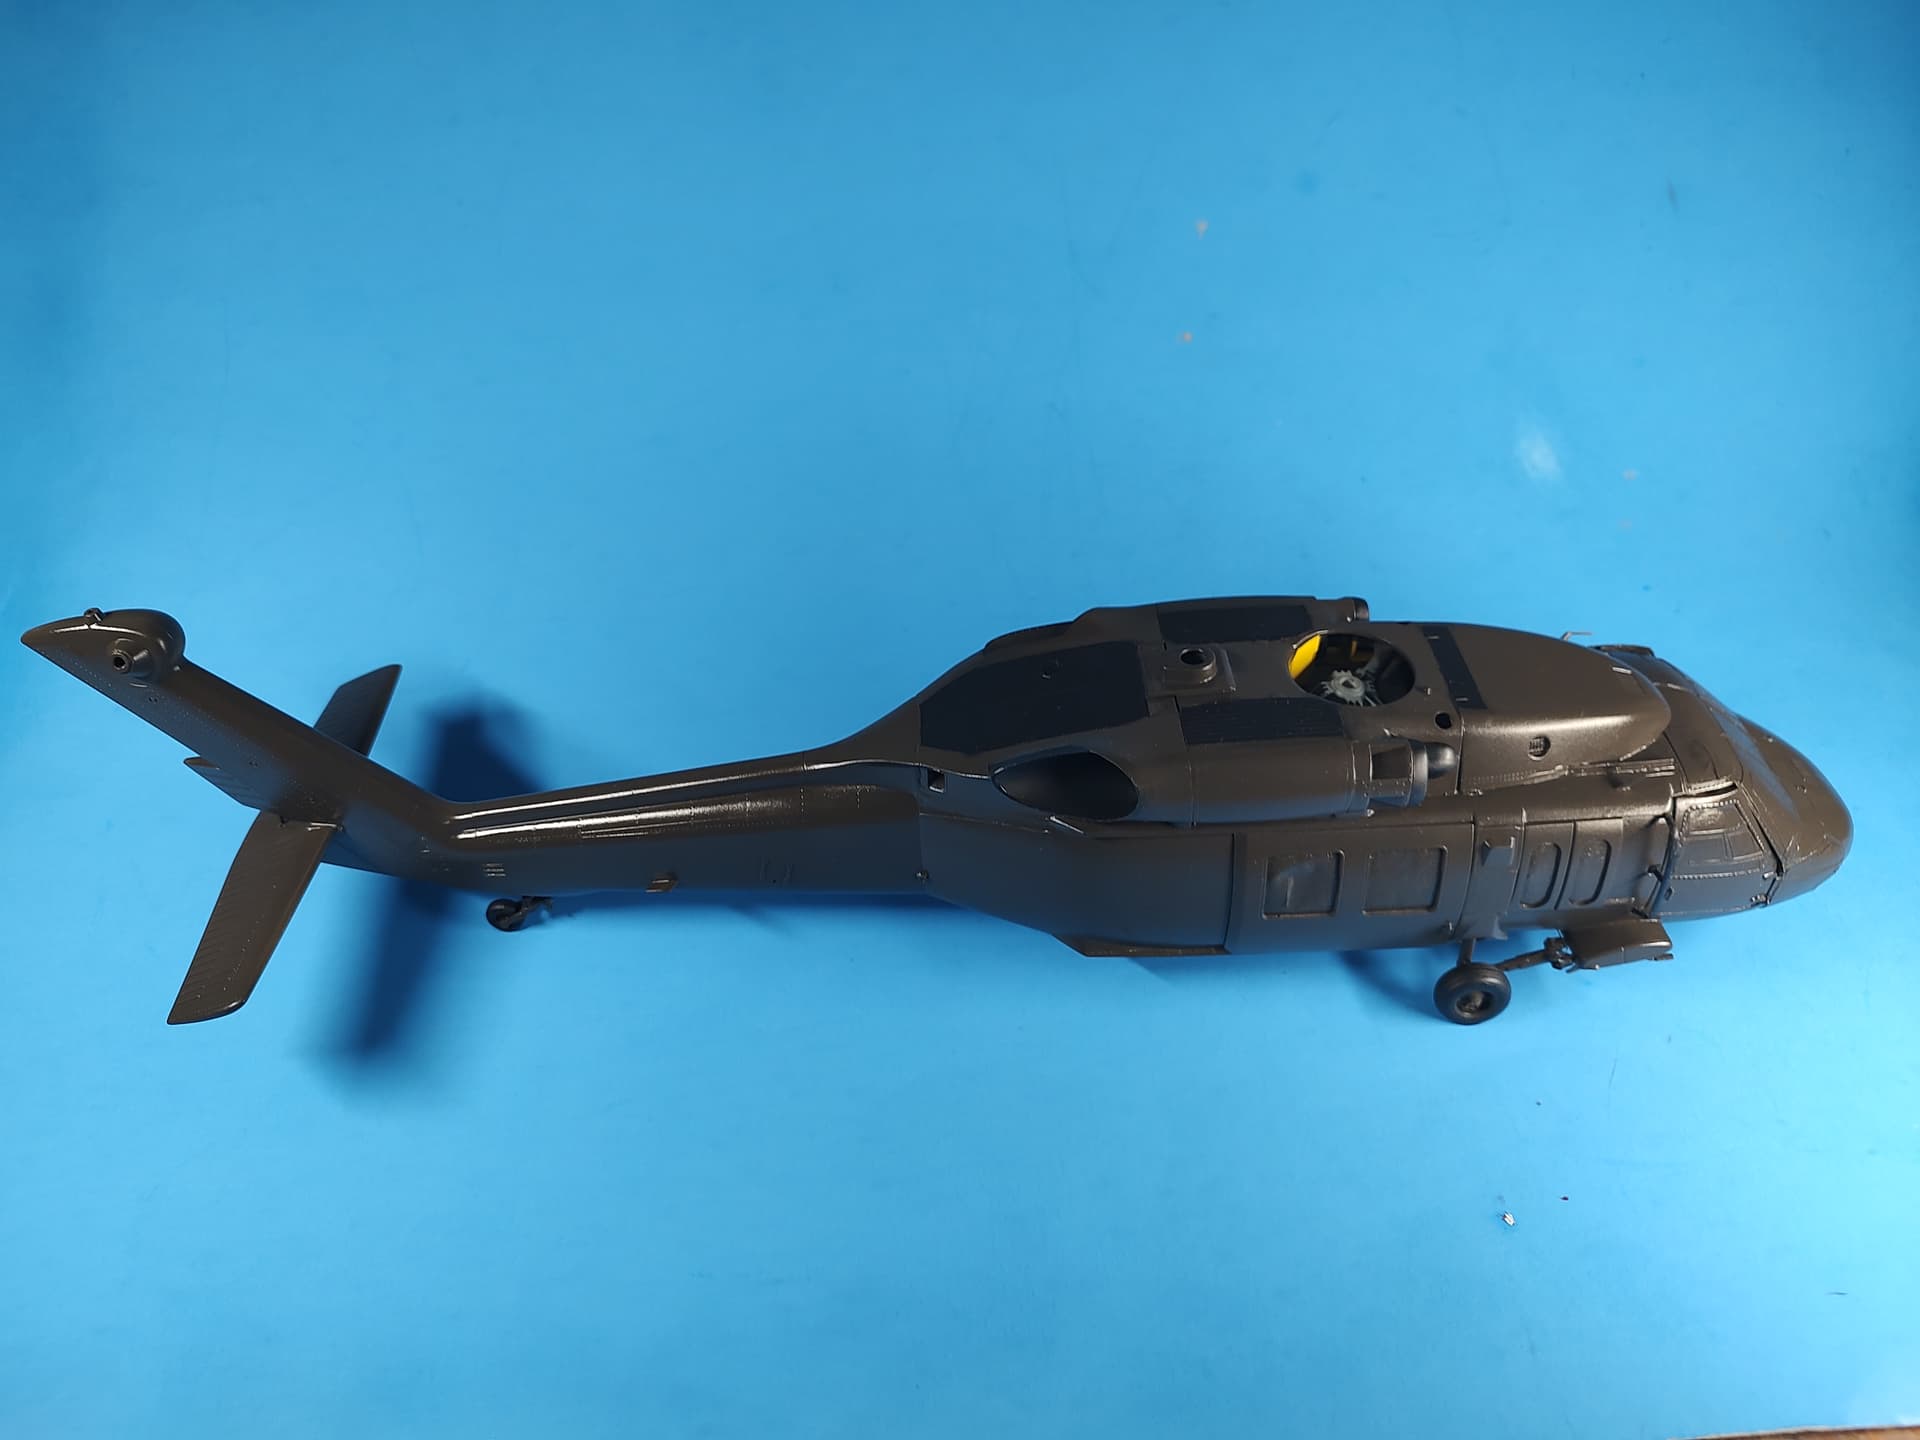
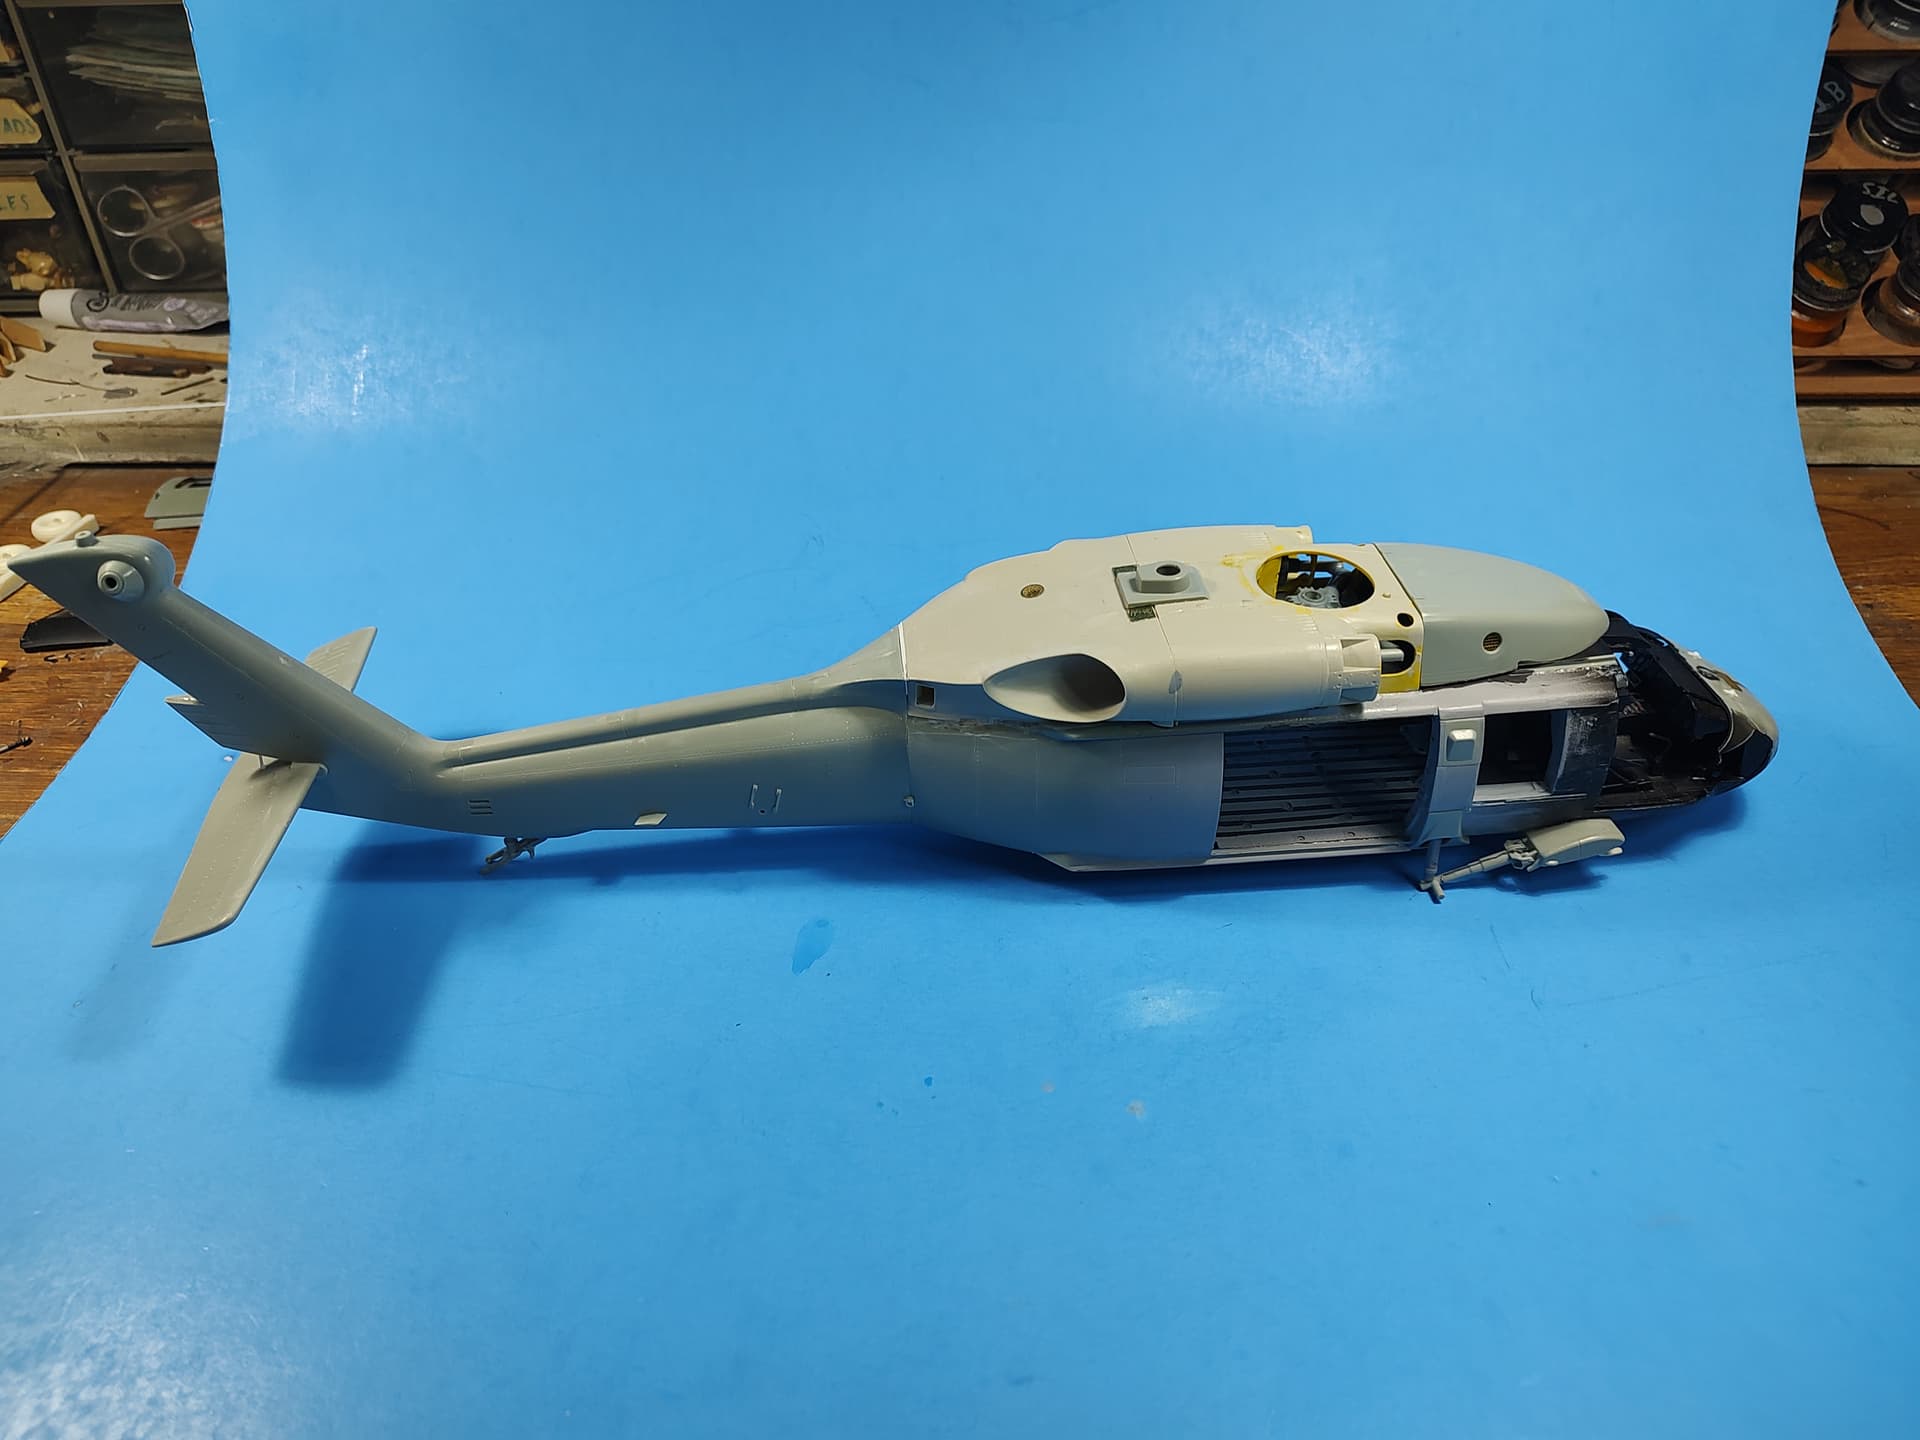
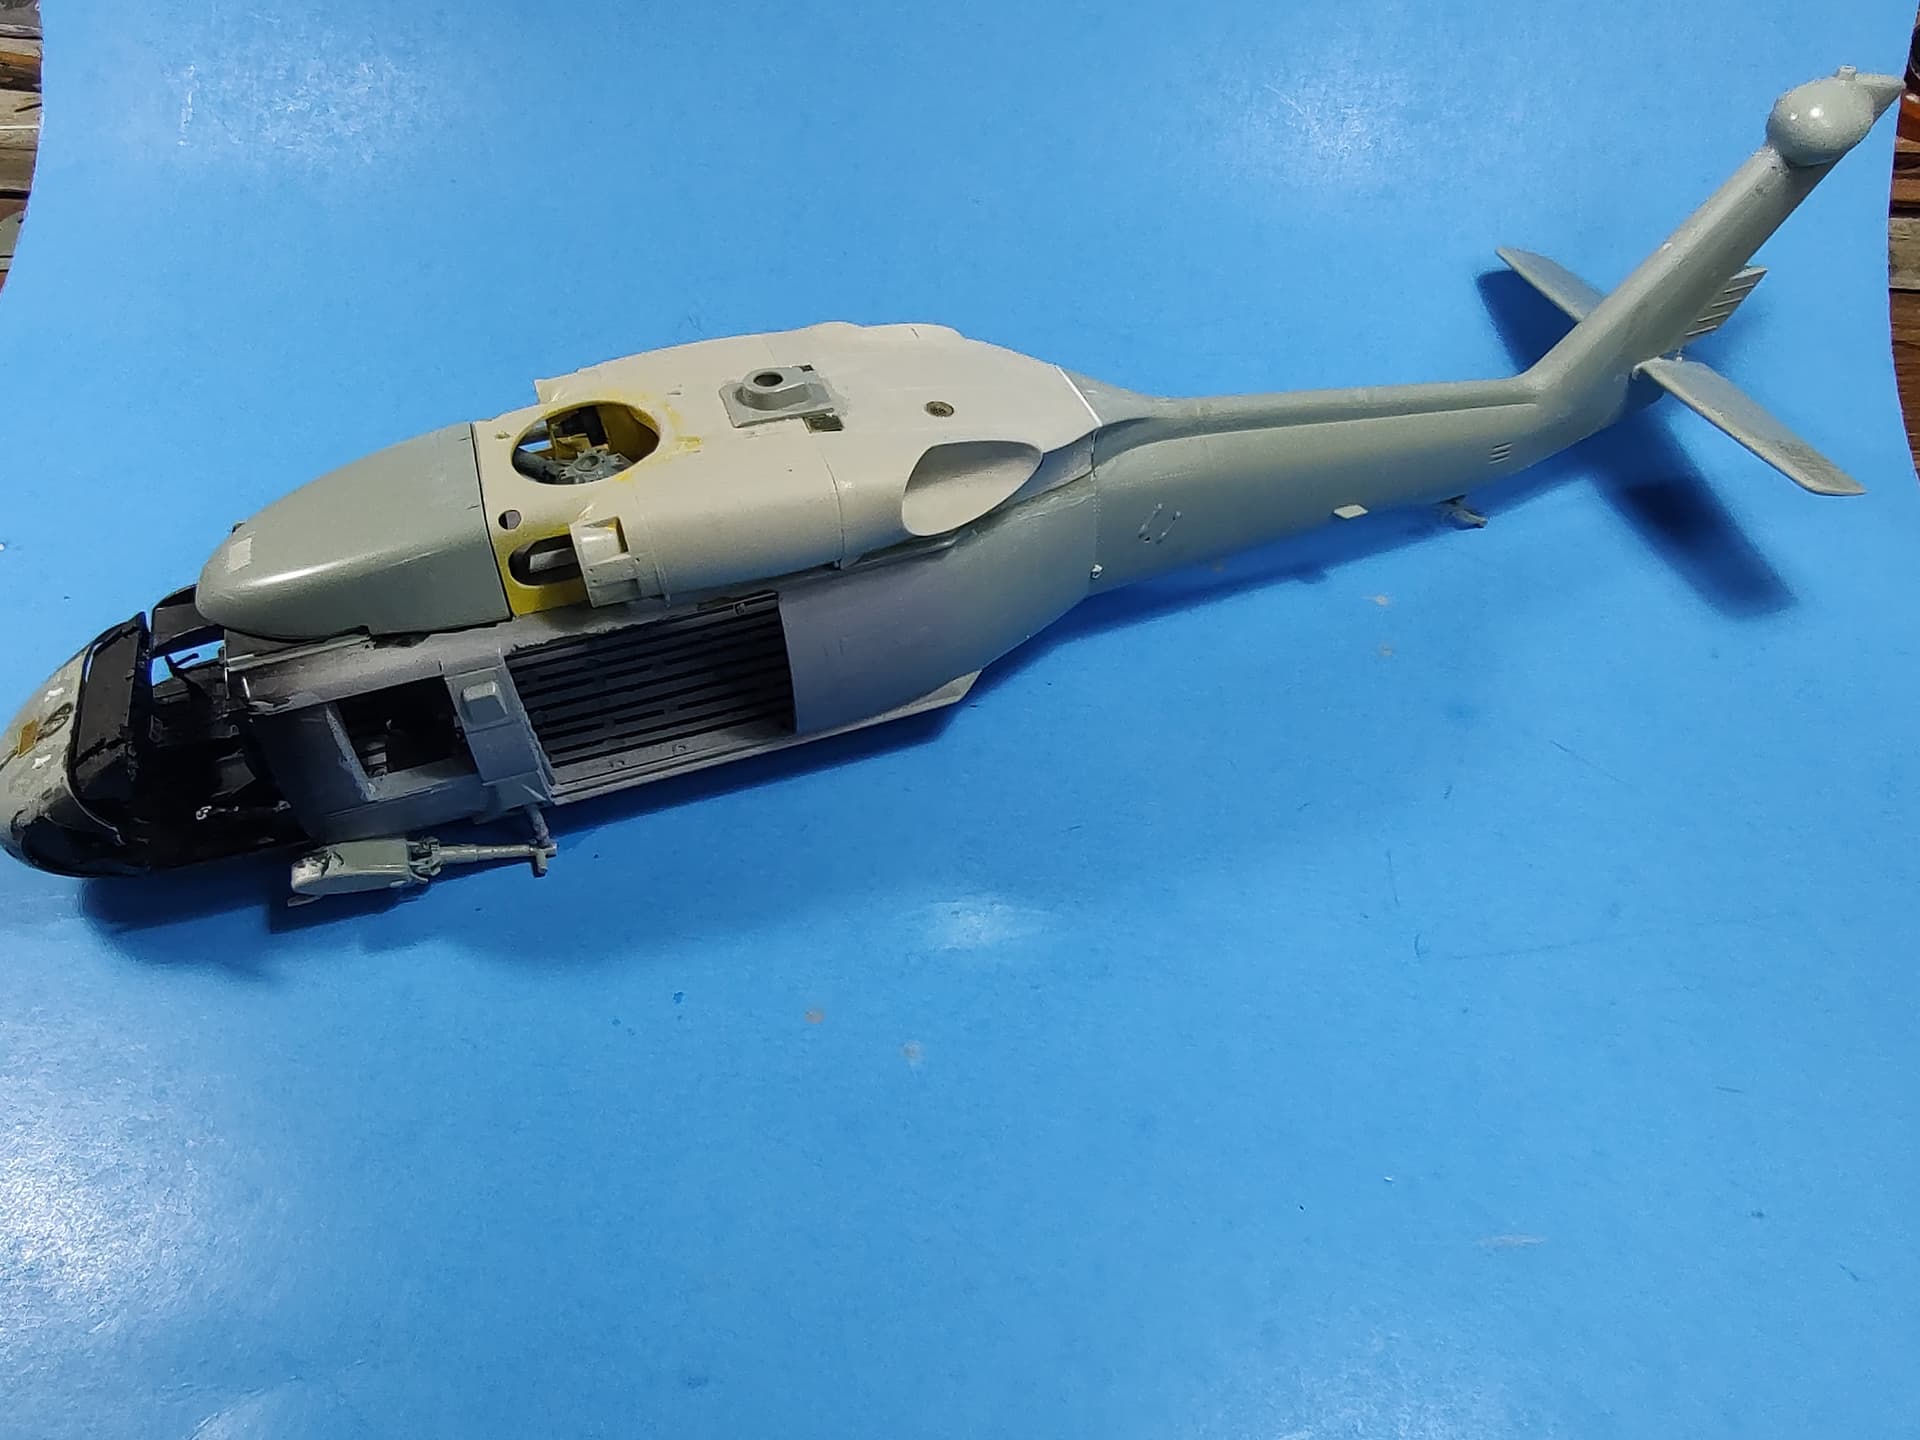
Over the last few days, I was able to get some paint on it. I painted it with Testors Model Master Helo Drab (FS34087) enamel. I bought a few bottles when I heard they were being cancelled. Luckily, I still have a few left.
Here it is overall.
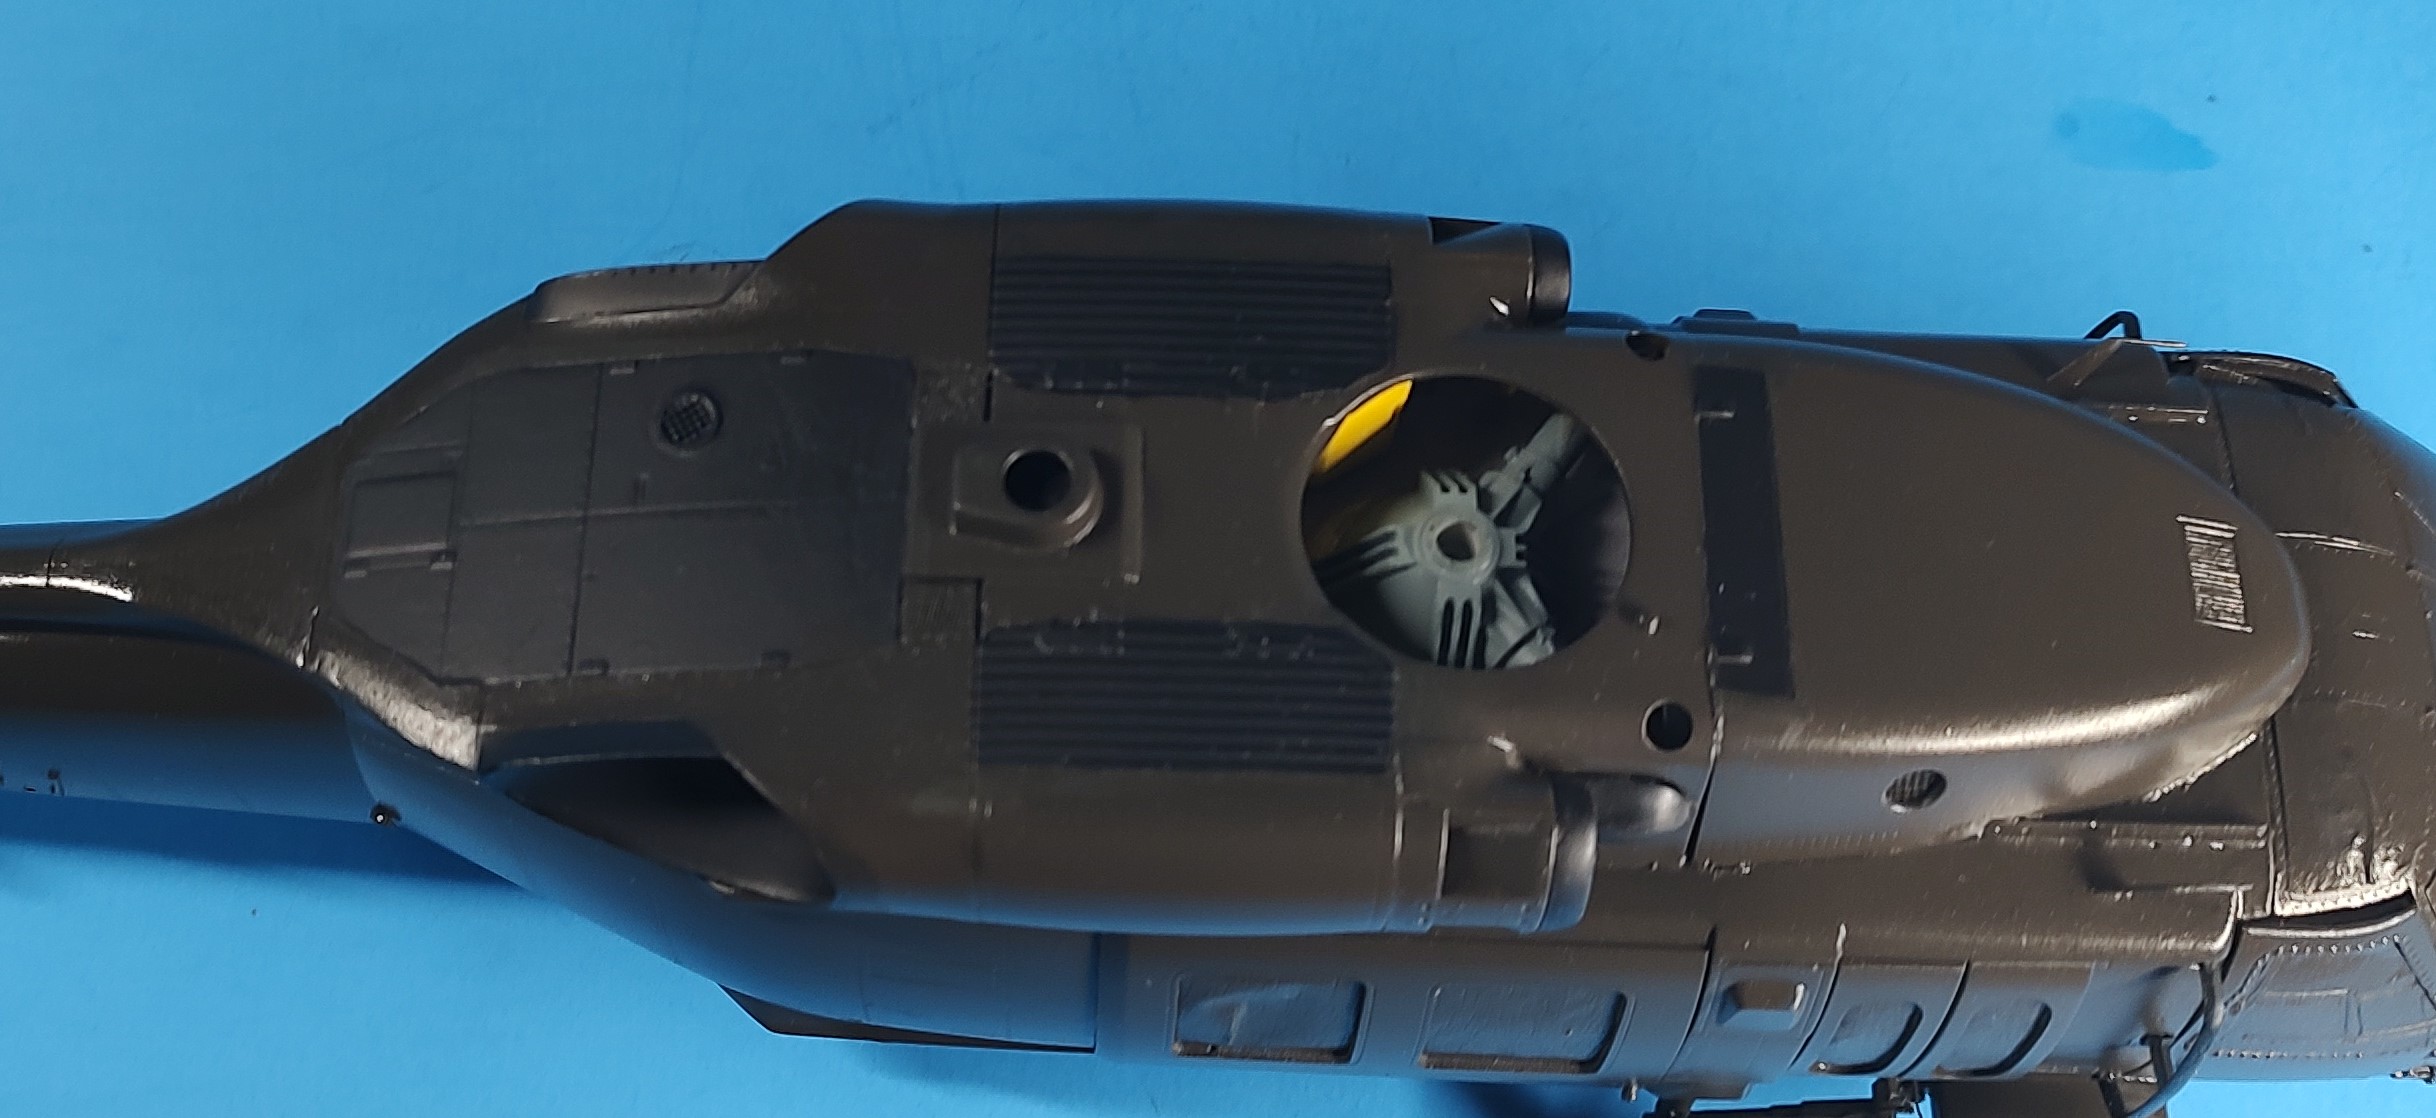
I taped off and painted the black non-slip areas on the roof and the exhausts. I also shot the intakes and the side antennas with black.
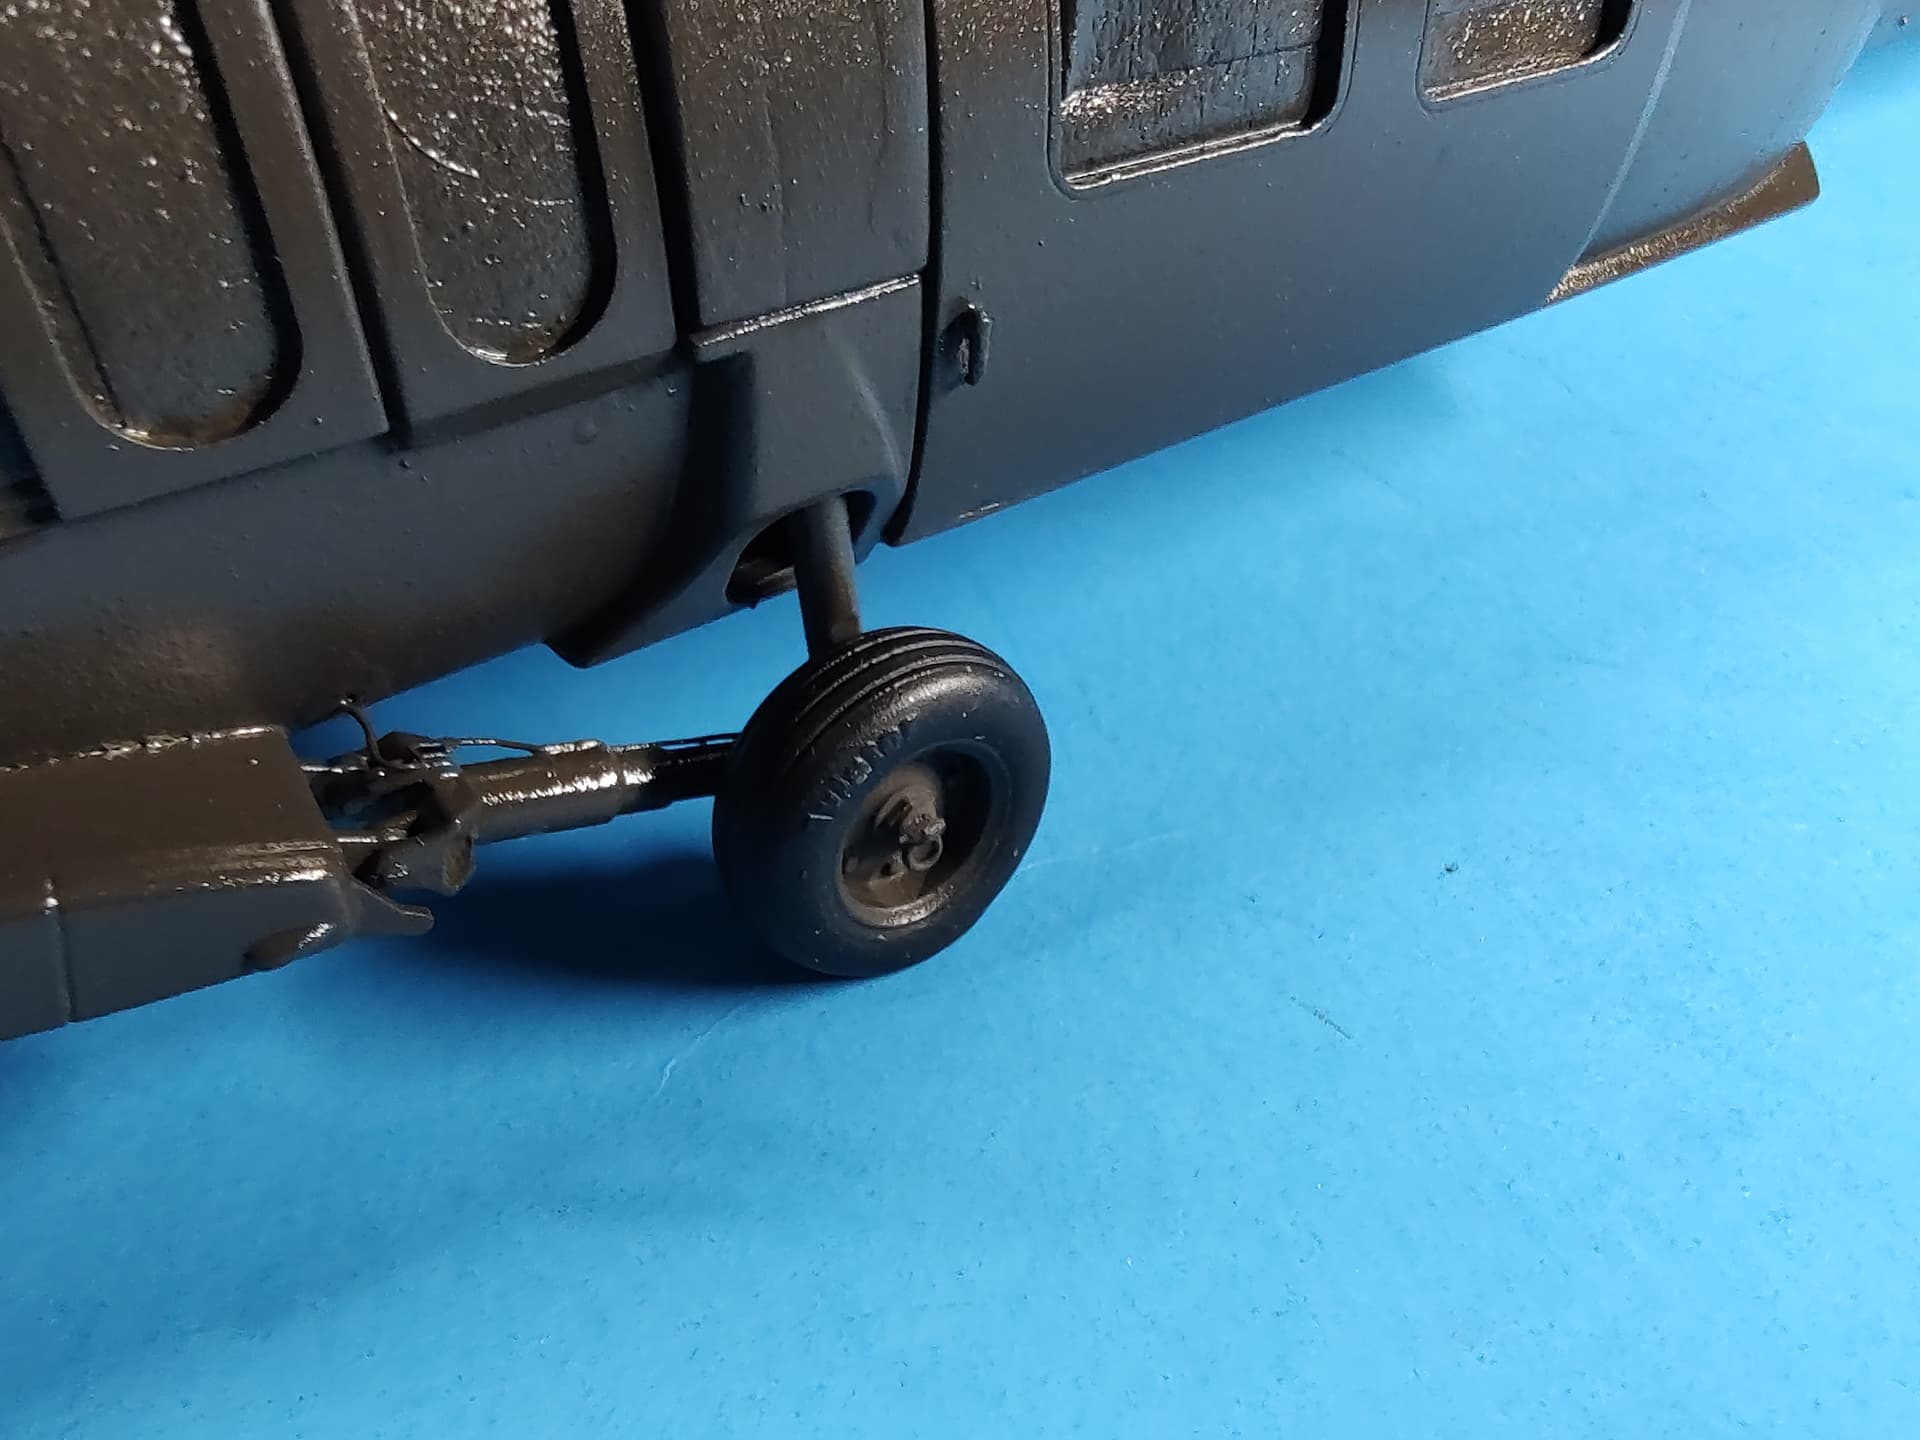
I got it up on its wheels too. For the wheels, I used a resin set by Werner’s Wings. They look great and have sidewall details and the proper groves around them.
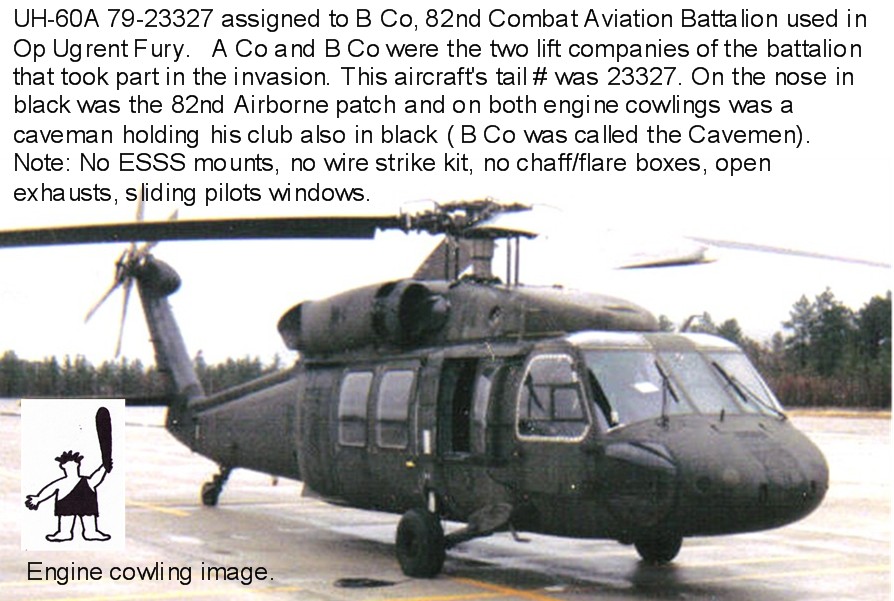
I will be marking it as a bird from B Co, 82d Combat Aviation Bn, 82d ABN Div.
I will use most of the common decals on the Academy sheet for stencils and such. I made up and printed out my own decals for the ones that are specific to this helo.
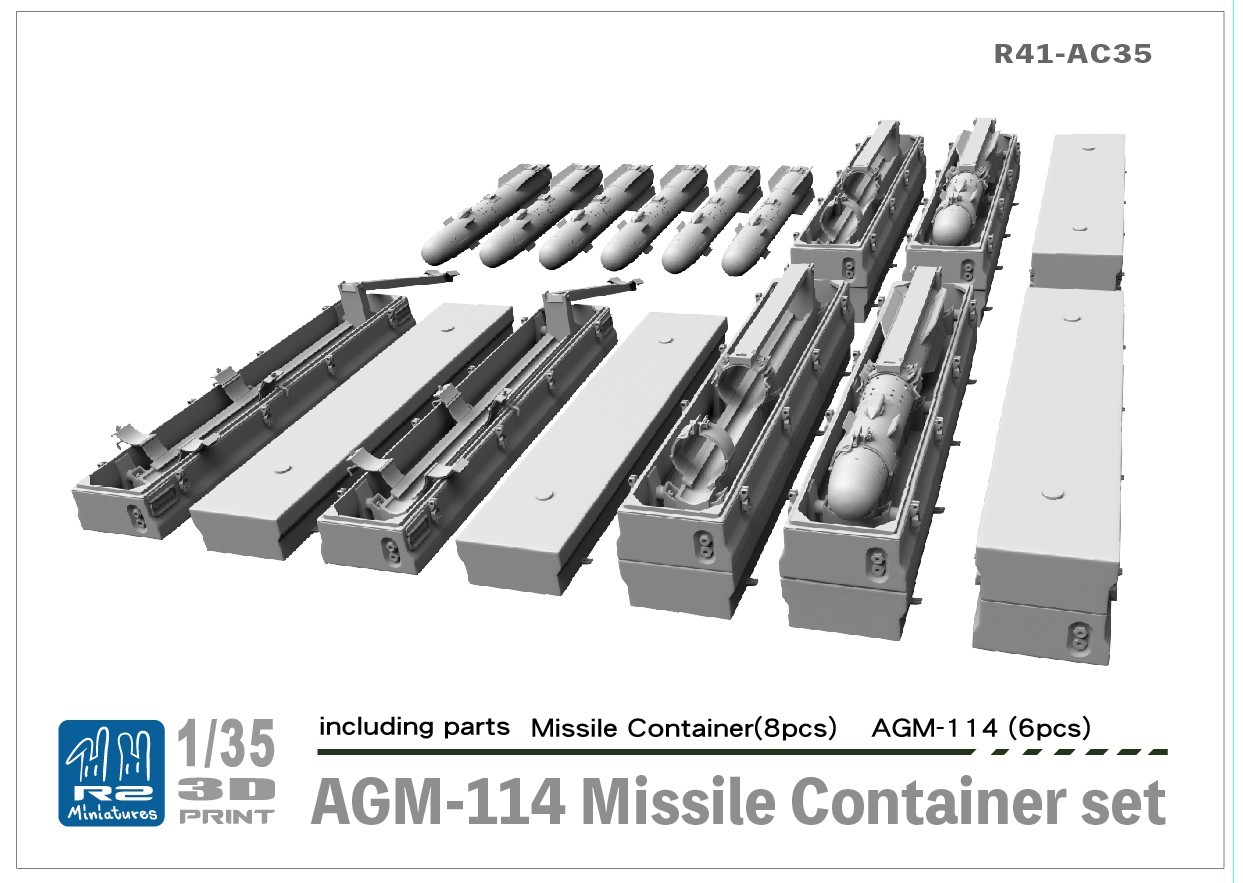
Lastly, I received one last bit I have been waiting for. I got the Res-Kit M60D doorgun set from Ukraine. They look great and have PE rear grips, PE vented bipods and sights, and all the needed accessories. They should look really nice on it.
Next up is decals.
-
Looking good. The red/white checker pattern came out great.
-
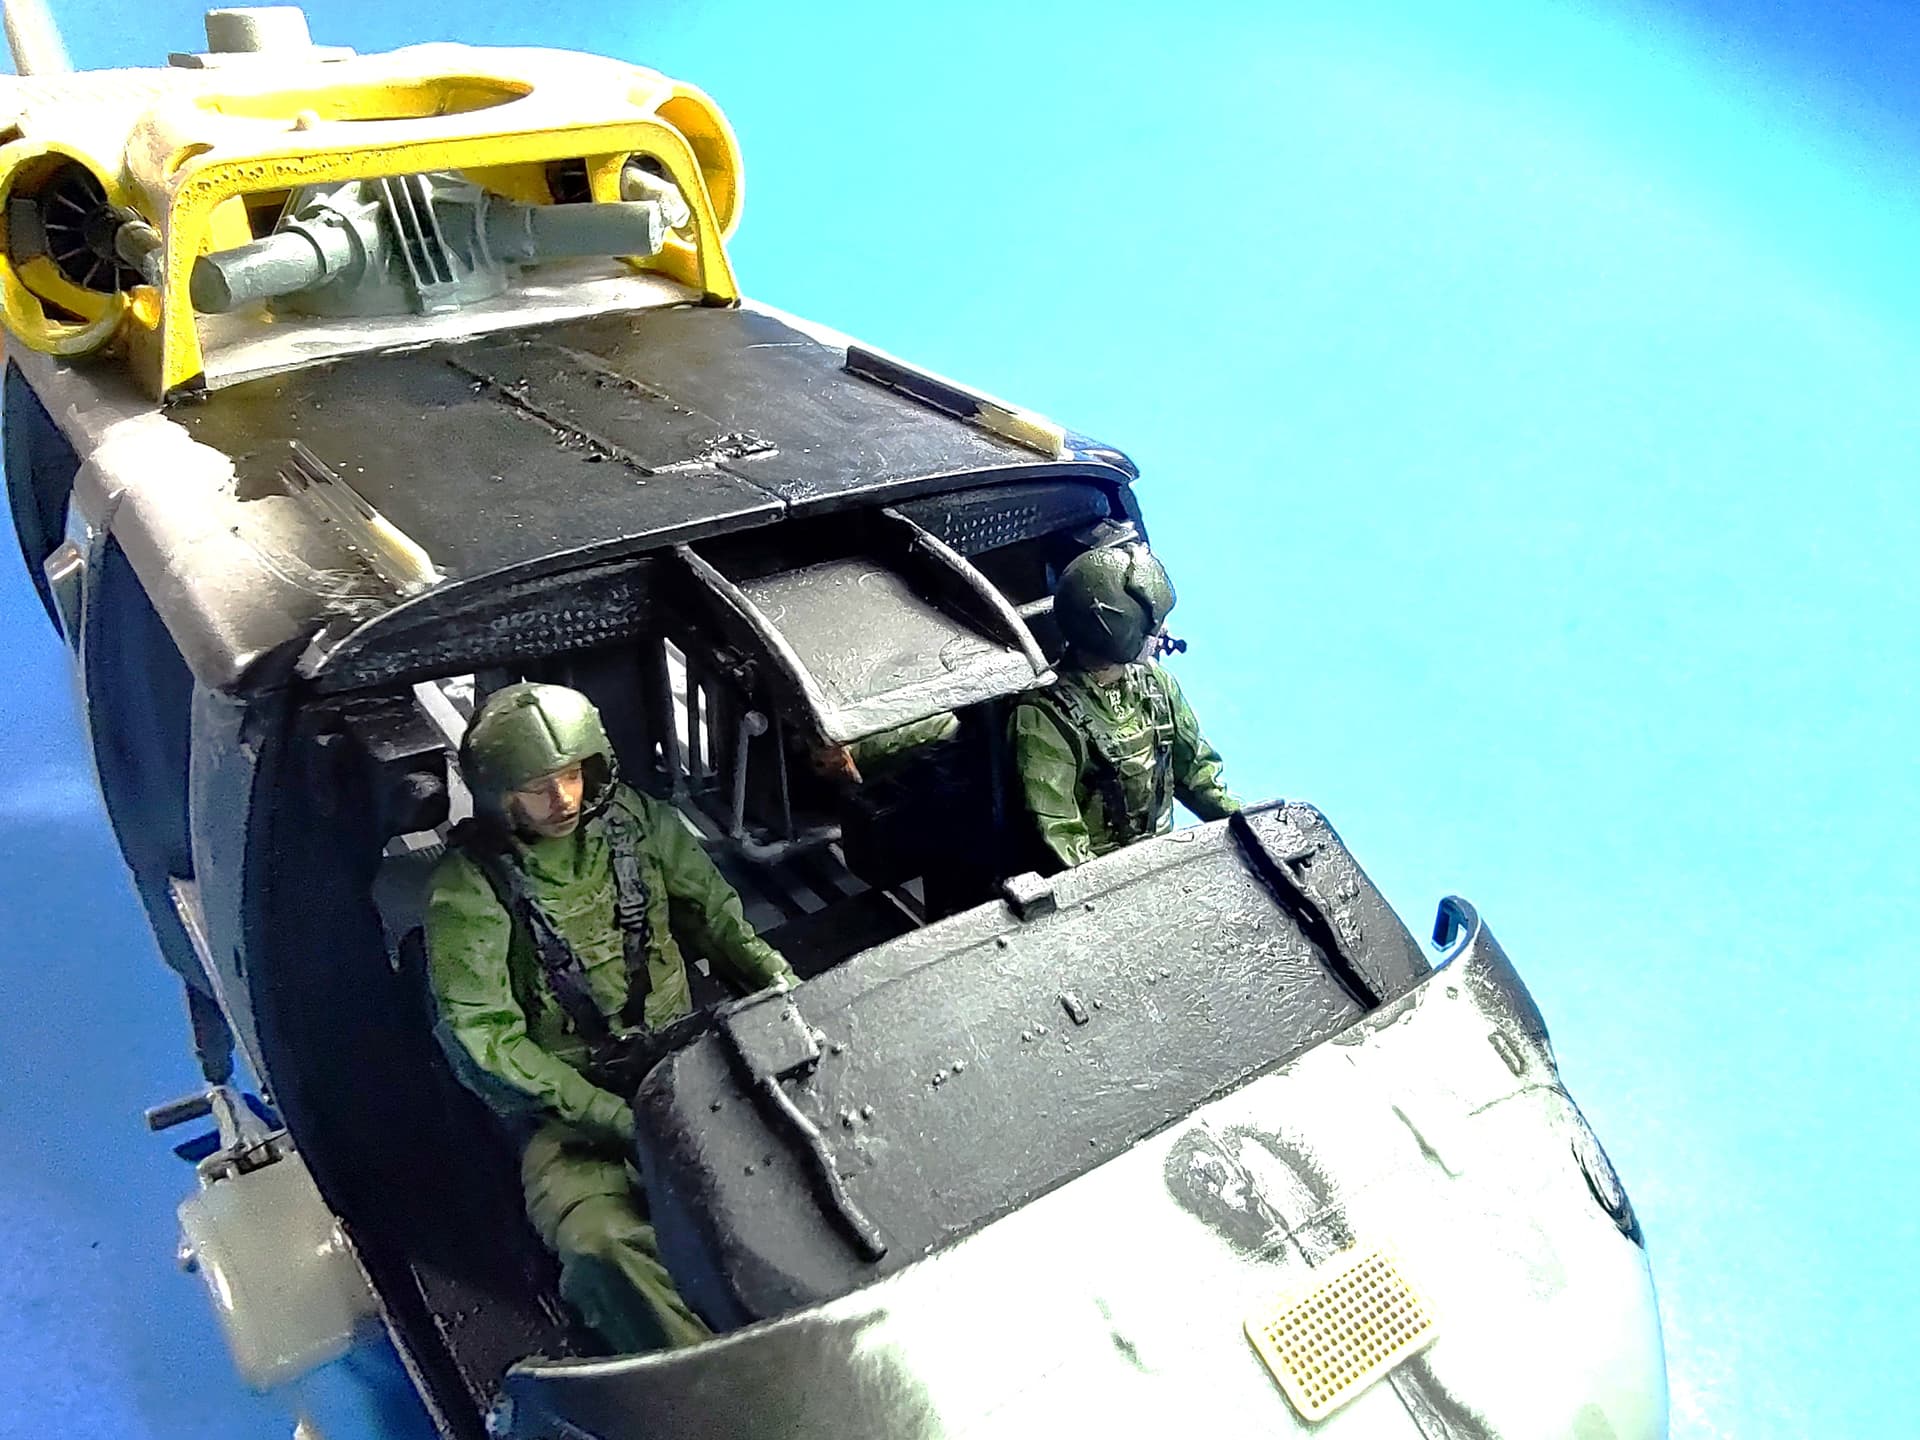
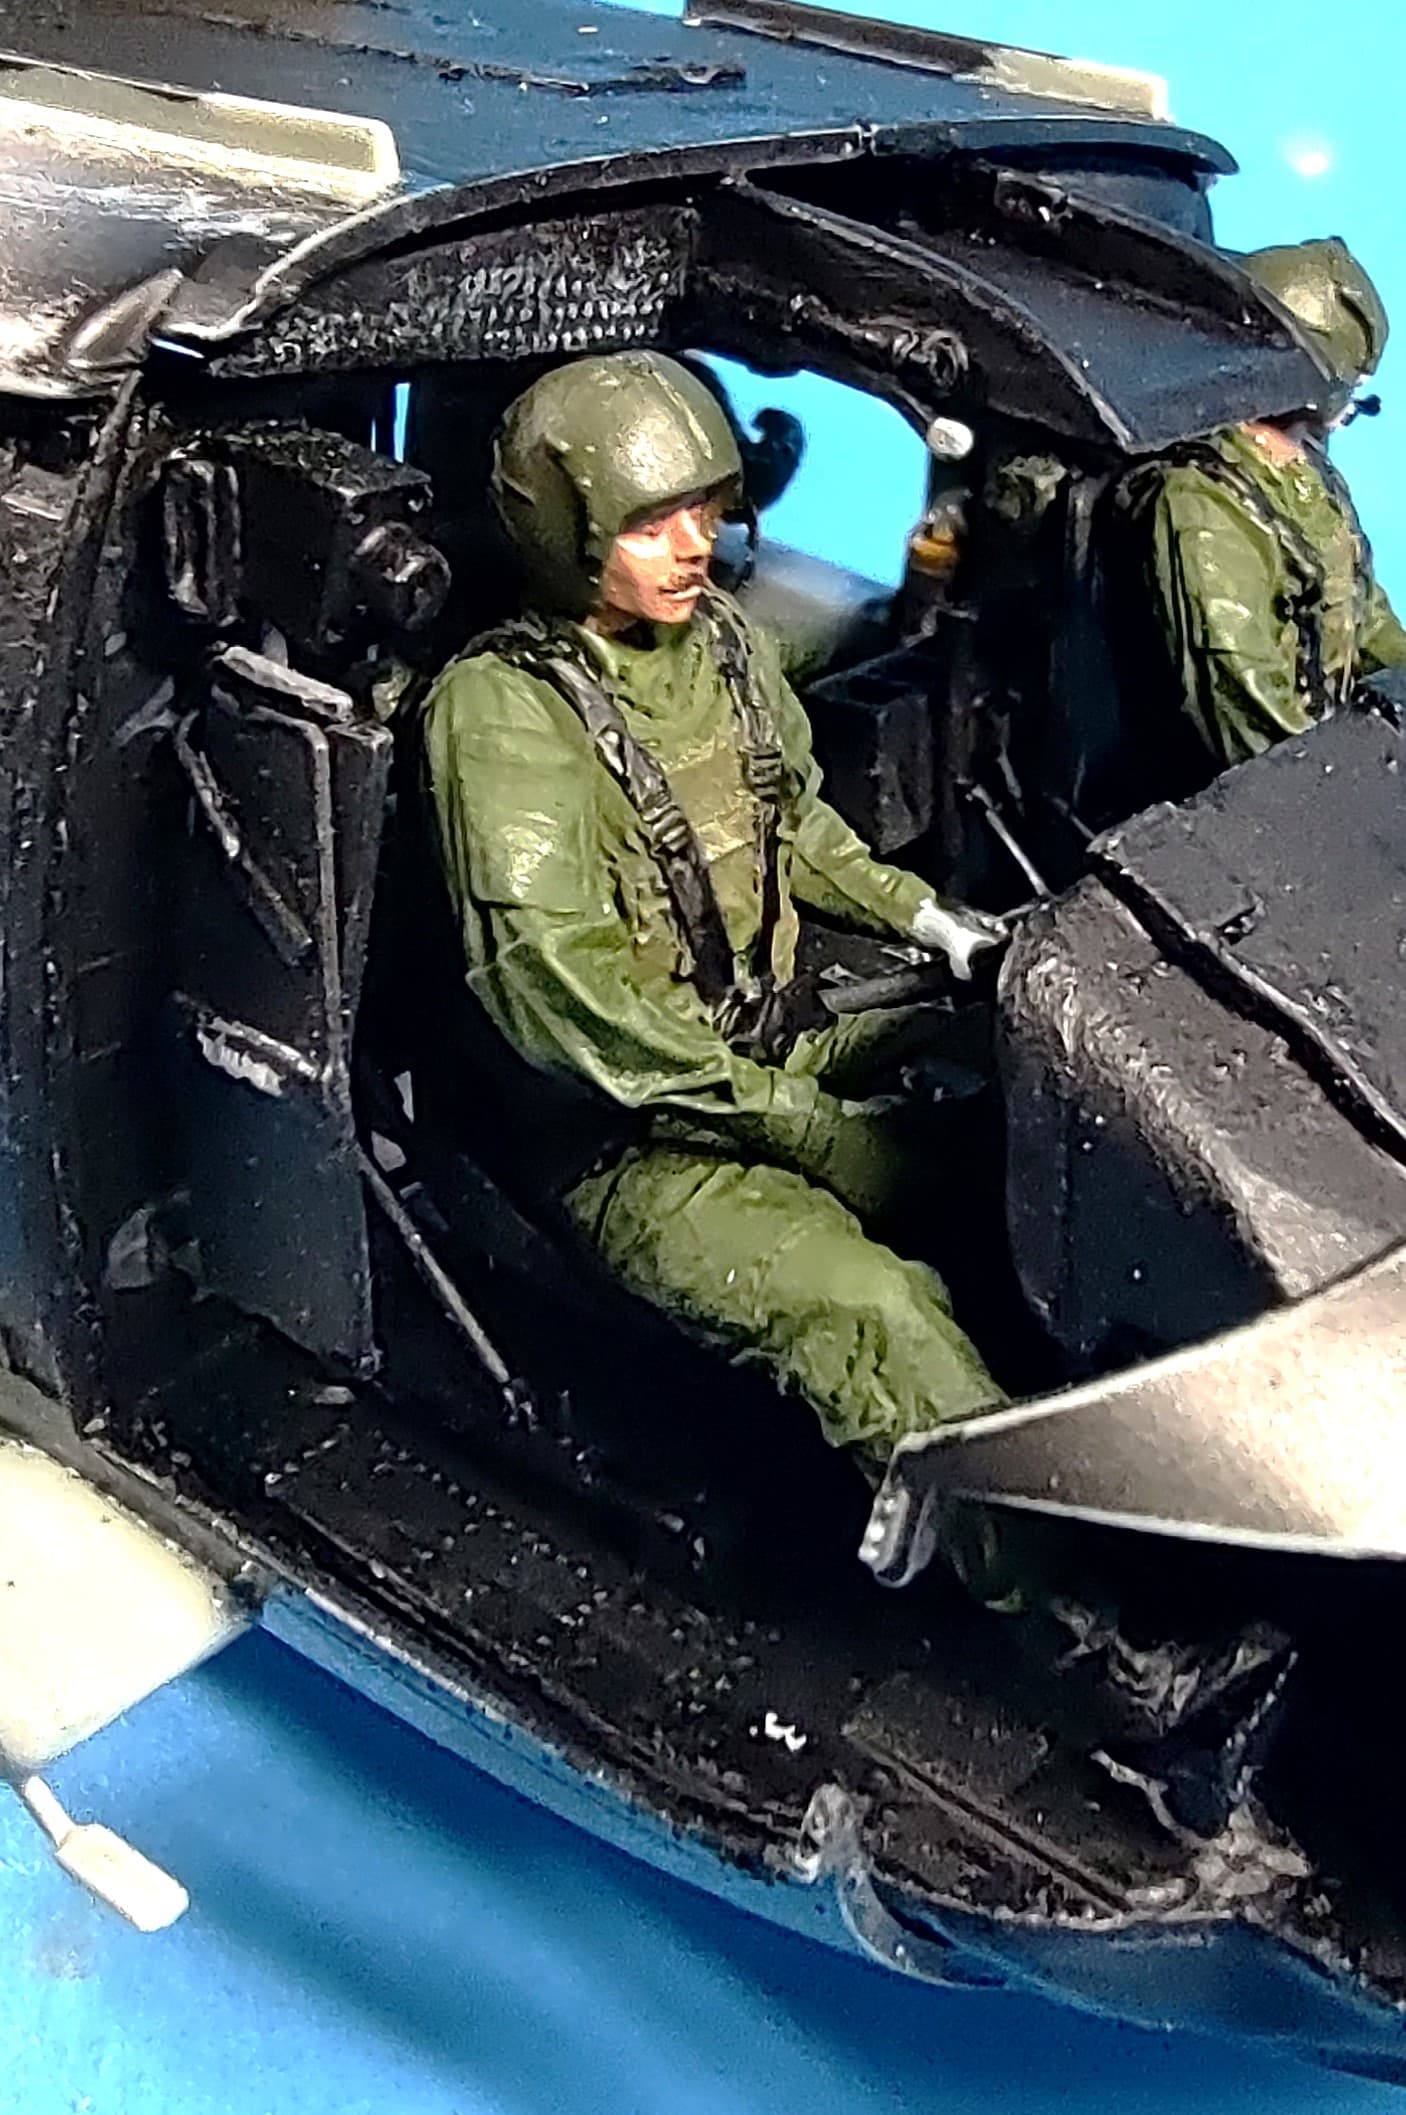
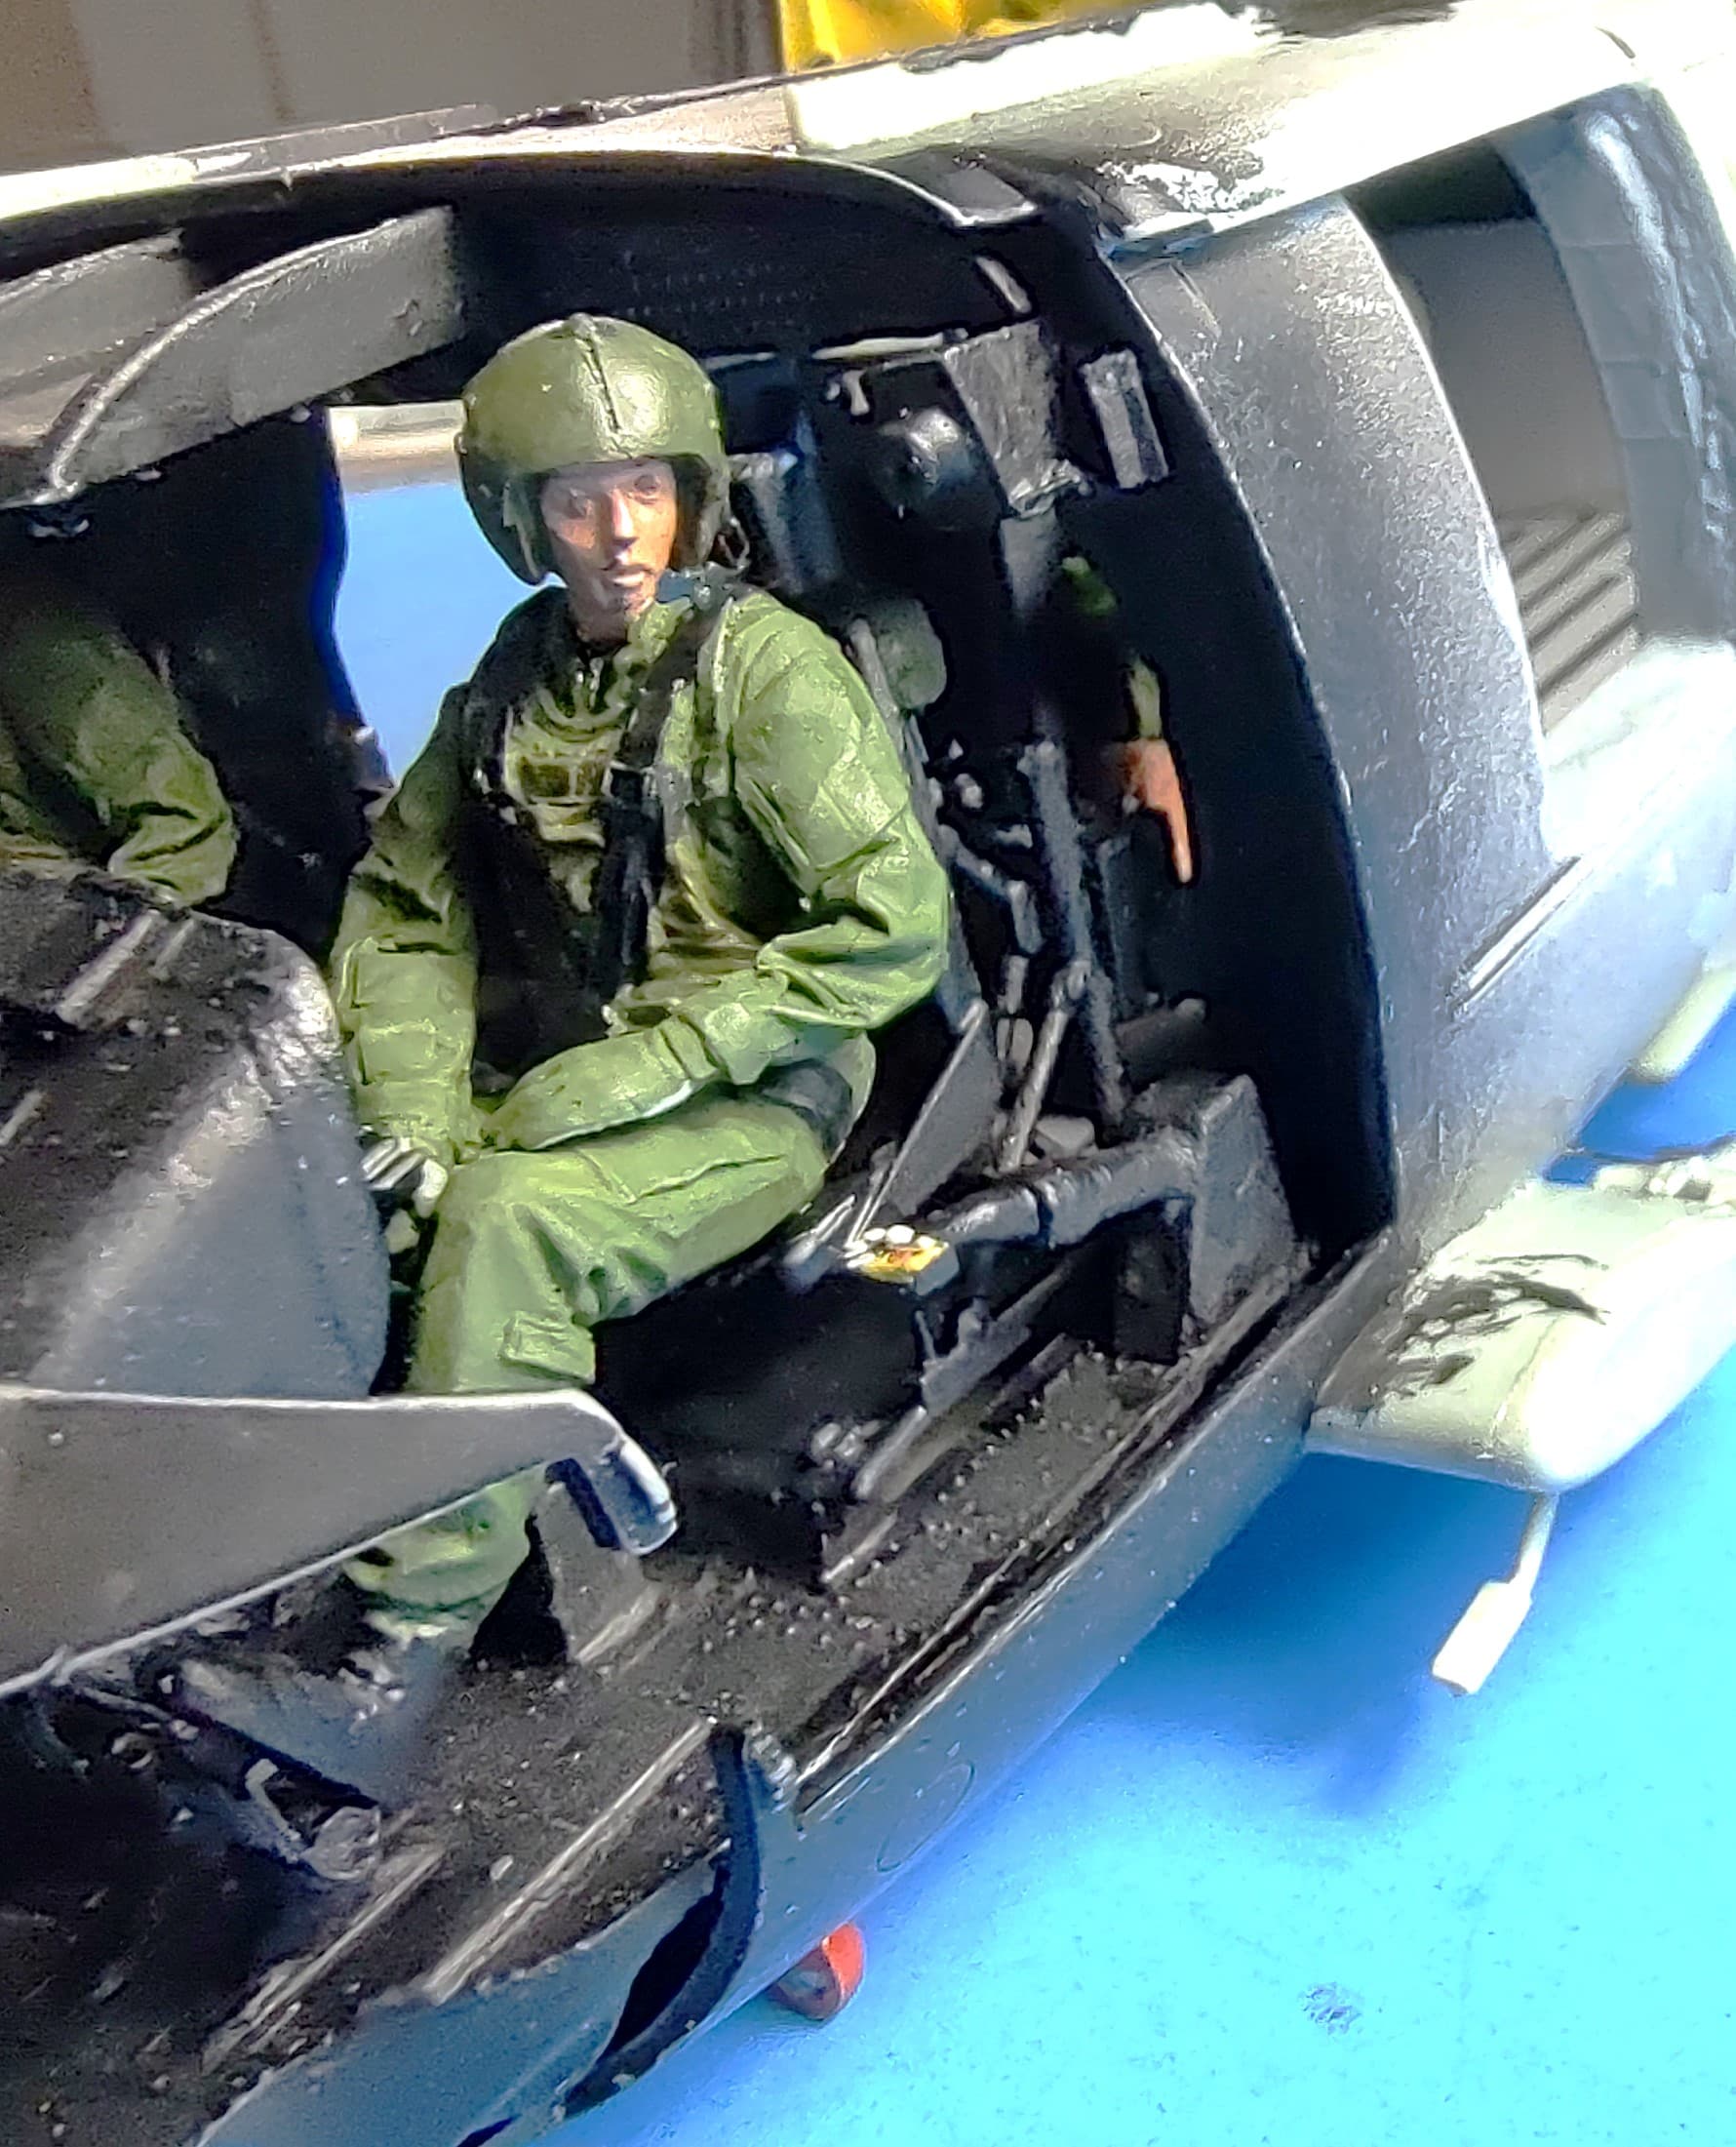
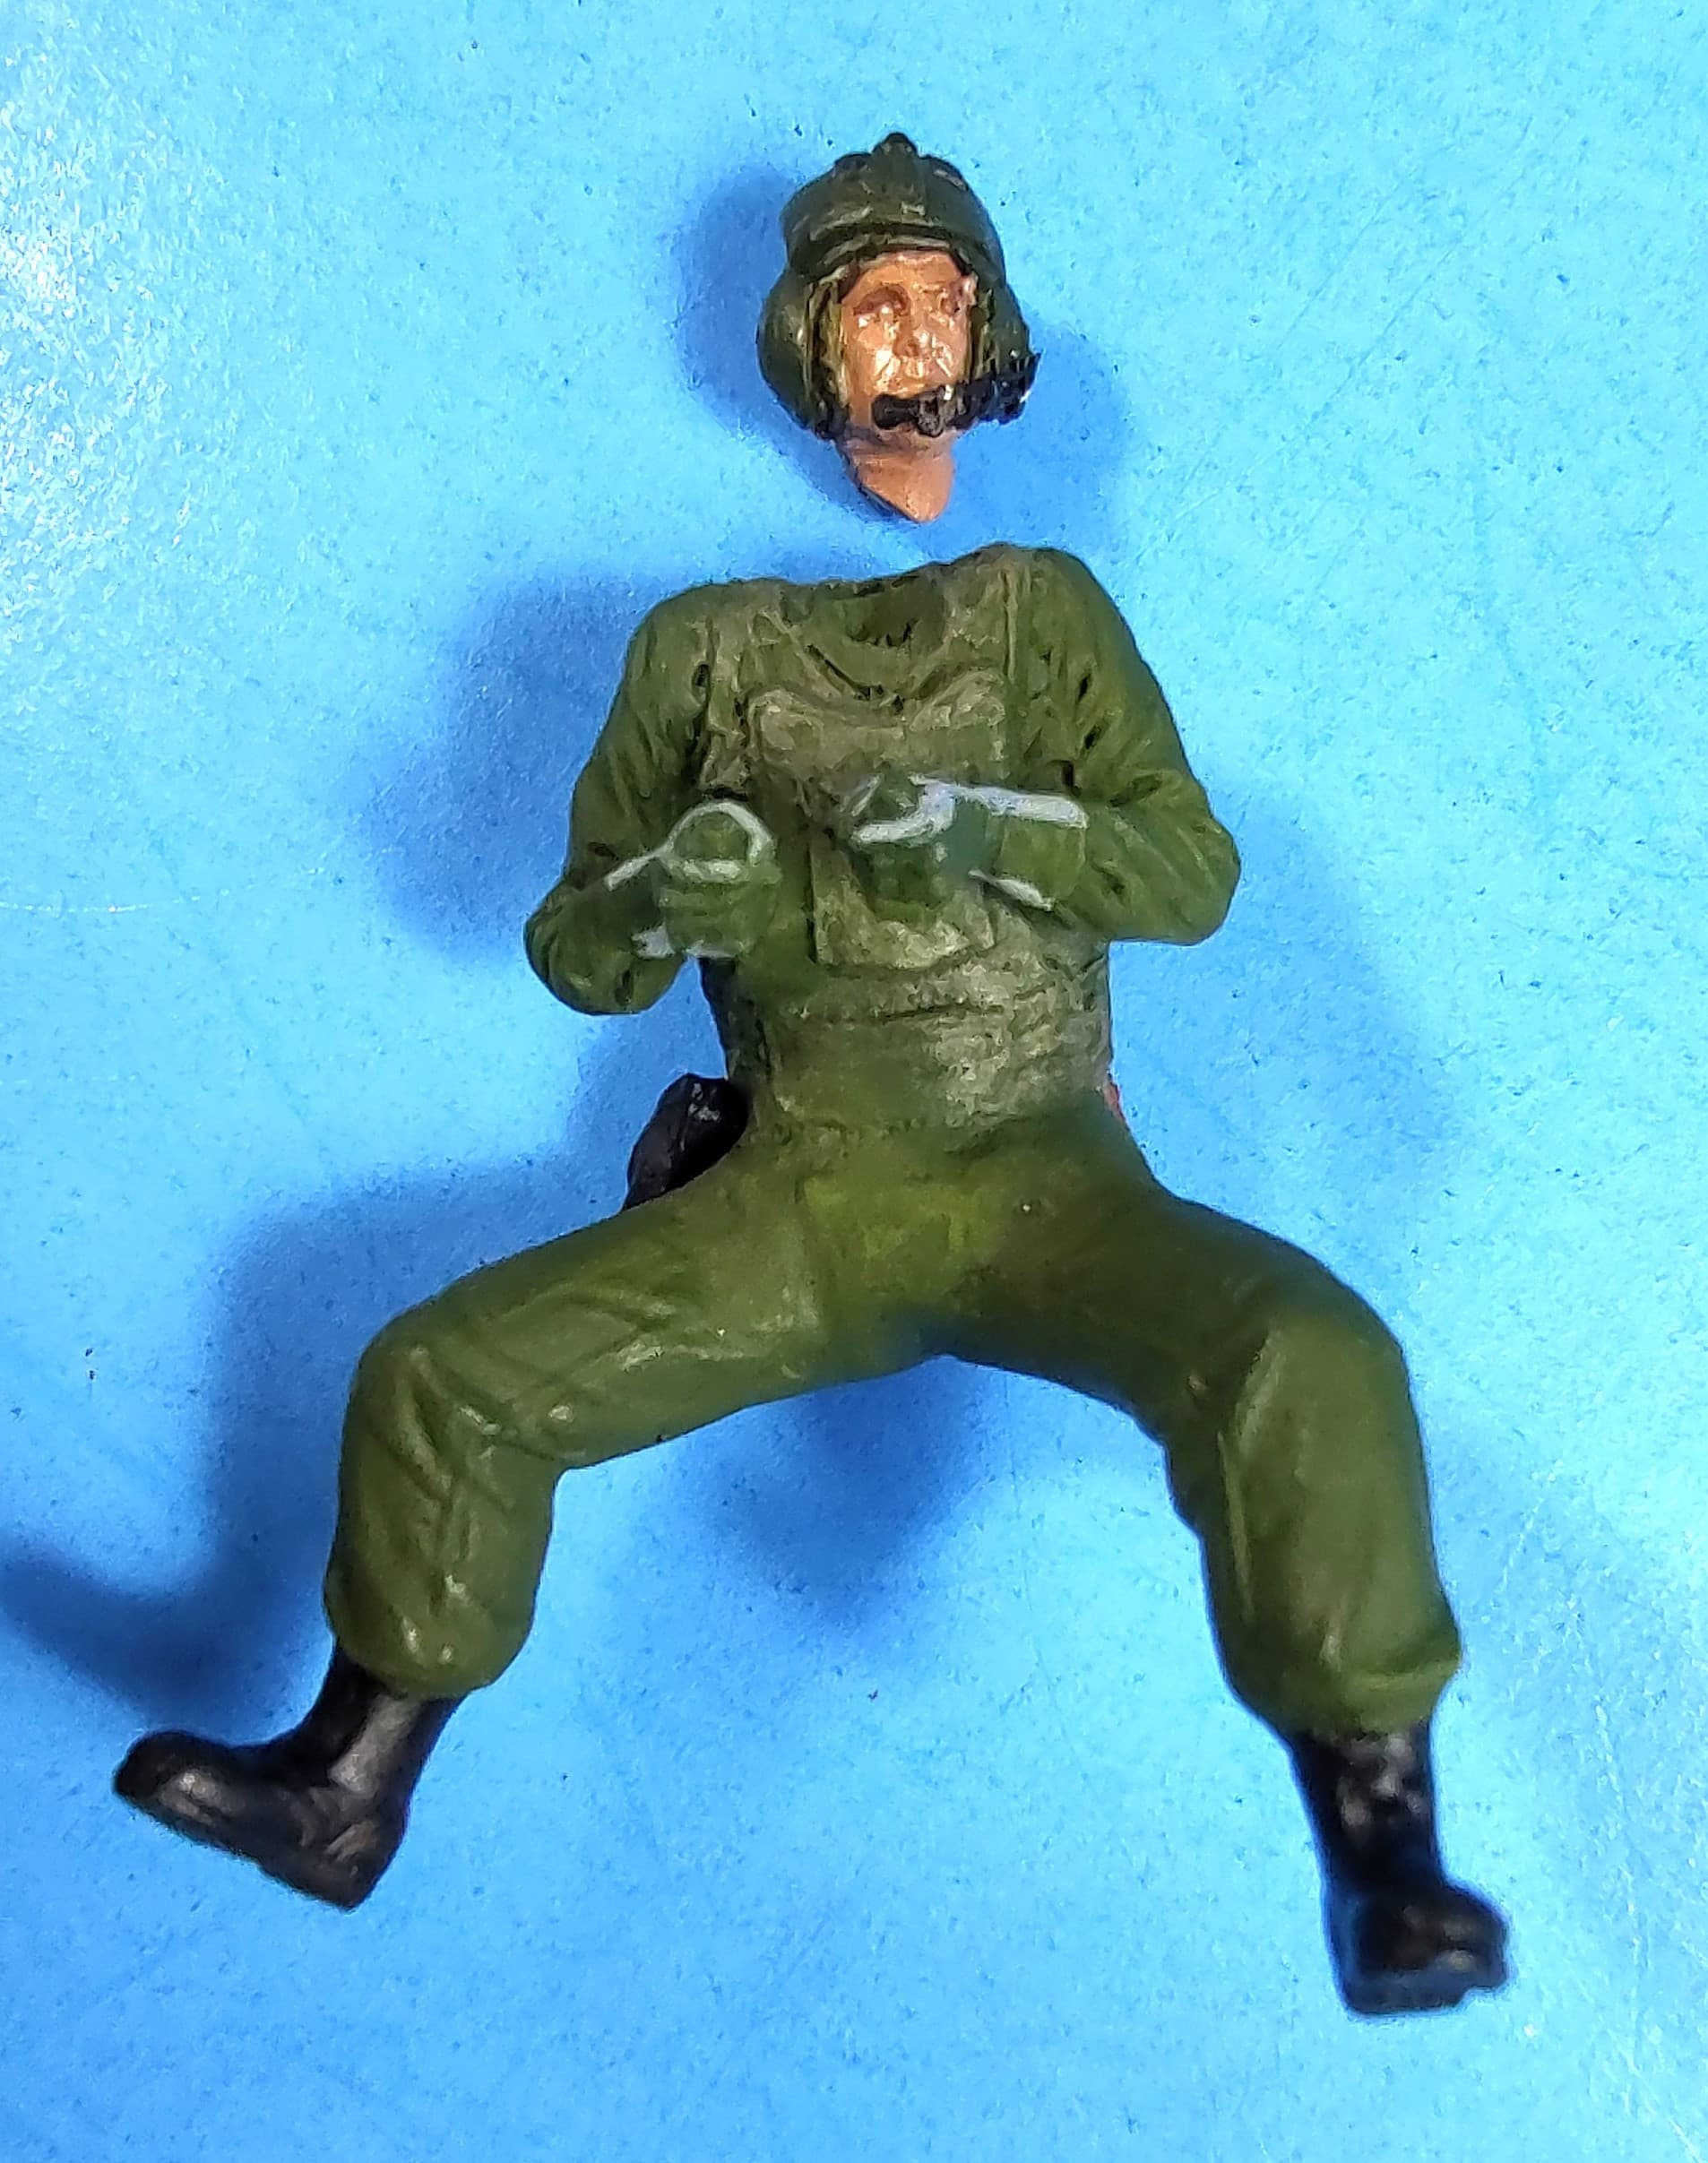
I completed the crew. I forgot to take pics before installing them in the helo. Here they are in place. One nice feature of the Bravo 6 crew is they come with PE boom mics. They look pretty good to me.
Pilots
Port side gunner.
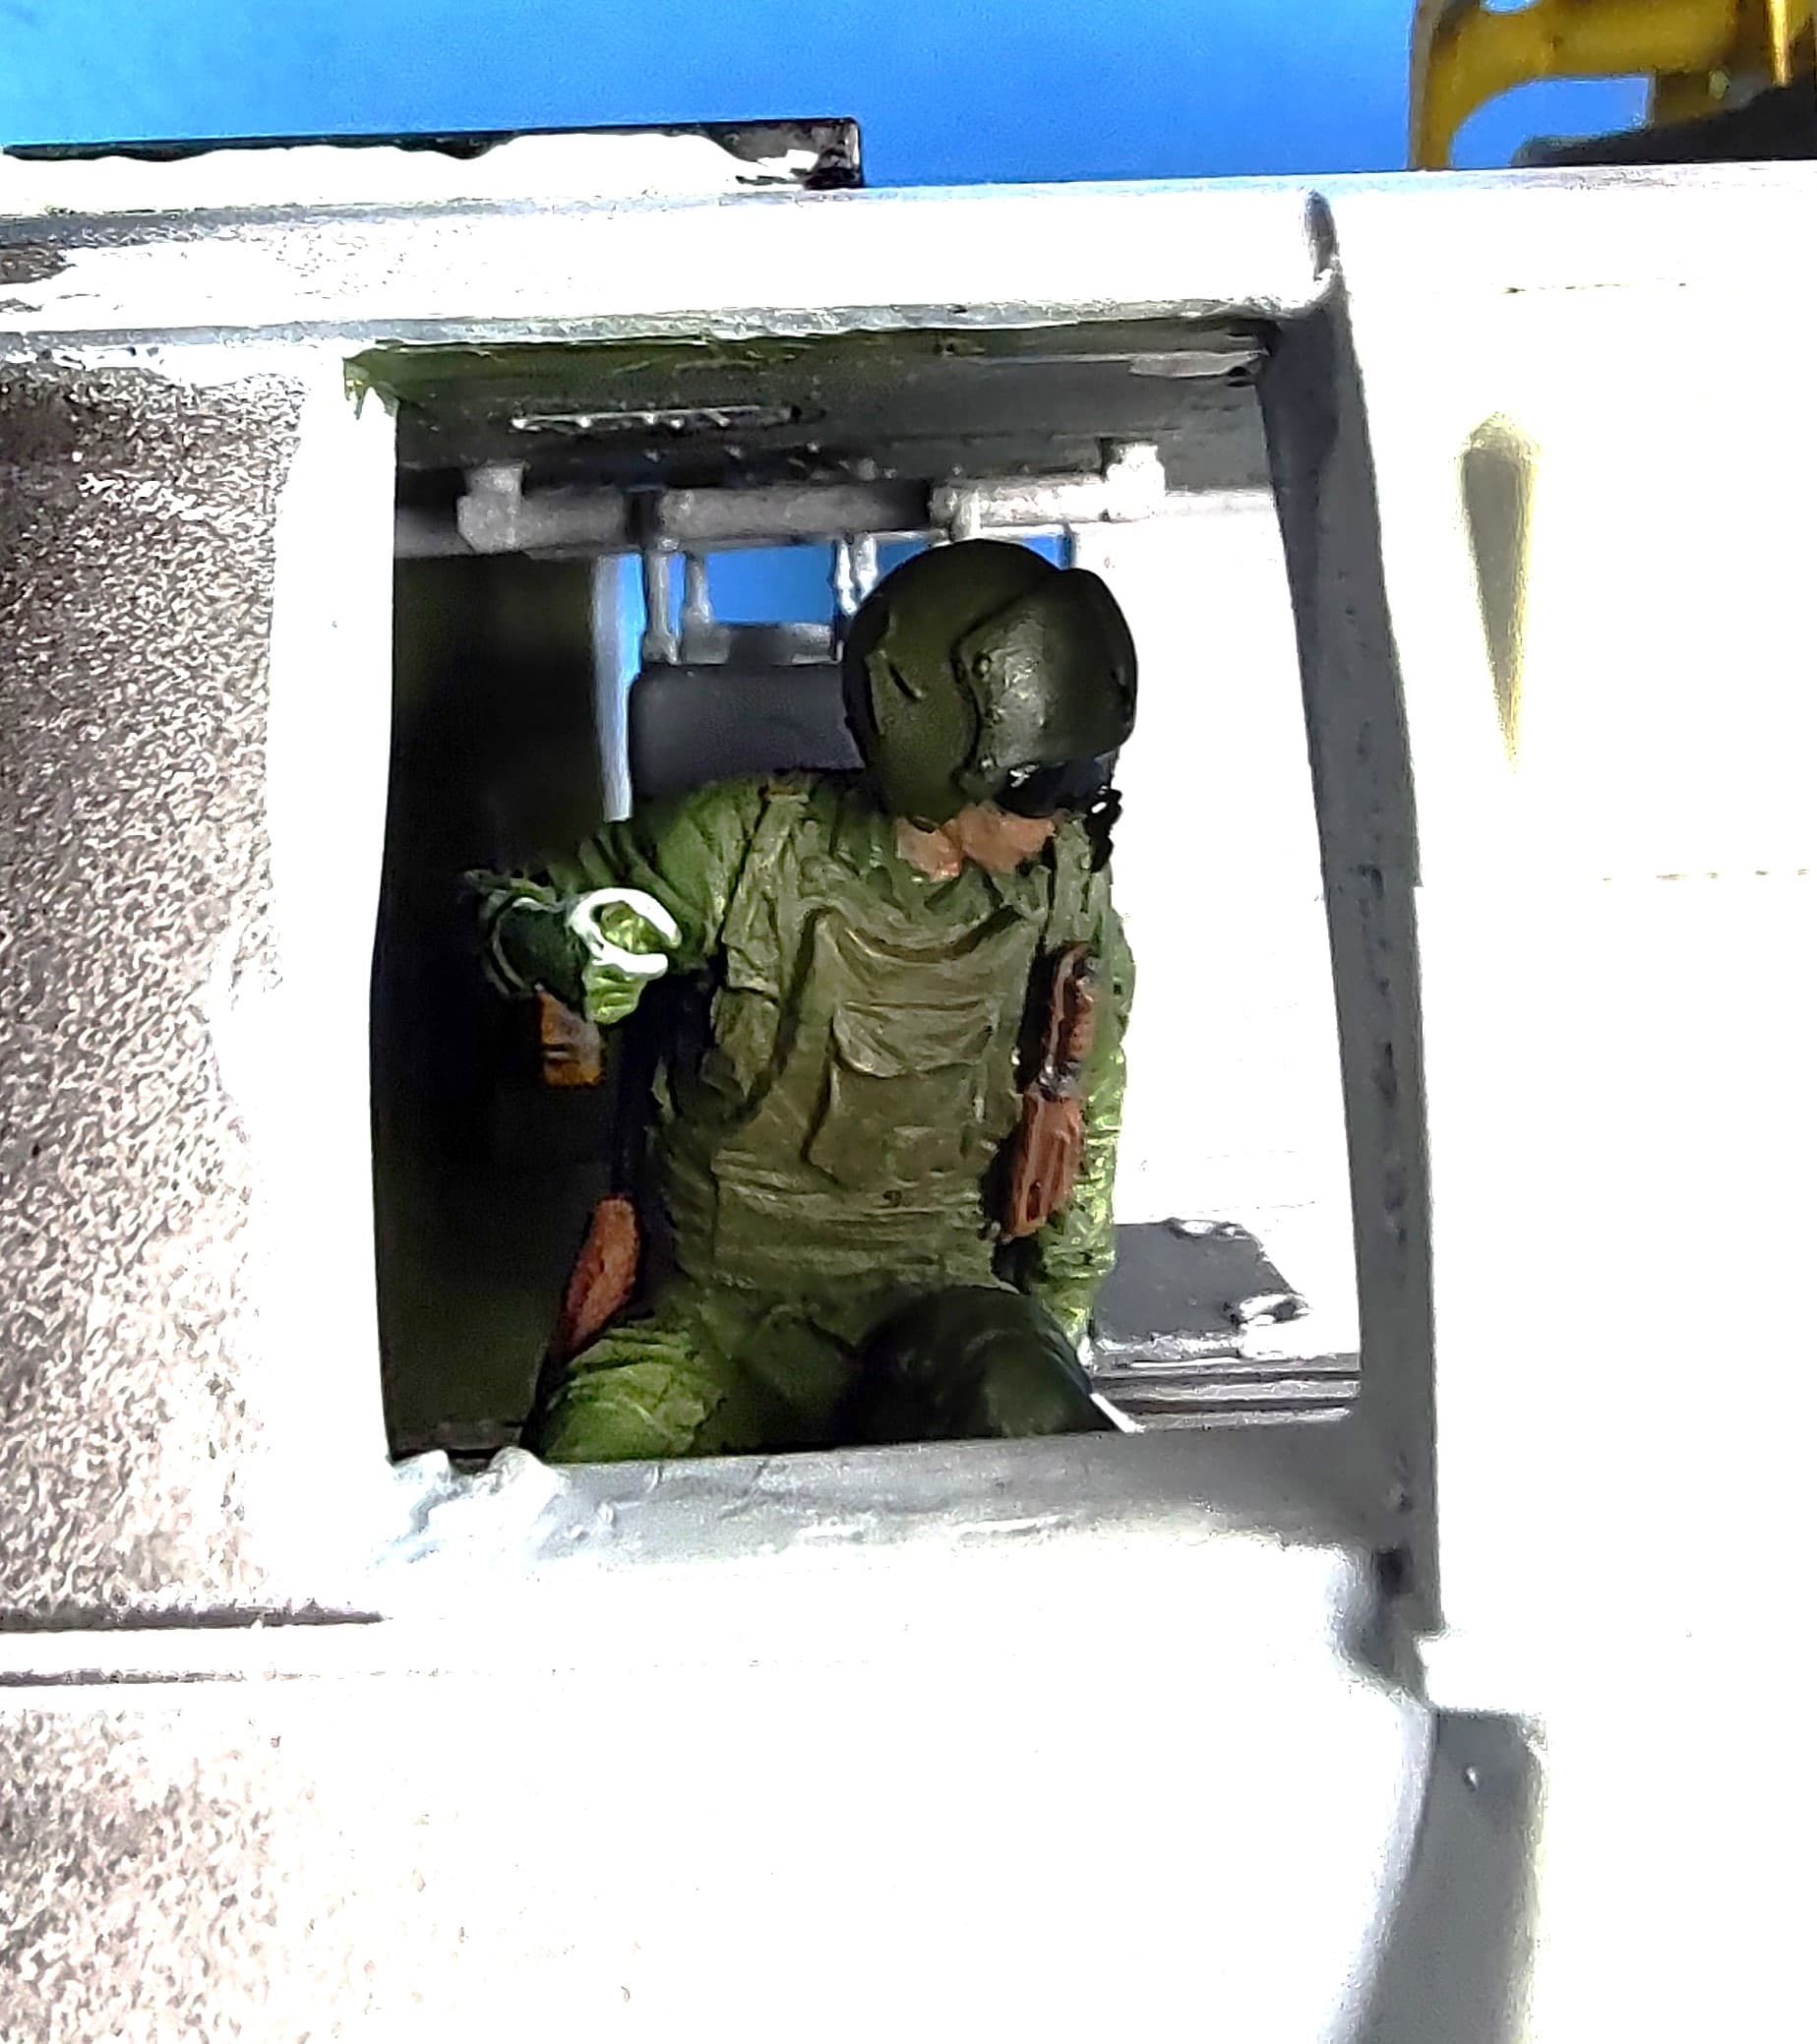
The starboard side gunner. He will be added after painting since he will be hanging out the gunner’s window.
Next up I need to install the canopy glass and tape it all off to prep for painting
-
This will be an 82d bird. They did wear chicken plate.
-
Thanks gents. I like how it is coming along.
-
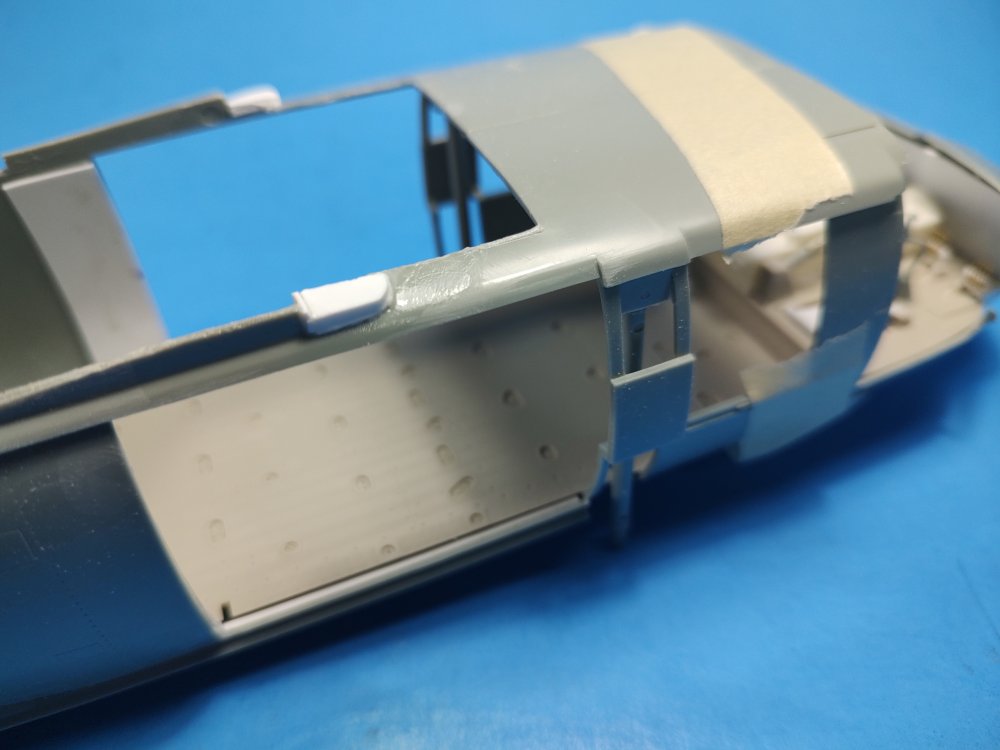
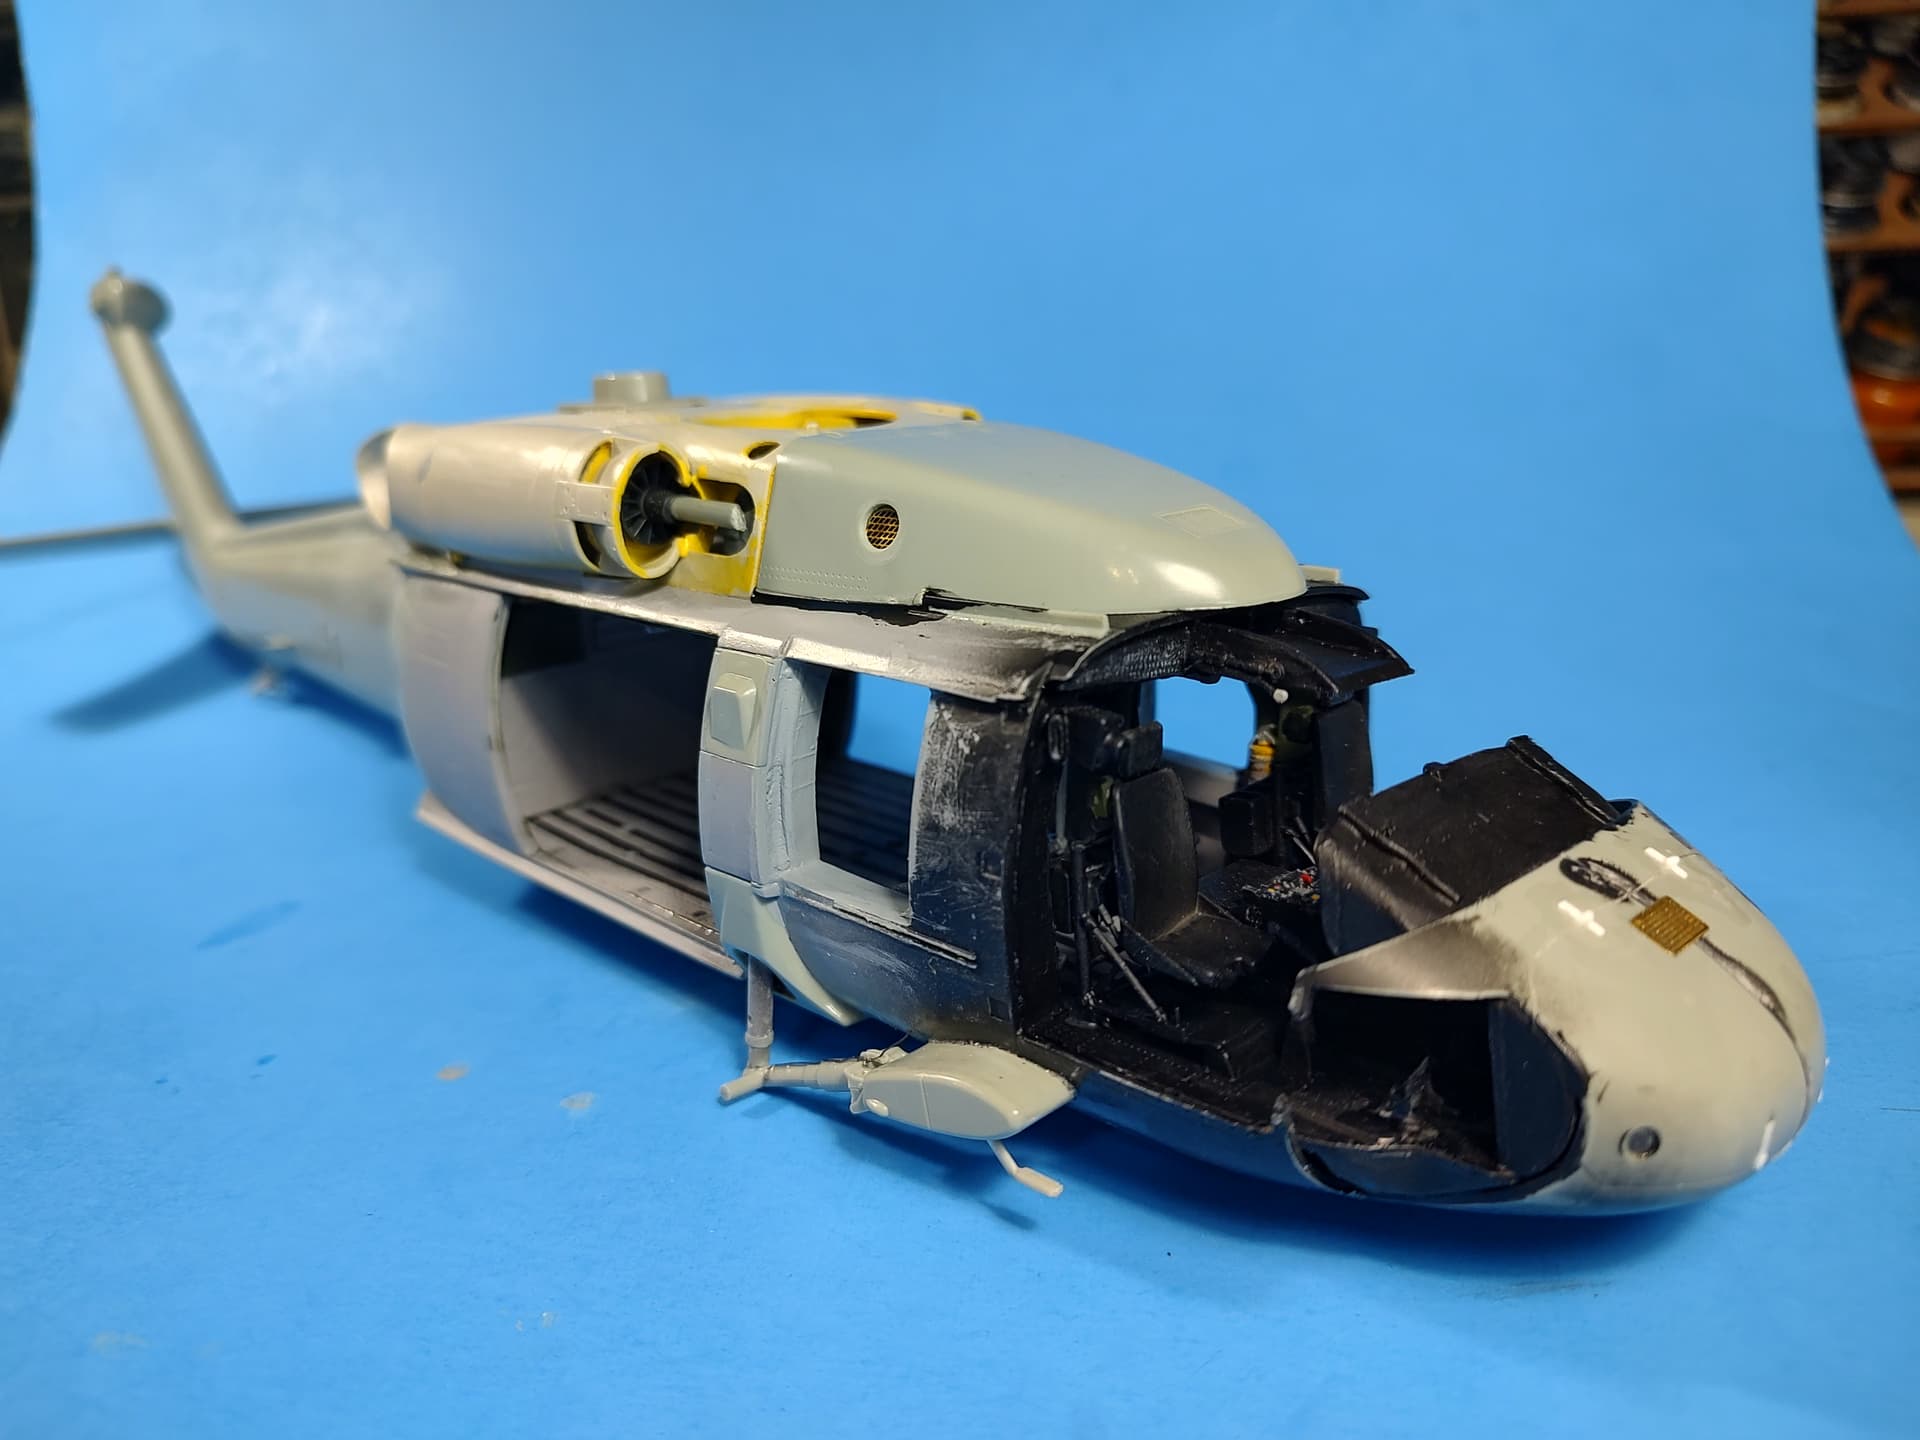
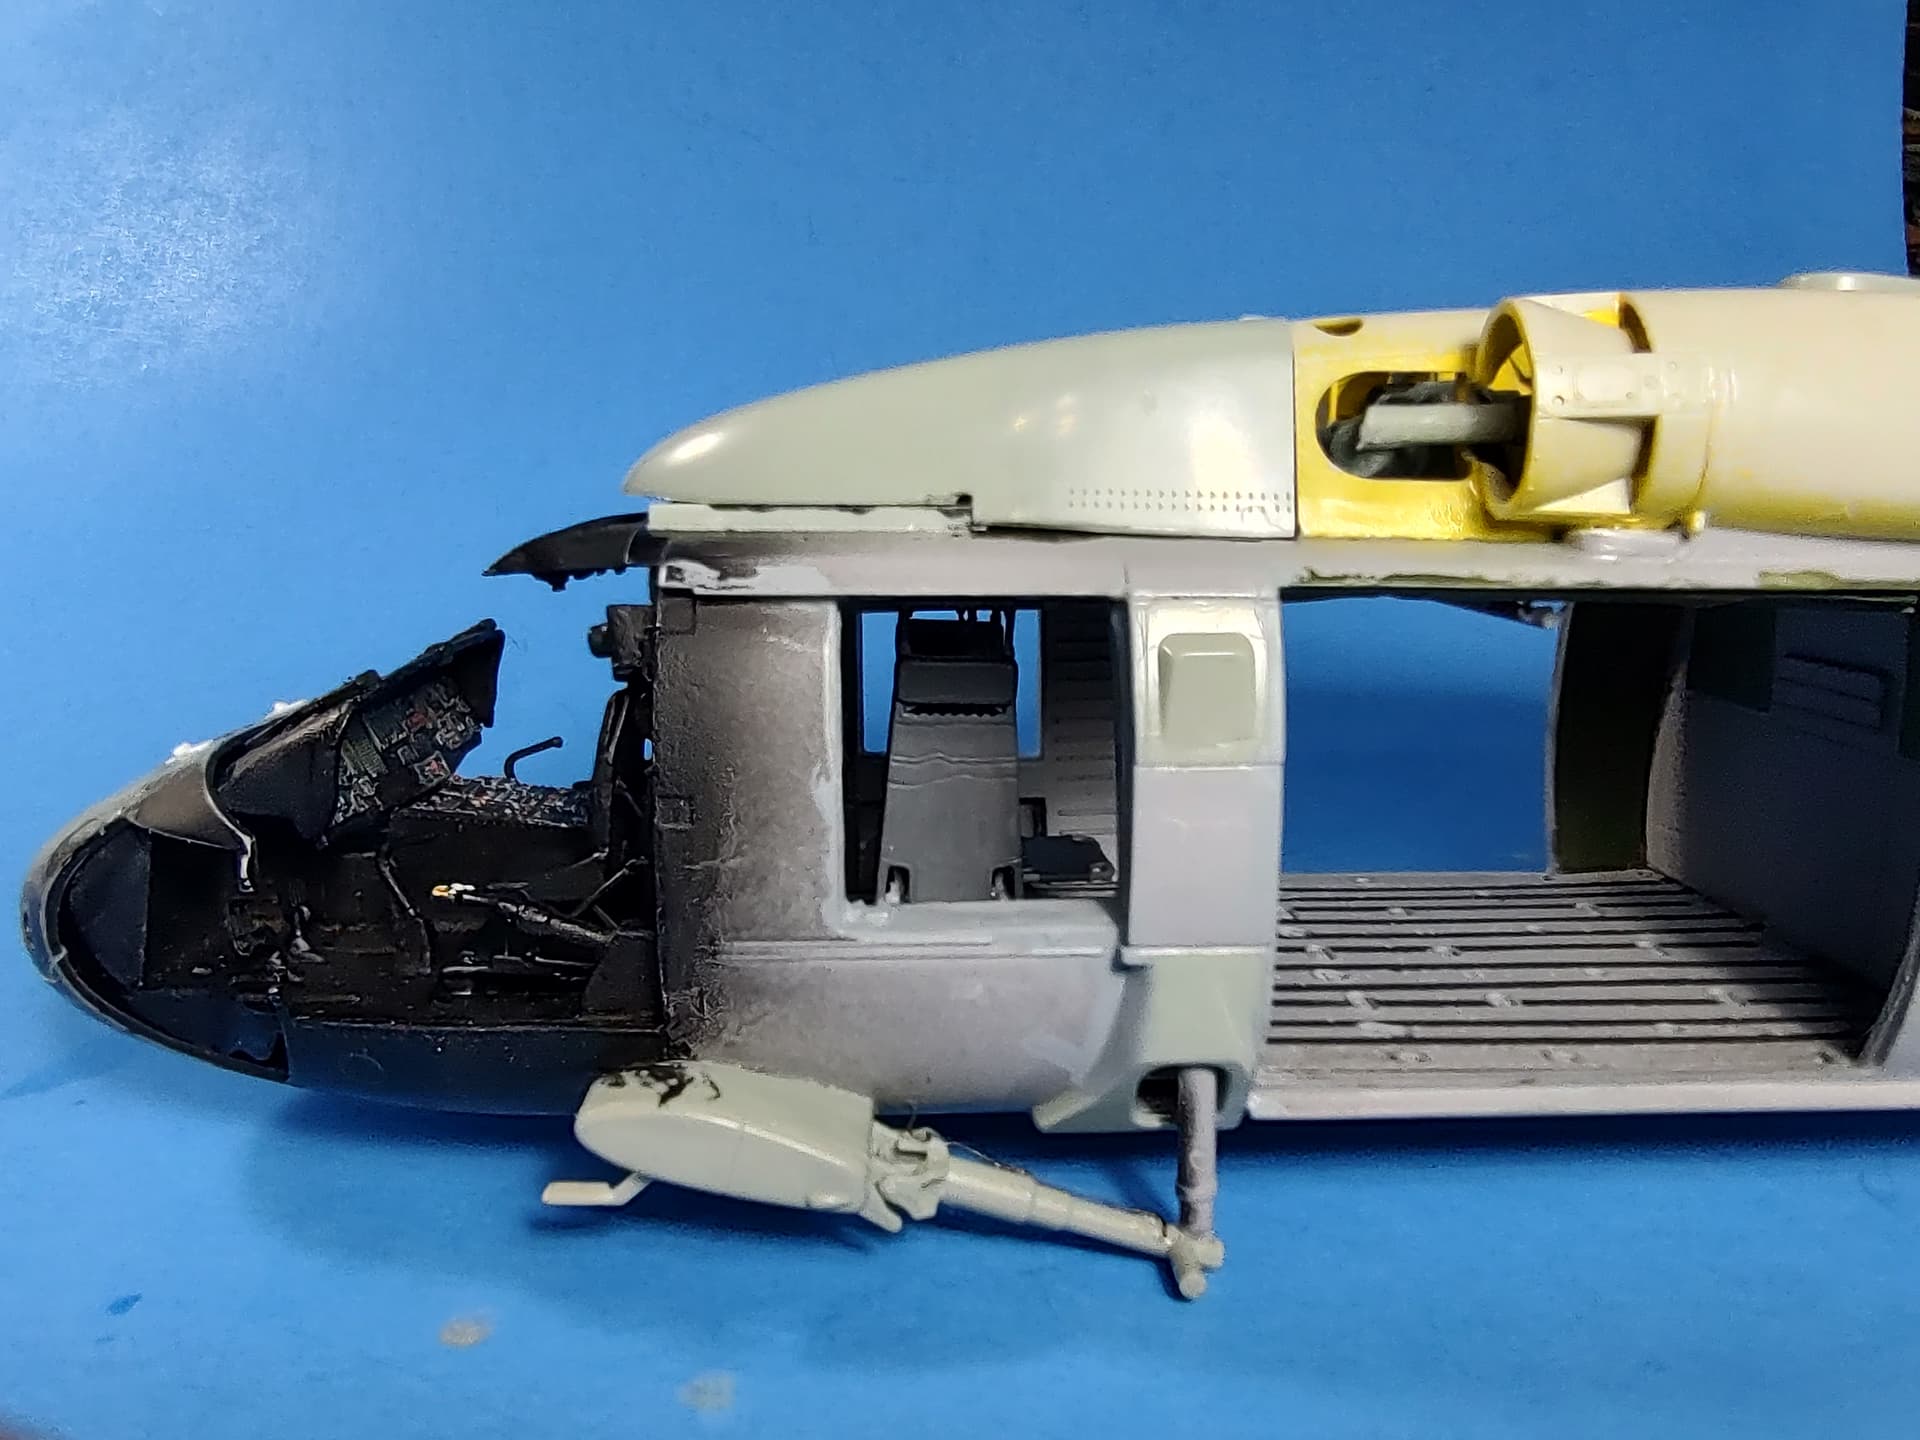
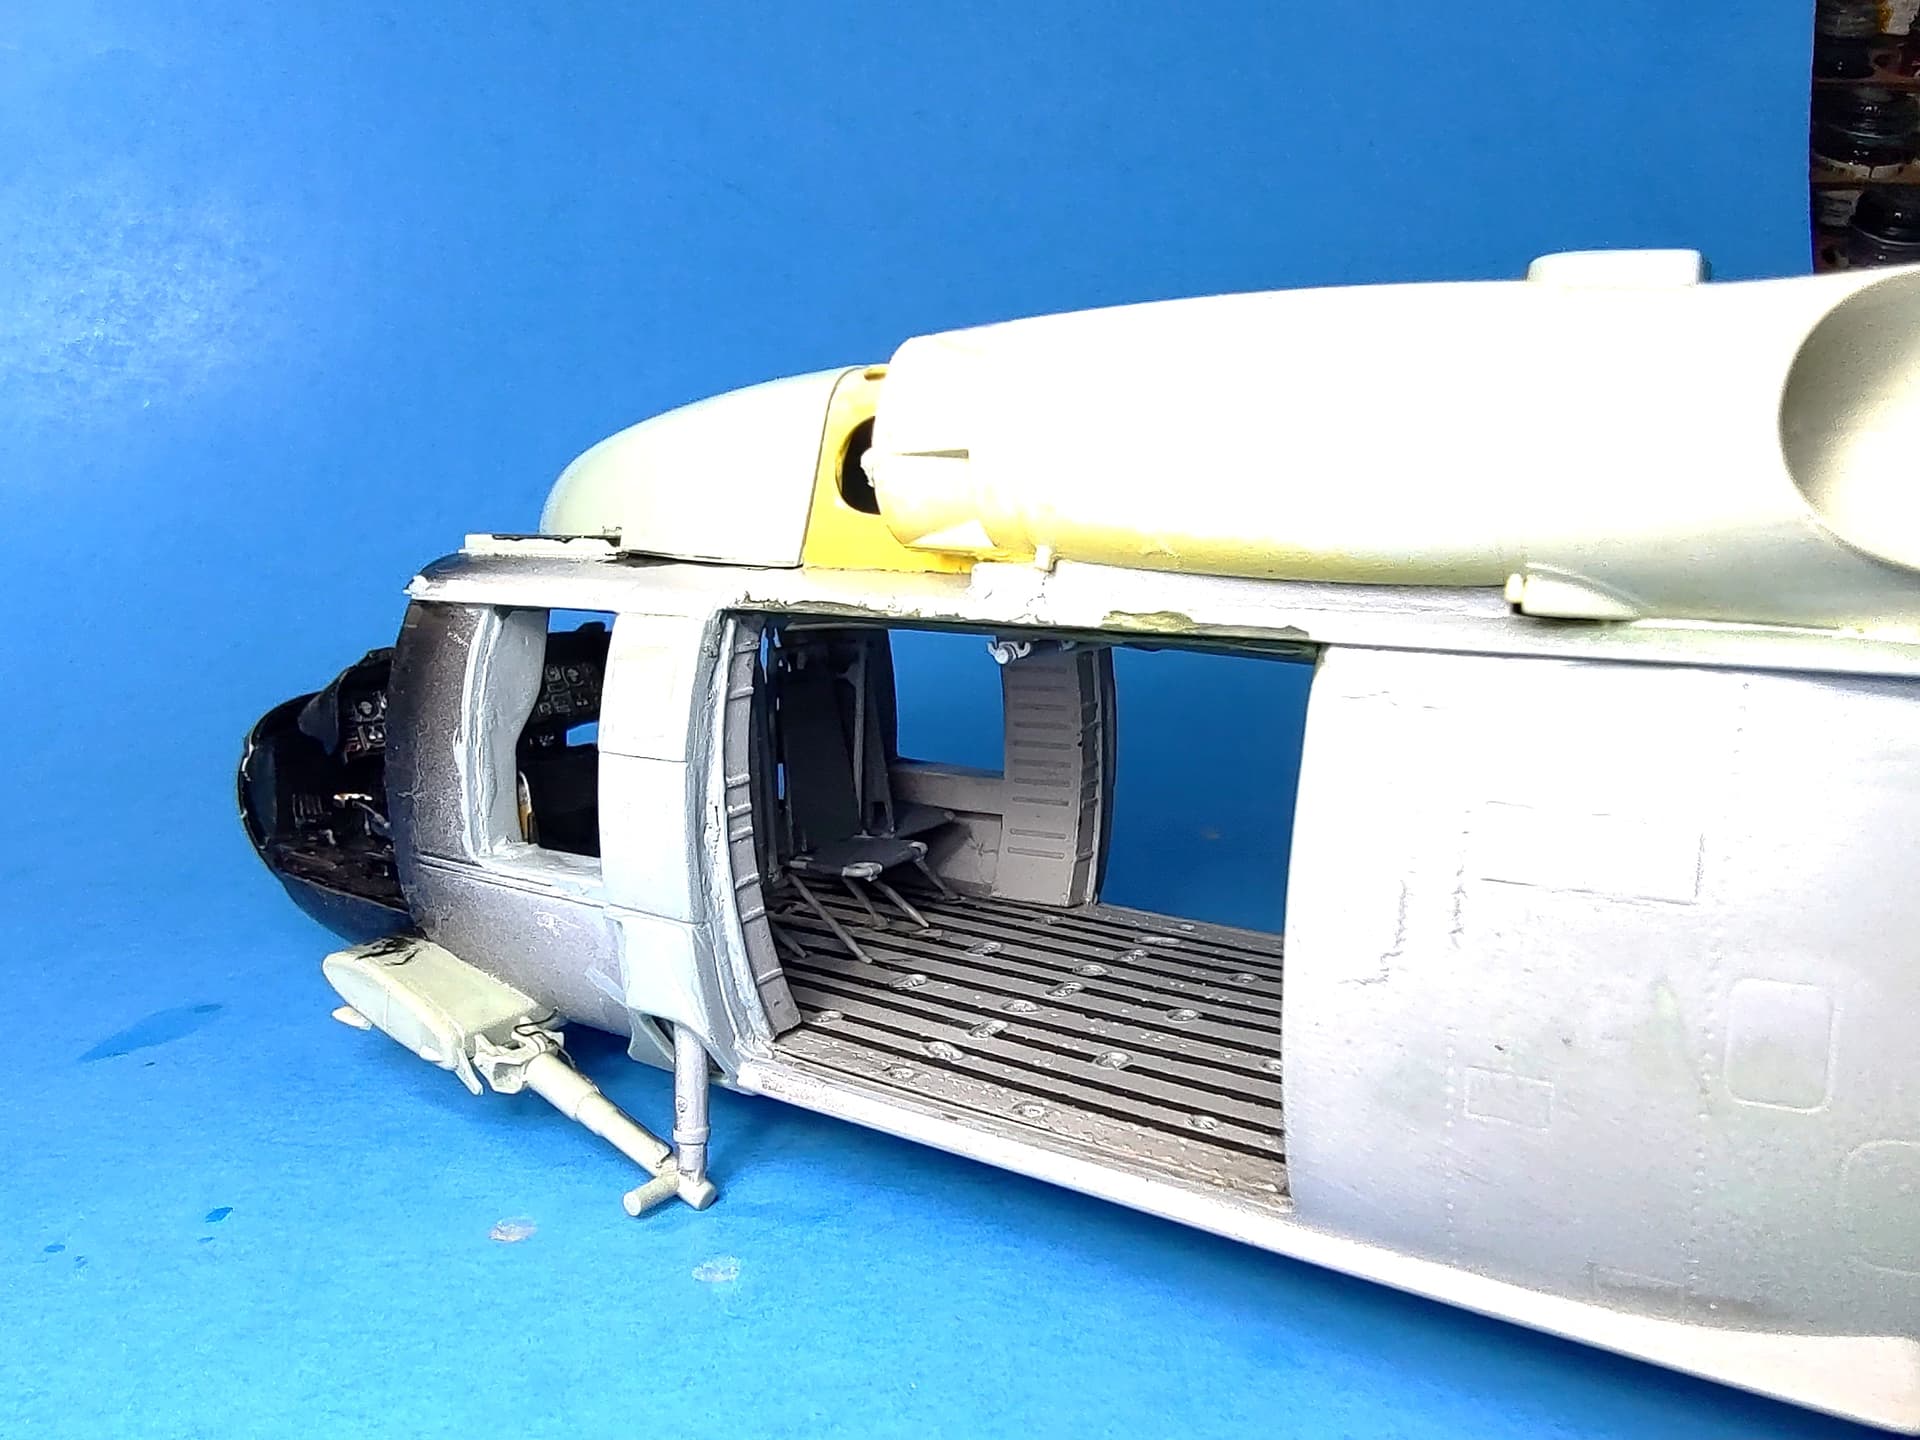
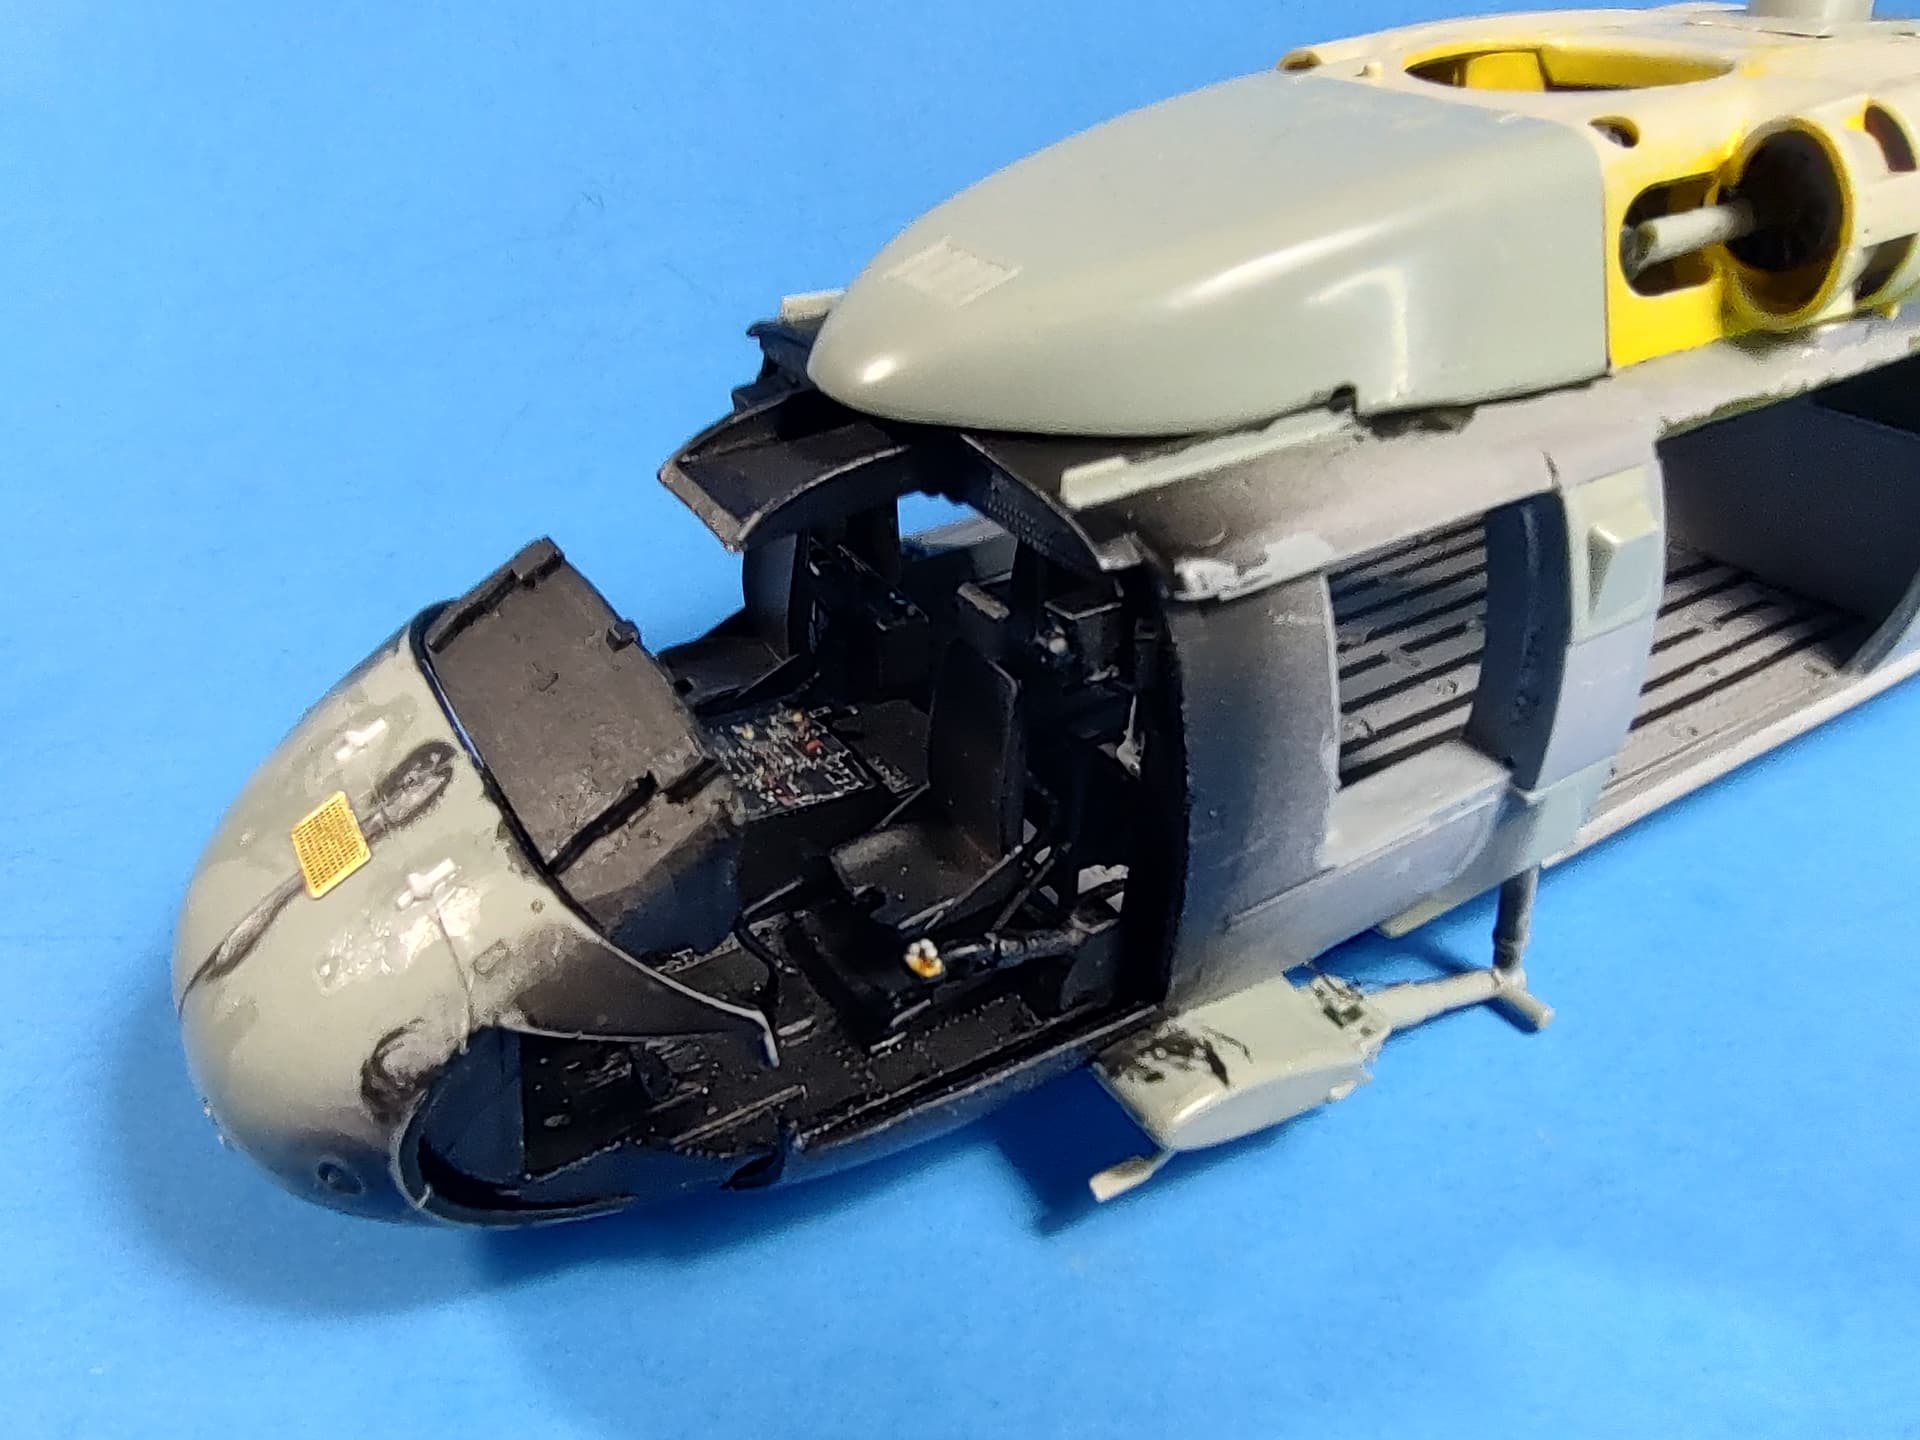
Over the last few days, I have made quite a bit of progress. It’s almost ready for paint.
First, I got it all closed up. It wasn’t too hard closing it up. A little bit of trimming on the cockpit floor sides and in the gunners’ windows and it closed up just fine.
Here it is overall. I also used a few spare pieces of PE here and there to add details.
On the inside, I added the gunners’ seats and the squad leader seat between them. I had forgotten how much of a PITA the legs are on those seats. After wrestling with them for a while, I finally got them all in place.
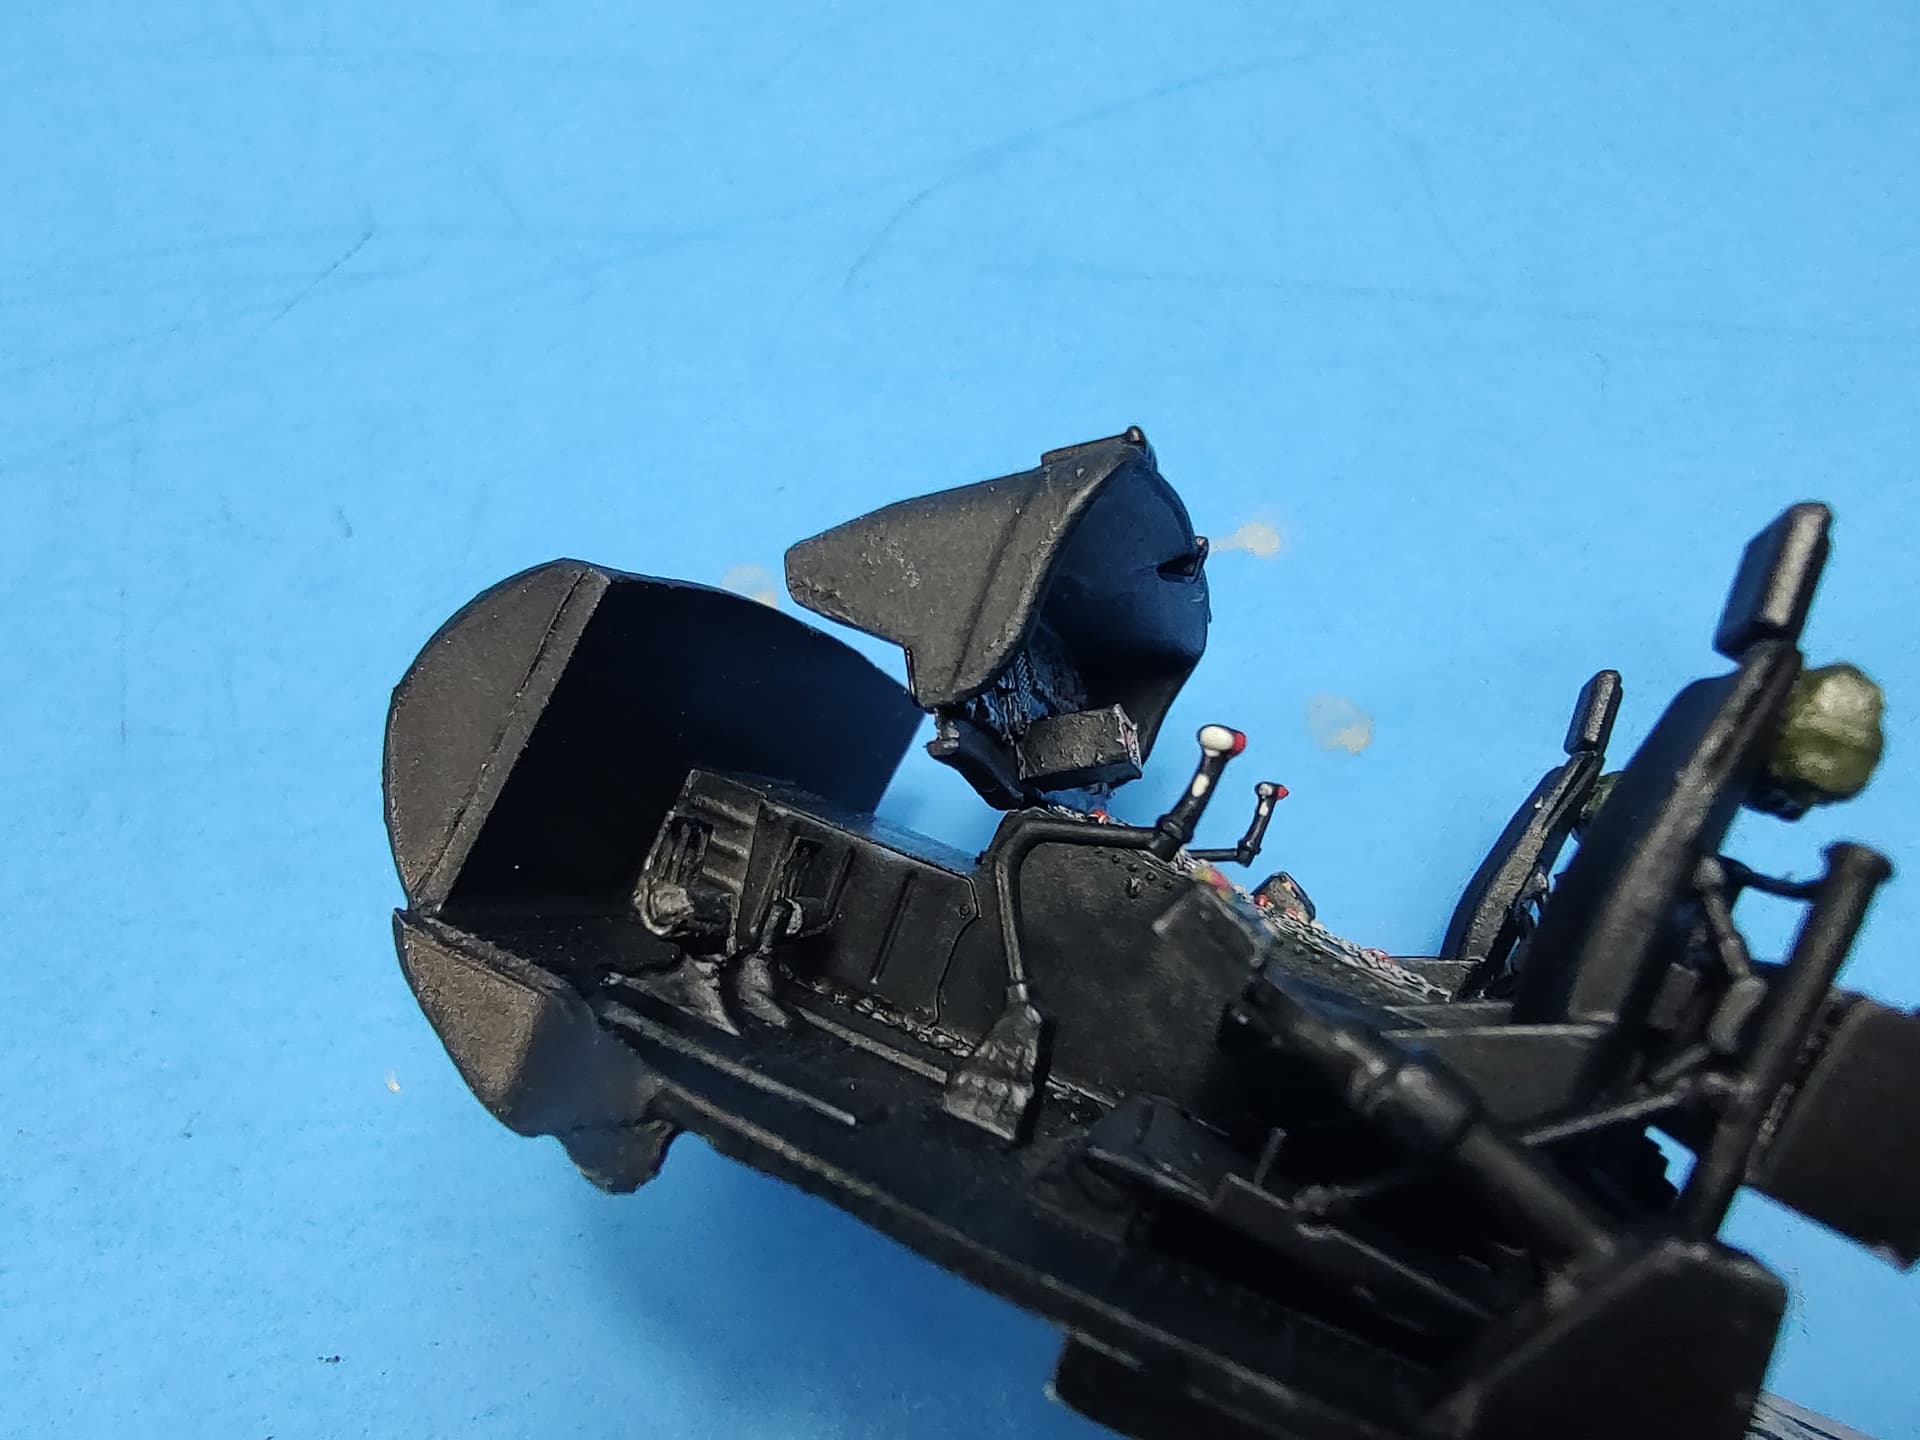
I also changed up the cockpit a little bit. I swapped out the collective handles and cyclic grips from a Live Resin set. The cyclic grips are in the pilots’ hands from the same Live Resin UH-60 pilots’ set. They look much better than what I had.
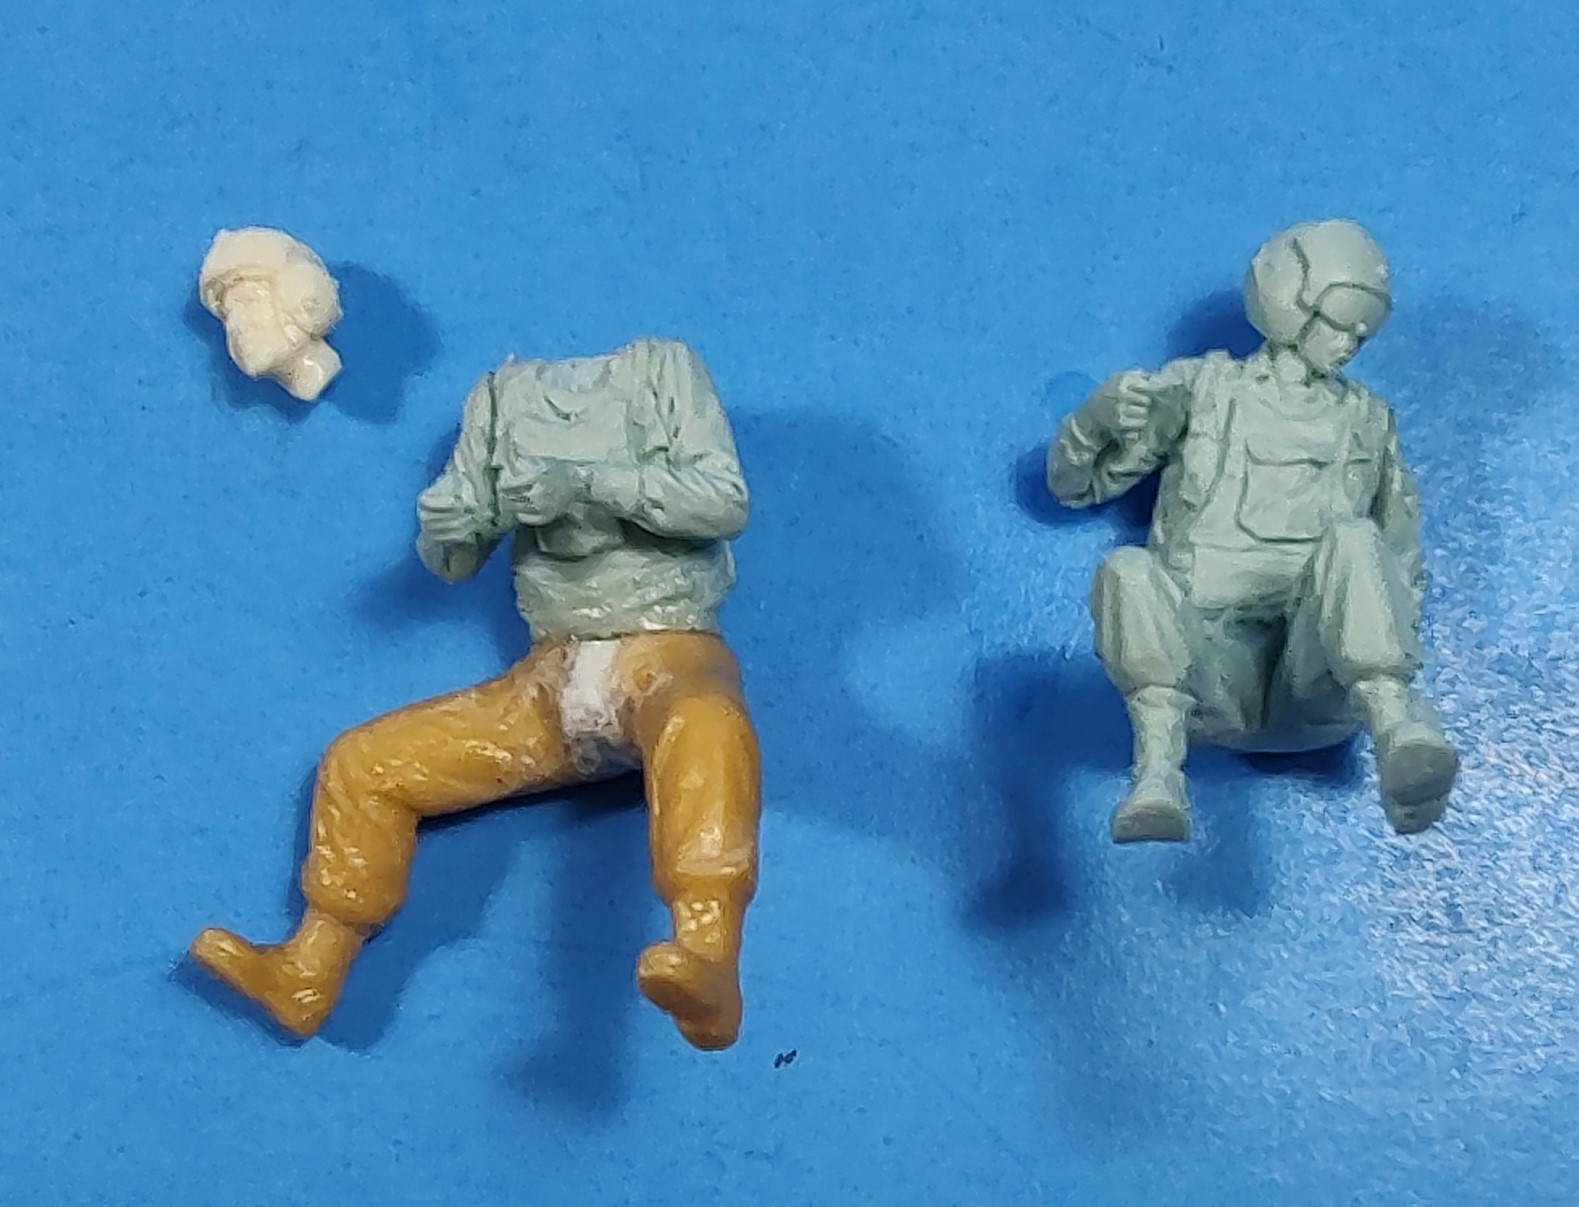
Here is the crew. I started with the Bravo 6 Vietnam Huey pilots and door gunners. I swapped the arms of the pilots for ones from the above-mentioned Live Resin UH-60 pilots set. They have their sleeves down and have the cyclic grips in their hands. They also have the chicken plate armor that was still being worn and molded on seat belts. I added the round seat belt release from the Kitty Hawk PE sheet.
The gunners are also the Bravo 6 Vietnam Huey ones. The seated one is straight from the set. All I changed on him was shortening his legs a bit to get his butt to sit on the gunner’s seat. The other one I took and added the legs from the standing gunner in the Dragon Vietnam Helo Crew set. I widened his legs, so he straddles the gunner seat on his side. He will be hanging out the gunner’s window and looking back, holding both grips on the M60D MG.
Next up is painting the crew and installing 3 of them. The standing gunner has to be added after since he will be hanging out the window. Then close up the glass and paint.
I will add the troopers hanging out the side doors and all their gear in the back after paint as well.
-
Yup, I agree. No seats it is.
-
On 3/31/2024 at 5:55 PM, Da SWO said:
We didn't have seats installed, just sat on the floor.
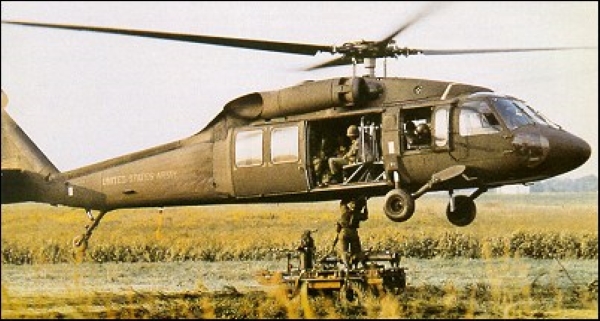
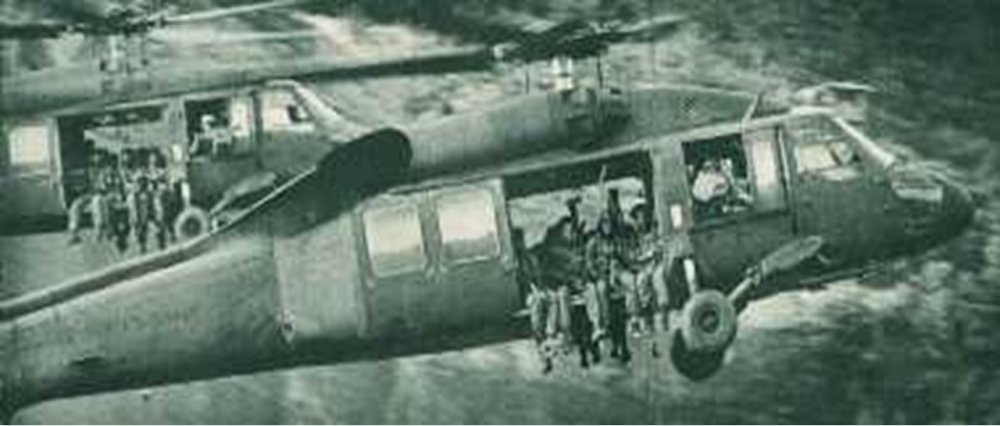
As Da SWO states above, it appears both UH-60As w/seats and w/out seats were seen in Grenada. I have seen pics of both ways, like below.
The question is how to do the troops in the back. I am leaning toward no seats and guys hanging out the doors. Opinions??
As posted above w/seats.
And w/out seats.

-
No problem. Thanks for checking.
-
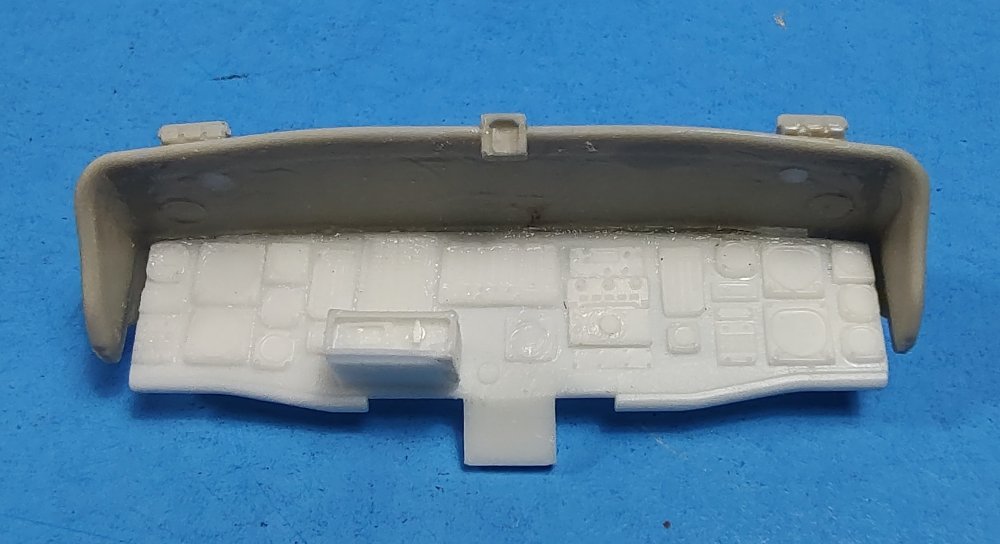
The IP is hand painted w/individual decals for the instrument faces. Not sure why the lines on the floor look wavy. They look pretty straight on the actual piece. They are just sticky tape, usually hand-applied by the crew on the actual aircraft.
-
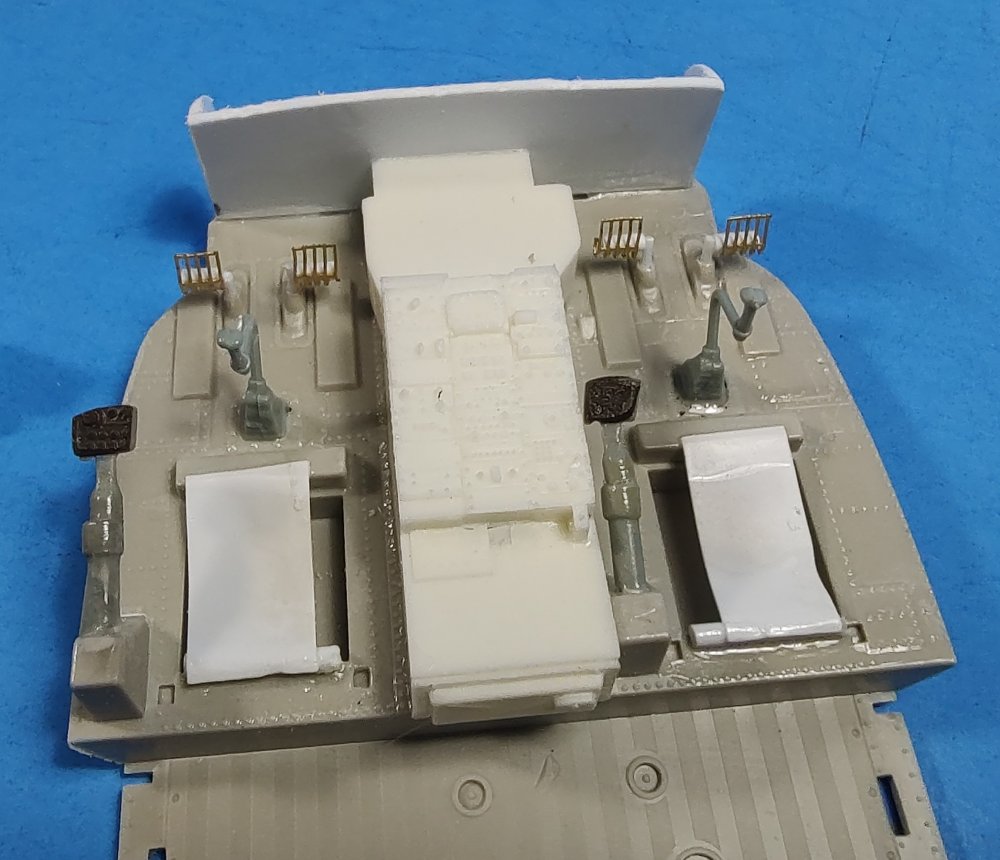
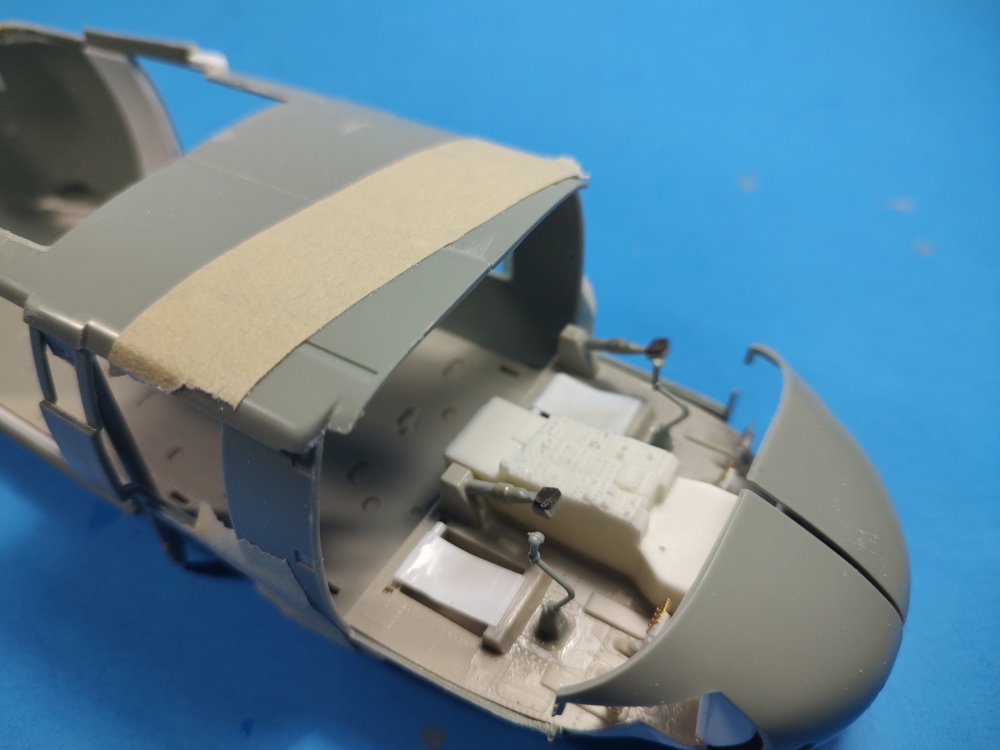
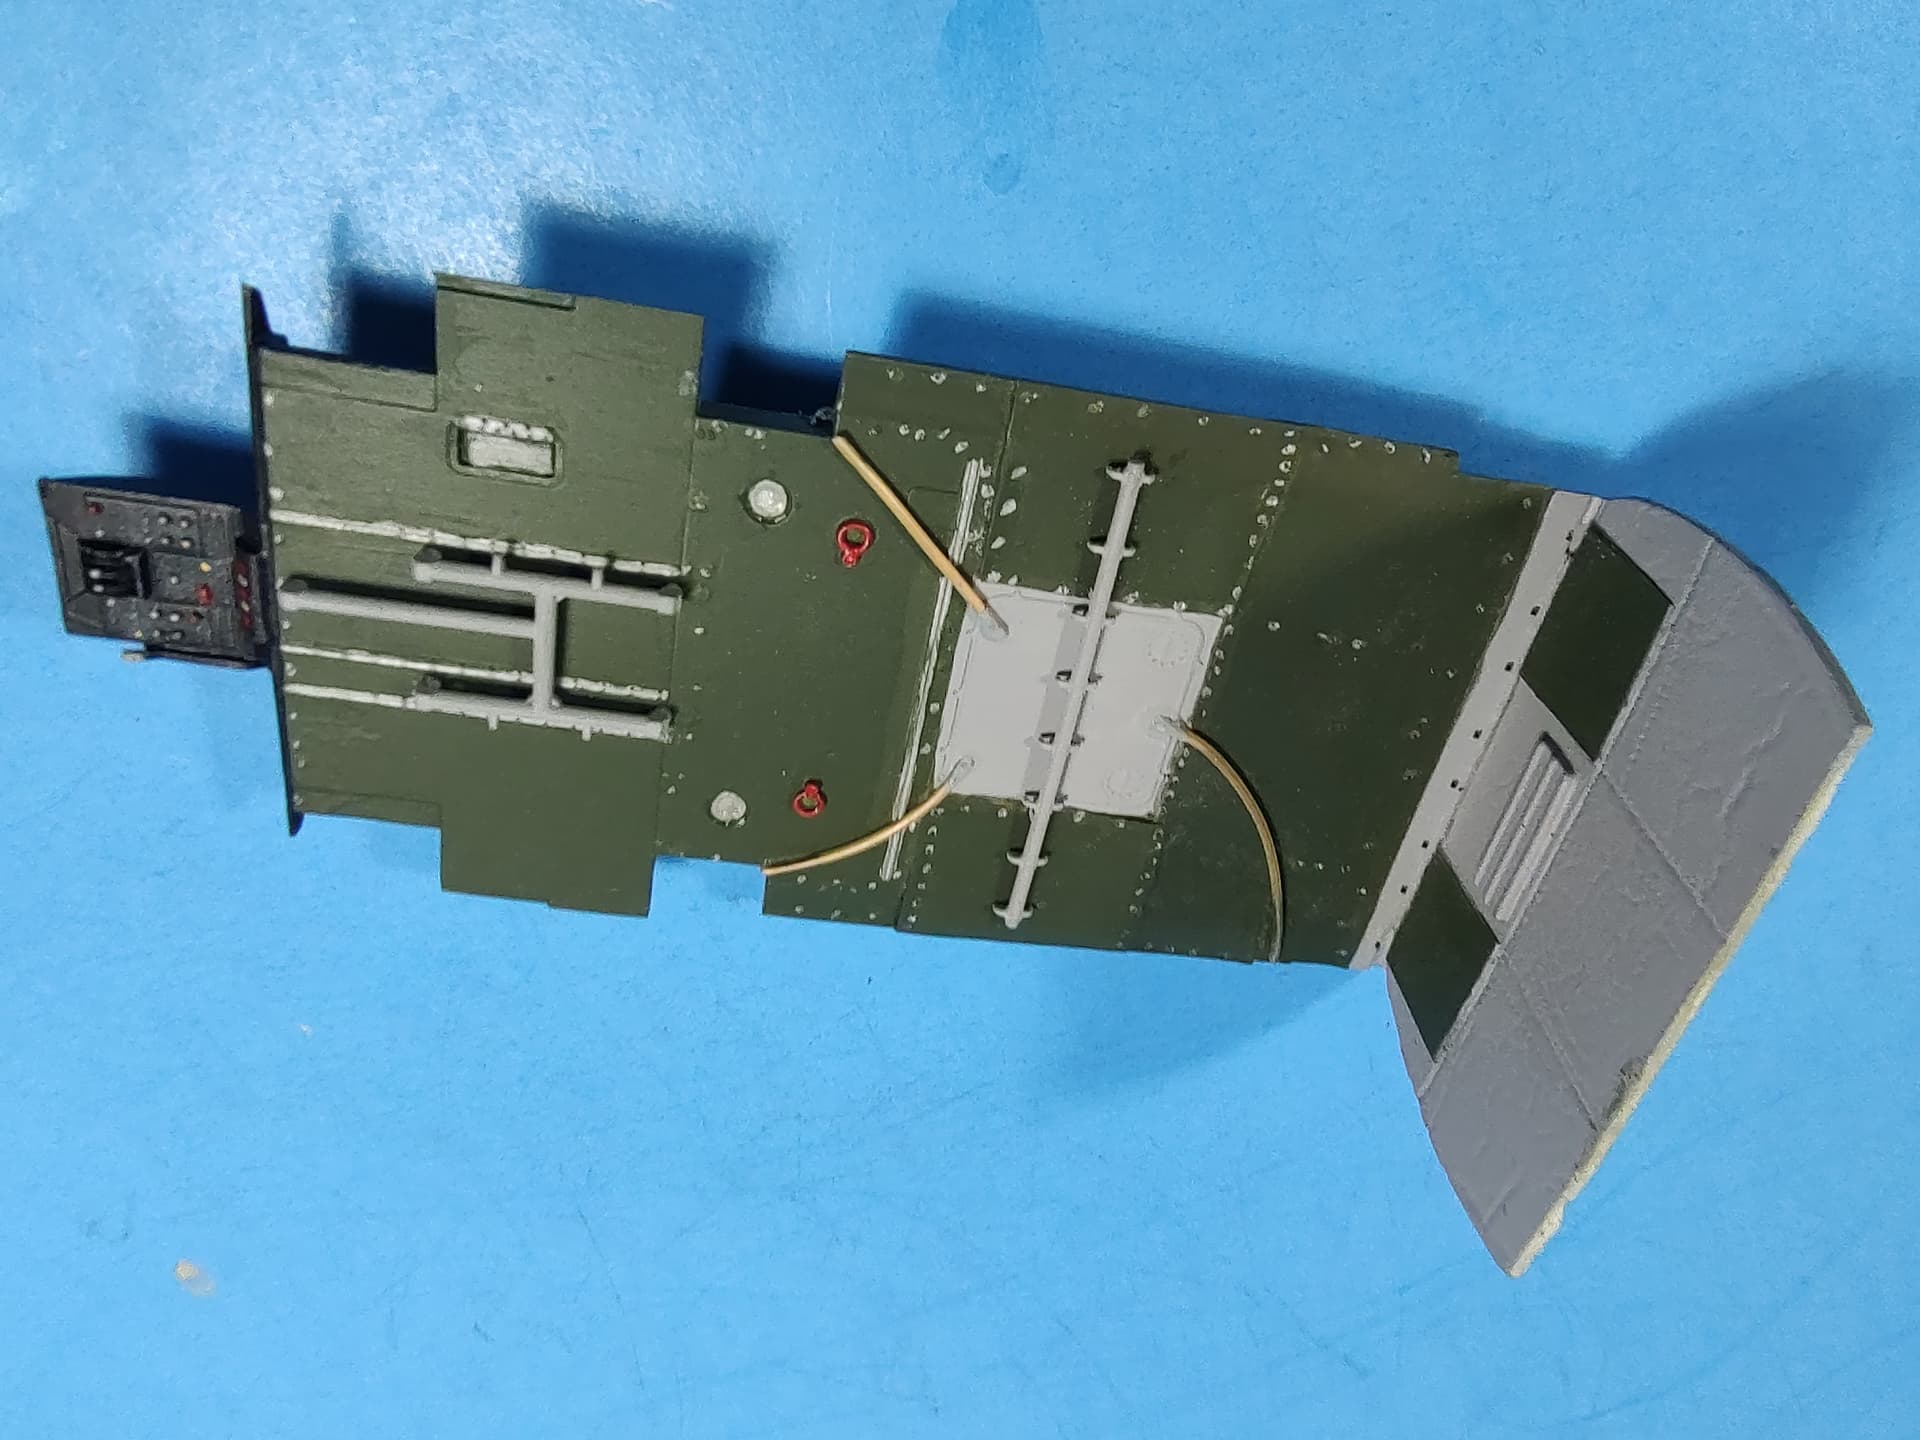
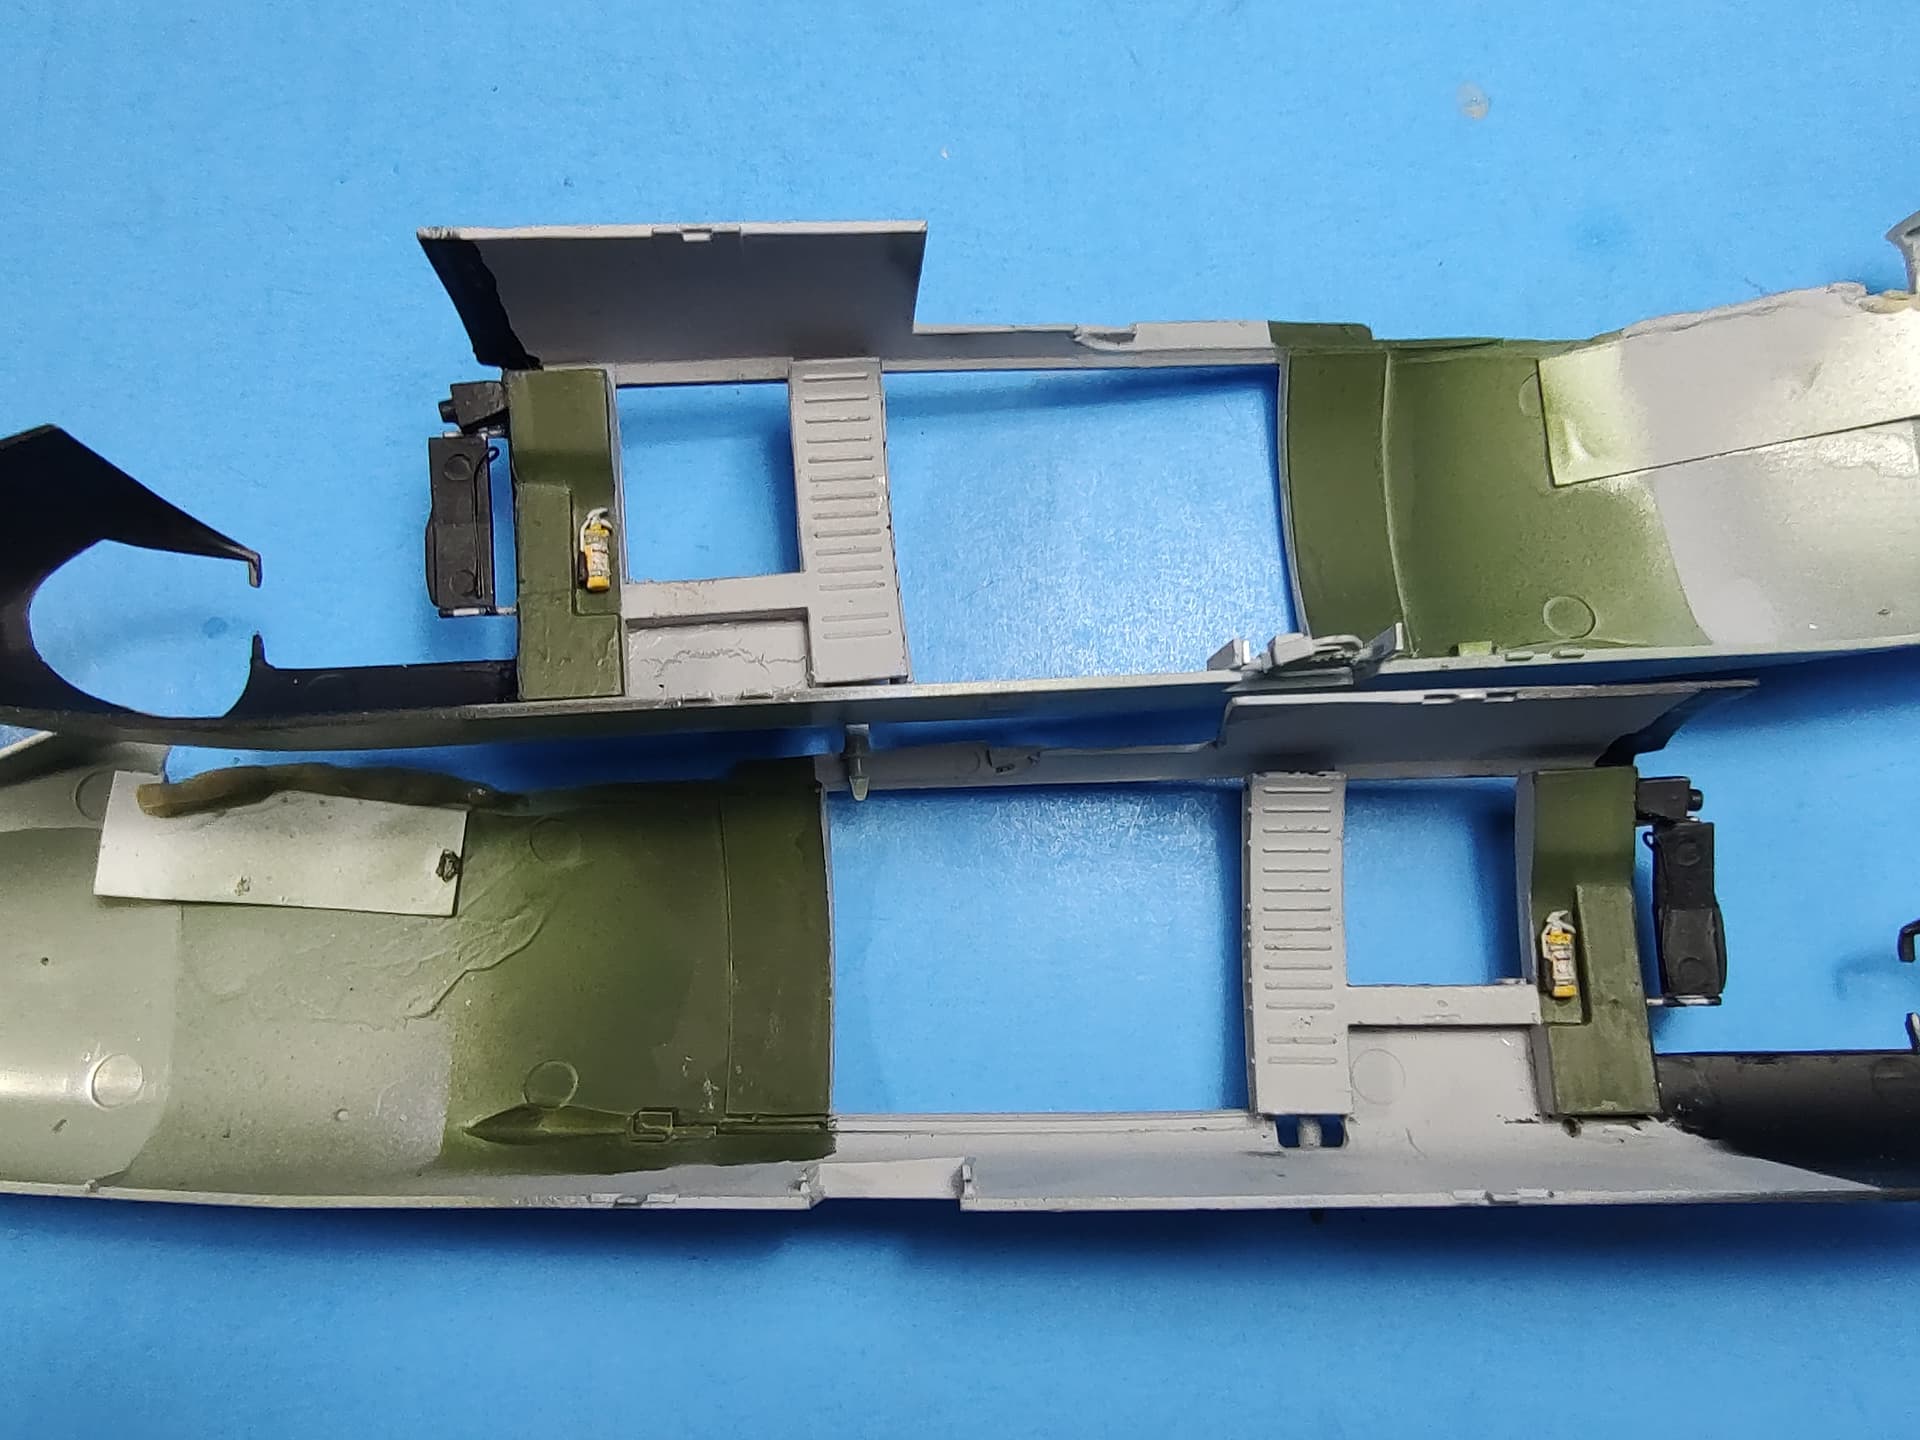
Over the weekend I was able to get the interior painted.
I added drain lines to the transmission drip pan on the ceiling. I also detailed the fabric panels with fasteners and added the H-bar and center bar for the crew chief and troop seats.
On the floor I added the anti-slip strips in black and first aid kits to the backs of the pilots’ seats. I also added individual instrument decals from a 1/32 jet IP decal sheet to dress up the IP.
I also fixed the yaw pedals by flipping them around so that the center bar is in front of the PE backplate.
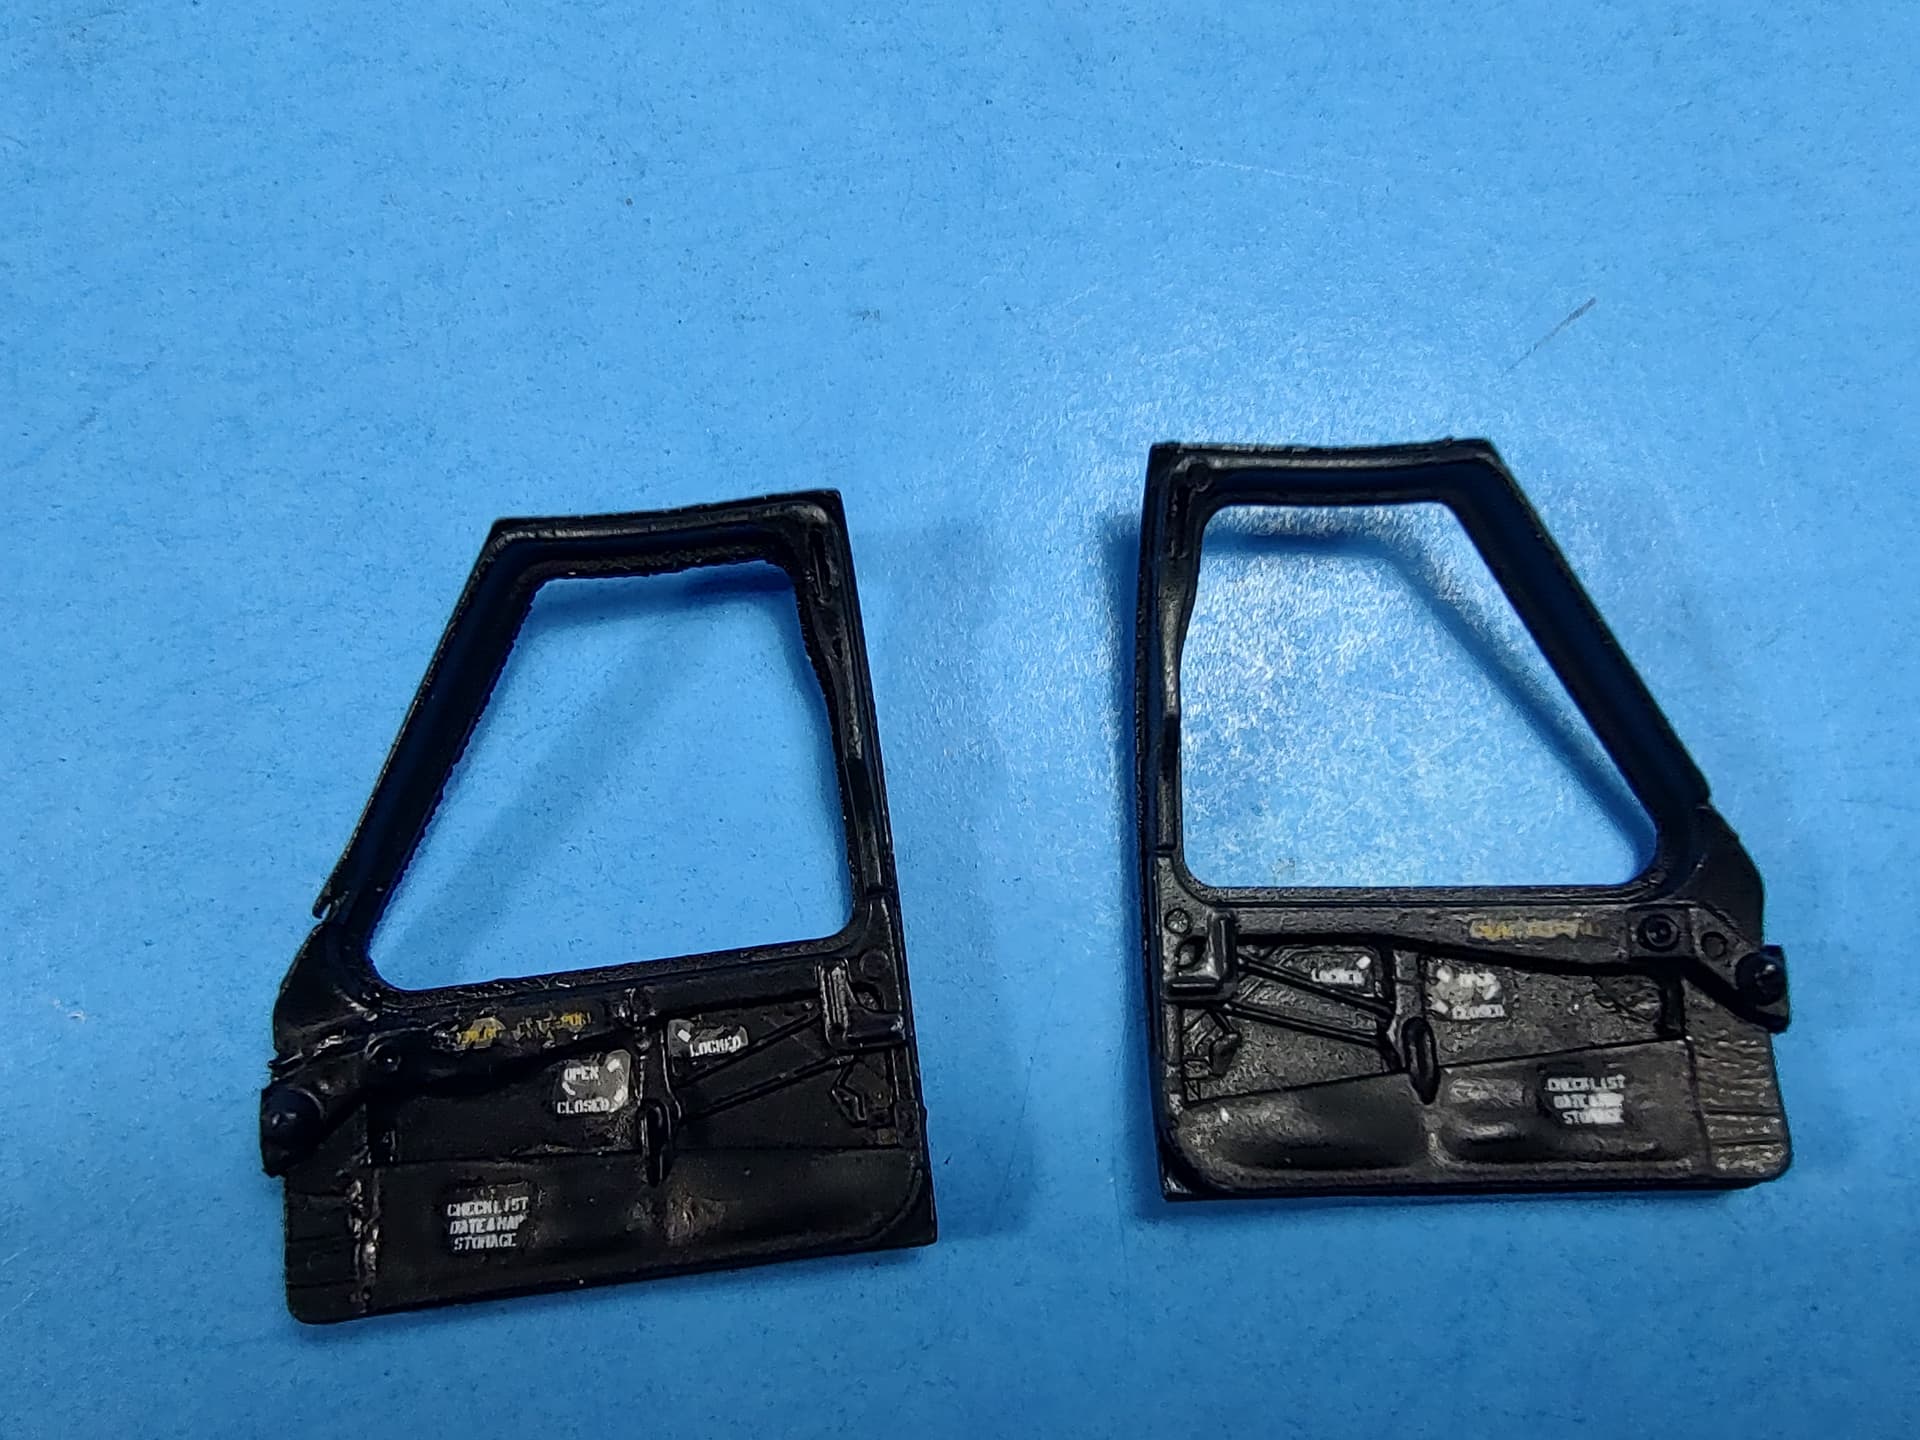
I also added the Academy door interior decals to KH doors.
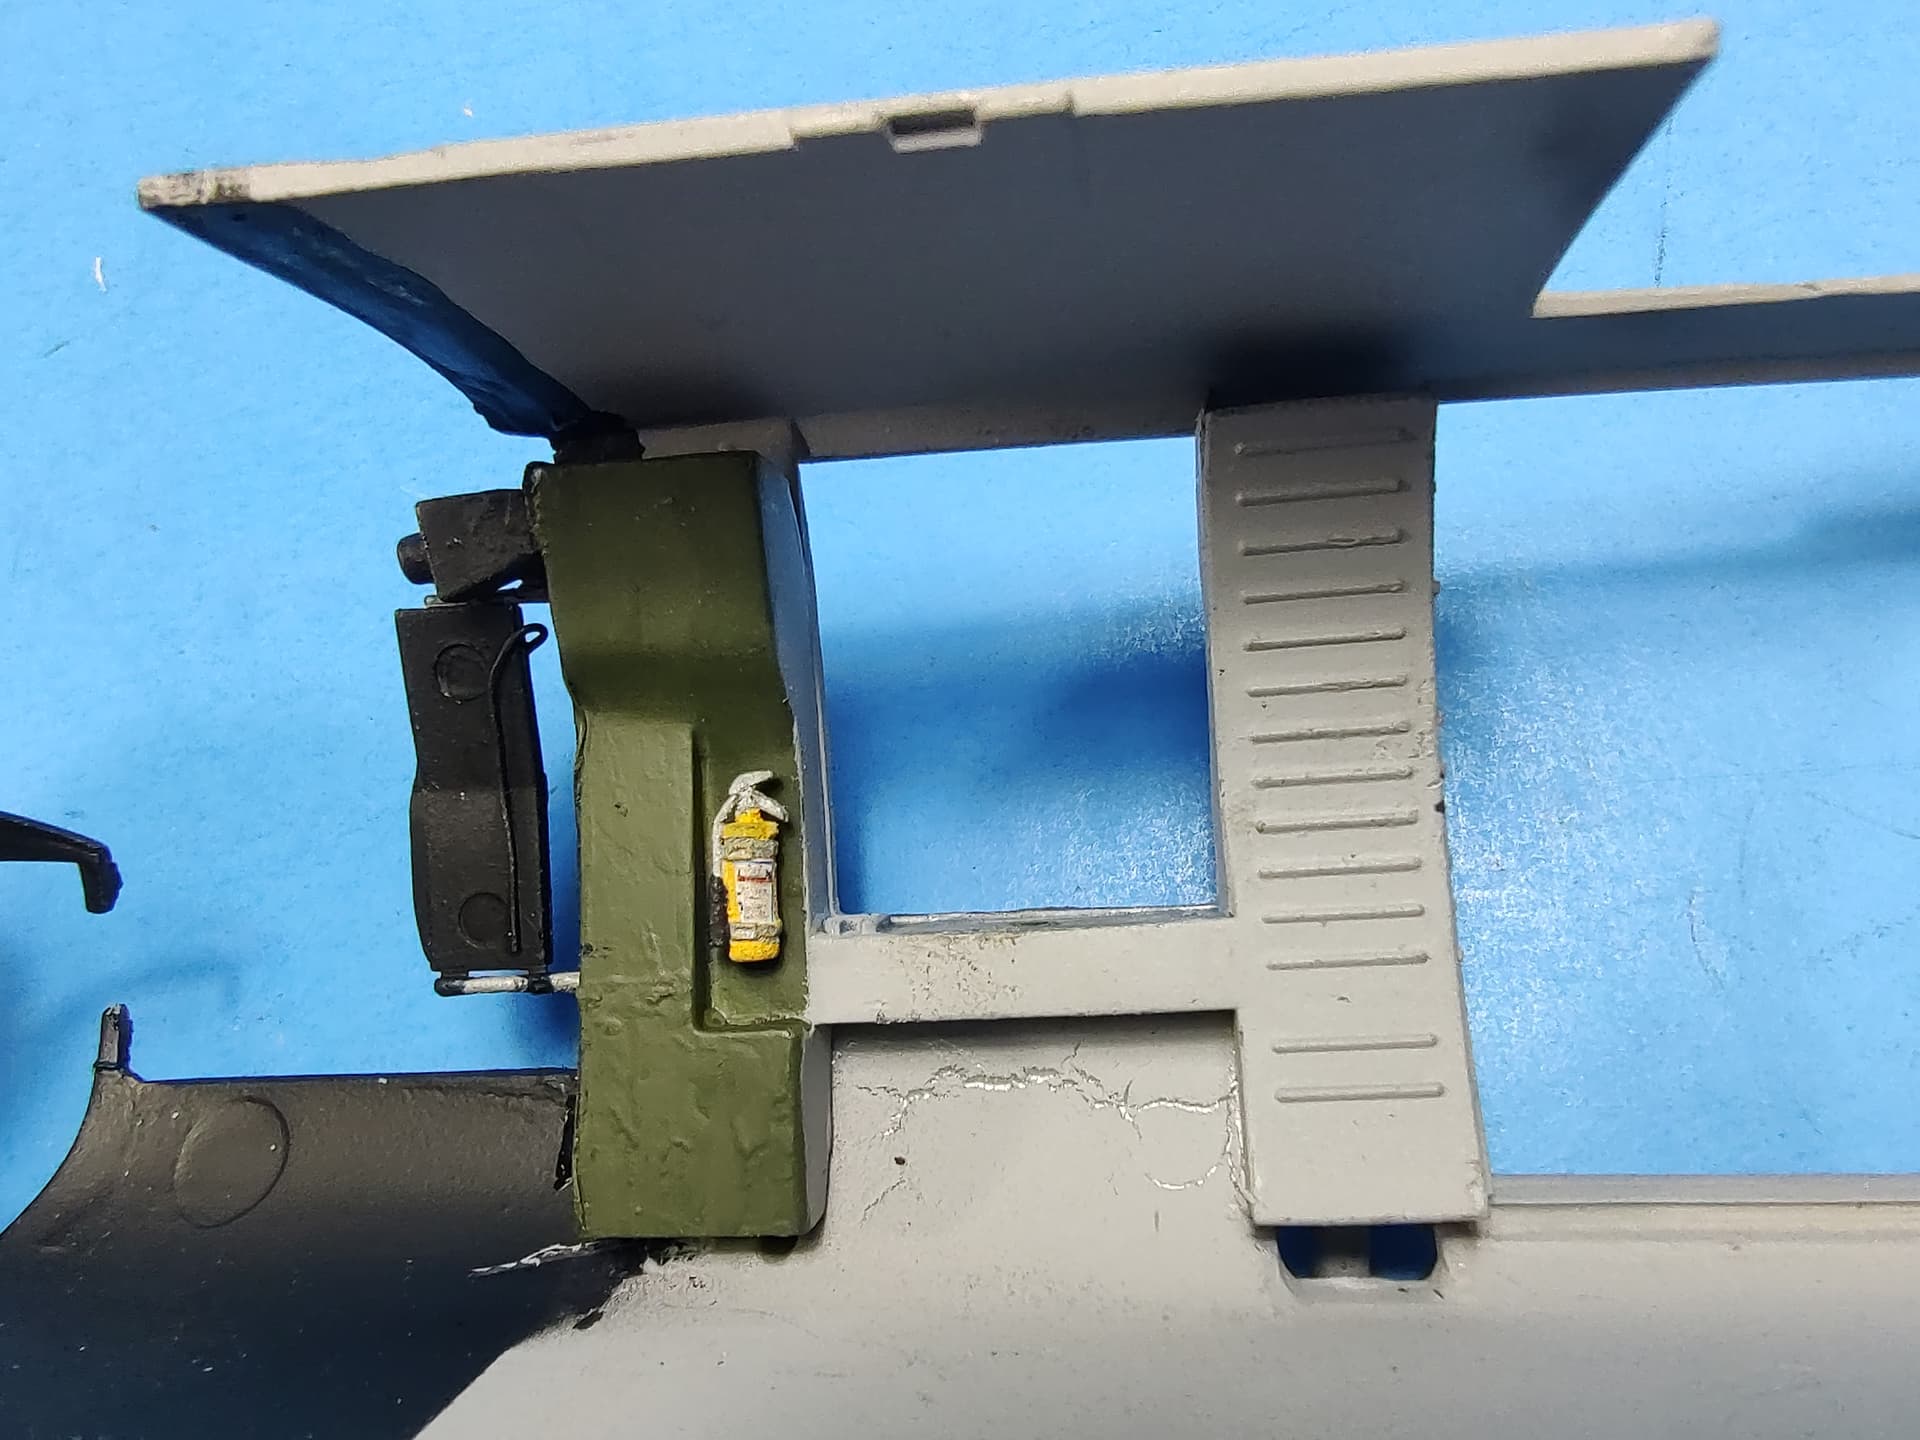
Here are the gunners side panels / A & B pillar interiors. I added fire extinguishers to them. I also added fabric panels to the rear side walls using sheet styrene.
!
!
Next up I will assemble the crew chief and troop seats and add them to the interior, along with the pilots, crew chiefs, and a few troopers in the back.
-
The fuselage behind the cockpit is twisted a few degrees to the right to counteract the rotor torque.
-
Not sure yet on the pilot figures. I will probably go with the ones from the Academy/ICM OH-58D. They are pretty good for early 80's pilots and already the have harnesses molded on. We'll see. I am almost done painting/detailing the interior and should have some more pics soon.
-
Easy fix, but they won't really be seen anyways as there will be pilots in it.
-
Loading pics today is a bear. I think some are showing.
You can see the whole build here: https://forums.kitmaker.net/t/1-35-uh-60a-grenada-op-urgent-fury-build/39002
-
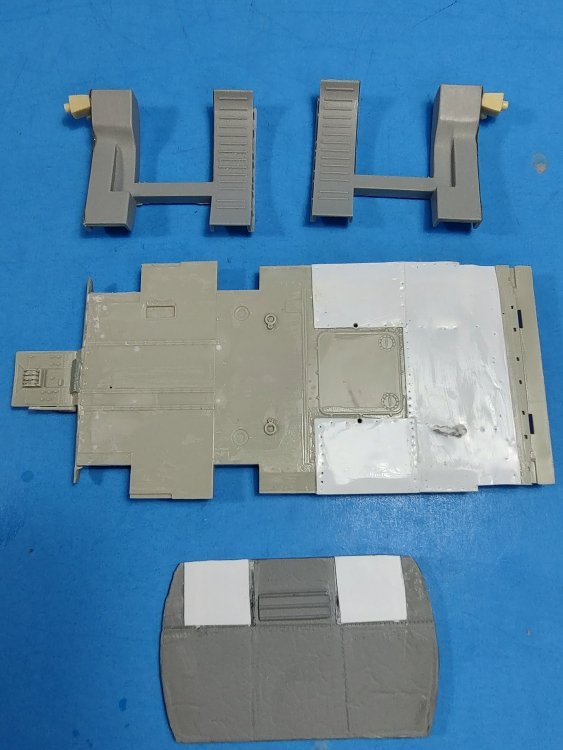
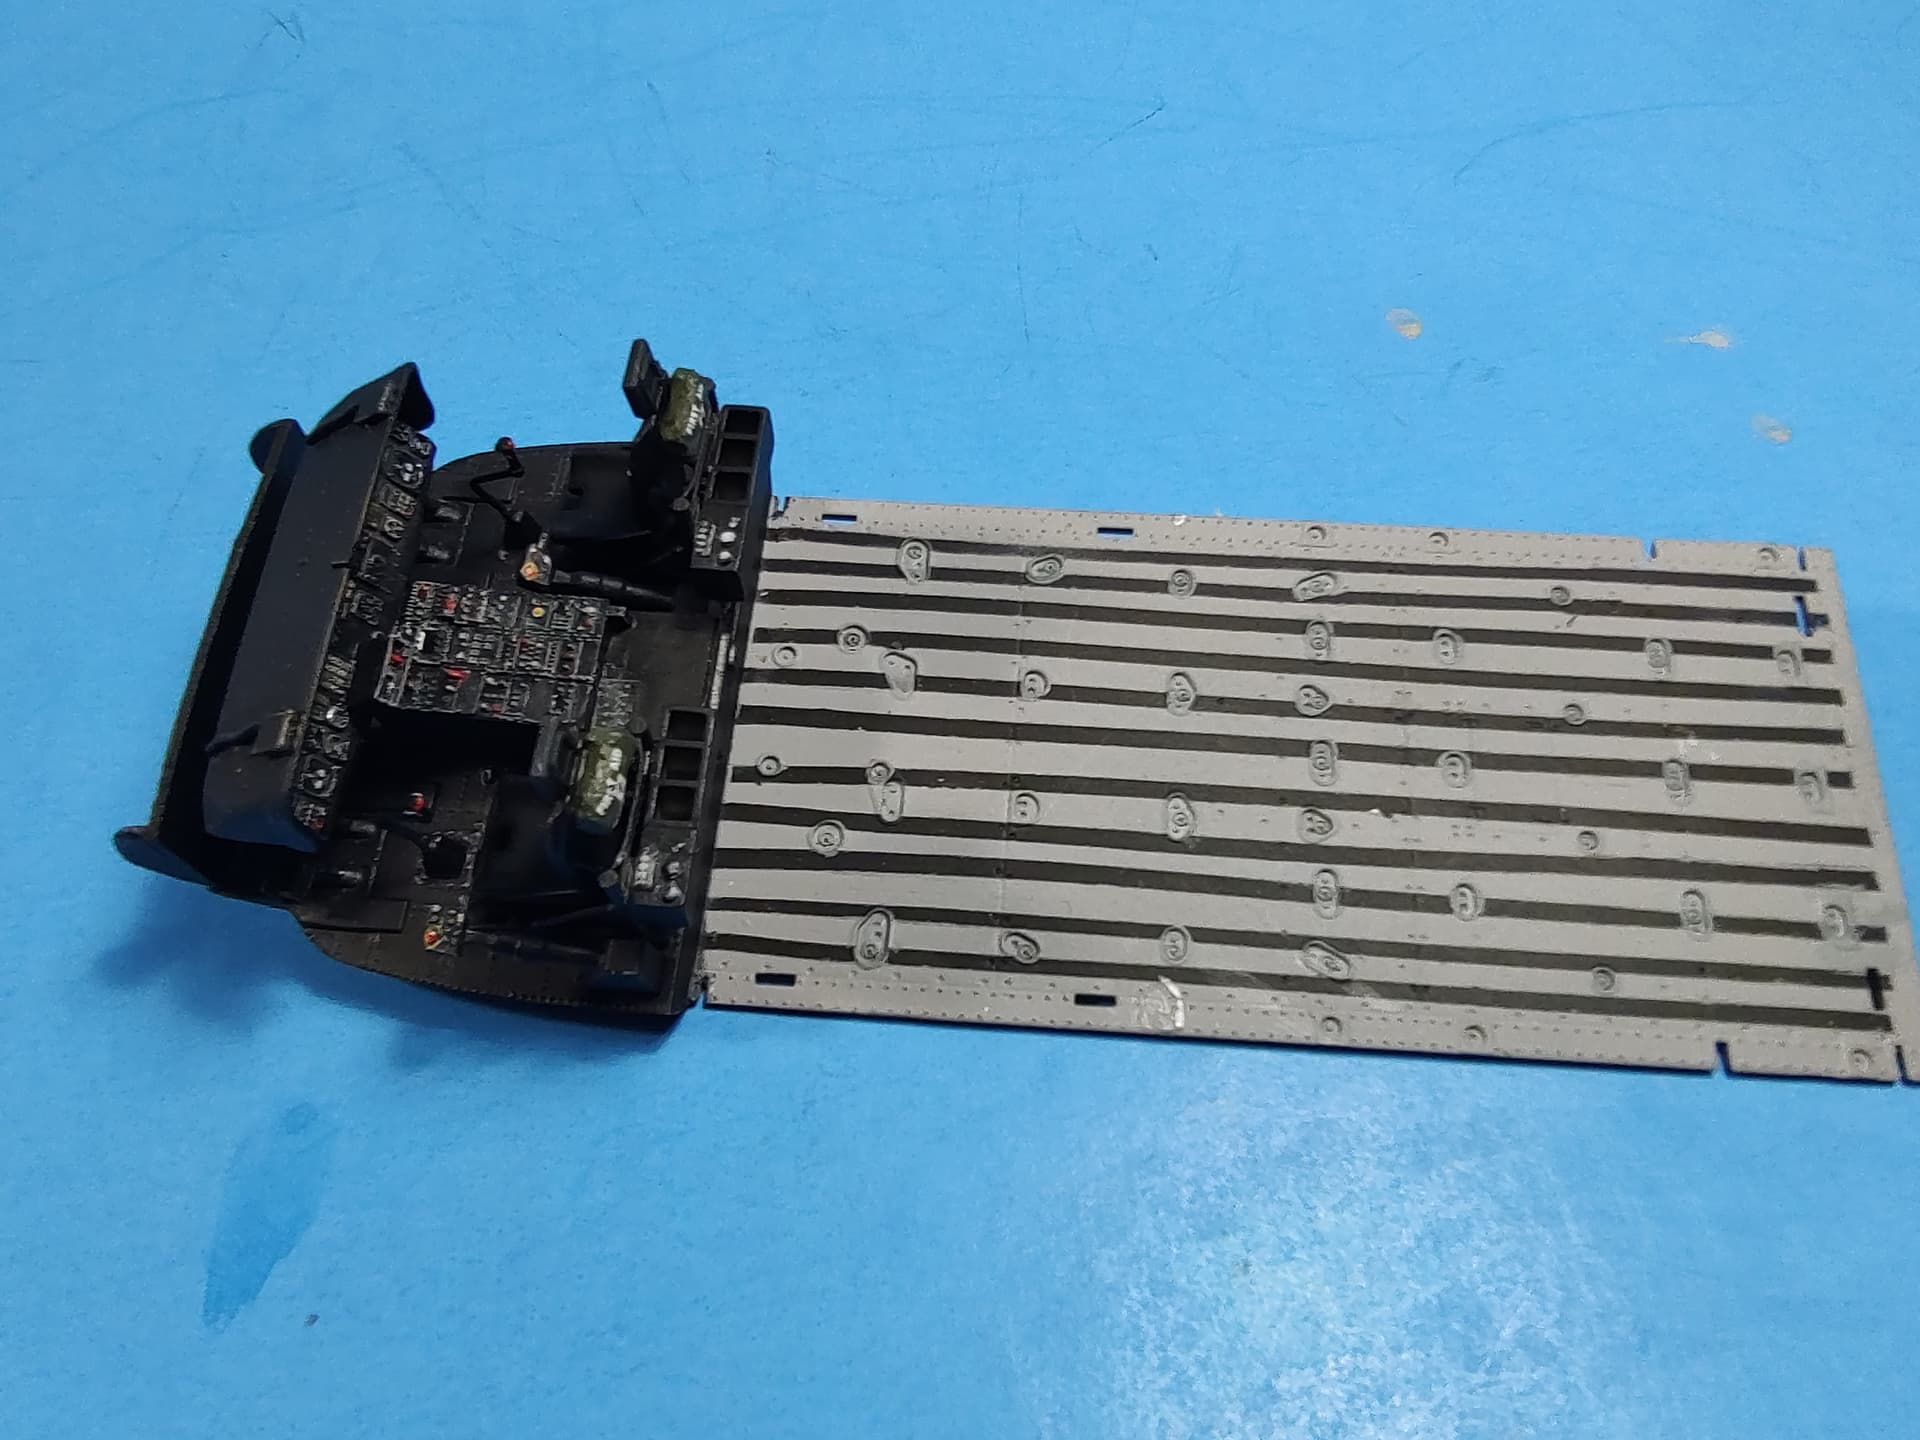
Work continues on the early UH-60A. I amusing the Kitty Hawk MH-60L interior on it. A nice thing about the Kitty Hawk H-60 kits, like many other manufacturers, they add new sprues into the box of previous versions to get newer version. Often, this leaves you with extra, unused parts. The KH MH-60S is a navalized version of the Army UH-60. KH gives you all the MH-60L parts and then a few more sprues for the MH-60S-specific parts. You end up with a big box and lots of parts left over. The extra parts include most of the UH-60 interior, including the floor plate, ceiling, and seats. This fixes the weakest part of the Academy kit, the poorly detailed interior parts.
Here it is so far. I made the yaw pedals from left over PE as I couldn't find all the Academy ones. I also used the Academy collectives and cyclic sticks. I added some button and knob details to the collectives.

I also used the instrument panel and center console from the Werner's Wings UH-60A/L backdate set. The crew chief's consoles/stowage bins on the back of the pilots' seats from an old Cobra Company UH-60 Update set.
Close up of the excellent Werner's Wings analog UH-60A/L instrument panel. It looks really great.
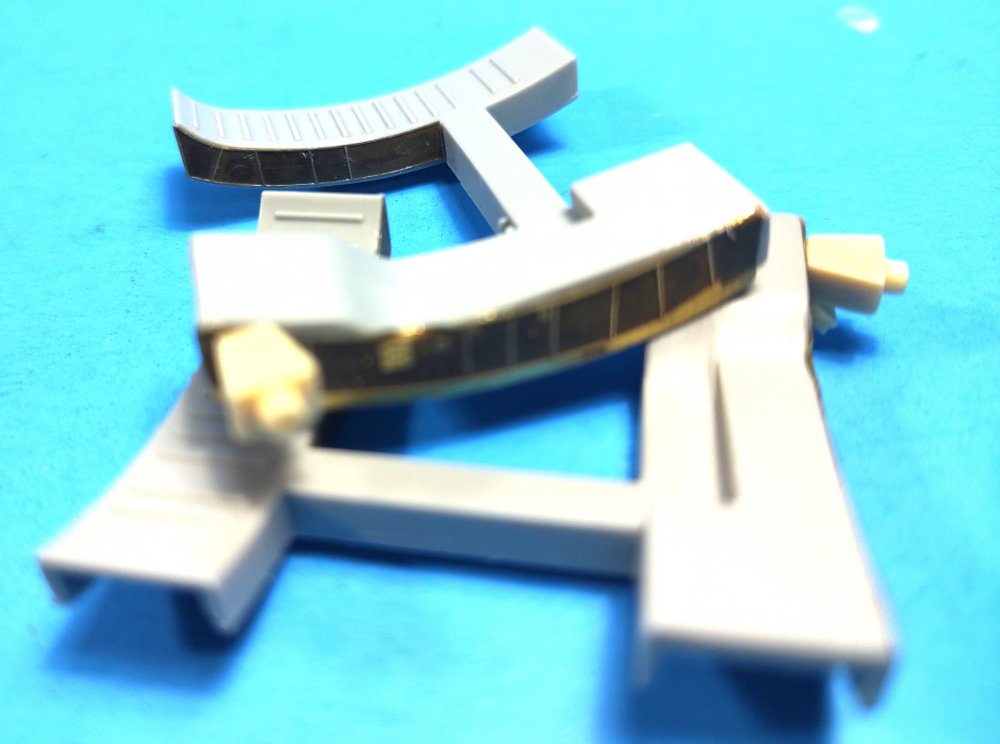
I am using a pair of gunner's side panels/A and B pillar interior parts left over from a Warner's Wings UH-60 MedEvac conversion. I added some left over PE side panel details and vent boxes onto them. I also closed in the KH ceiling with thin styrene to represent the the cloth coverings on the ceiling and rear panel.

The KH interior also fits into the Academy fuselage almost perfectly. It actually fits better than into the KH fuselage, which is very tight and almost impossible to close up without gaps. You have to sand down the sides of the floor and ceiling to get them to fit cleanly into the KH fuselage.

Work continues. Painting and detailing the interior items is next.
-
-
9 hours ago, Da SWO said:
82nd CAB?
Yes, it will be. Any pics you have would be great.
-
Thanks gents. There is actually quite a bit of info on them being used in Grenada. More to come soon.
-
It came out looking great. Nice job on it.
-
I have started on another project I have wanted to do for a while. I am building an early UH-60A Black Hawk from Operation Urgent Fury, the US invasion of Grenada in Oct 1983. This was the first combat action the Black Hawk helicopter had seen, its baptism by fire. These early UH-60As had no wire strike kits, open exhaust, no ESSS wing attachments, no chaff buckets, M60D doorguns, etc.
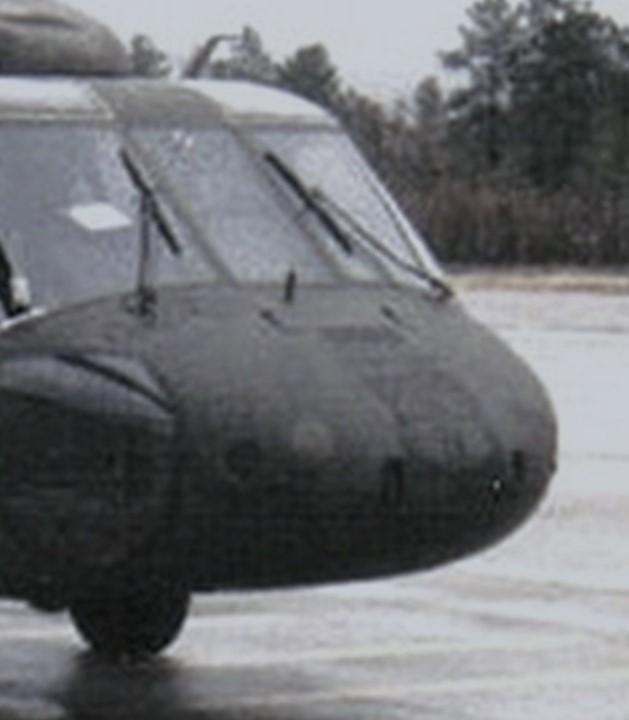
Here is one in Grenada.
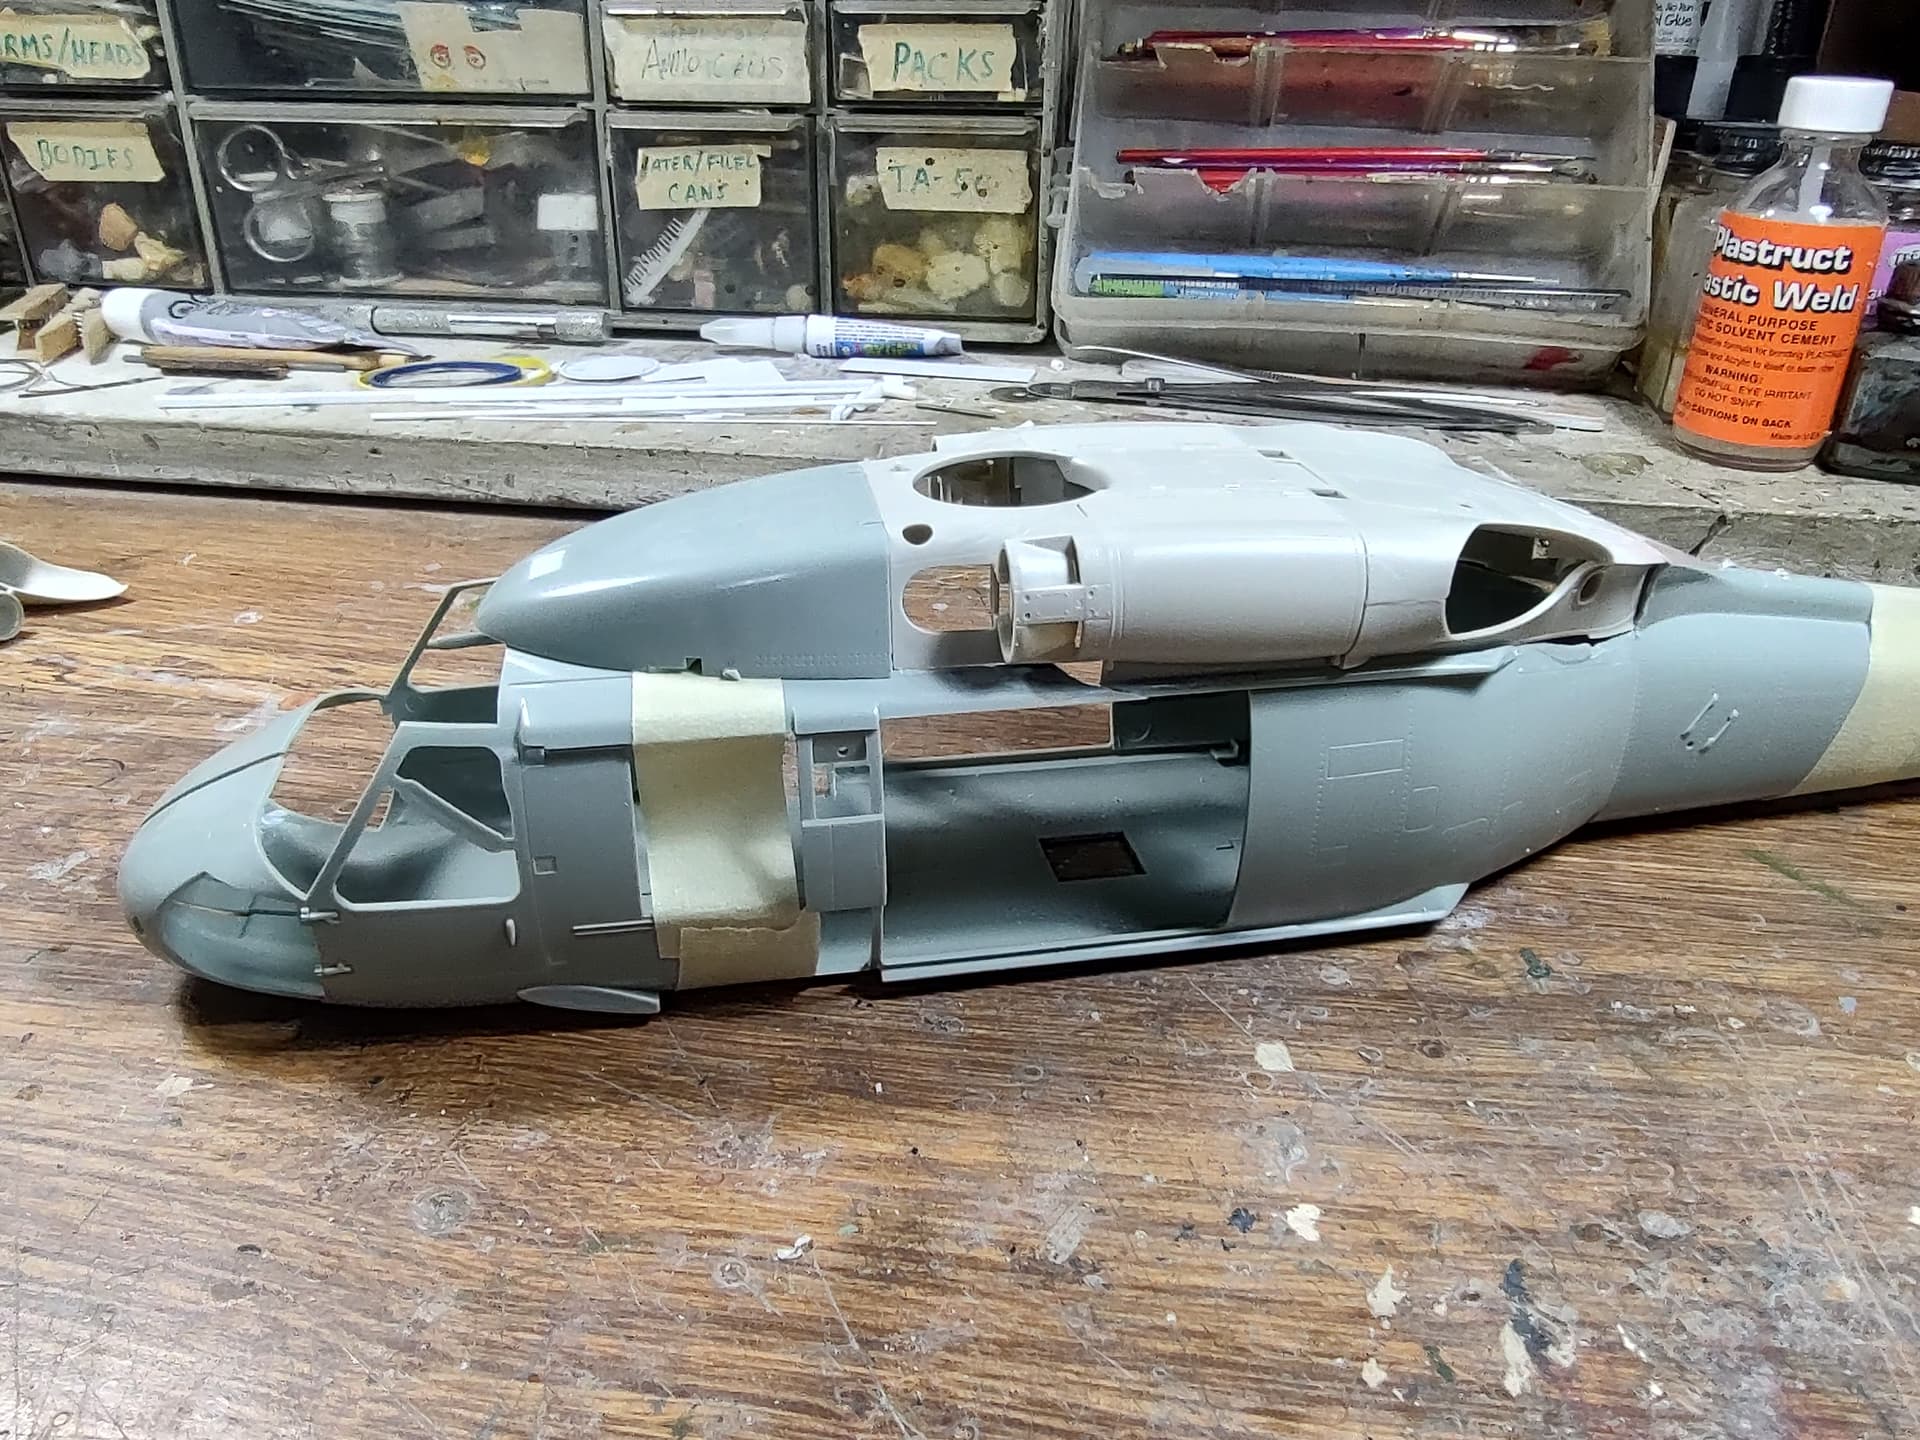
So far, I have started a test to see if the open exhausts from one of Kitty Hawk’s Naval H-60s would fit onto an Academy fuselage. I want to use the Academy fuselage since it is a cleaner one and earlier than the Kitty Hawk H-60 fuselage. Kitty Hawk’s has a later transmission access panel on the starboard side and reinforcing strips on the tailboom and other areas. Academy’s fuselage is pretty clean with no extra (later) features.
I have the Kitty Hawk Naval HH-60H kit, which has the open exhausts as extra parts since it uses HIRSS exhausts like an Army H-60. I also had bought an extra KH MH-60L C sprue which contains all the other parts for the engine cowlings.
Here it is so far to show that the KH open exhausts and engine cowlings fit on the Academy fuselage. I did have to do some cutting and remove most of the Academy engine cowl parts. It will require a bit of filling and sanding to blend it all together, but a good start.
-
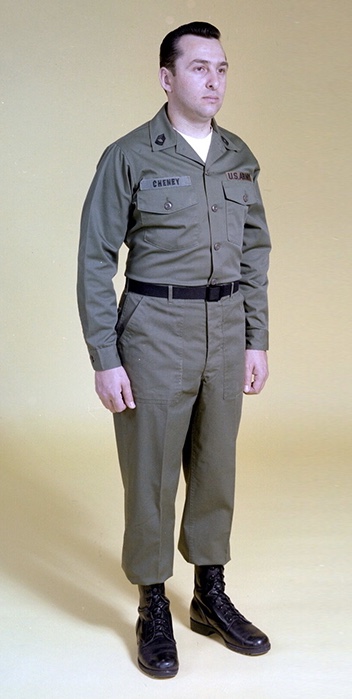
All the various gear and elements look great. I agree that the labels on the cans and bottles are not really correct but may be too late to change. One other potential issue that you may or may not care about is the uniforms on the figures. As currently depicted, they appear to be wearing Vietnam Jungle Fatigues. I thought you did not want a Vietnam scene, but an earlier (late '50s) scene. The Vietnam Jungle Fatigues (side leg pockets, lower shirt pockets, slanted upper shirt pockets) were only issued and authorized in Vietnam. The rest of the US military was wearing OG107 Fatigues at the time ('50-early '80s). They did not have the side leg pockets nor lower shirt pockets. Also, OG 107 Fatigue shirts were worn tucked in.

-
I don't think anyone makes them. They don't look too hard to do yourself though.
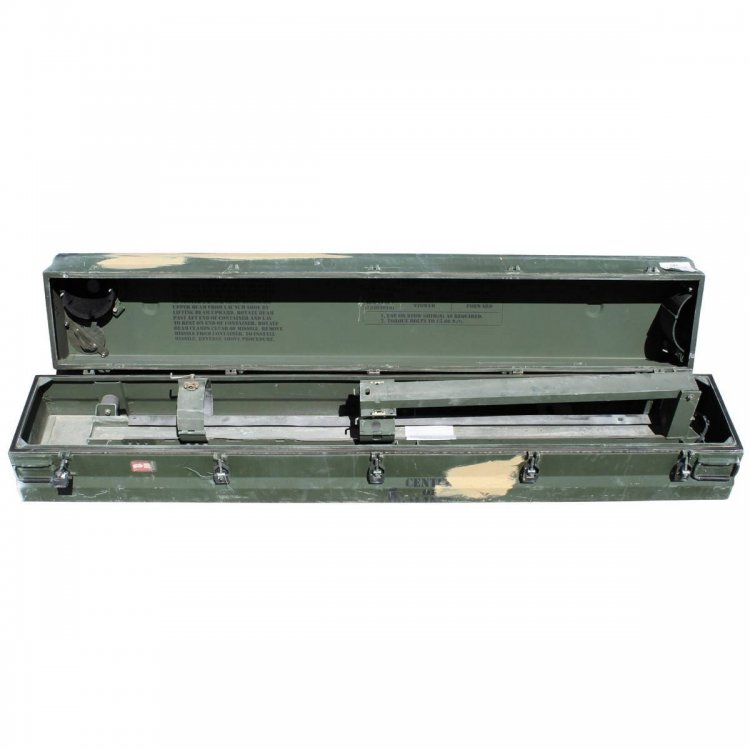
Dimensions:
External dimensions: 214 x 37 x 40 cm
Internal dimensions: 188 x 33 x 39 cm


1/35 UH-60A Grenada (OP Urgent Fury) Build
in Helicopter Modeling
Posted
Thanks Ski. I like how it is coming out too.