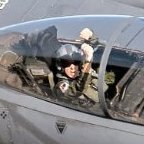
latormentabritanica Posted February 5, 2008 Share Posted February 5, 2008 (edited) Hello all! This is my first group build, so I'm excited to see how this goes. I was looking for an excuse to buy the Academy P-38, and when I first found out about this GB, it gave me the motivation I needed. I also found an OOP decal sheet from Aeromaster that I had. So let's get her started! The kit: Decals (I'll be doing the top F-5): The Academy kit comes with a sparse cockpit and rubber tires. Both will be replaced by True Details resin sets, which I recently ordered from Squadron. Hopefully they'll be here by the end of the week. Photo of the real bird: "Lanakila" was assigned to the 27th Photo Reconaissance Squadron, 7th Photo Reconaissance Group based at Mount Farm, England. She wasn't assigned to any one pilot, but was flown by the whole squadron. Edited February 5, 2008 by latormentabritanica Quote Link to post Share on other sites
latormentabritanica Posted February 5, 2008 Author Share Posted February 5, 2008 (edited) Research time! The Academy P-38 kit seems to have been well received by the modeling community. Fit seems to be fine, detail great, and a massive amount of weapons is included. The kit comes with four different noses to make either a standar gun-totin' P-38, a pathfinder, an F-5, or a droopsnoot. However, upon inquiring on ARC, I was informed that the shape of the F-5E nose is incorrect. The nose included in the kit appears to have the shape of an F-5A nose. Drawing of kit nose: F-5A: F-5E: Notice the differences? Well, the F-5E's were arriving in England as standard P-38's and were being converted there. The normal P-38 nose was modified to allow the lateral camera blisters and a flat dorsal camera platform, as seen in the last picture. The gun ports were covered up with metal plates, as were the ejector chutes. So, how do we fix it? As of this moment, there are no conversion or correction kits for the Academy F-5E. Paragon used to make a spot-on F-5E nose, but it was designed for the Hasegawa kit. Neil from Paragon tracked one down for me, but shipping costs and minimum order amounts made it about a $20+ nose! I think I've figured out a pretty good compromise. Last night I was fiddling around with the different noses and noticed that the opposite sides to the gun nose and the photo nose matched up perfectly around the upper seams when placed together. What I needed were the camera blisters from F-5E nose attached to the standard P-38 nose, and then a few minor modifications to the gun ports and ejector chutes. Judging by the dryfitting session, I decided to take the nose tip and bottom panels from the standard P-38, and attach them to the upper panels from the F-5E. I forgot to take some in progress pics of the splicing and dicing, but here's the basic modification. It's the first time I've ever hacking into a kit like that, so it's not perfect! However, with a little bit of putty and some rescribing, I think it will look quite good. The flat part of the real F-5E nose is still missing. Tomorrow I will try to sand my Frankenstein nose flat on the bottom. I don't want to ruin it while I'm ahead, so I believe I will simply paint the lower camera window on rather than risk ruining the bottom of the nose. Other than that, the booms are glued and drying. I'll keep posting as I work! Edited February 5, 2008 by latormentabritanica Quote Link to post Share on other sites
latormentabritanica Posted February 5, 2008 Author Share Posted February 5, 2008 (edited) Also, much thanks to P-38 Guy (Mike) for all the great reference pics and the info on the proper noses. Thanks! Edited February 5, 2008 by latormentabritanica Quote Link to post Share on other sites
datguy Posted February 5, 2008 Share Posted February 5, 2008 [snip] It's the first time I've ever hacking into a kit like that, so it's not perfect! However, with a little bit of putty and some rescribing, I think it will look quite good. The flat part of the real F-5E nose is still missing. Tomorrow I will try to sand my Frankenstein nose flat on the bottom. I don't want to ruin it while I'm ahead, so I believe I will simply paint the lower camera window on rather than risk ruining the bottom of the nose.Other than that, the booms are glued and drying. I'll keep posting as I work! If you're not going to cut the windows, I'd suggest decals rather than painting. I can't speak to 1/48, but in 1/72, I've had good results from spraying a very dilute gloss blue/purple over a black decal and cutting the windows to shape. I found that easier than trying to mask the sharp square edges of camera windows and it gives an impression of the odd reflections of optically coated glass. Additionally, framing can be built up with strips of silver or airfame color decals. This can give the area the proper 3D look. DG Quote Link to post Share on other sites
Old Man Posted February 21, 2008 Share Posted February 21, 2008 That looks very nice, Sir! Welcome to the wonderful world of looking at kit pieces as raw material rather than finished product. Keep it up and you will be scratchbuilding.... If you do not mind a bit of advice: be sure of the thickness of your plastic where you must sand it flat. Things dimple and tear before they disappear entirely, and it is very nasty on a seam line when they do. A quick and slightly reckless way to protect it is to load the area inside with a thick layer of CA gel. Another is to glue down some strips of sheet styrene on the inner surface. Another approach is to take your chances with some sheet styrene standing by, and if it does start to show signs of damage, file on a little past the proper point, and then put a piece of sheet over the area, and blend its edges into the outer curves of the kit pieces. Quote Link to post Share on other sites
P-38 guy Posted February 25, 2008 Share Posted February 25, 2008 Cameron sorry for not getting back with you I just plain forgot with everything thats been going on the past few weeks. I think you have the right answer for the nose. but I would just slice off the bottom and glue a piece of sheet stock then blend it in. If you look close thats what was done on the real thing (circled in yellow). Make sure to leave the little lip in front of the gear door (circled in red). Also remove the bumps on the insides of the engines they are not on the real thing. That is where they had the oval that they shined up to see the reflection of the nose gear. Don't know how they made that mistake but they did. Mike Quote Link to post Share on other sites
GA.modelmaker Posted February 25, 2008 Share Posted February 25, 2008 looks good for what you have done so far. i just opend mine up and the kit i have dosent have those humps on it but it does have the other stuff you are talking about. i dont know which is the better of the two but the one i am using is minicraft 1/48 f-5e lightning this will be the frist wwII kit i have built in many moons. Quote Link to post Share on other sites
TF51GREGWISE Posted February 26, 2008 Share Posted February 26, 2008 looking good. waiting for the next update. Quote Link to post Share on other sites
Bodo Posted June 19, 2008 Share Posted June 19, 2008 (edited) My next P-38 double project allmost done !! This is No.1 ( hi!hi!hi! -2 times No.1) Why 2 times No.1 ?? First build + number one ace !! Edited June 19, 2008 by Bodo Quote Link to post Share on other sites
Bodo Posted June 19, 2008 Share Posted June 19, 2008 (edited) Double project No.2 !! - before .... and after ... Edited June 19, 2008 by Bodo Quote Link to post Share on other sites
Bodo Posted June 19, 2008 Share Posted June 19, 2008 Hallo Mike ! Great inspiration for all Lightning fans ! Some 3 years ago I biuld the same plane usung the same model , the same decal sheet ( Damn ! Why 10 PRG bird from this decals is incorrect !! ) - and I used fighter nose as well ! Lightning looks GREAT in blue !! As camera windows I used stripes of mirror-polished metal - and its look great ! Remember ! Do not use kit front 8-holed wheel !! I rescribed most of the panel lines on the engine nacelles as well ! Best - Bodo from Poland Quote Link to post Share on other sites

Recommended Posts
Join the conversation
You can post now and register later. If you have an account, sign in now to post with your account.