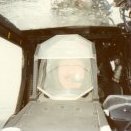
Floyd S. Werner, Jr. Posted April 1, 2009 Share Posted April 1, 2009 Hey everyone, I have the beginnings of Fireball Modelworks 1/32nd scale AH-1S (Mod) Conversion Set. So far I have the cockpit and it is impressive to say the least. I absolutely love the level of detail that Joseph has been able to capture here. What is really impressive is the small number of parts from the original kit that is used. Of the original kit you have to use 15 pieces. Yes 15 pieces. Here is the photo. Sorry I've already started cutting the exhaust area and you can see what needs to be removed from the hatched pattern. So what do you get with the set? A whole new cockpit that is specific to the Mod-S, new landing gear (complete with skid pads under the tubes), new wings, new tail rotor (previously released), new exhaust system (previously released), new TOW racks complete with missiles or not your choice. What about rocket pods? This is Joseph we are talking about. Are you sitting down? New XM-158 pods, yes he has figured out how to cast them, new M-200 19 shot pods, new M-260 seven shot pods, and new M-261 19 shot pods. New anti-collision light and vent for the doghouse. A new M-28 turret that has to be seen to be believed. Can't have the new turret without the lower portion of the ammo bay being fixed. Of course you will need a new nose for the TSU. You will get a Werner's Wings canopy, I think available from Joseph as a one stop shop. There are decals for the instrument panels and of course the whole aircraft. Granted they are not that colorful, but what about a US Army aircraft and an Israeli one? Guess you'll need two. How much does it cost? He doesn't know yet but you are getting almost a brand new helicopter in 1/32nd scale. On to the pictures. Now for the absolute gorgeous cockpit. Some of the things are just pinned in place and others fit so well that they are just sitting on the cockpit tub. Here is the entire cockpit area. Now some close ups of the front and rear cockpit and just some overall shots. Note not all the parts are put on yet. Rear cockpit Just look at the detail on these side panels Front Cockpit This set is almost completely done. What can be next? An AH-1J is in the works. I'm trying to convince him to do an AH-1P and if you've done the canopy already why not an AH-1E. From there you might be able to get to an AH-1F, but I'd wait for mine. LOL Great job Joseph. Excellent work and I can't wait to see the rest of the parts. Look forward at this thread for updates as construction goes along. Floyd Quote Link to post Share on other sites
Albert Moore Posted April 1, 2009 Share Posted April 1, 2009 Ooooh, look at those castings! Joseph is quite the artisan. I've said it before but it is worth mentioning again; it is a great time to be a helicopter modeler! Cheers, Alby Quote Link to post Share on other sites
Tank Posted April 1, 2009 Share Posted April 1, 2009 I know its coming but why post today, of all frinking days. Joseph, put me done for one J. Quote Link to post Share on other sites
rotorwash Posted April 1, 2009 Share Posted April 1, 2009 Holy Cow! I had a peek at the progress on this one, but man, that is just gorgeous. Joseph has outdone himself this time! Ray Quote Link to post Share on other sites
B-1 Nut Posted April 1, 2009 Share Posted April 1, 2009 The money in my pocket is already starting to heat up in my pocket. Just so I understand....is this a whole 1/32 kit or is it an upgrade set to the 1/32 Monogram "G" model? You might have said before, but I don't think I caught it. JED Quote Link to post Share on other sites
Tank Posted April 1, 2009 Share Posted April 1, 2009 Just so I understand....is this a whole 1/32 kit or is it an upgrade set to the 1/32 Monogram "G" model?You might have said before, but I don't think I caught it. It's an upgrade.....the first pic shows the only kit pieces used. Quote Link to post Share on other sites
Whiskey Posted April 1, 2009 Share Posted April 1, 2009 Oh my god ! Quote Link to post Share on other sites
Cobrahistorian Posted April 1, 2009 Share Posted April 1, 2009 MOTHER!@$&*%!!!!!!! Hate you guys.... makin me go back to 32nd.... Time to break out the razor saw.... In all seriousness, Joseph, it is GORGEOUS! J Quote Link to post Share on other sites
marine4 ever Posted April 1, 2009 Share Posted April 1, 2009 I know its coming but why post today, of all frinking days.Joseph, put me done for one J. Ryans been bitten by the Davenport bug!!!! Floyd that's just beautiful work! Too bad it's not 48 scale! Semper Fi Dan Quote Link to post Share on other sites
Anthony in NZ Posted April 1, 2009 Share Posted April 1, 2009 Wow, thanks for the heads up on this beauty Floyd! Joseph, you rock mate!!!! What an awesome set you have produced.........mmmm how about a twin Huey conversion for the Revell kit?? Seriously though, great pattern making indeed Quote Link to post Share on other sites
Retired GunPilot Posted April 1, 2009 Share Posted April 1, 2009 Just Awesome! I can't wait to get my hands on a kit. I guess we will all be competing on Ebay to buy up all the 1/32nd cobras. Charlie Quote Link to post Share on other sites
BrittMac Posted April 2, 2009 Share Posted April 2, 2009 Just Awesome! I can't wait to get my hands on a kit. I guess we will all be competing on Ebay to buy up all the 1/32nd cobras. Charlie Looks like a great mod. I need to get cracking on some resin ability for real now. As for Ebay.....while at Tyndall I missed out on a 1/32nd kit for $10.......But the show was worth it. I have gotten a couple from ebay for less than $15 so just keep your eyes open. Quote Link to post Share on other sites
11bee Posted April 2, 2009 Share Posted April 2, 2009 Oh my....... This kit looks awesome. I'm not a big fan of seat belts cast into the seat itself but those belts look much, much better than any PE set out there. What a great job. I can't wait to see some more pictures of the parts and hopefully soon, a built up kit. Congrats on this, John Quote Link to post Share on other sites
chopperpilot71 Posted April 2, 2009 Share Posted April 2, 2009 I've been away from the modeling for a while and this just reeled me in.....move over .50 cal rounds, this is a modeling table again.. Joseph, you're a rock star in the modeling world!! Quote Link to post Share on other sites
Floyd S. Werner, Jr. Posted April 2, 2009 Author Share Posted April 2, 2009 Oh my.......This kit looks awesome. I'm not a big fan of seat belts cast into the seat itself but those belts look much, much better than any PE set out there. What a great job. I can't wait to see some more pictures of the parts and hopefully soon, a built up kit. Congrats on this, John And look at each seat, the belts are different from front to back. Not just a copy of one. Floyd Quote Link to post Share on other sites
SuperCobra Posted April 2, 2009 Share Posted April 2, 2009 And look at each seat, the belts are different from front to back. Not just a copy of one.Floyd Heck Floyd look at how the back lap belt drapes over the armor just like if you drug it over on the way out of the aircraft. Can almost hear the crack as the buckle hits the glass window on the adf panel. Makes you want to add HSS scratches to the canopy! Quote Link to post Share on other sites
Joseph Osborn Posted April 2, 2009 Share Posted April 2, 2009 Oh my.......This kit looks awesome. I'm not a big fan of seat belts cast into the seat itself but those belts look much, much better than any PE set out there. What a great job. I can't wait to see some more pictures of the parts and hopefully soon, a built up kit. Congrats on this, John I thought about PE belts, but I never have been able to get PE to naturally drape, even after annealing the brass. I used lead foil for these belts on the master, knowing the whole time that they would be destroyed the first time I molded the seats. If you guys knew how much time I spent on those seats... What you can't see in these photos is the A/C ducts that run from the back cushion to the bottom cushion. They are only visible if you look straight into the seat from the front. Almost all the masters for the various parts are done. I'm just fine-tuning some of them prior to molding. The skids are the biggest change to the kit-- they dramatically change the way the kit sits. Here's a photo of my AH-1J mule wearing the new skid masters: The set will include a boatload of resin, some photo-etched brass, decals, and optionally, a well-known vac-form canopy. I wish I could tell you how much it will cost, but I still haven't been able to calculate the material cost. It's going to cost as little as possible. Thanks very much for all the kind remarks, dear friends Quote Link to post Share on other sites
Whiskey Posted April 2, 2009 Share Posted April 2, 2009 I can hear the music playing in the background now " hallelujah.............. hallelujah...........hallelujah, hallelujah, hallelujah!!!!!!!" Quote Link to post Share on other sites
otis252 Posted April 2, 2009 Share Posted April 2, 2009 Dude that is beautiful work. Wonder if those seats might be sold seperatly, would they work in the 35th scale Whiskey. Slight difference in scale, but.... Chuck Quote Link to post Share on other sites
Floyd S. Werner, Jr. Posted April 2, 2009 Author Share Posted April 2, 2009 Did I mention that the left pedal says Bell and the right one says Cobra just like the real thing? Anal I tell you. LOL Insane, but in a good way. LOL Floyd Quote Link to post Share on other sites
Tank Posted April 2, 2009 Share Posted April 2, 2009 Did I mention that the left pedal says Bell and the right one says Cobra just like the real thing? Anal I tell you. LOL Insane, but in a good way. LOLFloyd Speaking of which..."There are decals for the instrument panels". Just going to throw this out there as an idea for getting real fine detail. Archer Dry Transfers has a line of instrument gauges for varies vehicles in 1/35 scale. I have used them for a M-29C Weasel. http://www.archertransfers.com/AR35230.html http://www.amps-armor.org/ampssite/reviews...516&Type=FB Maybe a partnership for this endeavor, again only an idea. Quote Link to post Share on other sites
Cobrahistorian Posted April 2, 2009 Share Posted April 2, 2009 Ok, so I'm going to do this. When will it be available? Quote Link to post Share on other sites
Floyd S. Werner, Jr. Posted April 2, 2009 Author Share Posted April 2, 2009 Speaking of which..."There are decals for the instrument panels". Just going to throw this out there as an idea for getting real fine detail. Archer Dry Transfers has a line of instrument gauges for varies vehicles in 1/35 scale. I have used them for a M-29C Weasel. http://www.archertransfers.com/AR35230.html http://www.amps-armor.org/ampssite/reviews...516&Type=FB Maybe a partnership for this endeavor, again only an idea. Trust me Joseph's decals are a match for Archers anyday. Should add a nice touch to the instrument panels. Floyd Quote Link to post Share on other sites
11bee Posted April 3, 2009 Share Posted April 3, 2009 (edited) I'm really getting interested in this kit. I think the cockpit is the best looking aftermarket resin that I have ever seen. I'd love to see a series of cockpits for some of the 1/35th helos out there. Anyway, I just have a few questions - Will the kit come with a toilet bowl exhaust? I don't know much about the Werner Wing's canopy. Can it be opened up or is it a one piece rig? What kind of kit is the Revel AH-1G? I've never seen one. Raised panel lines or recessed? How is the detail on the fuselage? What are the new skids made of? I'm a bit skeptical of the ability of resin to bear any kind of weight. Regards, John Edited April 3, 2009 by 11bee Quote Link to post Share on other sites
Joseph Osborn Posted April 3, 2009 Share Posted April 3, 2009 I'm really getting interested in this kit. I think the cockpit is the best looking aftermarket resin that I have ever seen. I'd love to see a series of cockpits for some of the 1/35th helos out there.Anyway, I just have a few questions - Will the kit come with a toilet bowl exhaust? I don't know much about the Werner Wing's canopy. Can it be opened up or is it a one piece rig? What kind of kit is the Revel AH-1G? I've never seen one. Raised panel lines or recessed? How is the detail on the fuselage? What are the new skids made of? I'm a bit skeptical of the ability of resin to bear any kind of weight. Regards, John Yes, it'll have the toilet bowl plus several other optional parts like APR-39 and wire strike kit components. The vac canopy is formed in one piece and can be cut open. It's so clear that it doesn't obscure the interior if it's left closed. A closed canopy keeps the dust out of the details The Revell AH-1G is perfectly proportioned and really only has a few bad points, namely the sparse interior and some dopey details like a removable engine panel. It has mostly raised surface detail, with some recessed panel lines. The rivets are great. There are several fuselage panels that are missing, but these various panels will be provided in the conversion in PE brass. The new skids are resin with florist wire embedded in the crosstubes and skids. The attachment to the fuselage is via the rectangular sockets used by the kit's skids. The wire is really overkill. At some point I will experiment with tooling resin to see if the wires can be omitted. When properly post-cured, a good industrial resin will easily bear the weight of the model. Hope this answers your questions and feel free to ask any more! Joseph Quote Link to post Share on other sites

Recommended Posts
Join the conversation
You can post now and register later. If you have an account, sign in now to post with your account.