spejic Posted September 5, 2014 Share Posted September 5, 2014 Starting another model even though I'm doing other group build models is probably stupid, but I can't help it. I had the original tooling of the T-4, but its fit problems defeated me years ago and while cleaning my apartment last month I threw it away. A week later I was visiting the localish model store and by coincidence they had new tool T-4 kits on sale. So I got one. And I can't stop working on it. So I might as well document it here. Here is what it looked like in the box. It comes with decals for most squadrons that fly the type, but some of the emblems are incorrectly sized. I'm not sure which markings I will pick yet. Quote Link to post Share on other sites
spejic Posted September 5, 2014 Author Share Posted September 5, 2014 The first meaningful thing I did was to expand the length of the intakes with some Milliput. Most of the shaping was done with a paintbrush handle and water. I glued the halves and finished with a little more Milliput and sanding with needle files. I also cut out a shallow mortise for a rectangle card of plastic. The part of the model behind this isn't totally solid, so I need to put a backing there to keep people from looking into the intake and seeing out the main gear landing bay. I also added detail to the area behind the rear seat in the cockpit. Next are the ejection seats. They need lots of work. Quote Link to post Share on other sites
spejic Posted September 8, 2014 Author Share Posted September 8, 2014 Here's the end result of my work on the seats. I sanded down the side to the cushion, and then cut back the rear of the seats. I also cut out the sides of the headrest to the level of the cushion, and I sawed into the bottom base of the back cushion to create the cushion cutouts. I then filled in the back (which has a hollow that could be seen in the finished model) and added all the appropriate detail. The front seat (on the right) should fit even though it has a large structure on top, but I think the rear seat might have trouble fitting under the canopy. I'll find out when the aircraft is more built. I also found that the kit instrument panel parts are very undersized. I made new ones. Quote Link to post Share on other sites
arnobiz Posted September 8, 2014 Share Posted September 8, 2014 Very nice scratch building, thanks for the detailed pictures. Looking forward to seeing your cockpit finished! Arnaud Quote Link to post Share on other sites
spejic Posted October 8, 2014 Author Share Posted October 8, 2014 I put the major parts together and finished the basic construction and painting of the cockpit. That took a while because the tub is too narrow and it took repeated painting/filling cycles to get the interior smooth. Were I to do this again, I would glue 0.10' plastic on both sides of the tub and then sand to fit it in the nose. I also put in the cockpit decals. The instrument panel decals have a border printed on them - that needs to be cut off or else it looks terrible. The fit is generally excellent - the wings didn't need any putty at all and the spine only needed a little. Just glue things a bit at a time. One of the exhaust fittings fit perfectly and the other needed a bunch of filler. I still need a little paint work on the intakes before I can install them. The cockpit decals look a little flat - my idea is to glue some detail items on top of them to give the cockpit a little depth. Here are throttle controls I just made, sized to fit on the drawings of throttles on the decals. I also made a HUD control box and will probably add some bezels on the larger instrument displays. The seats are painted, but I need to add belts and details. Quote Link to post Share on other sites
Ichitoe Posted October 27, 2014 Share Posted October 27, 2014 Nice detailing work! Mike Quote Link to post Share on other sites
spejic Posted November 13, 2014 Author Share Posted November 13, 2014 I experimented with various techniques for adding detail to the seats and most of them failed, so this took a while. That looks rougher than in real life. I might touch some of that up. I also installed the intakes. With very careful fitting this can be done with almost no gaps. I painted the area between the intake and the fuselage before installing because it is too tight for airbrush spray to get in there after. I then did the puttying for the main landing gear bays. If you are building this kit, think about the gaps in the bay before installing the bottom plate - there is nothing to support any putty you put in there. You should add in some sort of internal shelf for later adding plastic card or putty. The way I built the intakes made the front easy, but for the aft gaps I had to run plastic rod through them all the way to the rear end of the kit. I need to add a few more details to the cockpit before I can close it up and actually paint the thing. Quote Link to post Share on other sites
spejic Posted November 14, 2014 Author Share Posted November 14, 2014 And here's what the cockpit looks like now. The throttles were drybrushed to make them stand out. I also added a HUD control box. I did have to sand the bottom of the rear seat so it clears the canopy. I probably should have measured and sanded it before I painted and added finicky details to it. Typical spejic. I just used the kit HUD straight. The real thing is one of those complicated "two glass panes held together with a lattice of thin metal bars" jobs, and I don't feel like taking a week to scratch build one. Hopefully everyone will be looking at those red seats. The intakes took a little putty on top, as you can see, but it didn't need any on the sides and underneath. As I said, it took a great amount of dry fitting and sanding of the glue points to bring it to that point, but after you do that it's great. It's the story of the whole kit. Quote Link to post Share on other sites
Tom G Posted November 15, 2014 Share Posted November 15, 2014 Wow, nice scratchbuilding. Your cockpit looks great. The seats look a whole lot better with the added detail. Looking forward to seeing how the rest of the build goes. Tom Quote Link to post Share on other sites
White Wolf Posted November 16, 2014 Share Posted November 16, 2014 Love the detailing on the seats! Quote Link to post Share on other sites
spejic Posted December 16, 2014 Author Share Posted December 16, 2014 I rescribed the panel lines and rivet holes on the upper fuselage and intakes and on the bottom of the engine nacelles. The panel lines in those locations were very shallow or were destroyed by sanding. Some needed to be modified as well. I used Mike J. Idacavage's trick of using a sewing needle tip for one of the probes. The rest of probes and antennas and a vent were replaced by plastic card. I added the backup compasses to the tops of the instrument panels with wire sticking out the back to represent the wire sticking out the back of those things. I also realized I put the throttles in backwards so I pried them out and reglued them so the handles are in the idle position. I had lots of trouble with dipping the canopy in Future. I had to redo it multiple times, which slowed me down a lot. But I should have it glued in and be done painting in a few days. Quote Link to post Share on other sites
spejic Posted December 28, 2014 Author Share Posted December 28, 2014 After multiple coats of Model Master Light Ghost Grey acrylic over multiple days, it's just about painted, with a few places around the canopy and on the bottom I still need to fix (How does fuzzy dust land on the bottom? It makes no sense.). At least the paint showed that my rescribing and re-riveting work was good. The first painting showed that the kit nose probe was terrible and not salvageable. I made a new one by stretching a 0.20 inch rod to create a thin section and dipping the end in paint to create the thick bit at the end. The exhausts were painted flat black with some copper pigment powder mixed in to give it the kind of shine the originals have. Never tried that before, but it worked great. Went through the airbrush without a problem. I'm trying hard to get it done by Jan 1. That will probably mean not having correct drying time for the clear coats. It's not the first time I did that. My bigger concern is the panel line wash - I'm not good at that, and this kit absolutely deserves it. I'll be experimenting on a well-done model with time pressure. Quote Link to post Share on other sites
White Wolf Posted December 29, 2014 Share Posted December 29, 2014 Gonna try that trick with the exhausts some time. I wonder if one could get the same effect by brushing the pigments after painting them instead of mixing it with the paint. Quote Link to post Share on other sites
spejic Posted December 30, 2014 Author Share Posted December 30, 2014 I did the orange tips and the black anti-glare panel. I finished the touch-ups, although there is still a section of the canopy edge I'm not happy with. I'm also working on the landing gear - some of the sections are far over-thick and need to be replaced. I think it will take me a few days past Jan 1 to finish. Gonna try that trick with the exhausts some time. I wonder if one could get the same effect by brushing the pigments after painting them instead of mixing it with the paint. Probably, but I always have trouble with evenness when I brush dry pigments. And you just want a little. Quote Link to post Share on other sites
spejic Posted January 10, 2015 Author Share Posted January 10, 2015 Still working. It took a while to paint all the white parts, and then to fix all the leaks and overspray from that. But it's finally all done. I will wait a few days for everything to dry and then do the gloss coat. The inset shows the scratchwork I did on the landing gear and the original over-thick kit part. Quote Link to post Share on other sites
spejic Posted January 15, 2015 Author Share Posted January 15, 2015 I've finished brushing on a coat of Future. I'm going to do the wash before the decals because the kit comes with some big decals that cover a lot of area. But first I need to spend a few days learning how to do a wash right on some test models. Quote Link to post Share on other sites
spejic Posted February 4, 2015 Author Share Posted February 4, 2015 I did the wash. There might be a few touch-up areas here and there, but this took a surprisingly long time and I really want it to be done. I did the wash using watercolor paint and dishwashing detergent and wiped with a nearly dry coffee filter. Some of the panel lines were very shallow (particularly on the bottom plate part) and there's just too many for me to rescribe everything. I'll spray a gloss coat before decaling. Quote Link to post Share on other sites
Tom G Posted February 5, 2015 Share Posted February 5, 2015 It's coming along nicely. The wash really brings out the panels. Nice work. Tom Quote Link to post Share on other sites
White Wolf Posted February 6, 2015 Share Posted February 6, 2015 Coming along nicely. I find that I always have to do some pre-scribing when it comes to Hasegawa kits in order to get a decent amount of wash in afterwards. Quote Link to post Share on other sites
spejic Posted February 14, 2015 Author Share Posted February 14, 2015 After three days of looking for the instructions and one day of decaling. The trickiest one was the red stripe that goes under and between the engine humps. I've had a rough idea of which particular aircraft to do, but I guess I have to pick now. Quote Link to post Share on other sites
Kingoalie Posted February 14, 2015 Share Posted February 14, 2015 That looks great! Quote Link to post Share on other sites
arnobiz Posted February 14, 2015 Share Posted February 14, 2015 Looks fantastic, now just get these hanumarus the MicroSol treatment they deserve ;) Arnaud Quote Link to post Share on other sites
spejic Posted February 16, 2015 Author Share Posted February 16, 2015 The kit gives you enough numbers for most T-4 aircraft, but it's a real pain to install 20 decals all perfectly in line. It does give you premade number sets for an aircraft in a training squadron, but I decided to make one from from 305 Squadron (an F-15 squadron, but all Japanese squadrons have T-4's for utility and training purposes). Well, in a stroke of luck 06-5643 was transferred to 305 Sq. sometime between when the kit was released and 2012, so my decalling operation was much, much easier. I lost a "No Step" decal somewhere, but because I didn't install the fuel tanks I stole a decal that would have gone there. The decals are done. I painted the little probe black because I just noticed that they are black in photos. I also figured out why the nose gear wasn't fitting - that's fixed and it should be glued in soon. I'll wait a bit for everything to dry and give it a coat of Future. I've been poking holes in any rivet hole covered by a decal with a toothpick so the Future should get the decal down into those. Unfortunately, the Future coat I placed before installing the decals wasn't enough - the water from the decals lifted the panel line wash in places and made things look a little dirty, especially on the wings. That's how you learn, I guess. Quote Link to post Share on other sites
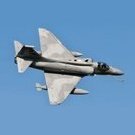
spejic Posted April 7, 2015 Author Share Posted April 7, 2015 Finally done. Since the last time I installed the final parts (like landing gear doors) and did the final detail painting. The landing lights were clear parts - I painted the backs bright silver and then white and they ended up looking great. A coat of Future and dull wasn't enough to hide the thick Hasegawa decals, so I practically drenched this in MM Acryl Flat. It helped, and also did a lot to hide the extra dirt left over from the less-than-perfect panel line wash, but it did fade the black markings a bit. I had to use a toothpick dipped in alcohol to clean up the canopy lines. I never get those right. Quote Link to post Share on other sites
Tom G Posted April 7, 2015 Share Posted April 7, 2015 Excellent work! Way to stick with it. The panel wash really makes it pop. Congrats on a fine build. Tom Quote Link to post Share on other sites

Recommended Posts
Join the conversation
You can post now and register later. If you have an account, sign in now to post with your account.