Ruud Posted December 13, 2014 Share Posted December 13, 2014 Darn, too bad about the Hasy fit of the CTFs on the Tamiya Viper. The Hasy CTFs fit the Revell Viper alright (luckily for me). What a difference between the Kinetic and Hasy CTFs! Quote Link to post Share on other sites
JackMan Posted December 14, 2014 Share Posted December 14, 2014 Fantastic build! I'm taking notes because I'm planning to do the exact same thing ( Hasegawa F-16E + Tamiya F-16CJ ). By the way, I don't know if it's just me but some of your pictures seem to be missing ( post #4 & post #24). It would be good if I could see them because they might be useful for my build. Quote Link to post Share on other sites
polar bear Posted December 15, 2014 Author Share Posted December 15, 2014 (edited) Hi Jackman, I 've fixed the pictures at hosting web. Hope they show up. I use Deluxe Putty to fill the gaps. It is easily wiped off the excess with soaked cotton swab. I added small vents the right side of fuselage. this one is near the rudder. I think this scope/vent is the reason Tamiya has separate part for this panel. may be Tamiya would release Block60 I the future. But before that, please launch two seater. The ventral one that Tamiya forget. Edited December 15, 2014 by polar bear Quote Link to post Share on other sites
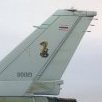
polar bear Posted December 15, 2014 Author Share Posted December 15, 2014 Formation light Original F-16s do not have any formation light. But UAE F-16s are equipped with combined slime and IR formation lights. Hasegawa provides decals for these lights. I substitute them with thin plastic sheets. at the dorsal: over the wings: under the wings, two per side: my reference showed a L- shape plate just after the nose landing bay. Hasegawa provides decal for it. I think it is a formation light as well. I replicated with vinyl sticker. Quote Link to post Share on other sites
JackMan Posted December 15, 2014 Share Posted December 15, 2014 Great attention to detail! Good work! And thanks for fixing the pics Quote Link to post Share on other sites
polar bear Posted January 3, 2015 Author Share Posted January 3, 2015 The real charm of CFTs are seals. I replicated the seal using heated stretch sprue glue in place. Seals aqlso helped hiding the nasty gaps and seems betewen CFTs and fuselage. Quote Link to post Share on other sites
nimrod77 Posted January 3, 2015 Share Posted January 3, 2015 Beautiful clean work. Inspiring and informative :clap: Quote Link to post Share on other sites
polar bear Posted February 8, 2015 Author Share Posted February 8, 2015 After distracted by couple projects, I dive back into Block 60 again. Prime and check for any flaw before painting Preshade I never trust Hasegawa painting manual. So, I check the real things online and plan for my own camo pattern. Quote Link to post Share on other sites
Colin K Posted February 8, 2015 Share Posted February 8, 2015 Nice looking build, PB! I have a question. The putty that you used, you mentioned wiping away the excess with a soaked Q-Tip. What did you soak the Q-Tip with, and did you have to do any sanding afterwards? Quote Link to post Share on other sites
polar bear Posted February 8, 2015 Author Share Posted February 8, 2015 Hi Colin, I use 'Deluxe' model putty. Once it is dry (only 1-2 hours), it is easily clean the excess with water, yes, just tap water. The join is quite smooth. But it is not hard enough for scribing over. PB Quote Link to post Share on other sites
boom175 Posted February 9, 2015 Share Posted February 9, 2015 Boy your doing one heck of a job!! Very inspiring! Quote Link to post Share on other sites
nimrod77 Posted February 9, 2015 Share Posted February 9, 2015 Prime and check for any flaw before painting What primer did you use? Cheers Quote Link to post Share on other sites
polar bear Posted February 9, 2015 Author Share Posted February 9, 2015 (edited) Hi Nimrod, I used GSI Mr.Surfacer 1500. It is medium gray and has fine grain. Once it's dry, it gives a thin smooth surface and does not cover small panel lines and rivets. It is thinned by GSI leveling thinner to consistency of milk. GSI also provides surfacers in many color such as black (good for metallic color) and red brown (like a real Germany AFV primer). Only disadvantage of Mr.Surfacer 1500 is unable to cover some obvious scratch and sanding mark. The 1000-1200 grain cover better but they seem to cover most of details as well. Regards. Edited February 9, 2015 by polar bear Quote Link to post Share on other sites
polar bear Posted March 2, 2015 Author Share Posted March 2, 2015 (edited) painting time! light color after preshading Hasegawa's manual indicates the key colors are Mr.Color C308 and C338. Compare to the real aircraft, The C308 is too light. I use C307 instead. I Also add some Mr.Color Super Stainless Steel into base paint to create HG sheen. More masking and painting to go! Edited July 14, 2015 by polar bear Quote Link to post Share on other sites
polar bear Posted March 4, 2015 Author Share Posted March 4, 2015 (edited) slow update for today. I spent almost a roll of tape for masking. Here are the results; My subject had difference color on CFTs, may be from the material they are made of. Edited March 5, 2015 by polar bear Quote Link to post Share on other sites
ST0RM Posted March 4, 2015 Share Posted March 4, 2015 No photos showed up. Was looking forward to seeing your progress. Quote Link to post Share on other sites
mirage@enthusiast Posted March 4, 2015 Share Posted March 4, 2015 I cant see anything.... could you try to upload the photos again??? I am interested in your job ;) Quote Link to post Share on other sites
polar bear Posted March 5, 2015 Author Share Posted March 5, 2015 (edited) picture reuploaded Edited March 5, 2015 by polar bear Quote Link to post Share on other sites
kurnass77 Posted March 5, 2015 Share Posted March 5, 2015 Damn Nat!!!! I can't still see nothing!!! Gianni Quote Link to post Share on other sites
polar bear Posted March 5, 2015 Author Share Posted March 5, 2015 Quote Link to post Share on other sites
Ruud Posted March 5, 2015 Share Posted March 5, 2015 Great work! Quote Link to post Share on other sites
kurnass77 Posted March 6, 2015 Share Posted March 6, 2015 Nat, this camo look beautiful! I've recently read this book,and to answer at your previous ask,the 99% of the pics show the UAEAF birds in CAP configuration,but one image depict the only deployed F-16F armed with two tanks,and two each AMRAAM,Aim-9 and GBU-12,probably referred to an late war stage. If you're interested,I can send you a PM with the pics. Gianni Quote Link to post Share on other sites
polar bear Posted March 6, 2015 Author Share Posted March 6, 2015 (edited) Nat, this camo look beautiful! I've recently read this book,and to answer at your previous ask,the 99% of the pics show the UAEAF birds in CAP configuration,but one image depict the only deployed F-16F armed with two tanks,and two each AMRAAM,Aim-9 and GBU-12,probably referred to an late war stage. If you're interested,I can send you a PM with the pics. Gianni Hi Gianni, Sure, I am interesting for your offering. Thanks so much. I am planning to build F-16F with PIDS pylon and SNIPER pod in anti-ISIS mission. I have just seen F-16E with SNIPER on 5R but no any bomb under her wings in recent issue of Airforces monthly. So, GBU-12 would be a good choice. N. Edited March 12, 2015 by polar bear Quote Link to post Share on other sites
polar bear Posted March 8, 2015 Author Share Posted March 8, 2015 (edited) Gianni, I got the pictures. They are superb and very inspire fro my next project. Thanks. Back to Desert Viper, next is panel wash and some weathering. I think she is still clean. I 'll try more weathering. P.S. I really love the way Tamiya produce their model. After weathering you can see every rivets show up! Edited March 8, 2015 by polar bear Quote Link to post Share on other sites
ST0RM Posted March 9, 2015 Share Posted March 9, 2015 Much nicer to see the pictures. Excellent work! Really inspiring. Is that book you all mentioned worth the purchase or just rehashing AP photos into one source?? Thanks! Jeff Quote Link to post Share on other sites

Recommended Posts
Join the conversation
You can post now and register later. If you have an account, sign in now to post with your account.