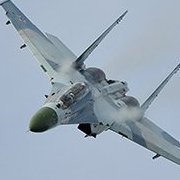
Sebastijan Posted April 20, 2015 Share Posted April 20, 2015 (edited) So my TIEs are finally completed and it's time to start this bird! As I've said before, I'll be building a Hornet, that I had a pleasure to see and shoot at (with my N-ikon) at Axalp in 2009! Will start building her tomorrow, so no in progress photos as of yet, but here's a photo of what I'll be using for this build. And one of the pics I took of this bird Edited April 20, 2015 by Sebastijan Quote Link to post Share on other sites
tobiK Posted April 20, 2015 Share Posted April 20, 2015 Amazing shot! Look forward to see your swiss Hornet growing! Quote Link to post Share on other sites
MiG-Mech Posted April 20, 2015 Share Posted April 20, 2015 Hi! I fear, the decals are designed for the Hasegawa Hornet. Quote Link to post Share on other sites
Sebastijan Posted April 20, 2015 Author Share Posted April 20, 2015 Thanks for the heads up, MiG-Mech. I just checked the sizes and it appears that decals are a tiny bit taller than the plastic, maybe 0.5mm or so, while the leading edge and trailing edge match up. Shouldn't be a problem in the end, I think... Quote Link to post Share on other sites
Crazy Snap Captain Posted April 21, 2015 Share Posted April 21, 2015 Welcome Sebastijan! Looking forward to your Swiss Tiger! Quote Link to post Share on other sites
Mike J. Idacavage Posted April 25, 2015 Share Posted April 25, 2015 Fantastic Sebastijan! It is great to see your build starting up in the GB. It will be cool to see your Academy build compared to my Hasegawa version. We should met half way and photograph them together! :lol:/> I think it is very cool that you have seen the actual Hornet at an Air Show, can't get a better reference than that! Have fun modeling Mike :cheers:/> Quote Link to post Share on other sites
MiG-Mech Posted April 25, 2015 Share Posted April 25, 2015 Thanks for the heads up, MiG-Mech. I just checked the sizes and it appears that decals are a tiny bit taller than the plastic, maybe 0.5mm or so, while the leading edge and trailing edge match up. Shouldn't be a problem in the end, I think... Okay, so I hope it will work out. :) Quote Link to post Share on other sites
Sebastijan Posted April 26, 2015 Author Share Posted April 26, 2015 Mike, I think that would be somewhere in the middle of Atlantic :D But anyhow thanks for the encouraing words. Quote Link to post Share on other sites
Sebastijan Posted May 5, 2015 Author Share Posted May 5, 2015 not much too show (as I am not allowed), but here's one pic of cockpit finished (seat still needs to get a flat coat). I am in the process of closing up fuselage now. Quote Link to post Share on other sites
Thadeus Posted May 6, 2015 Share Posted May 6, 2015 That Eduard PE realy makes the seat and the cockpit look better. Can't wait for some more of Your updates :) I have a feeling this will be a very nice Hornet ;) There's one thing though, if You want it. I've noticed, that on completed Academy Hornet models the ejection seat sits much too low. The top of the headrest should almost reach all the way up to the canopy. I always add some plastic under the seat, and install it after the model is pretty much assembled, so I can check it against the canopy, or lately, as the very last thing left to complete. Cheers! Quote Link to post Share on other sites
Sebastijan Posted May 7, 2015 Author Share Posted May 7, 2015 Thanks Thadeus! I was trying to use Dr Pepper resin full length intakes, but simply there's no place for them inside the fuselage - no instructions are provided and it might be, they were designed for some other kit (Hasegawa?). I also have some fit problems with the nose cone - it simply won't fit as it should and I'll have to sand the area to the shape. Other things are shaping up nicely and I should start cutting wings, soon enough. Thank you for the tip - seat is not fixed yet and I couldn't have noticed the position problem yet. Quote Link to post Share on other sites
Sebastijan Posted May 19, 2015 Author Share Posted May 19, 2015 Not much to see, but the Hornet is finally taking shape now... Hope to get her into paint booth by the end of the week. Quote Link to post Share on other sites
Sebastijan Posted June 11, 2015 Author Share Posted June 11, 2015 Not as much modelling time as I would have liked but I just crossed a major milestone with this project. As the decals were designed for Hasegawa bug, I expected some irregular fit. Inner decals were a tad too long and had to be trimmed at the bottom by around 1mm while the outer ones are a tad too short, but I'll have to live with that. I am very happy that one piece decal, after some persuading with hairdryer, conformed well to all the details sticking out of Hornet's tails. Now off to apply a gazillion No Step stencils :D Quote Link to post Share on other sites
Crazy Snap Captain Posted June 12, 2015 Share Posted June 12, 2015 Seb, Looks awesome mate. Great work! Quote Link to post Share on other sites
Mike J. Idacavage Posted June 14, 2015 Share Posted June 14, 2015 Sebastijan This looks outstanding! :thumbsup:/> The tail decals look as good or better than my result on the Hasegawa kit. Well done! I think your Swiss Hornet will look great when finished. Hopefully, you will not have the same problems with some of the stenciling not staying attached to the model that I had. Have fun modeling! Mike :cheers:/> Quote Link to post Share on other sites
Sebastijan Posted June 15, 2015 Author Share Posted June 15, 2015 Well to be honest, I didn't bother to apply all the stenciling. I did on the upper part, but on the lower, the difference between the shades of grey is not contrast enough and if you want to see the stencils, you really have to have a close look. I haven't had any problems with stencils coming off, but I did have to use a bit stronger decal solvent to get rid of the silvering. Quote Link to post Share on other sites
Sebastijan Posted June 17, 2015 Author Share Posted June 17, 2015 Almost there... Clear coat will be applied today, followed by some dry pastel staining and attaching a bunch of small fiddly things... Quote Link to post Share on other sites
tobiK Posted June 17, 2015 Share Posted June 17, 2015 WOW, looks great...hold on to show us a nice finished tiger hornet! Quote Link to post Share on other sites
Thadeus Posted June 17, 2015 Share Posted June 17, 2015 Looks awesome to my eyes :) You're almost there! Quote Link to post Share on other sites
Sebastijan Posted June 21, 2015 Author Share Posted June 21, 2015 And she's finished. Click on the photo for more! Quote Link to post Share on other sites
tobiK Posted June 21, 2015 Share Posted June 21, 2015 WOW, very nice, awesome! fantastičen, dobra! Congrats to flawless Tiger! ...Now let's eat some swiss cheese Quote Link to post Share on other sites
Mike J. Idacavage Posted June 21, 2015 Share Posted June 21, 2015 Fantastic Sebastijan!!!! :thumbsup:/> Your Swiss Hornet looks great! I really like the look of your completed model, well done! You have inspired me to try and get my Swiss Hornet finished by the end of the GB in about a week. It will be close! Have fun modeling Mike :cheers:/> Quote Link to post Share on other sites
Thadeus Posted June 22, 2015 Share Posted June 22, 2015 Your Hornet turned out very nice. Those Swiss markings look very good on a Hornet! Quote Link to post Share on other sites
Sebastijan Posted June 22, 2015 Author Share Posted June 22, 2015 thanks guys! Mike, can't wait to see yours finished! Quote Link to post Share on other sites
Crazy Snap Captain Posted June 25, 2015 Share Posted June 25, 2015 Stunning job Seb. Well done. Quote Link to post Share on other sites

Recommended Posts
Join the conversation
You can post now and register later. If you have an account, sign in now to post with your account.