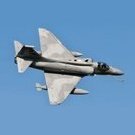
spejic Posted July 1, 2015 Share Posted July 1, 2015 The AF-1B Falcão is the result of the Embraer update program for Brazil's AF-1 Skyhawks. Externally the aircraft gain a radar, digital cockpit, a slightly different paint scheme, big antennas, and new bumps (especially near the nose). The first aircraft (N-1001) was delivered just a month ago and 11 more aircraft are being updated. N-1001 doesn't have guns now - I'm not sure if this is a permanent change. Here are the parts in their current state: I bought a Fujimi A-4M kit but it came with the A-4KU sprue (it had a plain, squared off tail). I was originally going to build it as a A-4M, so you may notice I de-KU'd the tail in the kit. I kept the bit I cut off so it will be easy to restore. Before the group build started I constructed the wings, put in the airbrakes, and did a little work on the cockpit. Quote Link to post Share on other sites
spejic Posted July 5, 2015 Author Share Posted July 5, 2015 I had already created an extended exhaust for the other Skyhawk (on the left), so my first task is to do the same for this one (on the right). I based the size on the kit part from the Hasegawa 1/48 kit. I also made some simplistic fan blade details for both. They won't be visible, but they are needed to force the ends of these tubes into a circle (as a curved sheet of flat plastic doesn't really want to by itself). The bracing piece of plastic is sanded down so this structure can be inserted in the fuselage after the halves are glued together. Quote Link to post Share on other sites
pollie Posted July 11, 2015 Share Posted July 11, 2015 Nice work on that exhaust! Quote Link to post Share on other sites
spejic Posted July 12, 2015 Author Share Posted July 12, 2015 I cleaned up the pylons and glued in the center pylons so I can rest the wings right-side up without hurting the slat braces. I put in the prominent hydraulic lines in the landing gear bays. The inset shows the instrument panel I modified for the AF-1B - I'm working on the decals now, and the cockpits won't be built until I finish them. I sawed in notches in the pylons where the anti-sway bars will go. I based the locations on scale drawings, not the marks put there by Fujimi because those were in the wrong place. Building two models is faster because you know what to do, but it sure gets annoying when you are doing the same thing 10 times. The front gear bay is really shallow and flat and lacks detail, so I did some work on it. I deepened the front part and made the appropriate shapes and added the one prominent pipe. Further details will be added after it is installed and painted. I am going to clean up the landing gear parts next. Quote Link to post Share on other sites
SERNAK Posted July 13, 2015 Share Posted July 13, 2015 Looks like a promising build!!! Will be watching it!!! Quote Link to post Share on other sites
spejic Posted July 22, 2015 Author Share Posted July 22, 2015 Some more minor detail work, although it took a while to do. I filled in the holes in the flaps, leaving a square for where the spoiler piston goes. It's a bit tricky because the left flap holes aren't the same size as the right flap holes for whatever reason. I also changed the shape and depth of the vent in the humps. The various antennas and bumps will go on much later. Quote Link to post Share on other sites
Holtsberry Hobbiest Posted July 22, 2015 Share Posted July 22, 2015 (edited) Its amazing how much time during a full build is really spent doing this kind of detail work, and then it takes 10 seconds to actually connecting the wings and fuselage together. Looking forward to seeing it all come together! Edited July 22, 2015 by Holtsberry Hobbiest Quote Link to post Share on other sites
RKic Posted July 29, 2015 Share Posted July 29, 2015 How did you fashion the dorsal vent pieces and fare them into the kit parts? Quote Link to post Share on other sites
spejic Posted July 29, 2015 Author Share Posted July 29, 2015 How did you fashion the dorsal vent pieces and fare them into the kit parts? The kit has a shallow and too-wide vent. I drilled a hole in the middle of it and expanded it with a little carving, a little sawing with a photo-etched saw, but mostly a square jeweler's file. I did the width of the old vent (knowing I would narrow it with some side pieces) and lengthened it forward nearly to the panel line. I put in the side pieces first, then the piece in the front and last the angled part in back. That angled part is actually curved, so I pre-curved it a bit before gluing it in. All of these parts were glued in with a little sticking out at the top so I could sand it all flush and neat. Quote Link to post Share on other sites
spejic Posted August 1, 2015 Author Share Posted August 1, 2015 I mostly finished the cockpit parts using lots of modifications and homemade decals. It looks great in real life, but it looks really rough in the photo. I might have to go back and fix a few things. I still need the throttle controls. The control sticks are painted, but installing the modified cockpits will require some handling and filling so I don't want delicate things in the way until that's all done. The rear fuselage has been glued to the wings. One kit went together perfectly, the other was a pain to get the tail square to the wings. Not sure why. Quote Link to post Share on other sites
spejic Posted August 25, 2015 Author Share Posted August 25, 2015 I did the major work on the rear fuselage (the pylons took an exceptional amount of effort to properly install and square off). I added some length to the tail to make it correct. It's a little hard to tell, but I replaced all the light elements in the wing tips with clear or tinted clear plastic. That might not have been worth the effort. Currently working on the nose section. I have it glued up but there's a lot of detail work to do. You can see the positioning work I did on the cockpit (the seat back should be even with that diagonal panel line, but I don't think the line is in the right place - I based it instead on the relative locations in the Hasegawa 1/48 kit). The padding is foil from a bottle of Martinelli's Sparkling Cider. (I wish I had big enough pieces of that for some helicopter interiors I want to do). Argentinian Skyhawks don't seem to have quilted padding so it's only in this model. I also shaped the nose. Now that the main parts exist I temporarily taped it together and found out that one weight in the nose is not enough. I glued in another one to the back of the cockpit. I don't recall it being so tail heavy last time I built one, but that was a long time ago. Quote Link to post Share on other sites
spejic Posted September 3, 2015 Author Share Posted September 3, 2015 Almost all the main components are together. I'm still working on the intakes - I added Milliput to the inside to give it rounder shape. I might redo that starboard blue light. I only had light blue plastic, but it should be a really dark blue. Quote Link to post Share on other sites
spejic Posted October 4, 2015 Author Share Posted October 4, 2015 Here's where I am currently. I've been doing tons of work and don't have a lot to show for it. I've added the instrument panel cowl using thin metal and some details in that space. I also installed many of the antennas. The seat is nearly done and should be installed soon. I added detail to the location of the main landing gear. I'll add more details where the gear support touches the model - those parts are already created and just waiting for the installation of the main gear. I want to get rid of the feeling of the gear just sticking out of a flat surface. I also installed the flare covers and whatever the bump is near the exhaust. There are two faceted antennas that I didn't install yet - I'm still trying to decide whether to use flat plastic or try to replicate the faceting. I'm also working on the large bumps near the nose (you can see my masking tape attempt to match the shapes in the photo above). It is a very unusual shape - I'm still not sure how to replicate it. Here's what it looks like: I already created that slightly raised detail with the hole below the "01", but I haven't glued it in yet. Quote Link to post Share on other sites
kurnass77 Posted October 5, 2015 Share Posted October 5, 2015 spejic, youo're building two beautiful planes! About the nose bulges,look like the formation light ( in shape ) on a F-16's air intake;if you neded them I've some extra parts from my RoG F-16s that I can send you,letme know if you're interested. Gianni Quote Link to post Share on other sites
spejic Posted October 5, 2015 Author Share Posted October 5, 2015 spejic, youo're building two beautiful planes! About the nose bulges,look like the formation light ( in shape ) on a F-16's air intake;if you neded them I've some extra parts from my RoG F-16s that I can send you,letme know if you're interested. The actual teardrop antenna is something I can scratchbuild easily. It's the area around it that is tricky. I can use Tamiya epoxy putty or Milliput, but it won't be easy getting the two sides to look the same. Quote Link to post Share on other sites
kurnass77 Posted October 5, 2015 Share Posted October 5, 2015 Ah,ok! Well,I will use plasticard:for the bigger plate probably a 0,15 mm sheet and for the intermediate plate,immediately under the taerdrop one,i will use maybe a 0,50mm sheet;now the good of using plasticard is that you can sand it down to reduce tickness and adjust the shape.I used this trick many time even in the build for this GB. To ease the scratch on both sides,you can first draw and create a template to cut the initial shape from the plasticard sheets,and after start with the aforementioned trick,just my two cent! Gianni Quote Link to post Share on other sites
spejic Posted October 25, 2015 Author Share Posted October 25, 2015 Here's what I ended up doing for the radar warning receiver. First I made scale drawings of the whole structure on my computer (which was a bit of a guess because it's curved) and printed it out so I could make consistently sized parts. I cut a copy of the largest plate in 0.010' plastic which I then sanded thinner. I made 4 copies of the plate under the receiver itself. The first two were glued onto the base plate with spacers to get the right height and angle. Because the base and the top were defined, it was easy to create a curved shape between them and be consistent on both sides of the aircraft. I did that with two-part Tamiya putty, which I shaped into the proper dome shape right up to the top of the receiver plate, making a dome with a receiver-shaped flat area on top. Once that was dried and further sanded to shape, I glued on the other two receiver plates to get that edge to it. Finally I glued on the receivers themselves, which I carved from plastic rod (that was a major pain). I will shape the receivers a bit more now that they are glued onto something and won't go flying off my tweezers (as many of their brothers did). So, now that I'm done with the nose, why didn't I install the refueling probe? Because I have an interesting plan in place: I'm going to make a resin mold of the nose. Quote Link to post Share on other sites
SERNAK Posted October 26, 2015 Share Posted October 26, 2015 It's coming along very nicely!!! Keep it up!!! Quote Link to post Share on other sites
K5054NZ Posted October 27, 2015 Share Posted October 27, 2015 I'm going to make a resin mold of the nose. I'm glad to read that, as I have a real soft spot for "modernised" Skyhawks. This is a great build and I'm excited to see your next progress update. For now, though, I'm off to research the AF-1B. Very cool! Quote Link to post Share on other sites
spejic Posted October 30, 2015 Author Share Posted October 30, 2015 I did the painting for the intakes. I carefully masked the outline internally and filled the center with latex makeup foam cut to shape. I slowly painted in very light mists to prevent paint buildup and bleeding. I'm guessing that the top color of the aircraft is Dark Ghost Grey. I also painted the backs of the intakes and the sides of the fuselage because once the intakes are installed there's no way airbushed paint will get in the gap. I did the same for my Argentinian Skyhawk, except that involved different colors for each side. I also painted the nose to see what work needs to be done there. Still have a few small things to fill. That vent on top was added - I chiseled out the flat and the back and then I added plastic to the sides and sanded it flush. Quote Link to post Share on other sites
kurnass77 Posted October 30, 2015 Share Posted October 30, 2015 Mate, from this shot the new EW bumps looks very very good! Like also the modified air intake,I think to use your tip for my next one. With the new extra room,do you think to drill on the right intake the IFR light? A very unseen detail in the 1/72 Scooter. Gianni Quote Link to post Share on other sites
spejic Posted October 30, 2015 Author Share Posted October 30, 2015 With the new extra room,do you think to drill on the right intake the IFR light? A very unseen detail in the 1/72 Scooter. I was thinking I'd just put in a little black mark (either decal or with a technical pen) after painting. In every photo it looks just like a little black dot. Quote Link to post Share on other sites
SERNAK Posted October 30, 2015 Share Posted October 30, 2015 Nice work on those EWs!!!! Quote Link to post Share on other sites
spejic Posted October 31, 2015 Author Share Posted October 31, 2015 Oh, man the fit on the intakes is terrible. On one side it sticks out, on the other it sticks in and I had to use a shim. And both are too narrow in the vertical direction. Lots of work needed. Quote Link to post Share on other sites
kurnass77 Posted November 1, 2015 Share Posted November 1, 2015 I feel your pain my friend,mine also have this problem and in fact was one of the area that I worked hard with the melted sprue,this facilitated my rescribig step. Gianni Quote Link to post Share on other sites

Recommended Posts
Join the conversation
You can post now and register later. If you have an account, sign in now to post with your account.