haneto Posted April 15, 2018 Share Posted April 15, 2018 (edited) Hi mates So long time no WIP thread since the ICM MiG-25RBT (yes I will finish it since I've got myself the amazing Amigo model resin nozzles), I'd like to start this thread to build a kit which was researched/designed by myself, as one of the development team members together with Gabor. This is the THIRD time I build this kit, but the first time to paint it. And I will build it as a modeller, not a developer to show all the tips you need to pay attention ahead, to make your all building much easier and more straight forward. Here we go with the upper fuselage part A3. First you need to add some putty to the 2 sides of nose where slight shrinkage could be found, because of the thick plastic with install pin holes there. Mask the rivets/details around to protect surrounded details from sending. The camera alike thing needs to be added since front part was obmit due to injection mold limitation. The rear edge of wings is way too thick. Be sure to thin it. Edited April 15, 2018 by haneto Quote Link to post Share on other sites
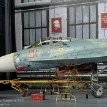
haneto Posted April 15, 2018 Author Share Posted April 15, 2018 (edited) Now we are meeting the most headache part in the whole built. The nozzle padel ring part F2 is too big to meet the engine pods. I have no idea why this happened since I had no problem when assembling T1 version. I guess the tool factory added more details which increased the F2 part diameter. But of course it is NOT UNBUILDABLE just with some 10 min extra work. This is my solution. Cut or sand the tail boom edge about 0.3mm (blue mark), both upper and lower fuselage. Then it should be like this. No worry about the hole here since it will be unvisible by nozzle padel part F2. And the F2 part fits much better now. Edited April 15, 2018 by haneto Quote Link to post Share on other sites
haneto Posted April 15, 2018 Author Share Posted April 15, 2018 Now moves to lower fuselage part B3. Some raised panels need to be added. Drill holes ahead too. Diameter 0.7mm for 4 holes on nose, and 1.2mm for 6 holes on lower wings. Quote Link to post Share on other sites
haneto Posted April 15, 2018 Author Share Posted April 15, 2018 (edited) Go on with nozzles. Due to plastic part thickness, the nozzle rotation angle may not be big enough to satisfy us. But again, it could be SOLVED with very simple work. For part F2, sand the inner ring to decrease inner diameter. Cut the first raised ring on part D5 too. I also sanded the inner part of nozzle padels D10/11/12/13 so that the thickness is much improved to add sharpness. Now the parts are so good to replicate the real AL-41F nozzles. Edited April 15, 2018 by haneto Quote Link to post Share on other sites
haneto Posted April 15, 2018 Author Share Posted April 15, 2018 Then the intake/engine pod parts H1 and H2. Nothing special, you just need to cut the front/rear end of install pins by about 0.3mm, and the whole part will fit quite seamless with lower fuselage part B3, almost no gap. Quote Link to post Share on other sites
haneto Posted April 15, 2018 Author Share Posted April 15, 2018 Next is vertical fins. Cut the little fresh inside of part B5. And also cut the install pin inside of part B8. There is a WRONG recessed panel line on part B4 by careless tool cutting. Fill and sand it to flat, add back the rivets. The small intakes fit not too well with vertical fins. Use putty and sand with care. All PLAAF Su-35SK obmit the GPS antennas which are on RusAF Su-35S, so I sand the detail off and add panel lines/rivets here. Attention: this change is ONLY for PLAAF version! Do NOT do this if you are building the Russian one. Quote Link to post Share on other sites
haneto Posted April 15, 2018 Author Share Posted April 15, 2018 Then the cockpit parts. First the K-36D-5 seat. Sorry you have no choice since no other makers ever made this seat especially designed for Su-35 and Su-57 before, plastic or resin, so you have to use GWH plastic parts. But it's quite OK actually with some careful cleaning work, and also add the bulge on 2 sides of headrest. And if you prefer more fun to have the canopy swithing between open/close any time after finish, cut out the area on part C99 to avoid interfere with part C49. Quote Link to post Share on other sites
haneto Posted April 15, 2018 Author Share Posted April 15, 2018 The front slat parts G4/5 and G7/8 need some sanding work and recribing/rivetting. Quote Link to post Share on other sites
haneto Posted April 15, 2018 Author Share Posted April 15, 2018 I added needle tip on top of nosecone part G11, to add sharpness and strength. Quote Link to post Share on other sites
haneto Posted April 15, 2018 Author Share Posted April 15, 2018 Next are weapon part. First the L-265M10 Khibiny-M ECM pods. The lift holes are molded all in the center of upper bulge, but actually the front lift hole is offsite to outer side. I remade the lift holes with 0.3mm brass rod, and open hole on small intake part I2 whicn is only on left ECM pod. There are issue with the cooperation between pylons and missiles I have summarized my solution to simplify your built. Quote Link to post Share on other sites
haneto Posted April 15, 2018 Author Share Posted April 15, 2018 Final is the canopy. As you know in the first limit edition, you have one clear brown sprue to replicate the tint canopy. I send Tamiya 1/48 F-16CJ tint canopy part to factory as their reference to mix the right color. But unfortunately (just as other "expected" issues), the color was too light and they started mass production before obtaining my approval to catch the schedule. So for my own built, I decide to "tint" the canopy my self. I also used Future wax to improve the clear parts. Really super impressive! I coated the canopy by Gunze Creos Mr Color GX109 clear brown. Just Tamiya F-16 clear part sprue as the standard for color tone. To be continued... Quote Link to post Share on other sites
Laurent Posted April 15, 2018 Share Posted April 15, 2018 I love "pathfinding" build threads where the builder gives workarounds on little issues that almost any kit have. Constructive and didactic approach. Keep up the good work Yufei ! Quote Link to post Share on other sites
mingwin Posted April 15, 2018 Share Posted April 15, 2018 Wow! thank you o much to share all of that with us! Quote Link to post Share on other sites
rom Posted April 15, 2018 Share Posted April 15, 2018 Great work! And very usefull for sure! Quote Link to post Share on other sites
JackMan Posted April 15, 2018 Share Posted April 15, 2018 6 hours ago, Laurent said: I love "pathfinding" build threads where the builder gives workarounds on little issues that almost any kit have. Constructive and didactic approach. Keep up the good work Yufei ! I agree with you! I love those pathfinding build reports too! Quote Link to post Share on other sites
The Dude Posted April 15, 2018 Share Posted April 15, 2018 Thanks Haneto! I'm in the decal stage of this model and noticed a lot of the same minor fit issues you have said. The engine nozzle part is the biggest but like you said I sanded it and was not a big deal to fix as was the other things you pointed out. Over all it has been a pleasure to build so far, I have 2 kits and have on order 2 more that I hope to get here soon! Quote Link to post Share on other sites
ching kuo Posted April 15, 2018 Share Posted April 15, 2018 the Haneto project are extra, to follow without moderation, I follow your progress Quote Link to post Share on other sites
B.Sin Posted April 15, 2018 Share Posted April 15, 2018 10 minutes ago, ching kuo said: the Haneto project are extra, to follow without moderation, I follow your progress WORD. Quote Link to post Share on other sites
Major Walt Posted April 15, 2018 Share Posted April 15, 2018 Fei Chang Hao! Quote Link to post Share on other sites
Mstor Posted April 15, 2018 Share Posted April 15, 2018 I am most grateful for this build. As others have already mentioned, pointing out problem areas and showing solutions is extremely helpful. I have this thread bookmarked for future use. Quote Link to post Share on other sites
nicholassagan Posted April 16, 2018 Share Posted April 16, 2018 NIIIIIIIIIIIIICE Quote Link to post Share on other sites
Aigore Posted April 16, 2018 Share Posted April 16, 2018 Lovely build thread....those small hints and fixes are invaluable! Great work, Haneto! Quote Link to post Share on other sites
keen Posted April 19, 2018 Share Posted April 19, 2018 期待解放军涂装! Looking forward to see the PLAAF scheme! Quote Link to post Share on other sites
haneto Posted May 1, 2018 Author Share Posted May 1, 2018 Thank you all for your encouragements guys! Yes I know these issues should have been fixed before releasing but we have to live in a imperfect world, and we have to face the fact. Fortunately noen of the issues is big deal so with a bit extra patience and dry fit, your build will be very much straight forward and enjoyable. Today is the labor day, a National holiday in China so finally I found some time to update the work. Some additional notes to vertical fin parts since some guys reported the right fin does not fit well with fuselage. I found the mounting slice was a bit too thick which is the main reason for the problem. Just thin 2 sides of the slice a bit and you will be happy. The left fin meanwhile, need no extra work to fit like a glove. Quote Link to post Share on other sites
haneto Posted May 1, 2018 Author Share Posted May 1, 2018 This time I also tried mini magnet to enjoy more weapon configuration in the future. The Su-35S is a multi role fighter so most adaptors have same install structure to fit any missile pylons. Another reason is that I'd lik to enjoy the well researchd and fine details on belly, especially on central pylon mounting points. In order to assur enough holding strength, I added 4 magnetc per pylon. There is no need to add magnets on weapons since almost every Russian missile has its own pylon so you cannot exchange different missiles on different pylons. And you can make your weapon configuration freely at any time going forward! Quote Link to post Share on other sites

Recommended Posts
Join the conversation
You can post now and register later. If you have an account, sign in now to post with your account.