CaptainObvious Posted July 30, 2018 Author Share Posted July 30, 2018 2 hours ago, DIO said: Not a pre-shading guy, but still I think you are heading for an impressive end result. I remain tuned as I like both the subject and your work on it. Cheers, DIO Thanks for dropping in with those kind words DIO! 31 minutes ago, Joel_W said: Captain obvious, You nailed that Camo pattern to a tee. The Back basing looks great. Joel Thanks Joel. I paint under a bright light so I can see where the paint goes. The problem is what appears to be a transparent coat that lets the black basing show through often ends up being too much coverage once viewed with the work light removed. Oh well. I'll polish up the clear coat and start the decaling next. Quote Link to post Share on other sites
Joel_W Posted July 30, 2018 Share Posted July 30, 2018 Capt. Obvious, Looking forward to seeing the decals on. It's always a major step in the build process. Joel Quote Link to post Share on other sites
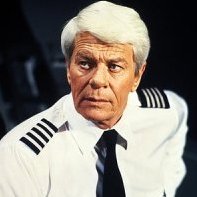
Major Walt Posted July 31, 2018 Share Posted July 31, 2018 Whoah! Those pilots are exquisite! Quote Link to post Share on other sites
Peterpools Posted July 31, 2018 Share Posted July 31, 2018 C.O. Simply Stellar work on the Hunter. The resin AM front office is a tremendous leap in detail and presentation - looks great! The intakes: what a nightmare - fantastic work on whipping them into shape and not following the instruction sequence as I’m sure it would have added hours of hard work. Canopy looks great as well and completely agree, open is the nly way to go. The Hunter looks good all buttoned up and looking forward to the start of the air brush work Kep ‘em comin Peter Quote Link to post Share on other sites
CaptainObvious Posted August 11, 2018 Author Share Posted August 11, 2018 On 7/31/2018 at 7:54 PM, Peterpools said: C.O. Simply Stellar work on the Hunter. The resin AM front office is a tremendous leap in detail and presentation - looks great! The intakes: what a nightmare - fantastic work on whipping them into shape and not following the instruction sequence as I’m sure it would have added hours of hard work. Canopy looks great as well and completely agree, open is the nly way to go. The Hunter looks good all buttoned up and looking forward to the start of the air brush work Kep ‘em comin Peter Thanks for your high praise Peter! -co Quote Link to post Share on other sites
CaptainObvious Posted August 11, 2018 Author Share Posted August 11, 2018 (edited) Hello everyone! Time for another update. This time it's decals. I'm surprised, there's quite a lot of them. The instructions and decal sheet are full of mistakes. For example, the instructions may call for 12 of a stencil but you are only provided 8. The aircraft originally flew for the UK in the 1950s, acquired by Singapore in 1970 and retired in 1992. Refurbished and upgraded many times, most of the stencils have been over painted in real life but I like the busy look so I added what I could. The 140 "Osprey" Squadron's logo depicts the bird's claws over the island of Singapore. The nose art on the port side looks good. However, the starboard decal is simply printed as a mirror image of the port side. I used some inkjet decal paper and printed a correction. The Republic of Singapore Air Force roundel as provided is also somewhat wrong. I rotated the Yin and Yang to more accurately reflect the actual design, and printed out some more decals. This is my first time printing decals and I messed up a few times before achieving these results. The roundels didn't turn out as crisp as I had hoped but they look passable from 3 feet away. As disappointed as I was with the kit's decals, I'm glad it gave me the opportunity to experiment with printing my own. Happy modelling everyone. -co Edited August 11, 2018 by CaptainObvious Quote Link to post Share on other sites
Joel_W Posted August 11, 2018 Share Posted August 11, 2018 Capt. Obvious, Just a great decaling job. I still remember being worn out from what seemed like a few hundred stencils for my F-4B. I'm really impressed that you made your own decals to correct the incorrect kit ones. Now that's pretty impressive. Joel Quote Link to post Share on other sites
skyhawk174 Posted August 12, 2018 Share Posted August 12, 2018 Great decal work and looks correct now. Ok tell me how you printed the white on the roundel. Alps? Quote Link to post Share on other sites
Peterpools Posted August 12, 2018 Share Posted August 12, 2018 Co Very nice work on the cammo and decals: amazing work on printing your own decals for the markings you wanted. Looking so good Keep 'em comin Peter Quote Link to post Share on other sites
CaptainObvious Posted August 13, 2018 Author Share Posted August 13, 2018 On 8/12/2018 at 4:45 AM, Joel_W said: Capt. Obvious, Just a great decaling job. I still remember being worn out from what seemed like a few hundred stencils for my F-4B. I'm really impressed that you made your own decals to correct the incorrect kit ones. Now that's pretty impressive. Joel Thanks Joel, I was thinking as I was applying the stencils that an F4 would put this effort to shame! I only spotted the decal errors after I applied them. Something looked off and once I figured it out, I just couldn't unsee it. -co Quote Link to post Share on other sites
CaptainObvious Posted August 13, 2018 Author Share Posted August 13, 2018 On 8/12/2018 at 8:18 AM, skyhawk174 said: Great decal work and looks correct now. Ok tell me how you printed the white on the roundel. Alps? Hey Chris, I just printed them on white decal paper. There is white edge that you would have to touch up after cutting out the decal. They are also a little translucent so I doubled them up on the roundel. -co Quote Link to post Share on other sites
CaptainObvious Posted August 13, 2018 Author Share Posted August 13, 2018 14 hours ago, Peterpools said: Co Very nice work on the cammo and decals: amazing work on printing your own decals for the markings you wanted. Looking so good Keep 'em comin Peter Thanks Peter! Quote Link to post Share on other sites
CaptainObvious Posted August 13, 2018 Author Share Posted August 13, 2018 On 7/31/2018 at 12:42 PM, Major Walt said: Whoah! Those pilots are exquisite! Thanks for stopping by Major Walt. Those pilots were painted for my previous project (Tamiya F-14A). I put up the pic to illustrate my first crude attempts at making ejection seat handles. -co Quote Link to post Share on other sites
kurnass77 Posted August 18, 2018 Share Posted August 18, 2018 What beauty mate! Gianni Quote Link to post Share on other sites
CaptainObvious Posted September 8, 2018 Author Share Posted September 8, 2018 Hello everyone! As per my norm, everything took longer than it should and turn out half as well as I planned but no matter, she's done! From the previous update, a X-22 gloss coat to protect the decals, then panel lined with dark brown wash on the top surfaces and gray below. Flat coated with XF-86 and lightly weathered with pastels then sealed with another flat coat. Thanks for dropping in everyone! Quote Link to post Share on other sites
Joel_W Posted September 8, 2018 Share Posted September 8, 2018 Capt. Obvious. You're being way to modest. Just a fantastic build, and she turned out top of her class. the overall camo paint scheme has just enough weathering to look like a replica of a well maintained operational aircraft. the variation in panel line colors really makes a huge difference especially with the gray in the bottom recessed panel lines. Overall, the build is spotless, well done, and would do you proud in any competition or display presentation. Well done my friend, very well done. Joel Quote Link to post Share on other sites
Slartibartfast Posted September 8, 2018 Share Posted September 8, 2018 I, too, really like your panel wash. Dark enough to bring the lines out but not so dark they smack you in the face. Another fine aircraft brought to market by CaptainObvious Industries. Quote Link to post Share on other sites
Tato Posted September 8, 2018 Share Posted September 8, 2018 Capt. Obvious, That's a fantastic Hunter! Love everything, from the scheme you choose to the final finish! The Hunter really has some beautiful lines. Thanks for sharing. Regards, Tato Quote Link to post Share on other sites
Falconxlvi Posted September 8, 2018 Share Posted September 8, 2018 Well done Captain. The model and marking is certainly a very unique subject. The extra time and effort you spent fixing things really shows! I hope you treat yourself to a new tool Tamiya or Eduard kit next - you deserve it!! Steve Quote Link to post Share on other sites
kurnass77 Posted September 9, 2018 Share Posted September 9, 2018 Great Hunter here Captain! Hope mine will be good half your's when I build it... Gianni Quote Link to post Share on other sites
CaptainObvious Posted September 10, 2018 Author Share Posted September 10, 2018 On 9/8/2018 at 10:37 PM, Joel_W said: Capt. Obvious. You're being way to modest. Just a fantastic build, and she turned out top of her class. the overall camo paint scheme has just enough weathering to look like a replica of a well maintained operational aircraft. the variation in panel line colors really makes a huge difference especially with the gray in the bottom recessed panel lines. Overall, the build is spotless, well done, and would do you proud in any competition or display presentation. Well done my friend, very well done. Joel Thanks Joel! You are always so generous with your compliments. Thank you for your encouraging comments throughout this build. They really help to keep me going. On 9/9/2018 at 2:31 AM, Slartibartfast said: I, too, really like your panel wash. Dark enough to bring the lines out but not so dark they smack you in the face. Another fine aircraft brought to market by CaptainObvious Industries. Thanks Slartibartfast! I'm thinking I could have gone with a lower contrast brown for the corresponding brown camo areas. That's a lesson learnt for the next one! On 9/9/2018 at 2:51 AM, Tato said: Capt. Obvious, That's a fantastic Hunter! Love everything, from the scheme you choose to the final finish! The Hunter really has some beautiful lines. Thanks for sharing. Regards, Tato Thank you so much for your kind words Tato! I'm glad you took the time to drop by. On 9/9/2018 at 3:49 AM, Falconxlvi said: Well done Captain. The model and marking is certainly a very unique subject. The extra time and effort you spent fixing things really shows! I hope you treat yourself to a new tool Tamiya or Eduard kit next - you deserve it!! Steve Thanks Steve! It is certainly true that some kits make you appreciate the better ones. I'm off to start a Revell reboxing of a Eduard Dr.1 kit next. I'm hoping for a quick build. 5 hours ago, kurnass77 said: Great Hunter here Captain! Hope mine will be good half your's when I build it... Gianni Thanks Gianni! Haha! I think you meant 67% (not half) as big in SIZE since you build in 72nd. Your 72nd scale models are insane! So much detail! I just build OOB mostly. No comparison at all. Cheers everyone! -co Quote Link to post Share on other sites
Brett M Posted September 10, 2018 Share Posted September 10, 2018 That turned out great (I tuned in late for having seen your build pop up over and over!). Nice work on the decals too, good looking bird. Quote Link to post Share on other sites
CaptainObvious Posted September 14, 2018 Author Share Posted September 14, 2018 On 9/10/2018 at 10:25 AM, Brett M said: That turned out great (I tuned in late for having seen your build pop up over and over!). Nice work on the decals too, good looking bird. Thanks Brett! Quote Link to post Share on other sites
Major Walt Posted September 16, 2018 Share Posted September 16, 2018 It’s beautiful! Quote Link to post Share on other sites
CaptainObvious Posted September 19, 2018 Author Share Posted September 19, 2018 On 9/17/2018 at 7:26 AM, Major Walt said: It’s beautiful! Thanks Major Walt! I'm glad you like it. Quote Link to post Share on other sites

Recommended Posts
Join the conversation
You can post now and register later. If you have an account, sign in now to post with your account.