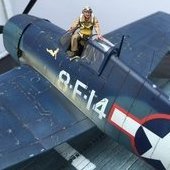
Hammerhead11 Posted November 11, 2019 Share Posted November 11, 2019 Hey Everyone, somehow my original post has disappeared, so I am starting this new one. Working through the brand new Tamiya P-38. For the most part I will be building out of the box using the decals provided for White 147. There have been plenty of reviews of the kit by individuals far more knowledgeable than myself, so I will refer you to those for a comprehensive overview, I will just be offering my thoughts on a few aspects of the build as I work through it. My First thought, I LOVE the poster sized painting guide. It's super high quality and it will definitely be on my garage wall after the end of this build. As is traditional, I started with the cockpit. There are quite a few pieces for the cockpit. Each piece is well detailed where appropriate and very thin where it makes sense. Hugh props to Tamiya on the seat. Some if the thinnest plastic I've seen used, it rivals the best resin seats. the whole cockpit tub is so well engineered that it almost doesn't need glue to all fit together. Well done Tamiya. The only detailing I did here was to add some wires and cables where it looked to make sense based on my limited reference material. I primed all of the interior parts with Vallejo black primer and sprayed all of the parts with a coat of Vallejo interior green. The seat and the armored head rest were painted IJA green, also by Vallejo and the details were all picked out in various Vallejo brush paints. The parts were also given a wash of MR Color dark brown My one gripe so far with the kit is the Seat belt. It's a decal, and it really needs to not be. I tried applying the decal to some lead foil and cutting it out. I'm not sold on the results, but I think it looks marginally better than using the decal straight onto the seat. I may swap it out for a PE belt later on, but we'll see. The decal for the instrument panel turned out much better than I expected, I did have to trim it a little to get it to align properly with the instrument bezels, but after a coat of solvaset, it was perfect. Once all of the main components were painted I started to assemble it all together and add it to the upper fuselage. I also started assembling and painting the nose wheel well, as the cockpit sits on top of it and makes up part of the cockpit floor. Thats where I'm at now. So far the fit has been amazing, and the instructions are really laid out in a way that makes sense for construction. For example, you build up the majority of the components of the cockpit in steps 1 and 2, but parts like the seat, armor, and radio aren't added until nearly the end of the build, to keep them from being broken during handling if you don't add the canopy's early. Just Tamiya looking out for the builder. Although, it doesn't fit my work flow, it's nice to see that they were thinking about it. comments and critiques appreciated, thanks, -Brett Quote Link to post Share on other sites
Geoff M Posted November 11, 2019 Share Posted November 11, 2019 Awesome work. Keep it up Geoff M Quote Link to post Share on other sites
Hammerhead11 Posted November 12, 2019 Author Share Posted November 12, 2019 8 hours ago, Geoff M said: Awesome work. Keep it up Geoff M Thank you! Quote Link to post Share on other sites
markiii Posted November 12, 2019 Share Posted November 12, 2019 Nice start! I'm in the completion stage of mine, doing option "B". Quote Link to post Share on other sites
Hammerhead11 Posted November 13, 2019 Author Share Posted November 13, 2019 On 11/11/2019 at 7:16 PM, markiii said: Nice start! I'm in the completion stage of mine, doing option "B". Thank you! I’d very much like to see what you are working on, or maybe any suggestions you have noticed in your build. Quote Link to post Share on other sites
markiii Posted November 13, 2019 Share Posted November 13, 2019 5 hours ago, Hammerhead11 said: Thank you! I’d very much like to see what you are working on, or maybe any suggestions you have noticed in your build. I'll try to post some pics here if you don't mind. I'm doing it out of the box except for the Master machine gun barrels I added. I did have a slight gap with the nosecone and I don't know why, everything fits so precise. Quote Link to post Share on other sites
Hammerhead11 Posted November 14, 2019 Author Share Posted November 14, 2019 3 hours ago, markiii said: I'll try to post some pics here if you don't mind. I'm doing it out of the box except for the Master machine gun barrels I added. I did have a slight gap with the nosecone and I don't know why, everything fits so precise. I would love to see pictures, and thanks for the heads up about the nose, I will make sure to dry fit a few times. Quote Link to post Share on other sites
markiii Posted November 16, 2019 Share Posted November 16, 2019 On 11/13/2019 at 7:02 PM, Hammerhead11 said: I would love to see pictures, and thanks for the heads up about the nose, I will make sure to dry fit a few times. Well I am halfway through the decals and realized I had put the horizontal stab on upside down. Luckily it was press fit on so I removed it, stripped the paint off and repainted it. Back to decals soon. Quote Link to post Share on other sites
Hammerhead11 Posted November 16, 2019 Author Share Posted November 16, 2019 Quick update. I finished up the nose wheel well and will soon be closing up the forward fuselage. I also started priming the parts for the main wheel wells. I swear, half the part count of this kit goes into the wheel wells. But I’m good with that. I don’t normally paint on the spruce, but Tamiya makes it easy on this kit. The majority of these parts will be painted aluminum, so that will be the next step. Quote Link to post Share on other sites
AlienFrogModeller Posted November 17, 2019 Share Posted November 17, 2019 Looks great, am following...cuz, I don't have enough to do with my other models. So I'm filling in my spare time with this article. LOL Cheers Quote Link to post Share on other sites
Hammerhead11 Posted November 20, 2019 Author Share Posted November 20, 2019 On 11/17/2019 at 11:24 AM, AlienFrogModeller said: Looks great, am following...cuz, I don't have enough to do with my other models. So I'm filling in my spare time with this article. LOL Cheers Thanks! Here is my update, sorry it’s not much. Managed to get some aluminum paint laid down over the primer I did previously. I used Vallejo Duraluminum. I’ve really enjoyed the Vallejo metallic colors. They go down great straight out of the bottle and a bottle lasts quite a while. I also managed to get the top and bottom halves of the fuselage put together. I almost forgot the included nose weight and I’m glad I remembered before I put glue down. The fit was phenomenal and there will be very little clean up. Thanks for looking, Brett Quote Link to post Share on other sites
Loki_v2 Posted November 20, 2019 Share Posted November 20, 2019 Great work! That cockpit is impeccable. Definitely eyeing this as next build. Quote Link to post Share on other sites
Hammerhead11 Posted November 22, 2019 Author Share Posted November 22, 2019 On 11/20/2019 at 10:06 AM, Loki_v2 said: Great work! That cockpit is impeccable. Definitely eyeing this as next build. Thank you! I was able to get a little more done tonight. First off, I got the rest of the wing components added, so now the main wing is done. And everything fit flawlessly. So far the only major seam issue I’ve found is between the upper and lower fuselage just in front of the cockpit. I tried to get this aligned properly, but I didn’t quite get it. It will require some sanding and smoothing. next I moved on to assembling the main landing gear bays and got one completed. These are amazing. They are built up in a logical way and the end result looks fantastic. I also got the supercharger pieces cleaned up and ready for paint. finally, I got the cockpit windows attached and masked using the included masks. I will be displaying this with the cockpit open, so I used the solid center section basically to cover the cockpit and not have to cover it with masking tape. It’s just tacked in place with a little white glue. The clear parts all fit flawlessly. (I feel like I’m repeating myself) thanks for looking! Brett Quote Link to post Share on other sites
markiii Posted November 25, 2019 Share Posted November 25, 2019 On 11/21/2019 at 7:34 PM, Hammerhead11 said: Thank you! I was able to get a little more done tonight. First off, I got the rest of the wing components added, so now the main wing is done. And everything fit flawlessly. So far the only major seam issue I’ve found is between the upper and lower fuselage just in front of the cockpit. I tried to get this aligned properly, but I didn’t quite get it. It will require some sanding and smoothing. I don't recall having a problem there and it looks like the starboard side is worse than the port side. Hope you get it sorted easily. Said I would post some pics of mine for you, but I don't want to post in your build thread. Will post in a new thread. Quote Link to post Share on other sites
Hammerhead11 Posted November 26, 2019 Author Share Posted November 26, 2019 6 hours ago, markiii said: I don't recall having a problem there and it looks like the starboard side is worse than the port side. Hope you get it sorted easily. Said I would post some pics of mine for you, but I don't want to post in your build thread. Will post in a new thread. Yeah, it wasn’t too bad to clean them up with some sanding, didn’t need any filler, funny enough though I didn’t have any issues with the nose section like you described. So, I’ll chalk it up to user error. Can’t wait to see your post. Brett Quote Link to post Share on other sites
markiii Posted November 27, 2019 Share Posted November 27, 2019 23 hours ago, Hammerhead11 said: Yeah, it wasn’t too bad to clean them up with some sanding, didn’t need any filler, funny enough though I didn’t have any issues with the nose section like you described. So, I’ll chalk it up to user error. Can’t wait to see your post. Brett I just posted in the display case. Quote Link to post Share on other sites
Salineated Michigander Posted December 7, 2019 Share Posted December 7, 2019 Hey Hammerhead, nice work so far on your P-38, it all looks very thoughtfully replicated. I like your work. I just finished this same kit a week ago and found myself smiling to myself at each dry fit and final assembly process and how well everything fit together. It's just a masterpiece of engineering, likely the best fitting kit I have ever built of any scale EVER. I also strongly agree with your comment about the landing gear and gear bays....they're just amazing. If only other manufacturers would sit up and take notice....sigh. Quote Link to post Share on other sites
Hammerhead11 Posted December 8, 2019 Author Share Posted December 8, 2019 4 hours ago, Salineated Michigander said: Hey Hammerhead, nice work so far on your P-38, it all looks very thoughtfully replicated. I like your work. I just finished this same kit a week ago and found myself smiling to myself at each dry fit and final assembly process and how well everything fit together. It's just a masterpiece of engineering, likely the best fitting kit I have ever built of any scale EVER. I also strongly agree with your comment about the landing gear and gear bays....they're just amazing. If only other manufacturers would sit up and take notice....sigh. Thanks, yeah this has been so much fun so far. I just wish I had more time to work on it, but between the holidays and work and family my time has been rather limited. However I did manage to get a little more done this weekend. I got the interiors of the radiators and oil coolers painted, once they are cured I will add some weathering. I also got the super chargers painted. I will add these towards the end of the build once everything is painted up and weather them further. Also, the majority of the build is complete. After I finish up the radiators and oil coolers I will be able to start priming and painting! I can’t wait, one of my favorite parts. thanks for looking, Brett Quote Link to post Share on other sites
AlienFrogModeller Posted December 8, 2019 Share Posted December 8, 2019 12 hours ago, Hammerhead11 said: "...I will be able to start priming and painting! I can’t wait, one of my favorite parts." thanks for looking, Brett MMMMMMM....*drools* ...priming. Quote Link to post Share on other sites
Hammerhead11 Posted December 9, 2019 Author Share Posted December 9, 2019 On 12/8/2019 at 7:44 AM, AlienFrogModeller said: MMMMMMM....*drools* ...priming. Wait, are you me? Seriously though, priming is very satisfying. Quote Link to post Share on other sites
AlienFrogModeller Posted December 9, 2019 Share Posted December 9, 2019 1 hour ago, Hammerhead11 said: Wait, are you me? Seriously though, priming is very satisfying. LMAOOO, I am the spirit of you, now get back to priming... Quote Link to post Share on other sites
Hammerhead11 Posted December 13, 2019 Author Share Posted December 13, 2019 On 12/9/2019 at 9:25 AM, AlienFrogModeller said: LMAOOO, I am the spirit of you, now get back to priming... Well, did I mention I was building the night fighter version... just kidding, primer is on. Using Vallejo’s black primer straight from the bottle. I love this stuff, it always goes on silky smooth. It’s still drying in the pictures so that’s why some spots are more glossy than others, but it dries to a nice satin sheen. Once this has had time to cure I will be using the black basing method and the next step will be to add some panel high lights and patterns using a really light grey. I will start with the underside and work my way up to the top side. thanks for looking, Brett Quote Link to post Share on other sites
AlienFrogModeller Posted December 13, 2019 Share Posted December 13, 2019 I've had issues with their primer. I use the Mr Color 1500 black or white. mix if necc for grey; love them. Looking good. Quote Link to post Share on other sites
Hammerhead11 Posted December 14, 2019 Author Share Posted December 14, 2019 17 hours ago, AlienFrogModeller said: I've had issues with their primer. I use the Mr Color 1500 black or white. mix if necc for grey; love them. Looking good. I‘ve never used the Mr Color primers, I’ll have to give them a try. well, I actually had a few hours to work on The P-38 tonight: I got the high lights added to the top and bottom of the plane, landing gear doors, drop tanks, and prop spinners. This is my first real time using this method on an entire model. Here is the lowered surface done. Used MIG neutral gray. This was my first time using MIG paints and I was very surprised how nice it laid down. And it dries really fast. Blue tac is one of my most used tools in model making. I use it to some degree on every kit I build. I must say though, the P-38 is a tough kit to mask. It really stretched my blue tac abilities. Here it is all masked and ready for the upper surface color. And here we are with paint! Used MIG for this as well and I’m really happy with it. so, I’m my limited research of this airplane, I came across an interesting picture of it: Notice the lighter lines along the panel lines. Well, I wanted to try and replicate that. So, here we go: Tape on. So, I misted on some slightly darker shade of the base color and removed the tape. I didn’t do every panel line, but I think it conveys the idea. And here it is with all of the masking off. Well, it was a fun few hours and I managed to get a lot done. Once this all cures I will hit it with a gloss coat and start the decals. thanks for looking, Brett Quote Link to post Share on other sites
AlienFrogModeller Posted December 14, 2019 Share Posted December 14, 2019 7 hours ago, Hammerhead11 said: so, I’m my limited research of this airplane, I came across an interesting picture of it: Notice the lighter lines along the panel lines. Well, I wanted to try and replicate that. So, here we go: Tape on. So, I misted on some slightly darker shade of the base color and removed the tape. I didn’t do every panel line, but I think it conveys the idea. And here it is with all of the masking off. Well, it was a fun few hours and I managed to get a lot done. Once this all cures I will hit it with a gloss coat and start the decals. thanks for looking, Brett Very impressive!! Looks great!! Quote Link to post Share on other sites

Recommended Posts
Join the conversation
You can post now and register later. If you have an account, sign in now to post with your account.