Falconxlvi Posted October 10, 2020 Share Posted October 10, 2020 (edited) I’m sorry, I couldn’t help it....after starting the F-111, after starting the 109s...I ordered another kit and immediately dove in! I will finish them all- I promise 😇😂 Seriously, what have I done 🤦🏼♂️ Ok, I am planning on doing this one exclusively until it’s finished, so let’s get started! The box! The loadout plan! The SUU-7 tactical dispenser pod. The pod was loaded with 1.75 lb BLU-3/B anti-personnel bomblets that were ejected rearward. This obviously limited where the SUU-7 could be loaded. During the Vietnam war, F-4’s carried 4 dispensers on the aft outboard and bottom stations of wing mounted MERs. For weight and balance purposes, a single Mk.81 bomb body (or maybe Mk 82?) was mounted on the forward inboard station of the MER, creating what could only be described as a wild-looking loadout! For an interesting video of BLU-3/Bs in-action, check out this link. https://www.criticalpast.com/video/65675057969_air-strike-missions_SUU-14-A-dispenser_BLU-3-B-bombs_A-1E-Skyraider Interestingly enough, Eduard recently released a set of SUU-7 pods in 1/48. They are well cast and beautifully detailed! Ok, so let’s start on the build. The cockpit builds up via interlocking modular assemblies and has separate inserts for the various side consoles and instrument panels/radar scopes. It is very nicely detailed. The ejection seats are ok, but have no harness detail. I opted for a set of Fine Molds Nano Belts. Each set comes with 4 complete harness straps, with 2 pair of shoulder straps bent slightly different than the other 2 pair- so you have a bit of variety. These are made of soft, bendable plastic and can benefit from some heat to shape them. I shaped each strap and secured them to the ejection seat with Mr Cement SP. Next, I built up the cockpit tub which also contains then nose wheel bay on the underside. And here’s what it looks like all together without the instrument and side panels. All the parts received a shot of Mr Color 1500 primer and the tub/panels were painted Mr Color Dark Gull Gray followed with X-22/MLT glows clear. And then, the cockpit decals happened! And they were amazing.... Edited October 10, 2020 by Falconxlvi Spelling Quote Link to post Share on other sites
Falconxlvi Posted October 10, 2020 Author Share Posted October 10, 2020 (edited) I started paintwork with the Ejection Seats. The kit allows each cushion to be painted separately and added to the seat frame, but since I added the belts, this wasn’t an option for me. After priming in black, I sprayed the front of the seat RLM 71 dark green and then proceeded to brush paint the frame black where I had overspray. Most of the details were painted with Vallejo acrylics and Tamiya Enamels. Here they are after receiving a wash and dry brush (but no flat coat yet). The kit comes with a very comprehensive set of cockpit decals for each panel. I decided to apply these over the raised details and am glad I went that route - the result is superior to anything I could ever paint. Using the Microset/sol system, I laid down each decal and brushed between the panel lines and raised switches on the consoles and panels. Where the decal shrunk a bit towards the edges, I did my best to fix it with Tamiya Semi-Gloss Black enamel. Here is the front instrument panel to give you an idea of how sweet these decals are! (They are Cartograf) And the cockpit tub with all the panels dry-fitted (before the flat coat) Last, some lovely details on the canopy frame ☺️ That’s all for now! Thanks for stopping by! Steve Edited October 10, 2020 by Falconxlvi Quote Link to post Share on other sites
RichB63 Posted October 10, 2020 Share Posted October 10, 2020 Looking good Steve. Keep 'em coming! Quote Link to post Share on other sites
cruiz Posted October 10, 2020 Share Posted October 10, 2020 Don´t blame yourself, we all know is Zoukei Mura fault for making this kit available in the middle of your others builds. A good looking cockpit what you did here, I'll be following with attention. Carlos Quote Link to post Share on other sites
konbini Posted October 11, 2020 Share Posted October 11, 2020 Nicely done! Im looking at getting myself a set as well. I will spend eons deciding where in the queue it should go. Looking fwd to the coming progress. Quote Link to post Share on other sites
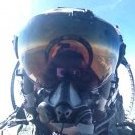
Falconxlvi Posted October 11, 2020 Author Share Posted October 11, 2020 (edited) On 10/10/2020 at 10:21 AM, RichB63 said: Looking good Steve. Keep 'em coming! Will do, thanks! If there’s one upside to this whole COVID thing, it is undoubtedly the increased time at the work bench. 22 hours ago, cruiz said: Don´t blame yourself, we all know is Zoukei Mura fault for making this kit available in the middle of your others builds. A good looking cockpit what you did here, I'll be following with attention. Carlos No kidding! It has been a pleasure to build - I am very impressed with my first ZM experience. Thanks for your kind words Carlos! Your Corsair build is stunning! 5 hours ago, konbini said: Nicely done! Im looking at getting myself a set as well. I will spend eons deciding where in the queue it should go. Looking fwd to the coming progress. Ah yes, the ever changing build que. It drives my wife crazy that I can start a model without finishing it. Modeling inspiration and mojo is hard to explain, but when it hits, you have to go with it - it keeps the hobby fun! Just a real quick picture to show the complete cockpit “pod” before most of the detail becomes very difficult to see between the fuselage halves! Now it’s time for the bulk of the construction work! Regards, Steve Edited October 11, 2020 by Falconxlvi Quote Link to post Share on other sites
Aigore Posted October 11, 2020 Share Posted October 11, 2020 Hey Steve! Great start on that ZM phantom! Great to see the finemolds belts being put to use 🙂 Quote Link to post Share on other sites
Falconxlvi Posted October 11, 2020 Author Share Posted October 11, 2020 31 minutes ago, Aigore said: Hey Steve! Great start on that ZM phantom! Great to see the finemolds belts being put to use 🙂 Hey Aigore, thanks for stopping by! I am now a big fan of the FineMolds belts - I think they will dress up a lot of basic kit seats quite nicely 👍🏻👍🏻 Quote Link to post Share on other sites
Falconxlvi Posted October 13, 2020 Author Share Posted October 13, 2020 (edited) ZM F-4E update (Day 12) The interior sides were painted Mr Color DGG and I highlighted each rib with Vallejo light grey before a dark wash and flat coat. The fit of the cockpit assembly is very positive between the two halves so alignment is easy. The fuselage halves are joined up and the fit here was pretty much spot on, both top and bottom! There’s not much putty needed at the join to ensure a smooth finish. The big dorsal insert was not a perfect fit and required a plastic shim at the back to improve fit fore/aft. I will re-scribe this later once the glue is fully cured. The side to side fit was also a tad sloppy, so I used Tamiya putty to fill the seams and lacquer thinner to clean it up. More work will be required here I think, especially between the bulkhead insert aft of the cockpit to the rest of the spine. There is a slight step here. The lower gun cover was press first, as was the radome. The small intakes on either side of the nose received putty to blend in the join seam. Here’s a picture of the nose underside. I really like the Vulcan canon face - I didn’t take a picture of it but ZM did a great job on the muzzle! I added a small shim on the front right canopy frame against the fuselage side to eliminate a small gap. You can barely see it- good 😂👍🏻 And that’s all for today! Thanks for stopping by! Almost time to start the wings 👏🏻 Steve Edited October 13, 2020 by Falconxlvi Quote Link to post Share on other sites
RichB63 Posted October 13, 2020 Share Posted October 13, 2020 Nice update! Quote Link to post Share on other sites
Teeradej Posted October 13, 2020 Share Posted October 13, 2020 This build looks promising. I will get my one late this month and want to learn if anywhere on this kit needs more attention. Quote Link to post Share on other sites
CaptainObvious Posted October 13, 2020 Share Posted October 13, 2020 That cockpit turned out nice. Those finemolds seatbelts really dressed up the seats. -co Quote Link to post Share on other sites
Da SWO Posted October 13, 2020 Share Posted October 13, 2020 Wow, great detail. Quote Link to post Share on other sites
Falconxlvi Posted October 13, 2020 Author Share Posted October 13, 2020 (edited) 15 hours ago, RichB63 said: Nice update! Thanks Rich- I’m flying on this build (well, for me anyways 😂). I am trying to finish it for the ARC Facebook Phantom build that closes at the end of the month. I don’t think I’m going to make it, but...it’s fun to try! 15 hours ago, Teeradej said: This build looks promising. I will get my one late this month and want to learn if anywhere on this kit needs more attention. It’s a great kit- some parts require more cleanup than I would like due to mold seams, and the plastic is very soft so go easy on the sanding. The detail is phenomenal and the first is pretty good 👍🏻👍🏻 4 hours ago, CaptainObvious said: That cockpit turned out nice. Those finemolds seatbelts really dressed up the seats. -co I agree - thanks for stopping by Captain! 3 hours ago, Da SWO said: Wow, great detail. It helps to have a great starting point, and this kit does just that! Engines: The kit provides two very-detailed J79s and a clever stand as part of the sprue runners that let you display the motor removed if you want. Unfortunately there is no engine bay detail, so you would have to scratch all that if you chose this option. I am very tempted to completely paint one engine just to show it off here, but obviously you won’t see any of it once installed. The detail is awesome for OOB- you get the stator vanes, flame holder, and nicely molded exterior detail. Each engine half has a raised circular ejector pin mark in the exhaust tube that needs some attention. Because the plastic is soft, it was easy to sand out. Here’s a quick pic looking in each end of the engine More soon! Steve Edited October 13, 2020 by Falconxlvi . Quote Link to post Share on other sites
RichB63 Posted October 14, 2020 Share Posted October 14, 2020 Steve, What are your thoughts on the upper fuselage spine insert? I understand the design philosophy behind it (modularity and crisp detail). But the drawback seems to be that four seams lines (vs. one) need to be filled and sanded, followed by some tedious re-scribing. I ask because I just started a ZM F-4C. Rich Quote Link to post Share on other sites
Falconxlvi Posted October 14, 2020 Author Share Posted October 14, 2020 (edited) 48 minutes ago, RichB63 said: Steve, What are your thoughts on the upper fuselage spine insert? I understand the design philosophy behind it (modularity and crisp detail). But the drawback seems to be that four seams lines (vs. one) need to be filled and sanded, followed by some tedious re-scribing. I ask because I just started a ZM F-4C. Rich I still like it more than the traditional split on the F-4 because of the many circular hatches on the spine. It is much easier to scribe perpendicular lines than 4 circles and all the various panels on top in my opinion. Also, the two longside seams of the ZM insert fall along natural panel lines (as do the fore/aft lines). After filling them in a bit with Tamiya putty and wiping off the excess with lacquer thinner, they look acceptable to me. Still there, but not as pronounced. We will see after the primer coat. ZM was really close to making this part a winner. Just 0.2mm off or so. Steve Edited October 14, 2020 by Falconxlvi Quote Link to post Share on other sites
SERNAK Posted October 14, 2020 Share Posted October 14, 2020 Nice work Steve, Quick question; looking at the kit do you think it's easy to modify the gun muzzle and make it a later one, you know, the long version? Quote Link to post Share on other sites
Dave Williams Posted October 14, 2020 Share Posted October 14, 2020 1 hour ago, SERNAK said: Nice work Steve, Quick question; looking at the kit do you think it's easy to modify the gun muzzle and make it a later one, you know, the long version? No need. The long gun muzzle is already in the box. Quote Link to post Share on other sites
Falconxlvi Posted October 14, 2020 Author Share Posted October 14, 2020 1 hour ago, SERNAK said: Nice work Steve, Quick question; looking at the kit do you think it's easy to modify the gun muzzle and make it a later one, you know, the long version? 10 minutes ago, Dave Williams said: No need. The long gun muzzle is already in the box. Well there you go! -Small update for today- More engine internals. The flame holder was painted Mr Color Super Iron (SM 203) with Tamiya Burnt Iron (XF-84) details and a Tamiya Dark Brown wash. The inlet bullet fairing was painted Mr Color Super Iron (SM203) with Silver (C8) nose cap and the compressor face Mr Color Silver (C8) with a Tamiya Dark Brown Wash. Both engines are assembled and I’m waiting on the joins to dry before painting the exteriors. Steve Quote Link to post Share on other sites
cruiz Posted October 15, 2020 Share Posted October 15, 2020 Very nice work Steve, judging by your progress pace, you can finish this on time and make a really good-looking Phantom. Carlos P.S. I was resisting when this kit came out; now, because of your build, I ordered one to add to my growing stash of Vietnam era planes. Carlos Quote Link to post Share on other sites
Falconxlvi Posted October 15, 2020 Author Share Posted October 15, 2020 58 minutes ago, cruiz said: Very nice work Steve, judging by your progress pace, you can finish this on time and make a really good-looking Phantom. Carlos P.S. I was resisting when this kit came out; now, because of your build, I ordered one to add to my growing stash of Vietnam era planes. Carlos You won’t regret it Carlos- this kit makes modeling fun! It’s been a long time since I’ve built a new tool kit and the way this just effortlessly goes together makes me motivated to get to the bench each day. I really think Zoukei Mura knocked it out of the park- this is light years ahead of the old Hasegawa kit! Steve Quote Link to post Share on other sites
Thadeus Posted October 15, 2020 Share Posted October 15, 2020 Nice build. What a cockpit. Please tell me You painted the side consoles. These can't be decals, right? Wow. Can't wait for more. Quote Link to post Share on other sites
Falconxlvi Posted October 15, 2020 Author Share Posted October 15, 2020 2 hours ago, Thadeus said: Nice build. What a cockpit. Please tell me You painted the side consoles. These can't be decals, right? Wow. Can't wait for more. The side consoles are, in fact, decals! Microset/Microsol is definitely required, but with a lot of patience, they lay down really well! I had to touch up a few edges of the panels where the decal inevitably shrunk as it settled over the raised details, but the touch ups were relatively minor. This is a fantastic kit! Quote Link to post Share on other sites
Mr.Happy Posted October 15, 2020 Share Posted October 15, 2020 Steve, Truly a build that will keep many of us riveted 🤓 Thank you for listing your build steps as it is educational and interesting. I’m looking forward to your next update on this kit. Great job, Mr. Happy Quote Link to post Share on other sites
Falconxlvi Posted October 15, 2020 Author Share Posted October 15, 2020 7 hours ago, Mr.Happy said: Steve, Truly a build that will keep many of us riveted 🤓 Thank you for listing your build steps as it is educational and interesting. I’m looking forward to your next update on this kit. Great job, Mr. Happy Thanks Mr Happy 😃 I will try to keep the updates coming! Steve Quote Link to post Share on other sites

Recommended Posts
Join the conversation
You can post now and register later. If you have an account, sign in now to post with your account.