Fishwelding Posted August 6, 2016 Share Posted August 6, 2016 (edited) As a regular Cold War modeler I have plenty of U.S. and Soviet hardware on my shelf. Recently I've paid more attention to other Warsaw Pact and NATO states' forces. I'm building a BRDM-2 in East German (Nationale Volksarmee) colors, and have a few troops to display with it. The trouble is strichtarn, the NVA's characteristic "rain"-pattern camouflage printed onto field uniforms and other textile equipment. I've tried several experiments to reproduce this pattern, but only recently have something I'm semi-satisfied with. I'm not attempting scale results, because they probably wouldn't be discernable to most observers anyway. Instead, I'm attempting an overscale pattern that suggests strichtarn. Attempts with fine paintbrushes or conventional pens produced clumsy rain-pattern, but I recently tried a special art pen with an ultra-fine tip, which produced somewhat appealing results. It's not fantastic; the pattern is still slightly overscale for my taste, black rather than brown (as on the real camouflage), very tedious to apply, and then tricky to blend with highlights. I pre-shade the figure with a dark olive color. Then, I use a middle or main olive color that to my eye is a scaled match for the background color on the real pattern. I then apply the rain pattern with the pen. Next I airbrush on translucent highlights with a light tan (greenish, not pinkish). This is technique requires time and patience. When I attempted to apply lots of markings with the pen in one session, I grew sloppy and the pattern suffered. The airbrushed highlights should be translucent to blend the pattern, but not so heavy as to obscure it. Where I sprayed too much tan, I then attempted to re-draw the pattern and re-highlight. It didn't work well. I'm learning to build dioramas but since it takes a long time to apply the NVA pattern to even a single soldier, GDR troops won't be as frequently represented in my Warsaw Pact scenes. These troops now need fleshtones added with oils (over an acrylic base), details of their "battle rattle" picked out with acrylics, added equipment such as ear flaps, a steel helmet, a Kalashnikov, a notepad, and so on. Any thoughts on how to improve this process or do something else altogether are welcome. Otherwise, I thought I'd share it in case anyone else was considering similar work. Edited August 6, 2016 by Fishwelding Quote Link to post Share on other sites
Hajo L. Posted August 6, 2016 Share Posted August 6, 2016 Sehr gute Arbeit, Genosse! ;) Very well done, looks really good! As long as no one is doing some sort of decals with Strichtarn to apply to figures, I think your solution will be the best! HAJO Quote Link to post Share on other sites
11bee Posted August 9, 2016 Share Posted August 9, 2016 Hi Fish, long time no see! Great start for your dio. I think your uniforms will come out fine. Good luck with the faces, that's the part that always did me in. Got new M60 and M113 series inbound from AFV Club. Good time to be a Cold War modeler! Quote Link to post Share on other sites
Fishwelding Posted August 9, 2016 Author Share Posted August 9, 2016 (edited) Sehr gute Arbeit, Genosse! ;)/>/>/> Very well done, looks really good! As long as no one is doing some sort of decals with Strichtarn to apply to figures, I think your solution will be the best! HAJO Danke, Hajo! There's a guy over at Armorama who printed his own Strichtarn decals, but I've never seen them from decal makers who sell camouflage sheets. Hi Fish, long time no see! Great start for your dio. I think your uniforms will come out fine. Good luck with the faces, that's the part that always did me in. Got new M60 and M113 series inbound from AFV Club. Good time to be a Cold War modeler! I agree! I picked up AFV Club's M109A2 a little while ago. Very glad to see the return of the M548, too. The hilarious thing is I've got a bunch of old kits squirreled away to build: Academy and Tamiya M113s, Esci M60s, Italeri M109s, Escl and Dragon BMPs, and so on. I figure these are still good for dioramas, though, since generally the scene is more important than detail or precise dimensions of the vehicles therein, especially after I've weighed 'em down with mud, crew gear, etc. Although with all the M1 kits, to my knowledge no one has replaced Tamiya's old M1A-Nothing... Edited August 9, 2016 by Fishwelding Quote Link to post Share on other sites
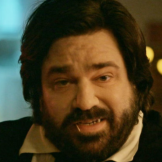
Fishwelding Posted August 10, 2016 Author Share Posted August 10, 2016 Faces and hands done in oils. I'm not thrilled with the result. I feel I did a sharper job on past figures, with more dramatic color variation. I'm getting old, and it's probably time to start using magnification, either reading glasses or even an optivisor. But these are good enough, especially after the infantryman gets a steel helmet. I don't know why it didn't occur to me until now, but the pointing soldier should probably have his mouth open, as if he's speaking. Quote Link to post Share on other sites
11bee Posted August 13, 2016 Share Posted August 13, 2016 Looking good. Didn't NVA troops use a unique version of the AK-47/74? Will you be able to replicate the rifles? Quote Link to post Share on other sites
Fishwelding Posted August 14, 2016 Author Share Posted August 14, 2016 (edited) Looking good. Didn't NVA troops use a unique version of the AK-47/74? Will you be able to replicate the rifles? Unless I find substantial differences between NVA rifles and what I'm getting in plastic out of Italeri's "Modern Weapons" set, I'm going to use the stock Italeri items. At really small scale I'm not as concerned with details. The ICM troops included AKs, of course, but bizarrely my copy of that kit had some sort of weird stickiness on the plastic parts. Alcohol wouldn't clear it. Diluted acetone cleaned up the troops' parts, but this wrecked the kit rifles. A few updates about the pen I used: I wrecked a tip adding the pattern to two troops. Replacement tips (and ink) are available, however, and are easily to install. They make a brown one. I didn't know this when I camouflaged the first two guys, and I'll stick with black for the third soldier just for continuity. But I picked up the brown pen to try it out on a future East German. The trouble I can see it that, unlike the black pens, neither the ink nor tip is replaceable, so it can be an expensive way to finish model soldiers. Edited August 14, 2016 by Fishwelding Quote Link to post Share on other sites
Fishwelding Posted April 16, 2017 Author Share Posted April 16, 2017 An Update. I still need to complete the infantrymen, but the BRDM guy is done. Quote Link to post Share on other sites
Hajo L. Posted April 16, 2017 Share Posted April 16, 2017 Looking strich-.. ahem... spot-on! ;) HAJO Quote Link to post Share on other sites

Recommended Posts
Join the conversation
You can post now and register later. If you have an account, sign in now to post with your account.