spejic Posted July 1, 2015 Share Posted July 1, 2015 The A-4AR is the updated A-4M for Argentina. To build this I need to modify the kit's nose and add a few antennas and bumps. The most difficult thing will be the cockpit. The A-4AR has digital displays on top of the instrument panel, which has the effect of squaring off the instrument panel cowling. I'm not quite sure how to build that yet, but I cut out part of the kit cowling as the first step. So far I've built the wings, did some work on the cockpit, and scratchbuilt the instrument panel and exhaust extension. I have some weapons from an Academy F-15E kit to arm it. Quote Link to post Share on other sites
plasticWerks_JL Posted July 2, 2015 Share Posted July 2, 2015 Both of your build threads look very interesting, spejic, I'll be following along with interest Quote Link to post Share on other sites
spejic Posted August 25, 2015 Author Share Posted August 25, 2015 Now that I'm working on the exteriors I'm going to be updating the model here instead of in the AF-1B thread. I did the major work on the rear fuselage. The main interesting thing is the rear-warning radars. The kit has two which are the same shape, but in A-4M's the starboard one is actually twice as wide as the other. I scratchbuilt it. I didn't need putty between the wings and fuselage, but that's the only place I can say that. The internal seam on the exhaust scoop in particular took days to do right. Quote Link to post Share on other sites
spejic Posted September 3, 2015 Author Share Posted September 3, 2015 I have the main parts together, but it was a real fight. When I tried to mate the nose to the rear fuselage it just wouldn't fit right. It turns out that the wing and the rear fuselage were not properly square. I had to break that apart, remove the bits that were supposed to make the wing square (but didn't work), and using an hour of dry fitting and lots of shims I was able to mate them properly. Quote Link to post Share on other sites
falcon20driver Posted September 5, 2015 Share Posted September 5, 2015 Its looking darn good to me. Quote Link to post Share on other sites
spejic Posted October 5, 2015 Author Share Posted October 5, 2015 Here's the current state of the Fightinghawk. I've installed the rear sections of the two cockpit MFD's and a bit of brown painted foil to replicate the cloth cover used there. The pictures I have of the cockpit are poor and I previously thought the display boxes were grey. But they are black and I had to print new decals for their faces. I've also installed the antennas, but I am waiting to install the white GPS bumps until after it is painted. I added a new vent near the existing one on the nose. Lastly, I installed the anti-lightning raised details on the nosecone. Another one of those giant antennas is fitted to the nose landing gear bay door. Flare covers, main gear bay details, aileron actuators, and some bumps. The funny thing is the Fujimi kit has panel lines for some of these details, but they didn't bother actually making the details themselves. Makes it easy for scratchbuilders at least. I stole the rear warning radars from the "Brazilian" kit to put under the wingtips. That bar under the arresting hook looks rough, but that's because my first attempt wasn't right (there's a complicated curve here) and I had to sand and putty the surface before installing the final bar. I'm thinking of installing Rockeye cluster munitions, which is the only weapon I have that Argentina has as well (their bombs don't look like Mk 84's). I've worked on a MER rack in preparation for this, and begun preliminary work on the bombs themselves. Quote Link to post Share on other sites
spejic Posted November 9, 2015 Author Share Posted November 9, 2015 The intakes were such a pain. They were so undersized it took a lot of putty to smooth out the join. But my first two attempts failed - regular Tamiya putty wasn't consistent and shrunk too much, and I think I didn't mix the Tamiya two-part putty enough because it never set. I finally turned to Milliput. Over a week just on this. Ugg. I did the seats. Seatbelts are painted foil with plastic buckles, and I did the stripes for the ejection handle with a technical pen just on the front section of the hand hold. I'm going to work on the HUD structure next so I can close up the canopy. Quote Link to post Share on other sites
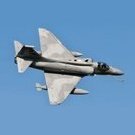
K5054NZ Posted November 12, 2015 Share Posted November 12, 2015 Looking good! I never knew much about the Fightinghawk but this build got me researching. Quite a cool machine! Now I want to build one. Quote Link to post Share on other sites
spejic Posted November 14, 2015 Author Share Posted November 14, 2015 (edited) Here's the HUD structure. I'll glue in the clear pieces after this is attached to the aircraft because it's too tiny and fragile by itself. Edited November 14, 2015 by spejic Quote Link to post Share on other sites
spejic Posted December 7, 2015 Author Share Posted December 7, 2015 I added scratchbuilt mirrors to the inside of the canopy. I've been doing a lot of work on the panel lines. I will finish that and add the last few antennas now that I can hold it without banging the cockpit details. I've already lost one ejection handle and had to make another. I'll be giving it the first coat of paint soon. Quote Link to post Share on other sites
kurnass77 Posted December 8, 2015 Share Posted December 8, 2015 Go mate! One thing,can I buy yur other windshield/canopy for the open option? As an M kit,I can use it to build an Israeli N. I'm waiting for the camo ! Gianni Quote Link to post Share on other sites
spejic Posted December 8, 2015 Author Share Posted December 8, 2015 Go mate! One thing,can I buy yur other windshield/canopy for the open option? As an M kit,I can use it to build an Israeli N. I'll send you a PM. Quote Link to post Share on other sites

Recommended Posts
Join the conversation
You can post now and register later. If you have an account, sign in now to post with your account.