

.jpg.2664761170317aa11c66d1f7e92d02af.jpg)
DDC
-
Content Count
632 -
Joined
-
Last visited
Content Type
Profiles
Forums
Calendar
Posts posted by DDC
-
-
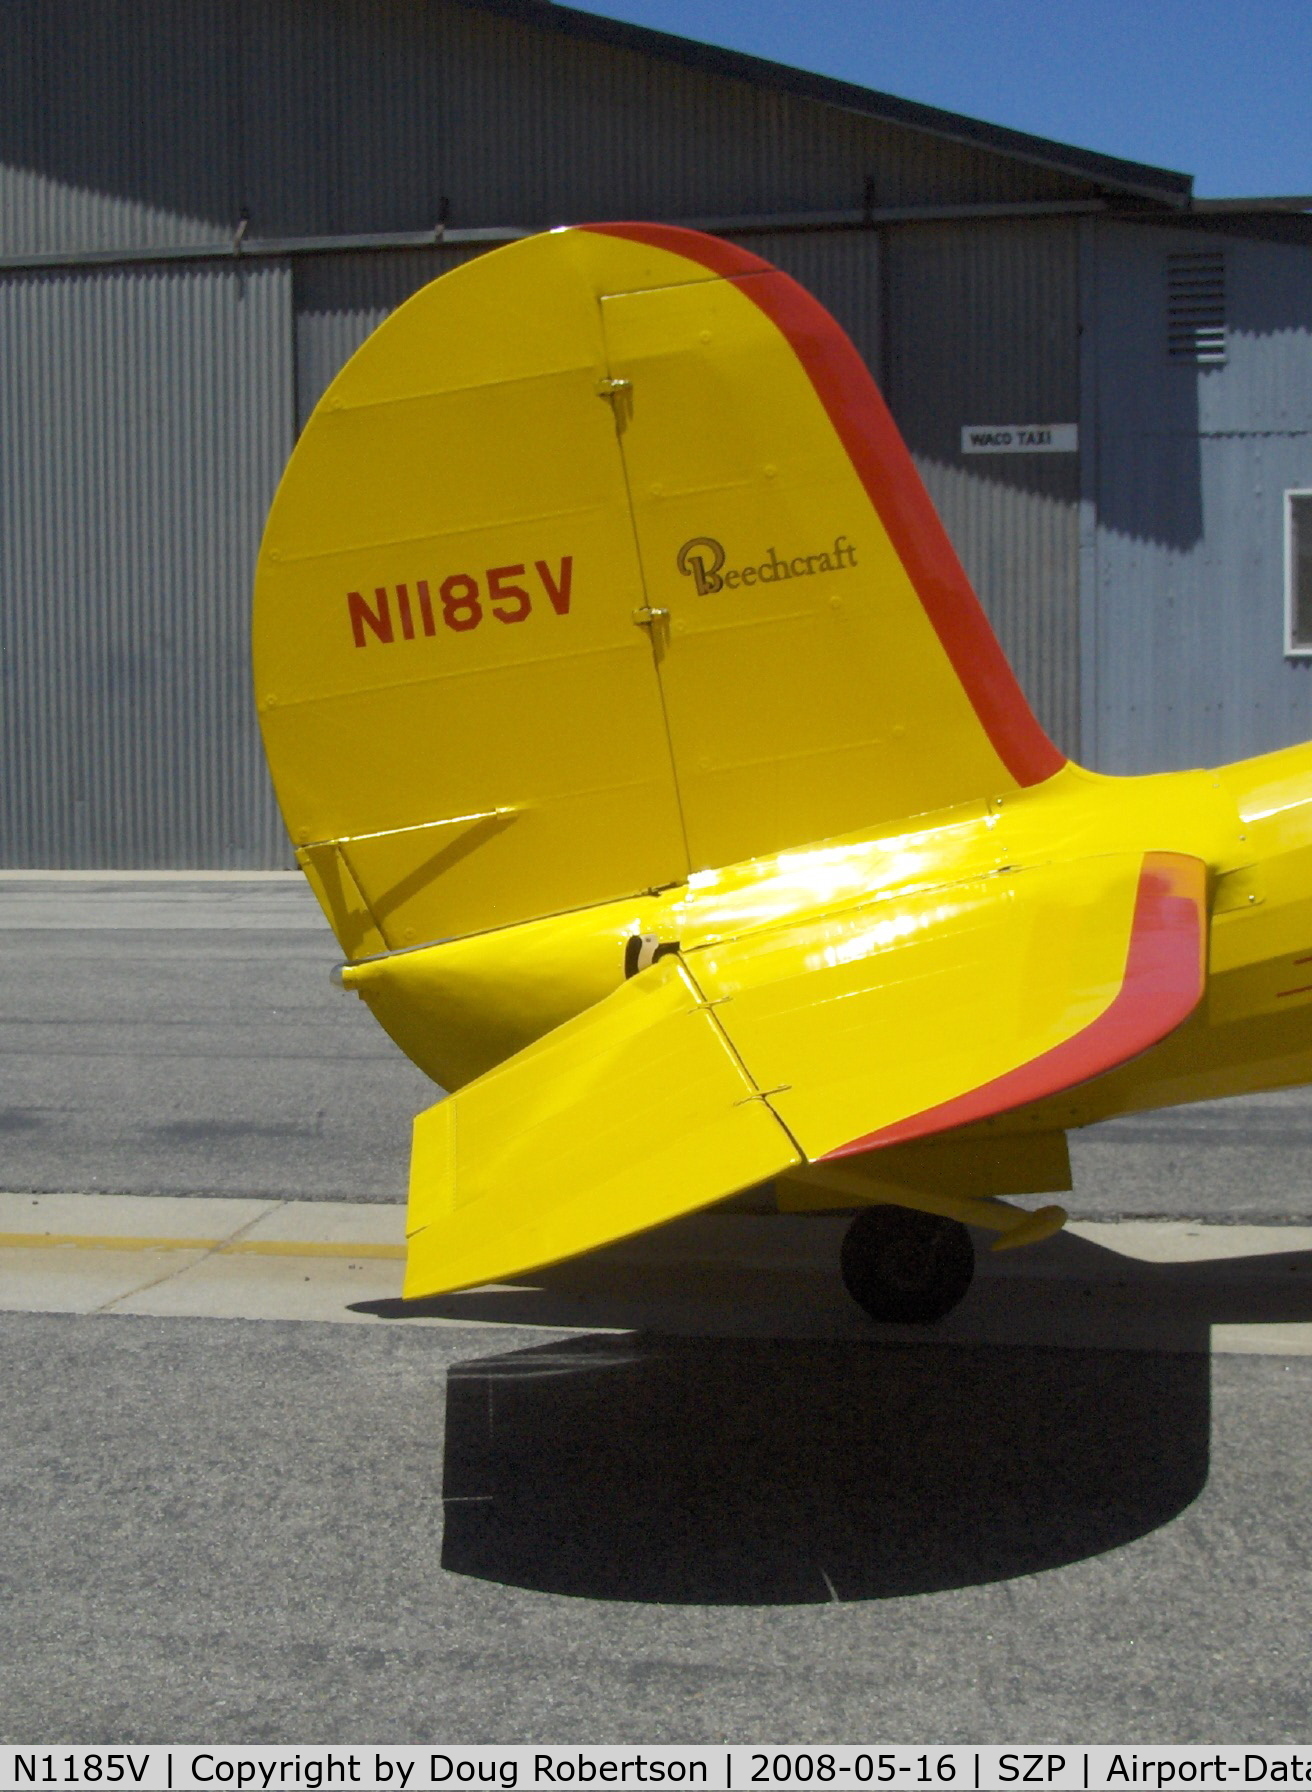
The kit was boxed by a couple of different manufacturers, and an internet search will turn up reviews of it.
I grabbed one from EBay a fee months ago for $20, saw one for sale at a show yesterday for $50.
There's no Interior provided with the kit, nor even an opening for wheel wells. The original issue had an electric motor to spin the prop to allow the model to taxi around under its own power. The wings are short and as you mentioned, straight out of the box it has the cowling for a G model, but the Instructions do provide pictures on how to convert the model to look like an earlier D version. The engine is just a front, and basic.
If you have the ability and want to make an accurate staggerwing from this model, you'd be better off scratchbuilding the whole thing. There's really not much that's salvageable.
Certainly only a kit for collectors, whilst the rest of us hope that someone comes along with a new large scale staggerwing series.
-
9 hours ago, Crutch said:
DDC, what decals were the aftermarket that you used?
G'day mate, I used the XtraDecal sheet for the T-28B/D
https://www.scalemates.com/kits/xtradecal-x48-112-t-28b-bd-trojan--545674
Denzil.
-
On 12/28/2020 at 10:49 AM, Drake64 said:
Beautiful work

Roberto
On 12/28/2020 at 2:40 PM, Sodasorb said:Looks great! I have one in the stash. Thanks for the tips on your build thread.
Thanks guys!!
-
On 12/29/2020 at 1:13 PM, Geoff M said:
You did a fine job to get that one done. Roden does some very under represented kits for which they should be applauded but they tend to be a bit rough. I had similar experience with their Birddog kit.
Geoff M
Thankyou mate! Yes roden does some really neat stuff, so while I moan about having to apply basic modelling skills, im still very happy that their kits are available. Its a first world problem for sure 😂
-
On 12/29/2020 at 12:21 PM, YF65_CH53E said:
Denzil,
I will certainly give them a go. I have been looking for a replacement paint system since I got back into the hobby after a 20+ year hiatus. Very good info to know. MM, Tamiya all over the place these days. With Vallejo, AK, Revell Germany releasing their own paints....ARGHHHHH, so good to get some inside gouge!!
r/Gunny
I feel that pain! There are SO MANY options to choose from, we are spoiled for choice! I'm very happy with how the MRP sprays, and after using them on a few builds now, im getting used to how they act and react to being applied.
I dont think there's a particularly wrong choice amongst the big name paint brands, and the outcome of your experience is determined predominantly by how much effort you're willing to invest in learning how your chosen brand like to be applied.
Welcome back to the hobby, I'm looking forward to seeing your progress 😄
-
14 hours ago, YF65_CH53E said:
Denzel,
Thank you so much. Straight forward advice and simple technique. I will try it on my current build. I am not familiar with MRP lacquer? I use model master gloss coat and dull coat. I've seen wat based paints in those from other forum mates.
Thanks a bunch. Cheers!
Gunny Dan
You're welcome mate!
Simple water colours over the top of completely dry enamels SHOULD be ok, but as always, if in doubt, test it on something else first!
I spent a lifetime using MM and humbrol enamels, but over the last decade their formulas have gotten awful. They don't brush well, and the pigment doesn't cover. I heard about MRP lacquers somewhere and wanted to give them a try. They come pre-thinned for airbrush use only, so you always get a consistent result out of your gun. They are like night and day compared to the current crop of enamels. Fast drying, excellent coverage and density, and very tough. Yes it means switching to lacquer thinner instead of mineral turps, but otherwise they are very user friendly.
Sprue Brothers sell them here in the USA, theyre well worth a try!
Denzil
-
2 hours ago, Geoff M said:
How was it to build?
Thanks mate! It was a bit of a pig!
Denzil
-
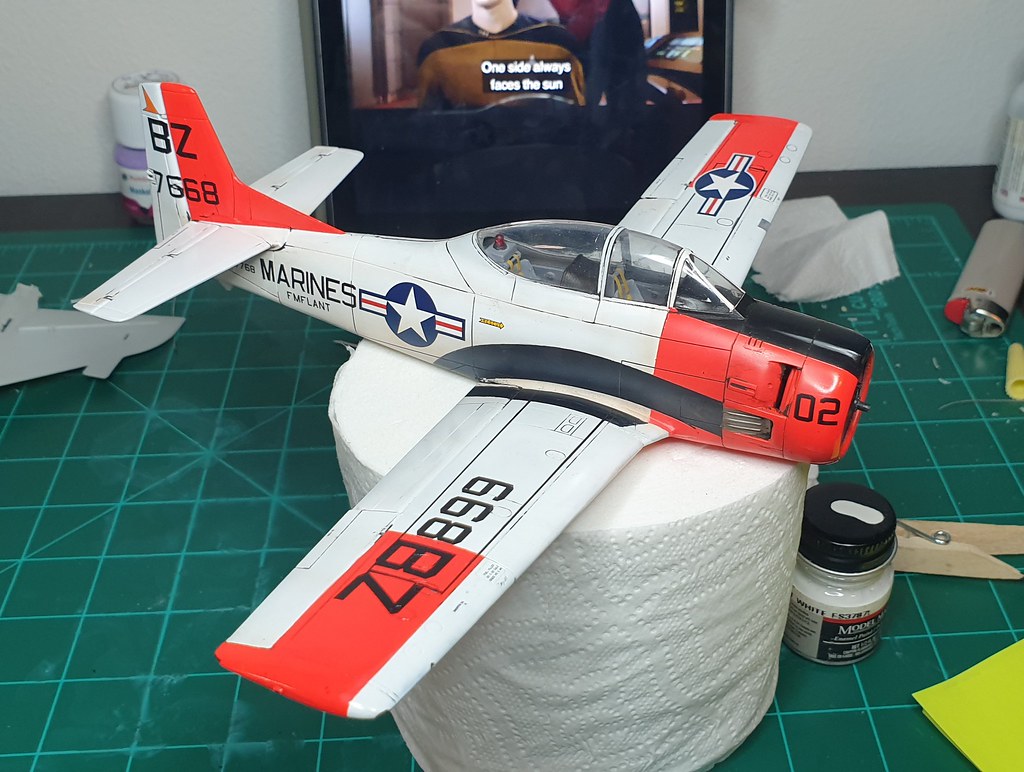
Wrestled this one across the line!

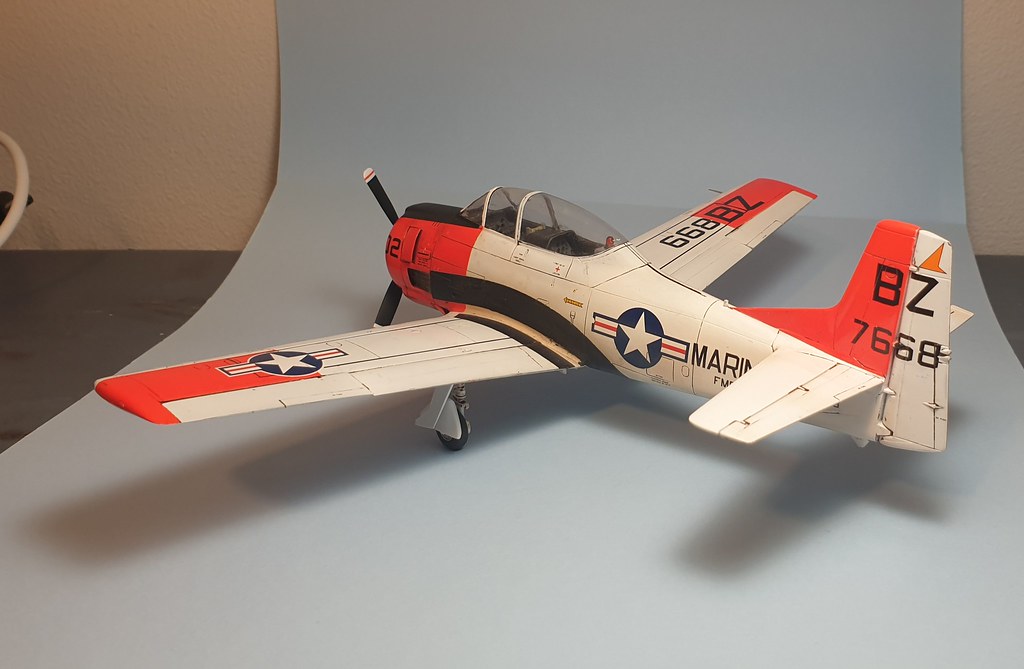
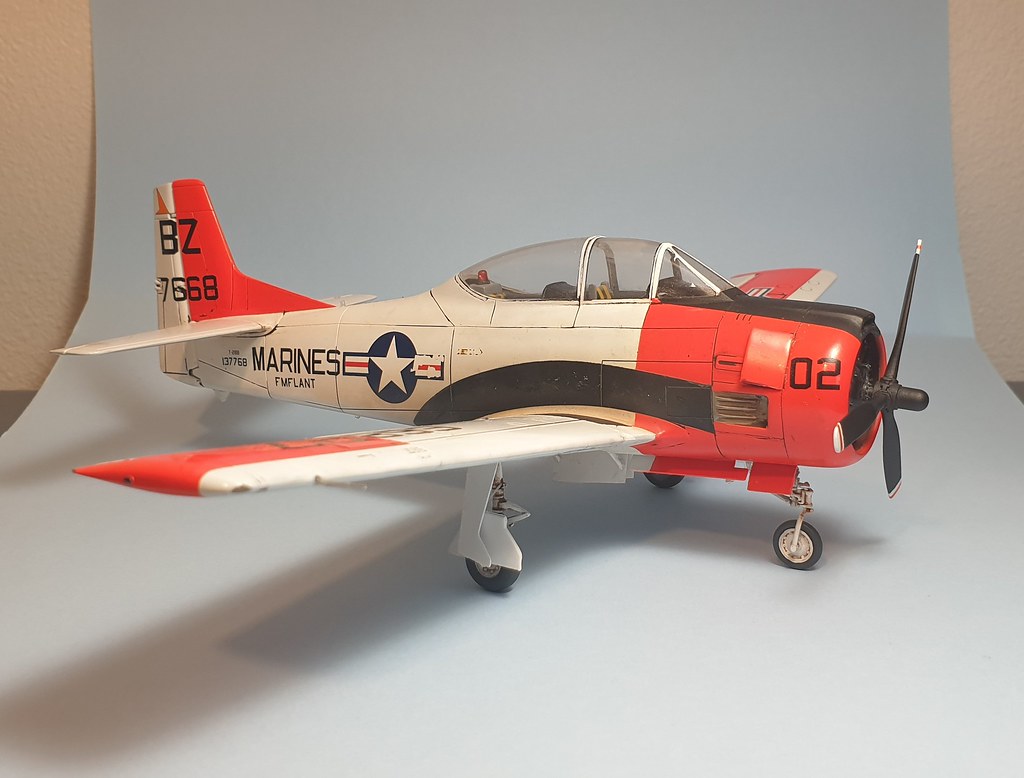
Denzil
-
-
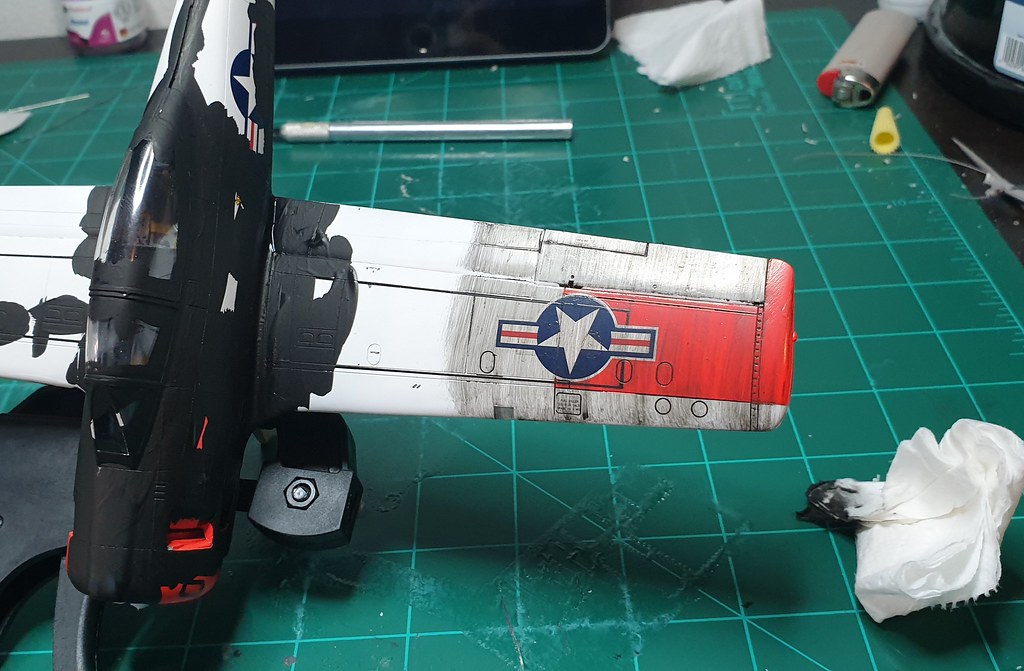
3 hours ago, YF65_CH53E said:
can you walk an armature as myself through the black weathering you just did? oils?
Thanks mate, Glad to help, its dead simple!
First step is a nice glosscoat so seal everything in place. I think i used MRP lacquer for this one. Pledge/future whatever it's called is also robust enough for this layer.
Once that's dry, i use water colours. They are easy to use, won't hurt the underlying surface and easy to cleanup! I bought a cheap 24 pack from hobby lobby, which is overkill because I primarily use black and burnt umber mixed to a satisfactory shade. Thin it out with a lot of water, and add a drop of dish soap to break the surface tension and flow more easily over your model.
I paint on wherever I think the real aircraft will have reasons to be accentuated. Deep gaps between parts, fluid leaks etc.
I put it aside to dry for a few hours (drying time will depend on how thick you lay it on), then using soft paper towel, I wipe the off the excess, trying to do it in direction of airflow when possible. Just keep wiping off until you've got the desired result. If its too.messy, keep wiping until it's satisfactory. Wiped too much off? Just paint some more on and repeat.
I have since learned that using single ply toilet paper is better than 2 or 3 ply, and the multi-ply sheets have a fine adhesive layer to keep them from falling apart.
Dont be afraid to experiment with colours, you can always wash it off if youre not happy with the results!
Id i were doing this one again, id probably use a lighter colour wash.
After you're happy with your finish, let it dry, and then coat with another clear coat. I have not had issue covering these cheap watercolours with MRP lacquer, but I cant guarantee compatibility with everything. If in doubt, test it on somewhere that won't be seen or a test mule.
Its an easy way to make kits look slightly more "lived-in". Hope you have a go with it soon!
Denzil.
-
JohnEB's on the money.
170/172s and 180/182s can be a muddy mess unless you're a bit of an anorak.
As the stock of tailwheel'd examples has dried up, there are plenty of mods that can be done (it's a fairly easy conversion) to turn nose-wheeled examples into taildraggers, both 172s and 182s.
AndrewD, the Monogram kit is what youre after, if you can't find an original issue with floats for a decent price, i believe KeeKah (spelling) might do correct floats for the purpose.
Denzil
-
-
If you want to throw kits together, and just want to build all the dall together kits, for sure a ranking matters.
However, if you're wanting to learn new skills and add unusual subjects to your collection, have a go at some of the less highly ranked kits. ALL kits are buildable, but some do take a lot more work than others.
When youre not intimidated by the less than fall-together kits, you won't worry about how other people rank kits 🙂
Grab some cheap "unbuildables" and have a go 😄
-
WWII fighters, tamiya and hasegawa are all pretty high quality. Hobby boss has SOME good stuff, but that's on a kit by kit basis.
Floatplanes are a very mixed bag. If you want to build anything other than a catalina, youre going to be delving into all manner of short/limited run kits. Which isn't a bad thing, but just don't be suprised when theres no shake and bake Volmer Sportsman kit 😄
-
absolutely fantastic work!
-
Speaking of aftermarket decals...

Success!
Time for some weathering.

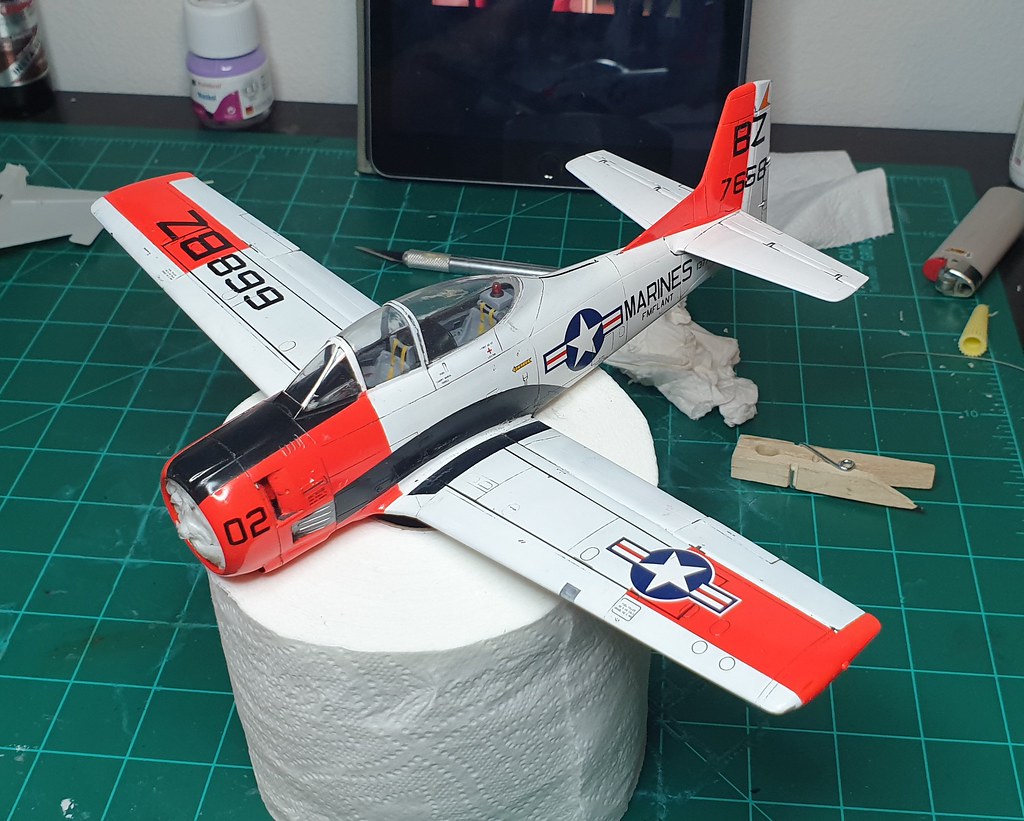
And some staining of various types
Denzil
-
By a substantial margin, Wingnut Wings is #1
-
Close second:
-
In a word; no.
In my experience, it seems only to be the mass-produced, mainstream stuff that comes shrink wrapped, and the kits that are going up in perceived value (monster facepalm) arent shrink wrapped from the factory.
-
On 7/22/2020 at 3:47 PM, Drifterdon said:
Looking good DDC. I have this one in the trainer build pile myself. I've noted your recommendations for gear replacement and I already have decals set aside as replacements. Can't wait to see this one drug across the finish line.
Thanks mate!
She takes a bit of effort, but is a better starting point than the old Monogram kit!
Brass gear and aftermarket decals are an absolute necessity, unfortunately.
I appreciate your encouragement, big motivation to see her finished and in the cabinet!
Denzil
-
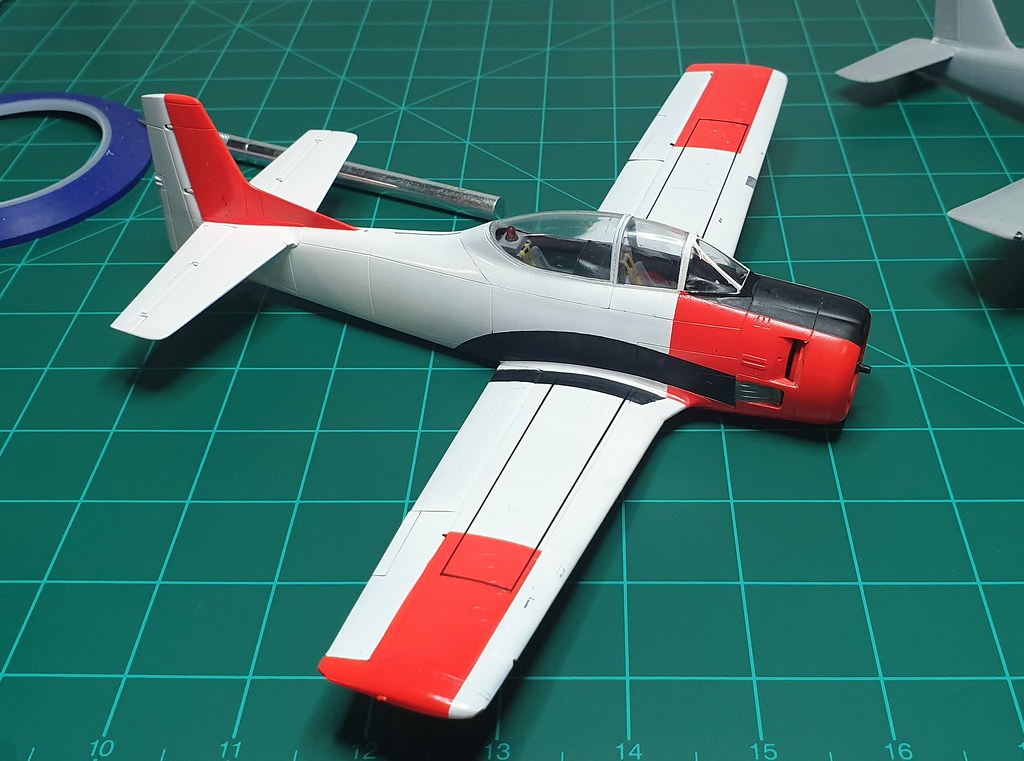
OK!
A move from the midwest to the Pacific North West and a new job, and the bench is finally set up for action

I used masking tape to peel off the decals, and removed the landing gear because I wasn't happy with how it sat.
First up, mask and paint the wing walks to suit the aftermarket decals.

-
1 hour ago, Mstor said:
The first model with recessed panel lines that I remember building was an Otaki 1/48 P-51D. I was amazed at the fine detailing and how much more realistic it looked. After that, I started looking for more like it, but they were rare at the time.
Even by current standards, they're still very nice kits!
-
14 minutes ago, niart17 said:
😁 thanks for putting that so tactfully. Now get off my lawn ya young punk. 🤣
I'll be so lucky if i live long enough to claim that title for myself 😆🤣
-
On 7/14/2020 at 7:39 AM, IPMSUSA2 said:
... but you have to wonder if today's modelers...especially the younger ones...have even heard of the early methods, let alone would be able to effectively use them.
Just a few thoughts from the archives.
30 something year old modeller here!
This discussion is a fascinating read for someone like me who grew up reading my father's modelling magazines, and absorbing all the different techniques that people used to varying success in the pursuit of realism.
After building airfix, heller and monogram kits, I remember being amazed at the crisp recessed detail on the first Otaki 1/48 kit I saw 😆
This discussion feels similar in spirit to a recent one about a lack of basic skills, in leiu of flashy accessories, and how the focus has shifted.
It's remarkable how our silly little pastime of playing with chunks of plastic has evolved over the years, and for someone who wasn't around to experience all the changes in person, I'm glad you more, er, youth-challenged guys are around to remind us how much has changed.
As for the discussion at hand: I'm an aircraft mechanic by trade (vintage, warbirds, GA and corporate) and whilst I generally rescribe my models, scribed lines are usually completely inaccurate in terms of realism.
As said elsewhere, however, they do hold washes well and add visual interest.
Pity we never got the chance to see WnW's Lancaster, that one, with its overlapping skins and "oil canning" seemed it may have come the closest yet to portraying a realistic finish in scale.
Maybe it would have ushered in the next generation of finishing techniques?
Denzil
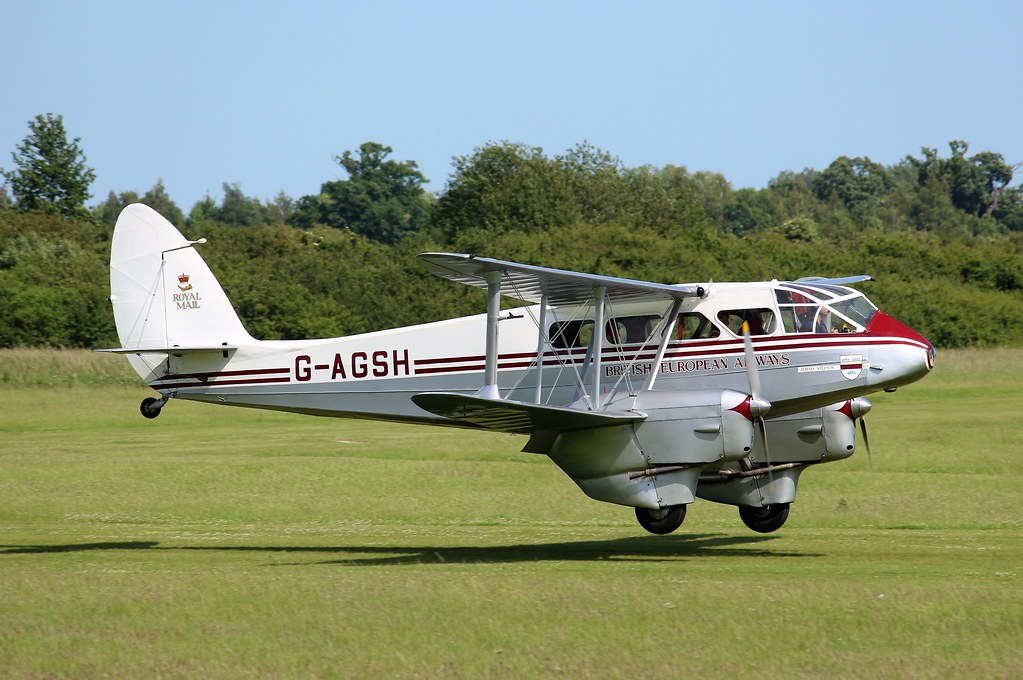
Beech Staggerwing, 1/32
in Classic Aviation Forum
Posted
A desktop model would be a good use for the staggerwing.
The beaver kit seems to pop up for sale relatively regularly
https://www.ebay.com/itm/314629244642?mkcid=16&mkevt=1&mkrid=711-127632-2357-0&ssspo=oSx5ddYdR1i&sssrc=2349624&ssuid=bTejNdsQTUW&var=&widget_ver=artemis&media=COPY