


Micro
-
Content Count
239 -
Joined
-
Last visited
Content Type
Profiles
Forums
Calendar
Posts posted by Micro
-
-
Thanks, Habu! That works wonderfully.

-
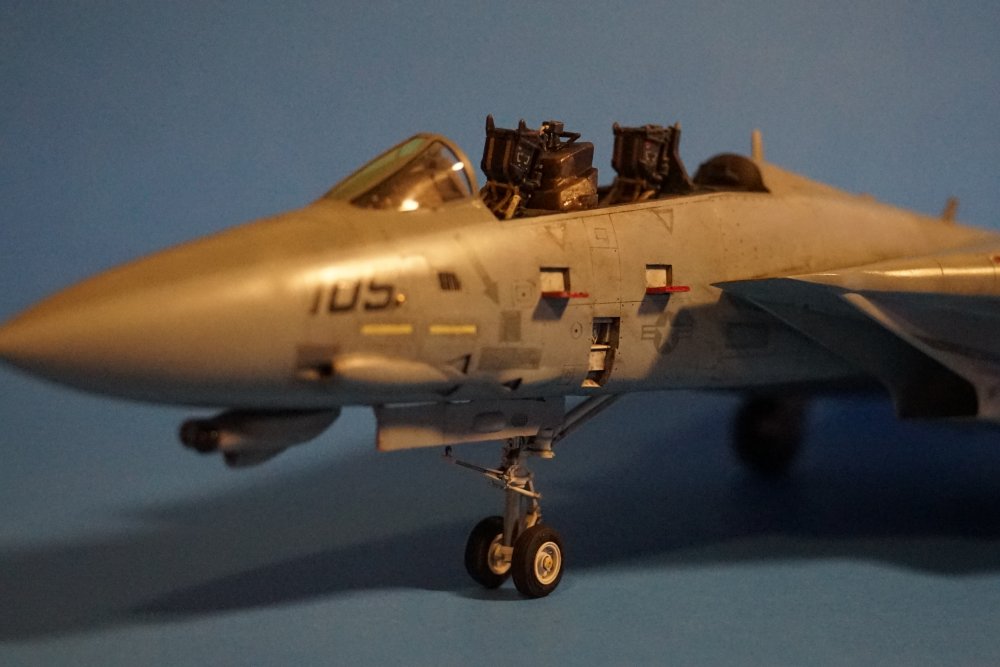
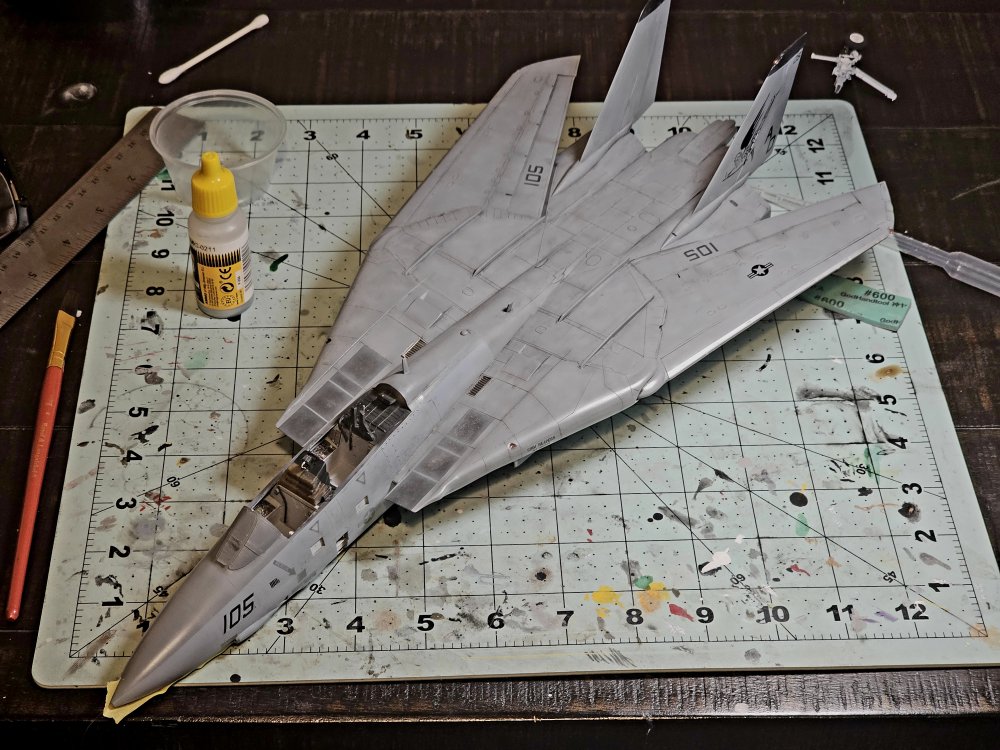
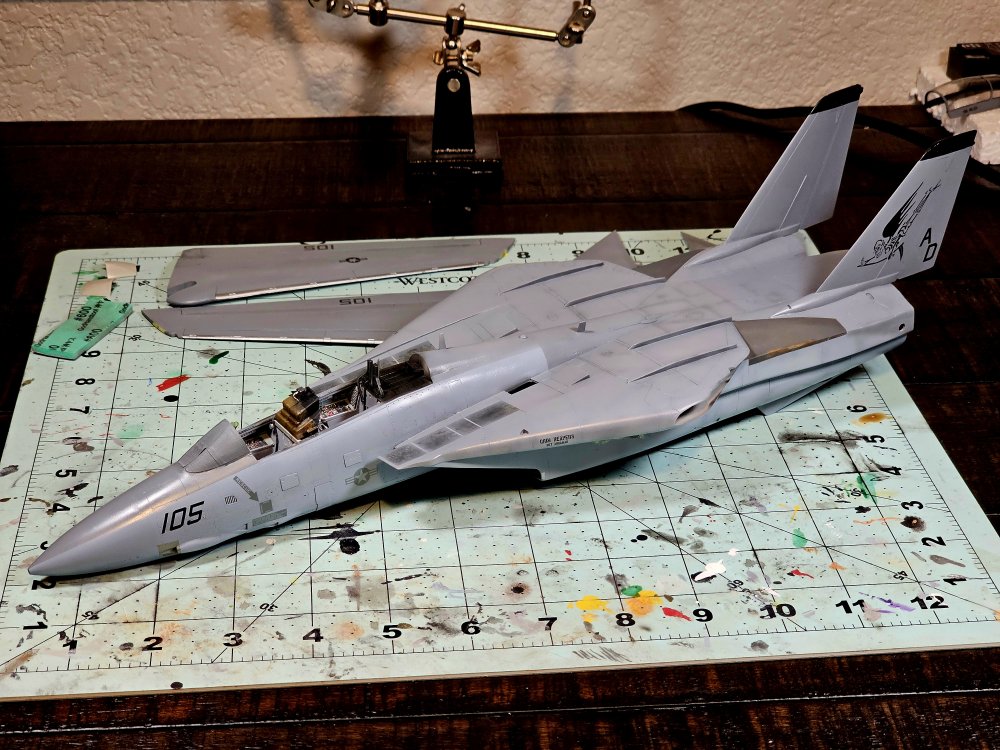
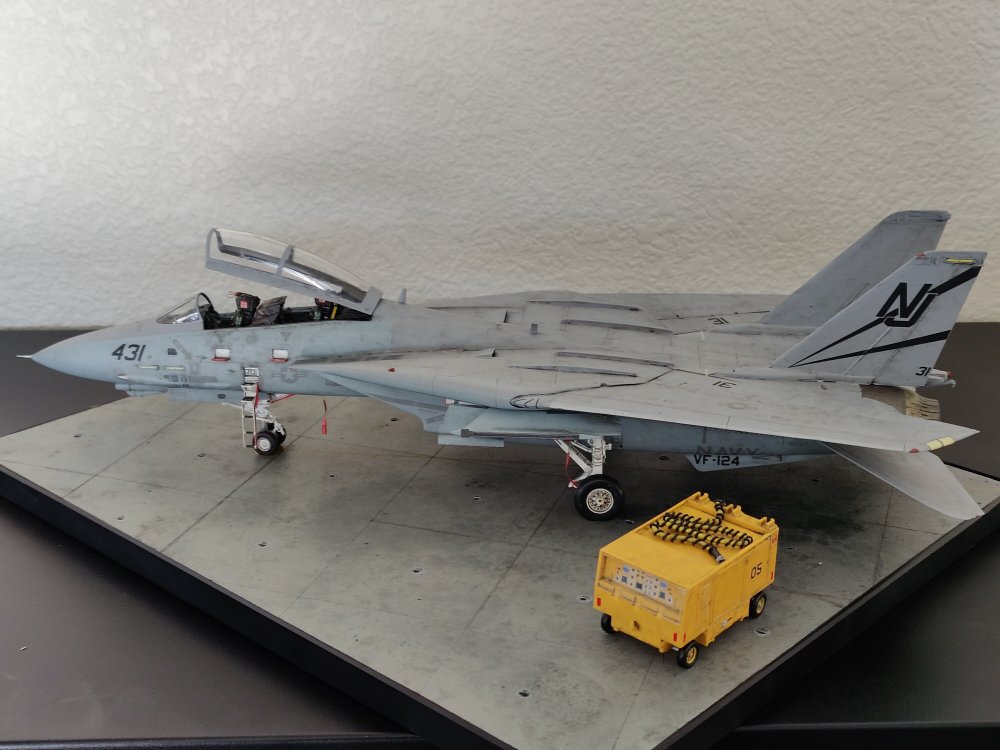
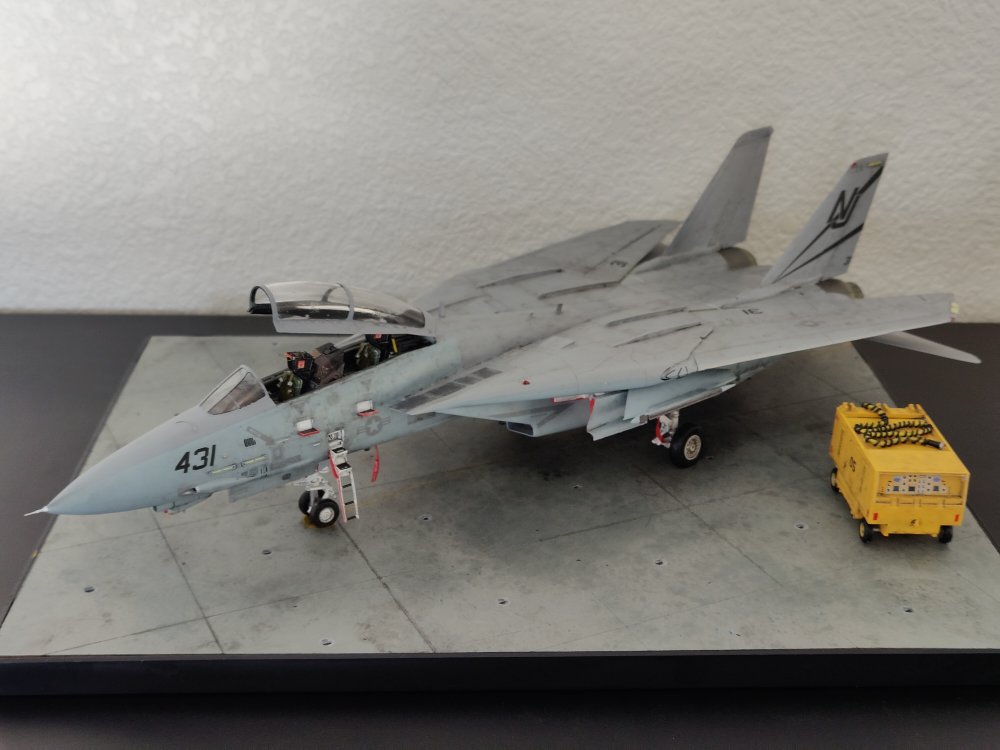
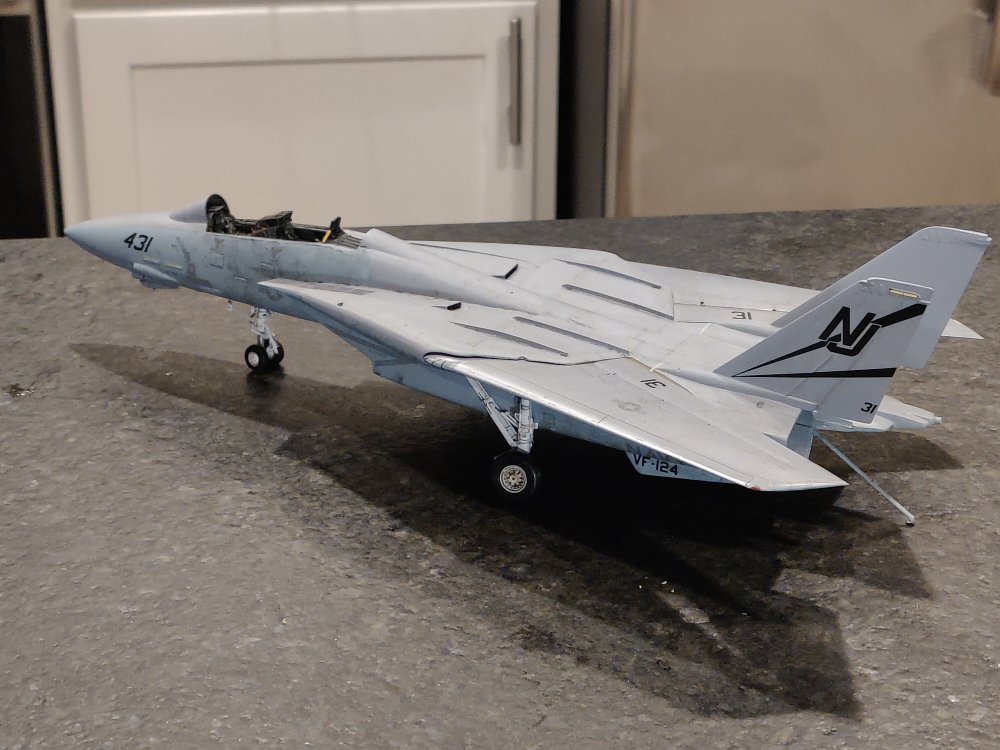
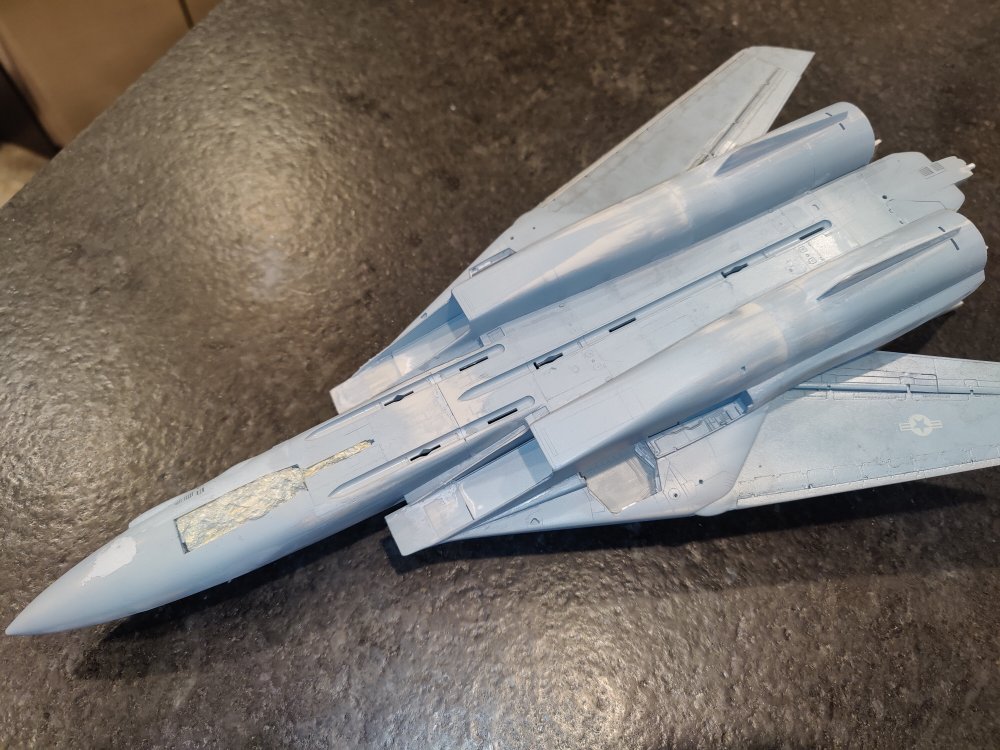
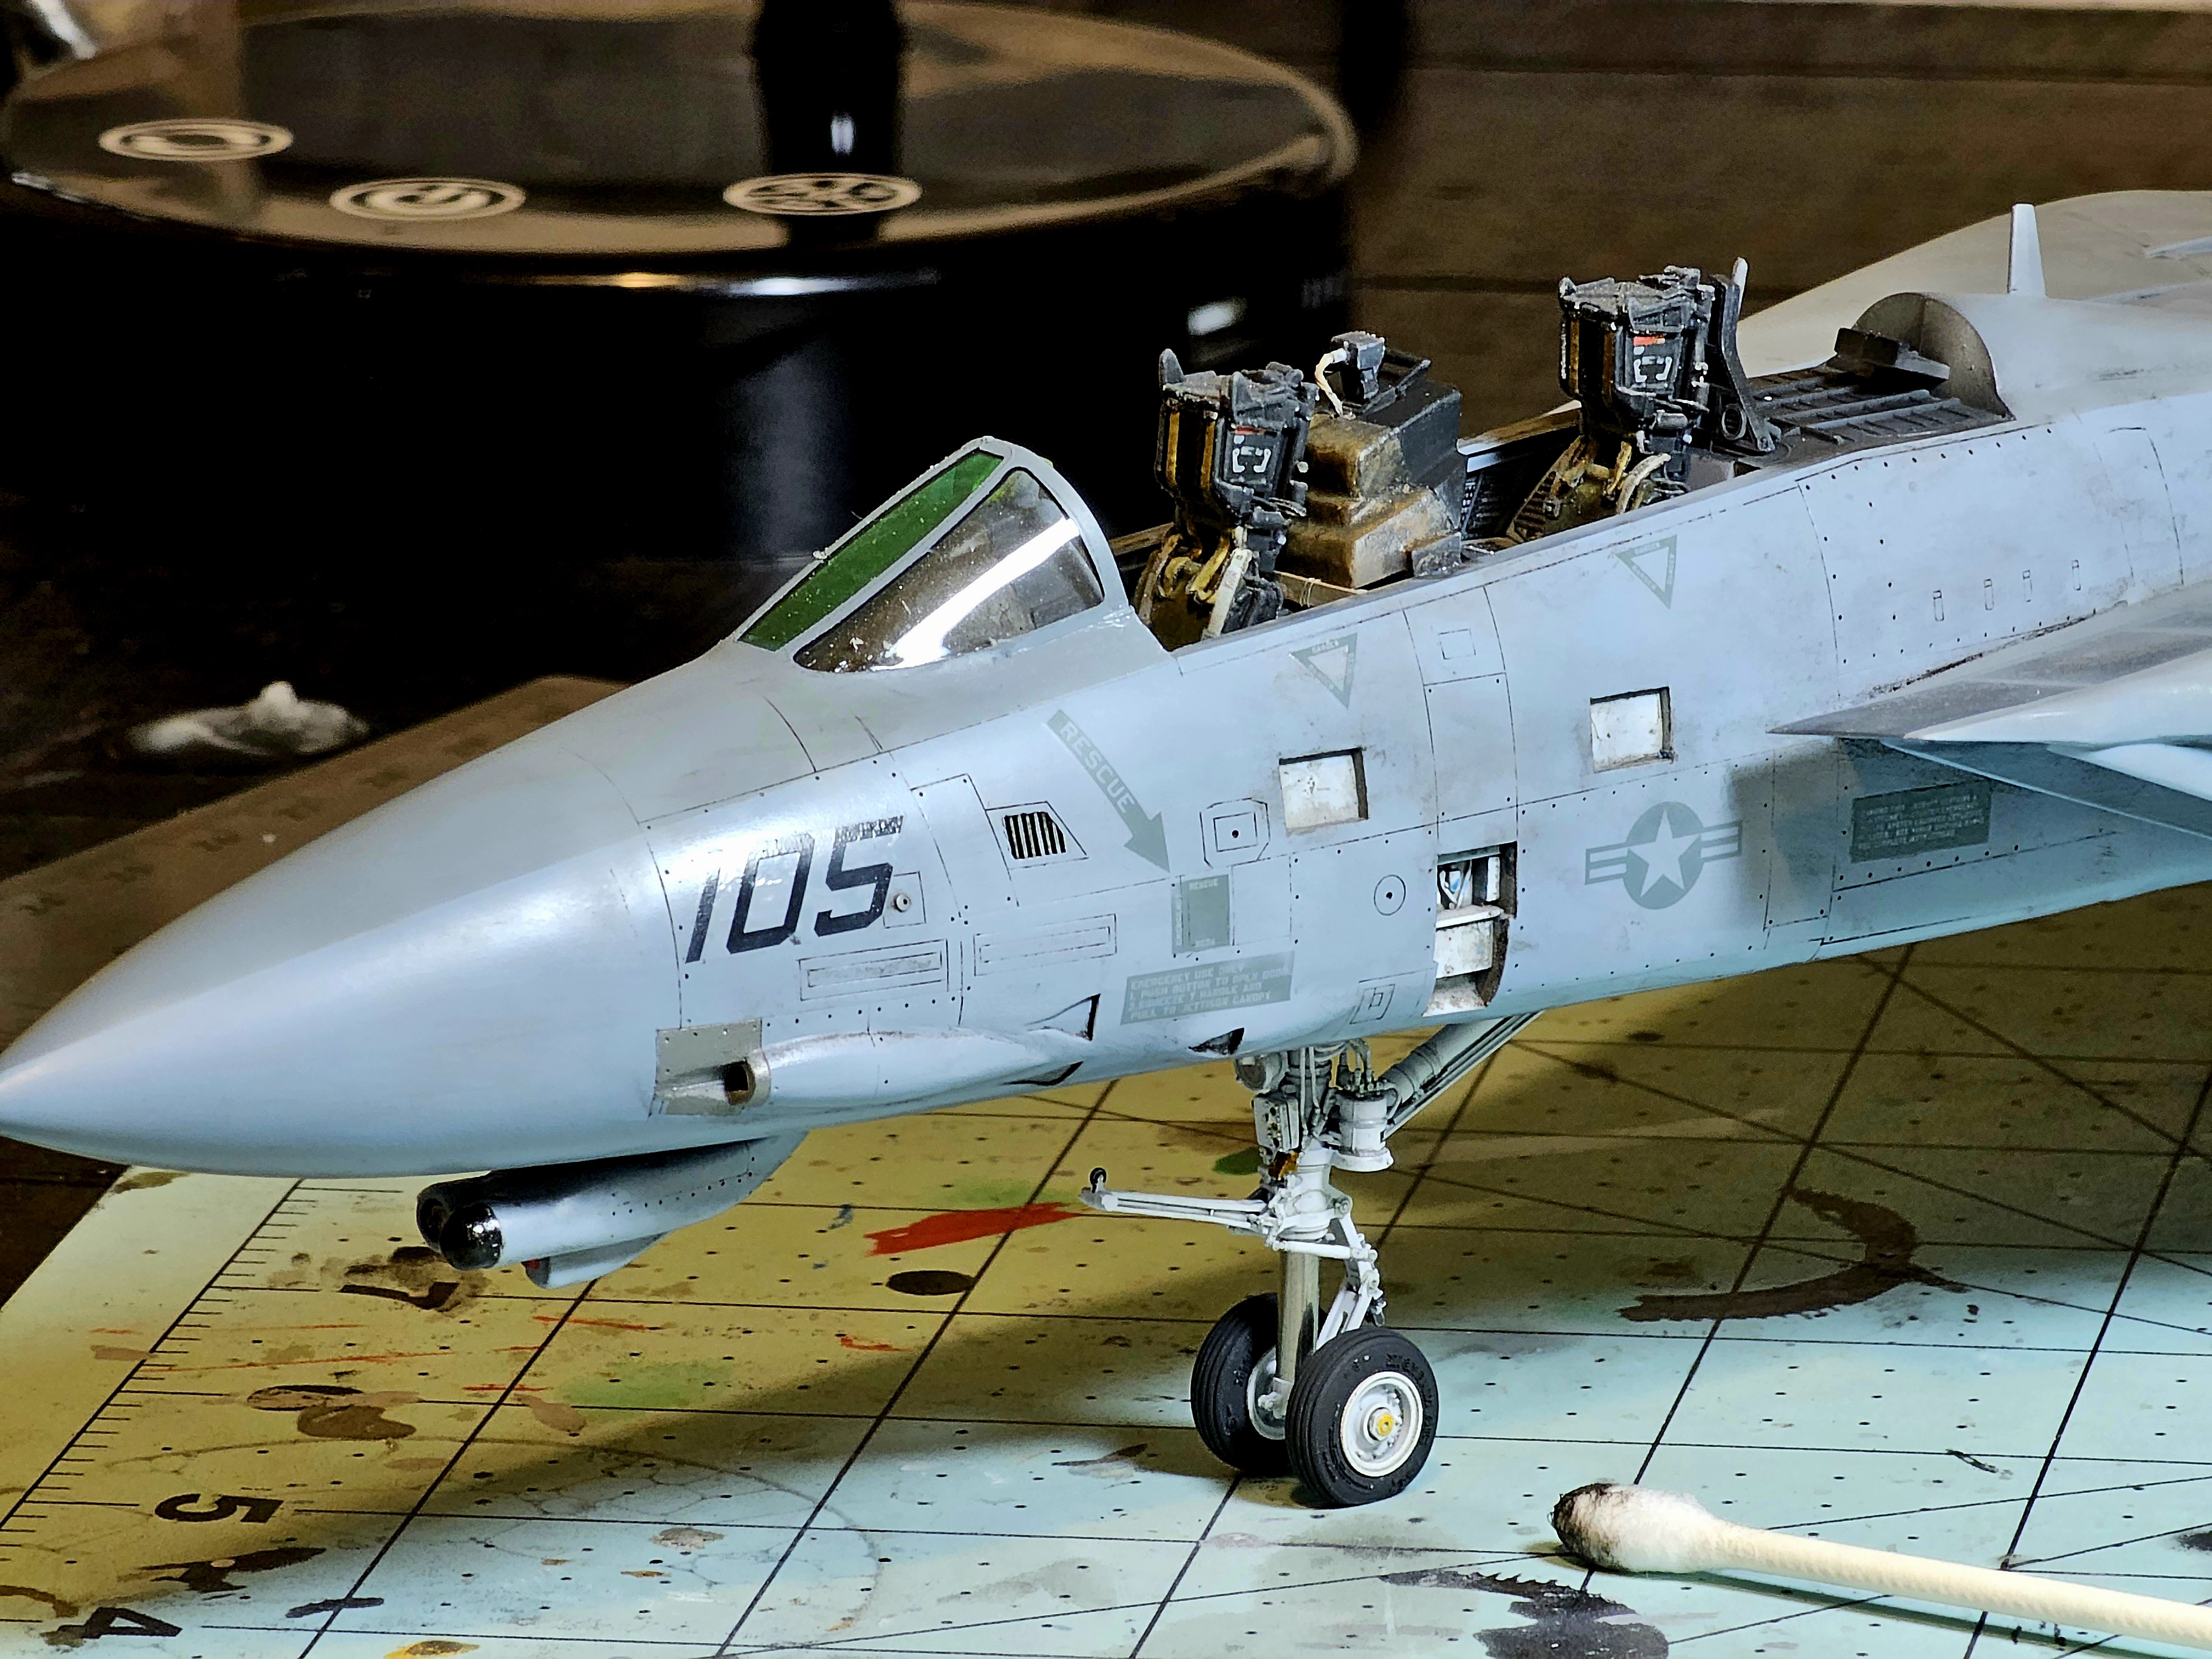
Starting to get into the final stages of this tempermental little beast. Also started working on my photography skills. Trying to figure out how to get everything in focus when up close.


-
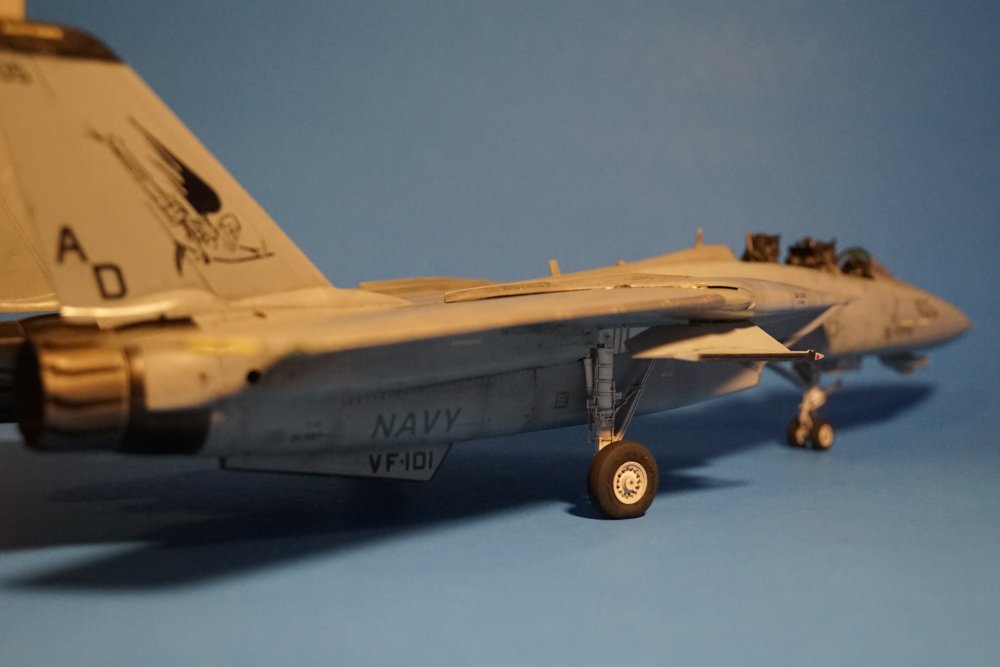
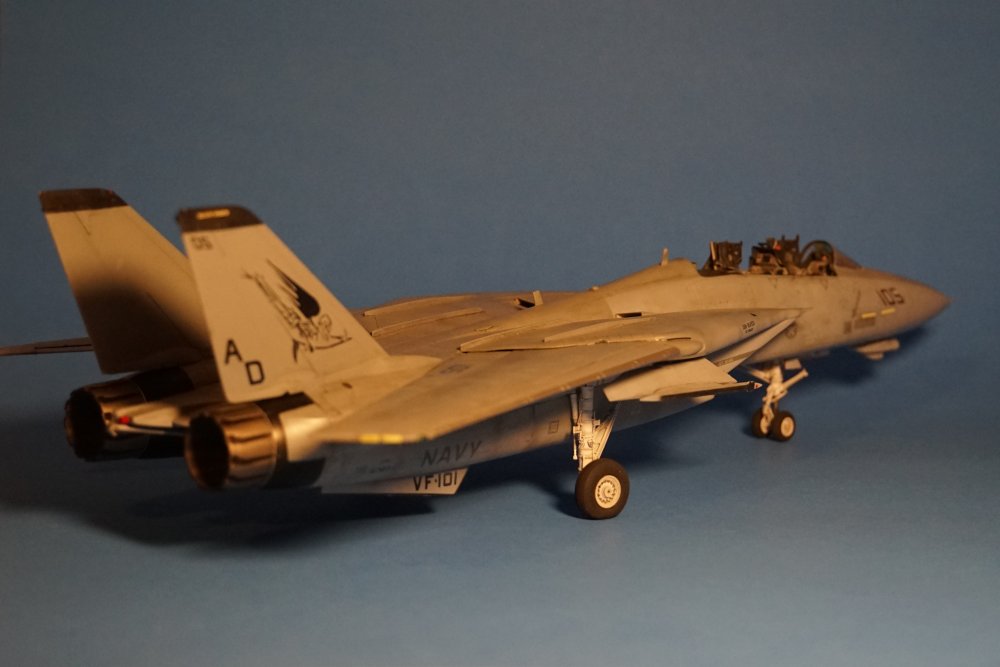
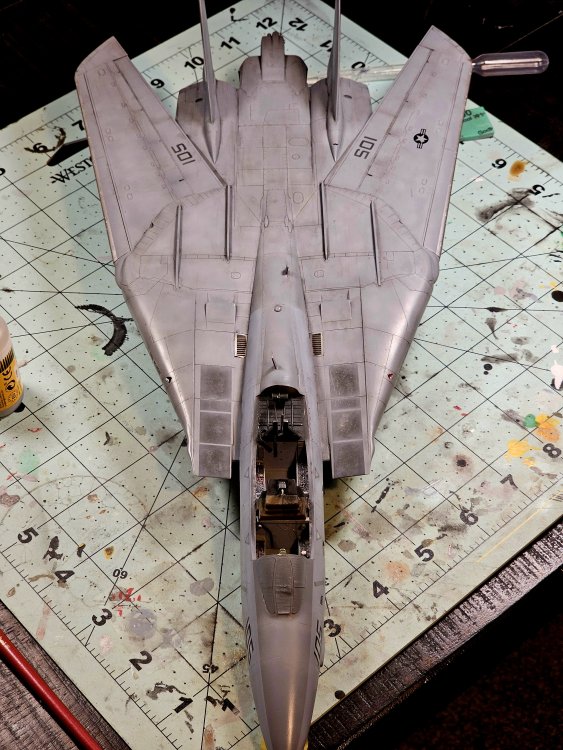
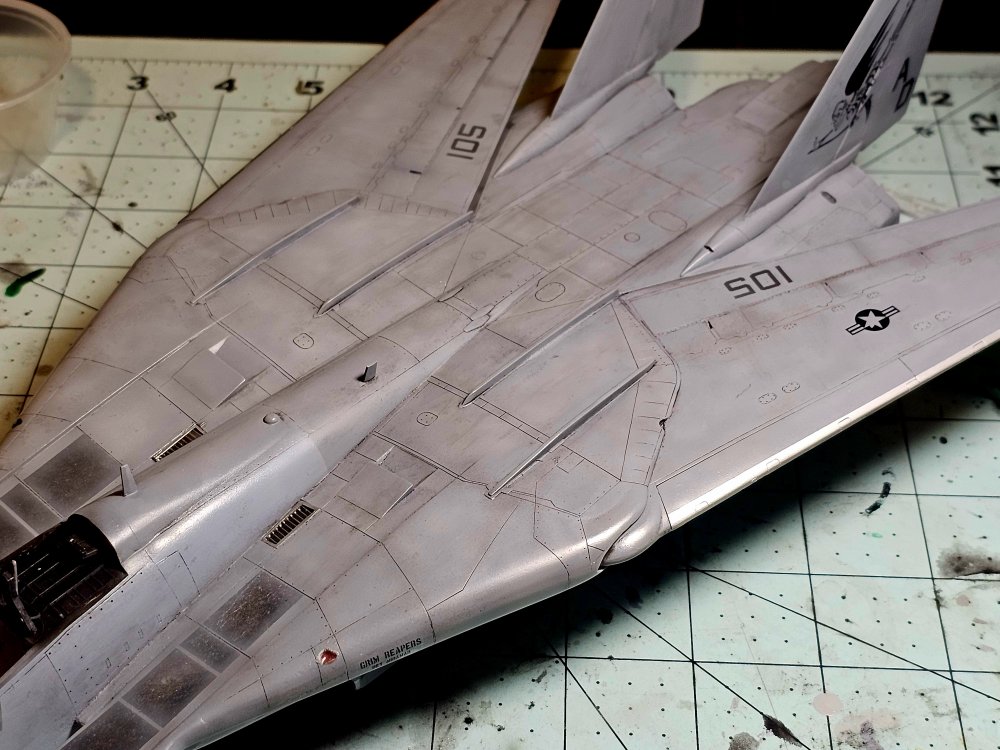
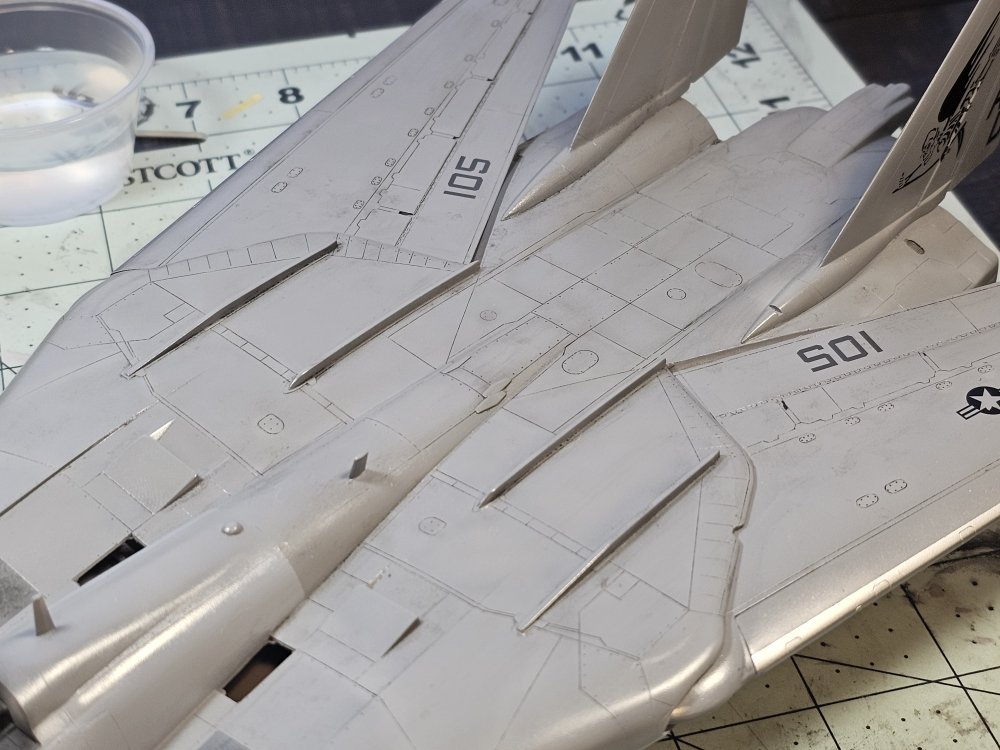
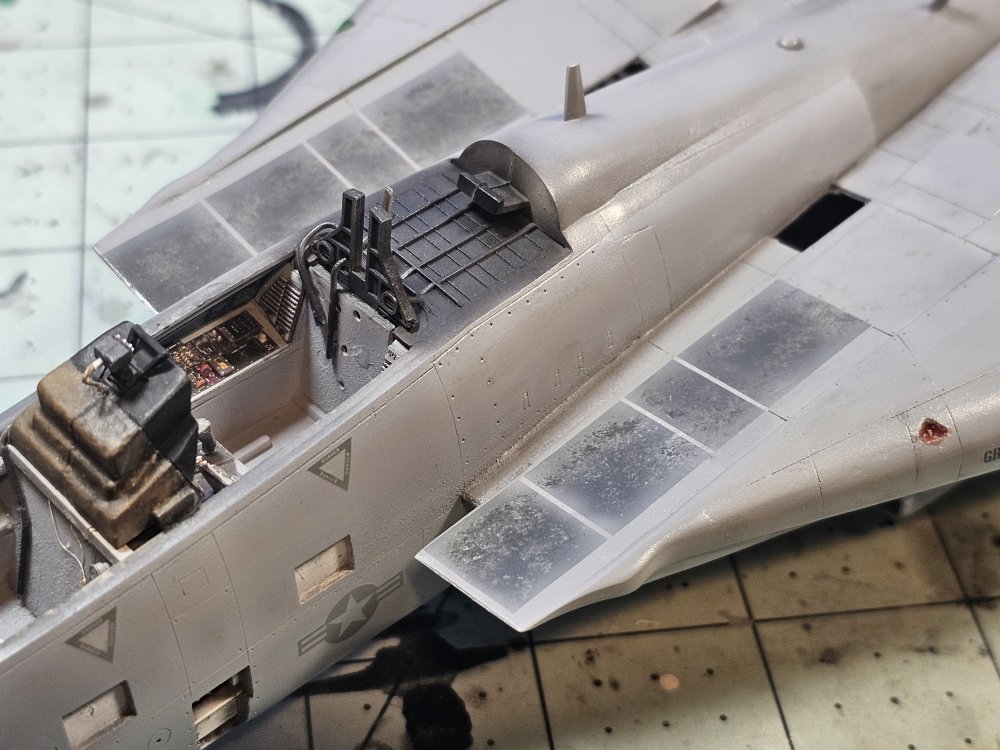
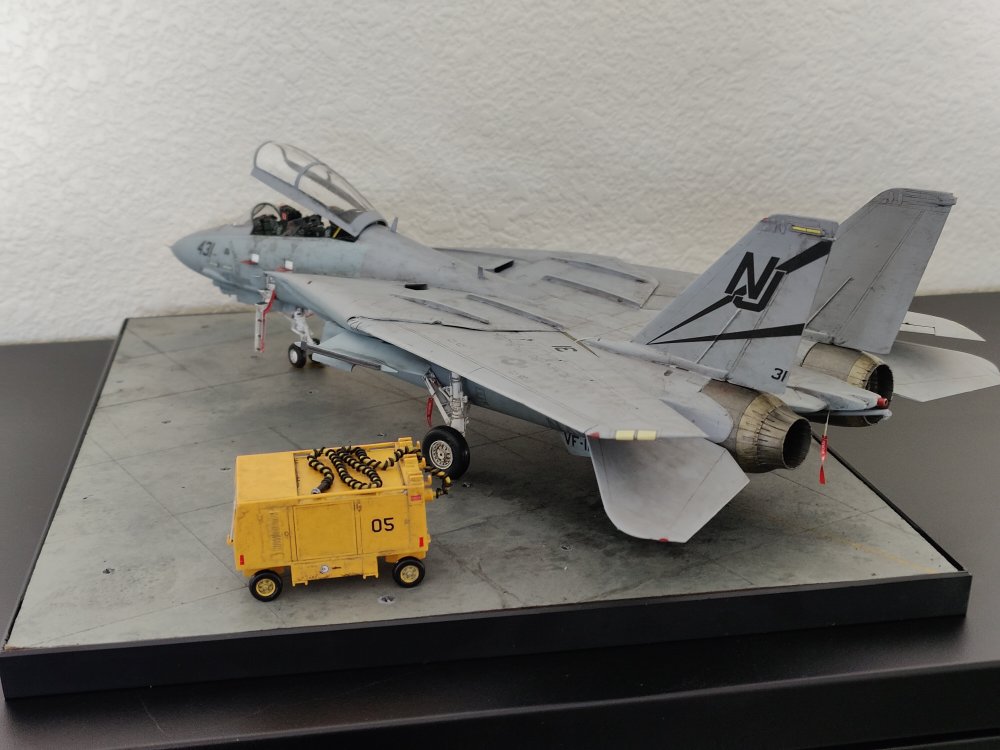
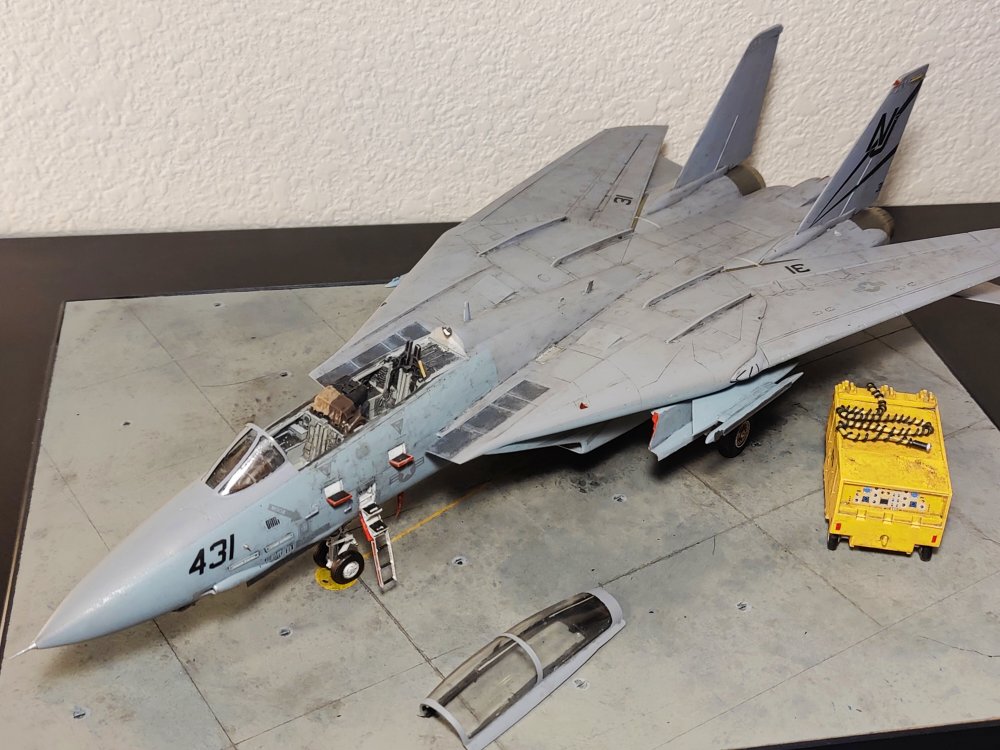
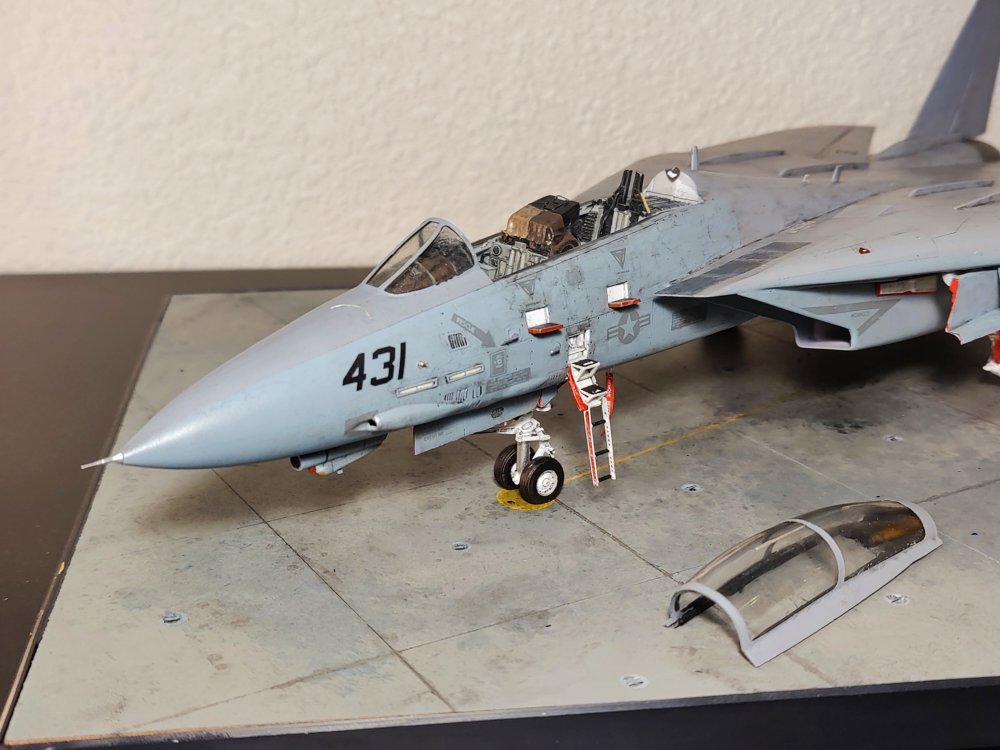
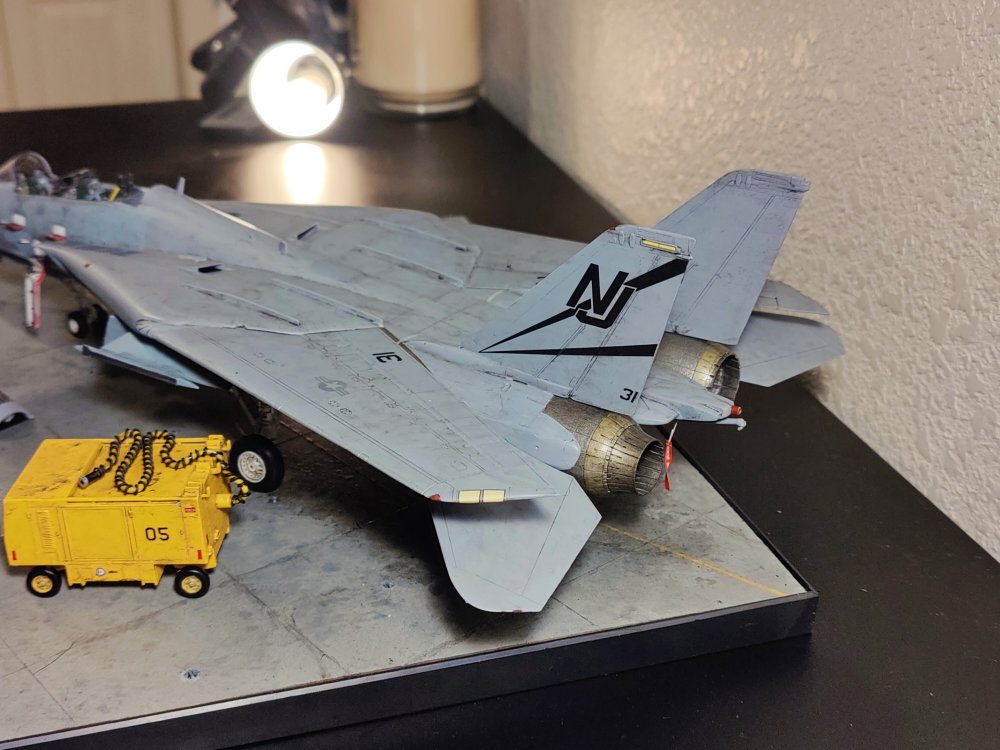
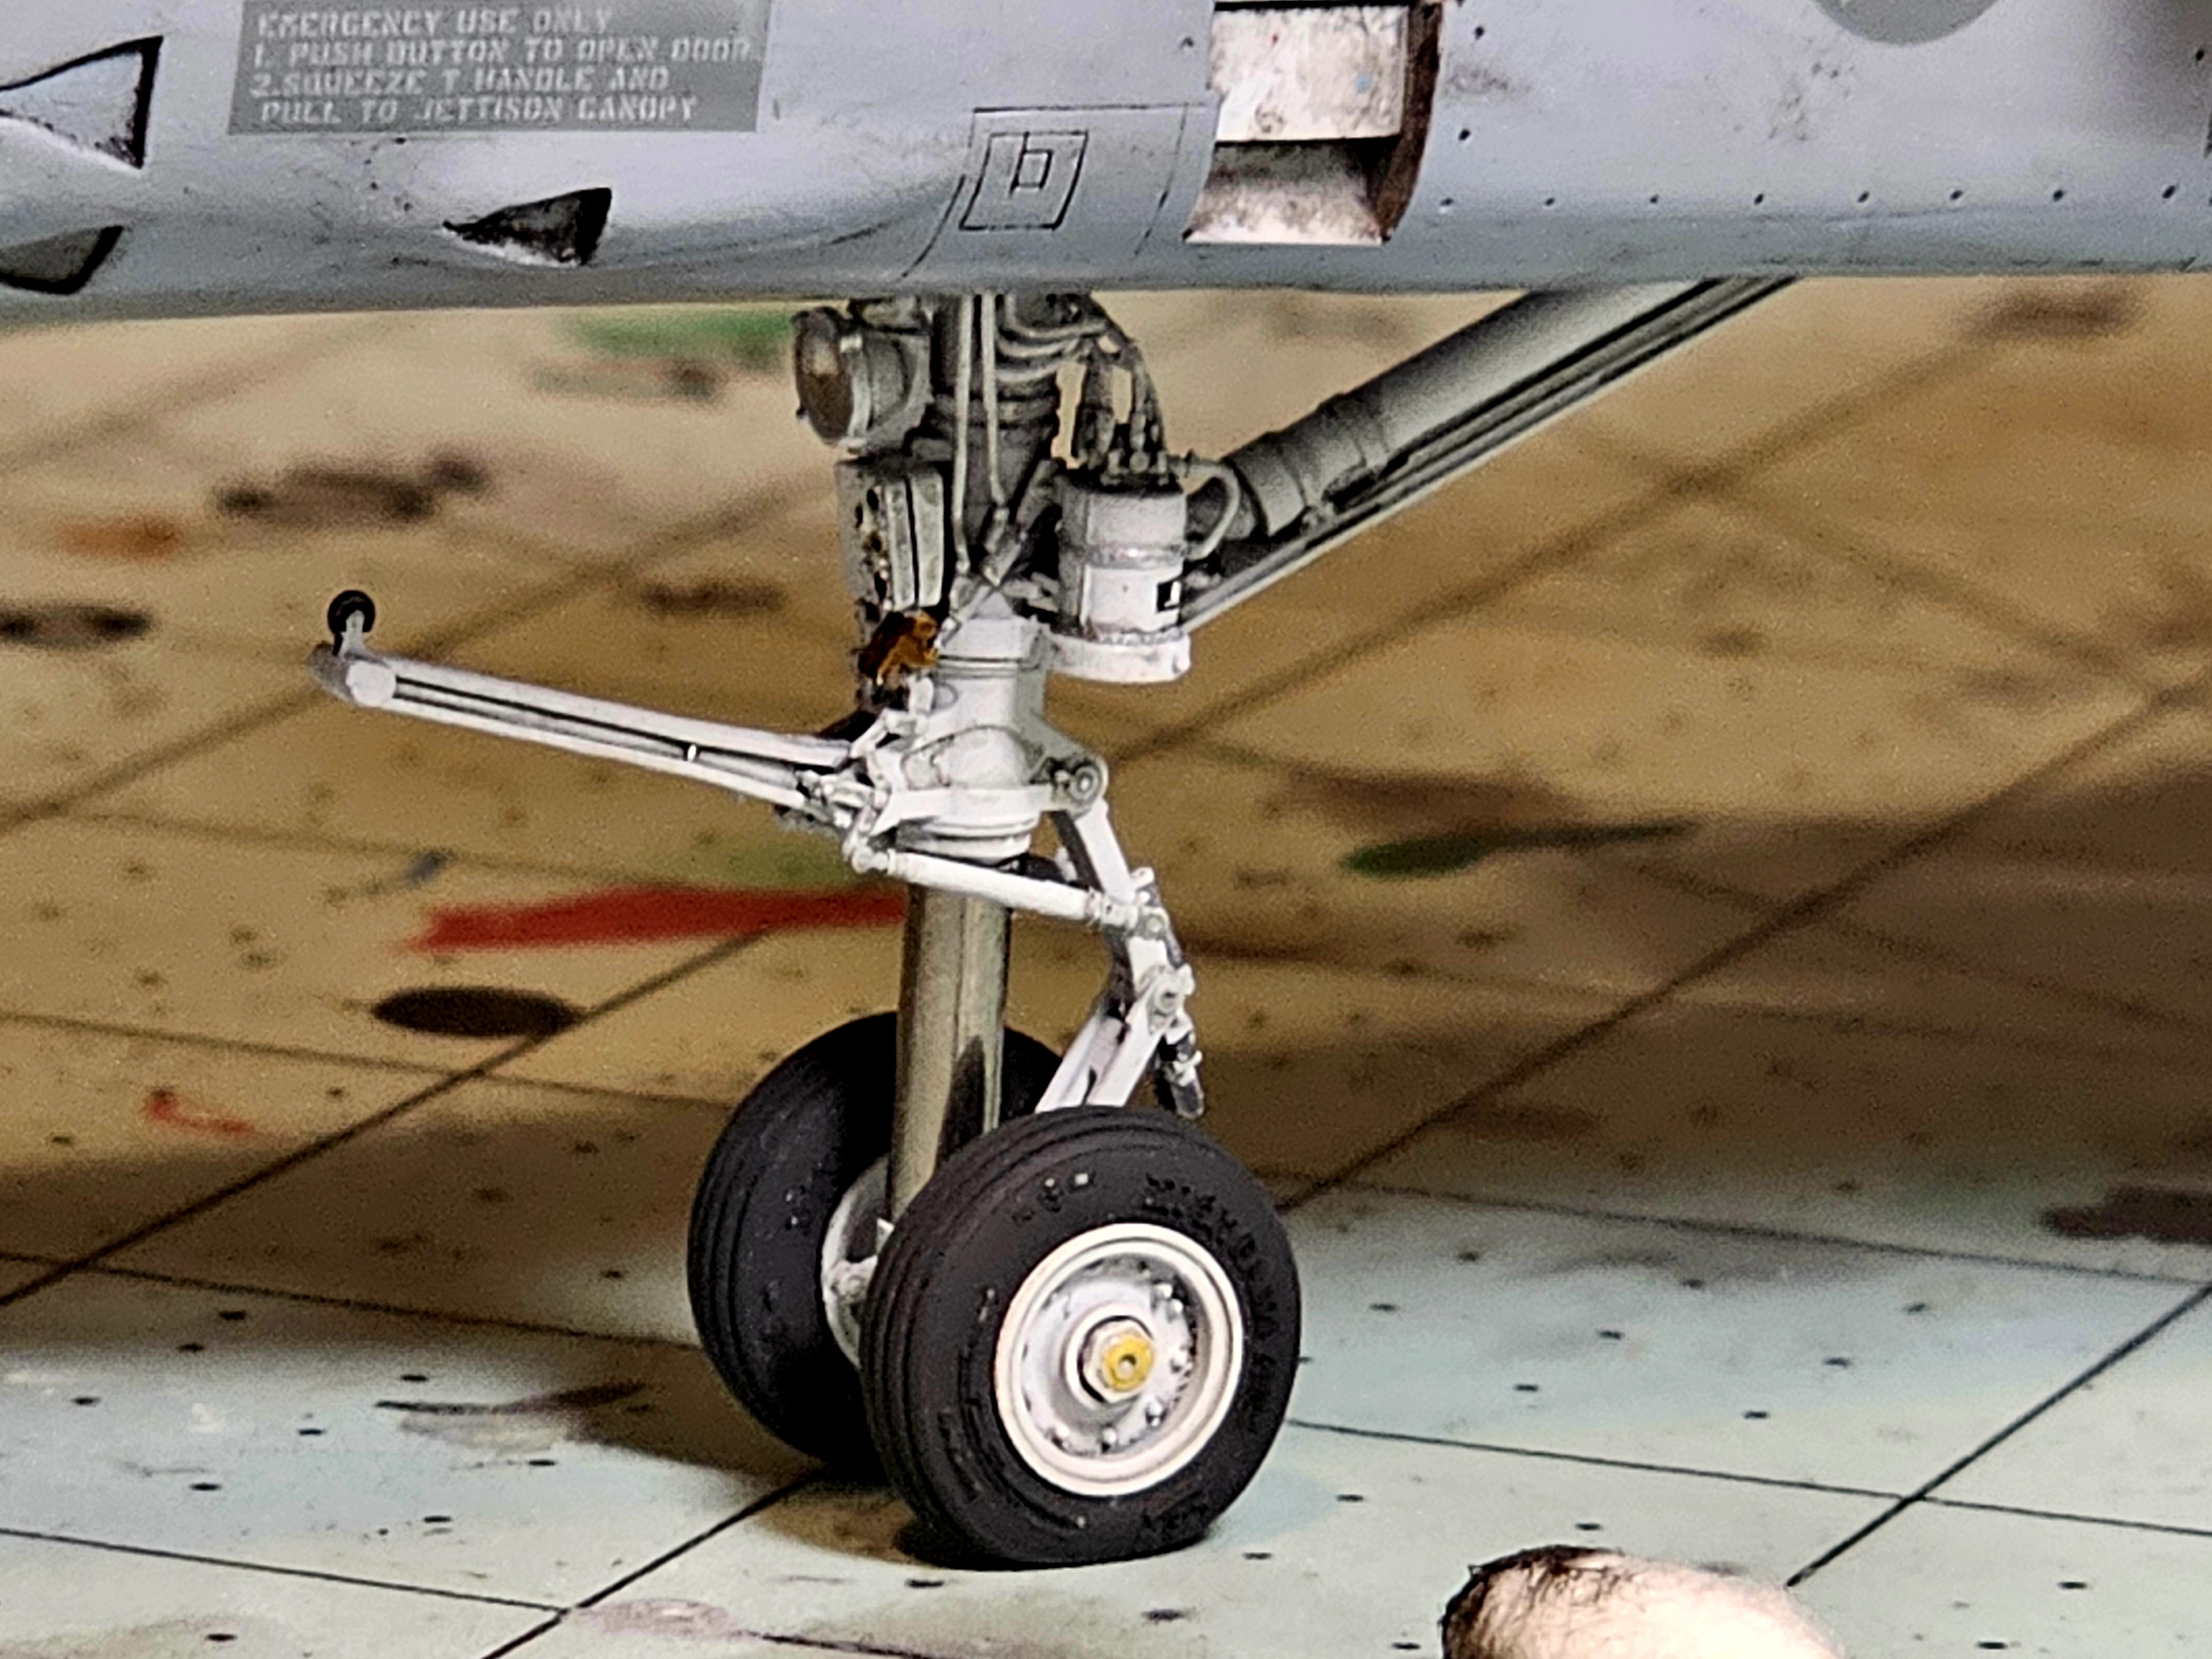
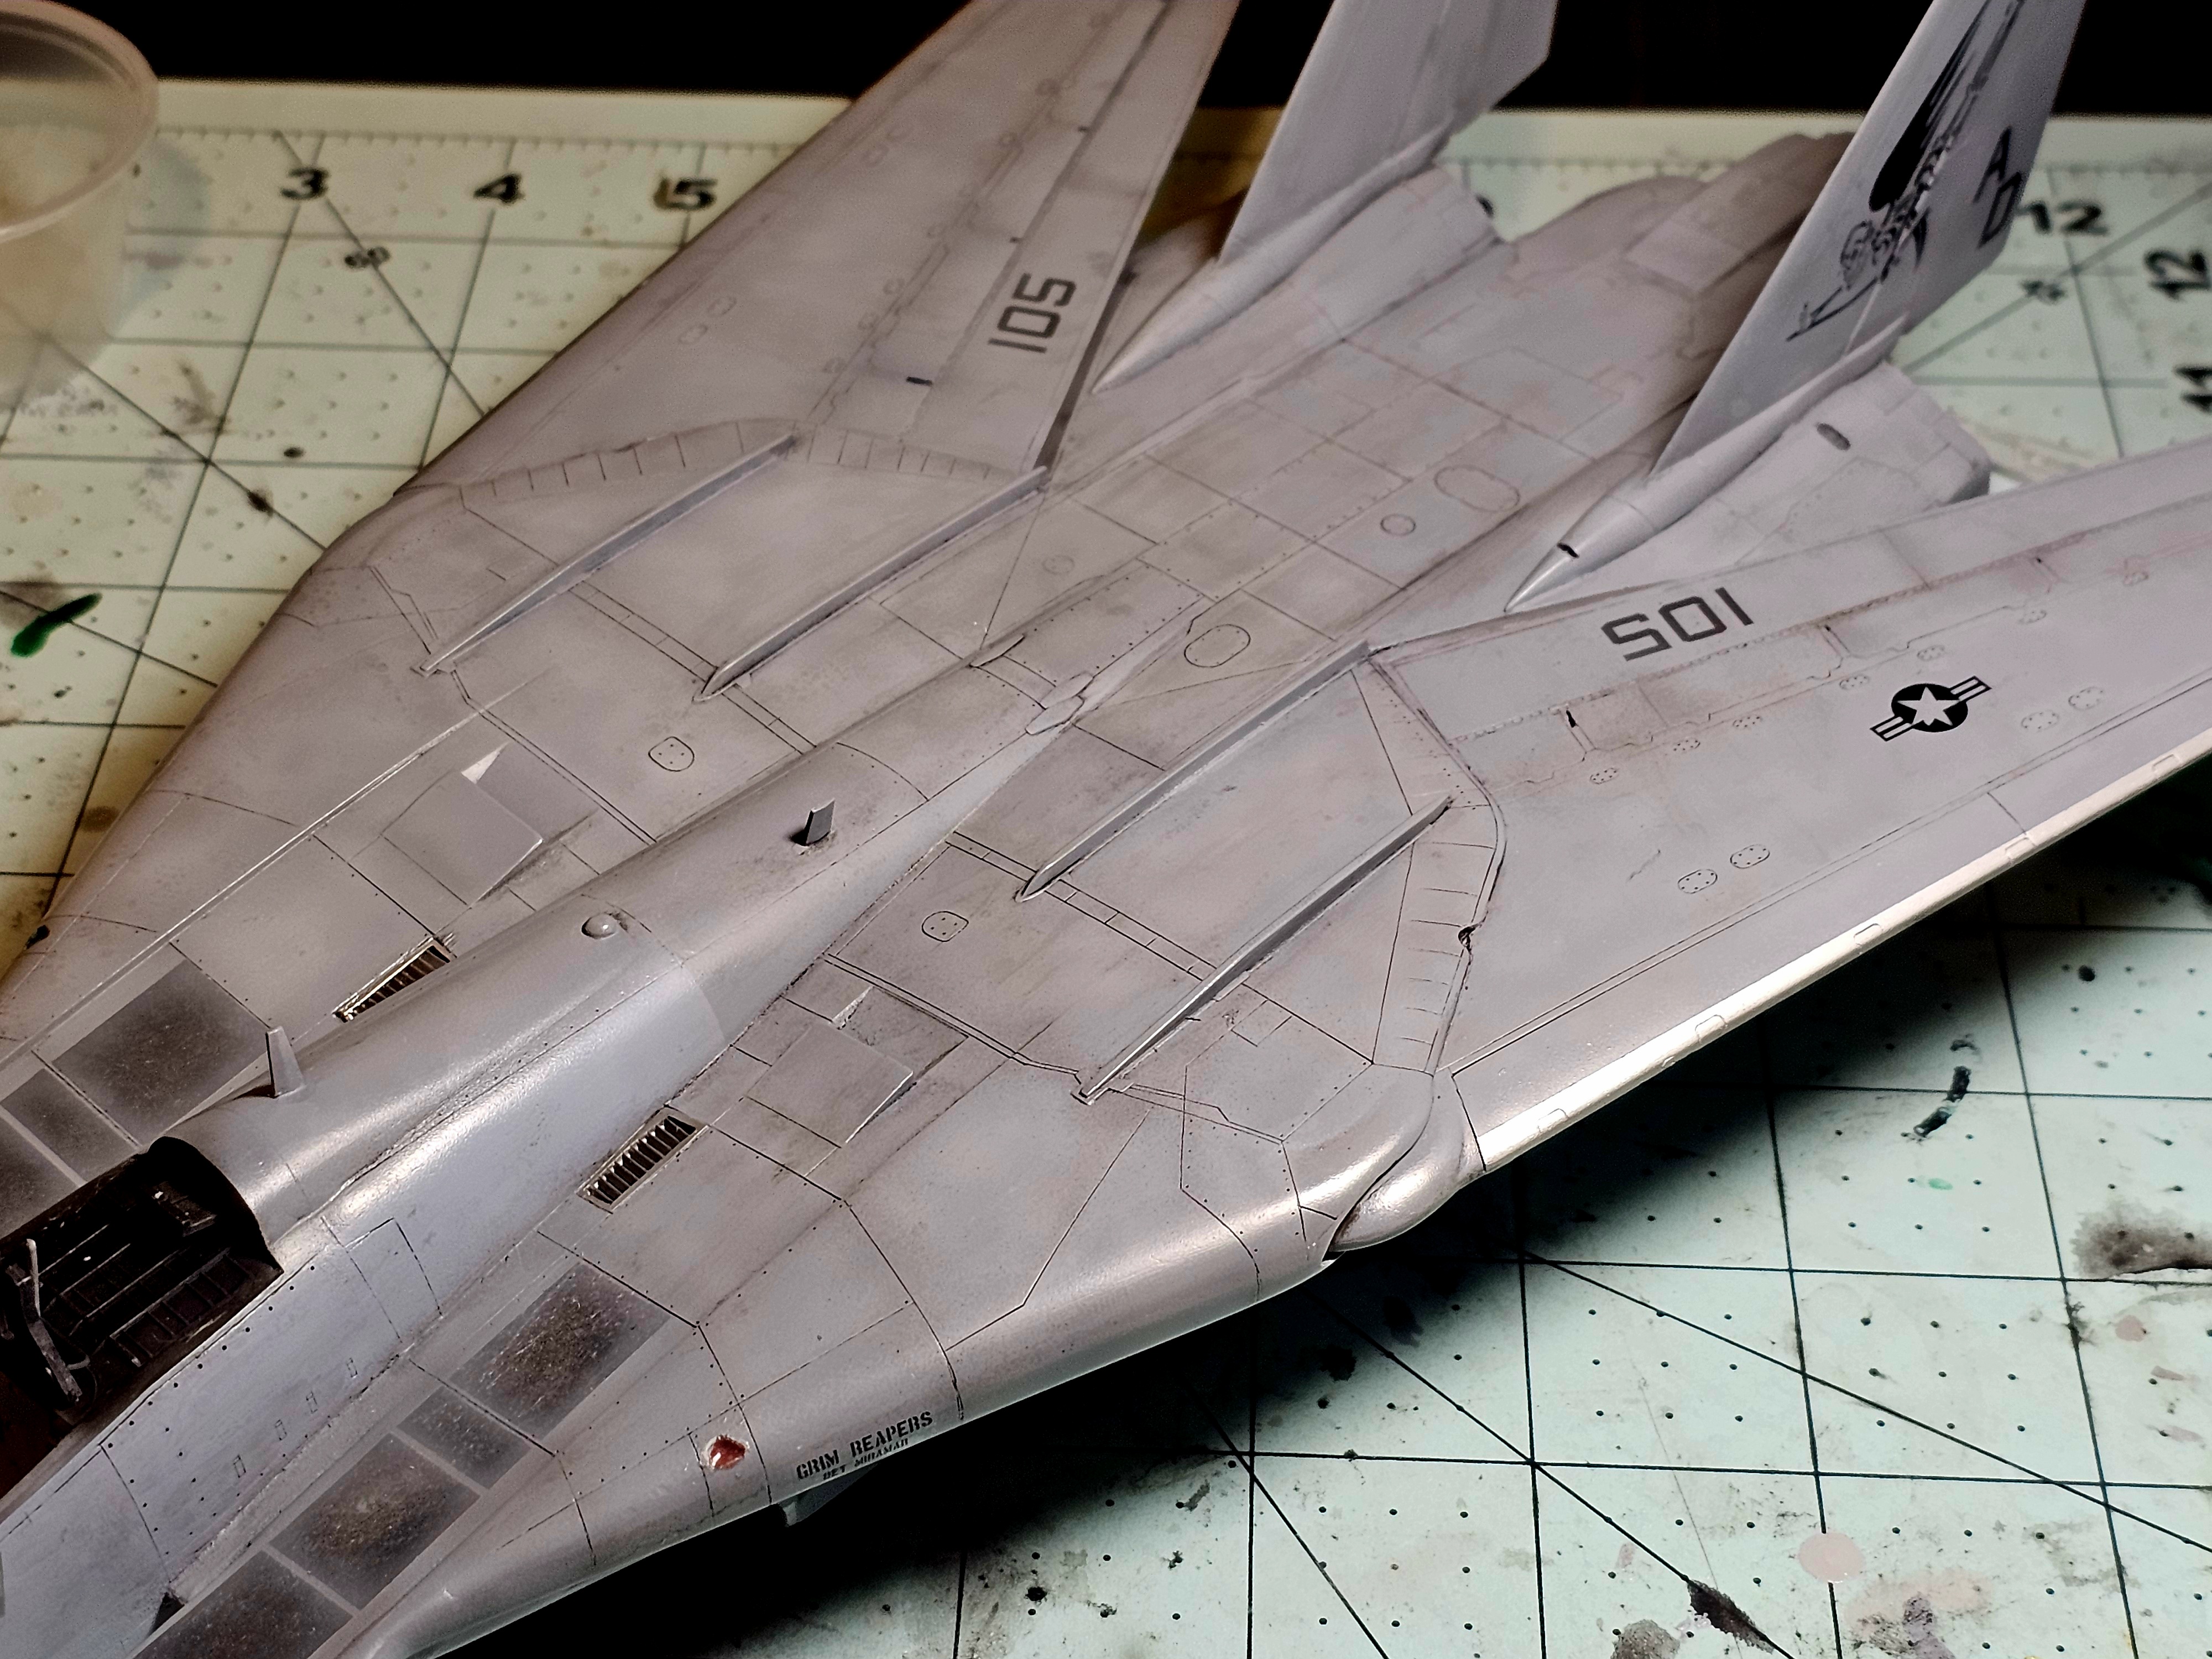
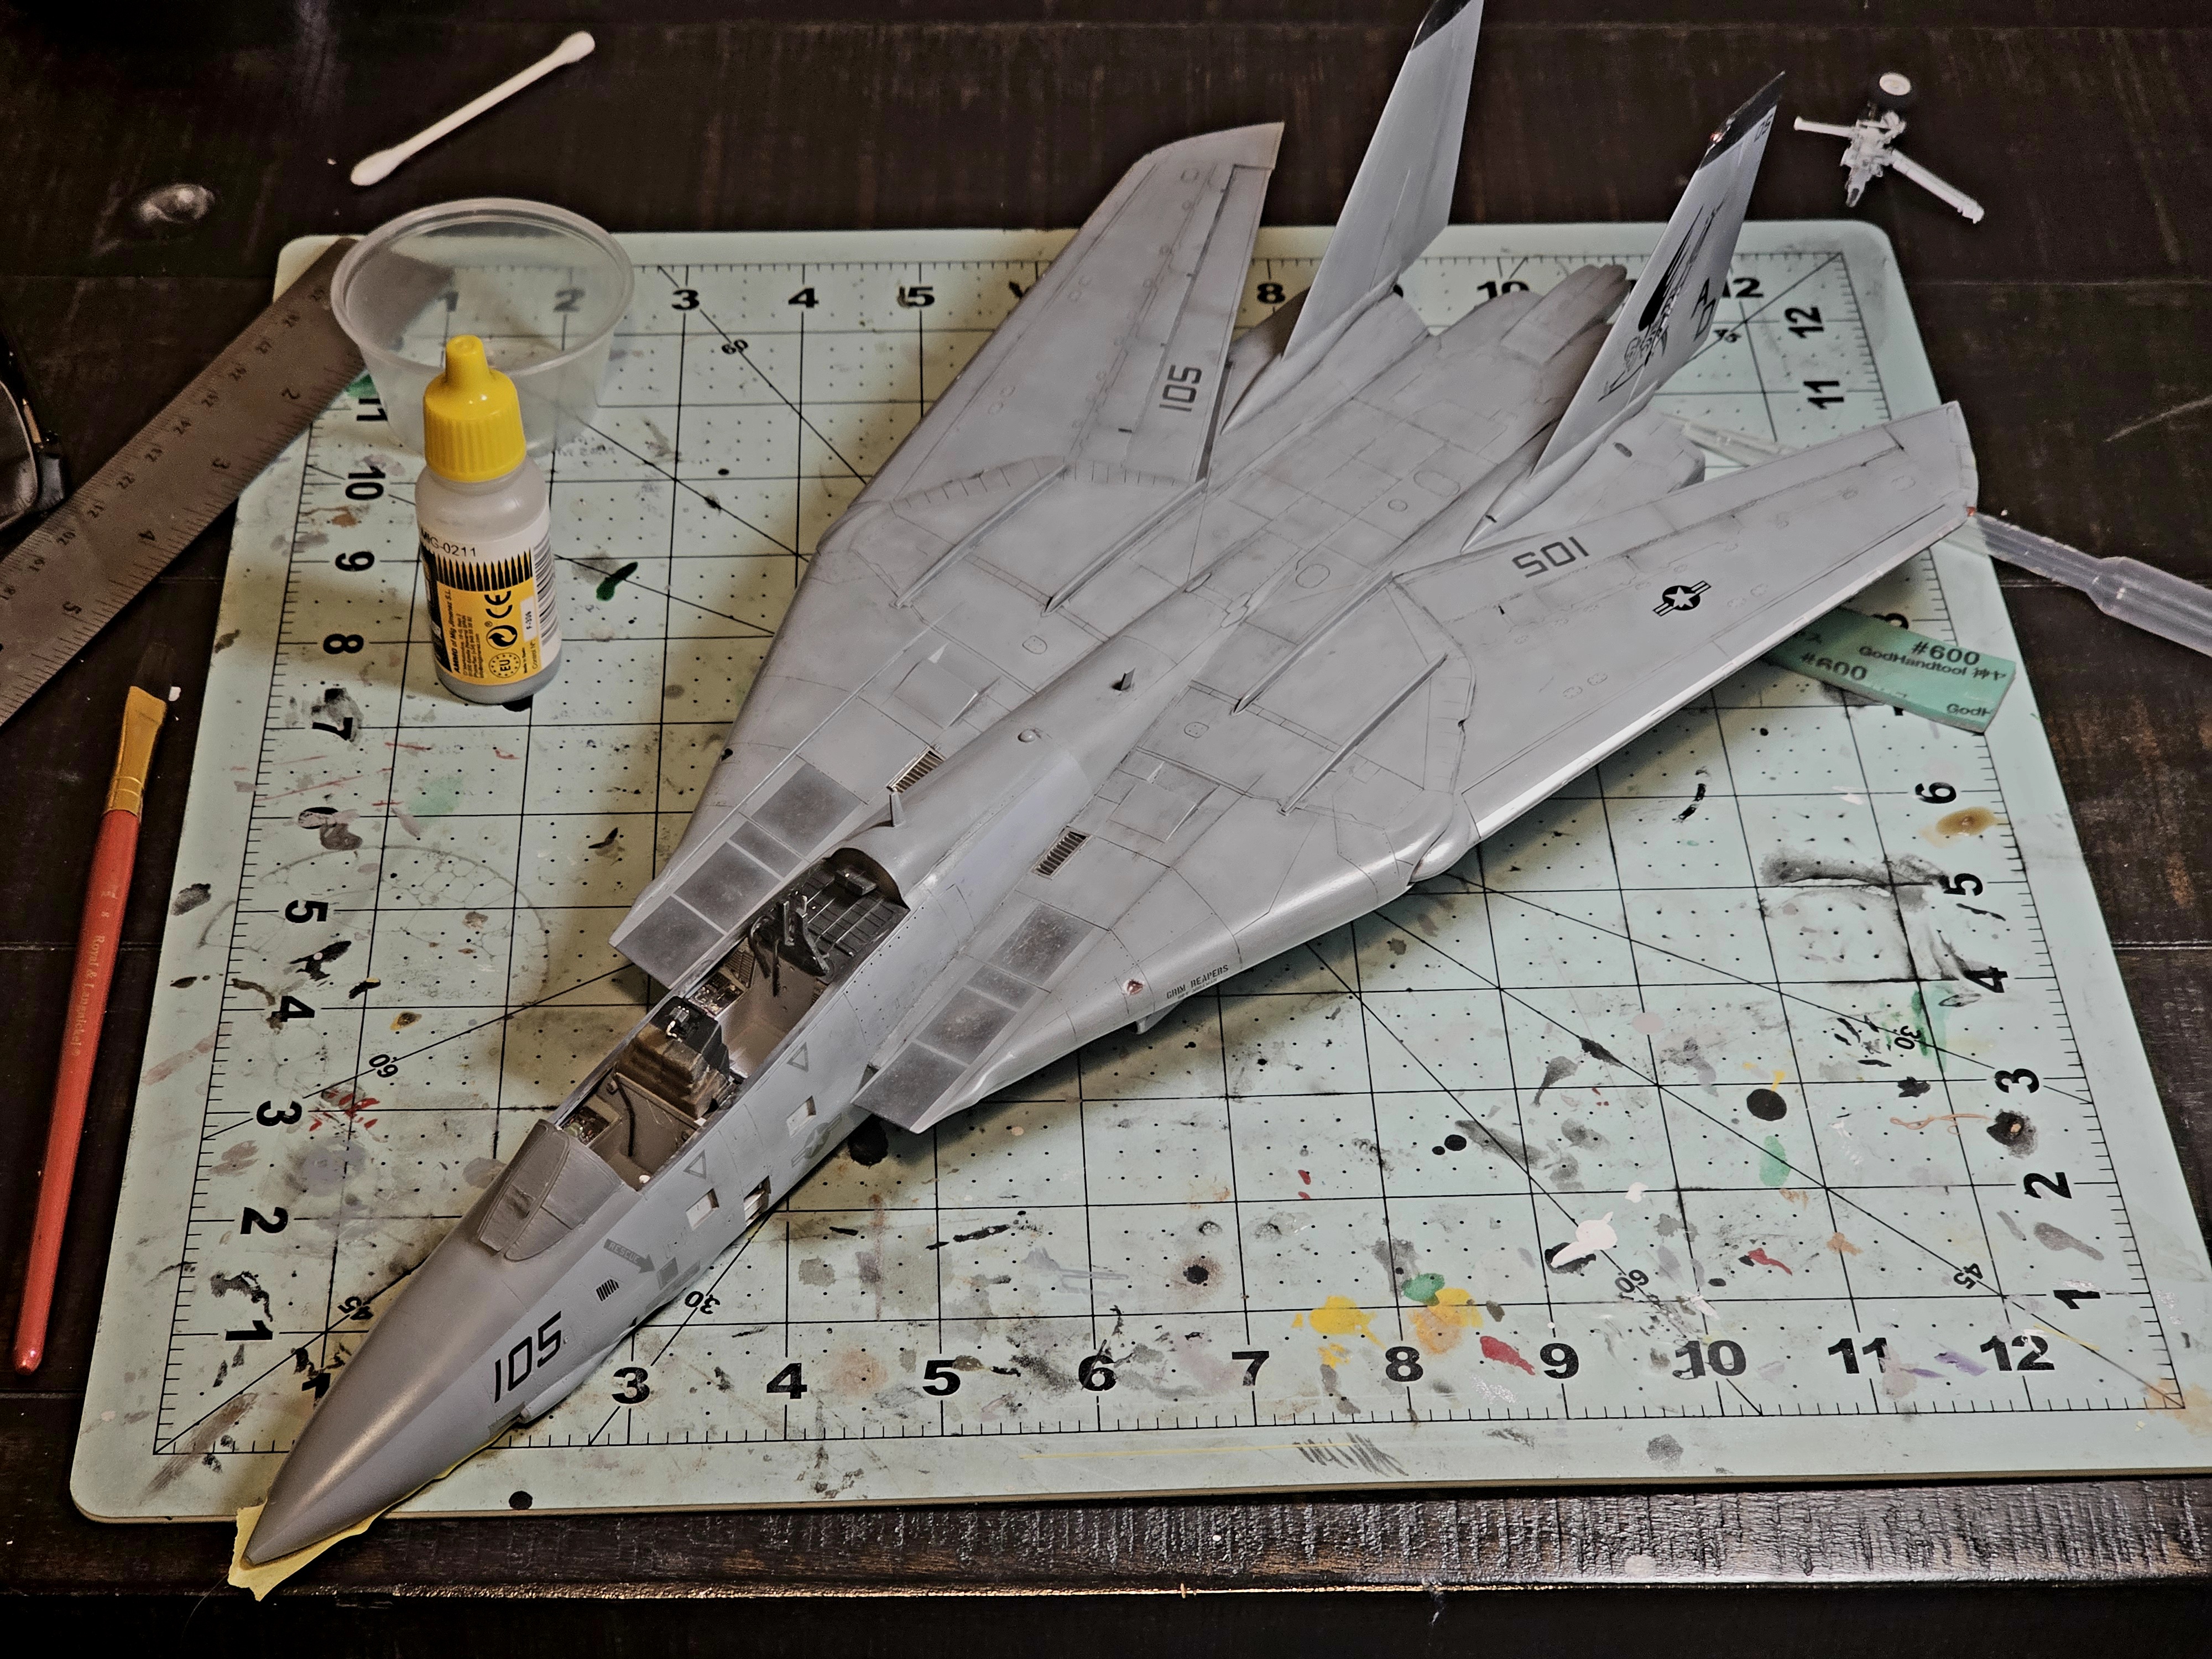
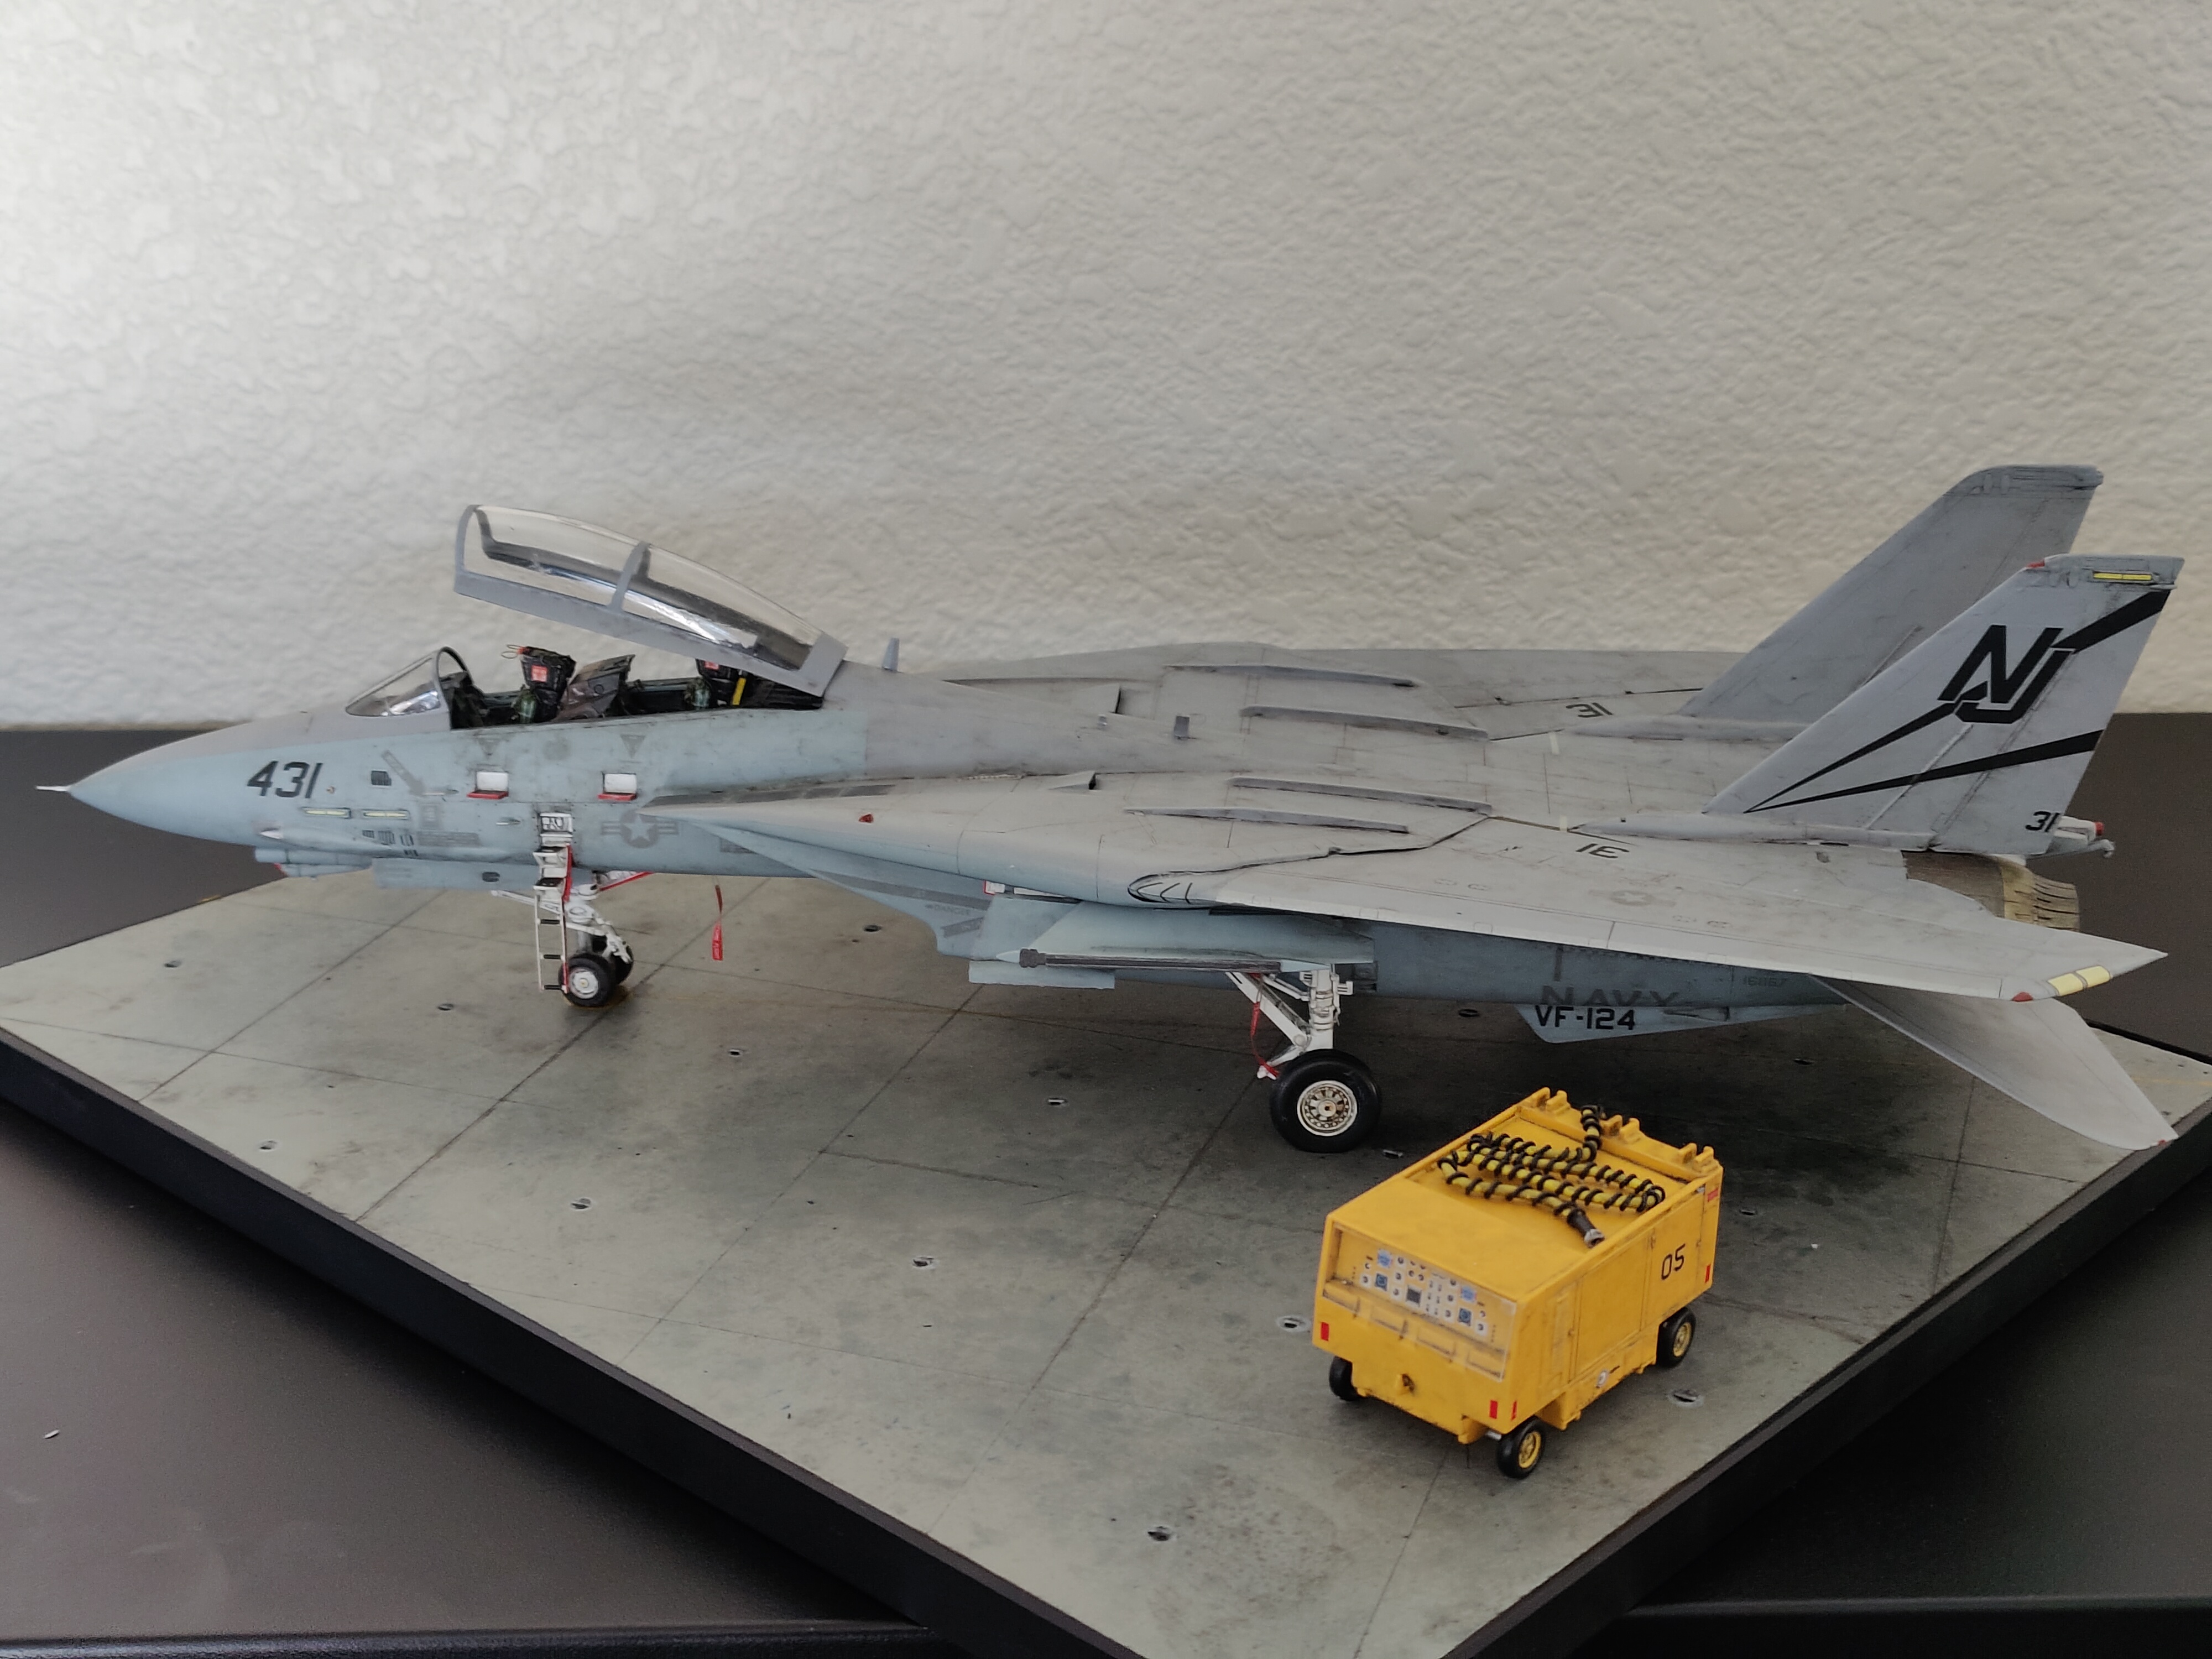
Weathering is progressing as I attach all the accessories.


-
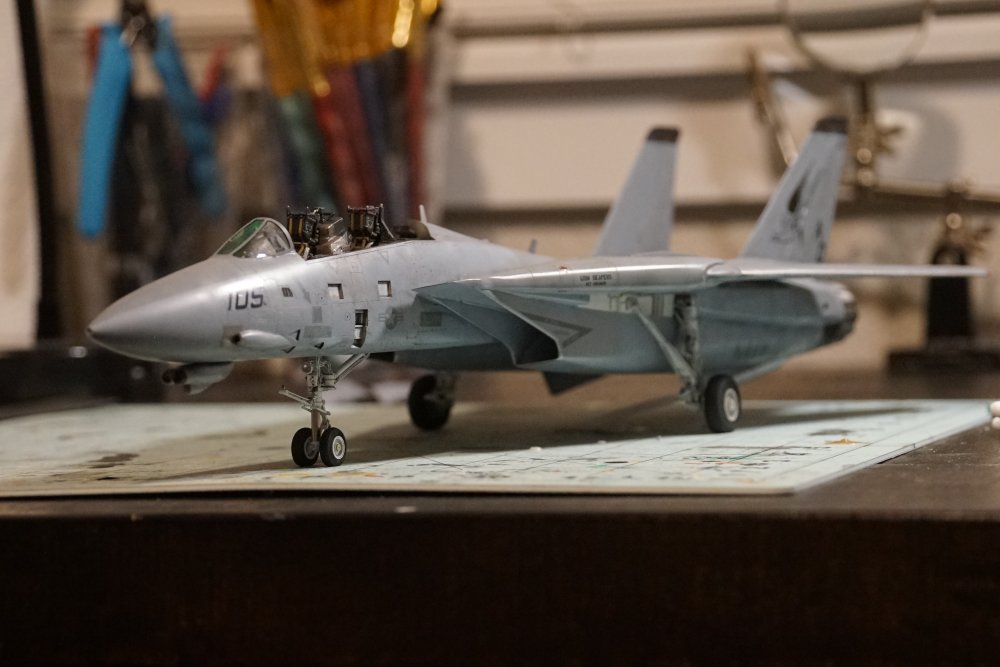
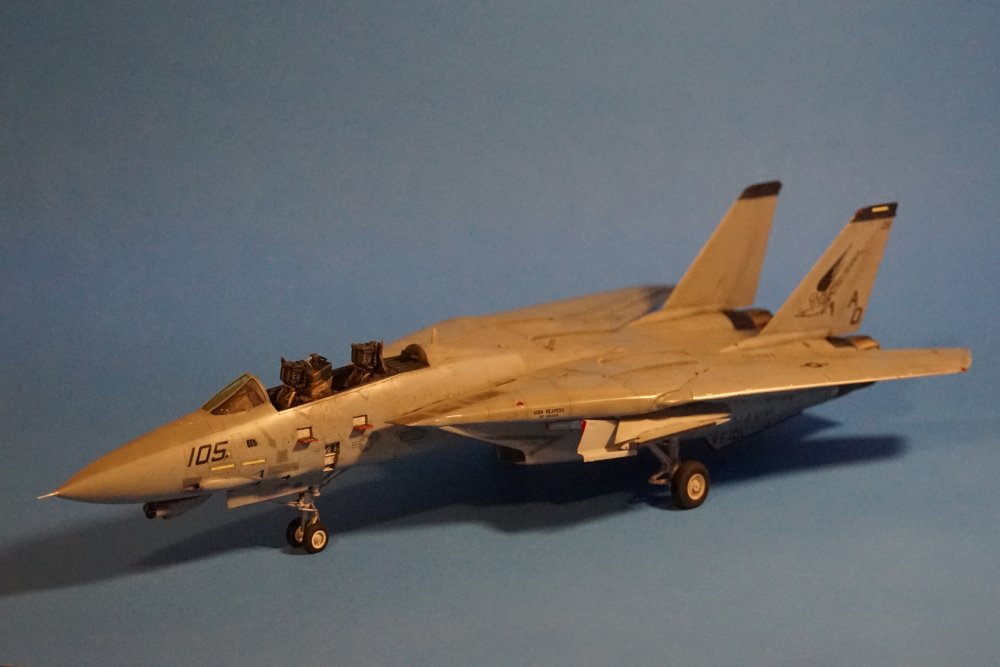
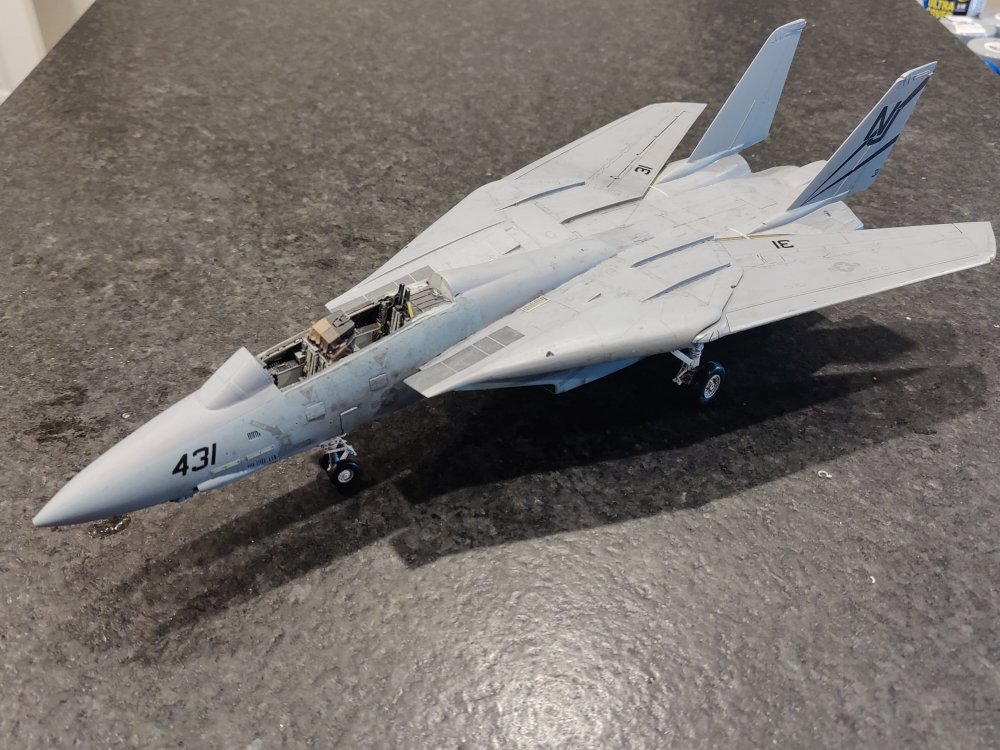
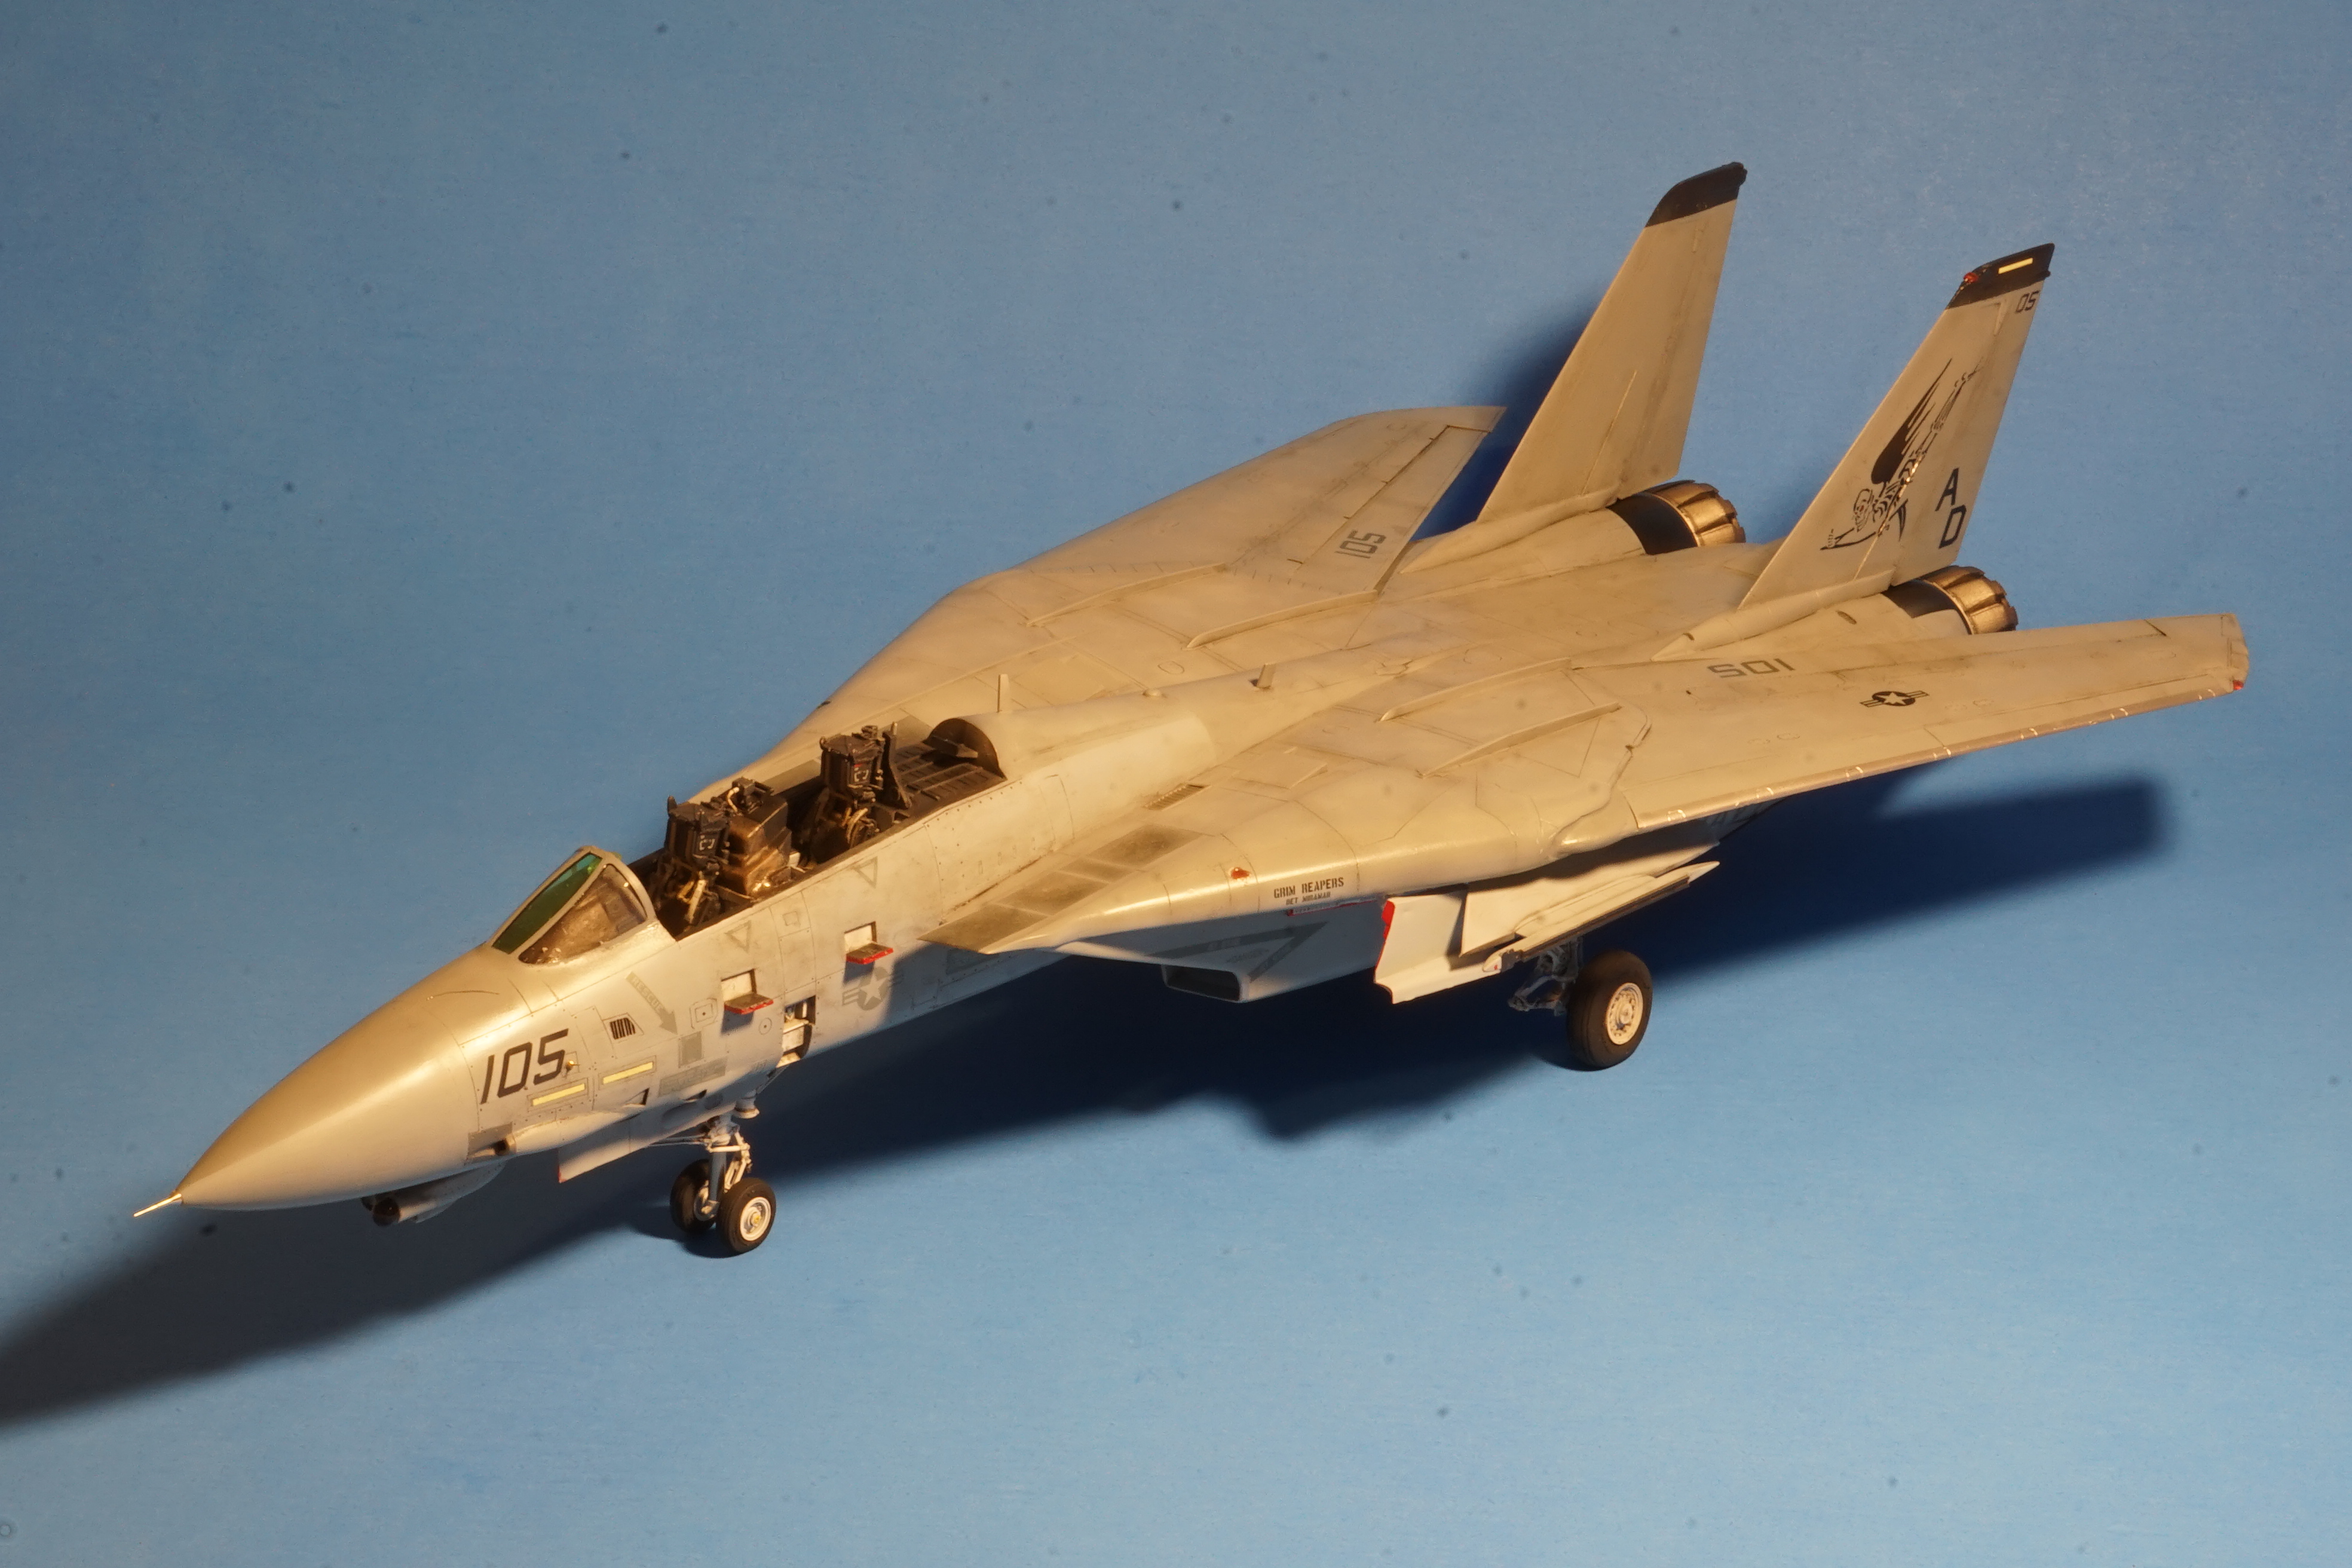
She's done with decals and into the weathering phase. Using a pastel wash first. Then going to explore a couple other new techniques.

-
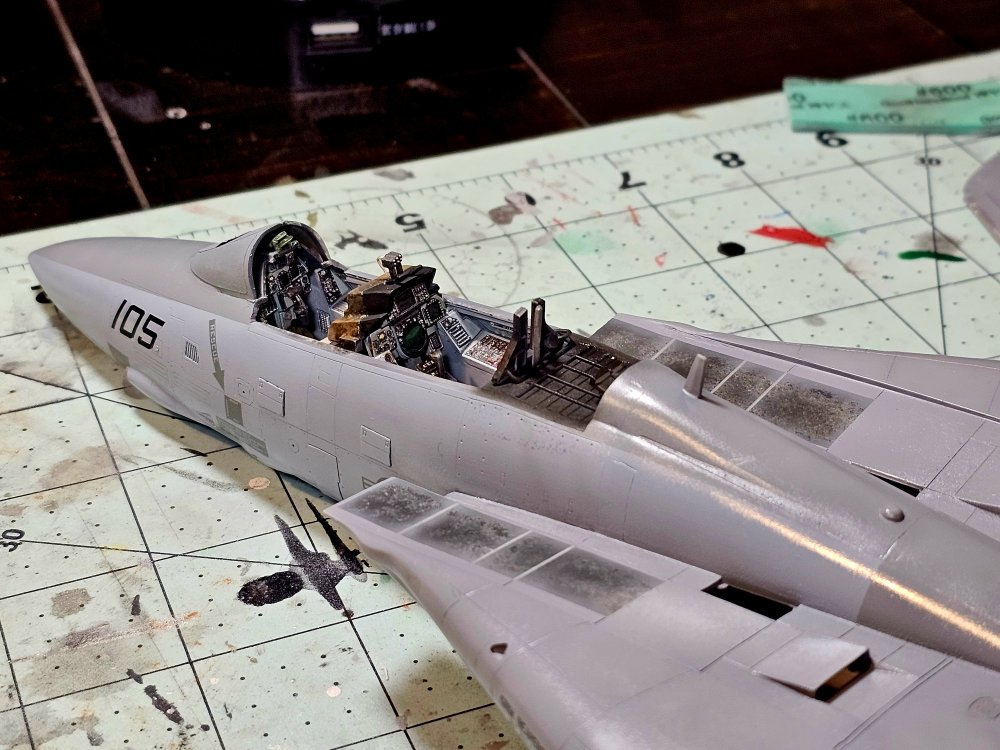
After about a 6 momth break from this kit following the HUD disaster, I got back at it not too long ago. She's in the decal phase and progressing once again.

-
Thanks, Sernak. I agree. They are absolutely phenomenal. Still in disbelief at how well they fit the panels once they are sanded.
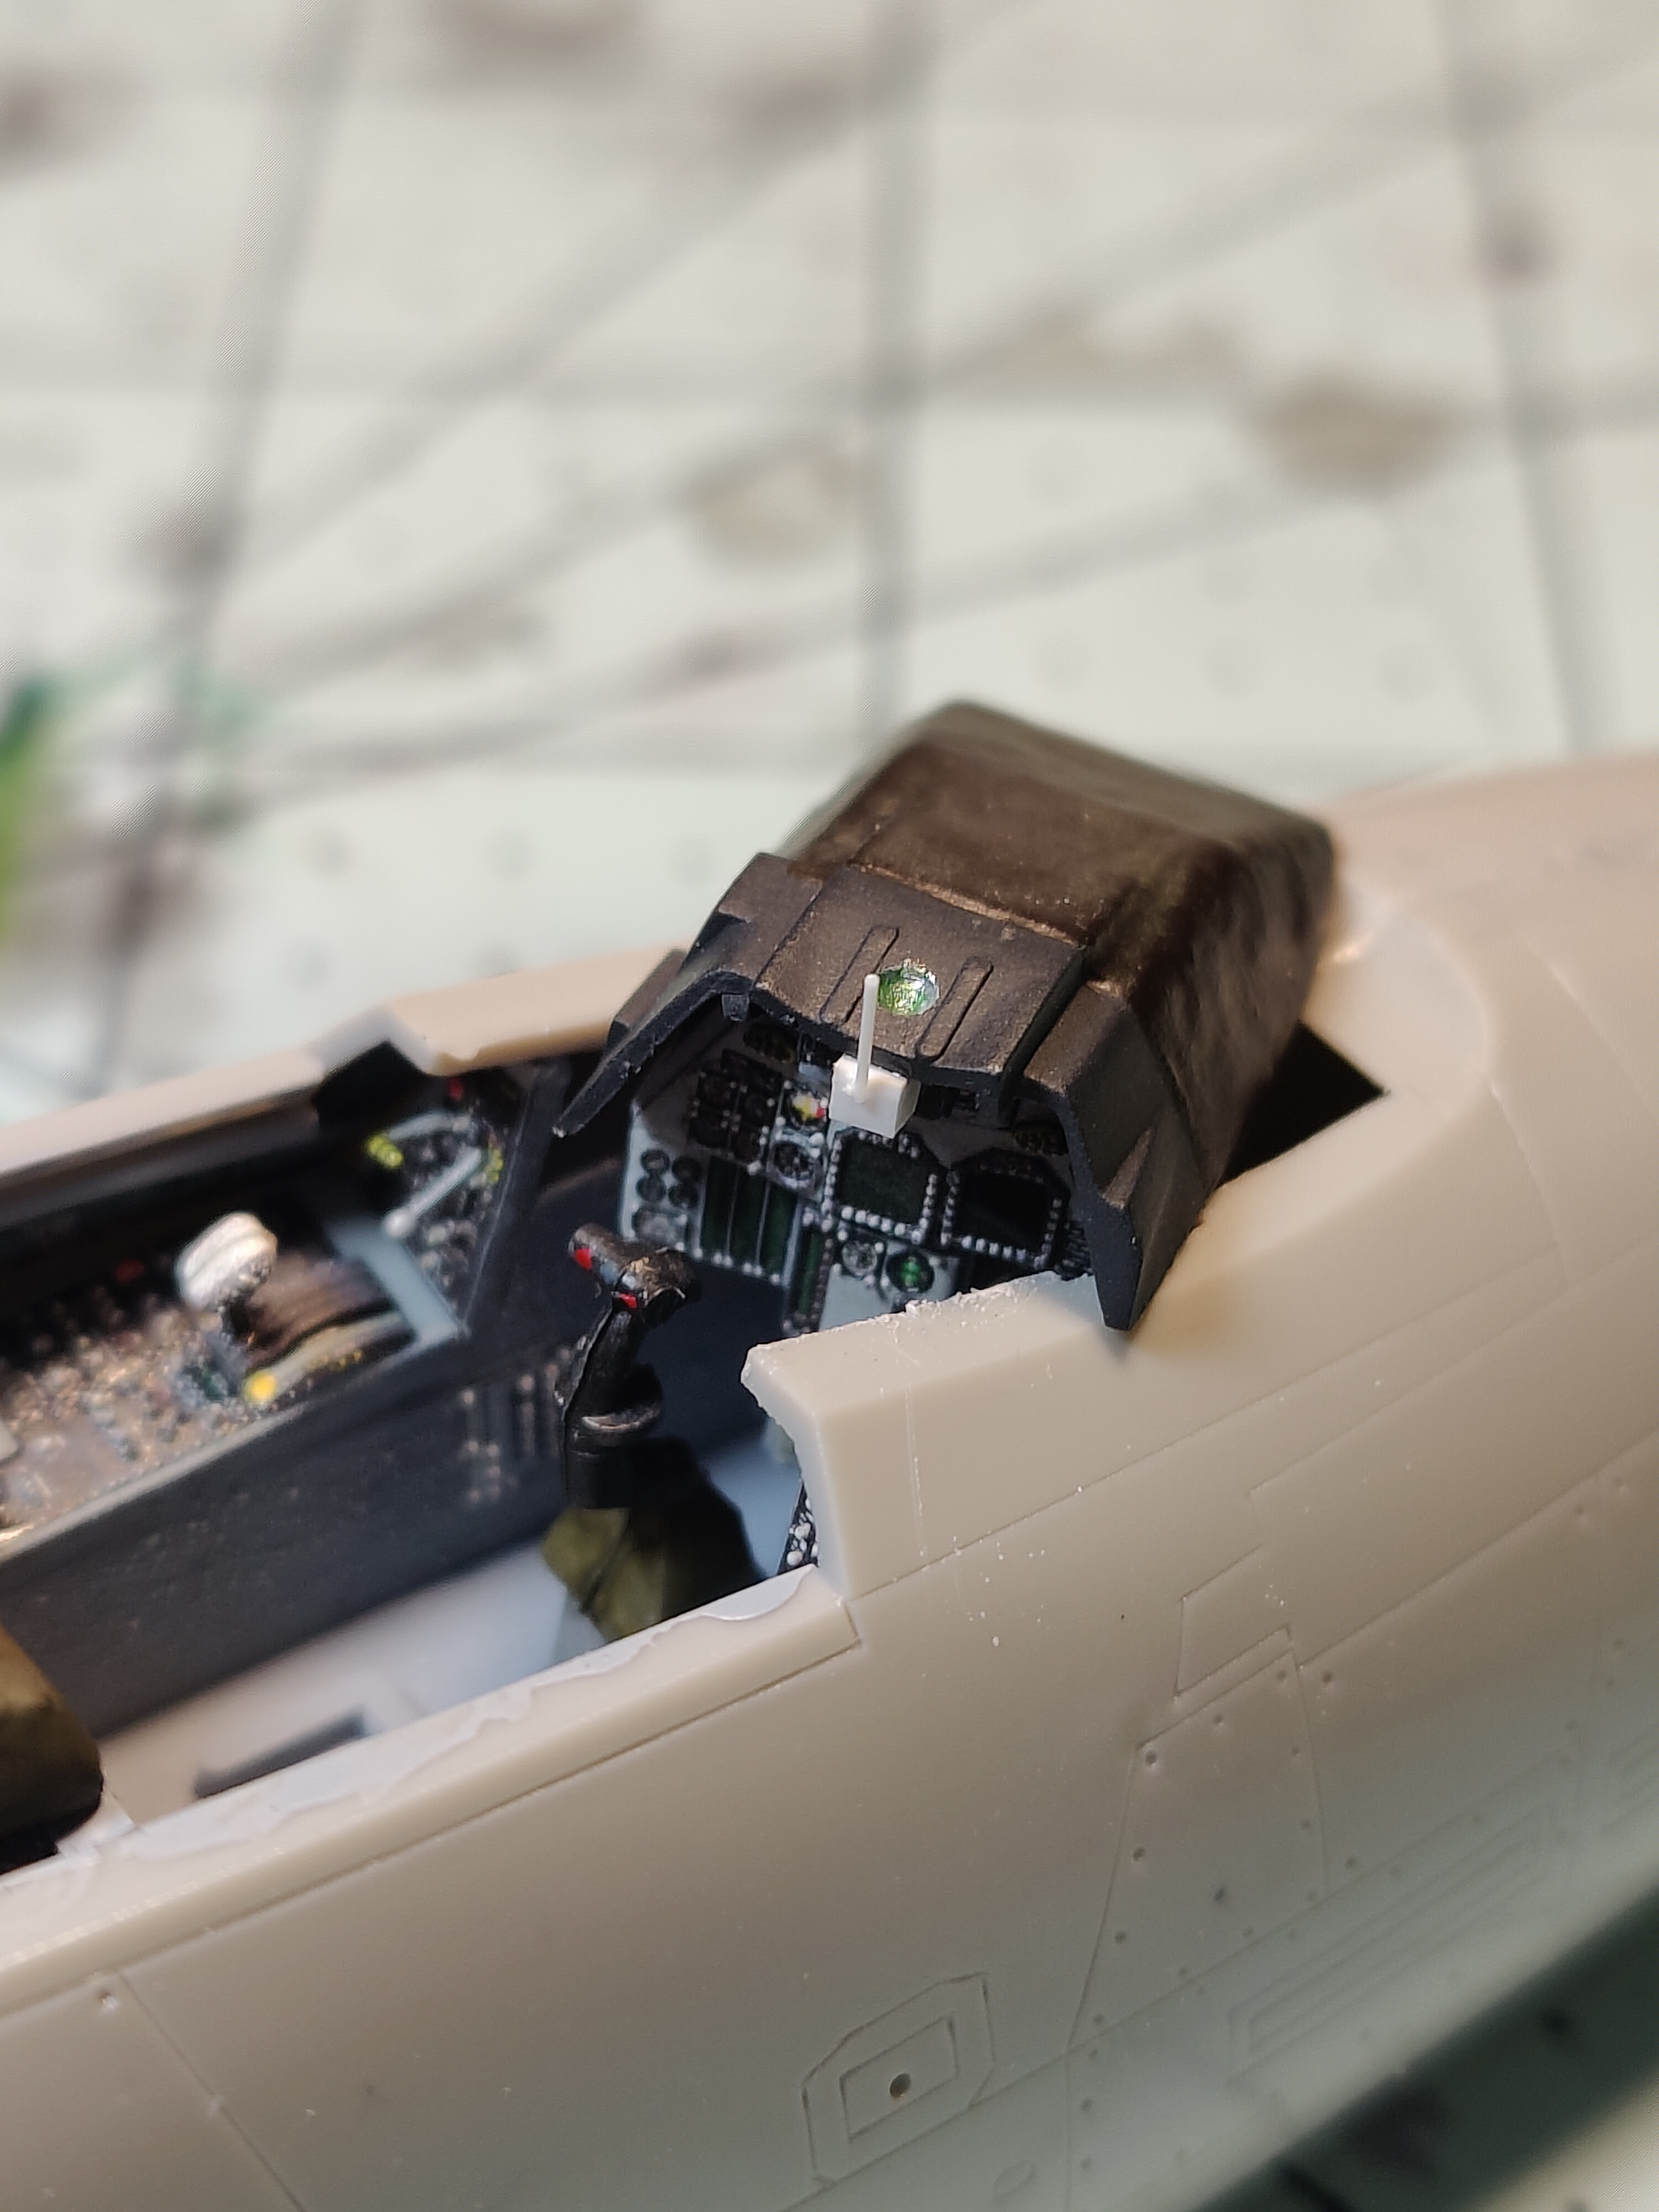
So just a note about the lack of updates. I was detailing the cockpit with some wires and plumbing and had an accident. The forward fuselage slipped out of my hand and the whole thing fell to the floor. I don't even want to take a picture of the damage that was done. The forward windscreen cracked and the HUD was destroyed. I've been taking time to process that because it really hurt my soul. I'll start up with the repairs in the next few days.
-
Thank you very much gents. I'm flattered.
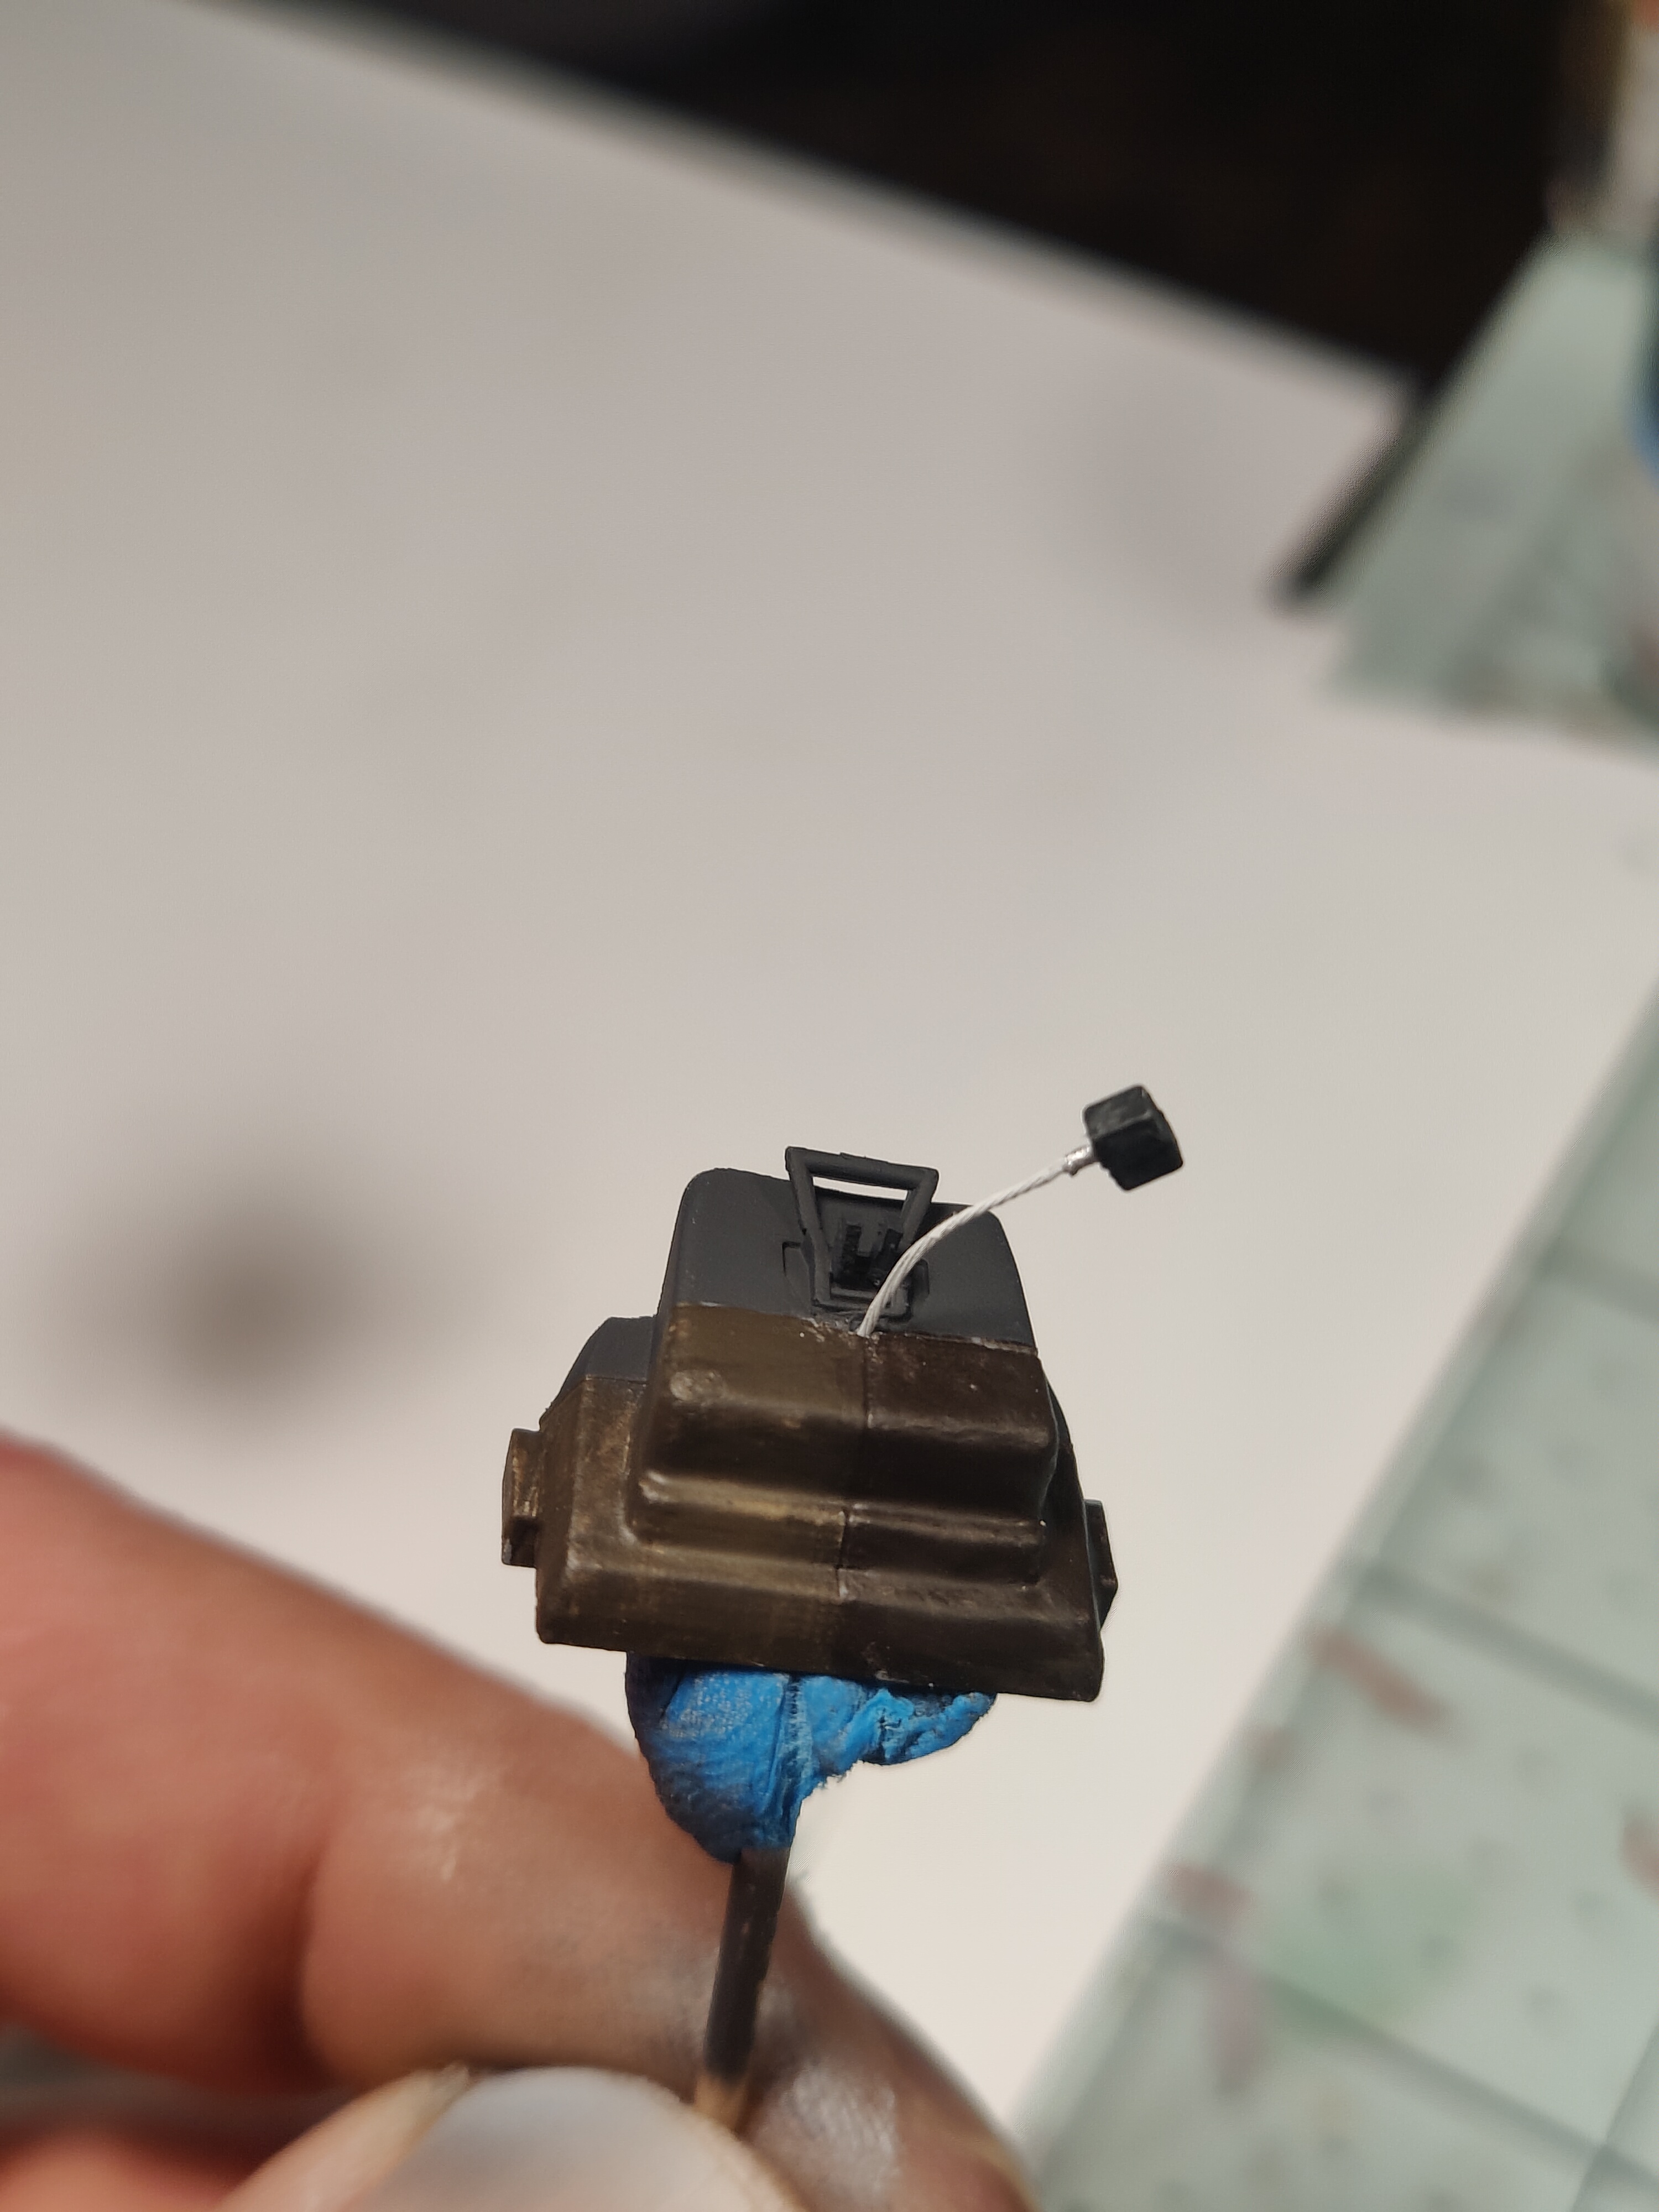
Steve you were absolutely right and I appreciate you reminding me. I just took a picture at the end of the night before I completed the HUD. That little delicate thing took a few months off my life. It's now got its second piece of combiner glass.
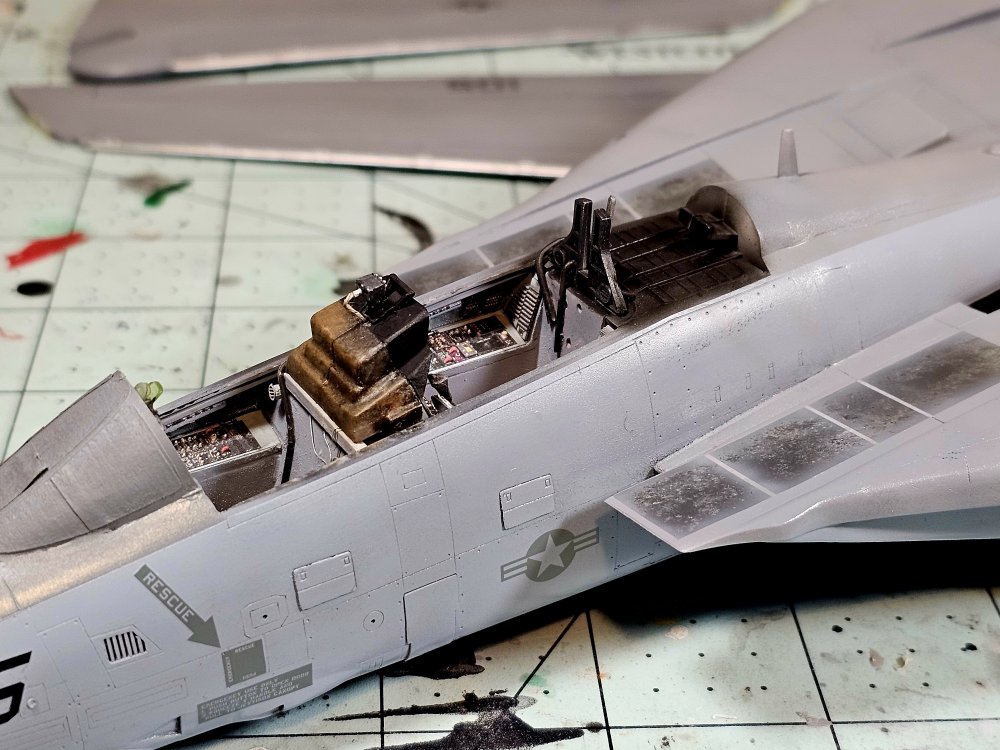
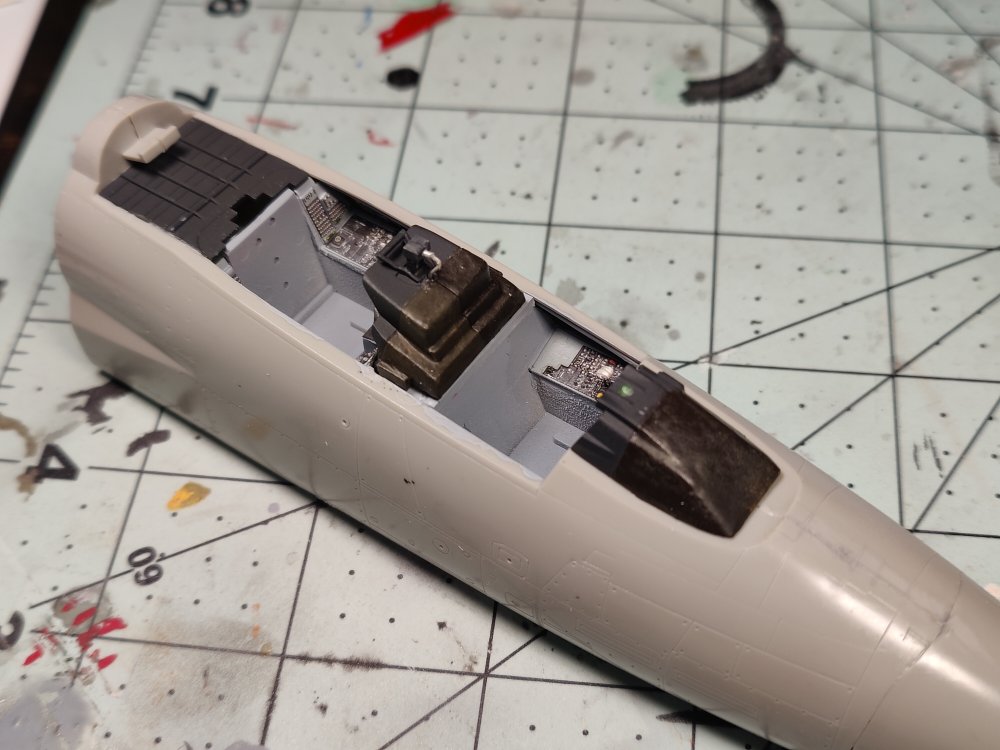
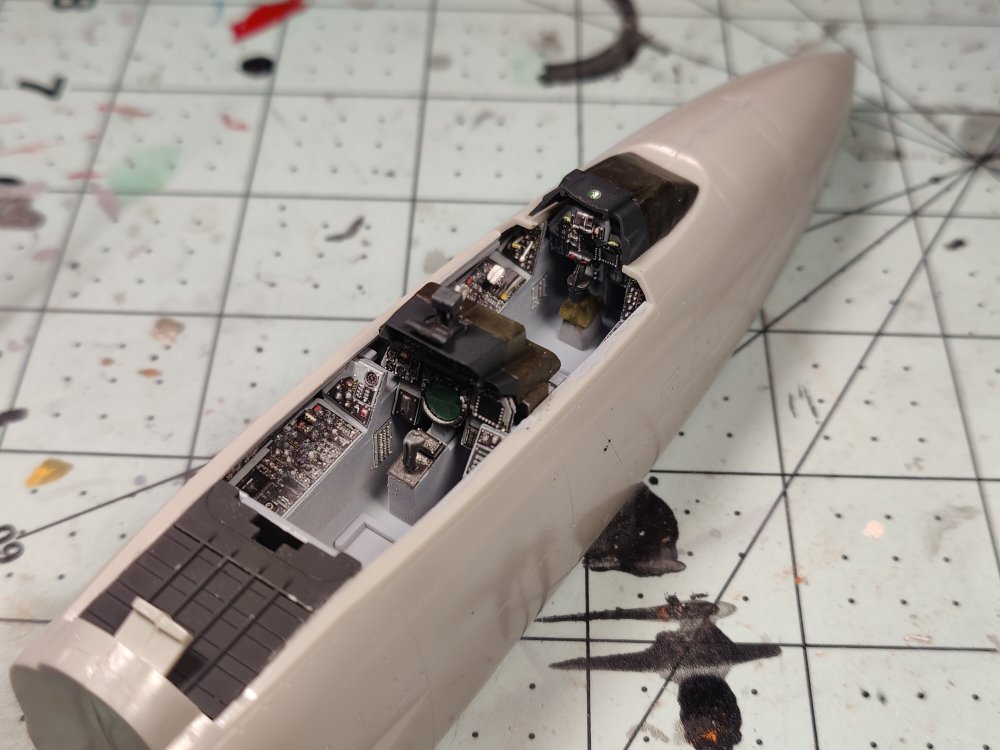
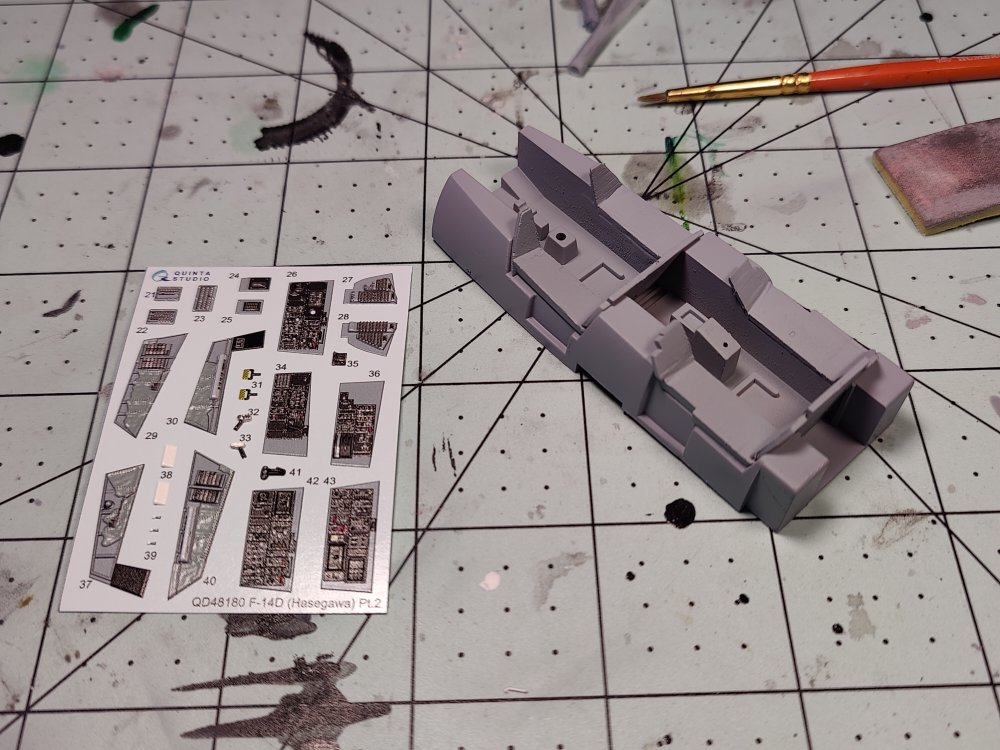
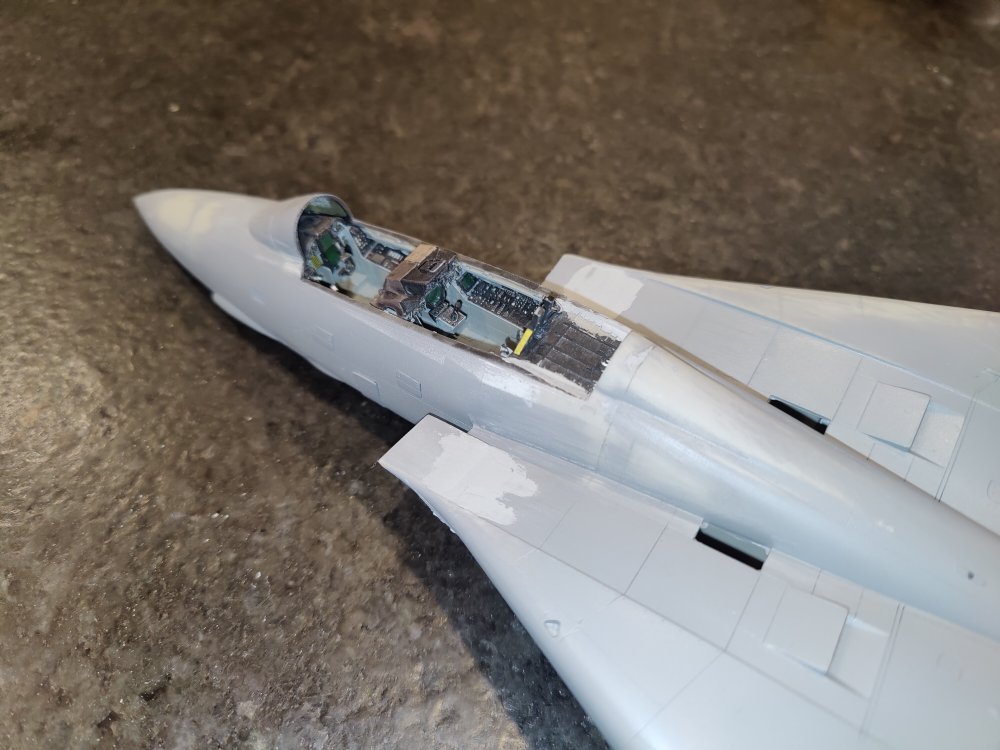
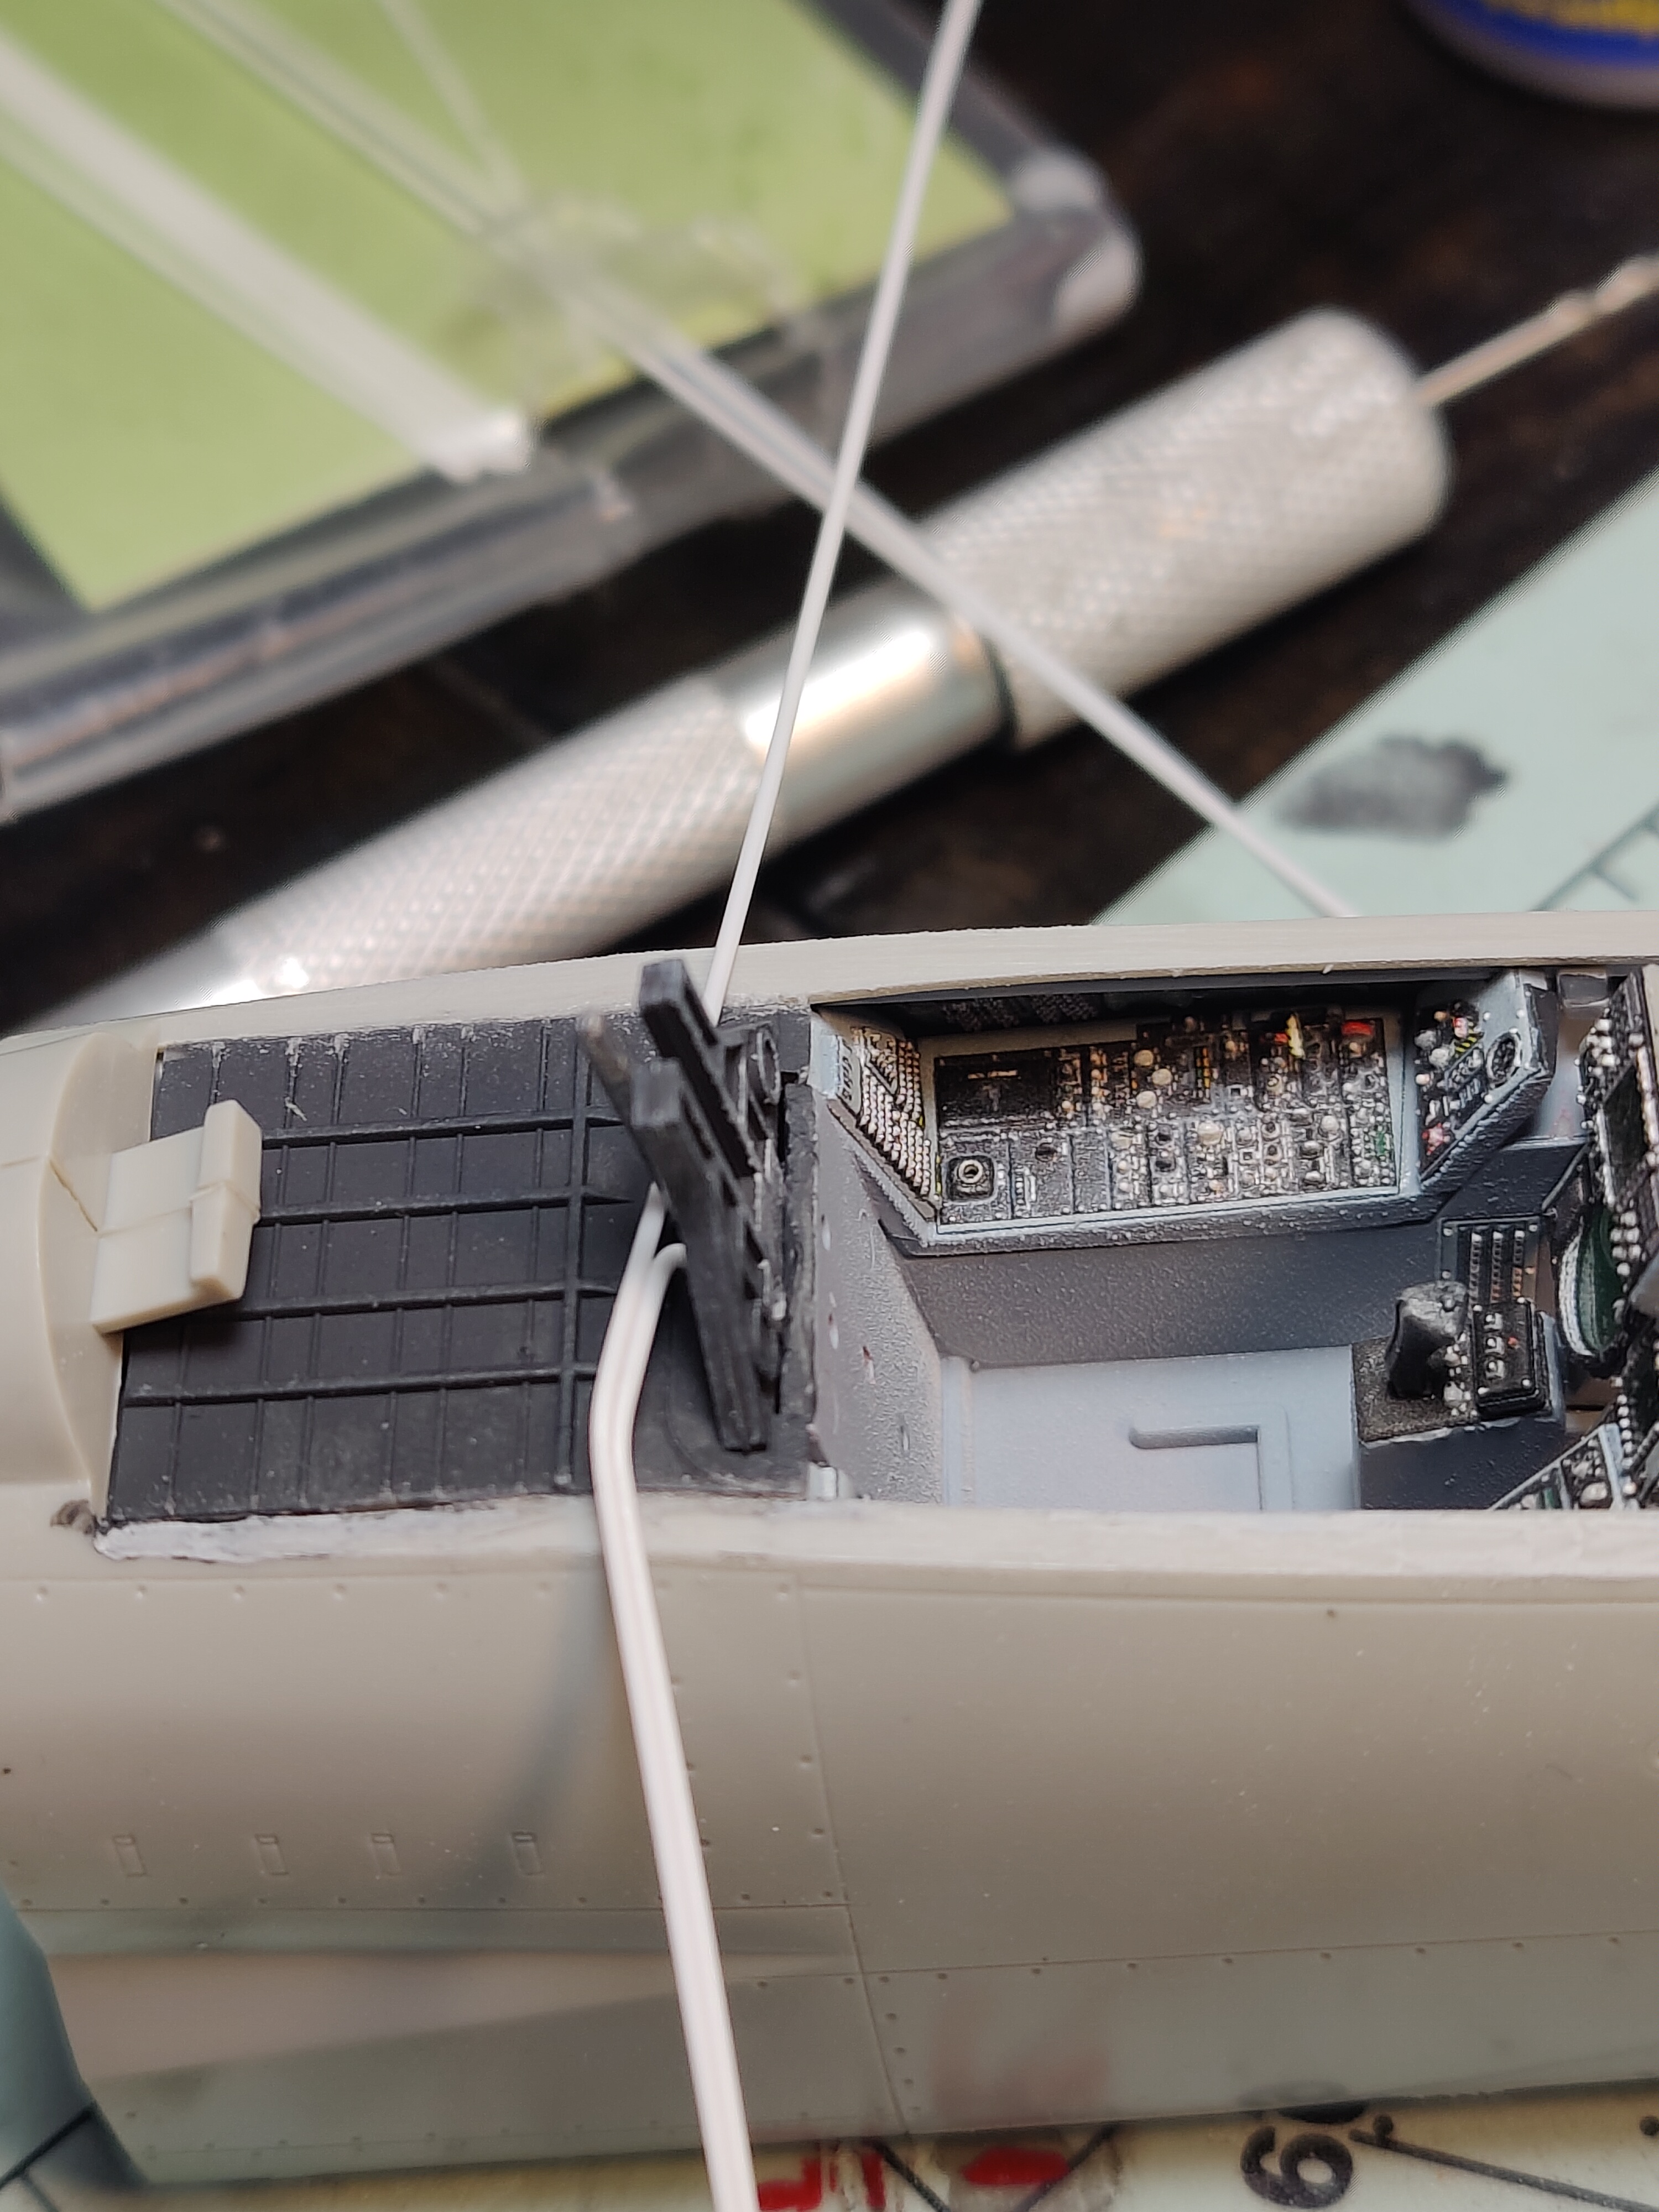
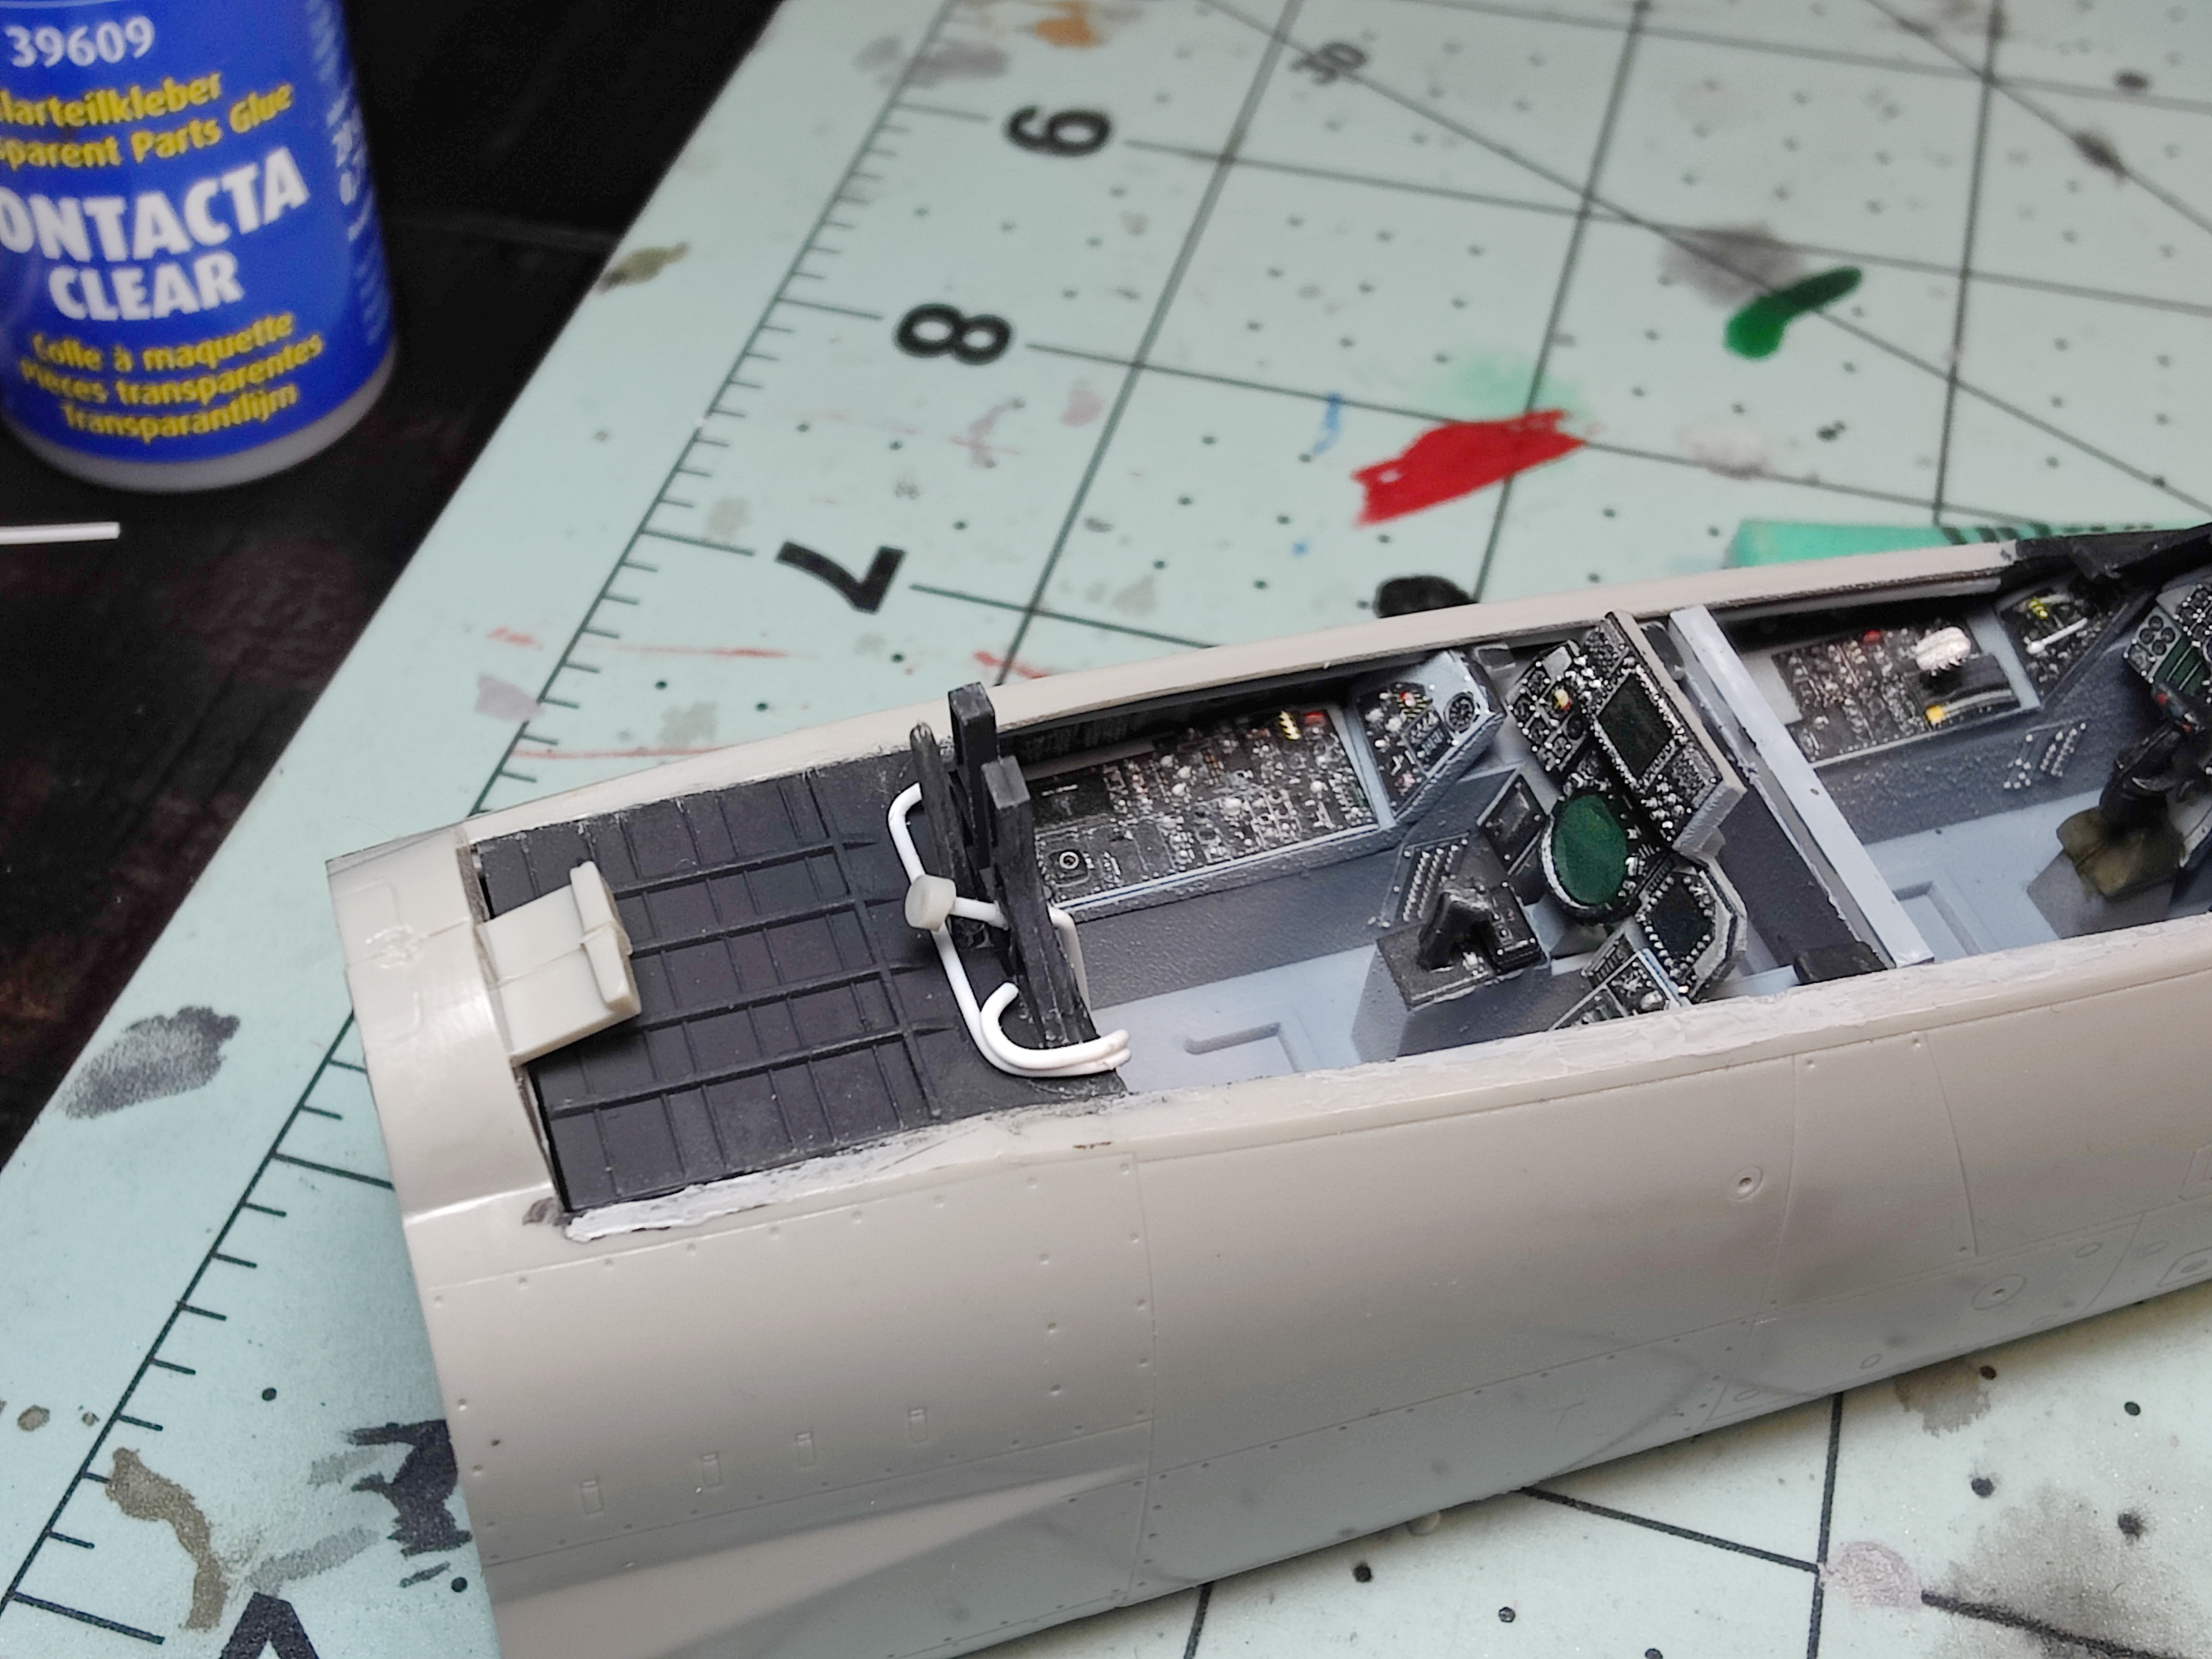
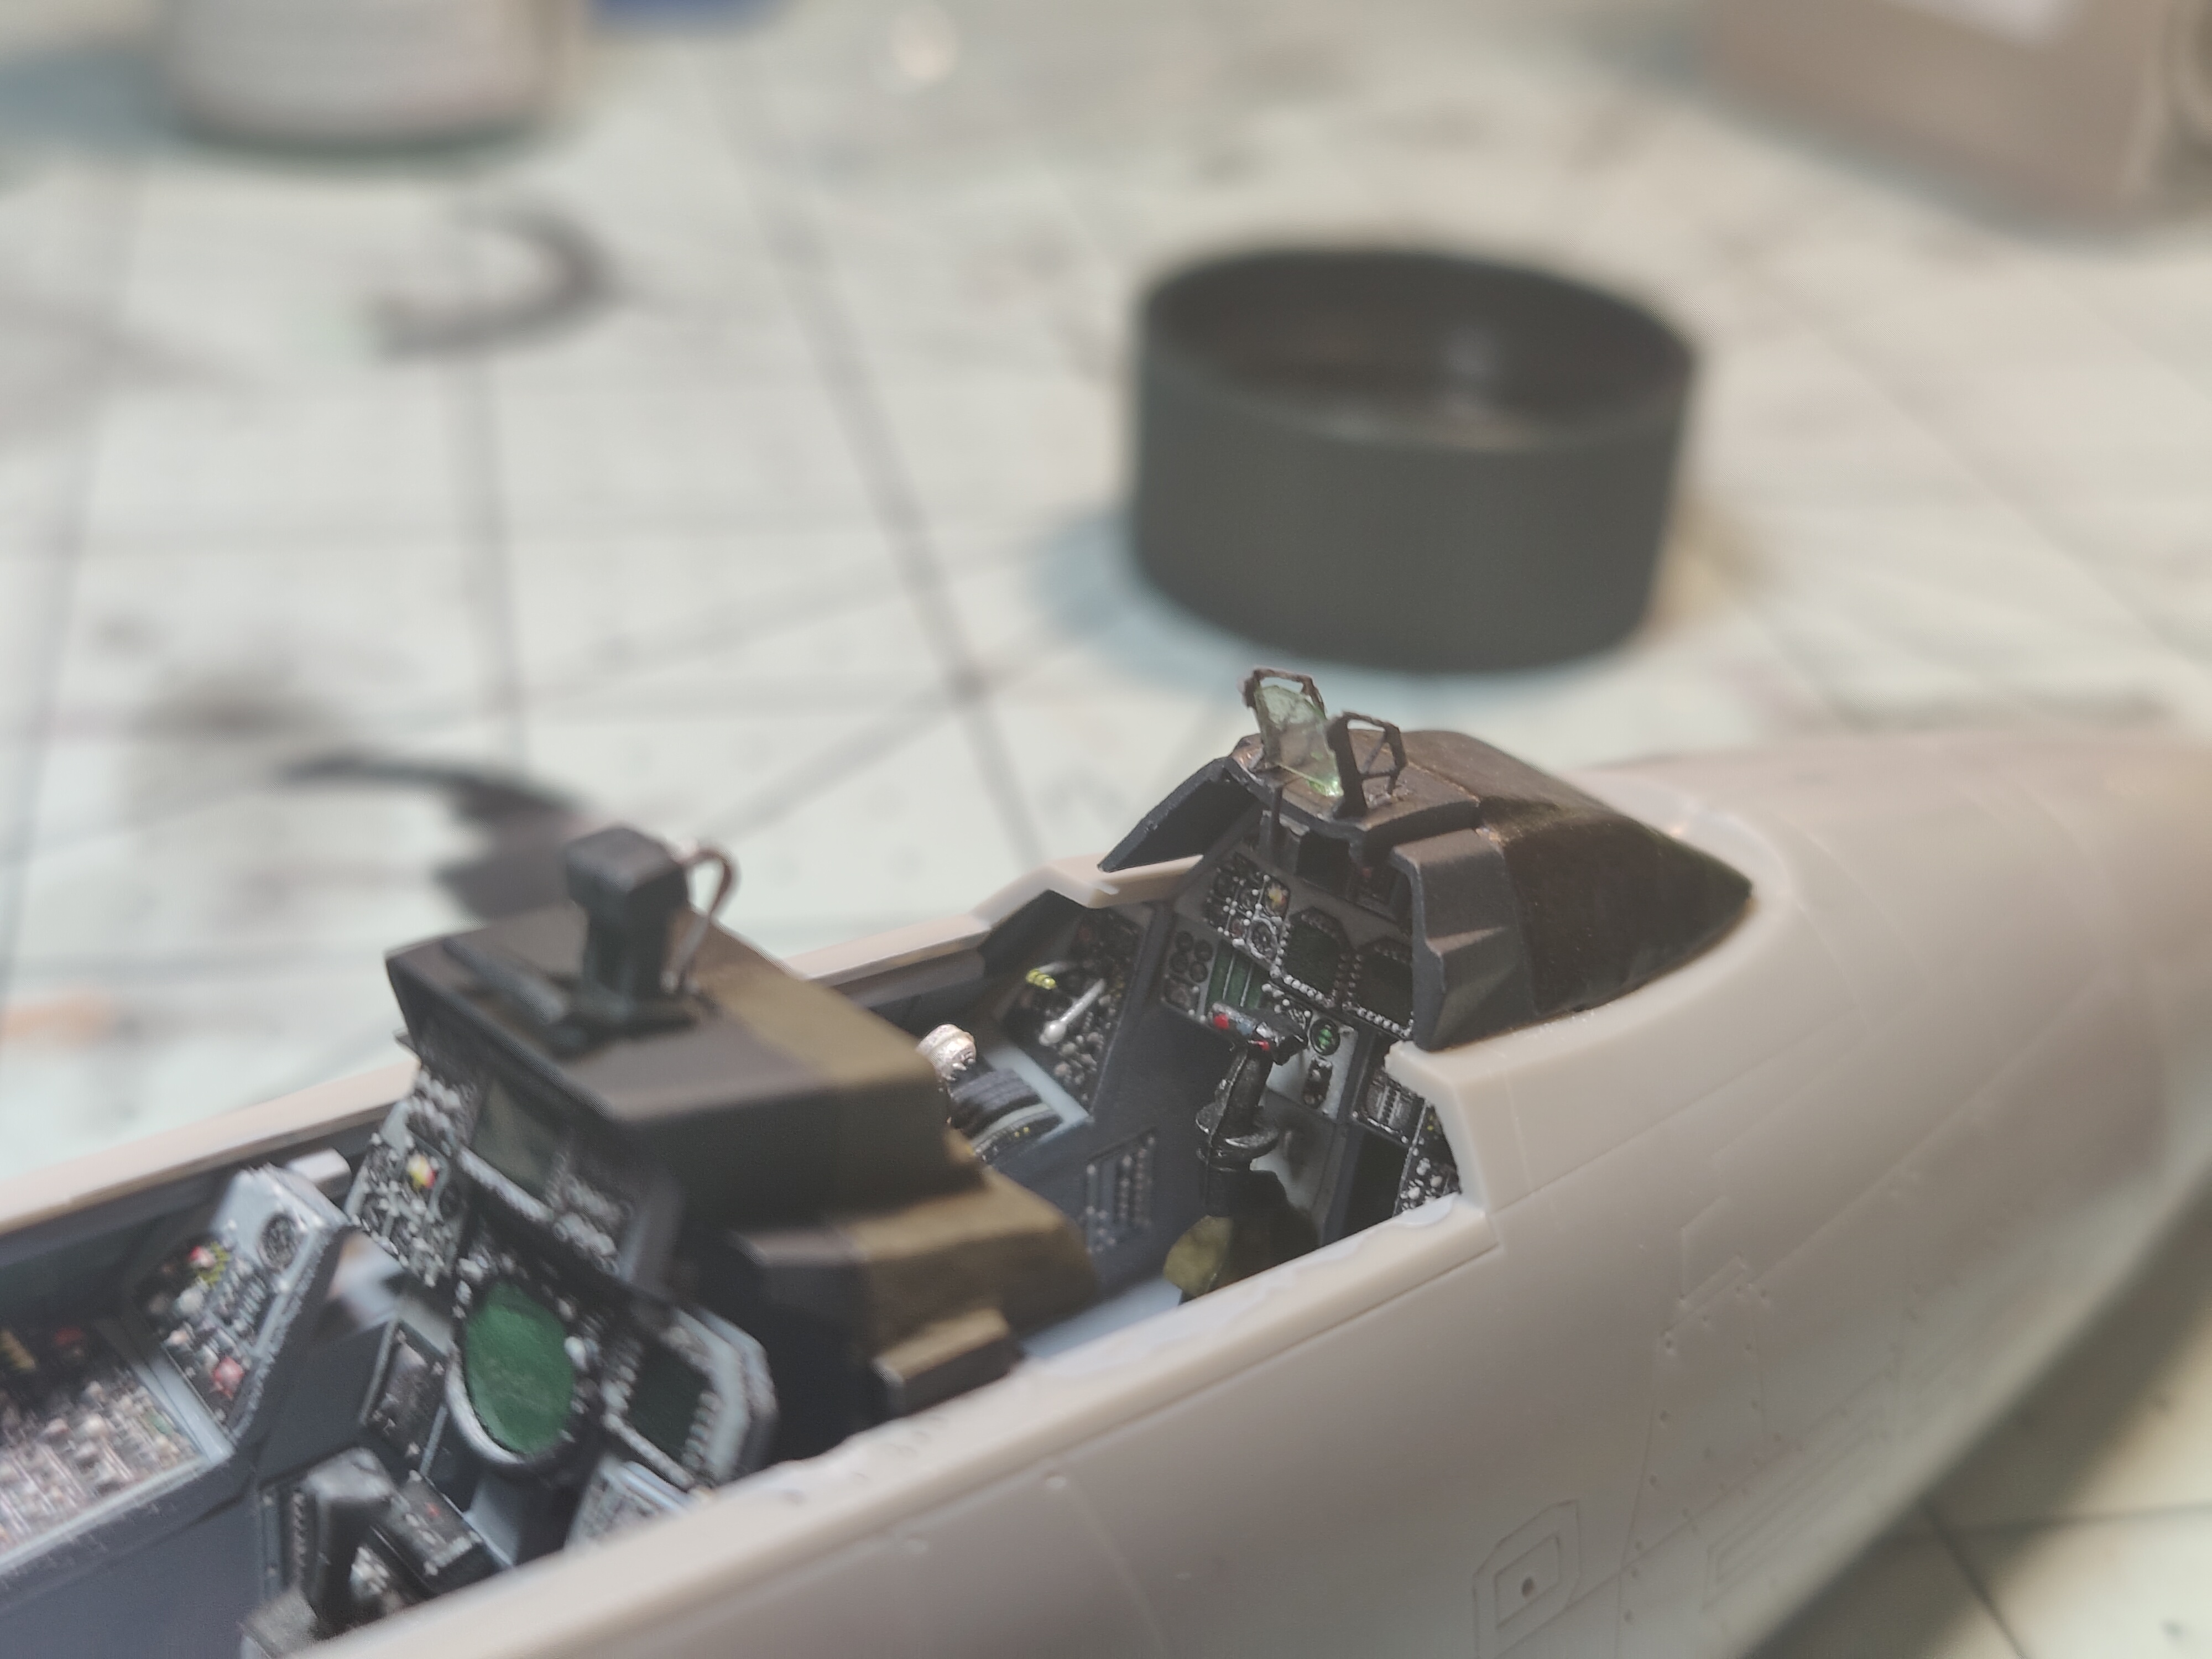
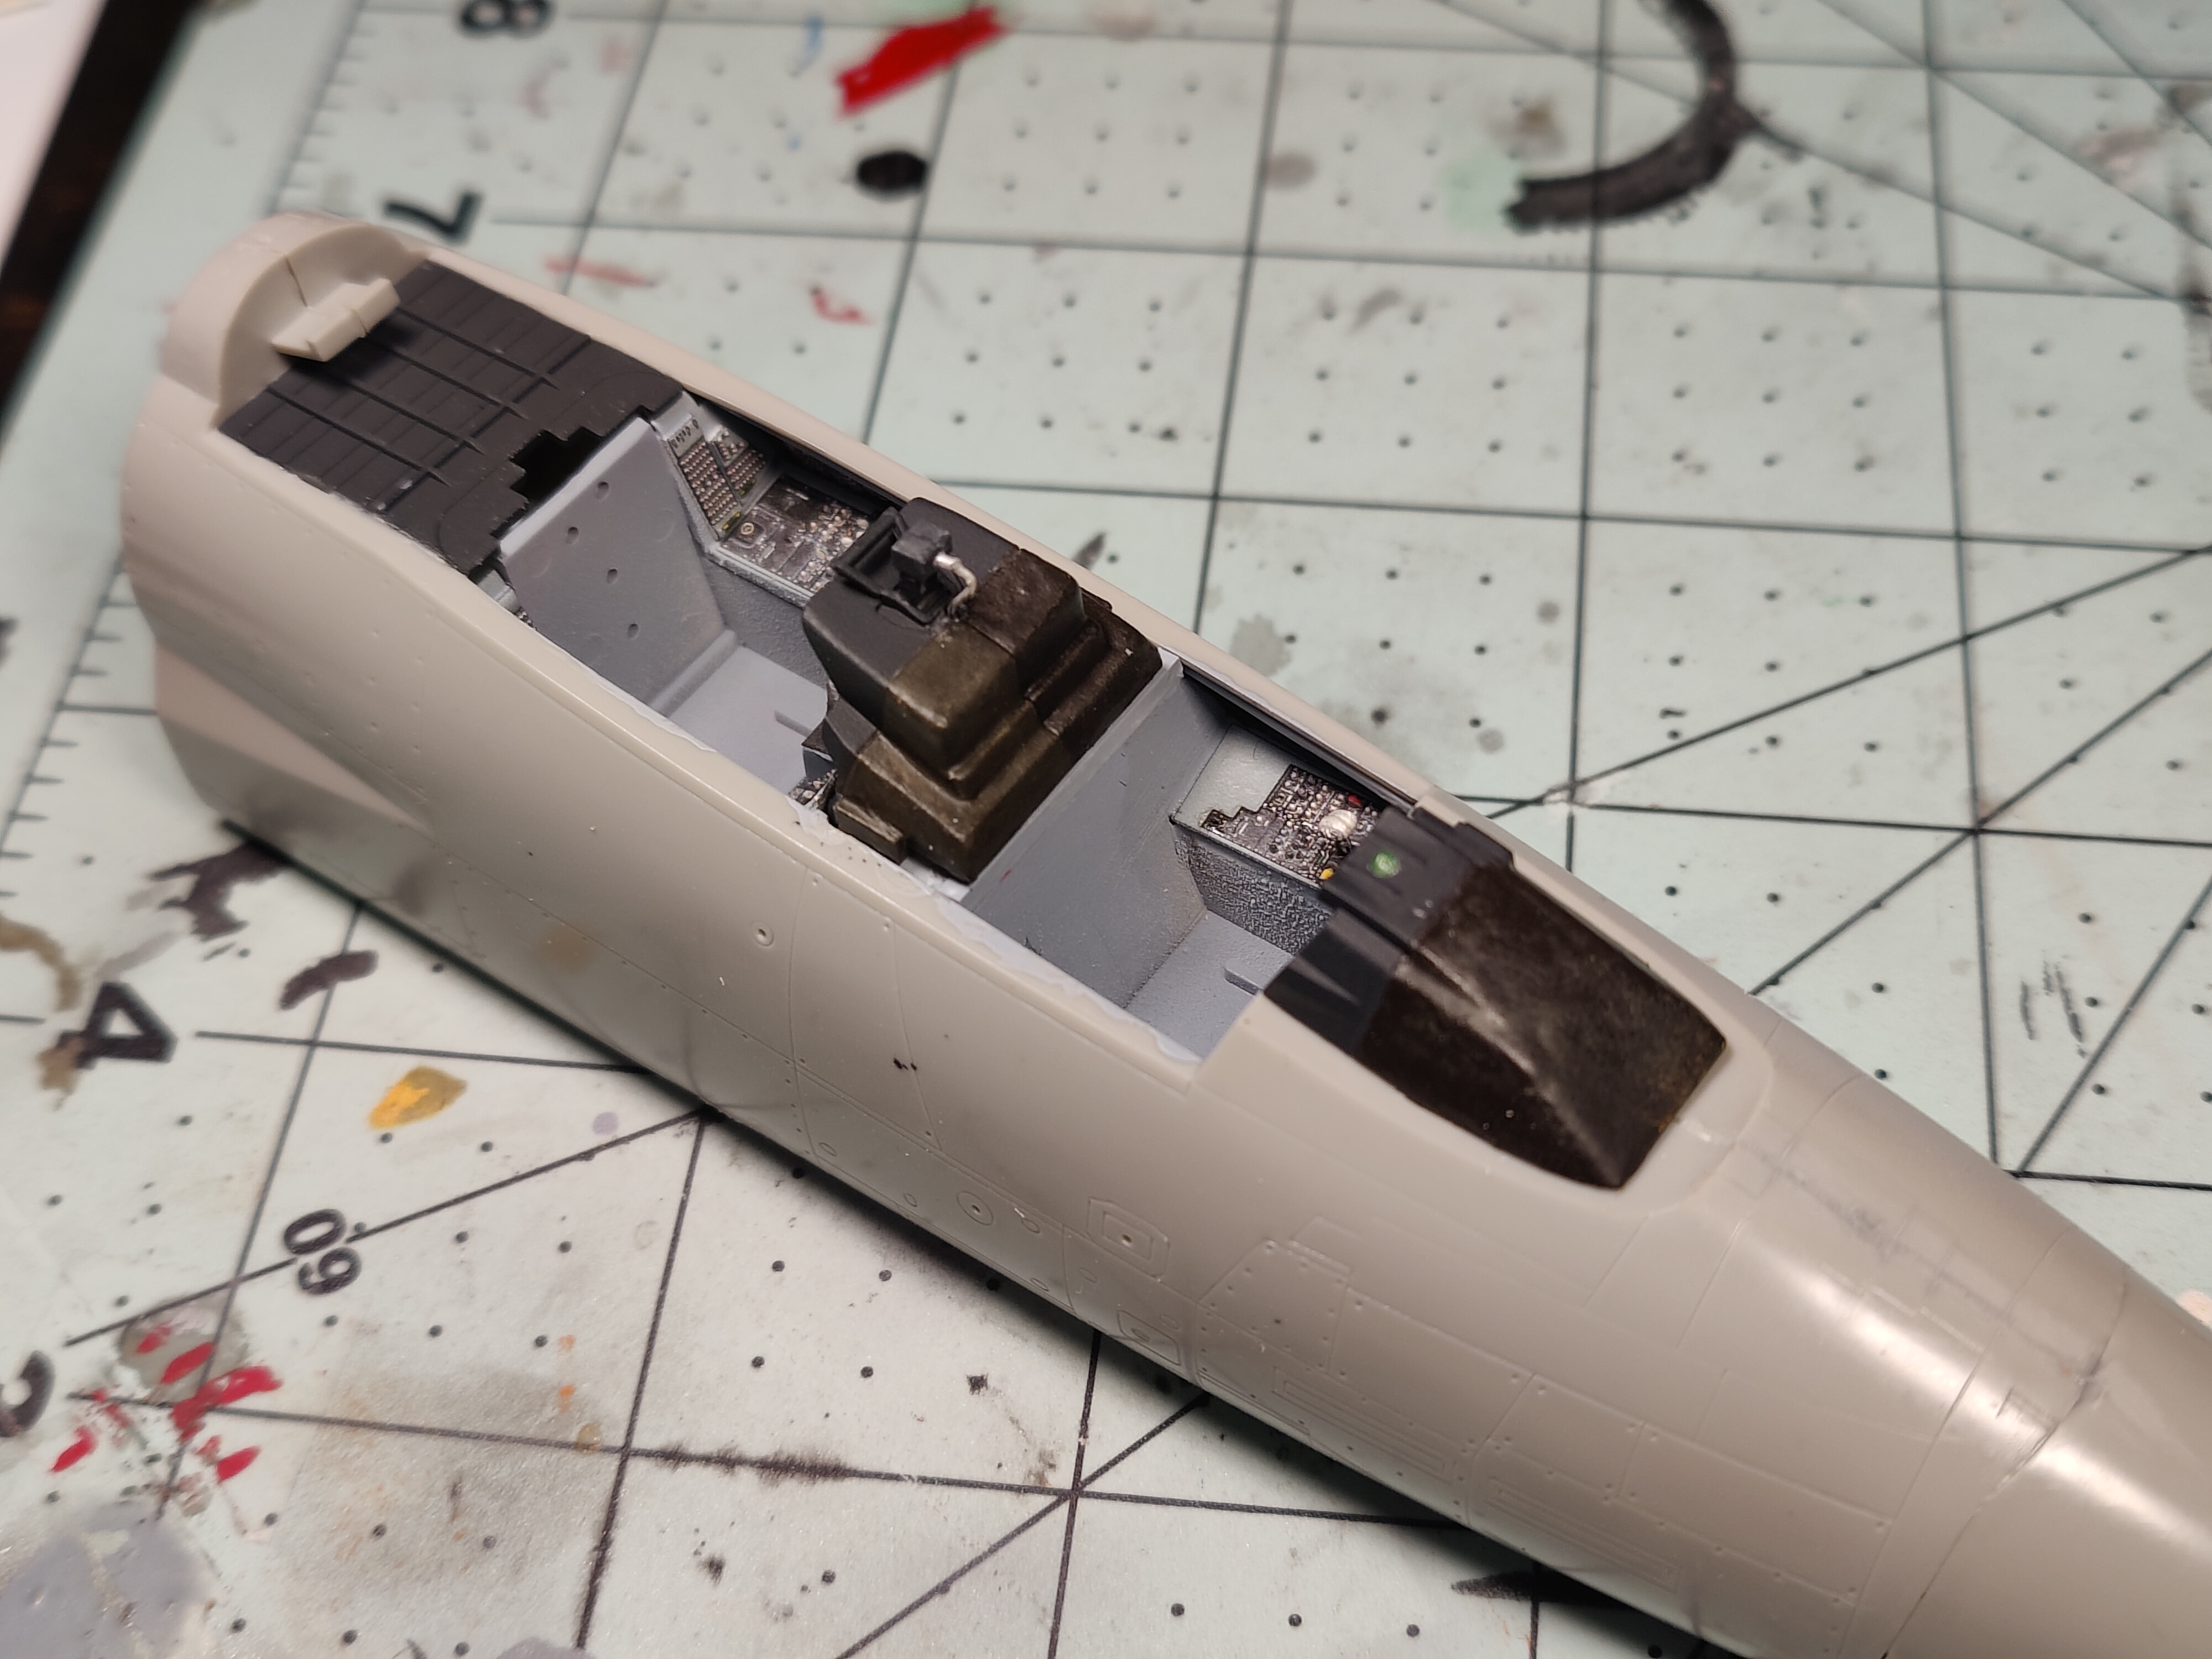
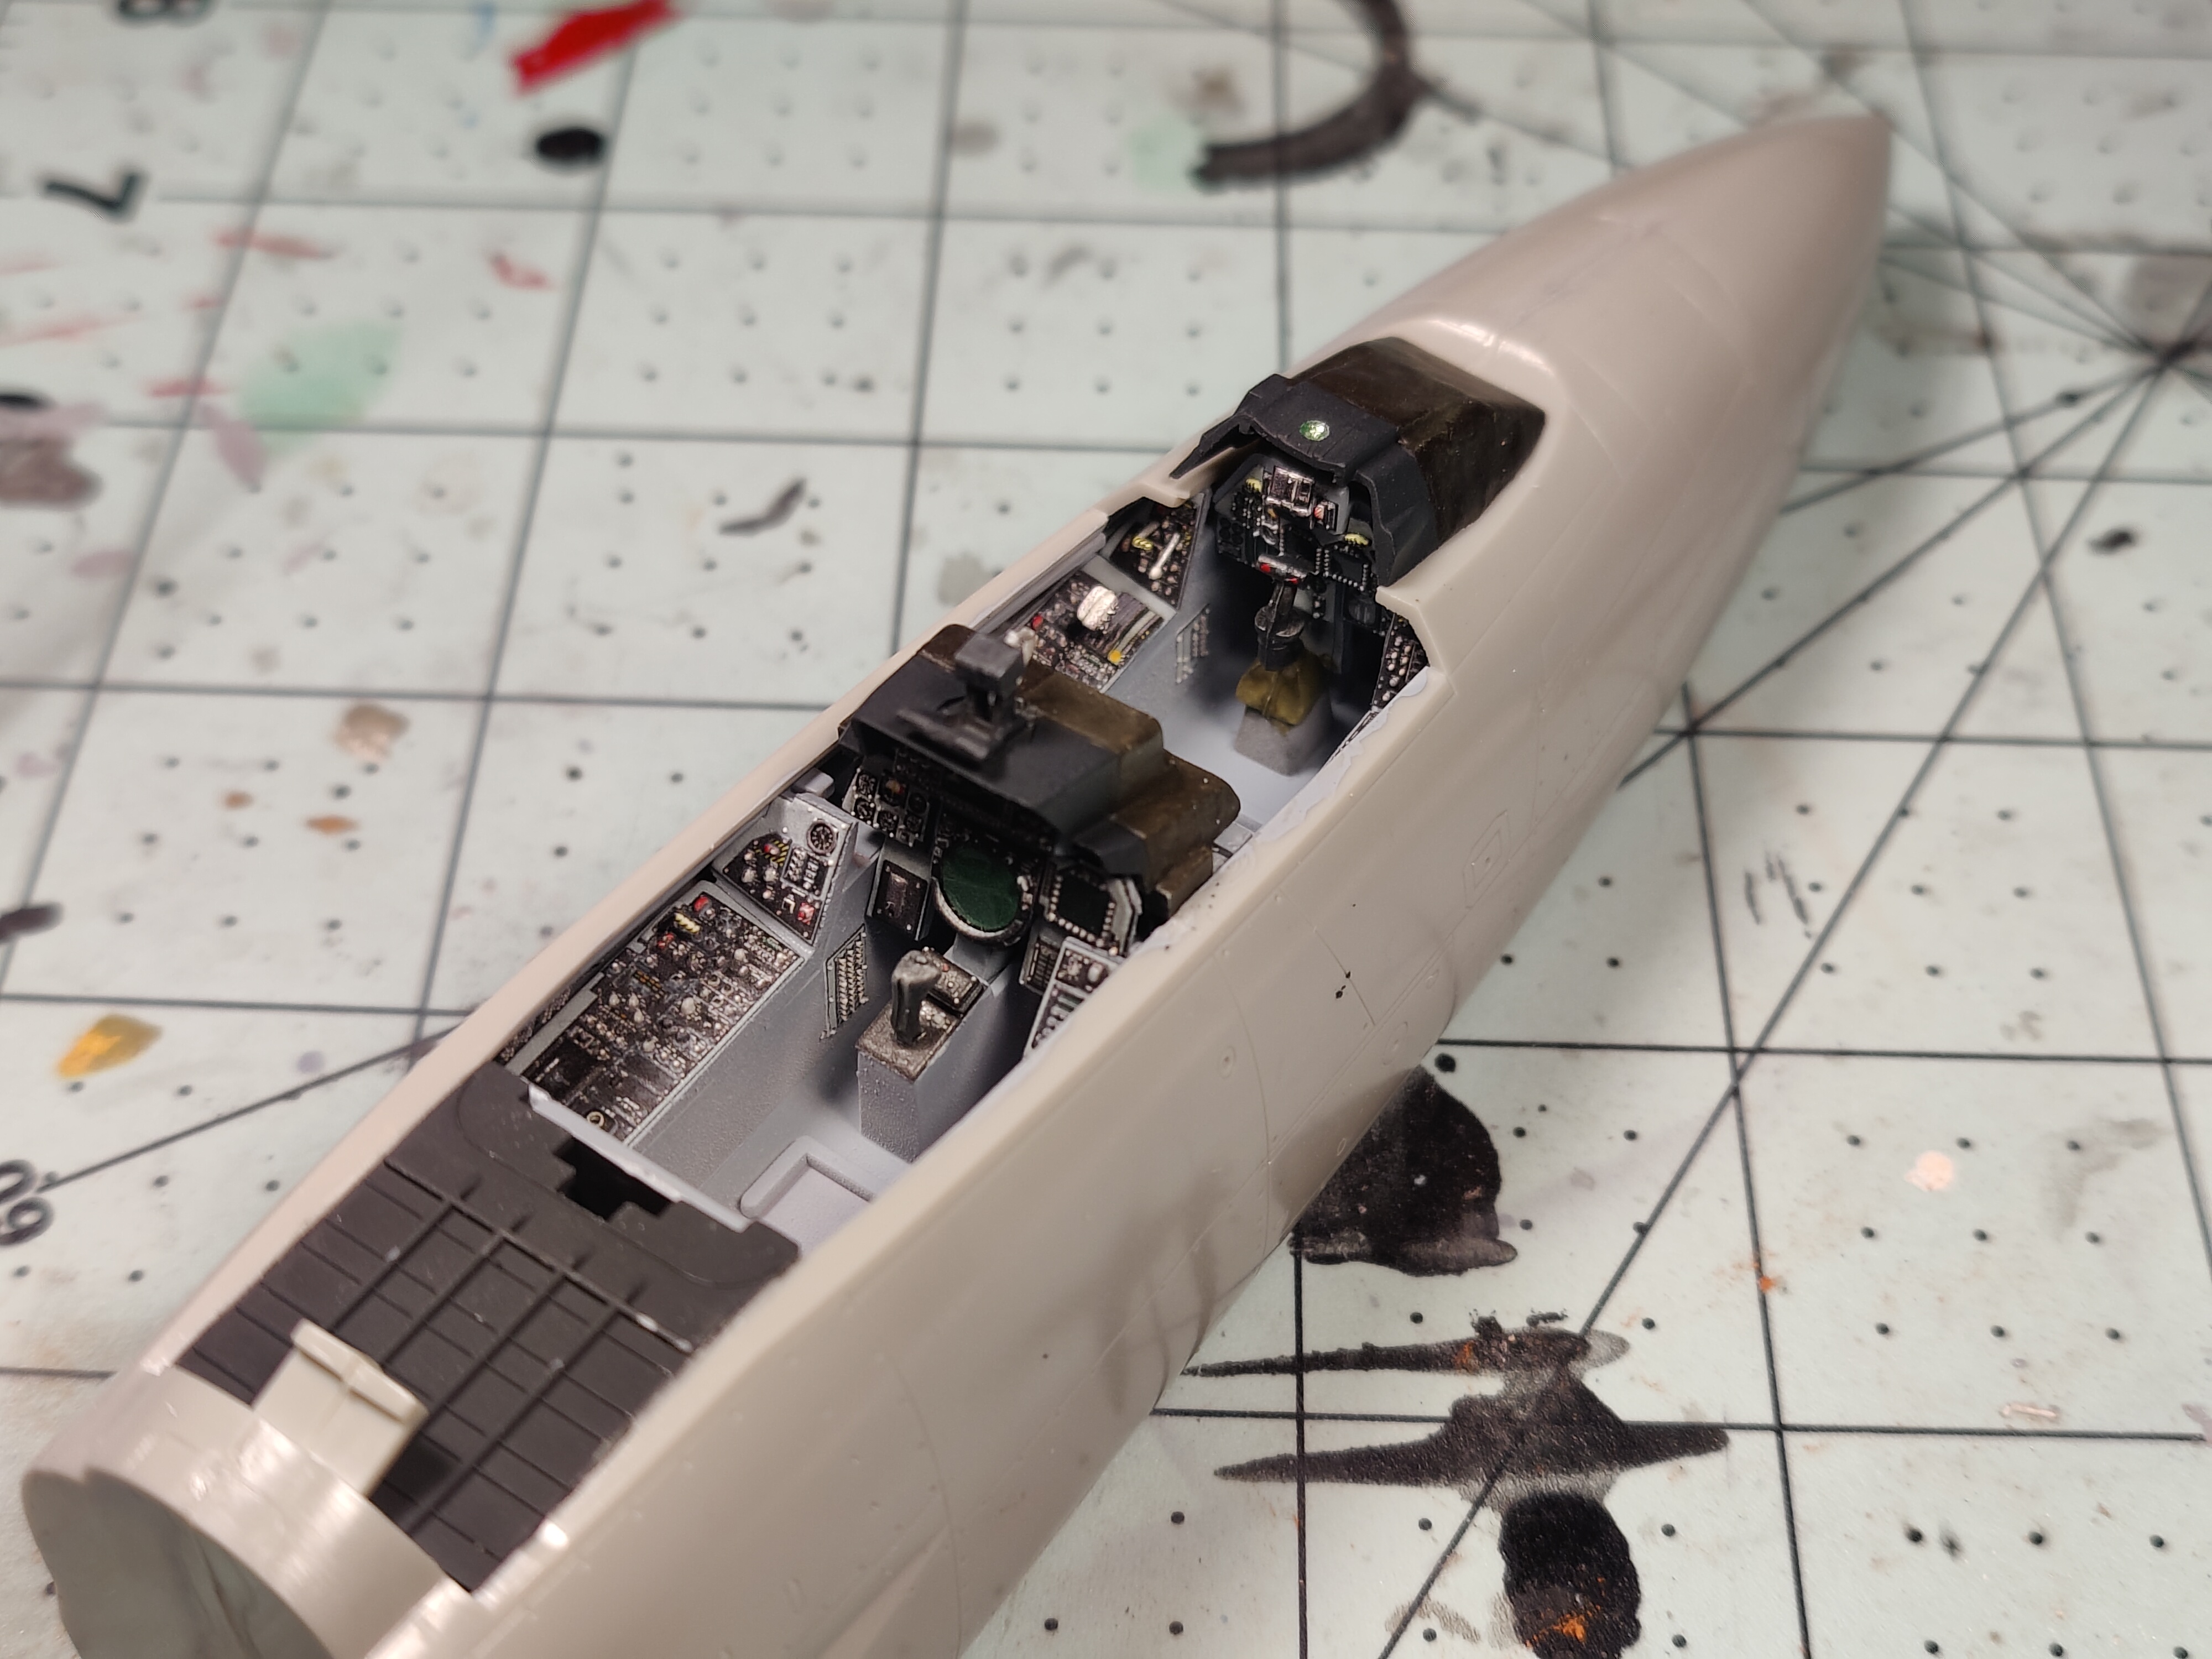
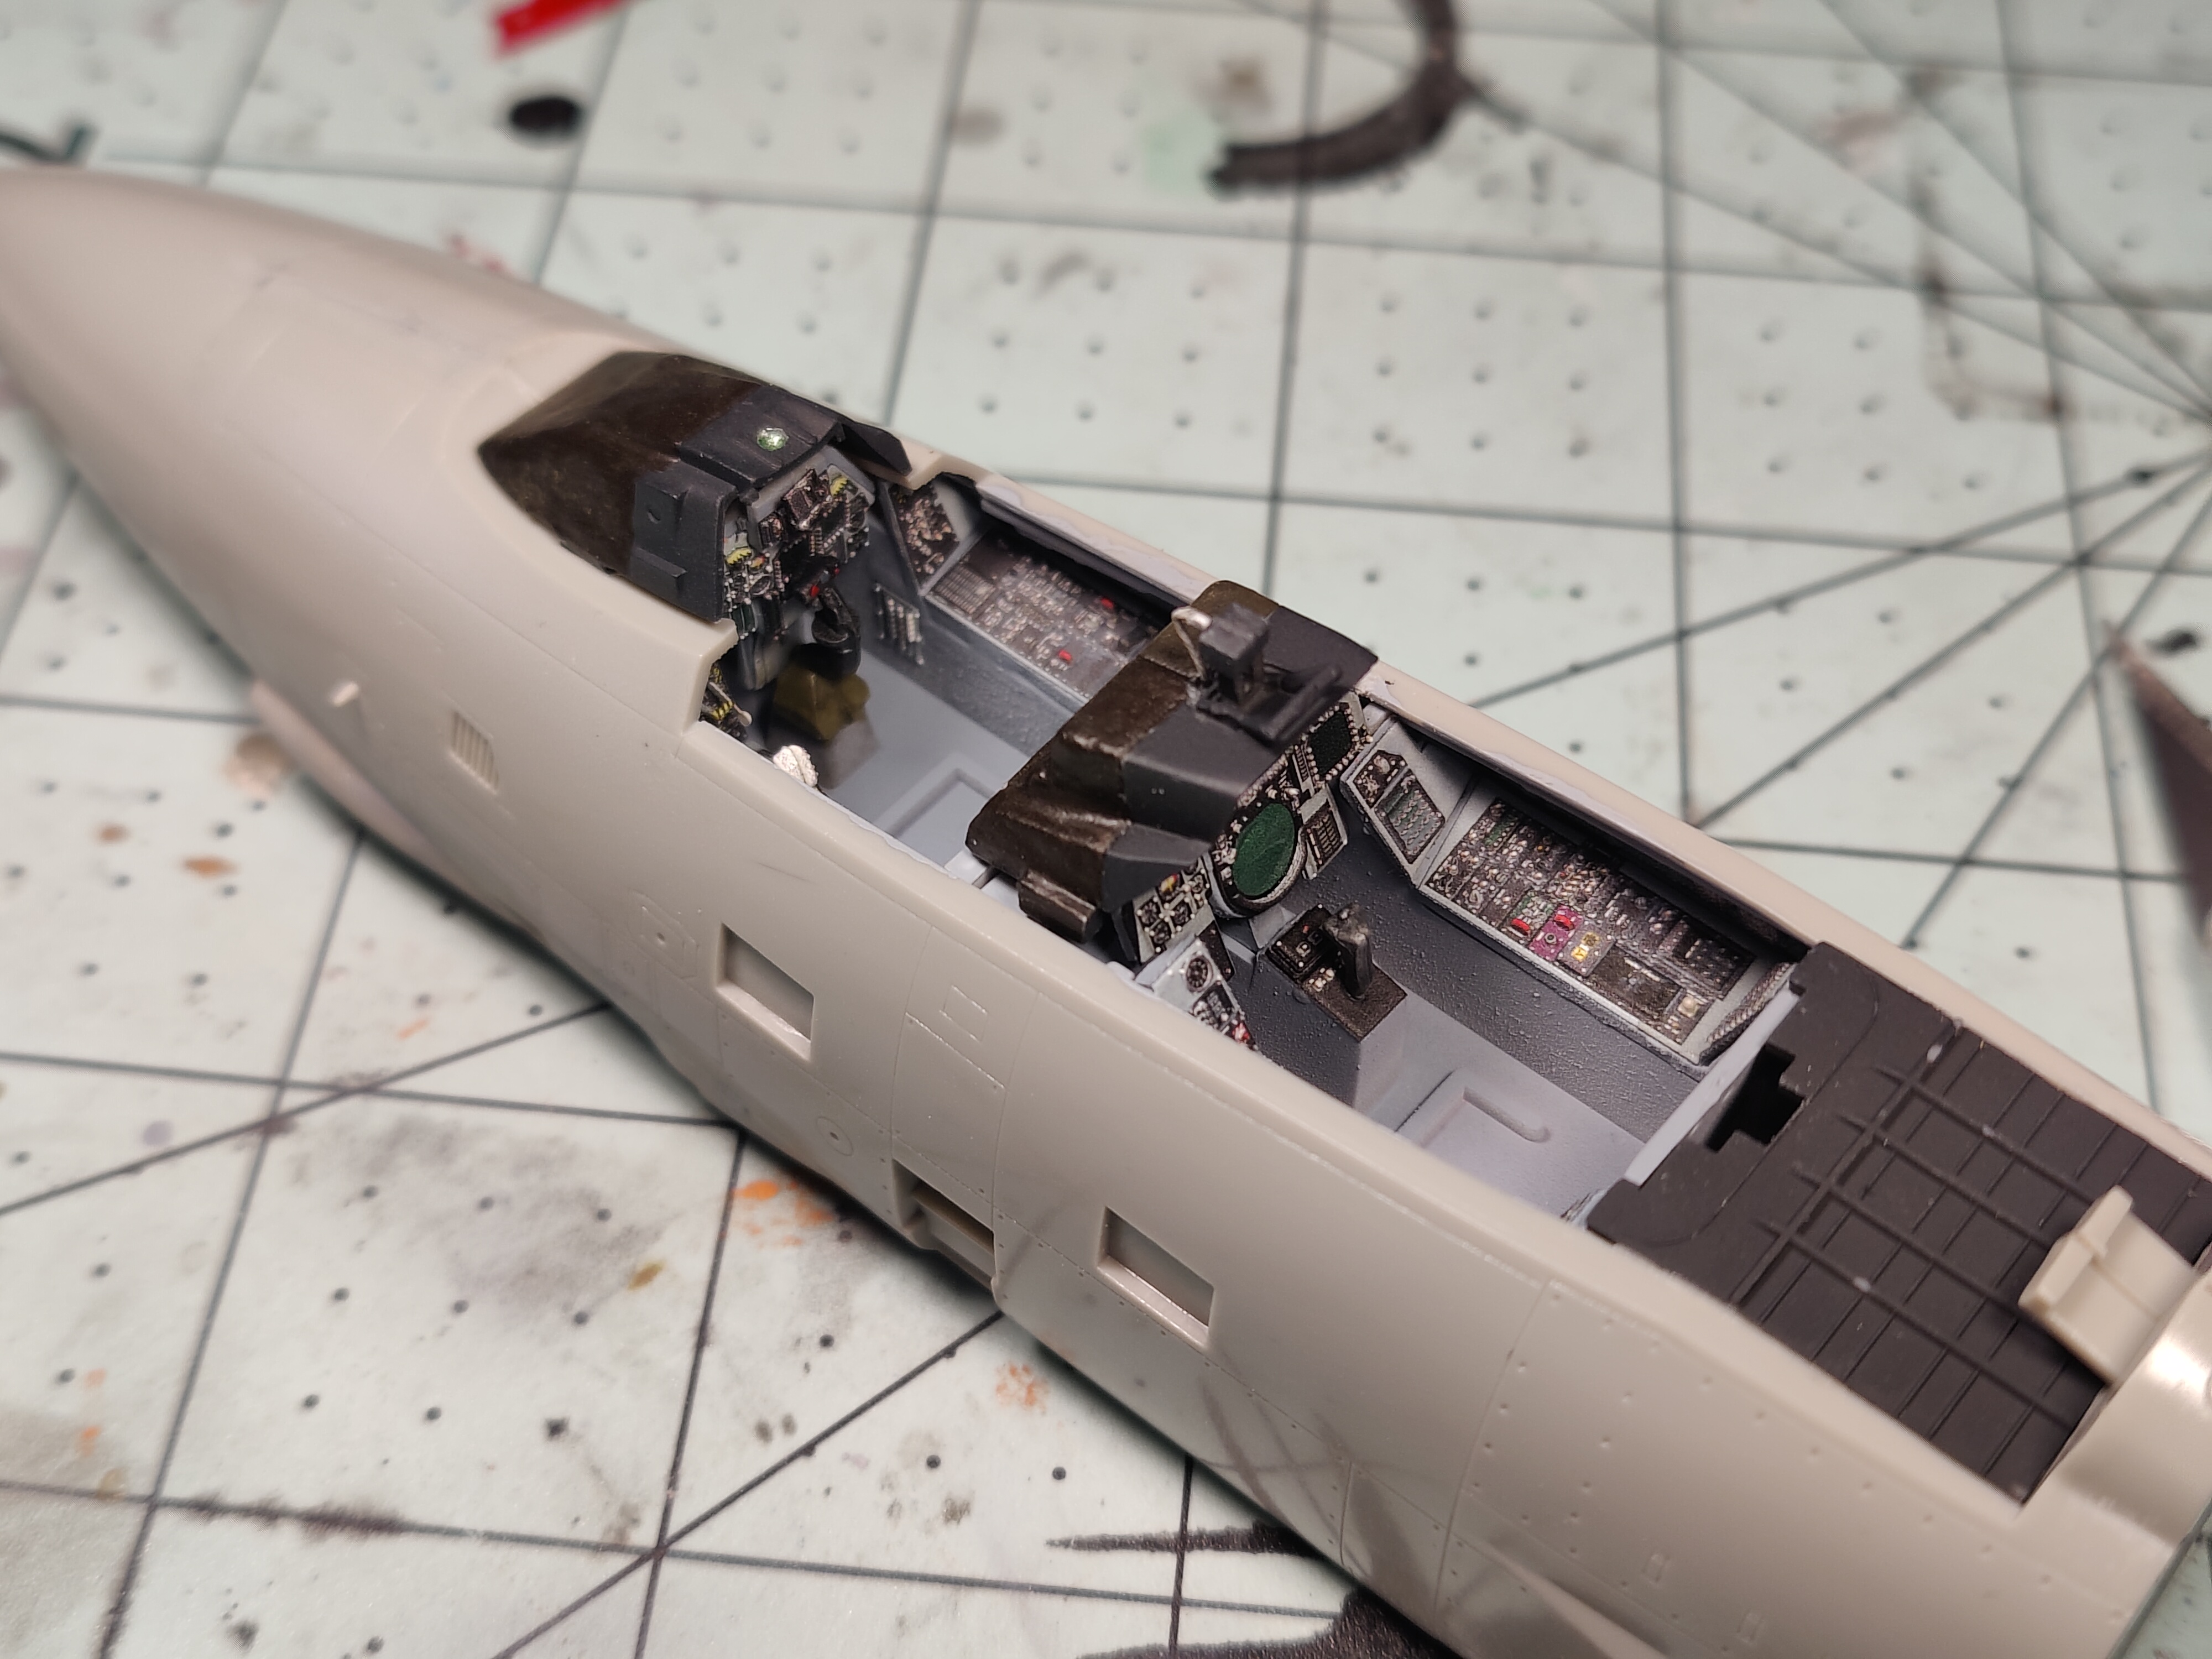
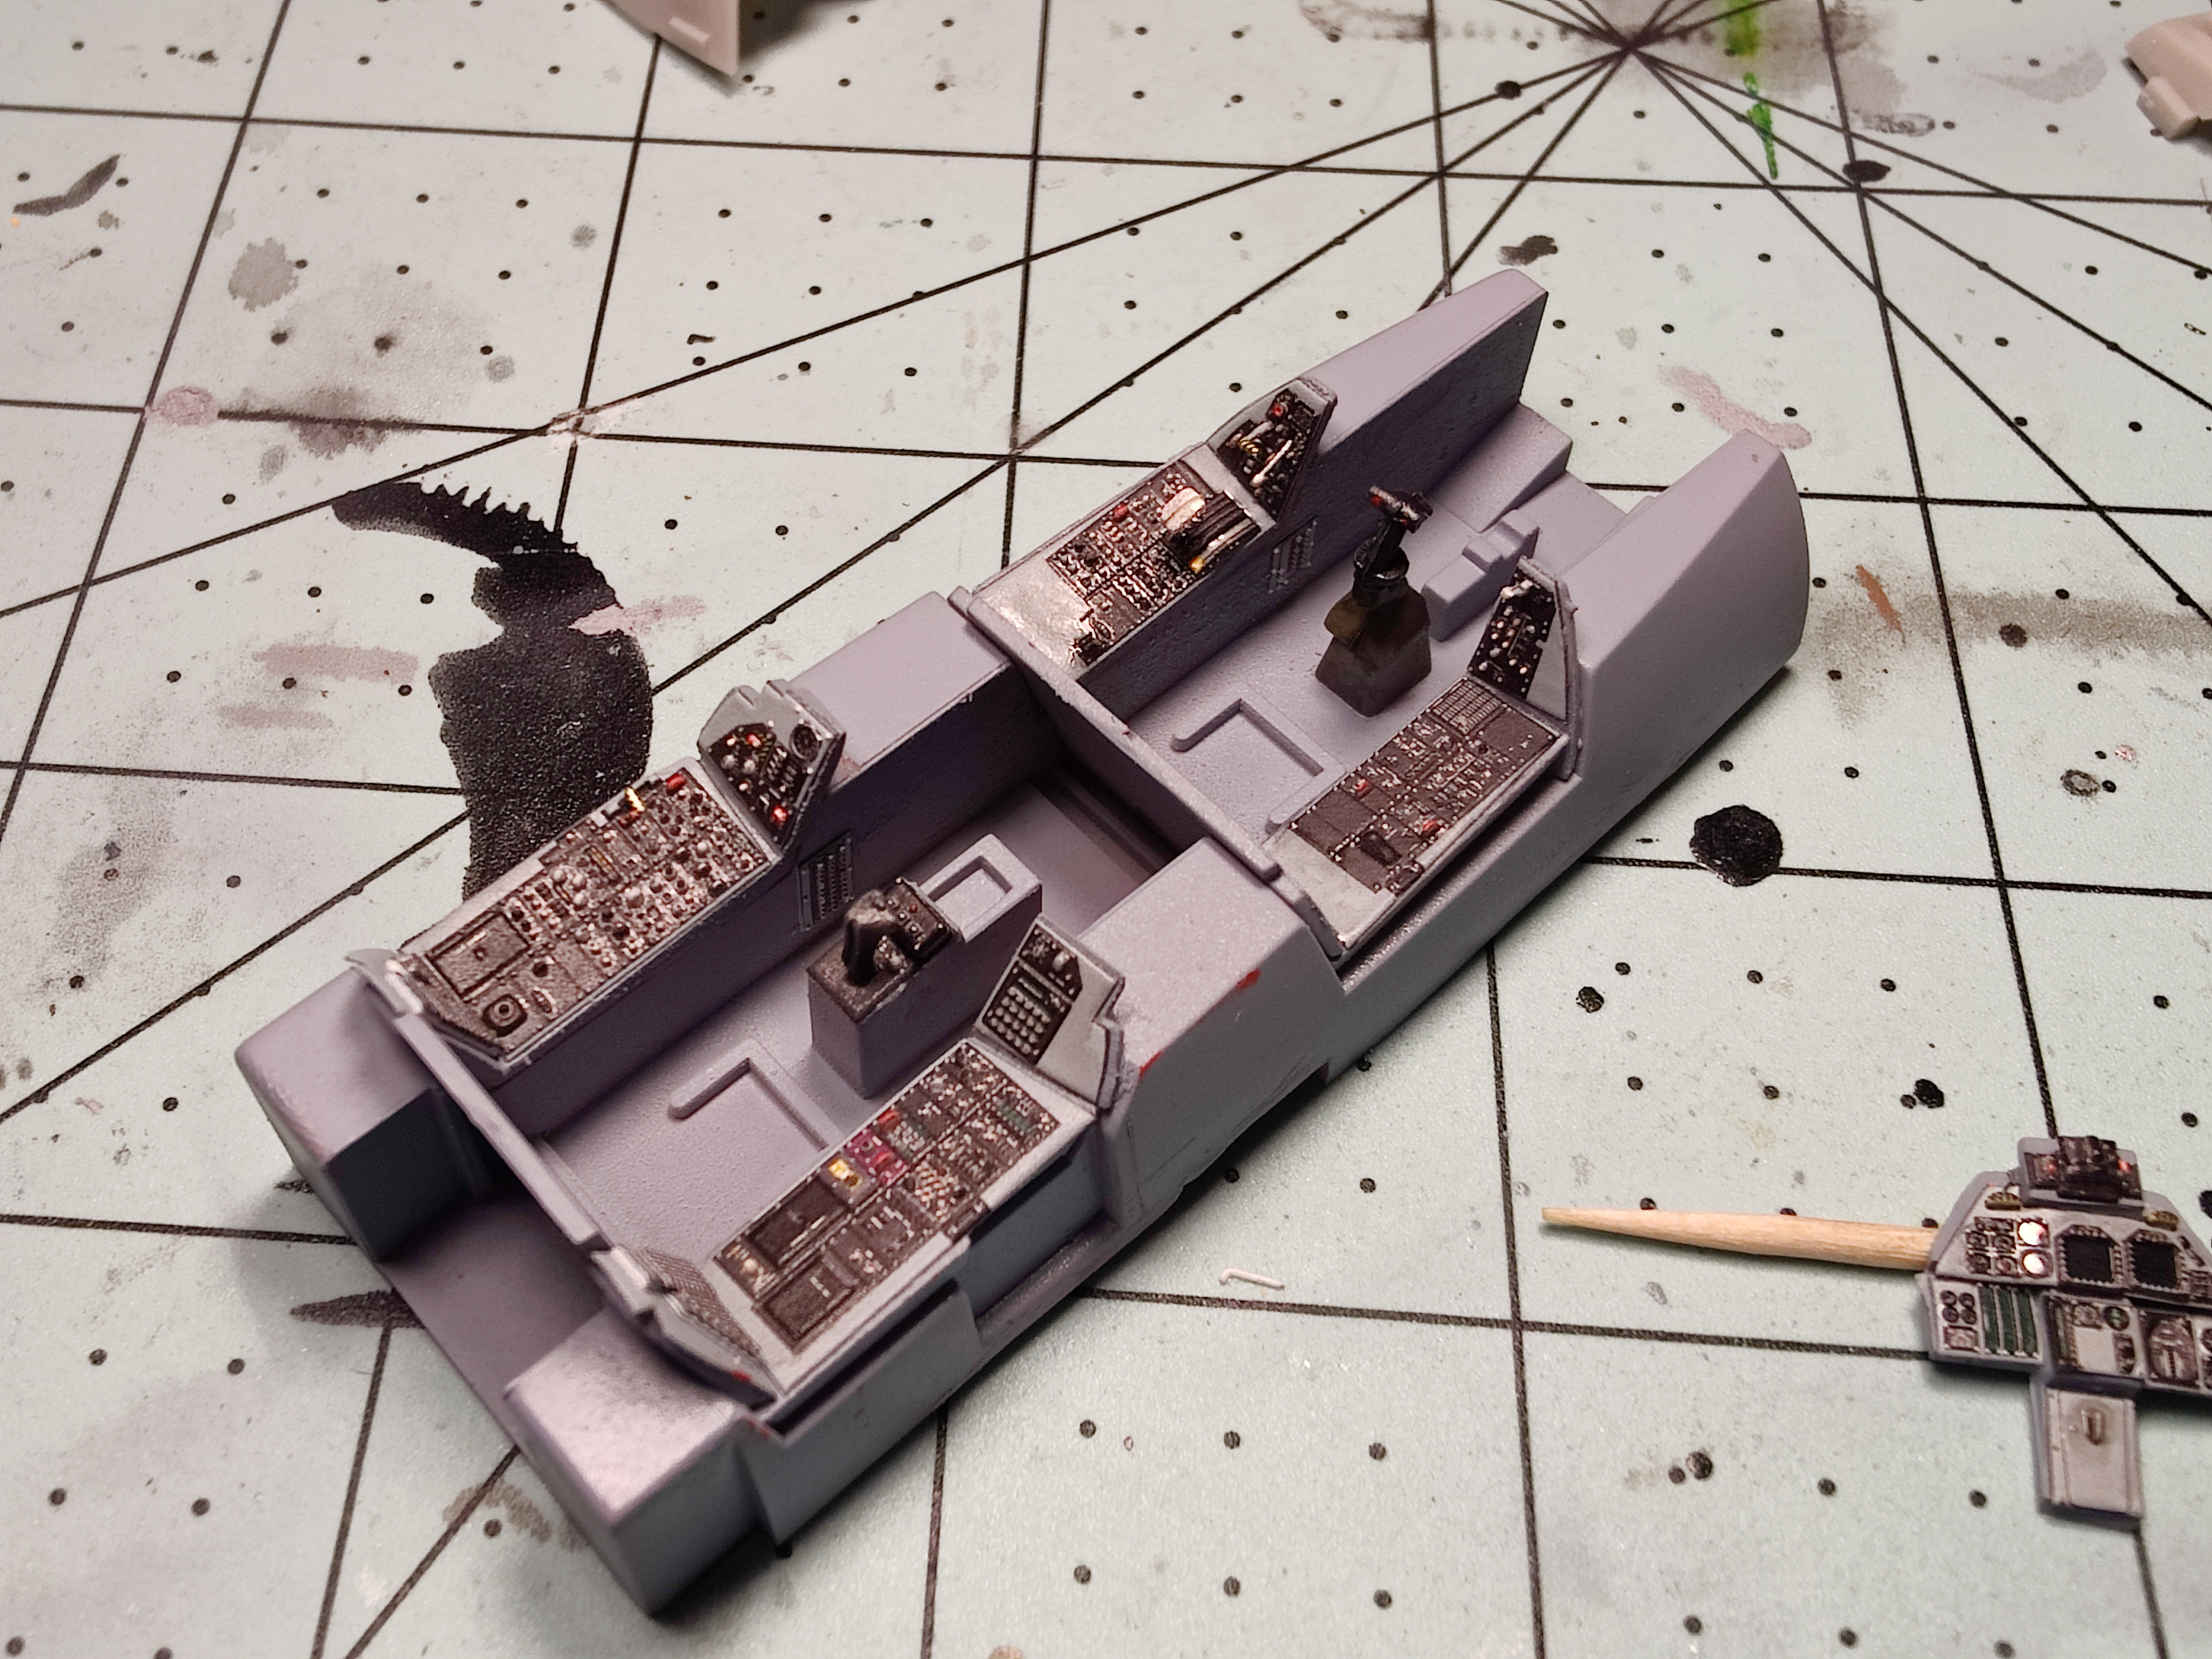
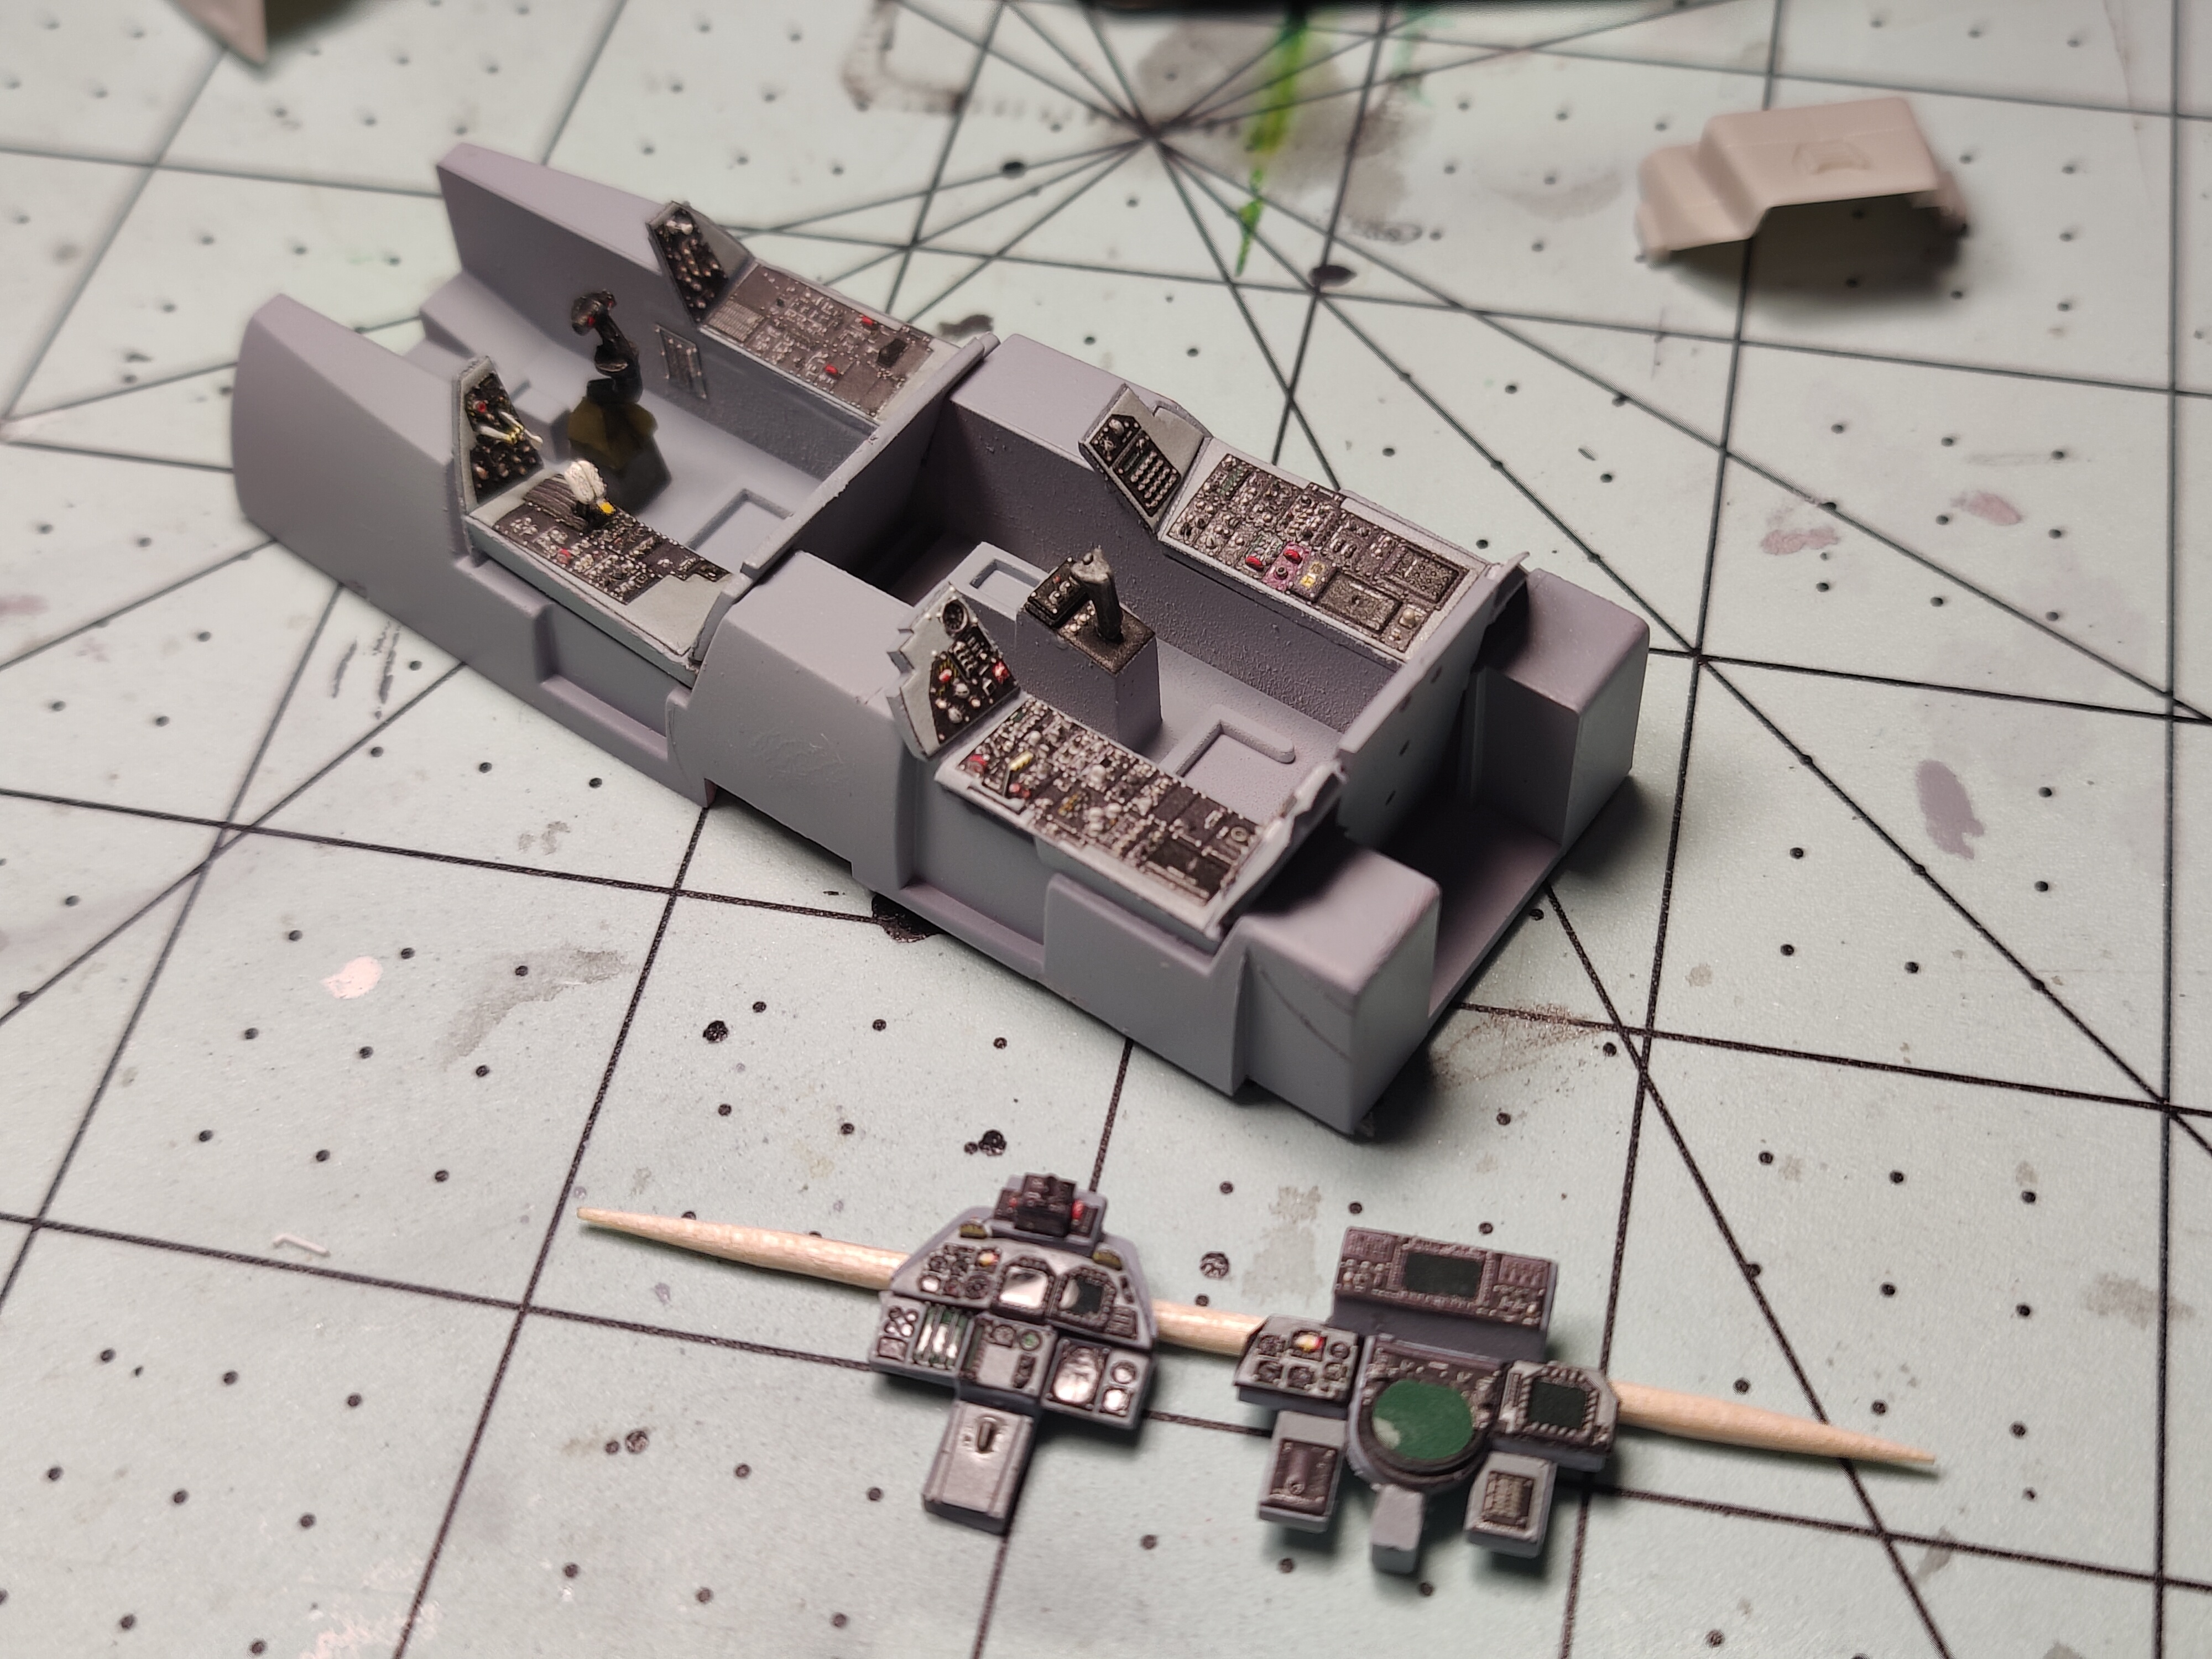
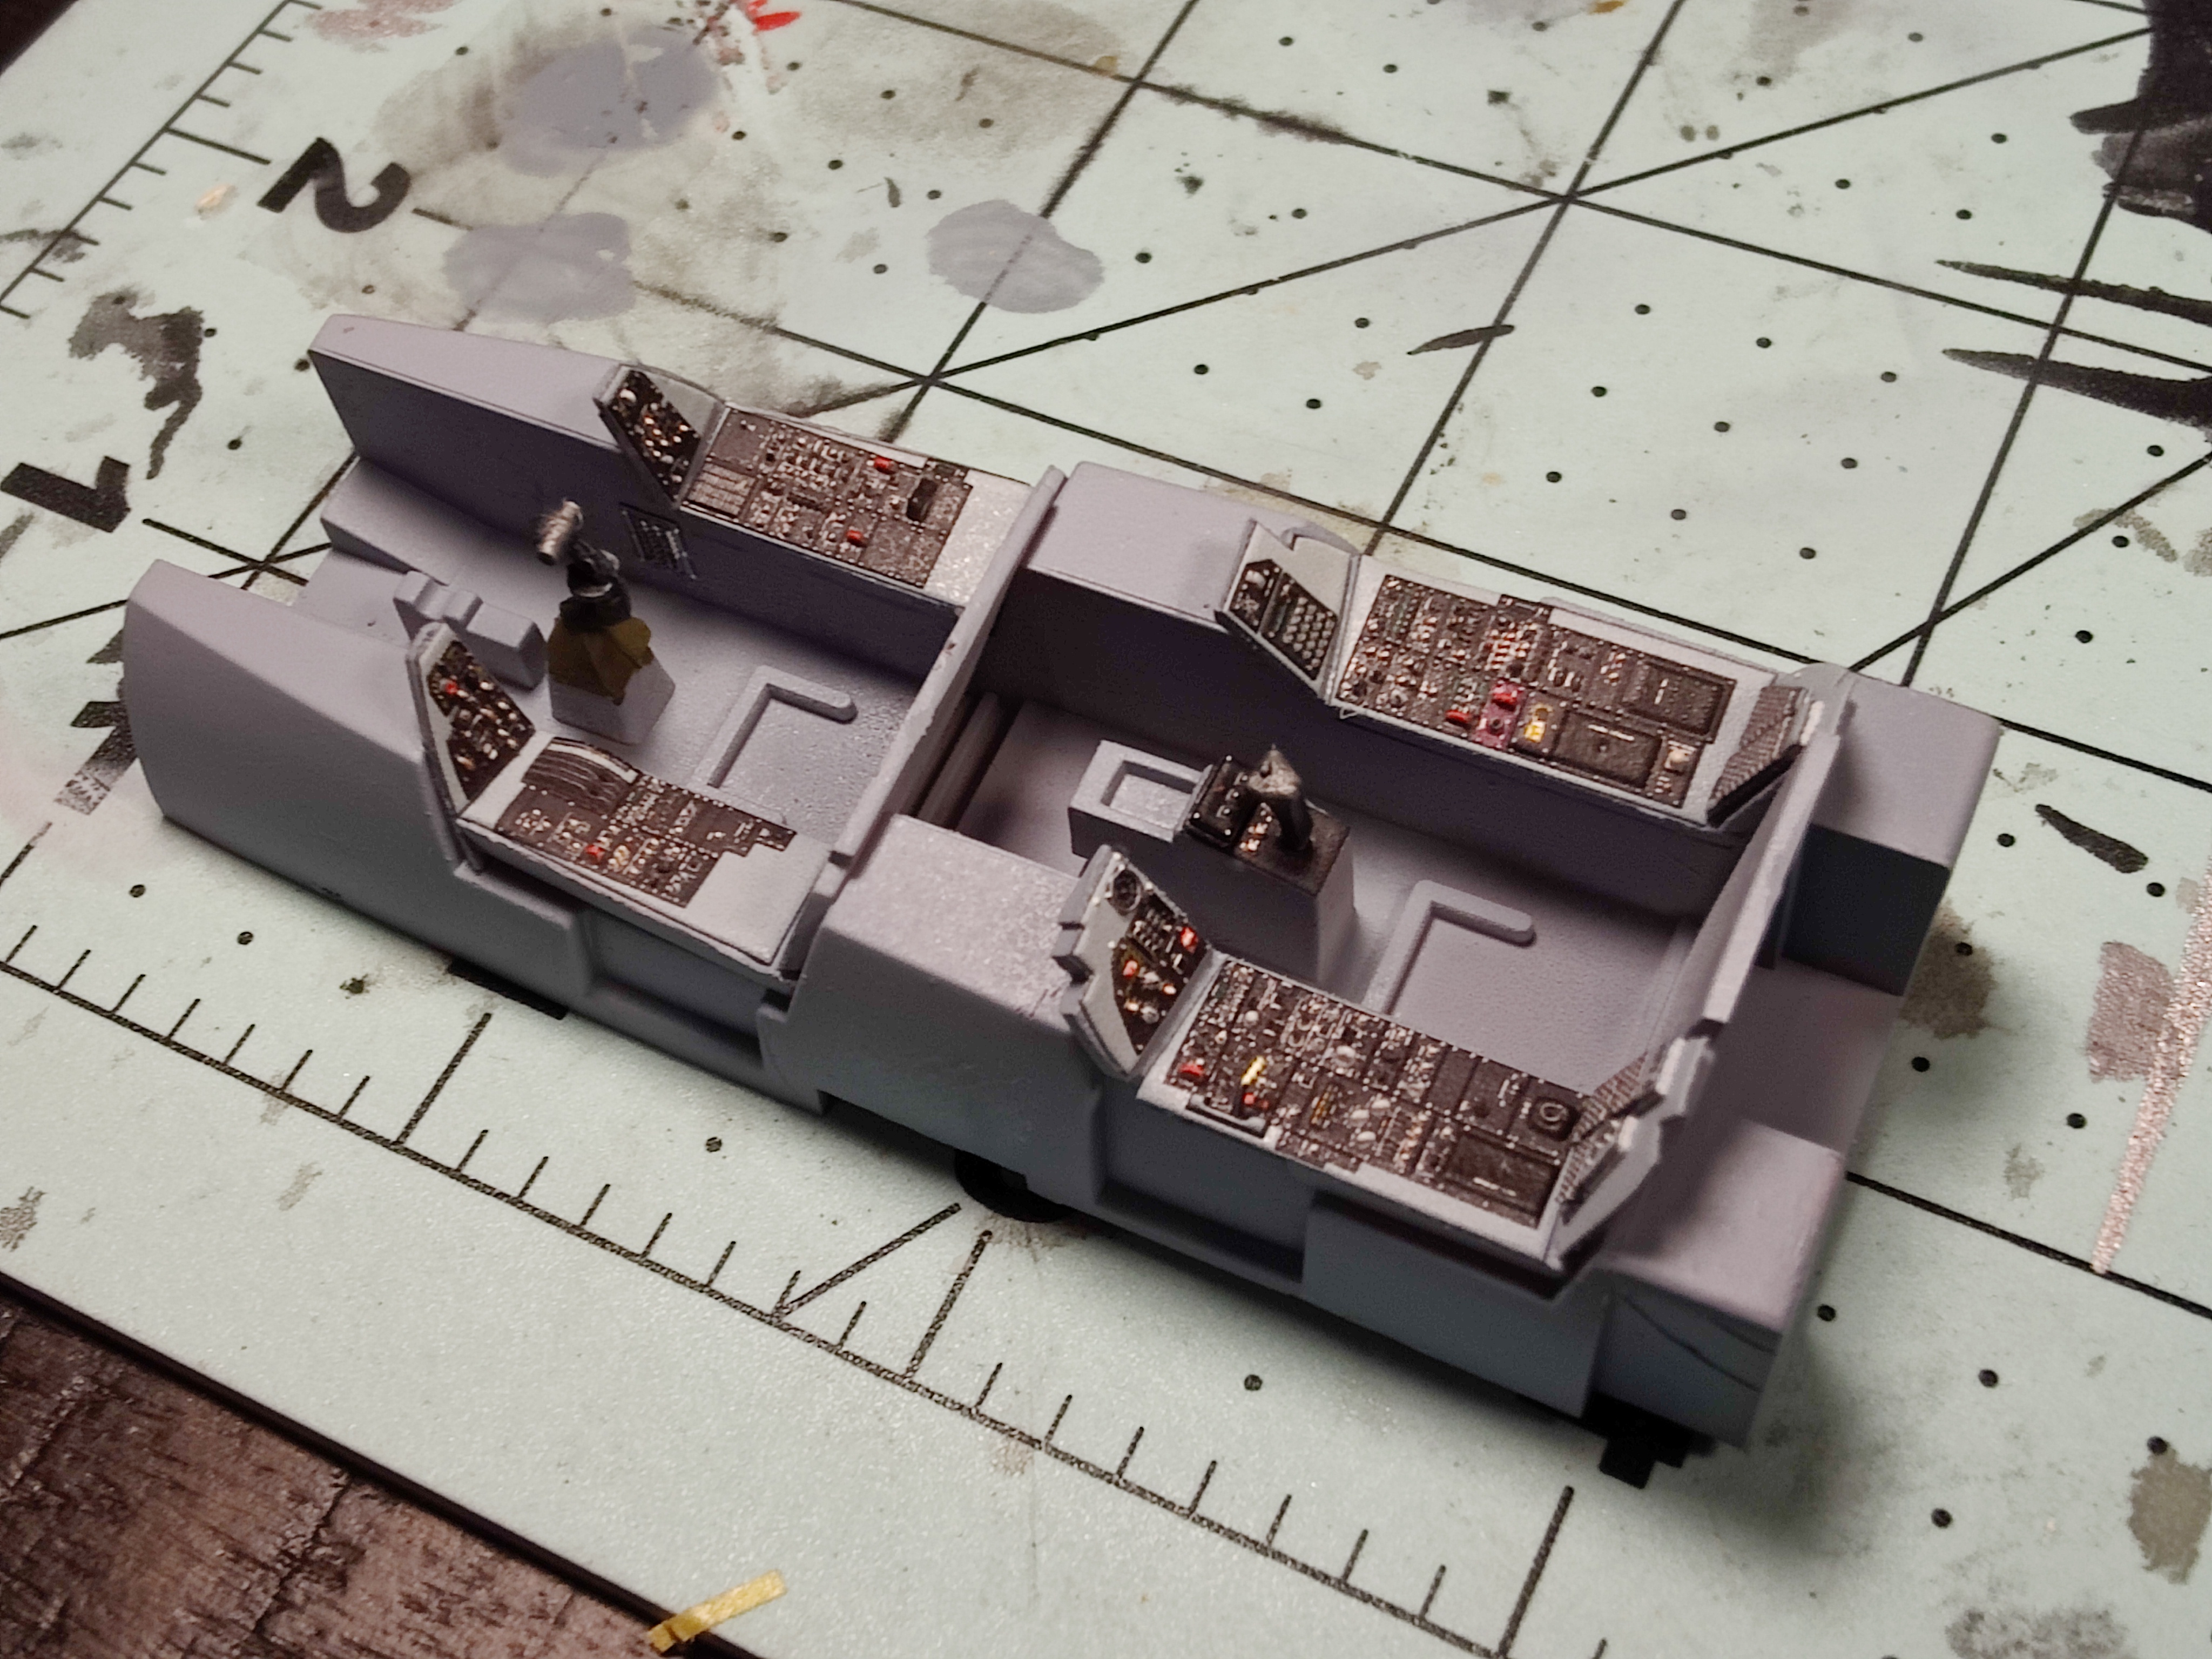
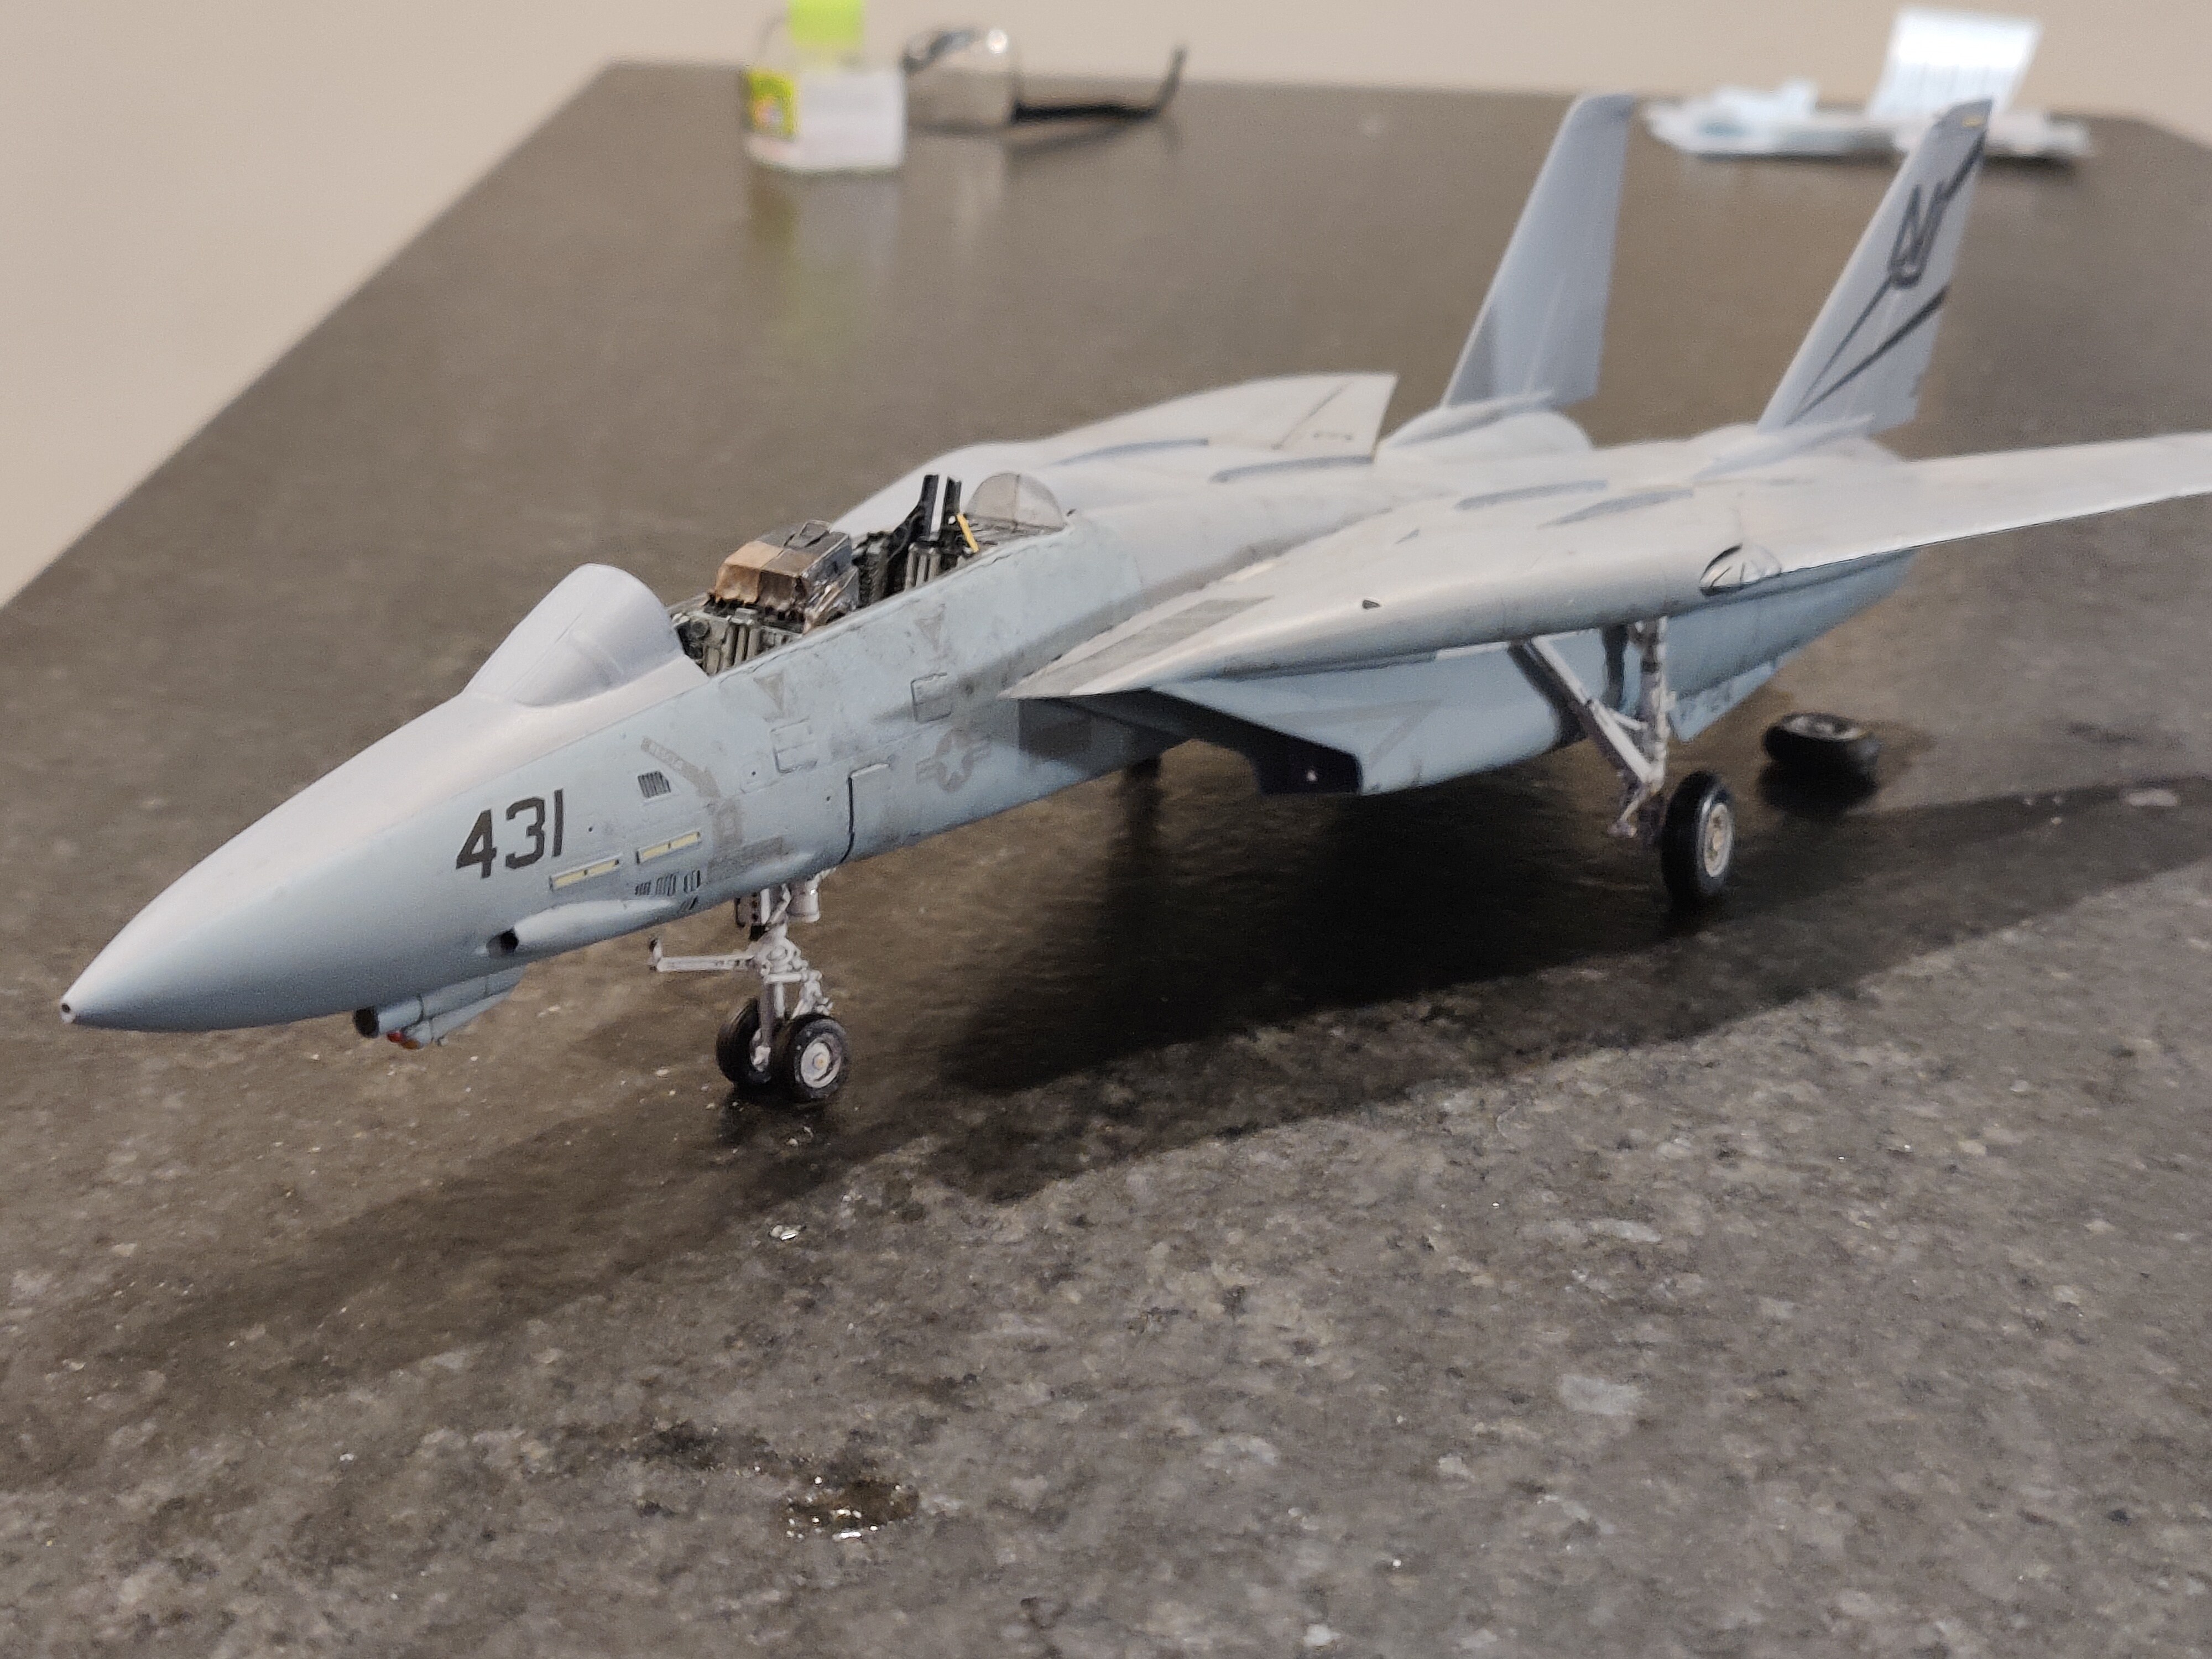
Now I'm starting to add the scratch details around the cockpit including ECS plumbing.

-
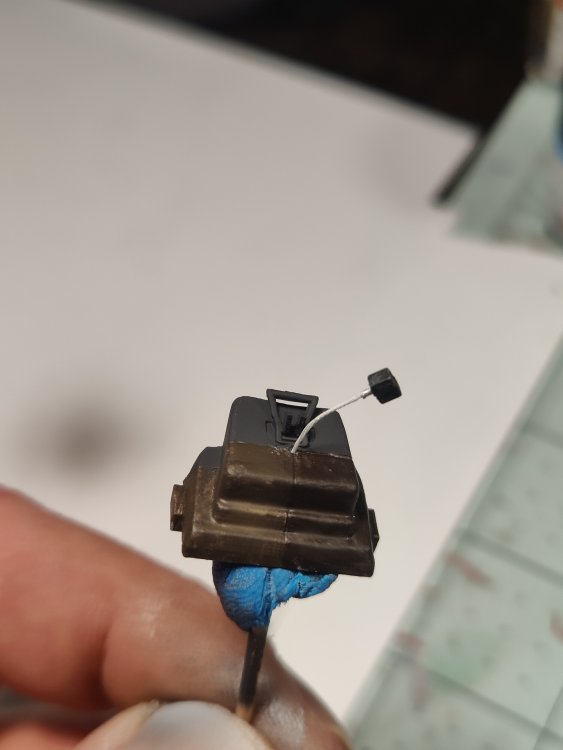
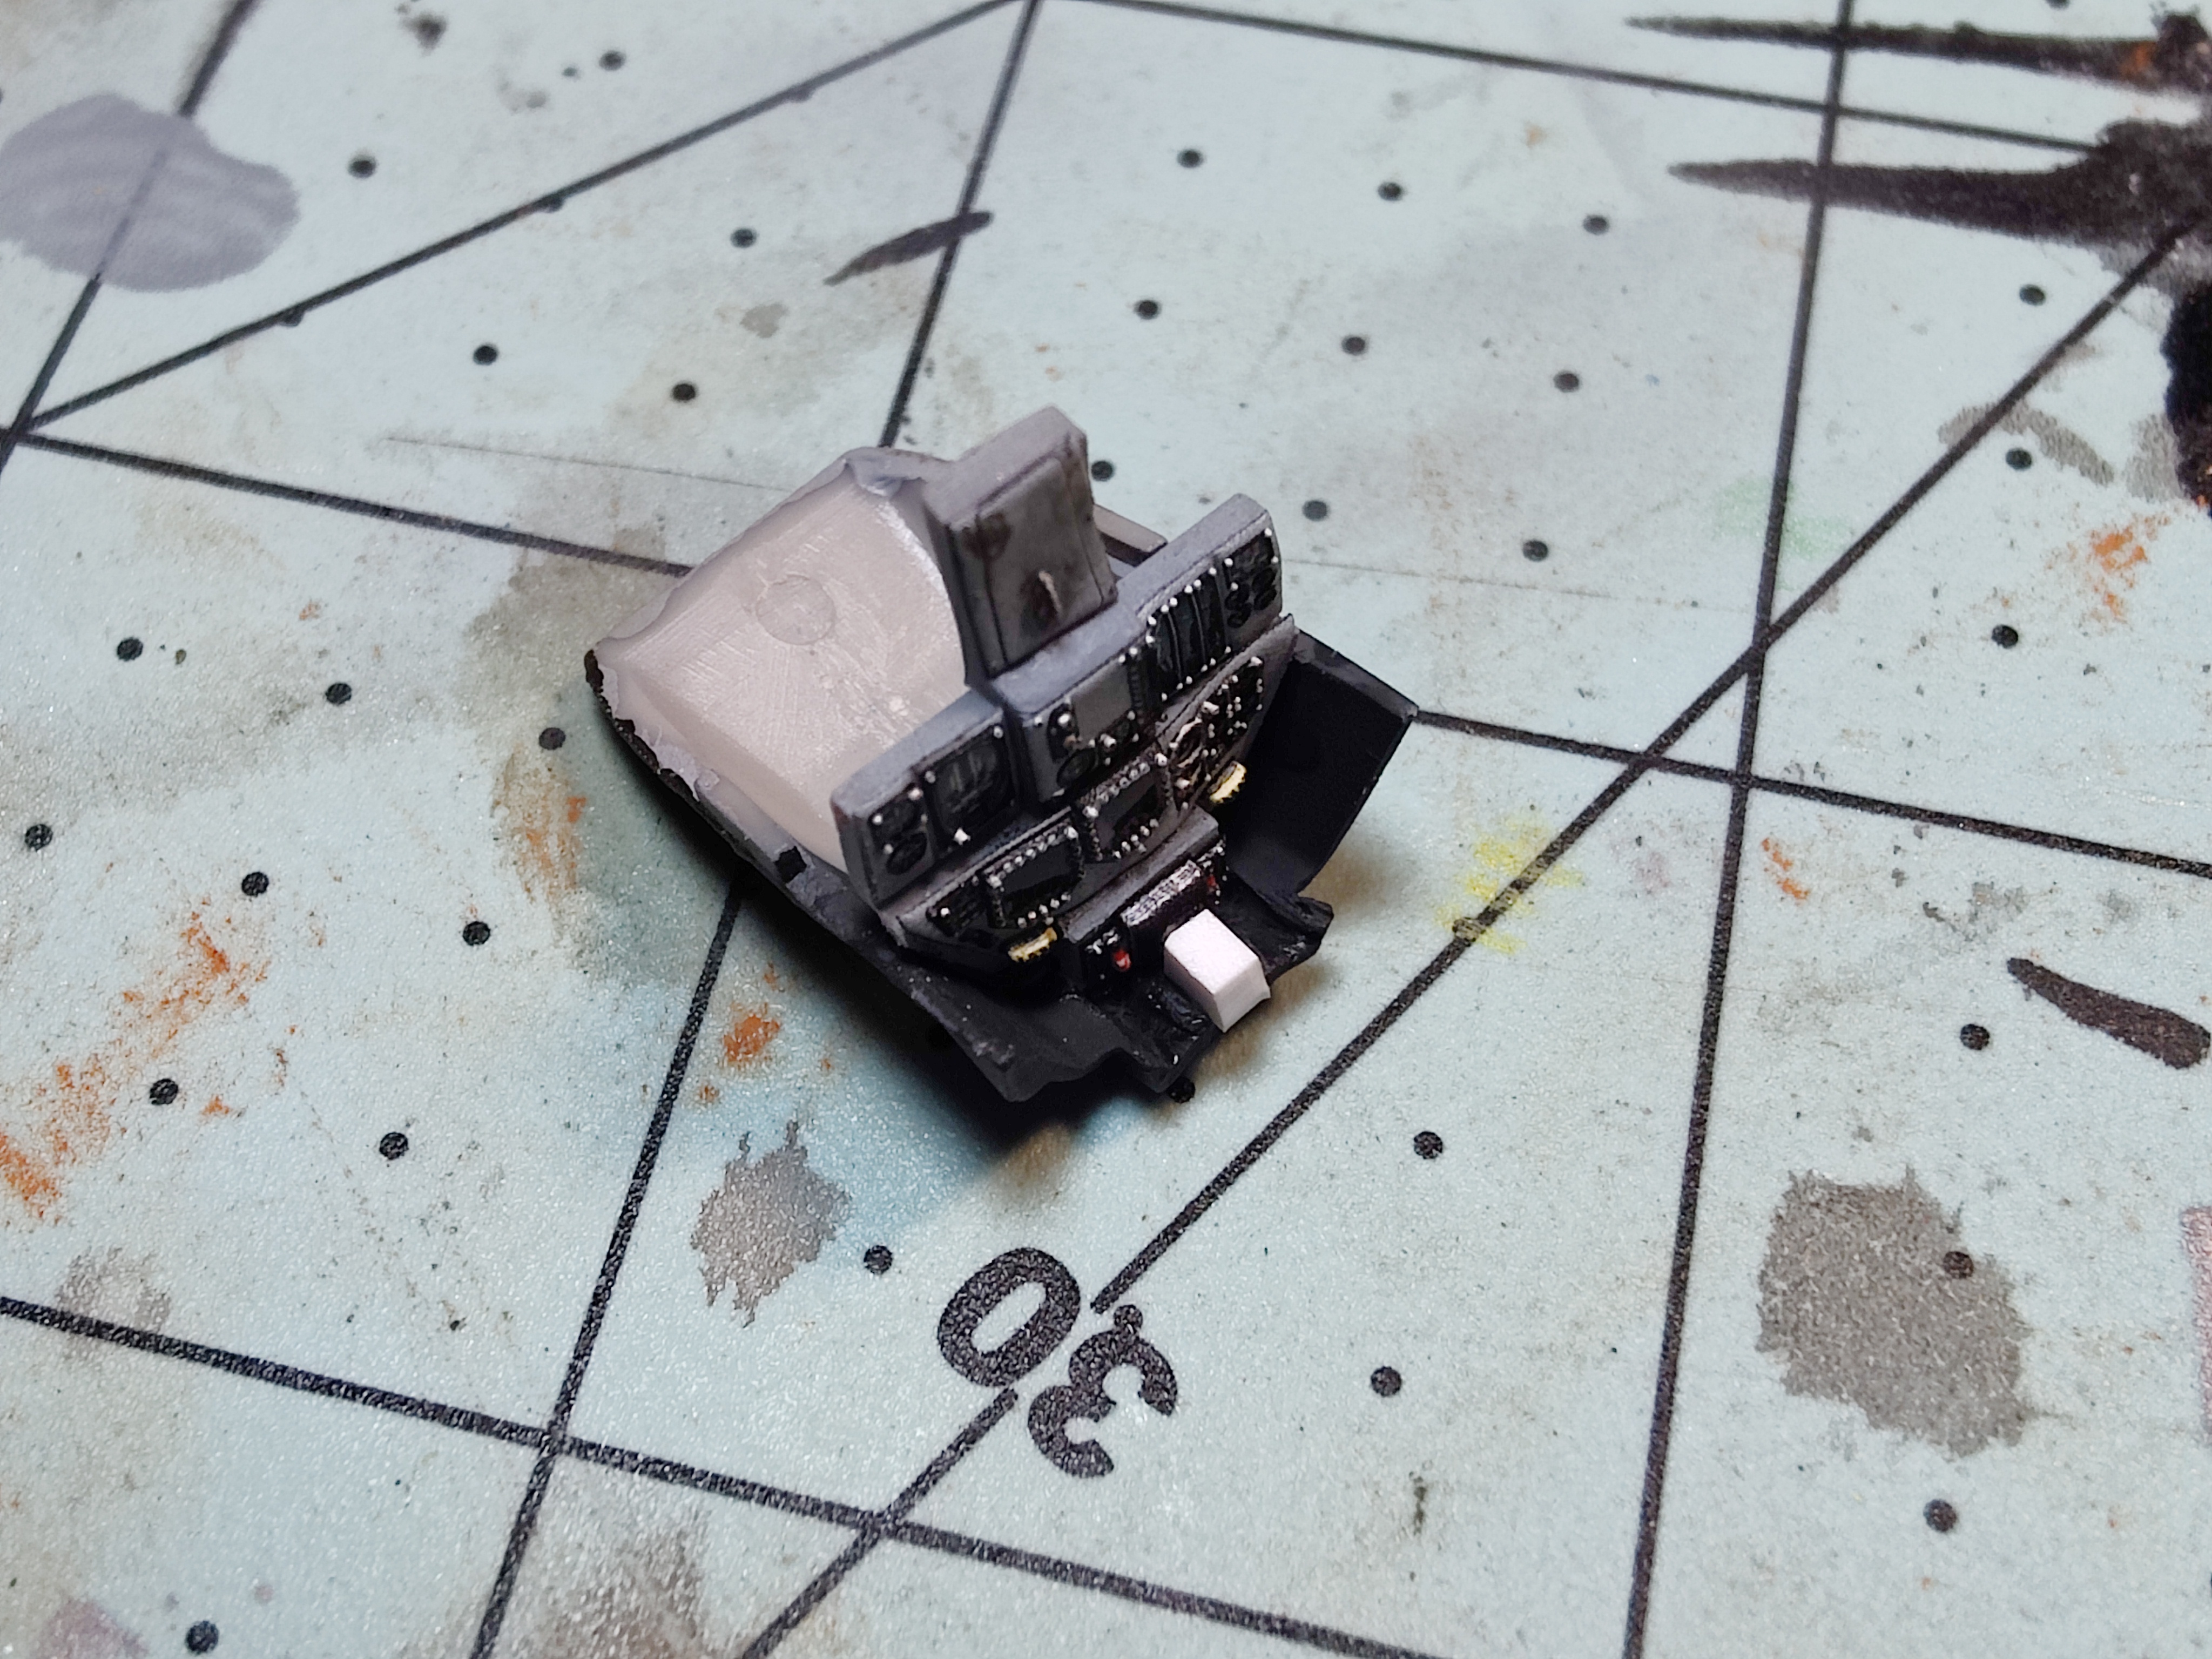
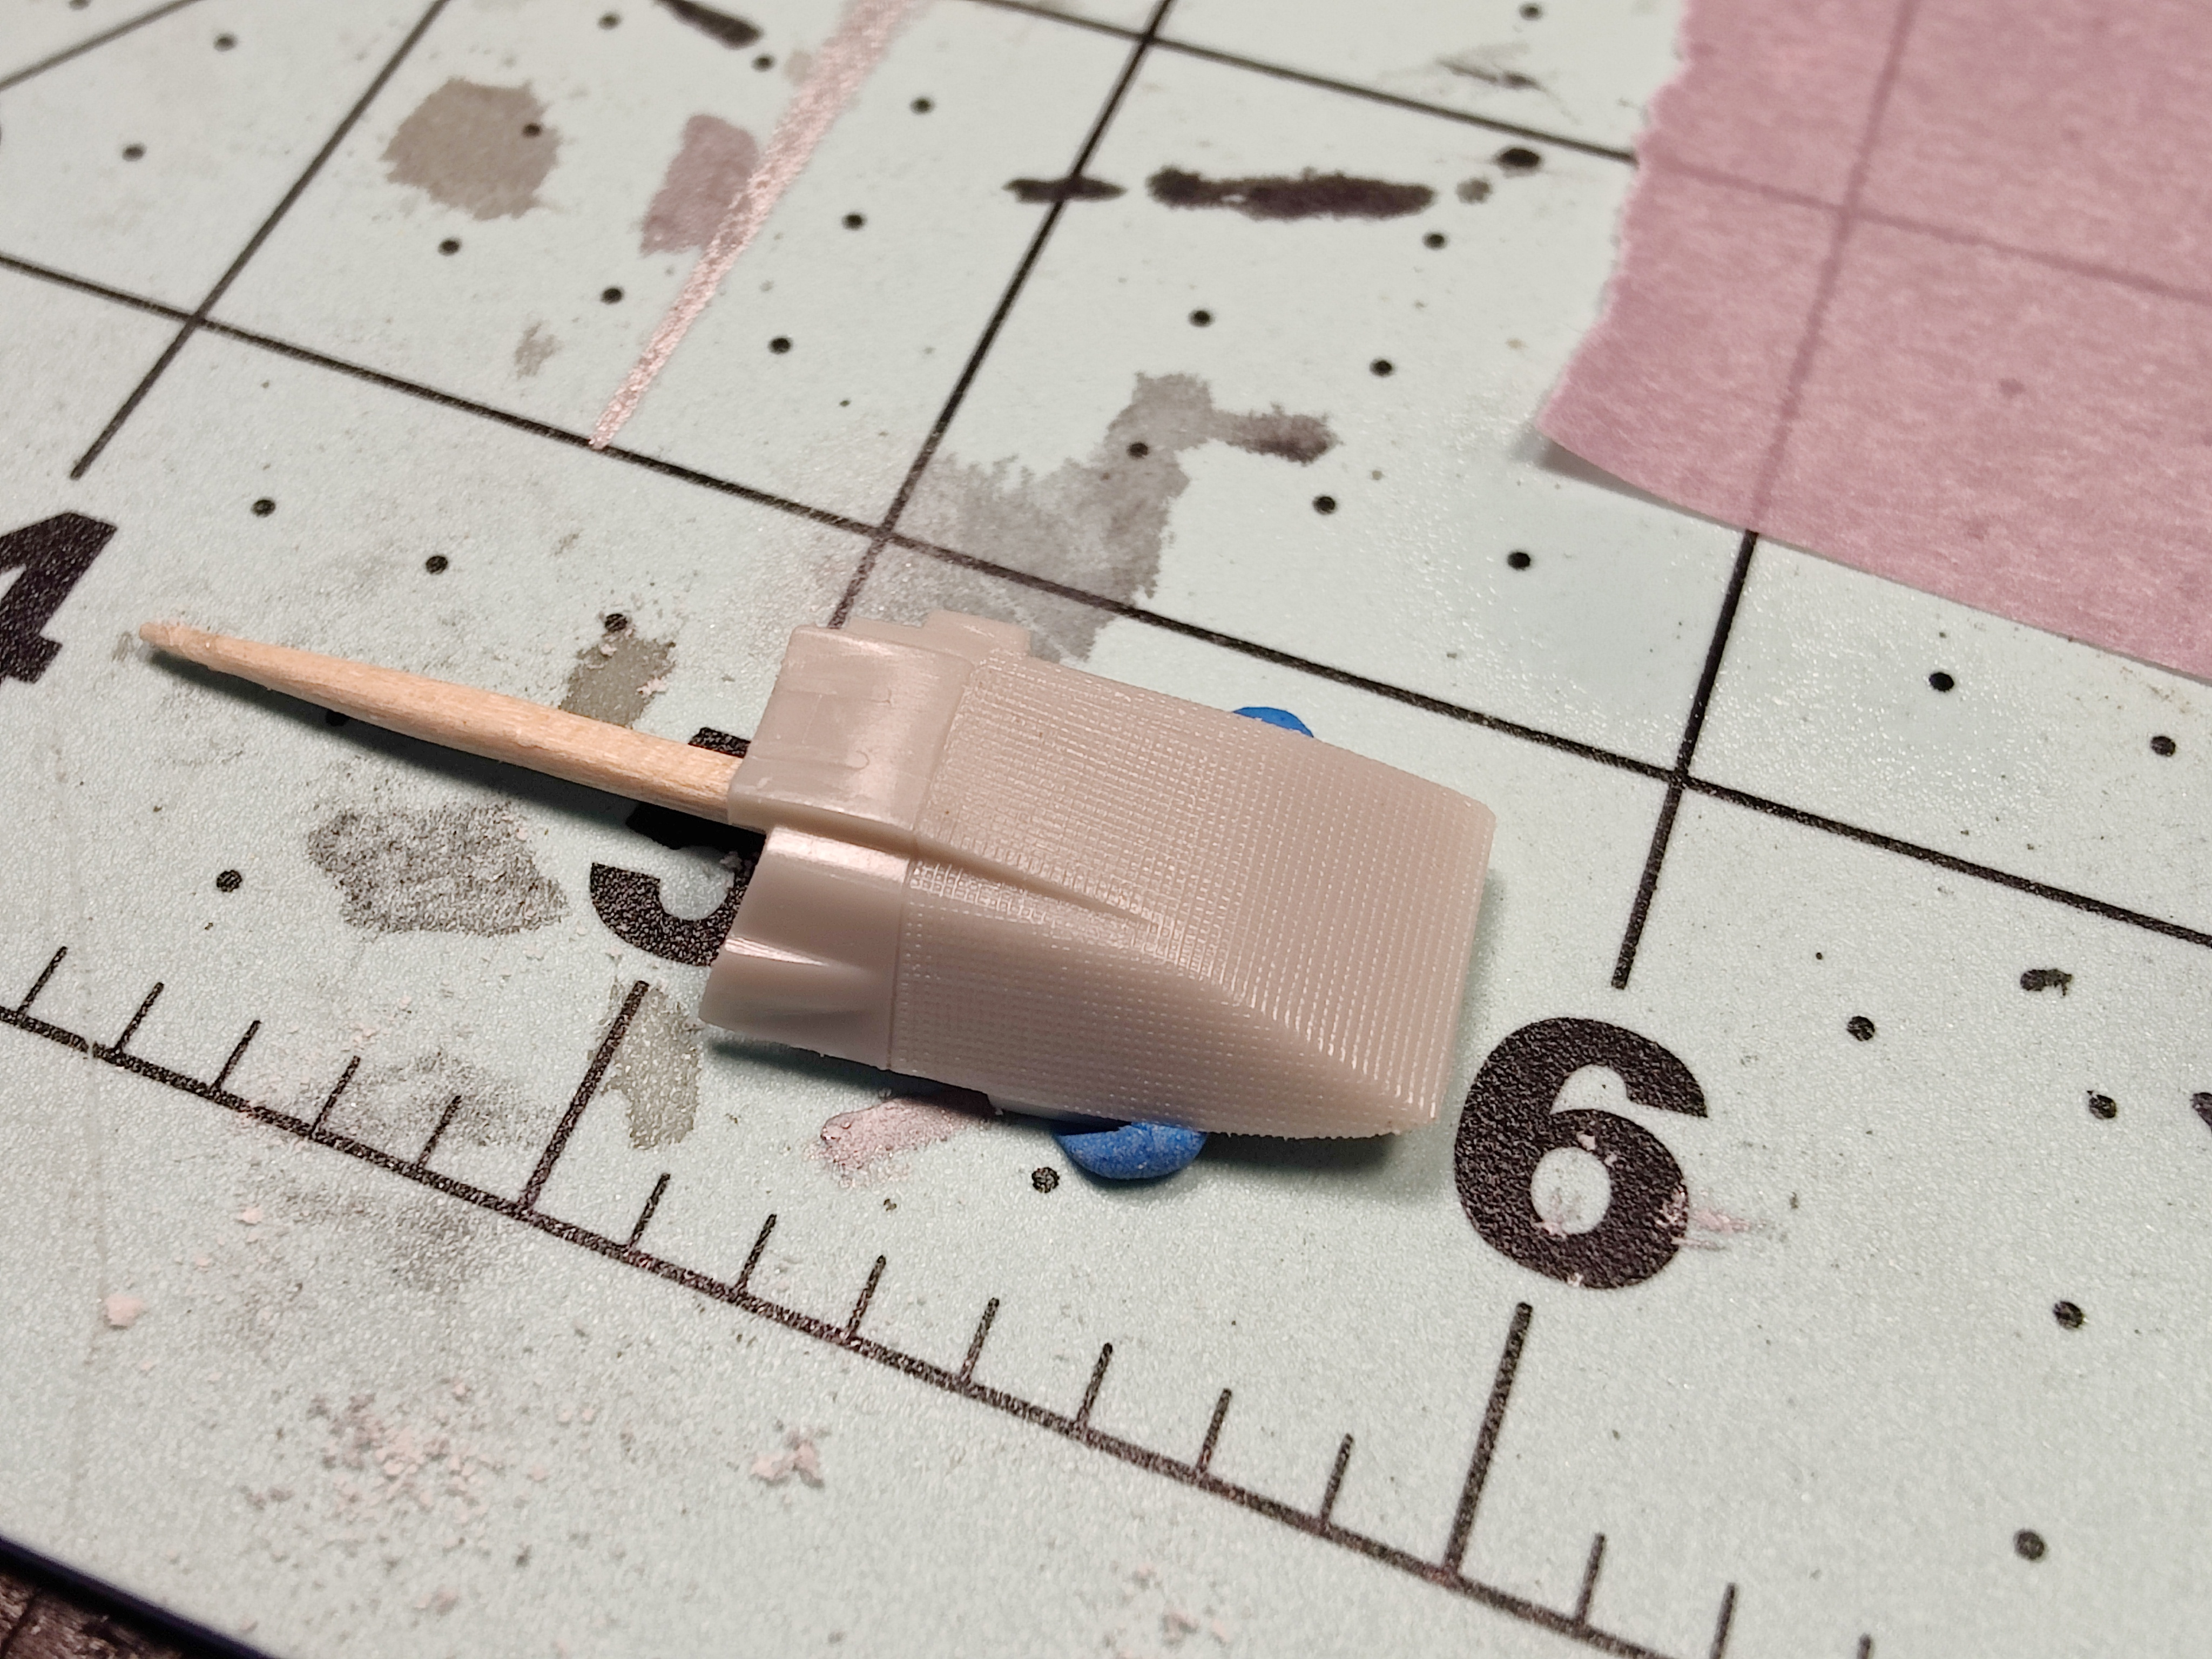
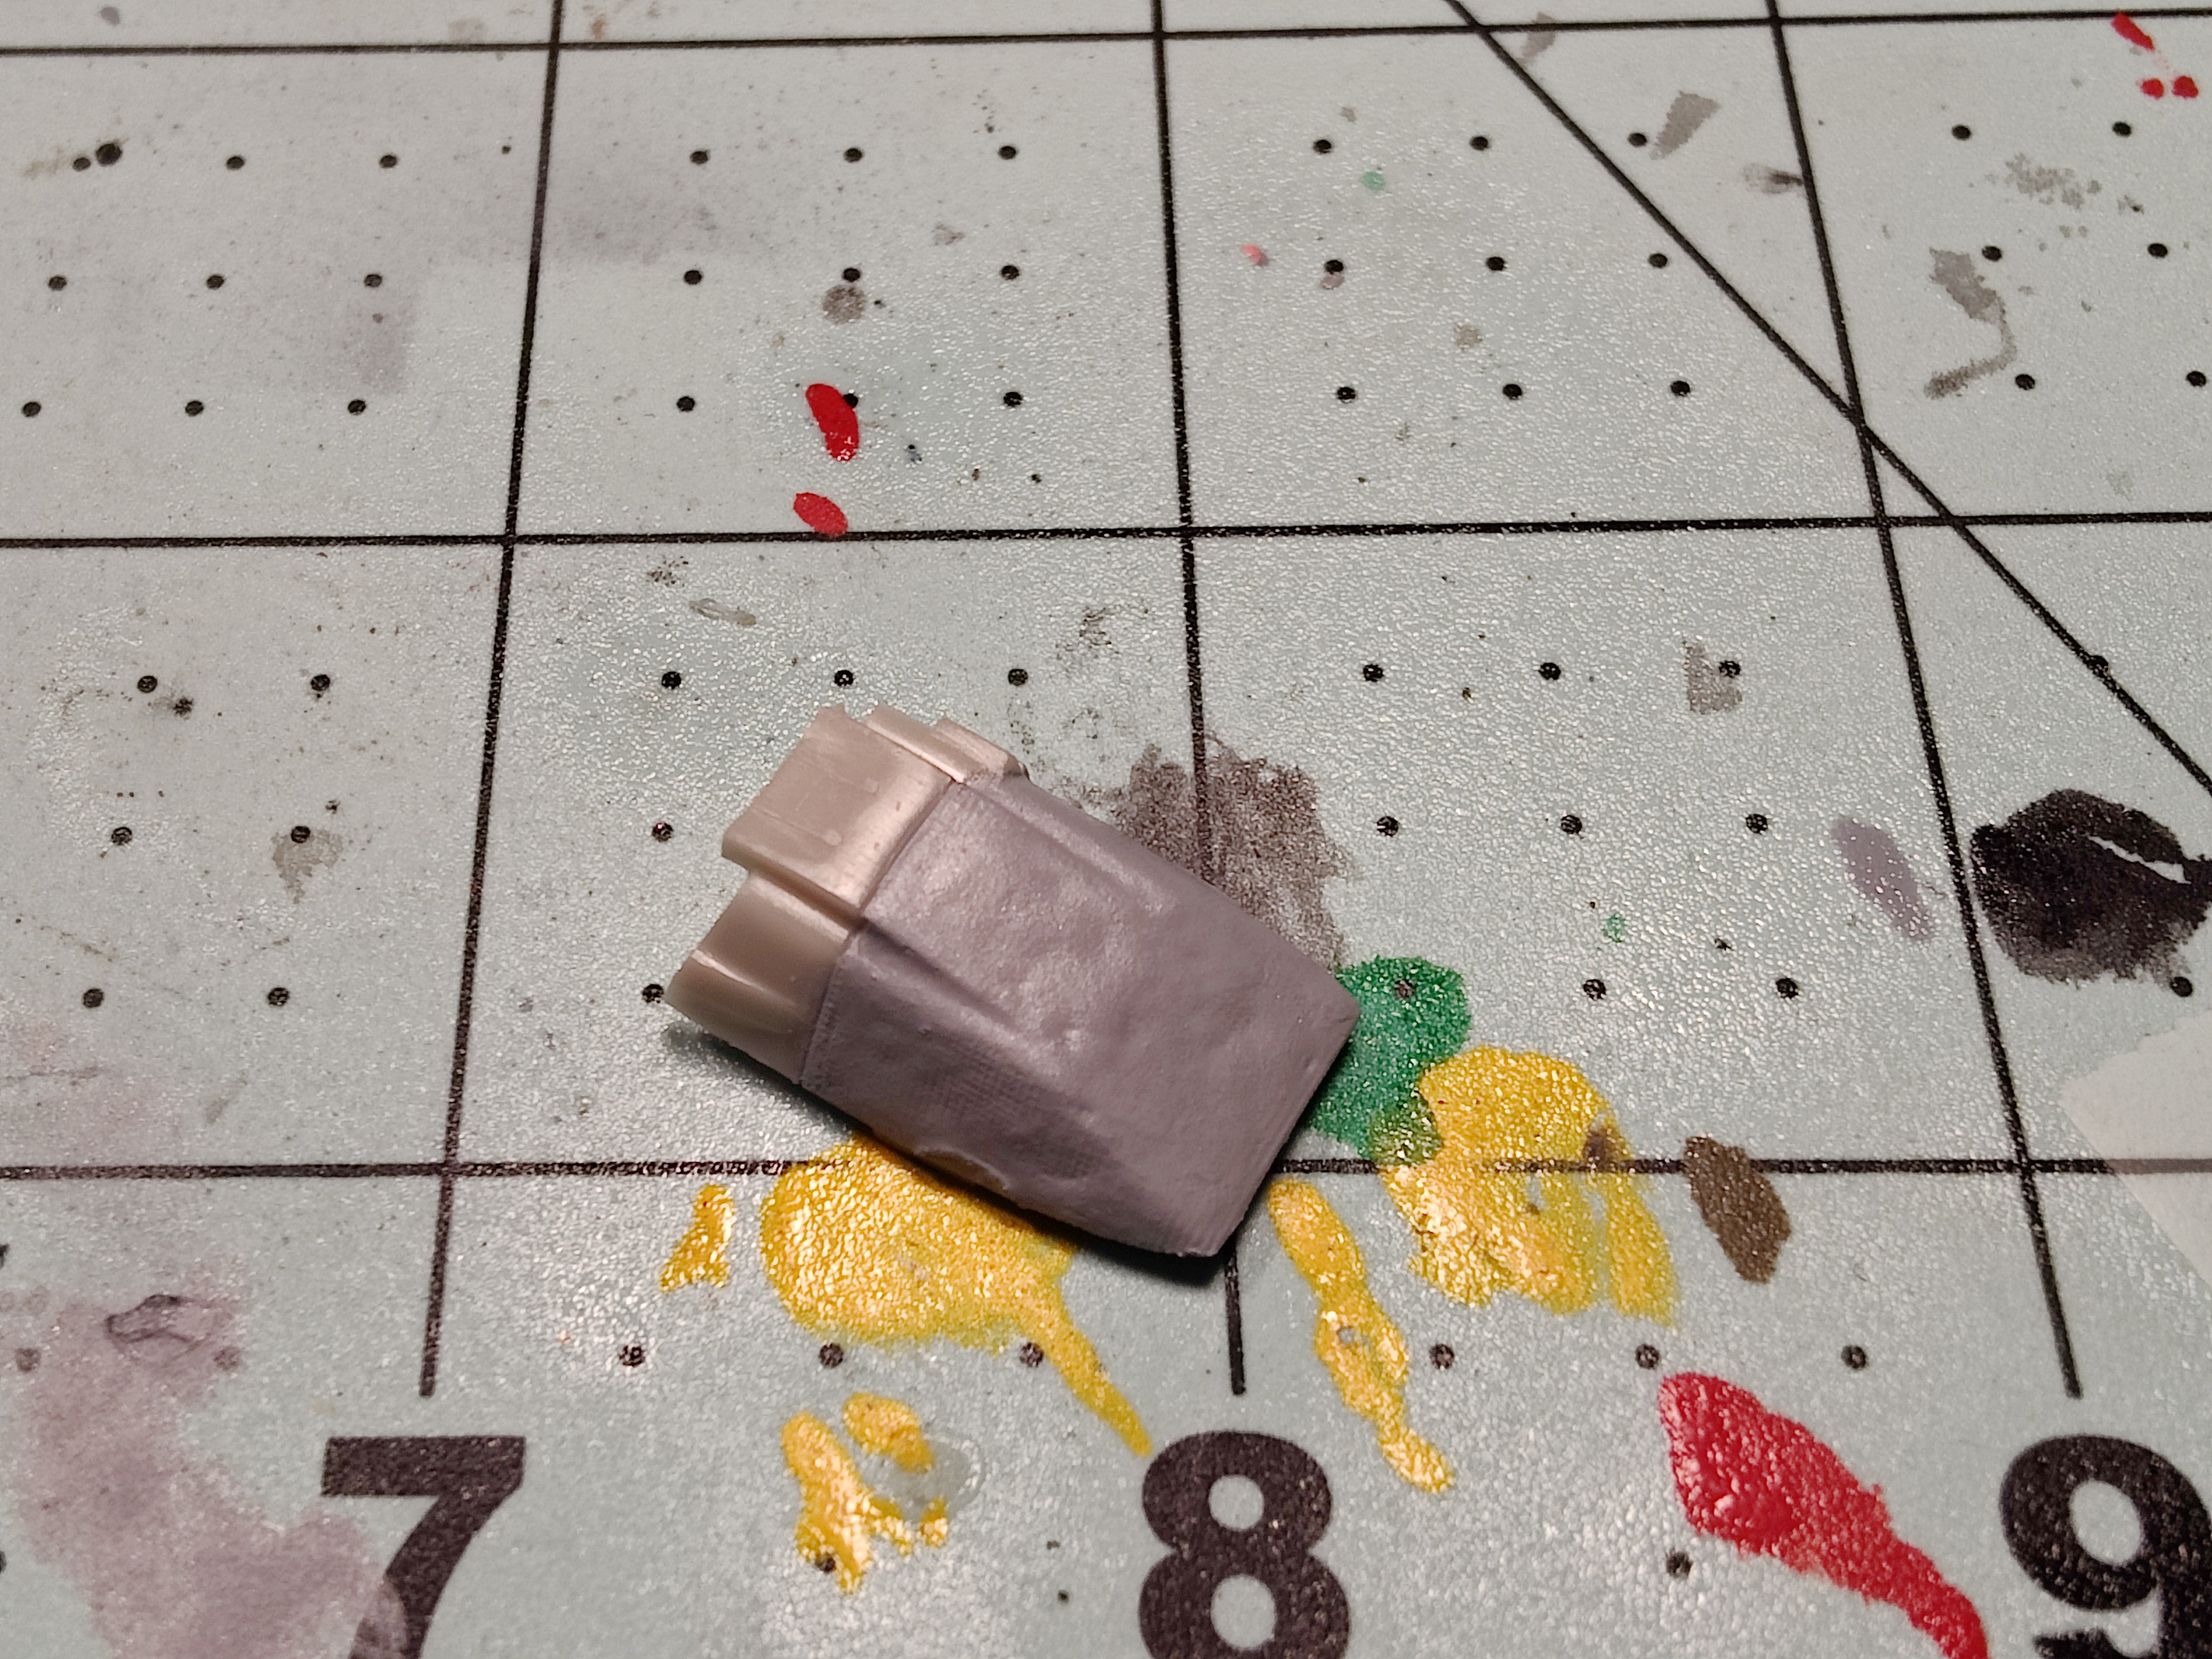
Added the piece under the shroud for the HUD camera, and the hood camera itself with a little piece of styrene. I ordered the HUD for the Harrier from Flying Leathernecks. Modifying it to fit and look like an F-14 HUD.


-
Thanks all for the tips. I found out the stuff I'm looking for is called "high density foam" and is sold at places like fabric stores.
-
Thanks, Thadeus.
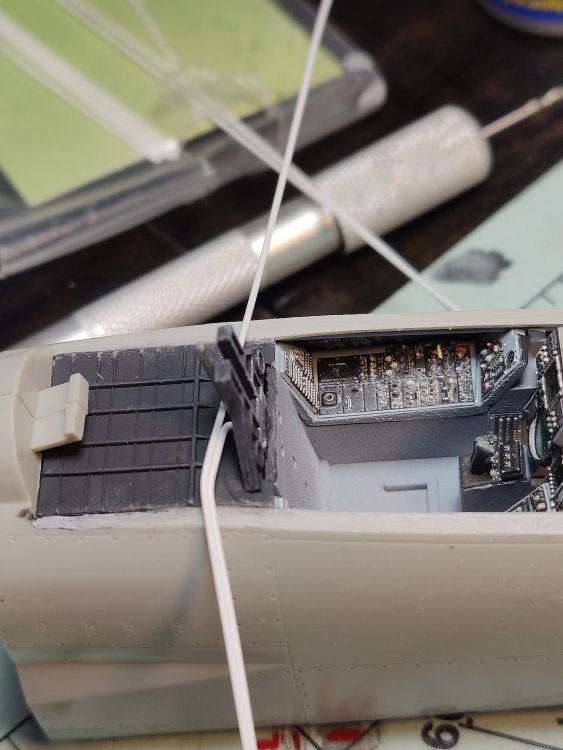
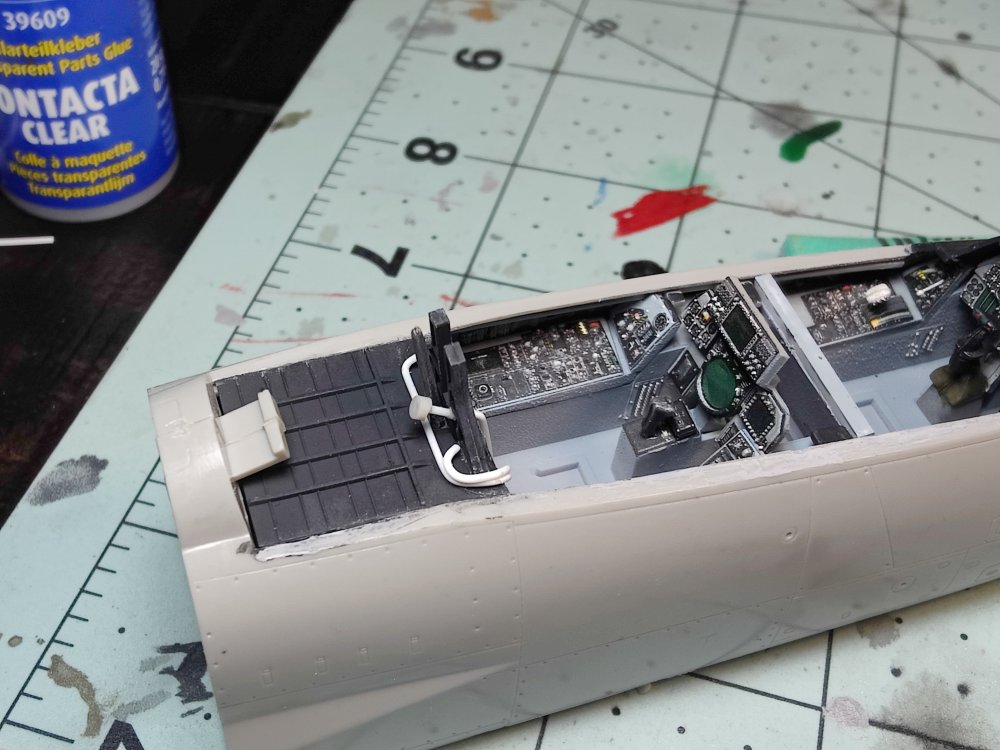
Slowly but surely moving along. Forward fuselage assembled. I didn't like the plastic piece fitted to the SSP so I took some ultra fine wire twisted it and created a cable. Drilled out a section for the HUD projector. Filled it with chrome paint first then clear green. Next step is to touch up the comings and build the HUD.

-
What kind of foam do you guys use to place into areas like painted wheel wells to protect them while other painting is done? And I guess not just what kind but where do you get it? All I've been able to find is floral foam which doesn't work at all.
-
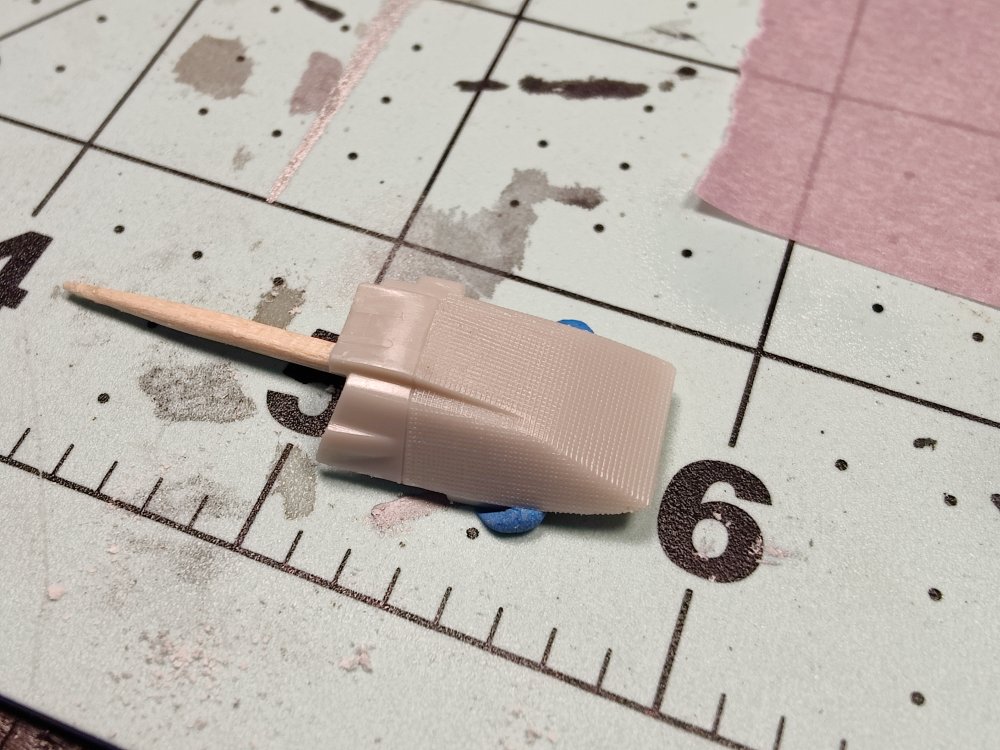
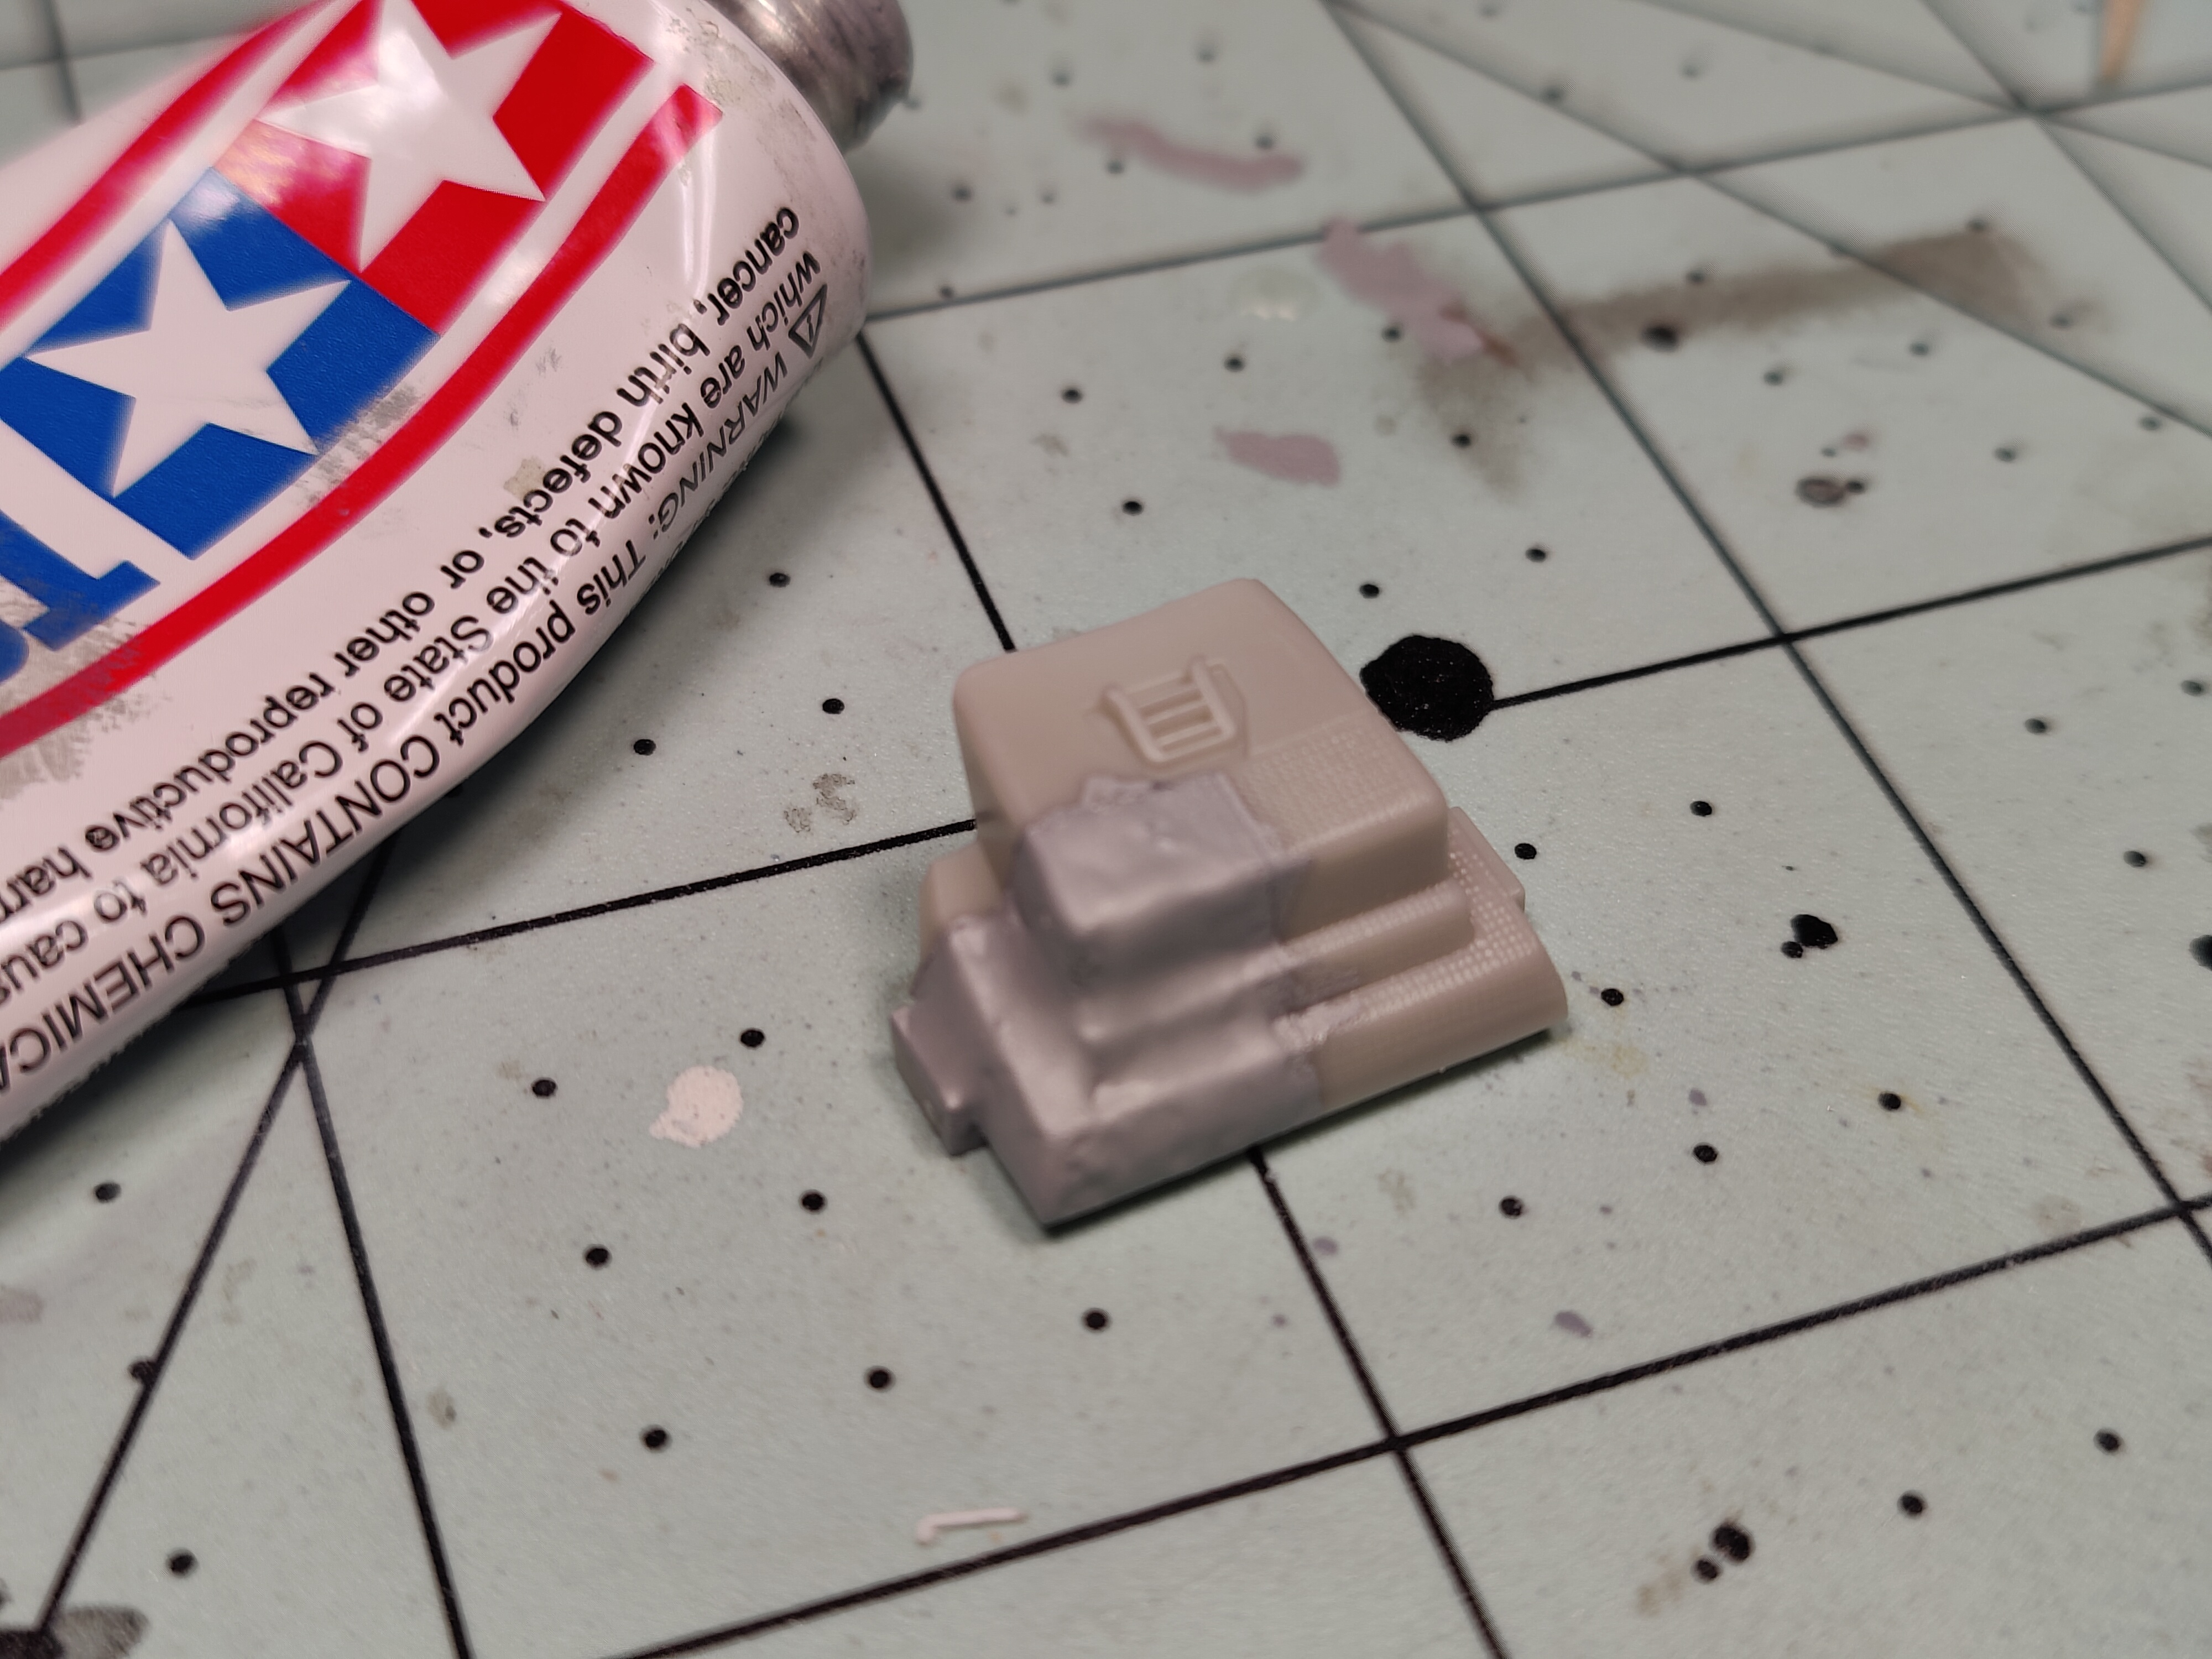
Quick update. Working on the instrument shrouds. The kit ones are a little too chiseled and unrealistic. So I'm taking some Tamiya putty send with lacquer thinner and creating a more fabric look by dabbing it on the shrouds.

-
-
Thanks, Bastian.
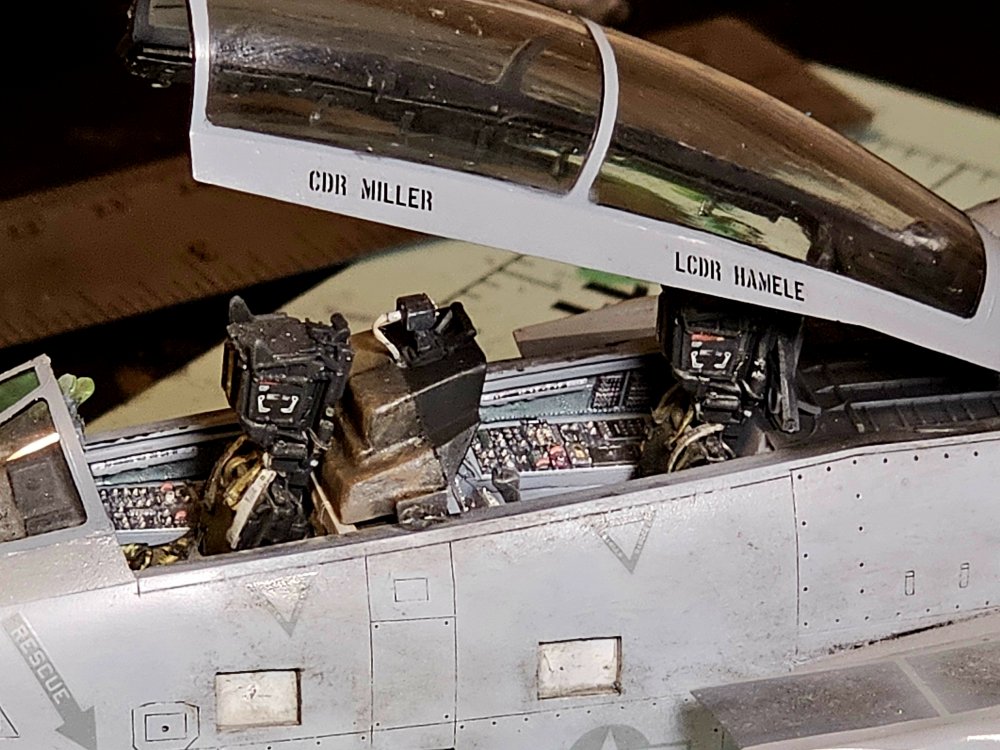
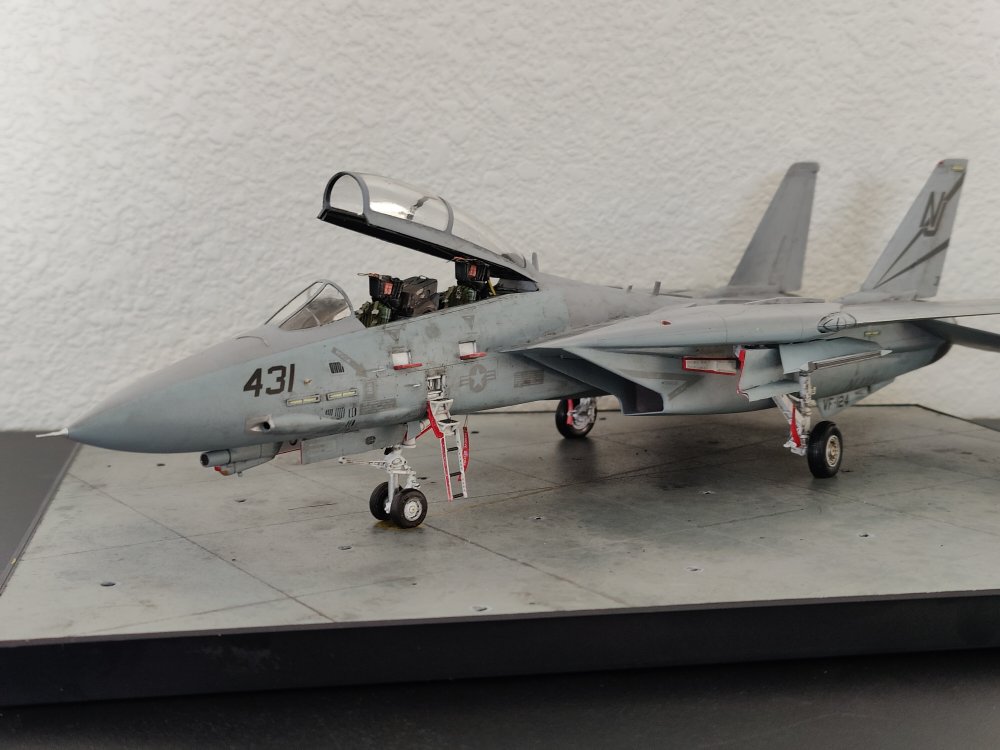
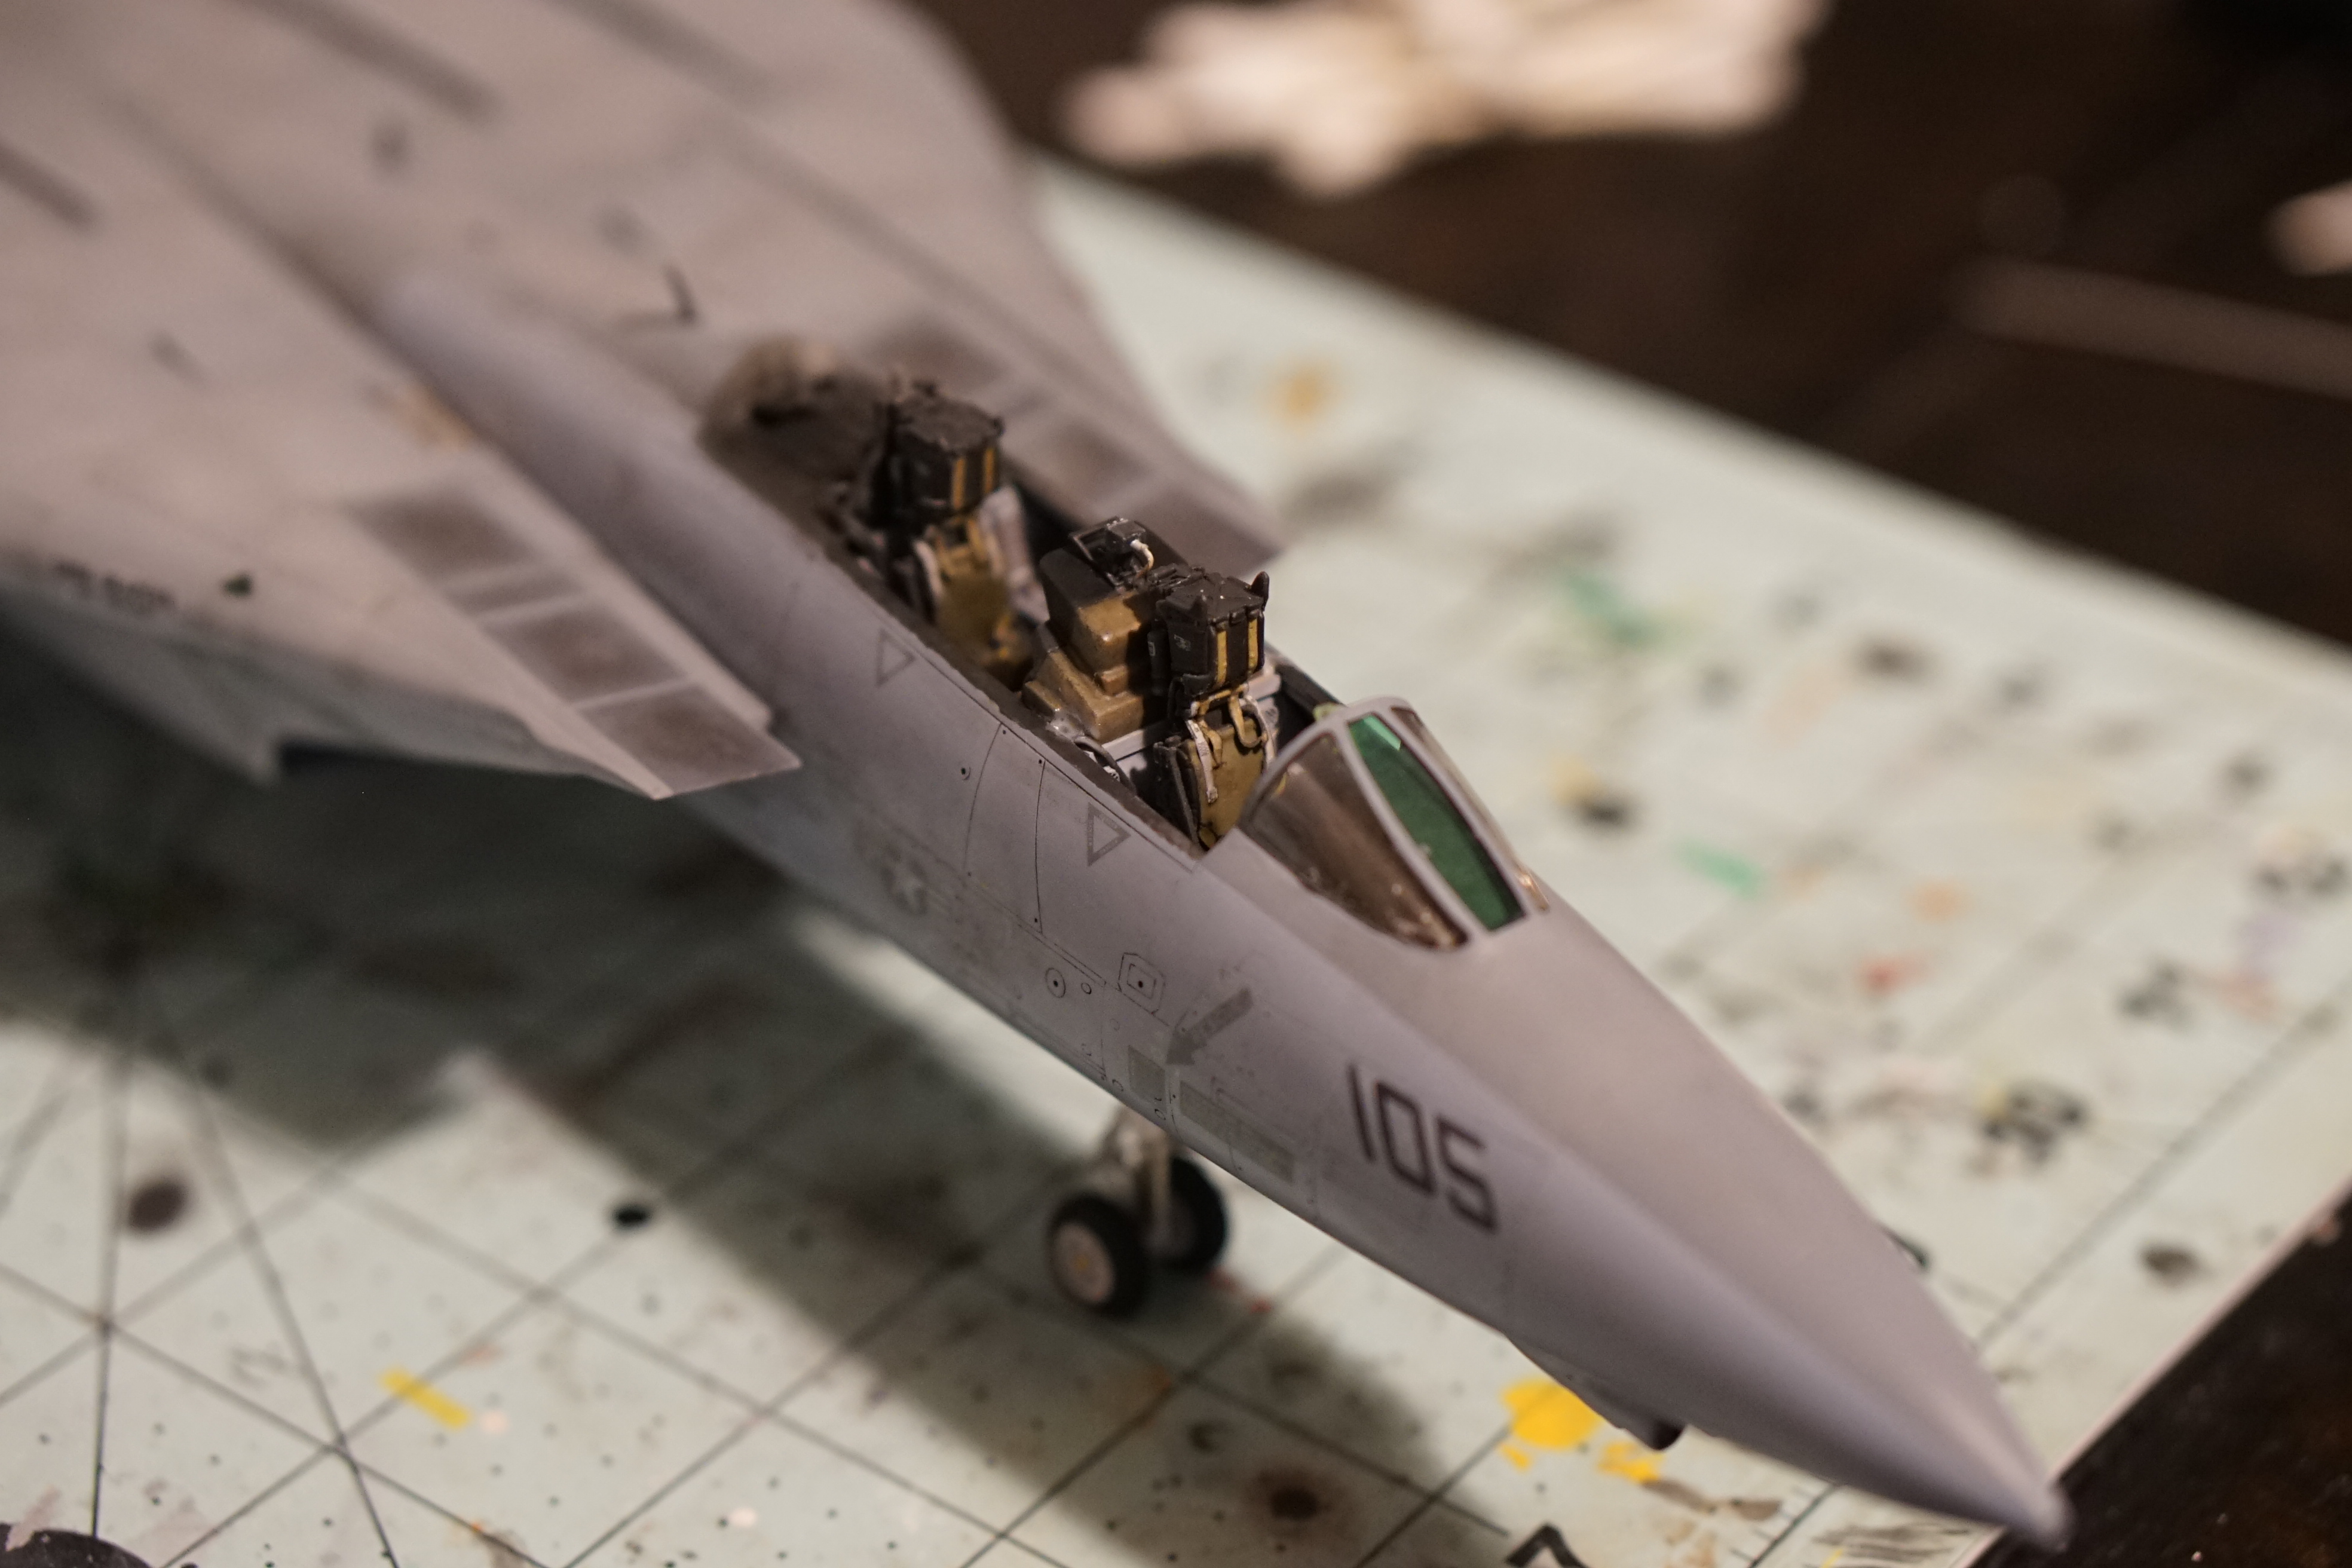
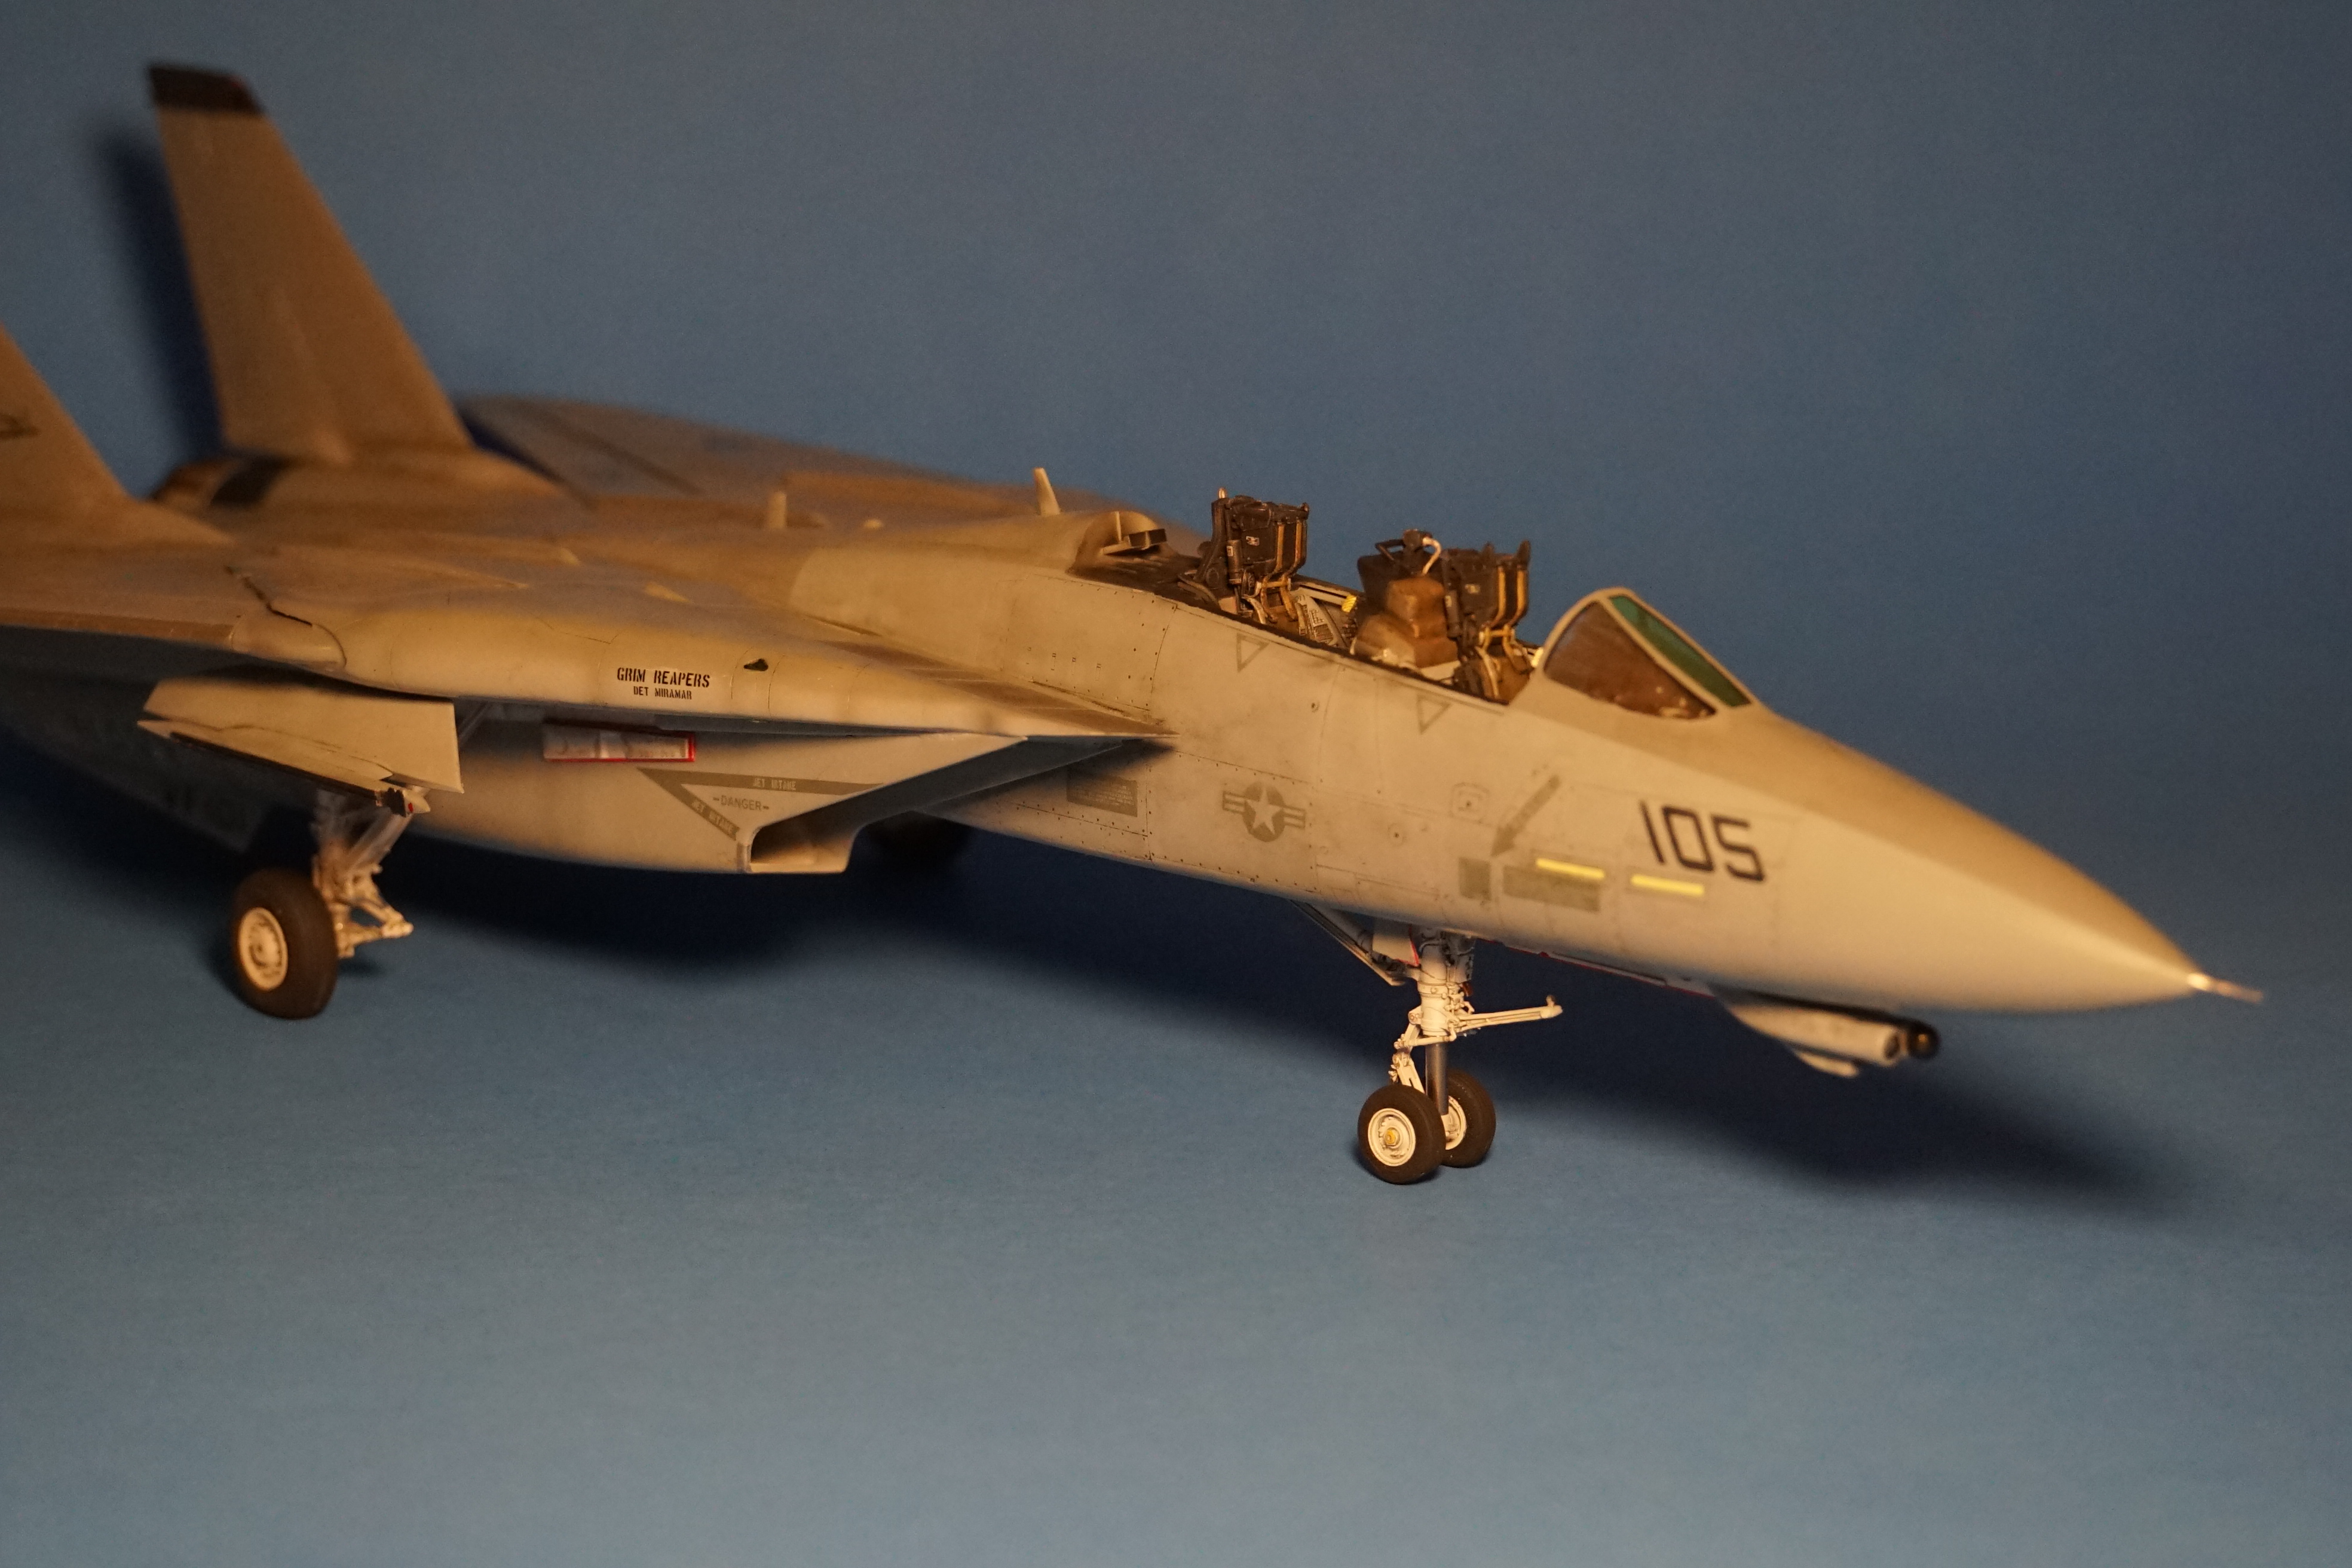
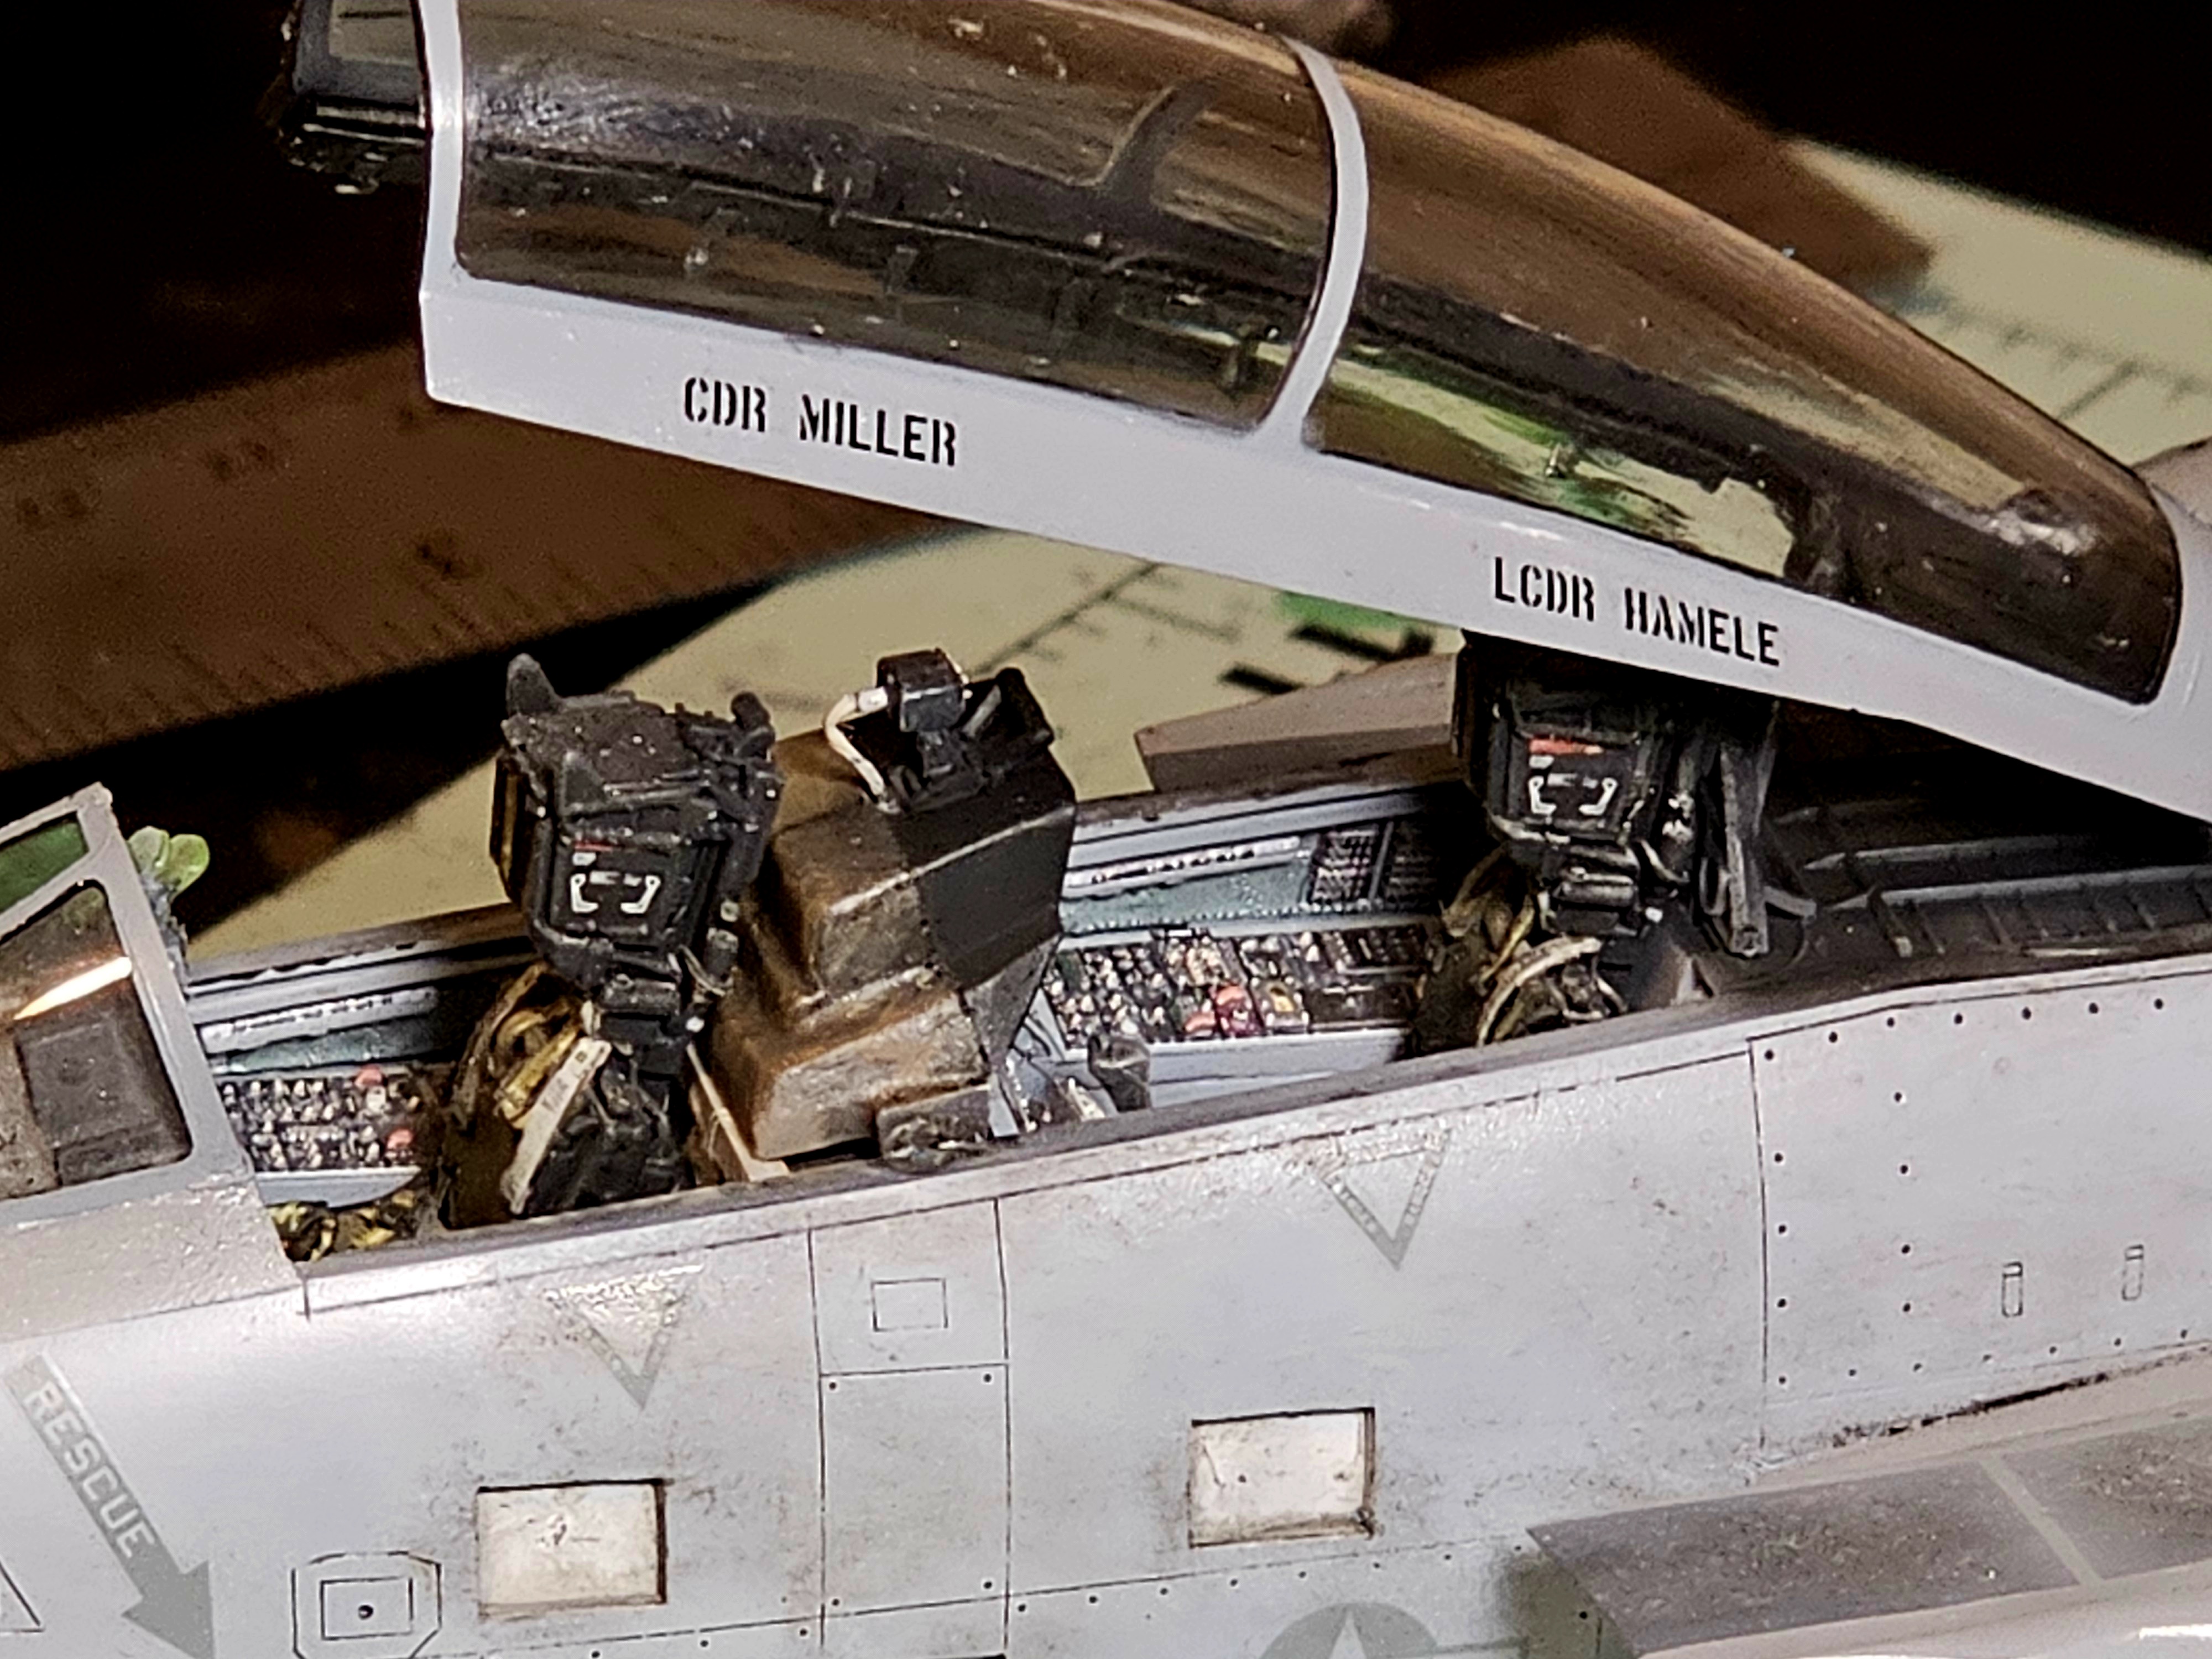
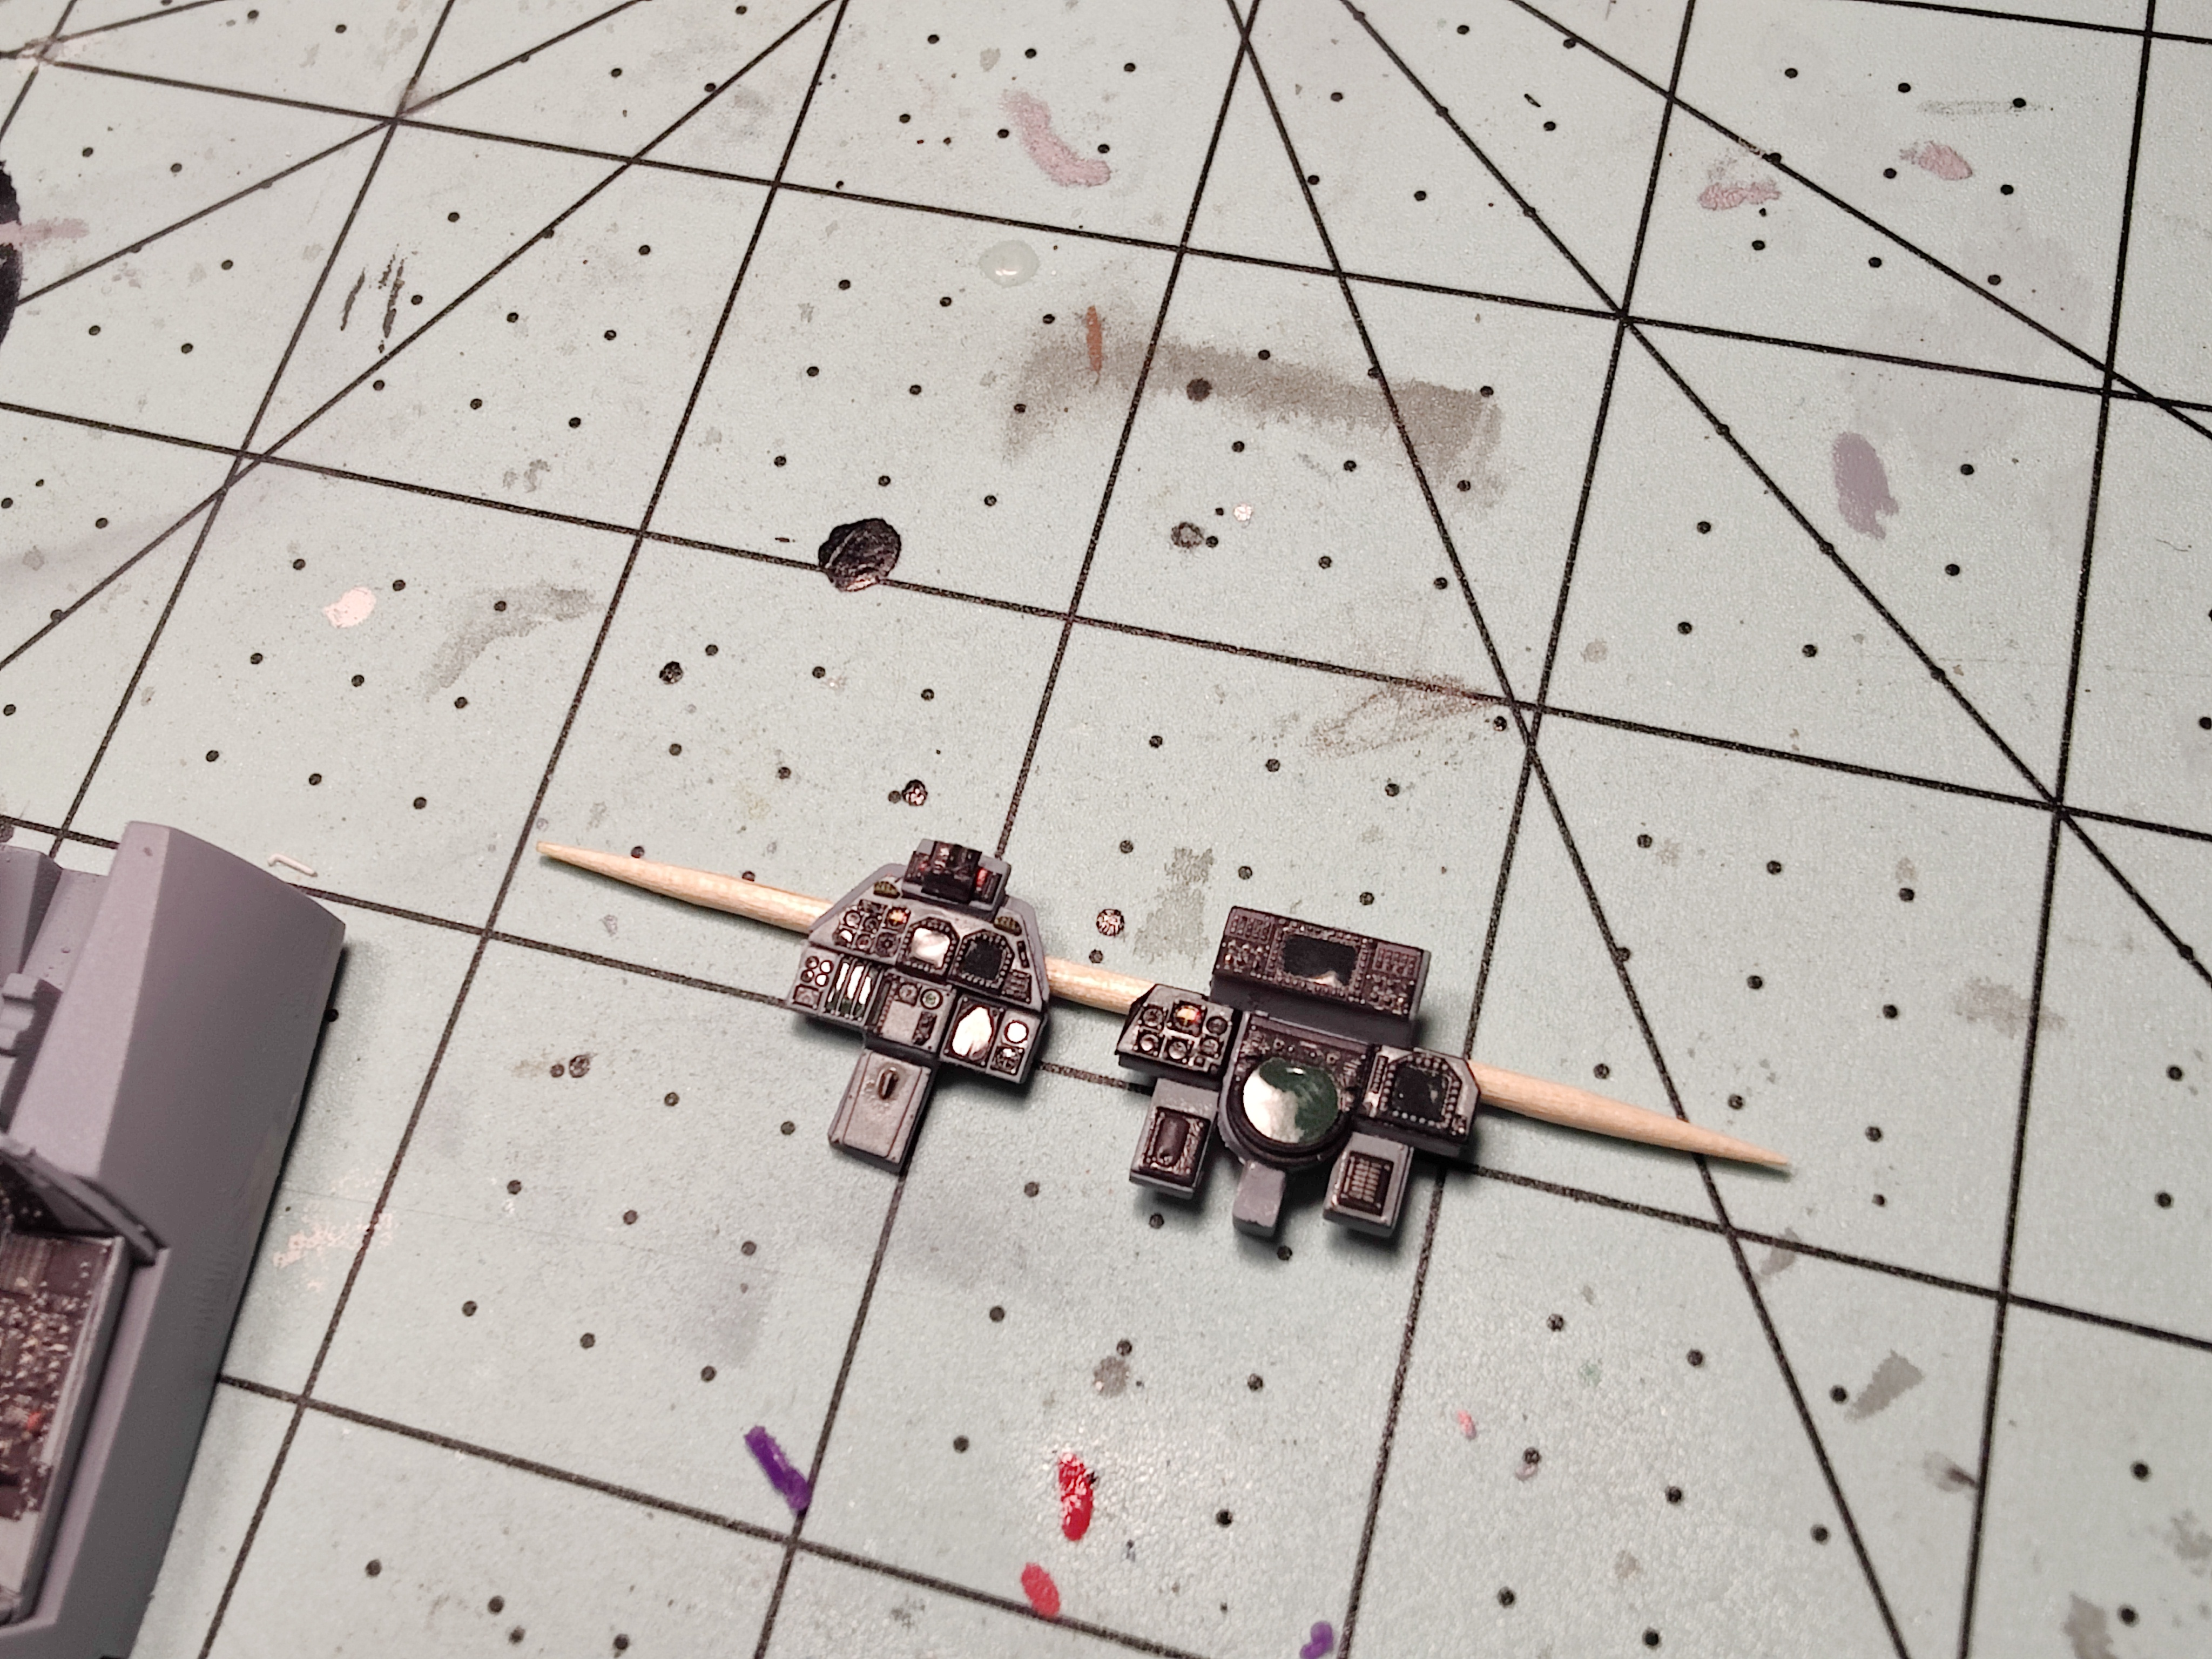
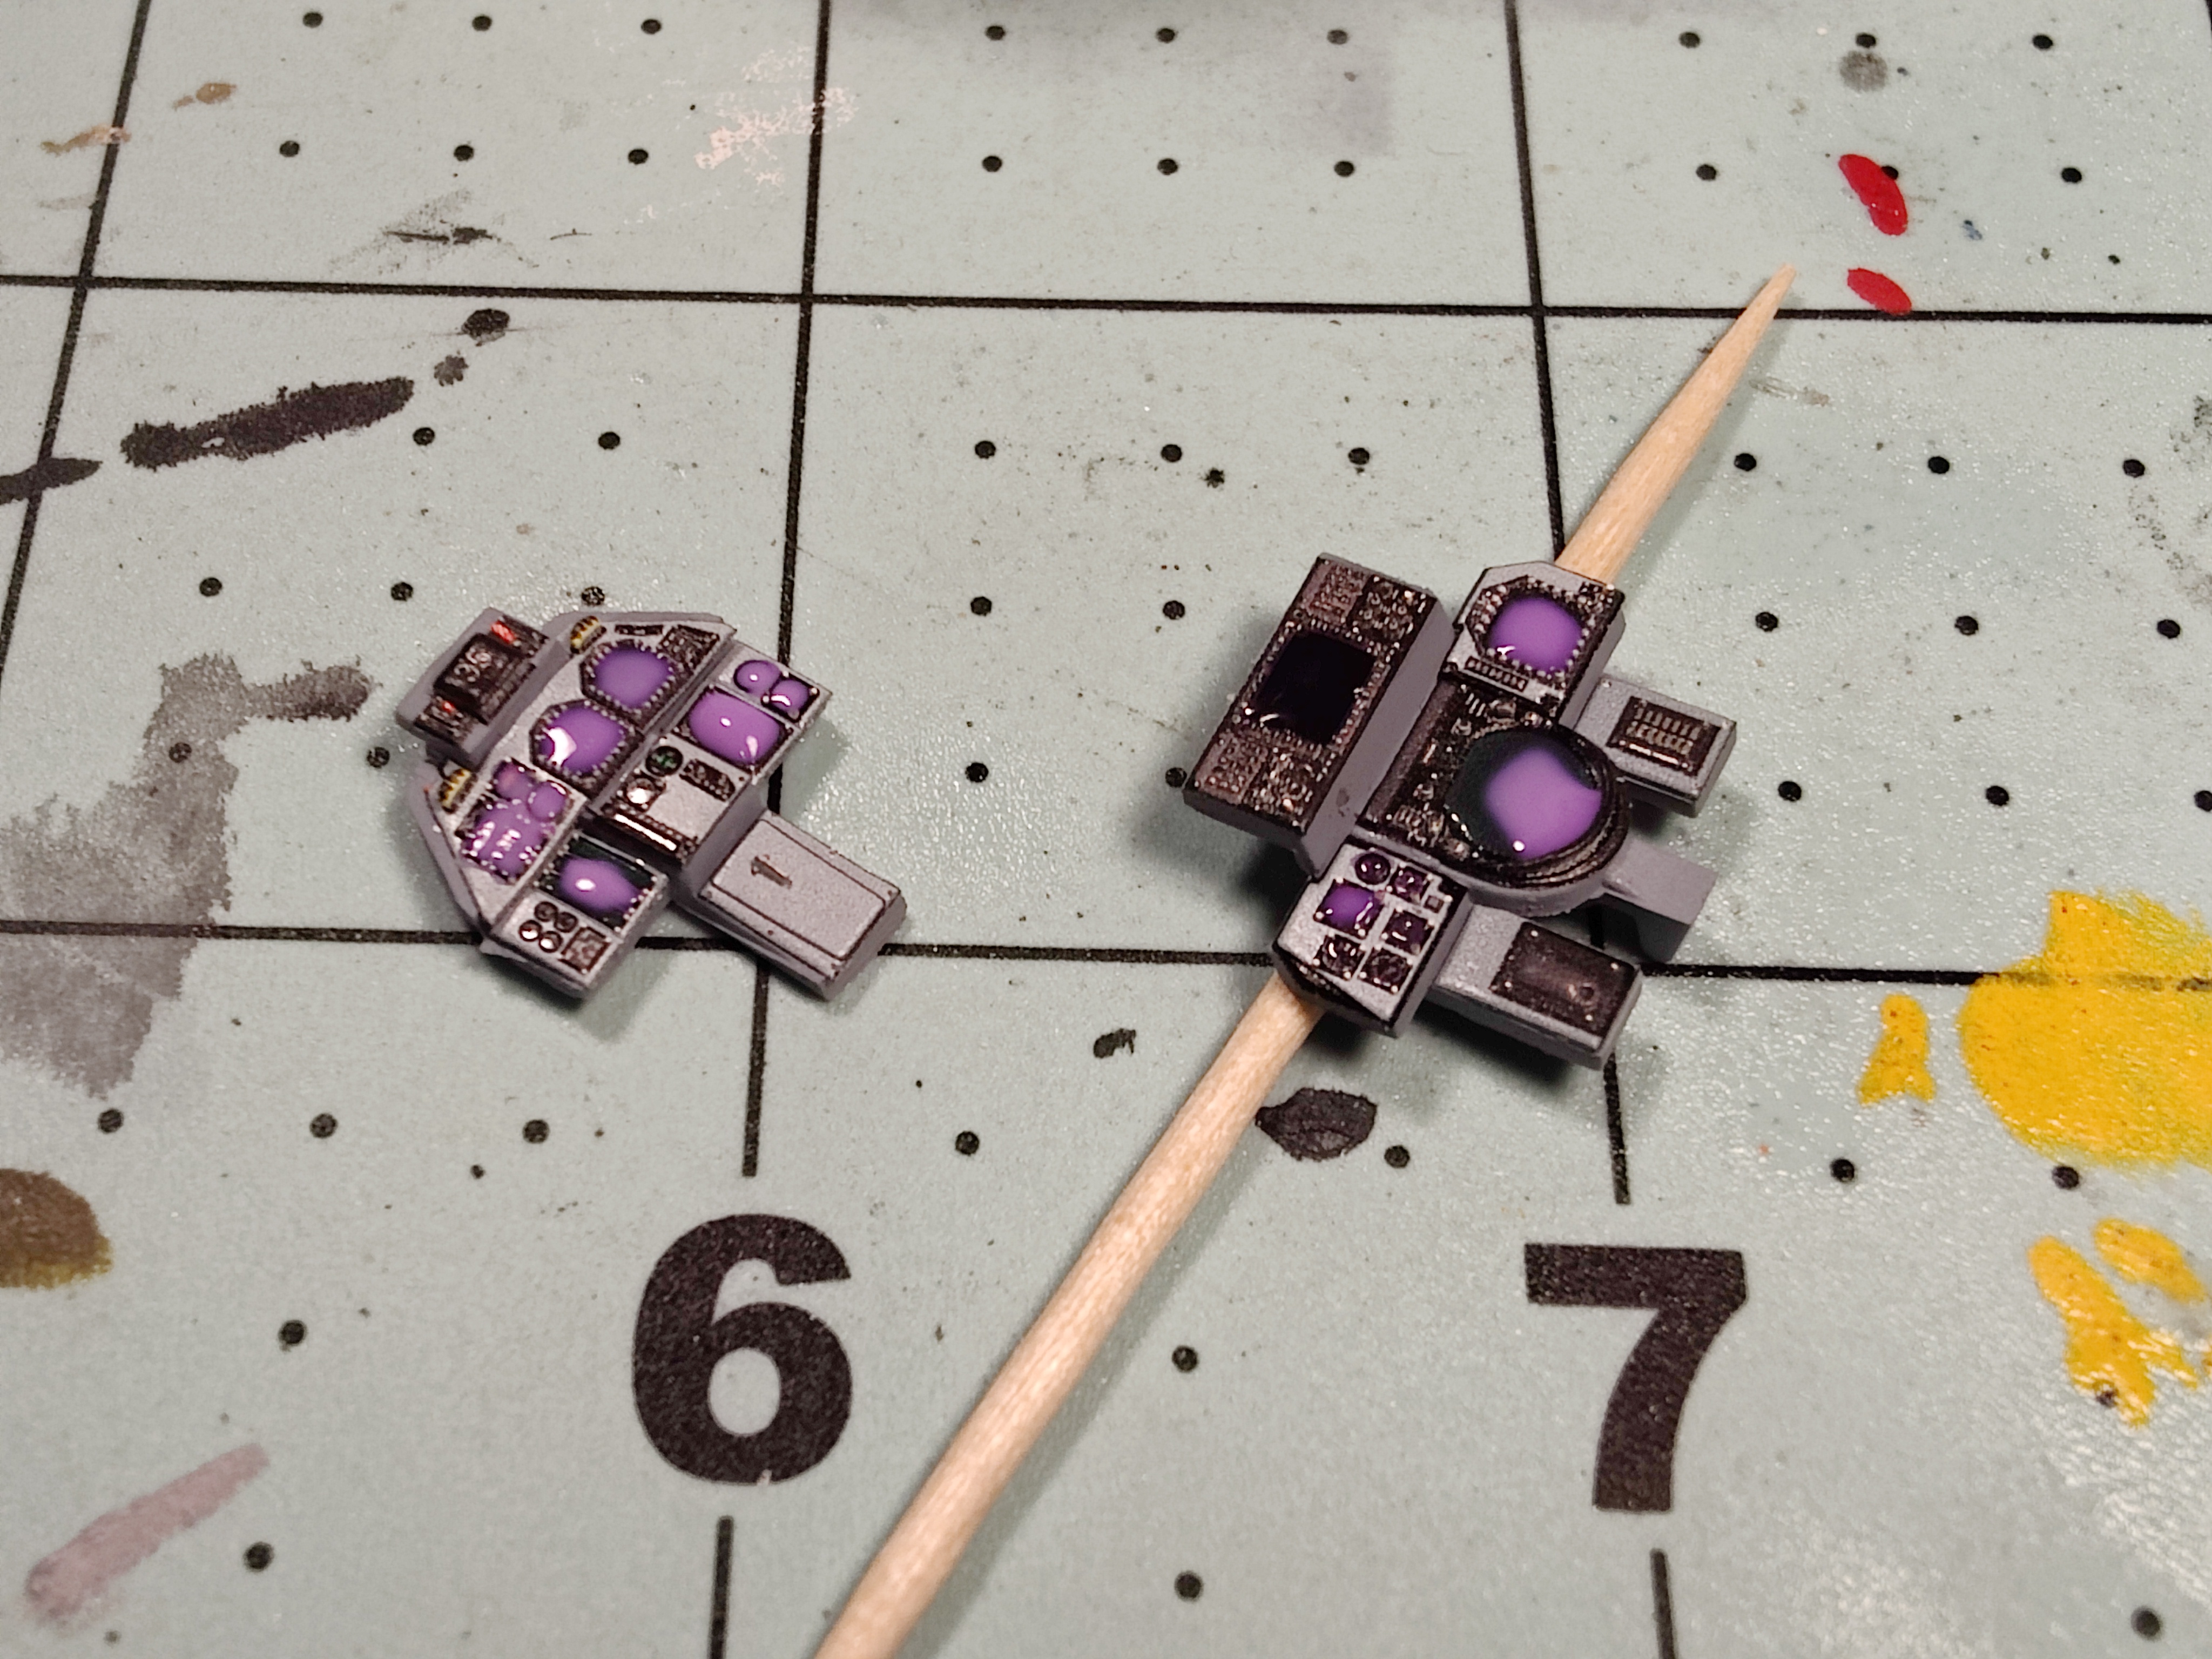
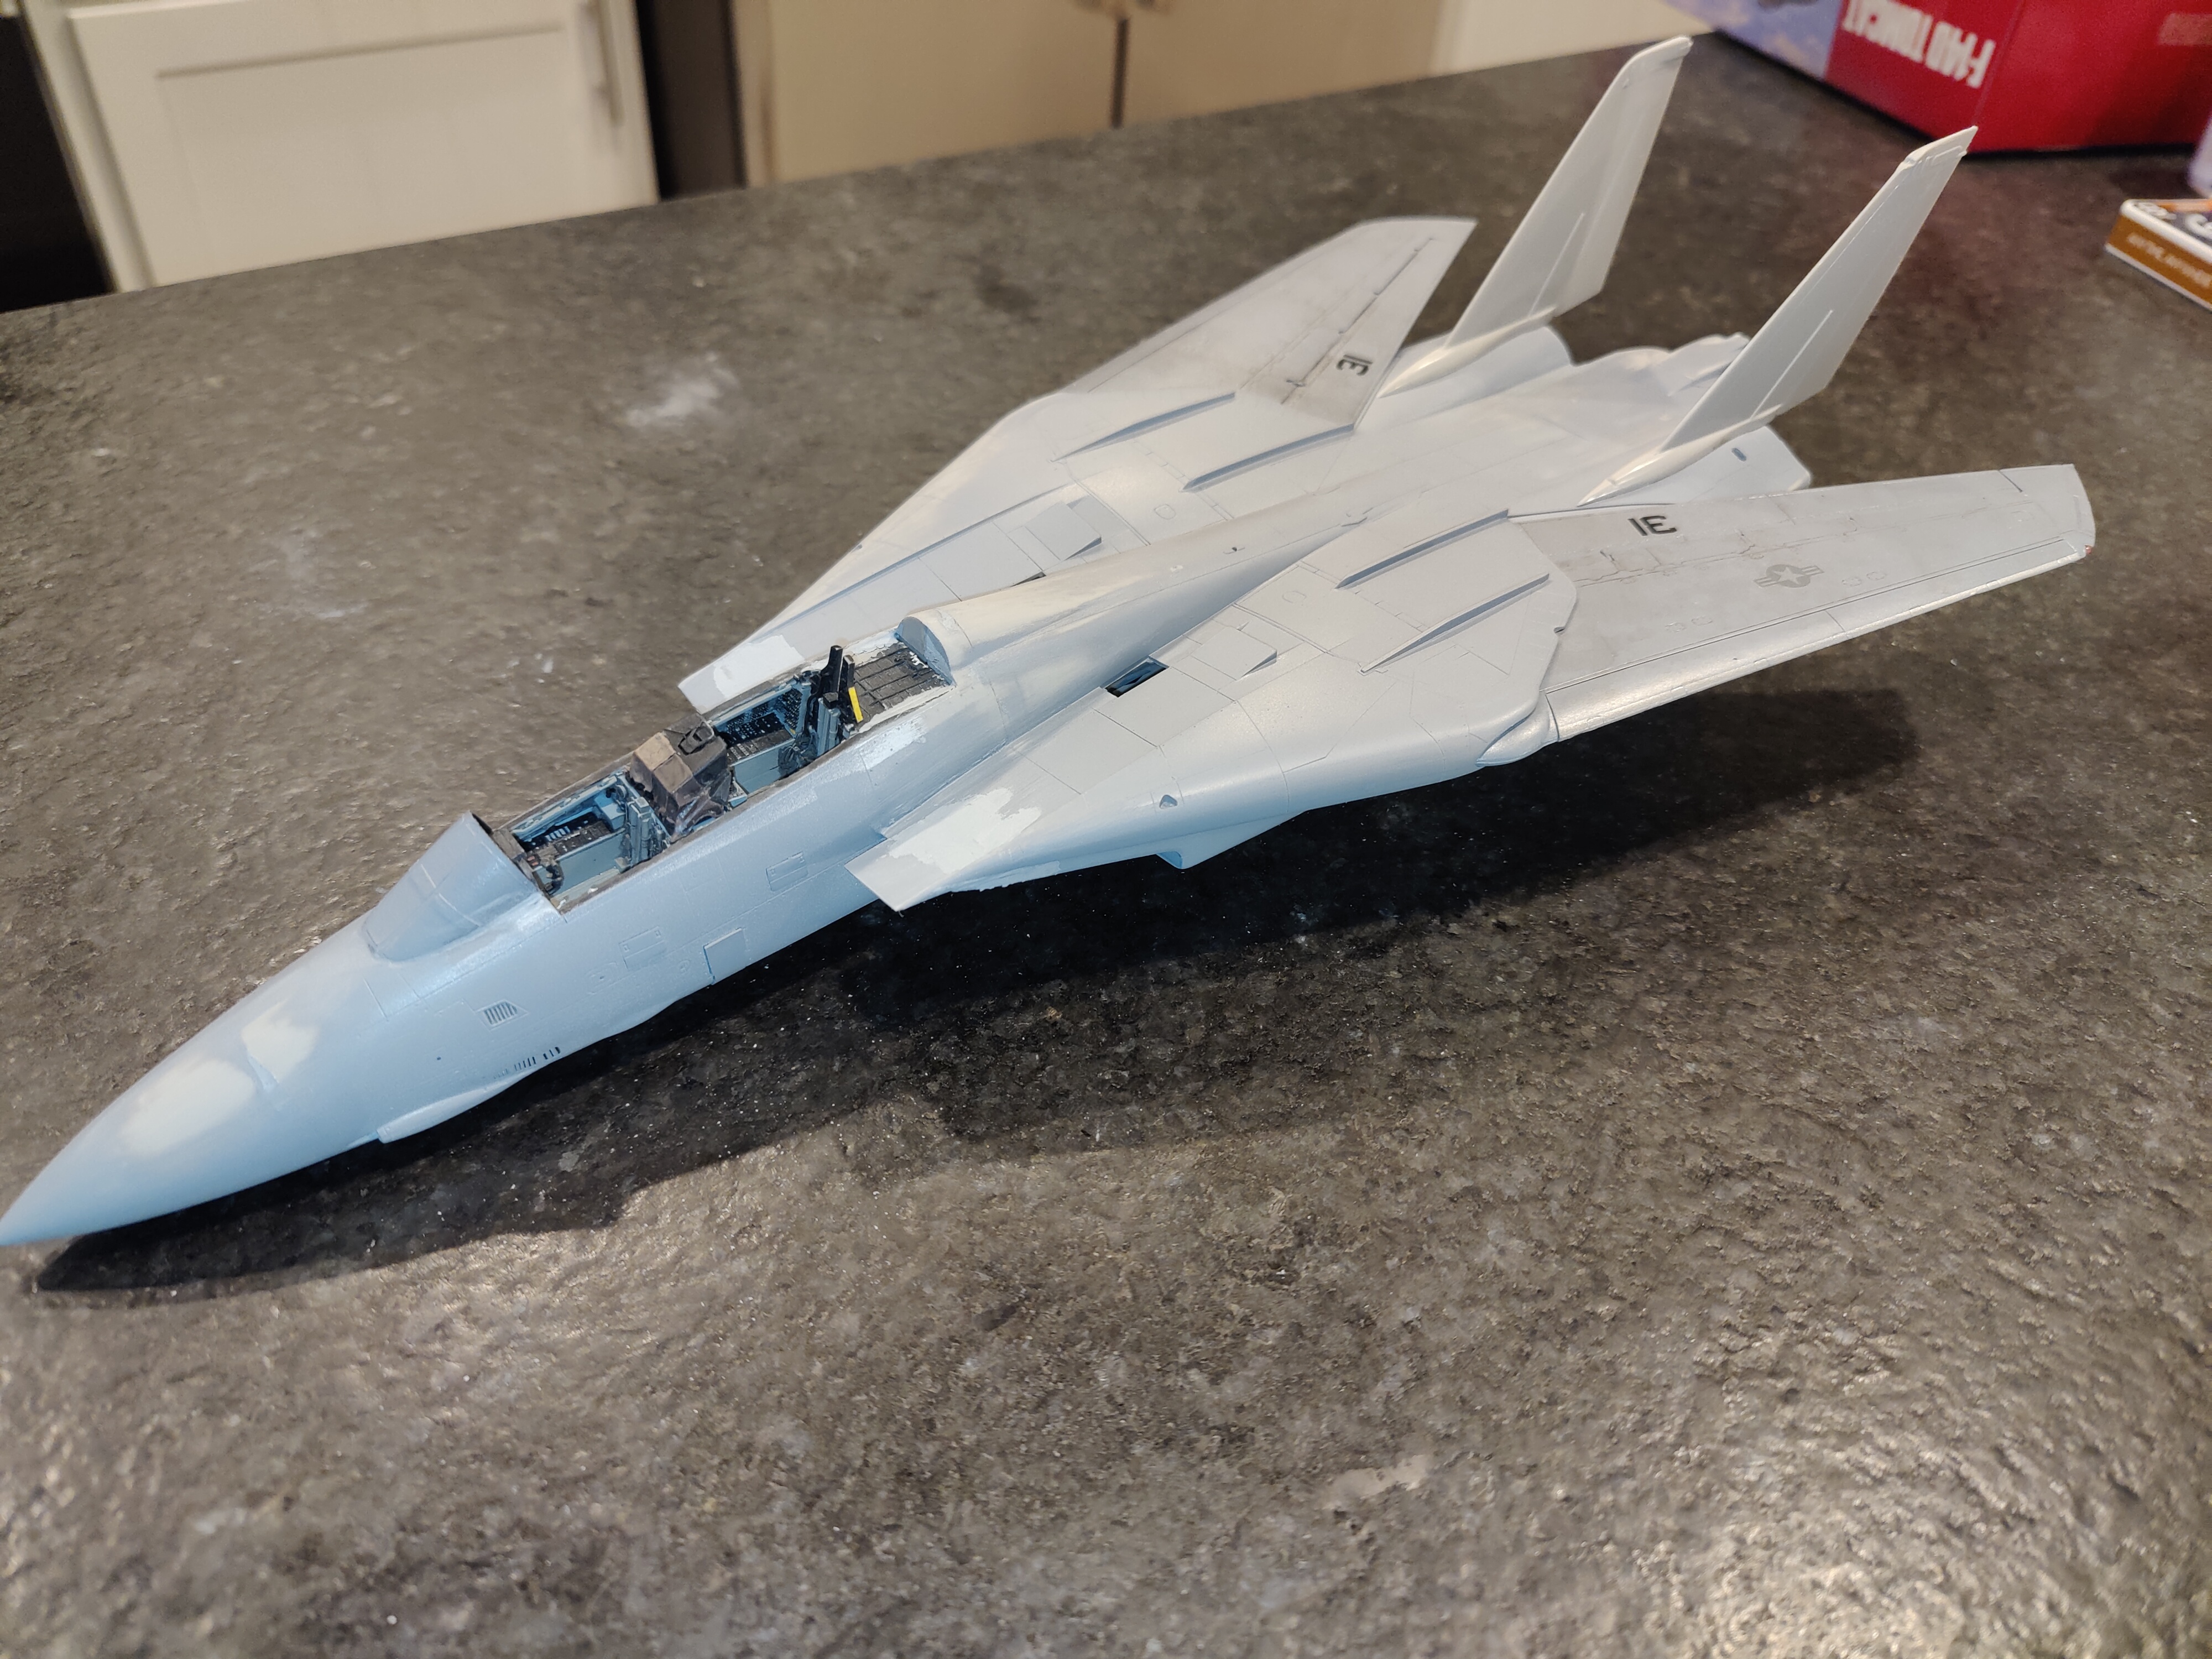
Working on the cockpit tub now. I'm using the kit tub with the Quinta 3D decals. Scraped off all the raised details from the molds. Laid down Tamia dark ghost Gray which matches the Quinta set. The fit of these decals is absolutely superb. They go right into place. They are pretty glossy so they need a flat coat after being applied. I'm masking off the glass portions because they have a really nice shine to them.


-
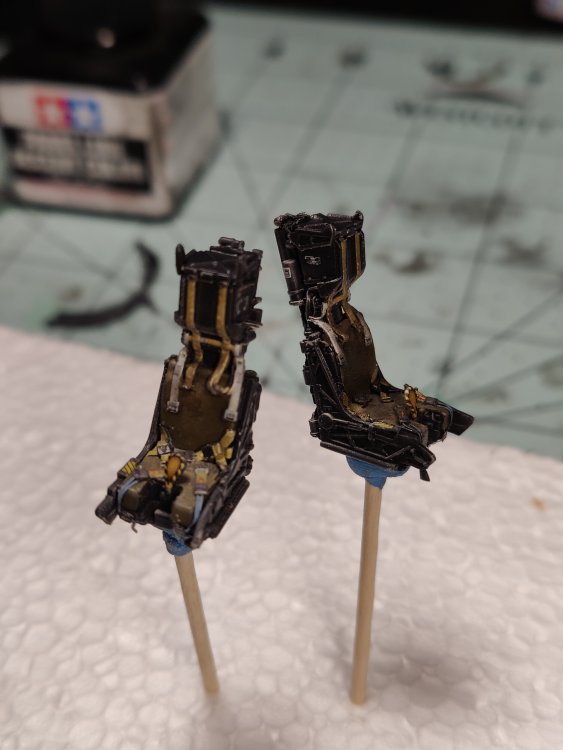
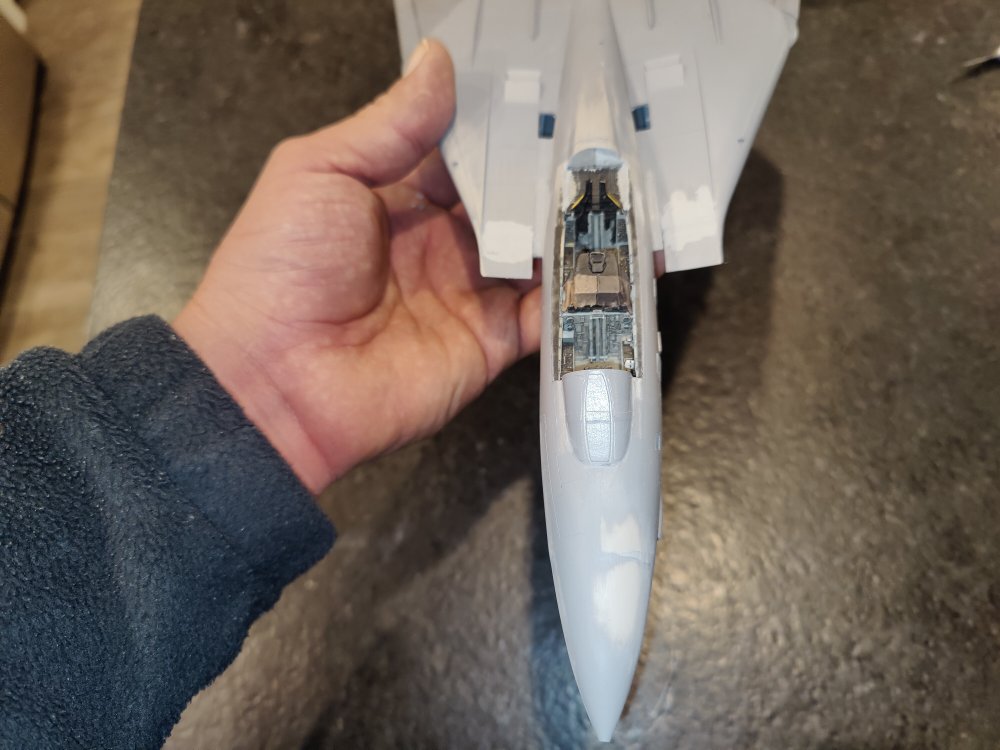
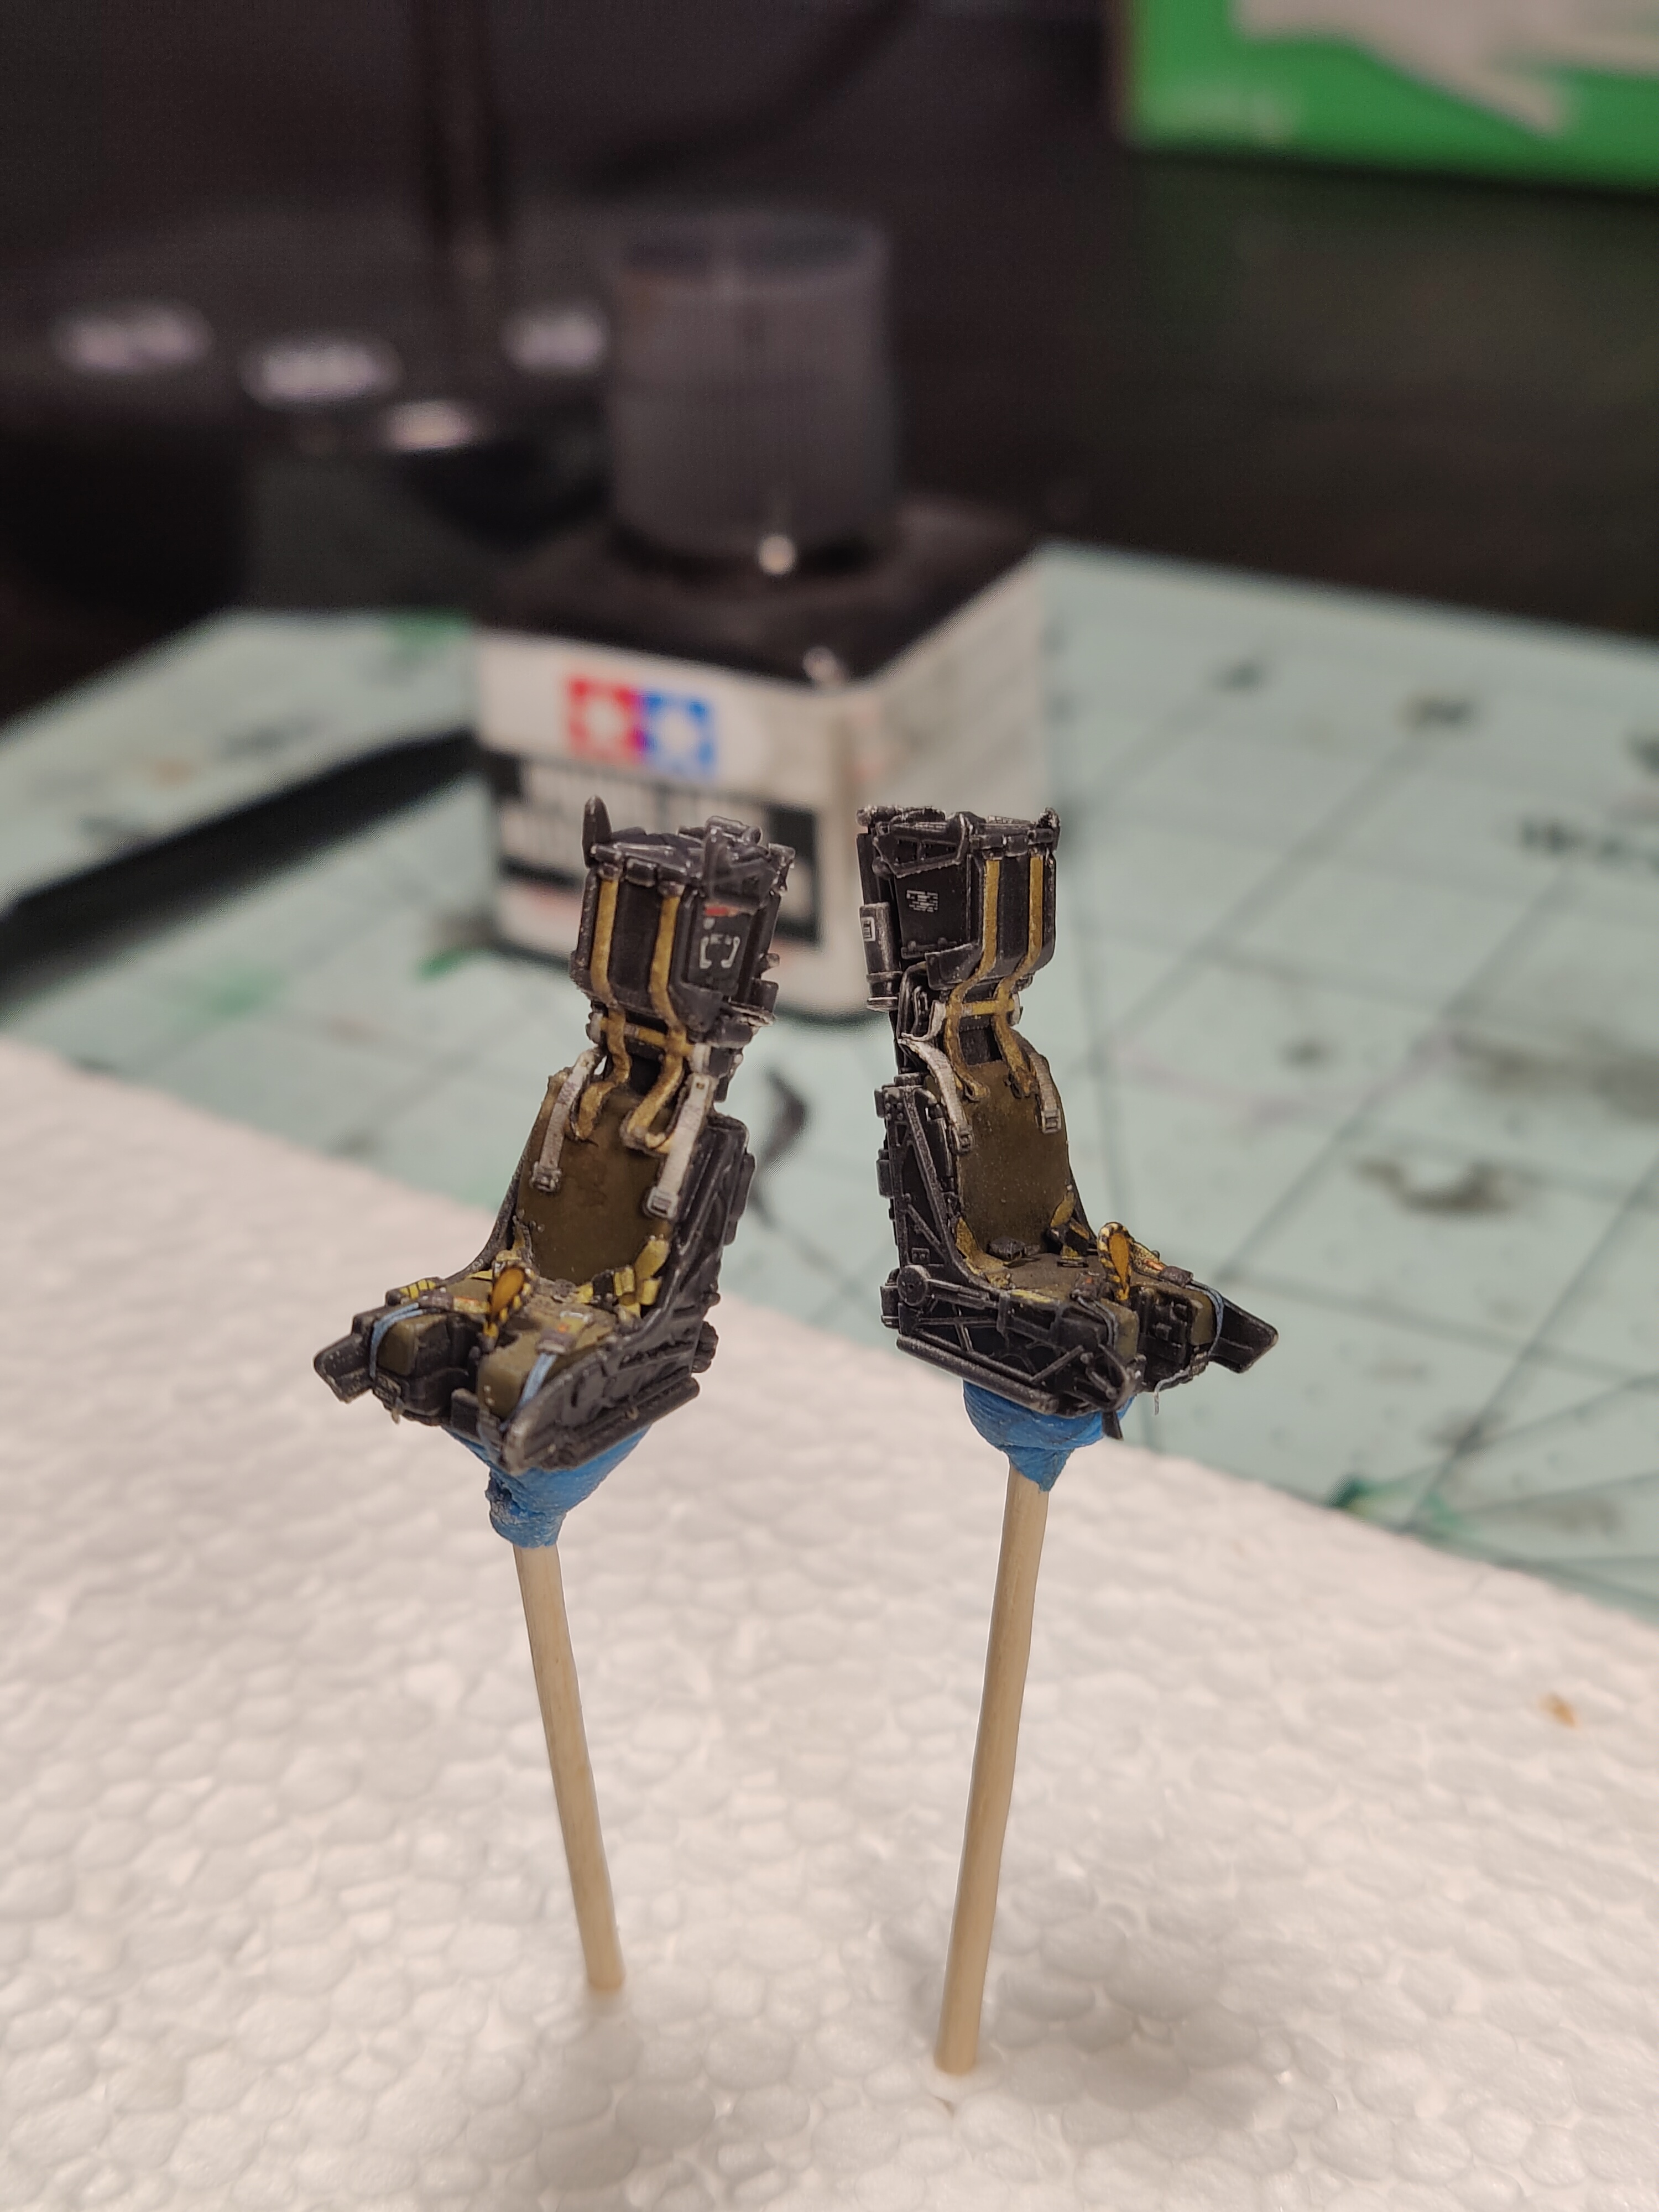
Seats done. I used the Quinta risers, ejection handles, and lap belts repurpose as leg restraints. The photoetched Eduard 3-point lap were more accurate and thus used. I also used the placards that came with the Eduard seats.

-
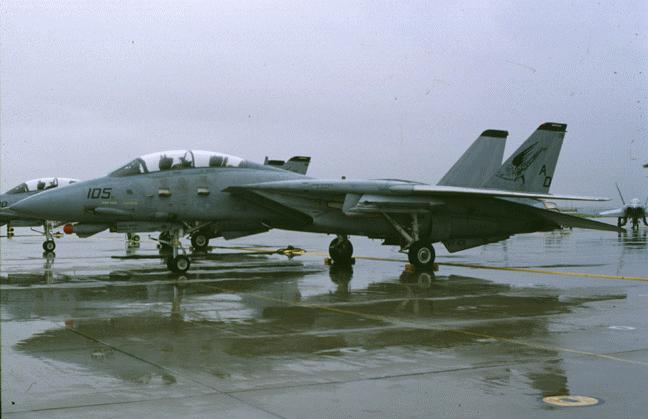
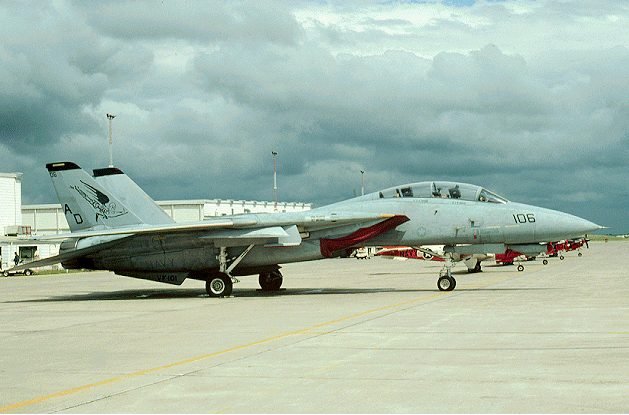
Well, I'm going for it. I had planned to build the Tamia kit for the second jet in my 2-jet build. But I already have the Hasagawa kit and I think I've learned a few things after my last build to make this one go a lot smoother. This jet is going to sit next to my VF-124 Tomcat. It's going to represent the time frame from when the 124 was decommissioned and VF-101 took over at Miramar.
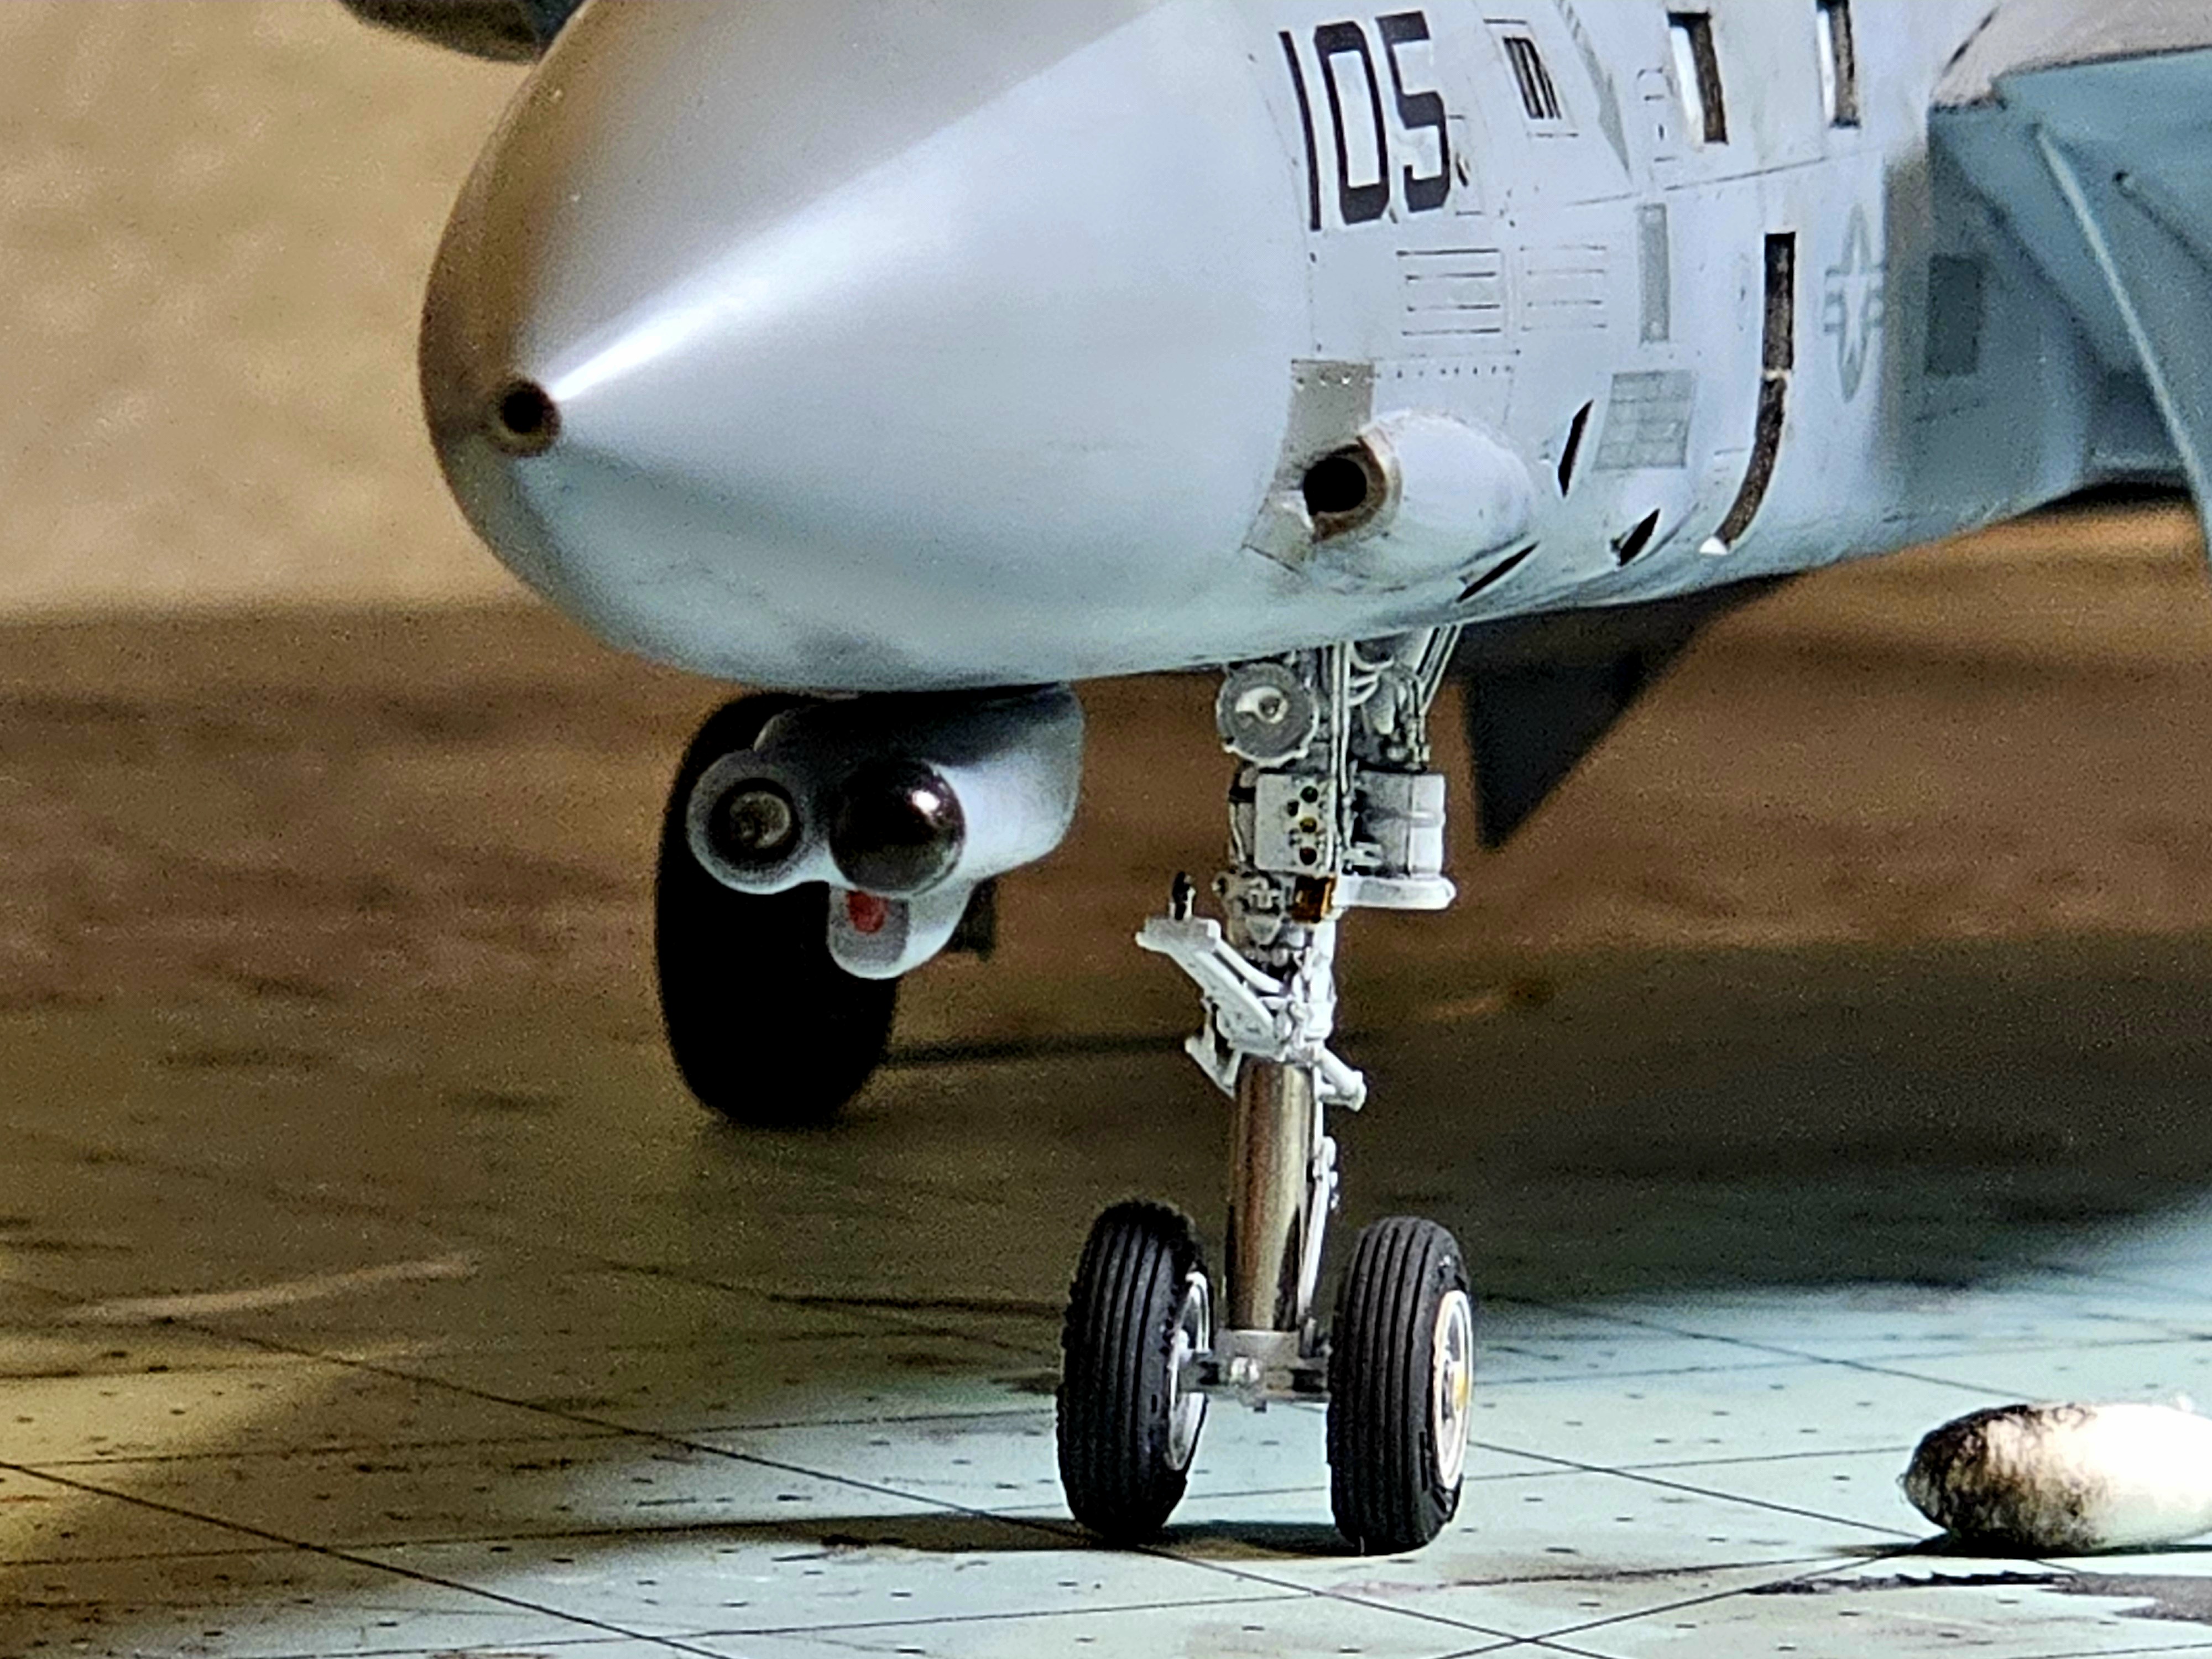
I'll be using the Furball decals, Eduard seats, Quinton 3D cockpit set, and DW 3D printed landing gear.

-
Completed this build today. It depicts a special jet from my past. The decals belong to an F-14D and there are a few other inaccuracies, but I mainly wanted an Alpha in the black markings of a line jet. A fairly tough bill due to the fit of the hasegawa kit. This one will always have a red-headed stepchild feel to it. Nevertheless I love it.

-
Well, it's finished. I have an odd love-hate thing going on with this build. It was an absolute bear to put together and is definitely not what I had hoped it would be, but it has a special meaning for me. I'll be redoing the canopy at some point because a big chunk of the Future came off. One thing is certain though, this thing was definitely a learning experience. Thanks for the support during the build. I'll be posting a few more pics in the Display Case forum.
-
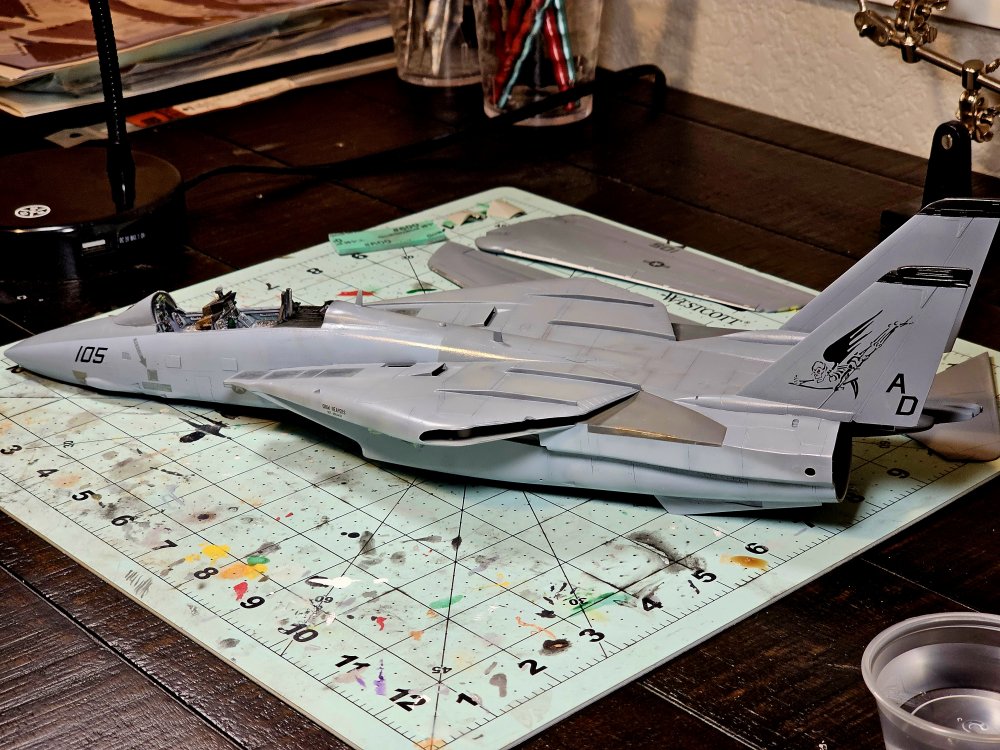
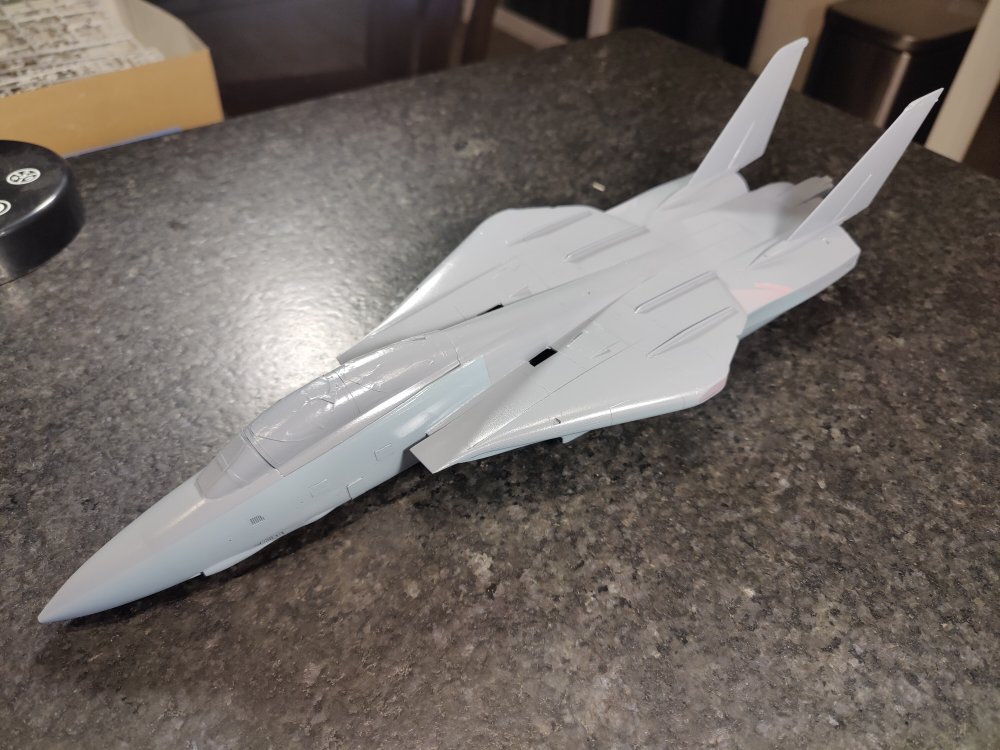
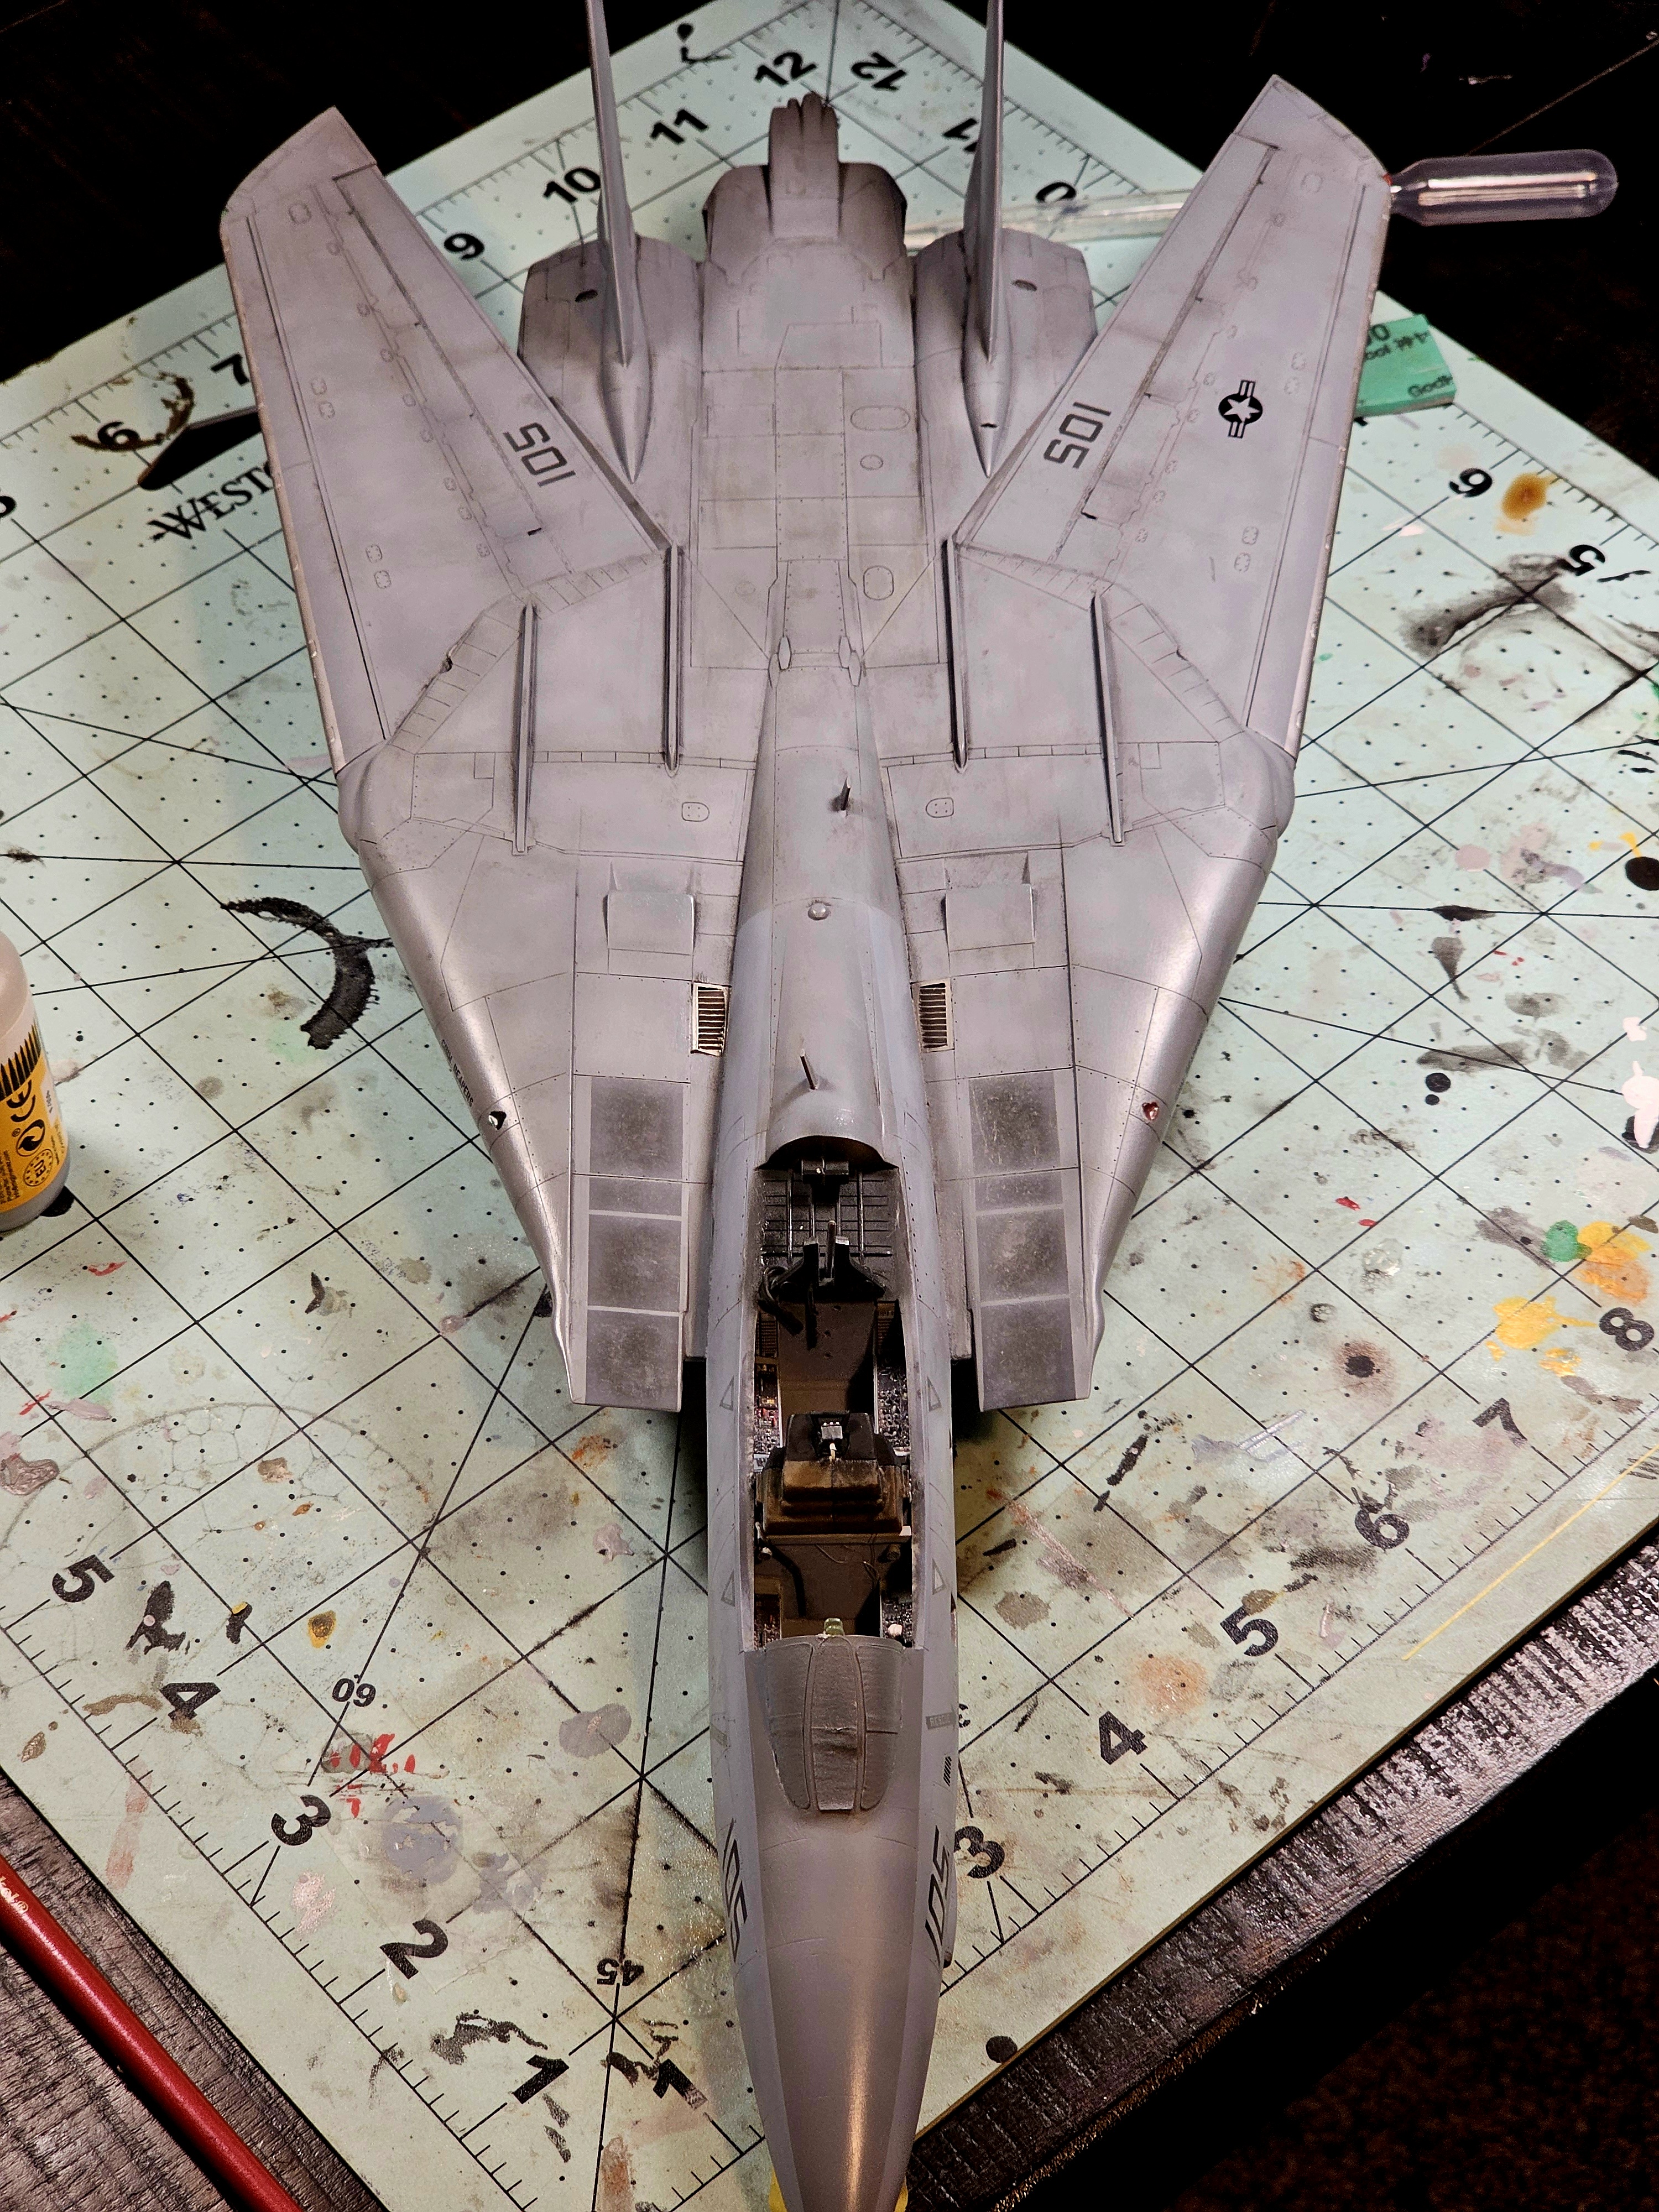
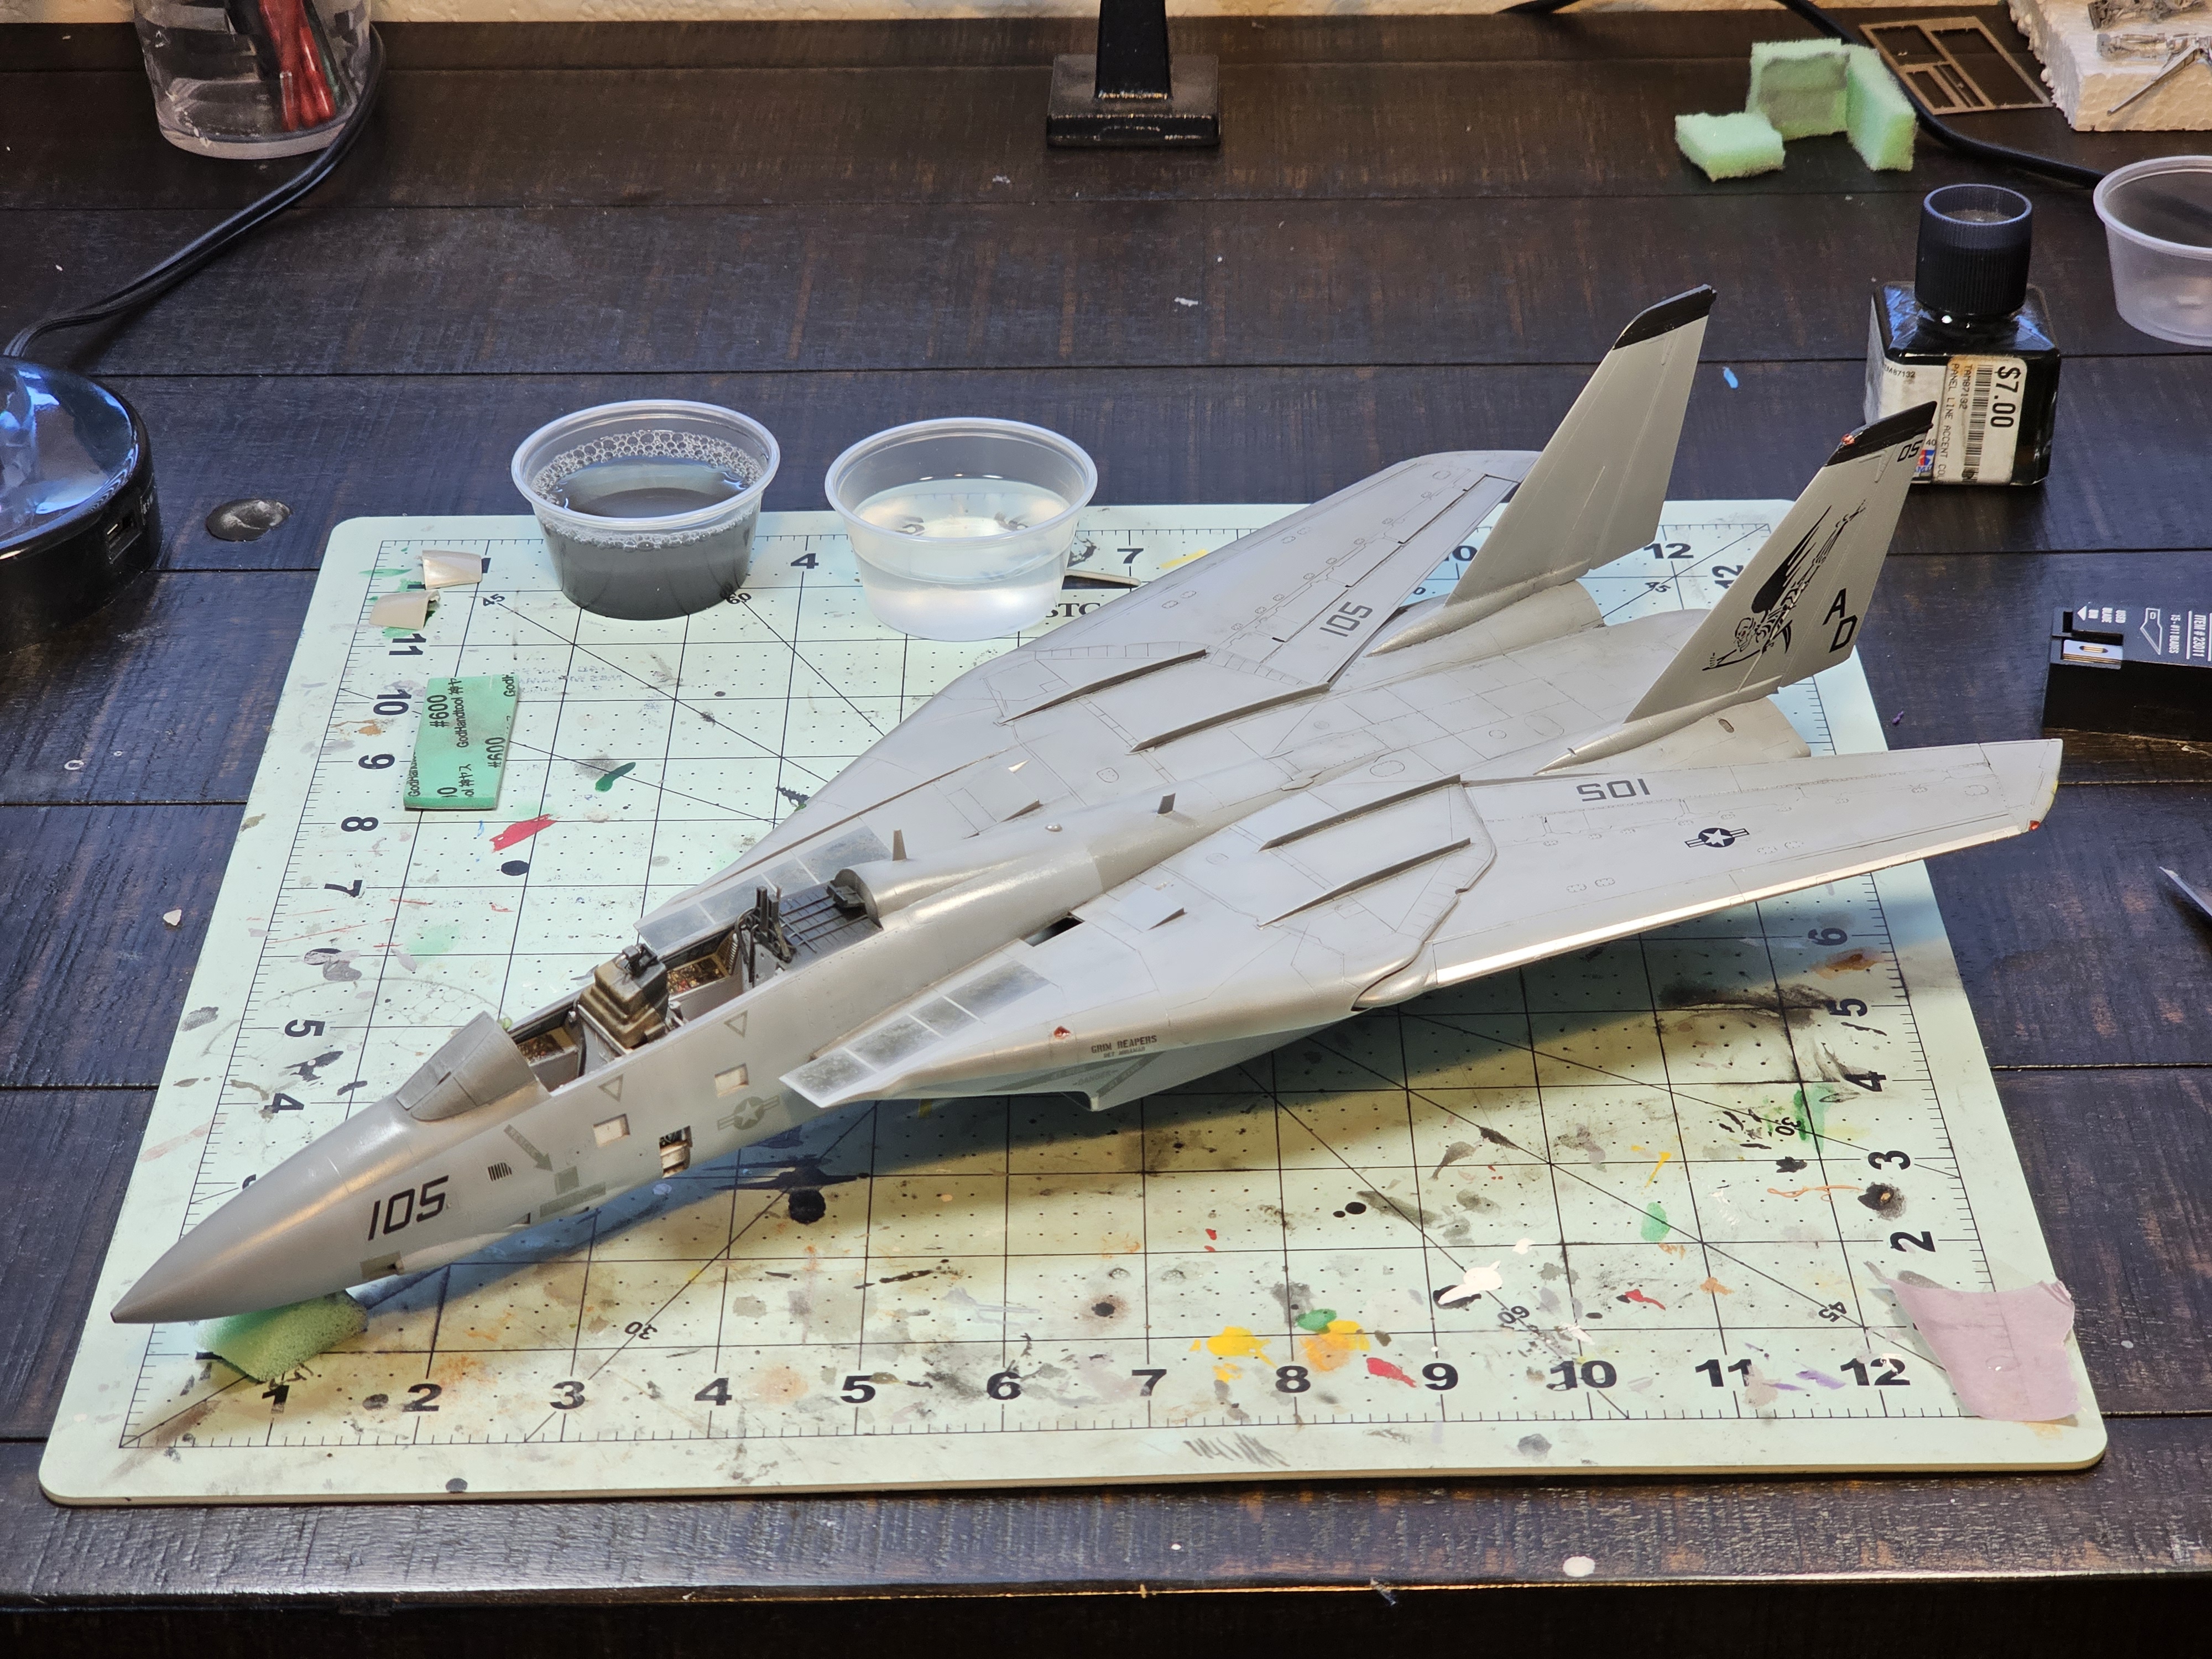
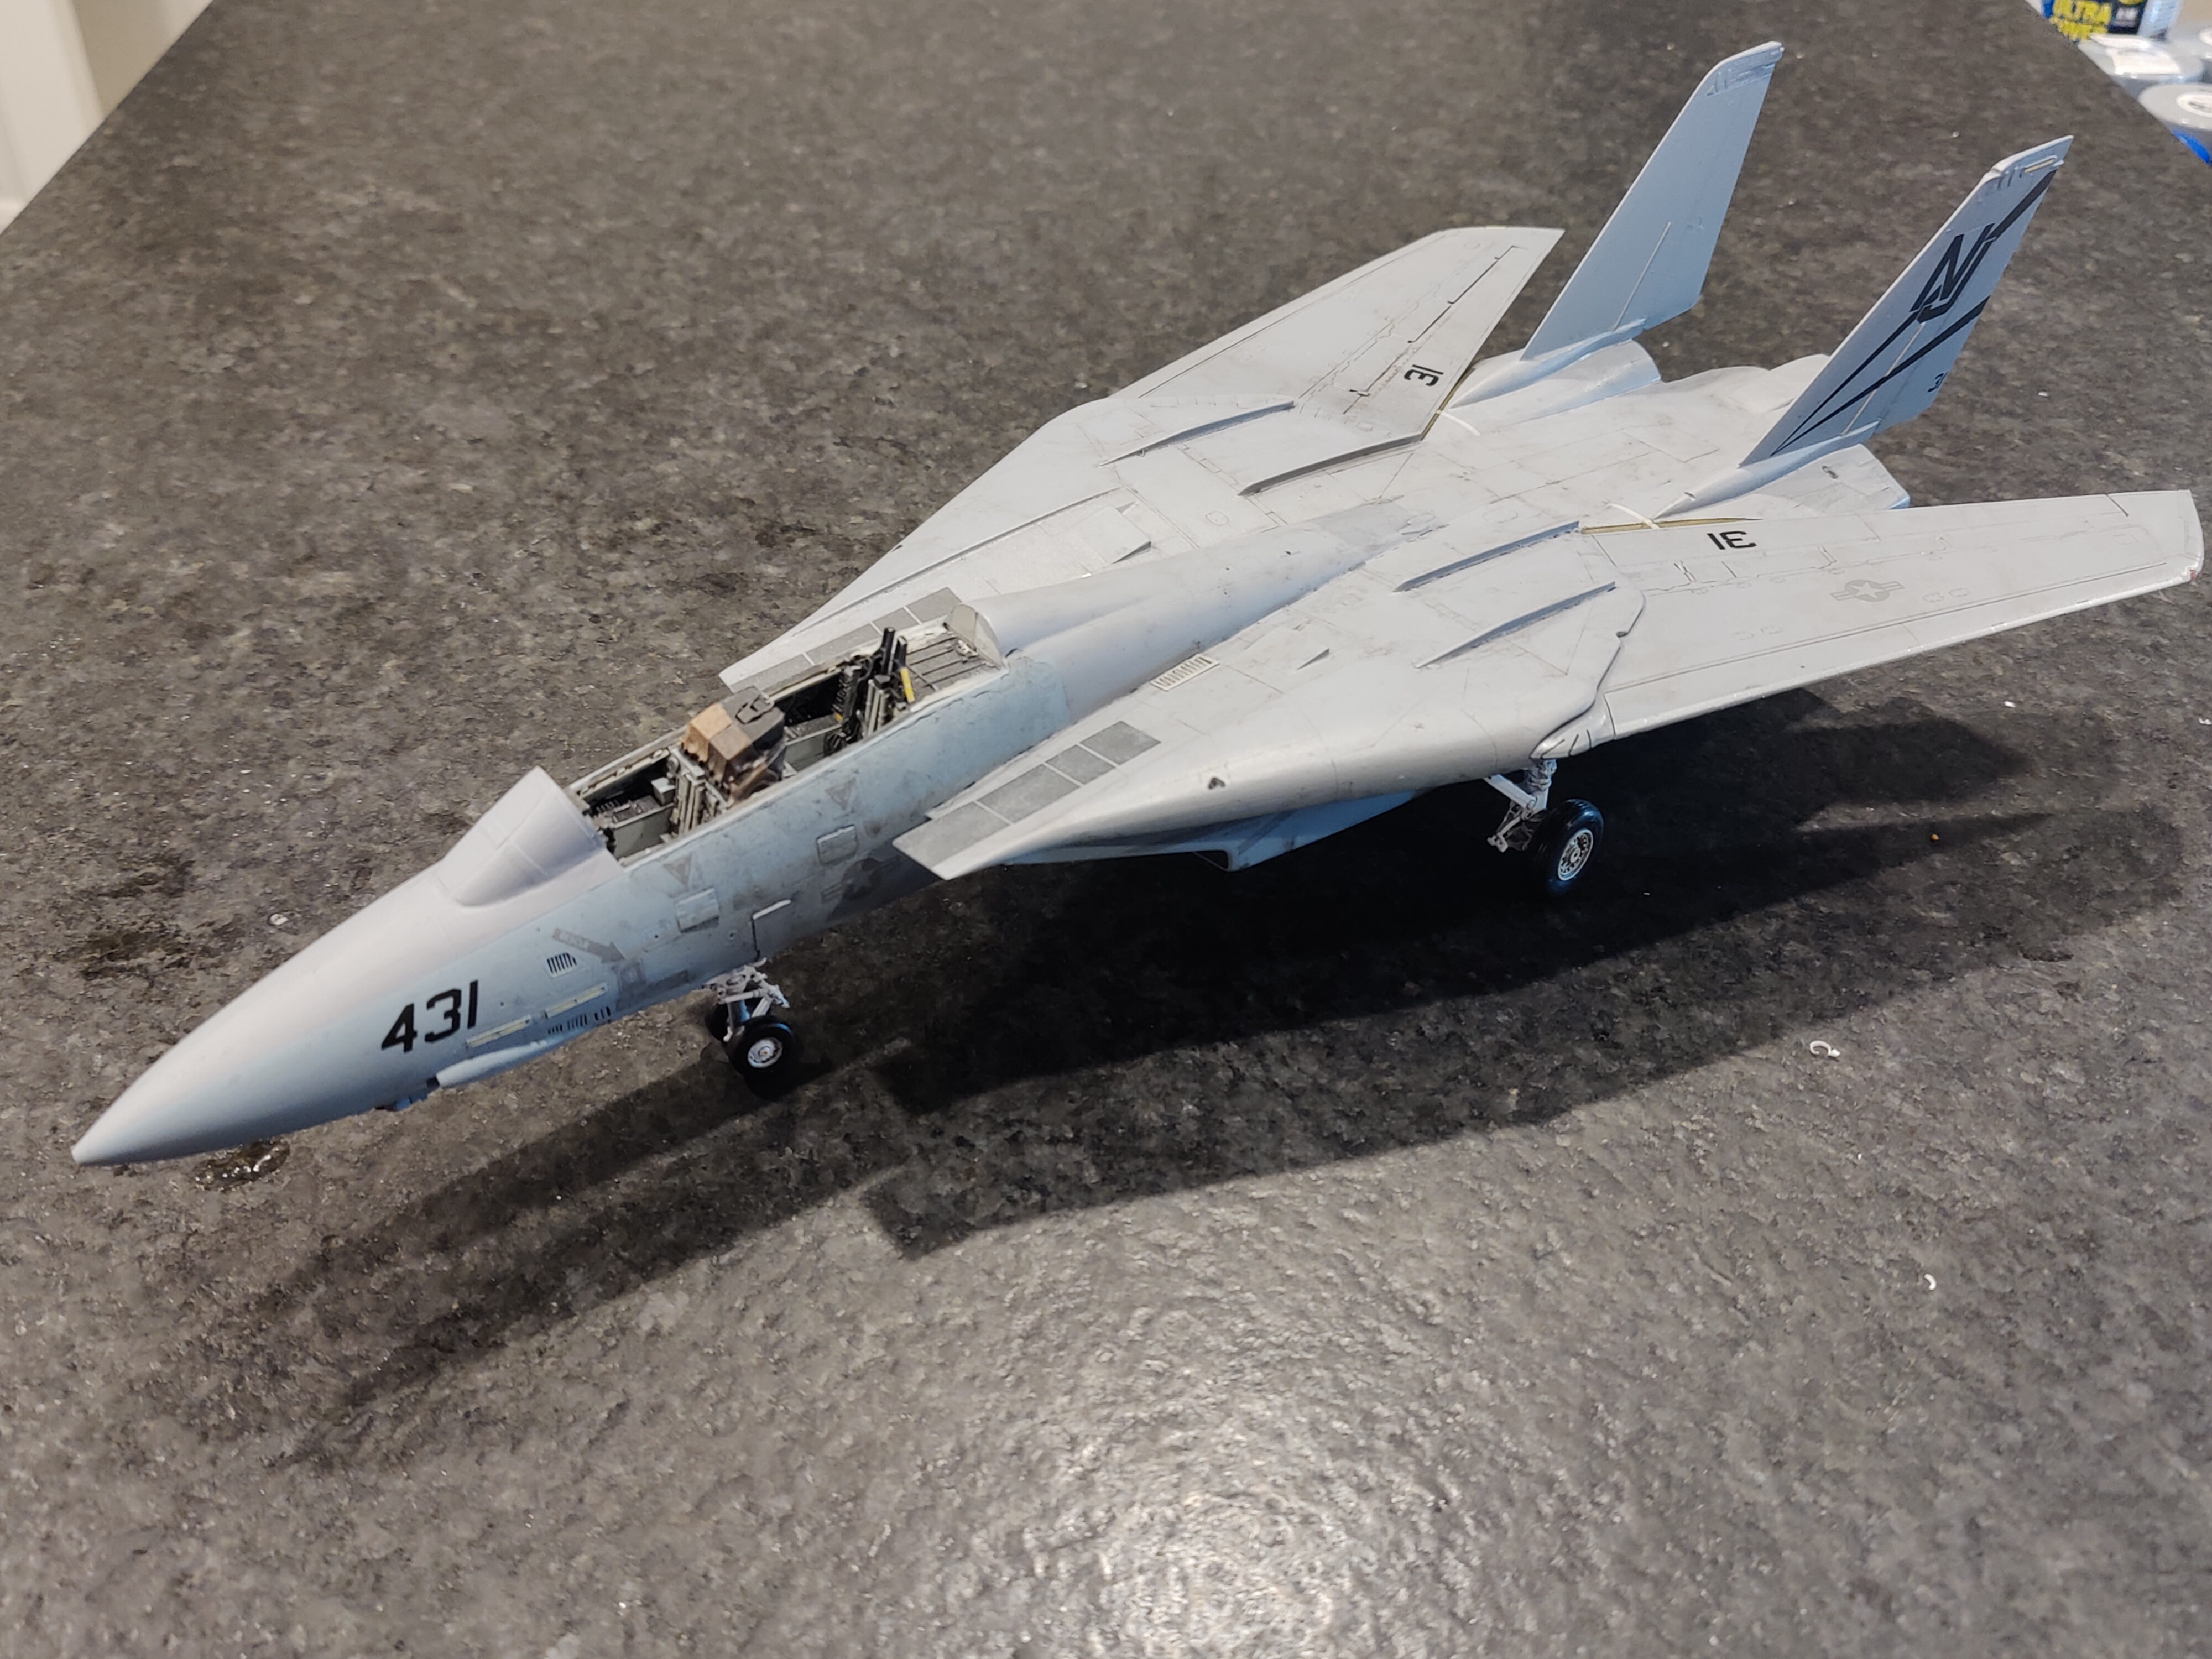
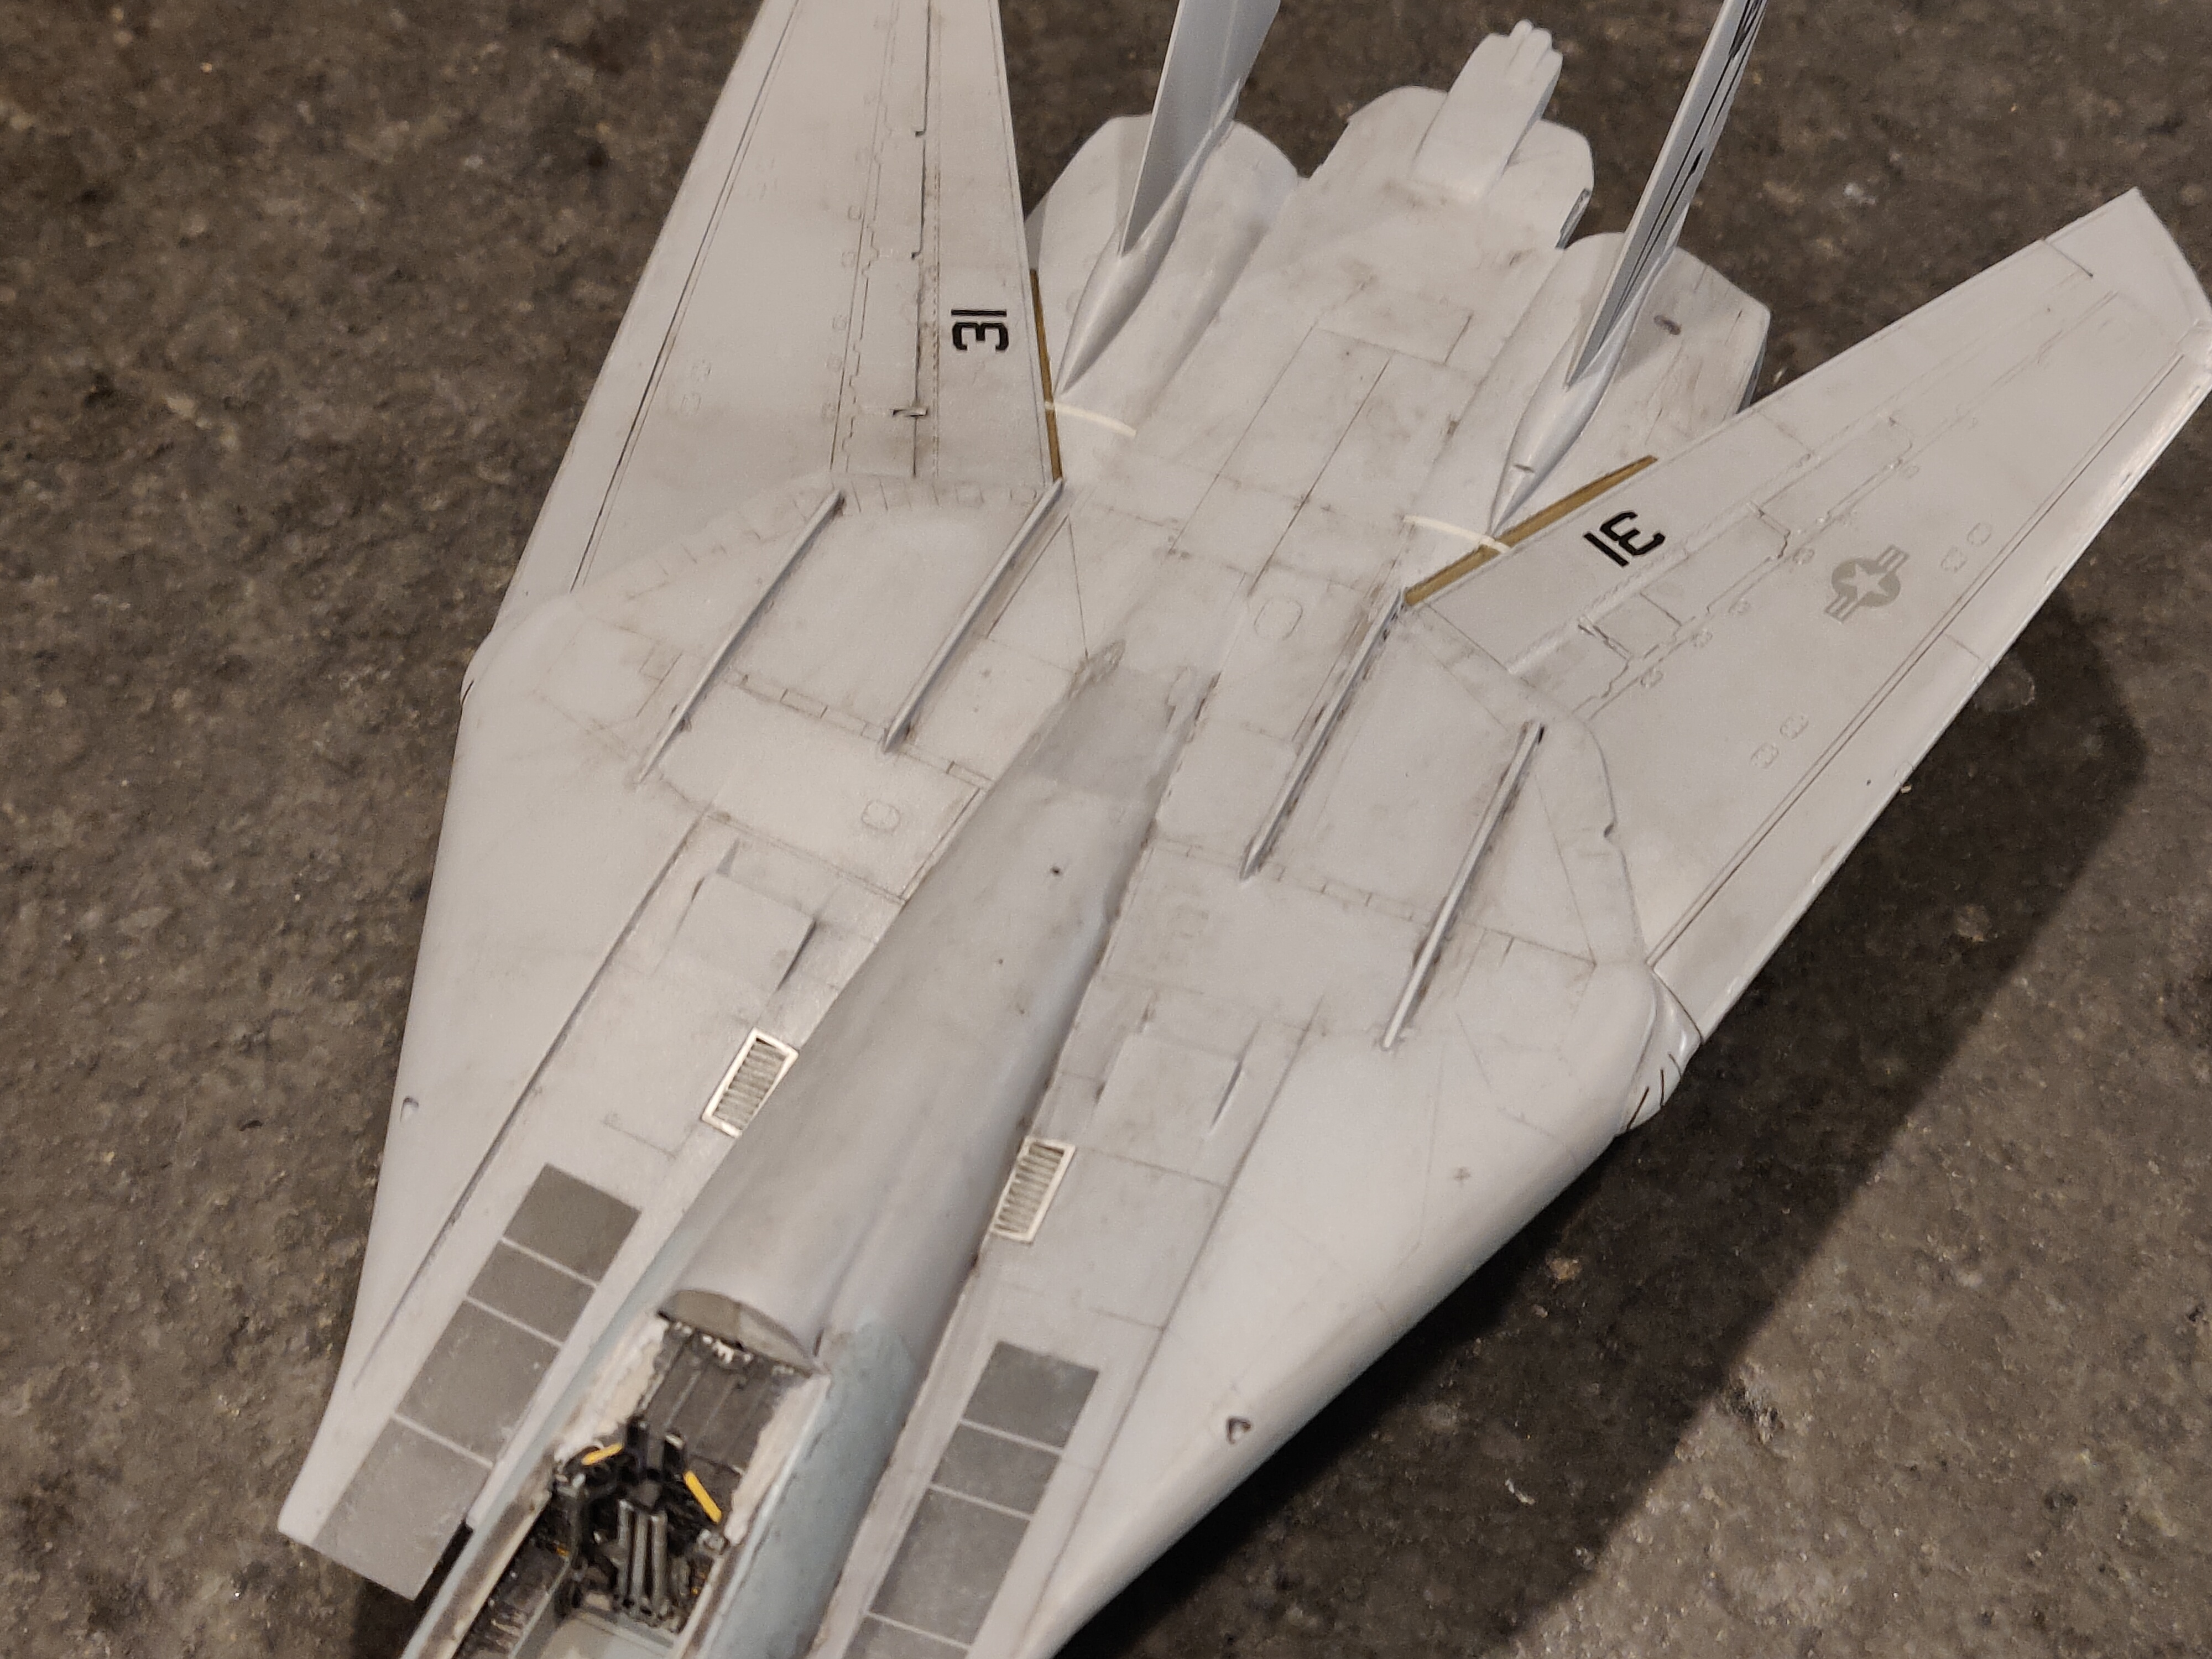
Got back to work on this over the past couple days now that the holidays are over. Still working on the weathering and putting on the details. But I should be wrapping this one up soon.
-
This little sucker has been nothing but trouble. LoL. That said, it's still been fun. Decals are on and in the process of weathering.

-
Thanks, Happy. Yeah, just kind of throwing it together now. Body painted and awaiting decals then weathering.
-
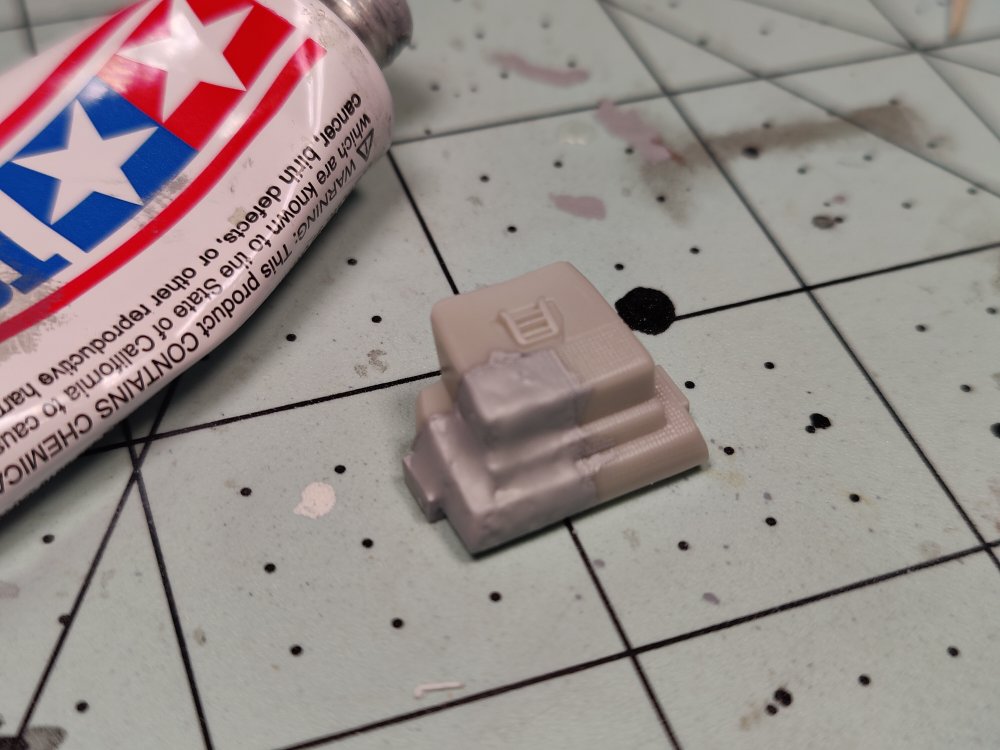
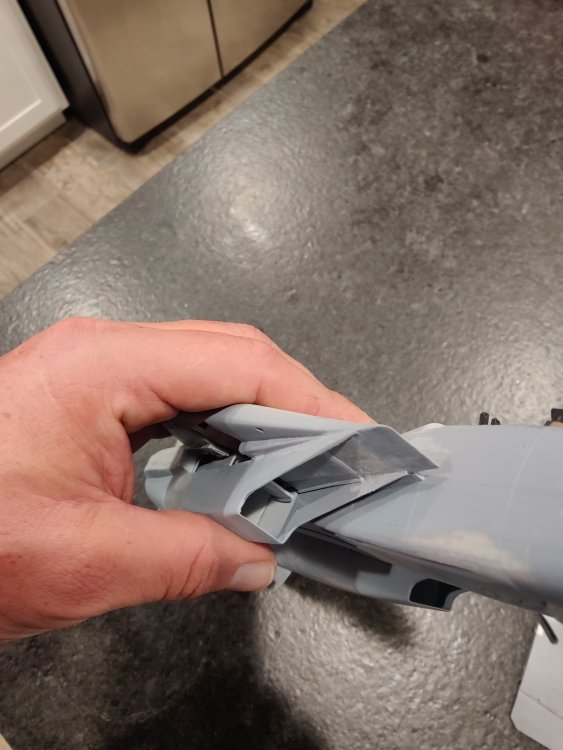
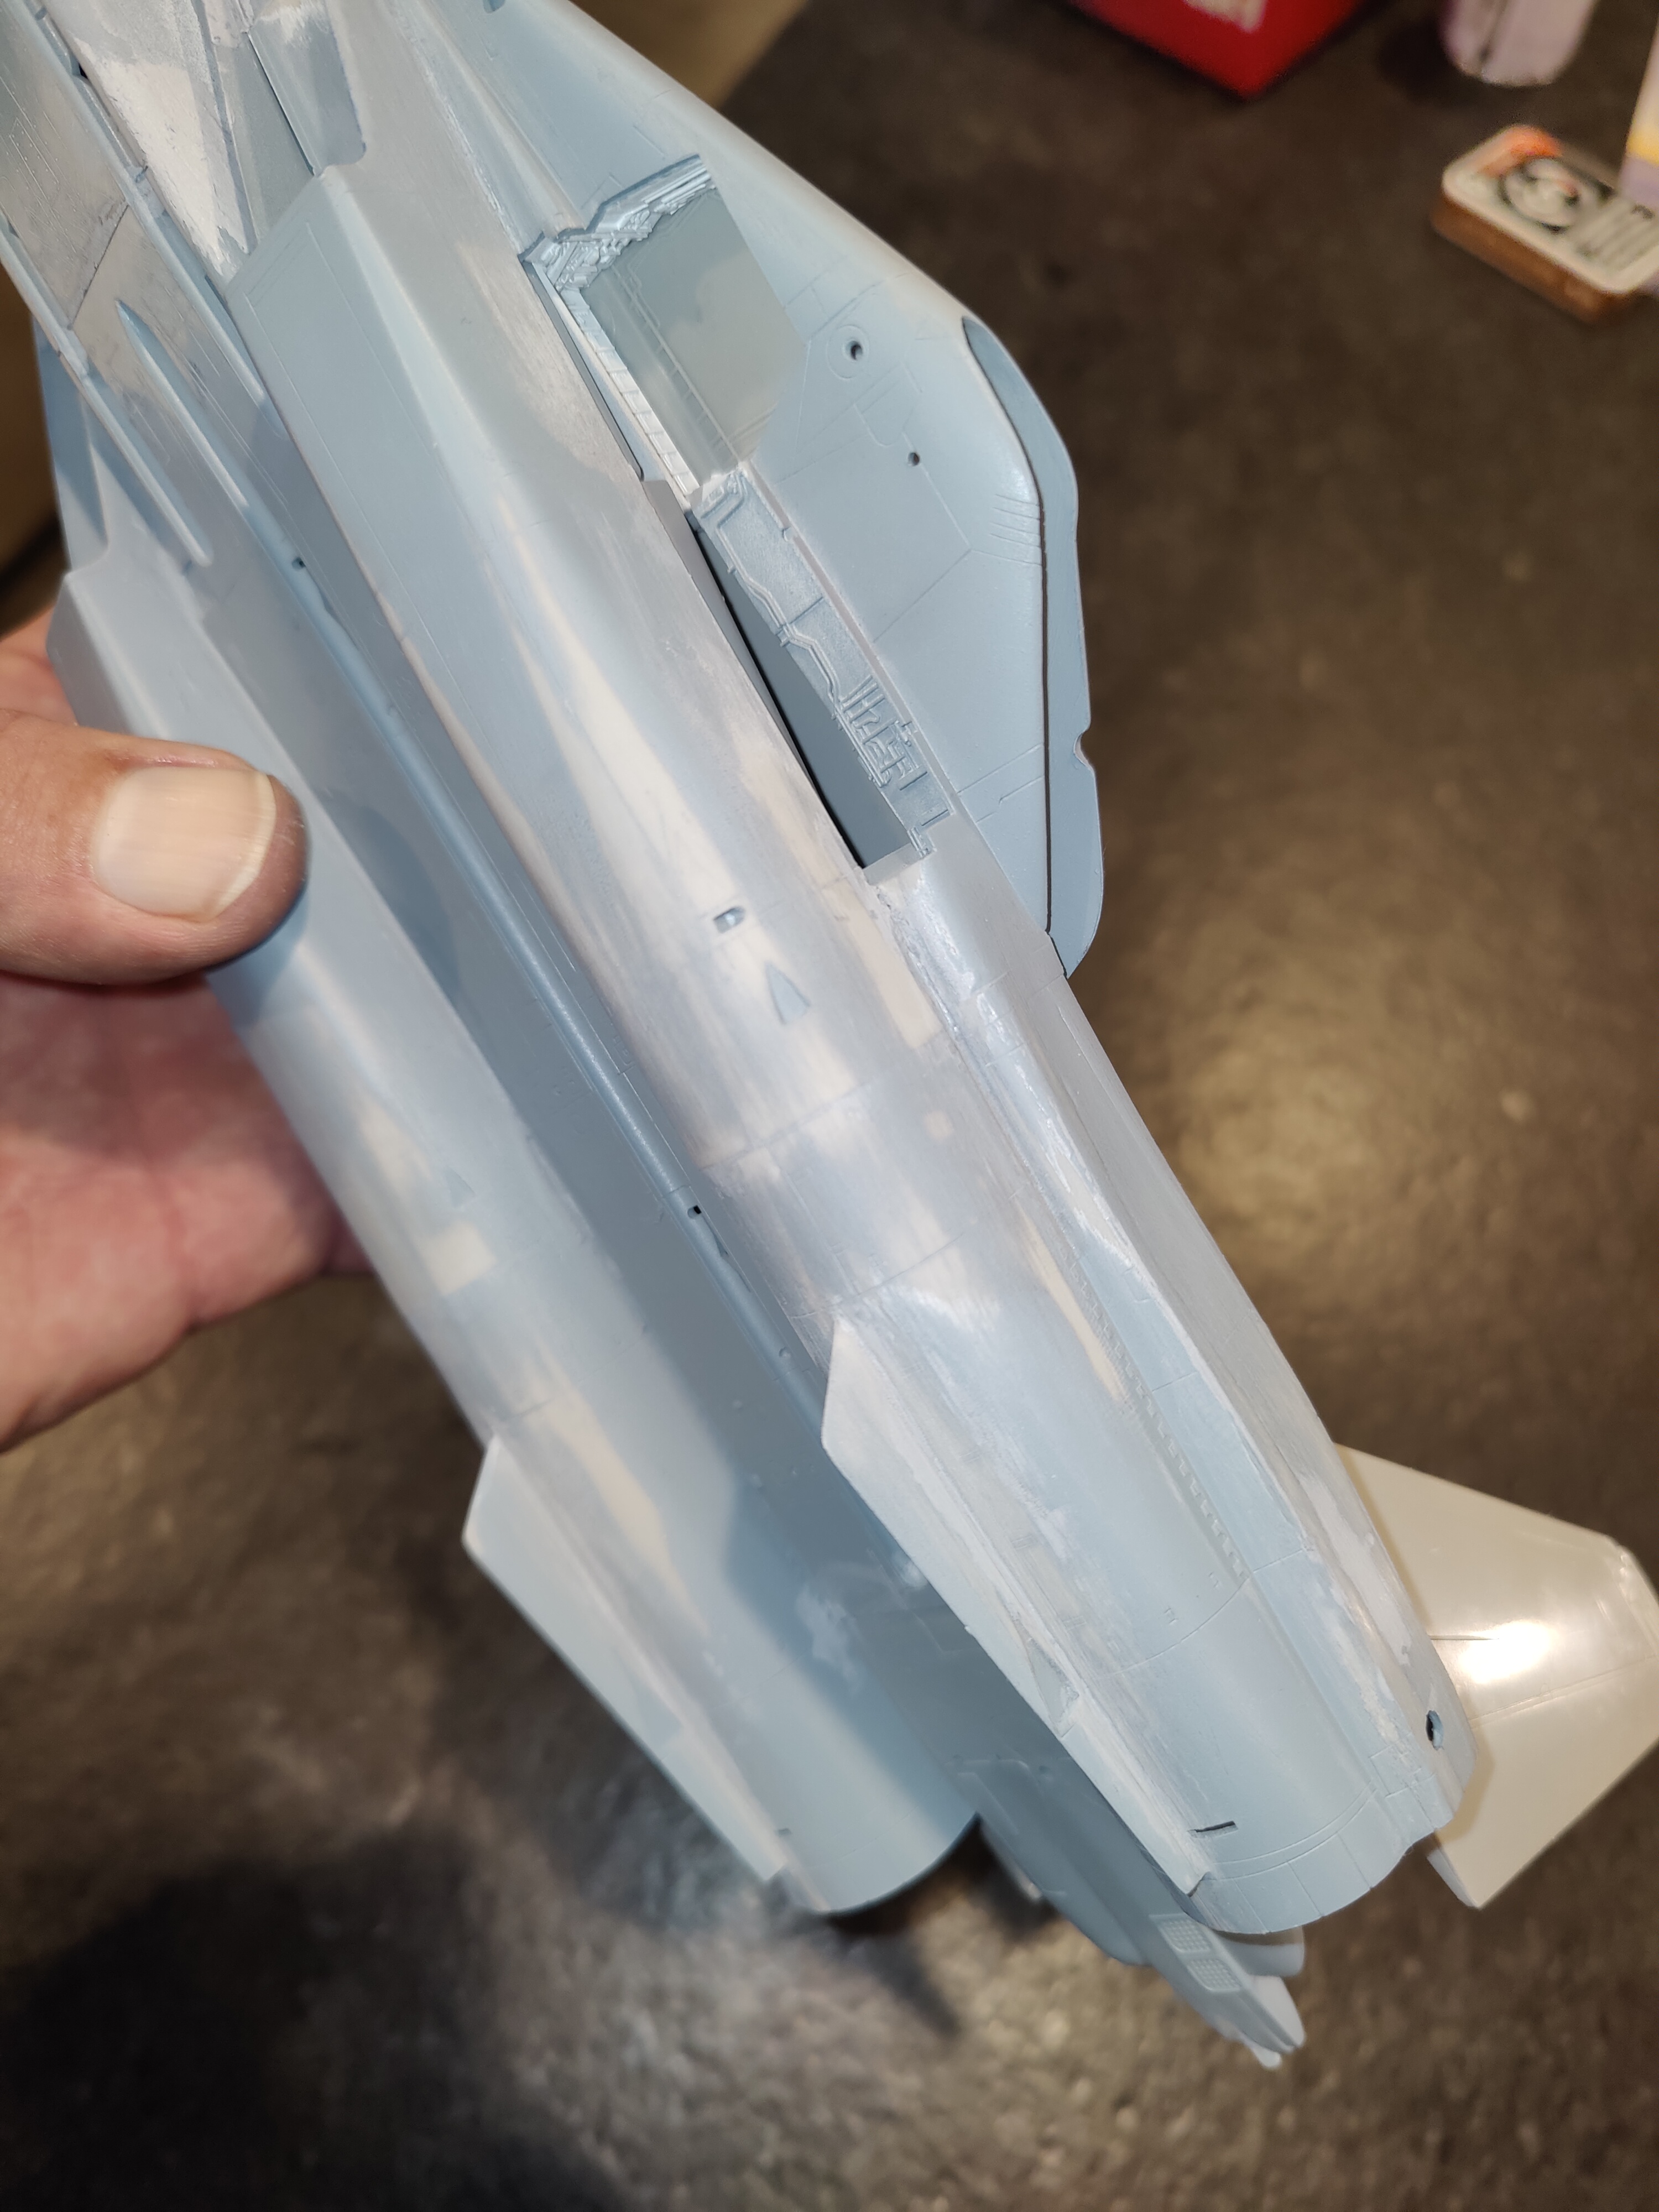
Well, back at it. If I had to guess, about 30% of this thing's total weight is going to be putty. I started putting the fuselage together and I'm now in the sanding phase. It's been disappointing to say the least. But, I'm going to use it as a learning experience.


-
Thanks guys. I appreciate the words of encouragement. Yeah I had put this thing on hold after wrestling with it with about three tubes of putty. And yeah that joint between the forward and a half fuselage is ridiculous. I'm going to get back to work on it in the next few days and just knock it out.
-
I'm posting basically just to vent! When I was younger hasegawa kits were the top of the line. I had this kit on my shelf for about 10 years and have been excited to build it for even longer than that. Now that I'm building it I'm becoming infuriated. The fit throughout the entire kit is atrocious. I don't know if the molds are just worn out, or if I'm doing something wrong. But the amount of putty and sanding I'm having to do is absolutely ridiculous. I'm giving strong consideration to cutting my losses and getting a Tamiya kit. Okay, rant over.


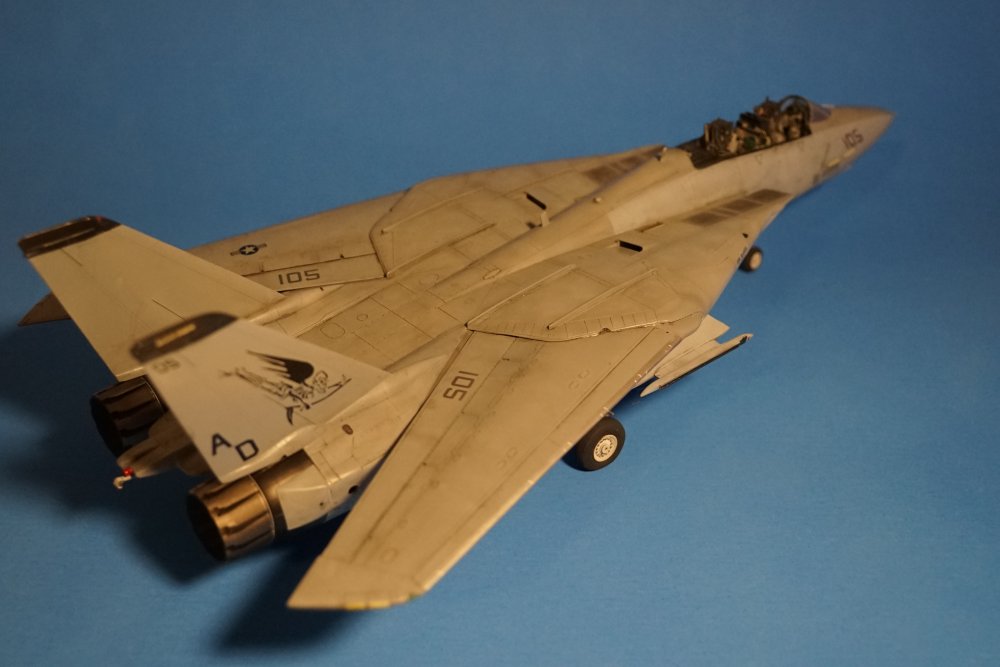
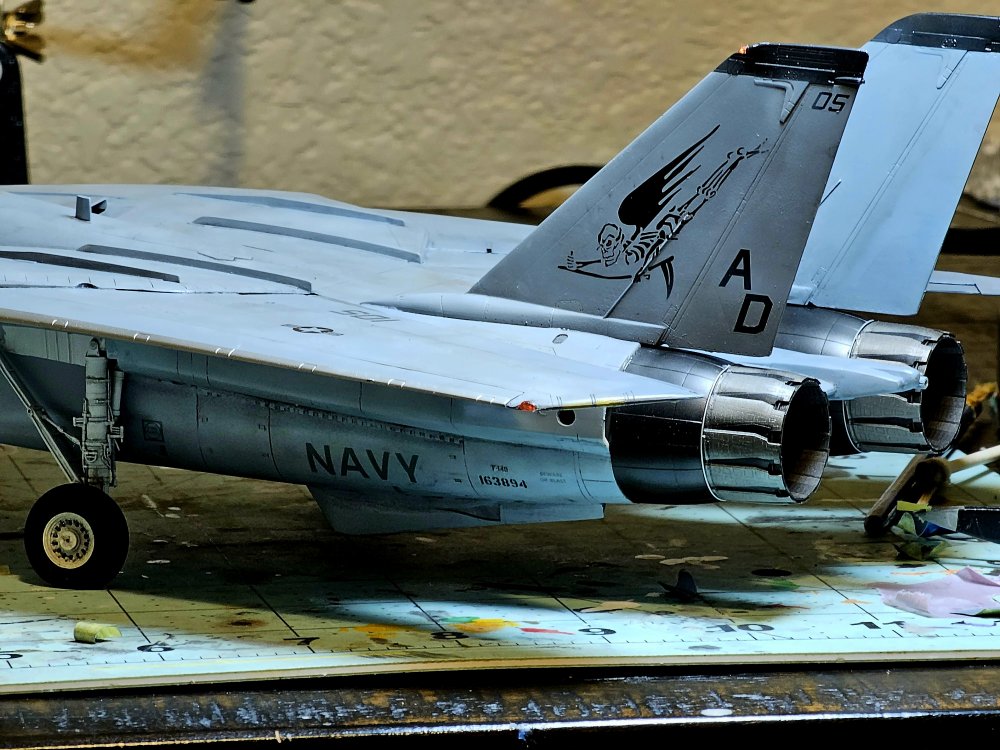
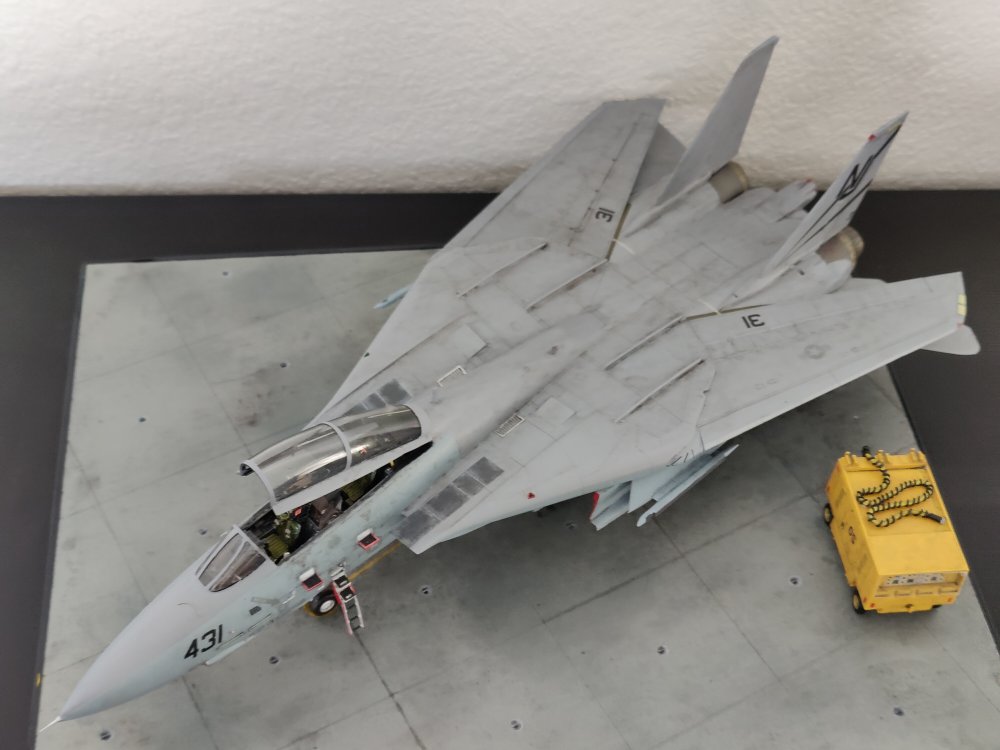
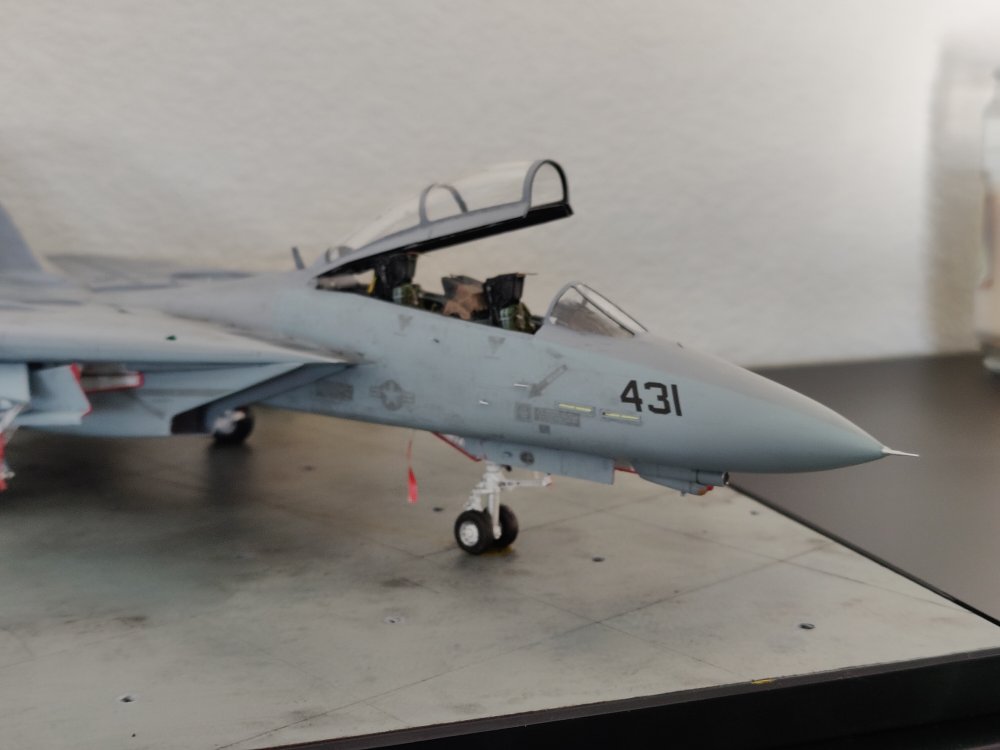
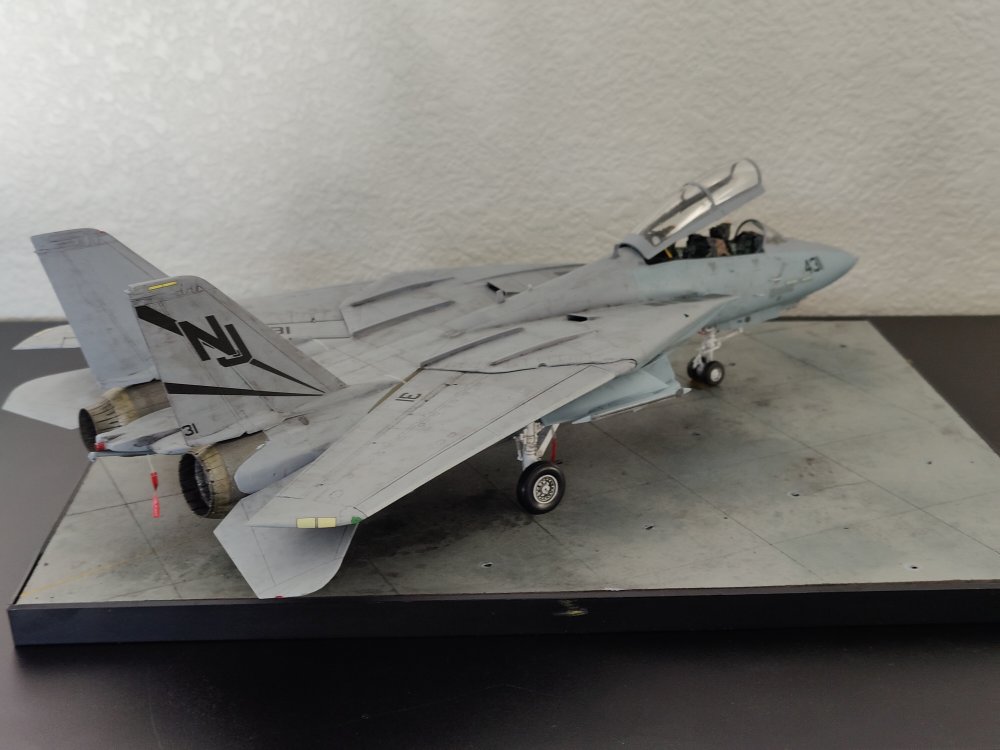
1/48 Hasegawa F-14D VF-101 (Miramar)
in In-Progress Pics
Posted
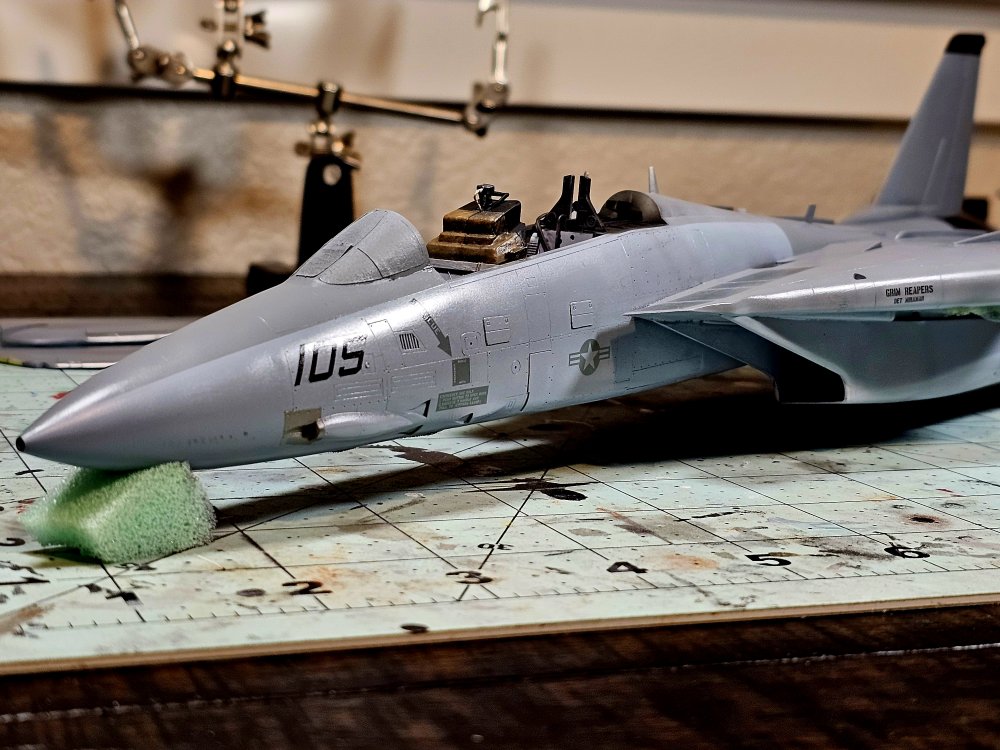
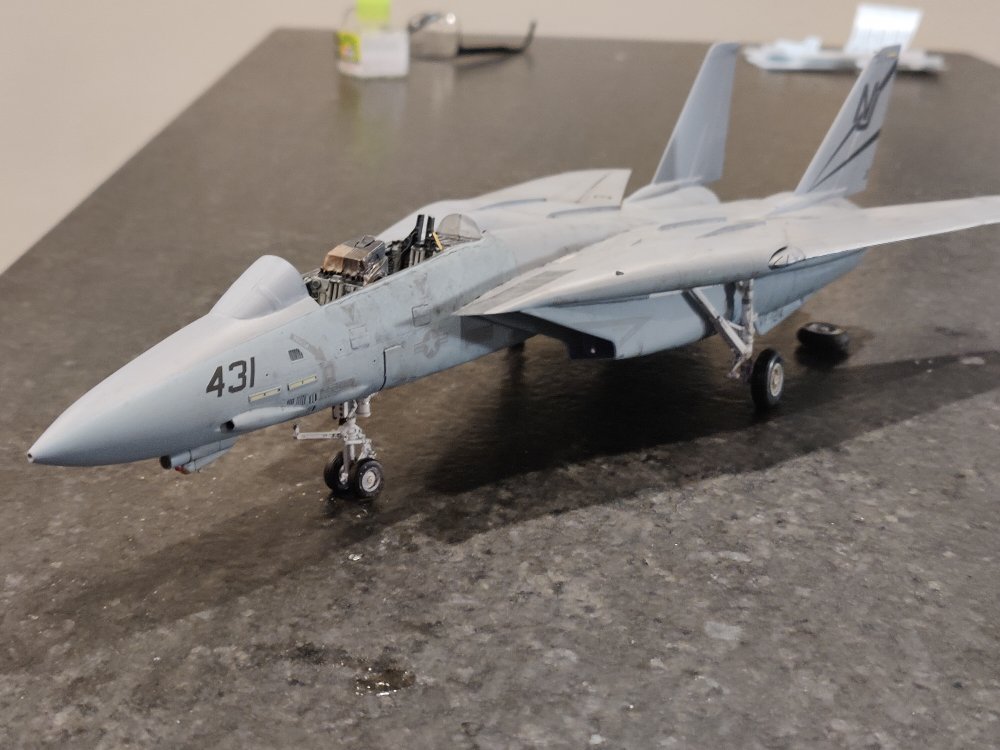
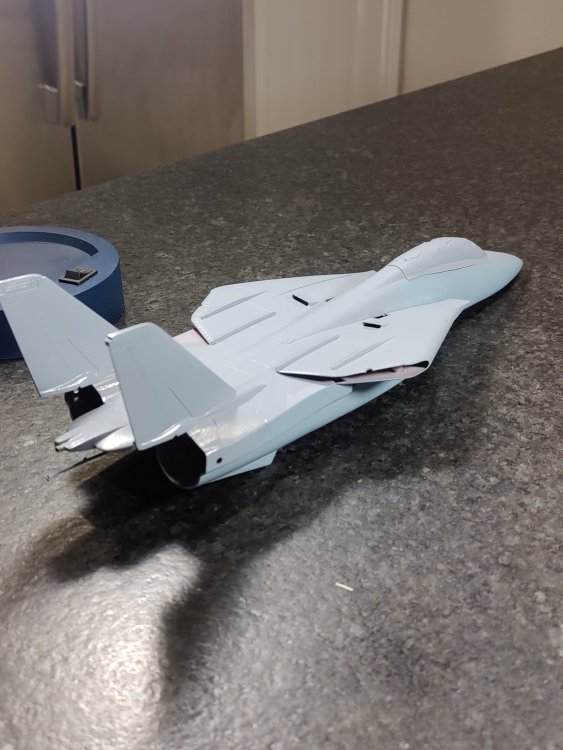
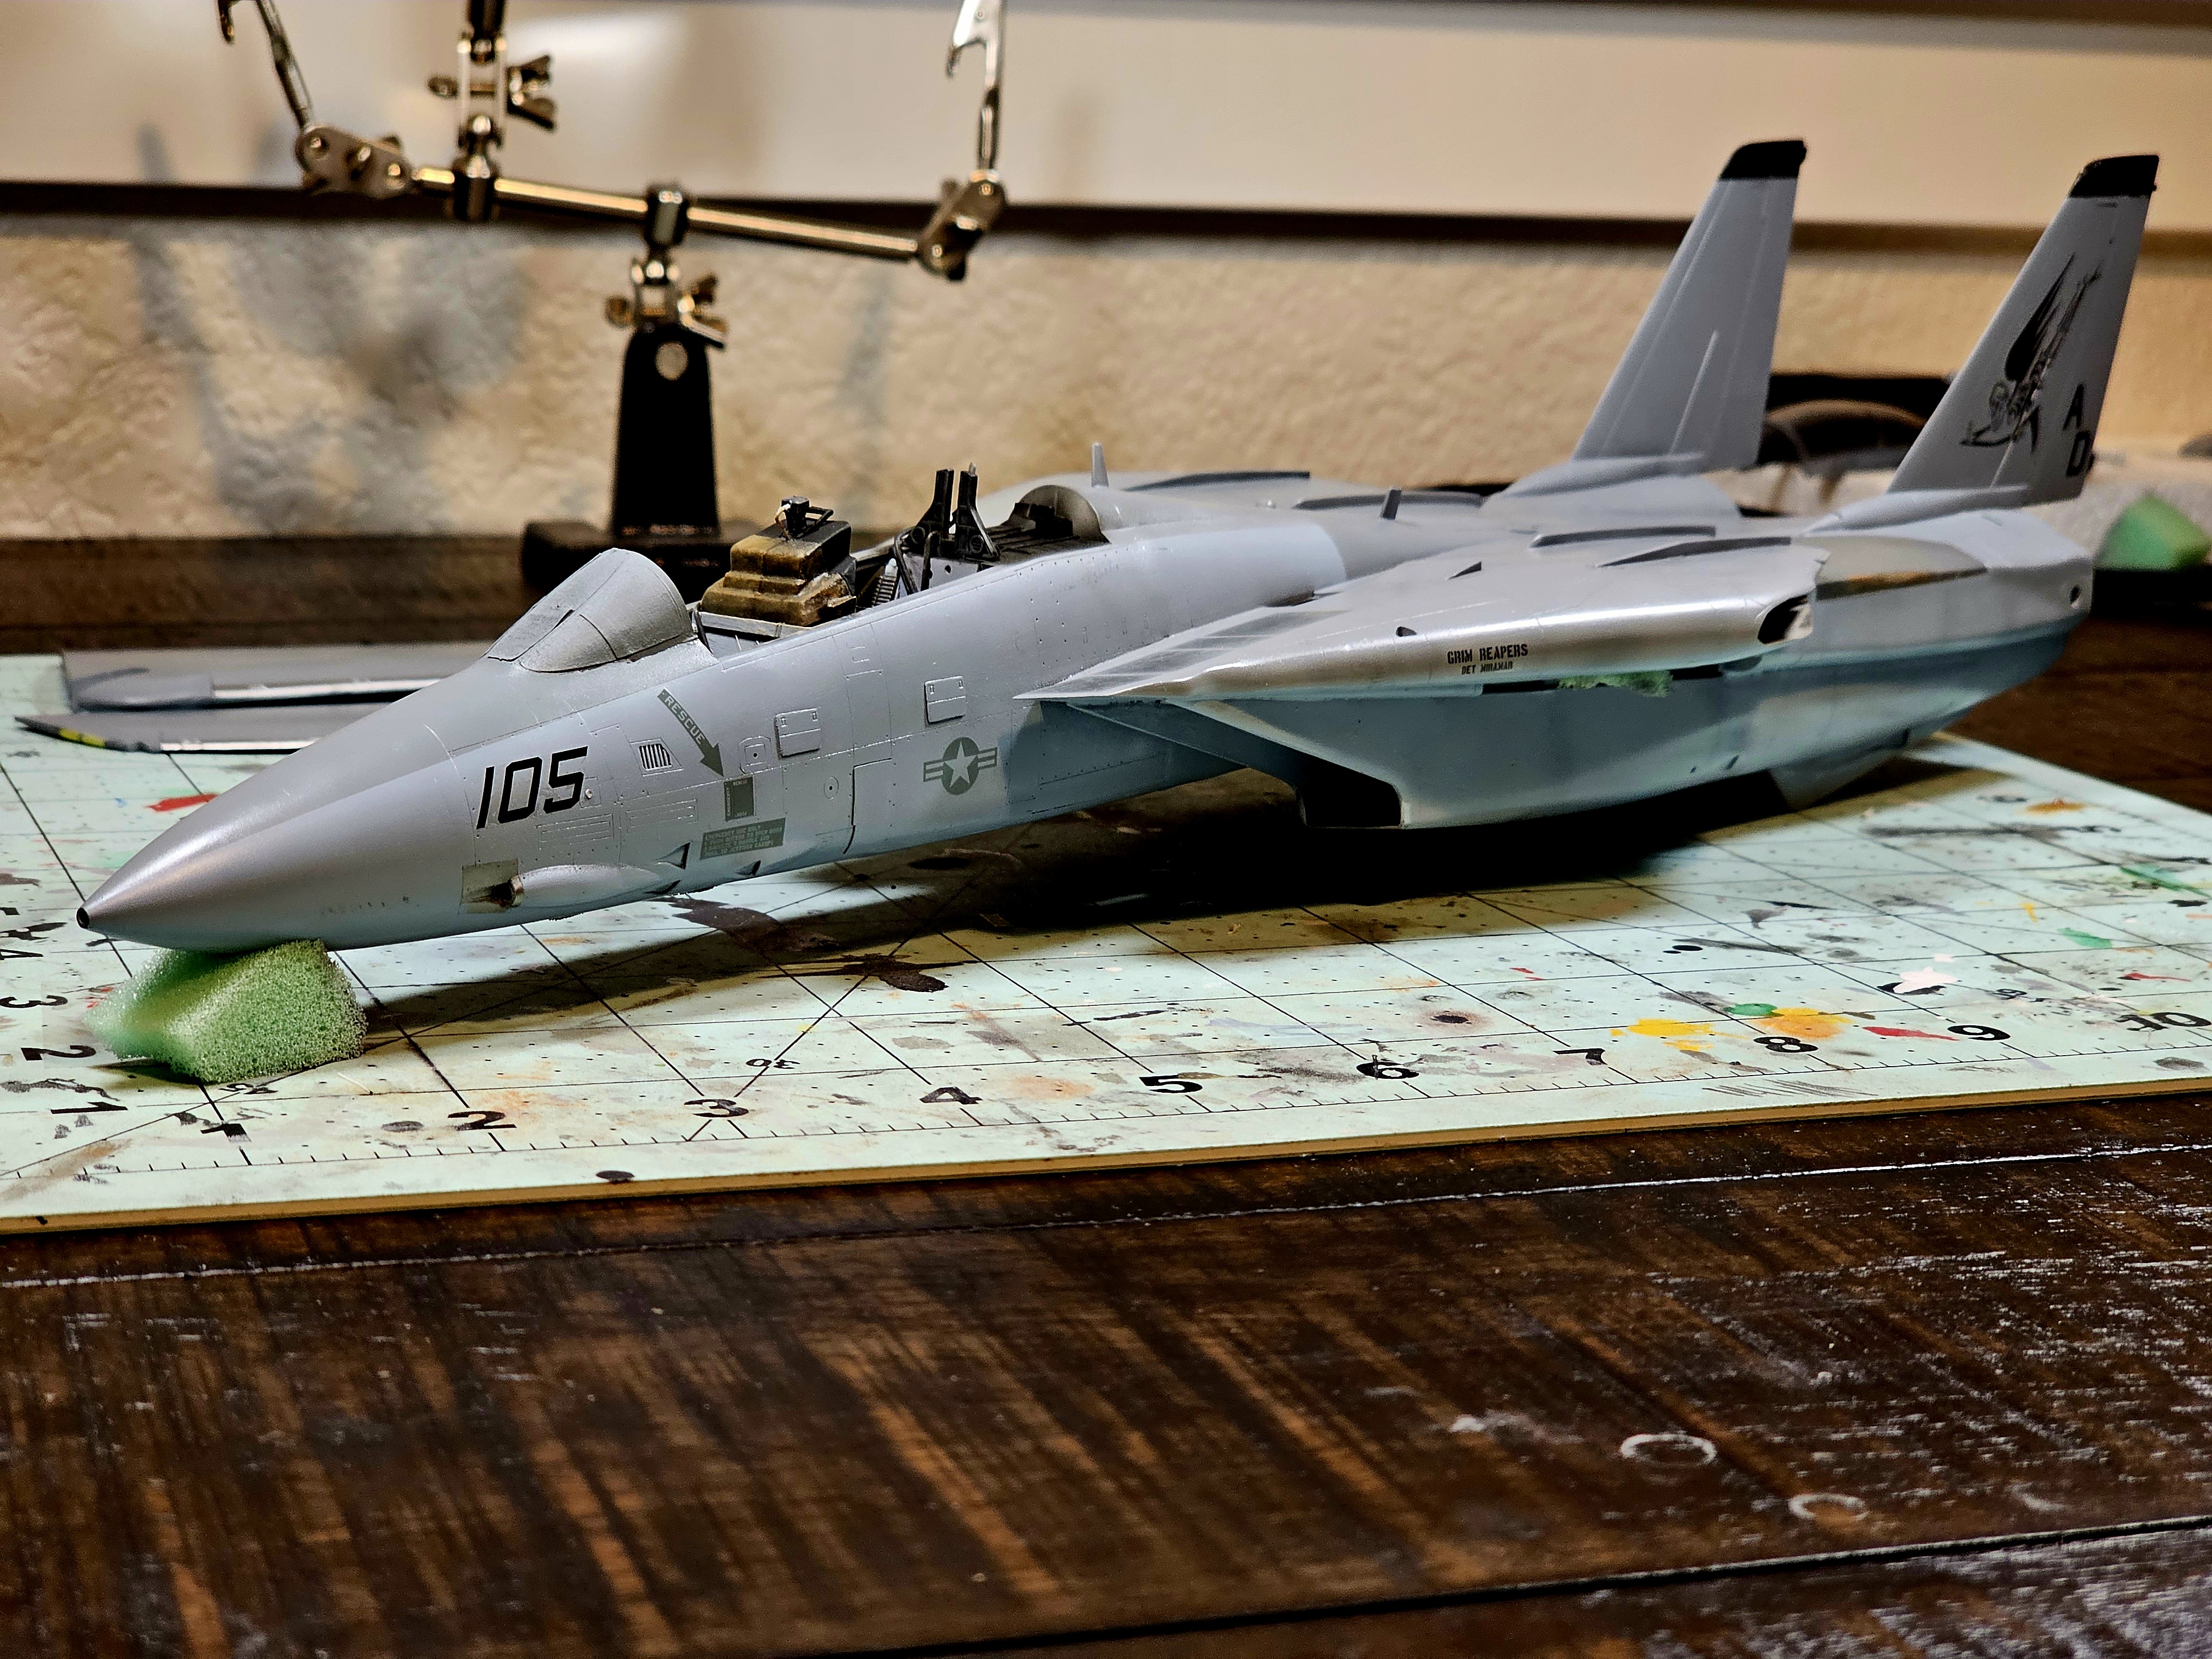
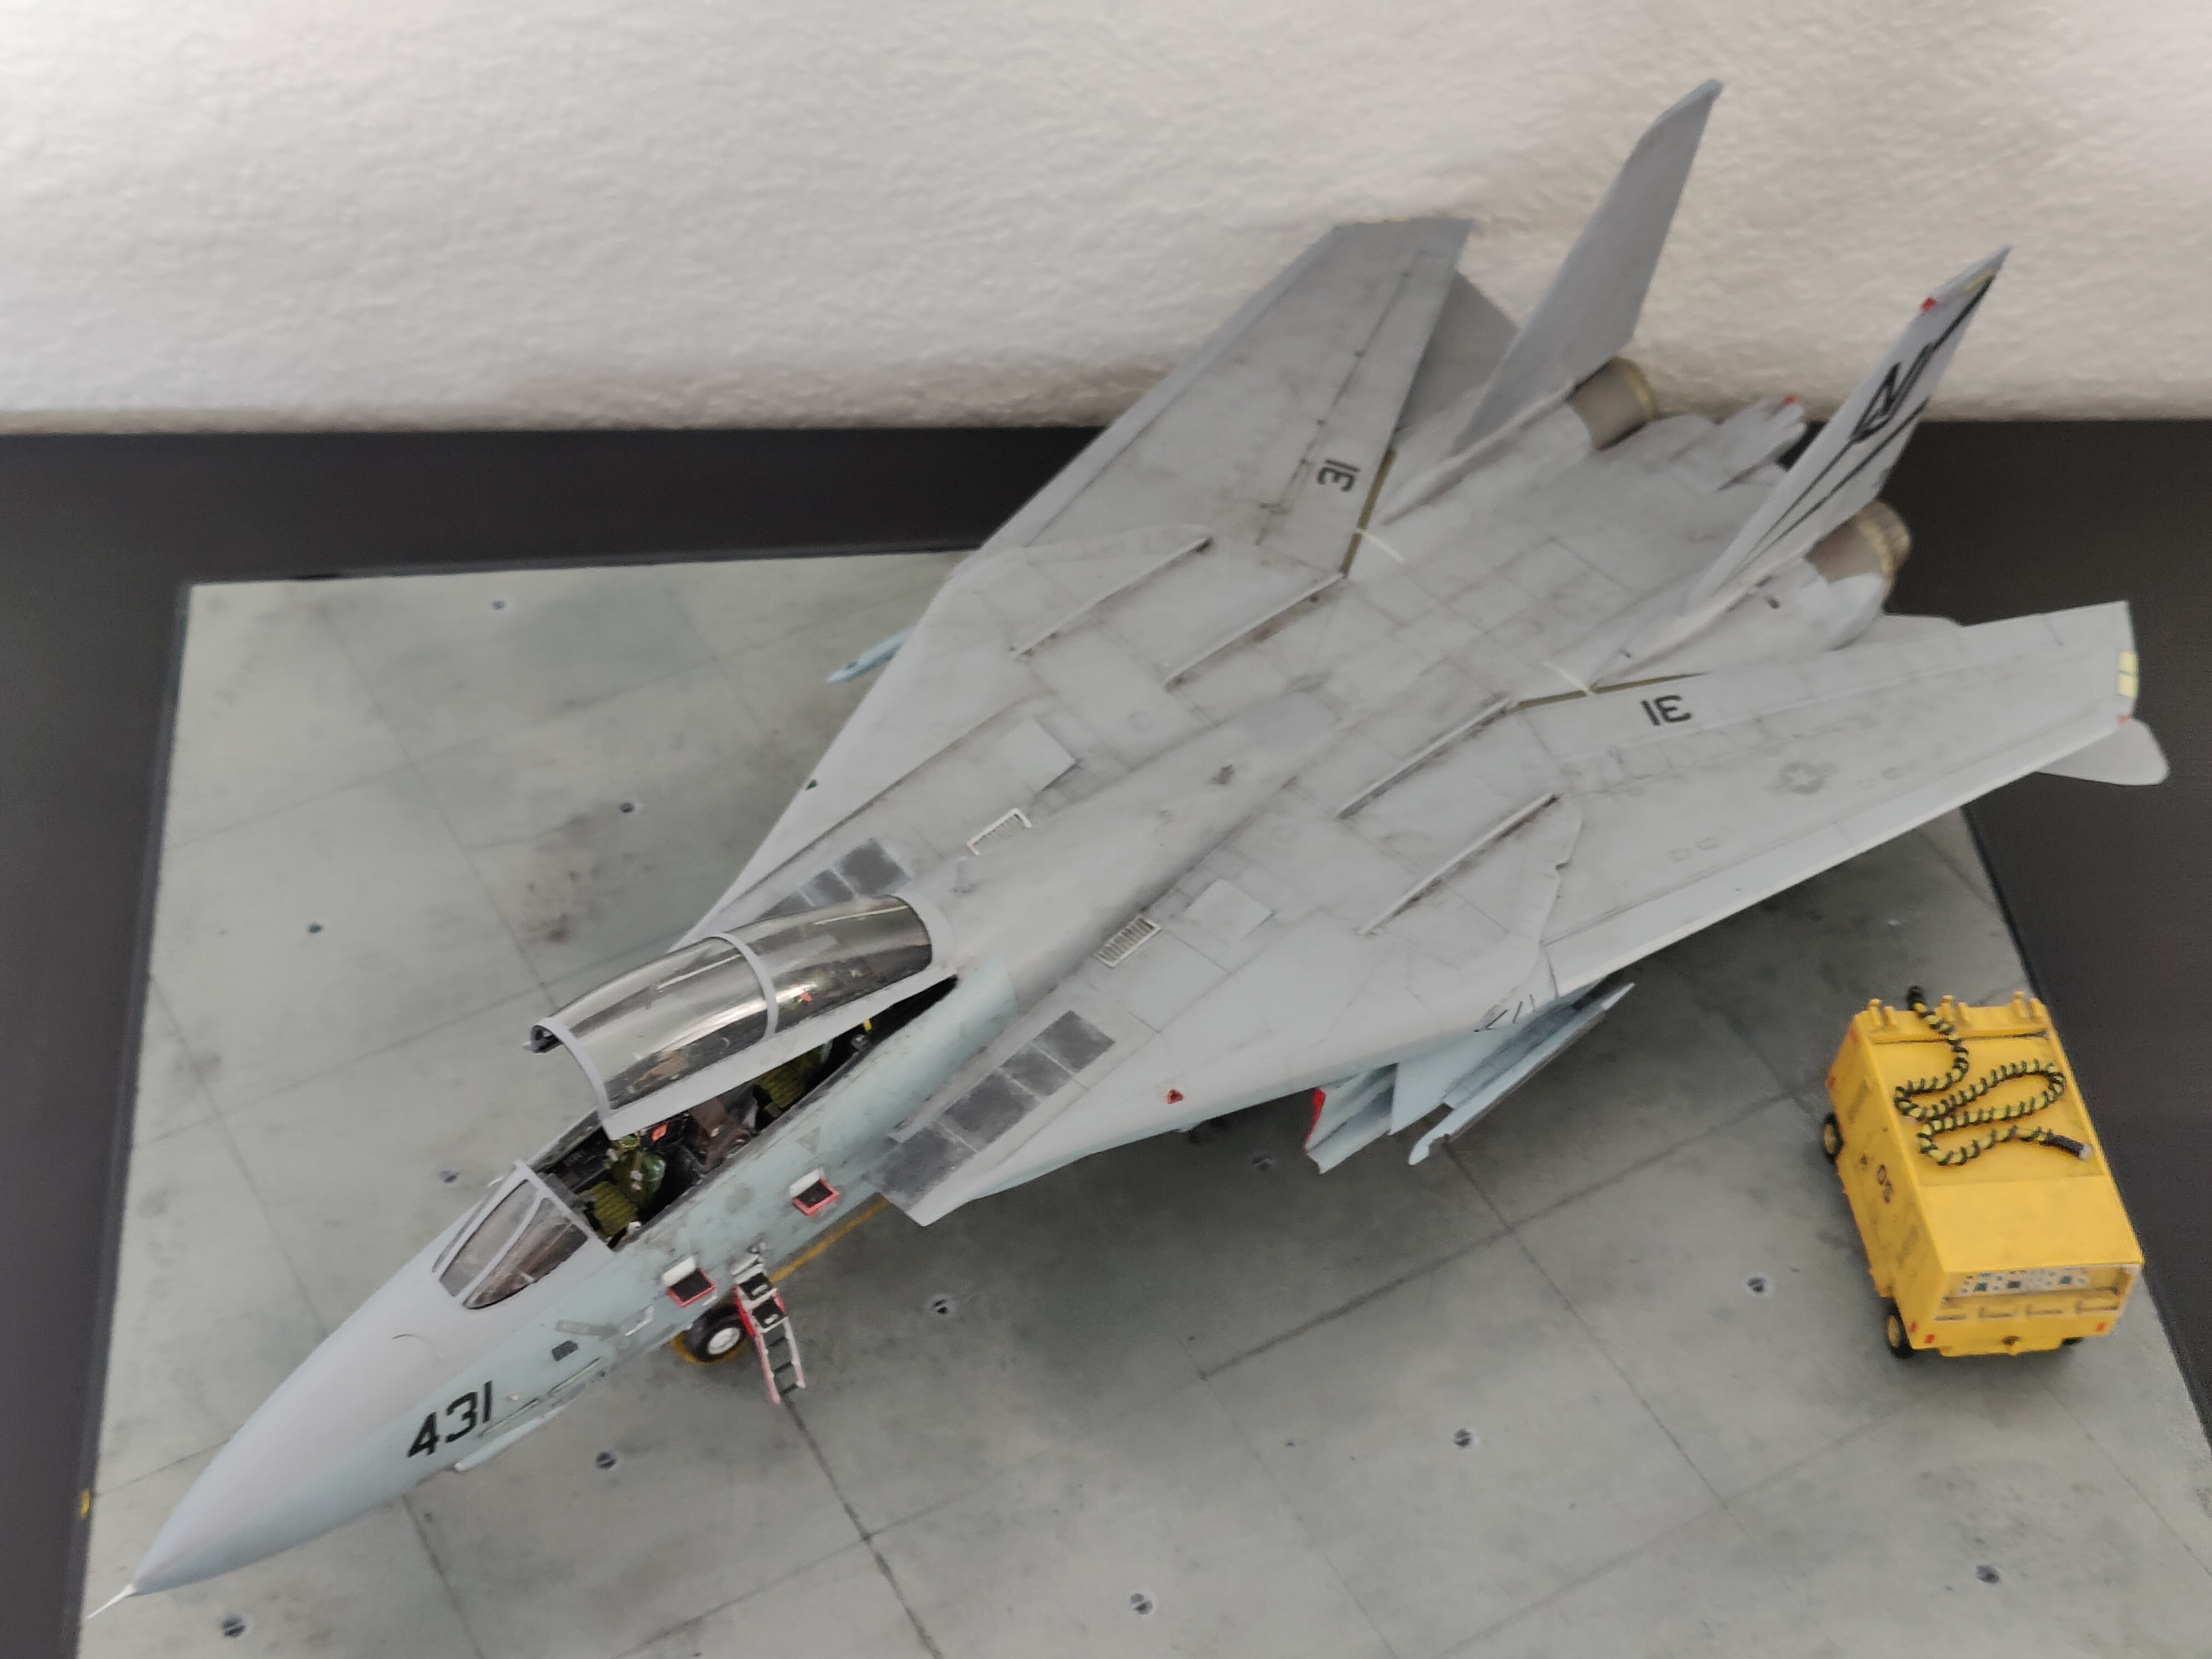
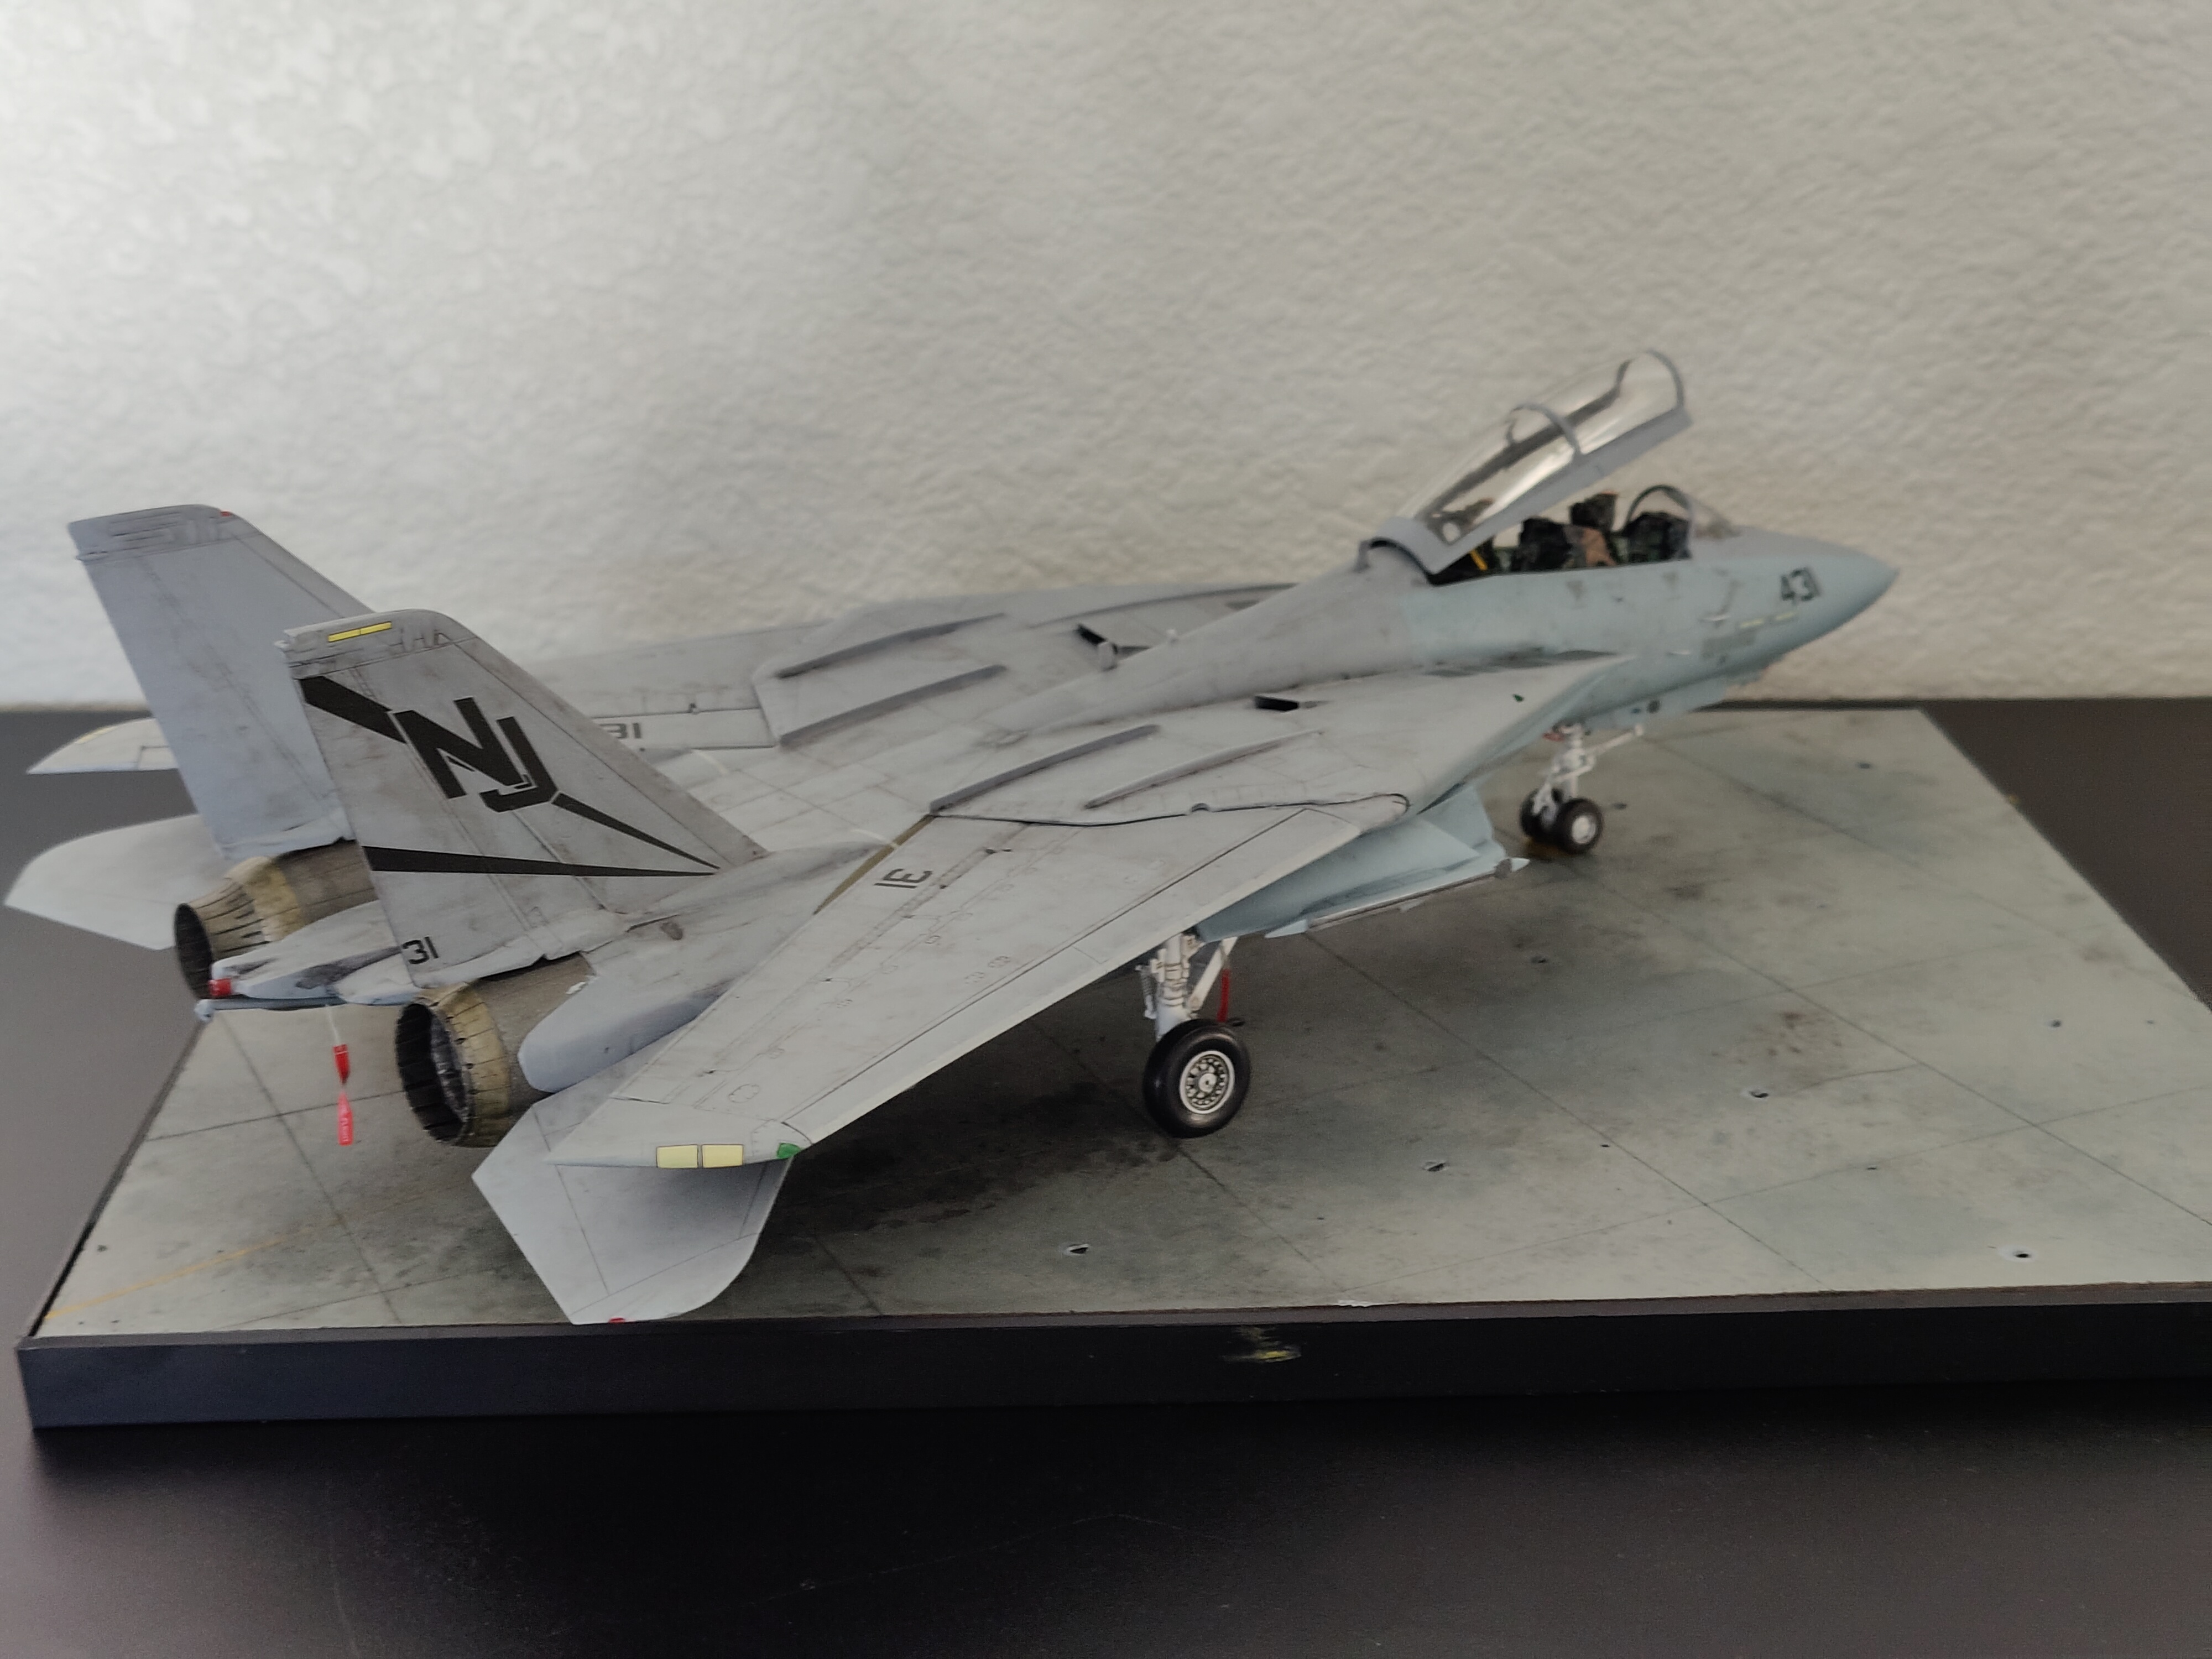
A few details and a proper base are the last few things I'll be doing, but she is pretty much done.